

A small home-made wooden box for storing vegetables in home conditions. In this box, you can store potatoes, onions, garlic, and if necessary, fruits, such as apples or pears.
At home, constantly there is a need to store different vegetables. Moreover, some vegetables, such as onions or garlic, must be constantly stored at home, because for them these are the best storage conditions. Other vegetables, such as potatoes, beets, carrots, etc. it is better to store it permanently in the cellar or underground.
However, in order not to go underground every time, bringing out vegetables for cooking, it is also advisable to have a small container at home (two buckets) to get the necessary vegetables out of the underground, put them in this container and, thus, create a certain supply of vegetables, which is enough weeks for two or three.
At the same time, the best container for storing vegetables is wood. Since wood is a natural material that transmits air and absorbs moisture, vegetables stored in wooden crates, as a rule, retain their useful properties for a long time and very rarely undergo various types of deterioration (dampness, rotting, etc.).
That is why, when I recently had the need to make such a container for storing vegetables at home, I decided to make a small wooden box with a lid.
As the walls of the box, I decided to take a board 20 cm wide, and for the bottom and cover, use hardboard (fiberboard). The overall dimensions of such a box will be the following: length 50 cm, width (or depth) 30 cm, and height approximately 22 cm. The volume of this box will be approximately equal to the volume of two ten-liter buckets.
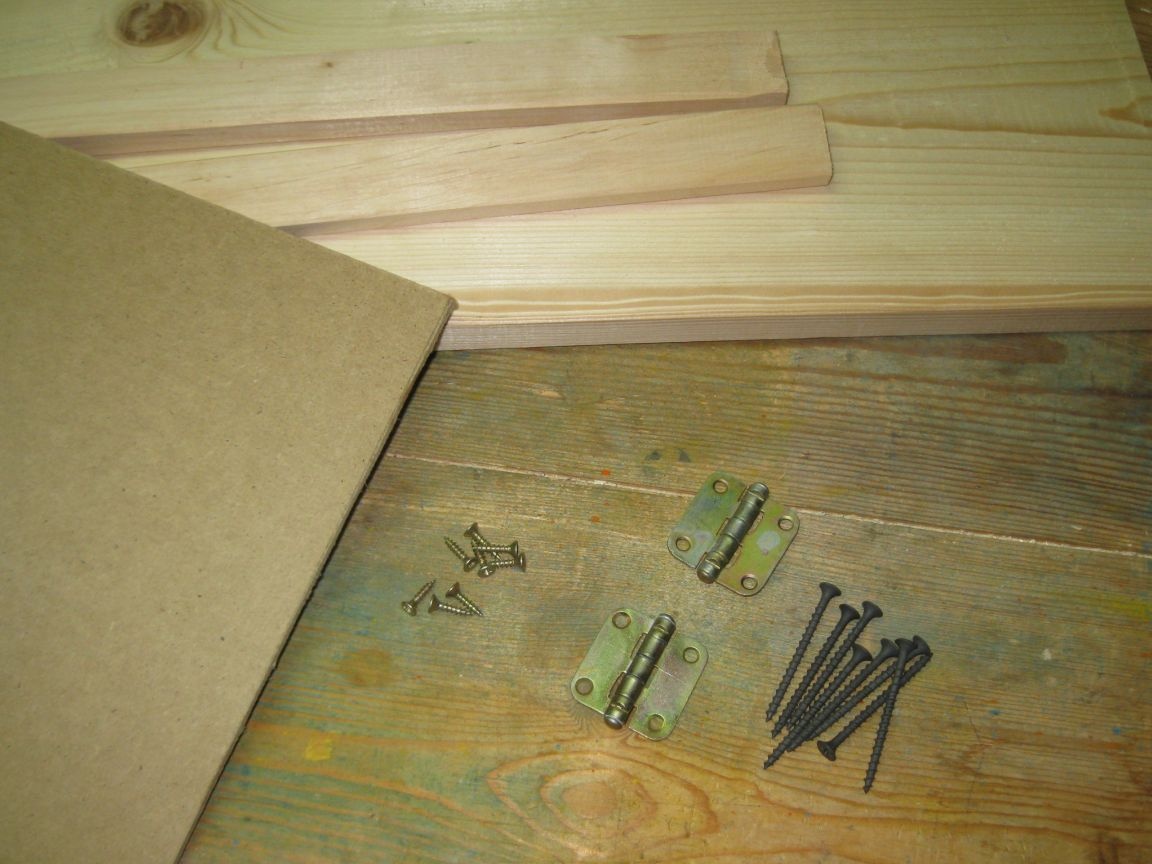
To make such a box, I needed the following accessories:
Main materials and fasteners:
• A section of a board 2 cm thick, 20 cm wide, and 160 cm long.
• Two slats 1.2 cm thick, 4 cm wide, and 80 cm long.
• Sheet of hardboard (fiberboard), measuring 60x100 cm.
• Wood screws with a diameter of 3.8 mm, different lengths.
• Small screws 3x15 mm.
• Four screws with a 4x20 mm press washer.
• Small cloves.
• A small furniture magnet.
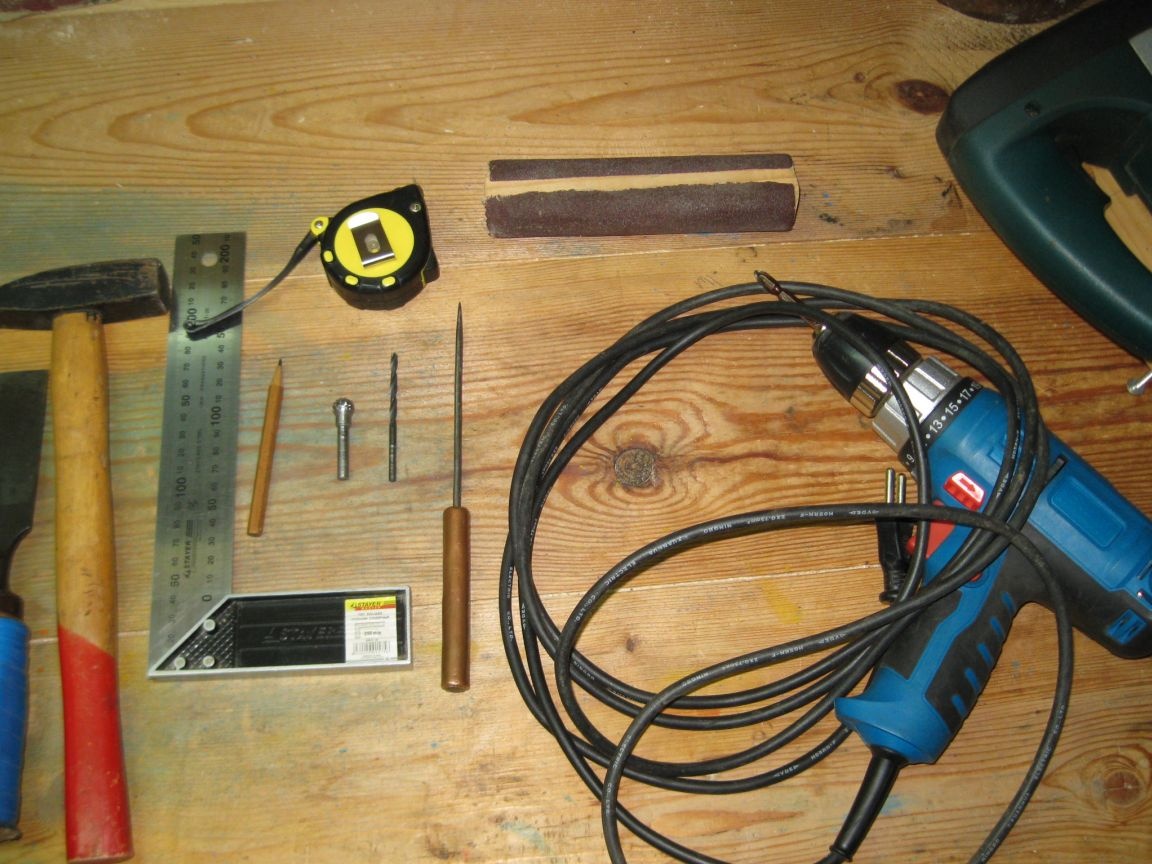
Basic tools:
• Measuring and drawing tools (tape measure, square and pencil).
• Electric jigsaw with a file.
• Electric drill / screwdriver.
• Drills for metal with a diameter of 2.5 mm, and 4 mm.
• Spherical wood milling cutter.
• Awl.
• Chisel and hammer.
• Screwdriver bits PH2 and PZ2.
• Sandpaper.
The procedure for manufacturing the box.
Stage 1. Production of the frame of the box.
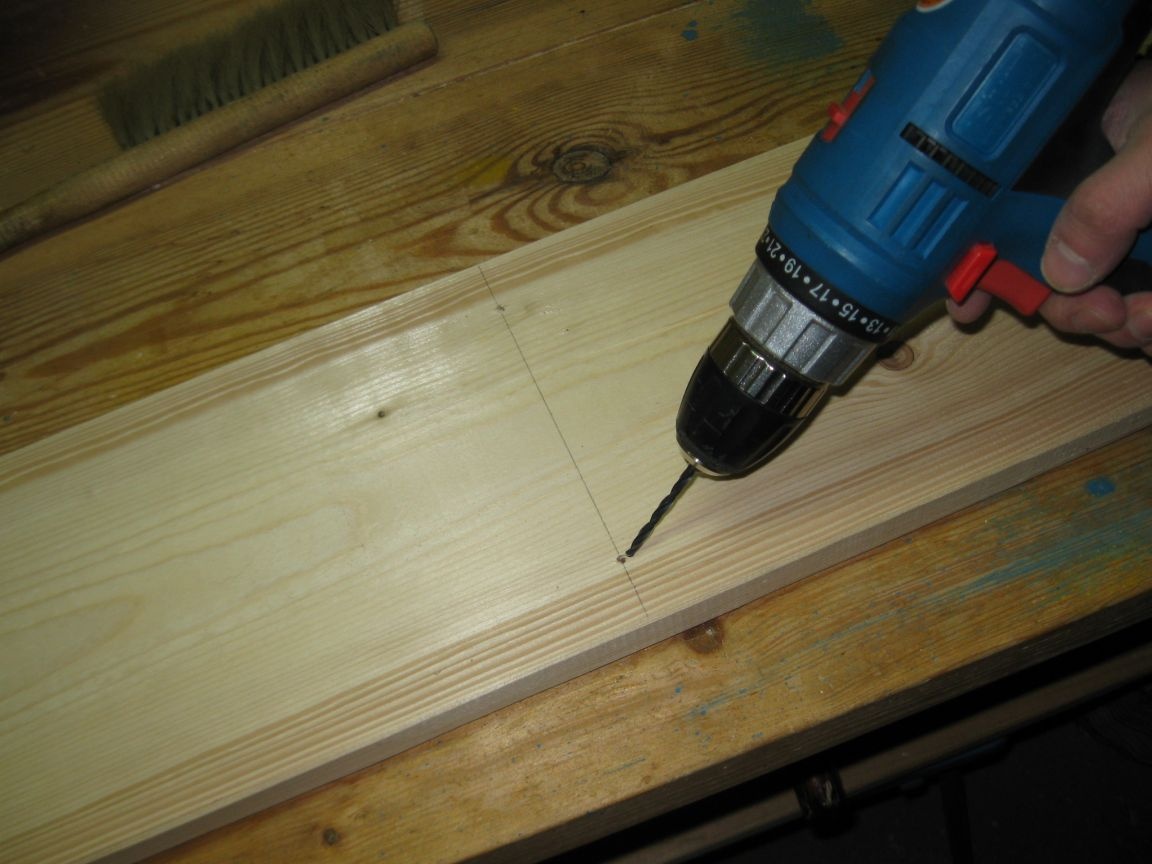
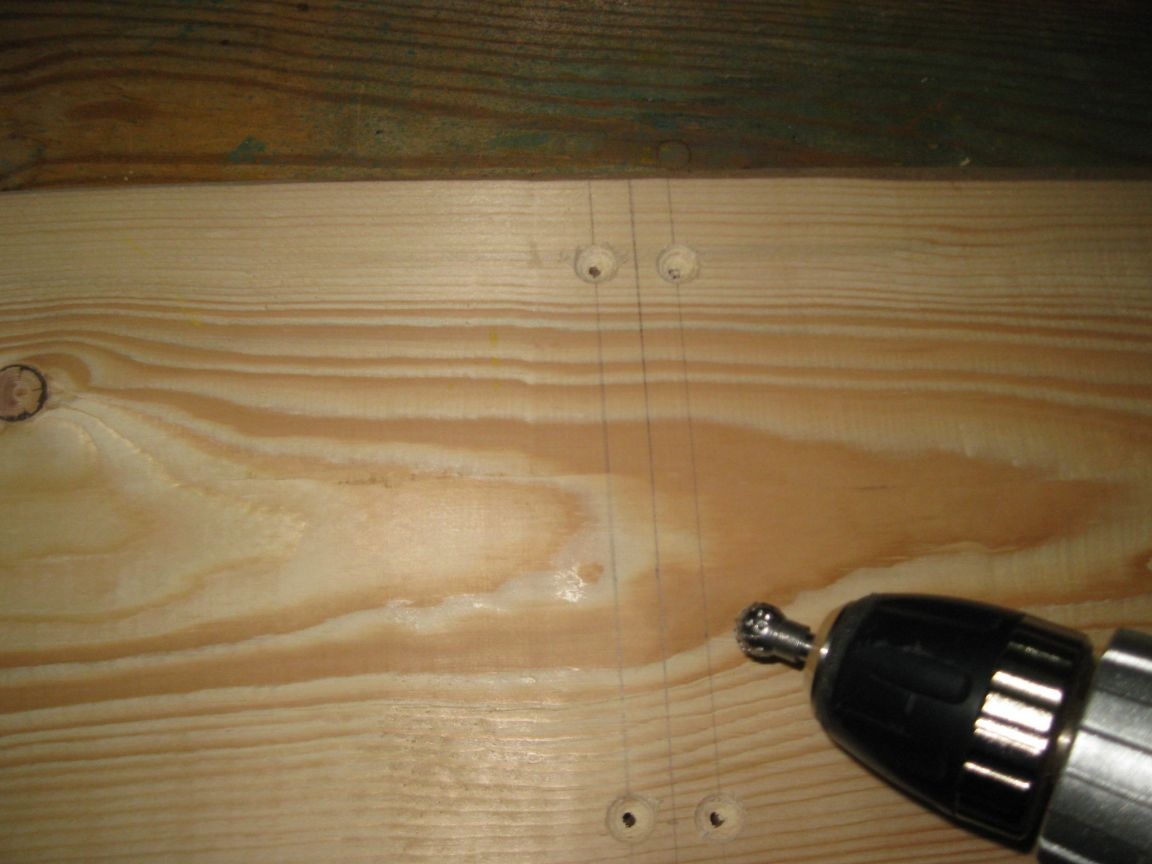
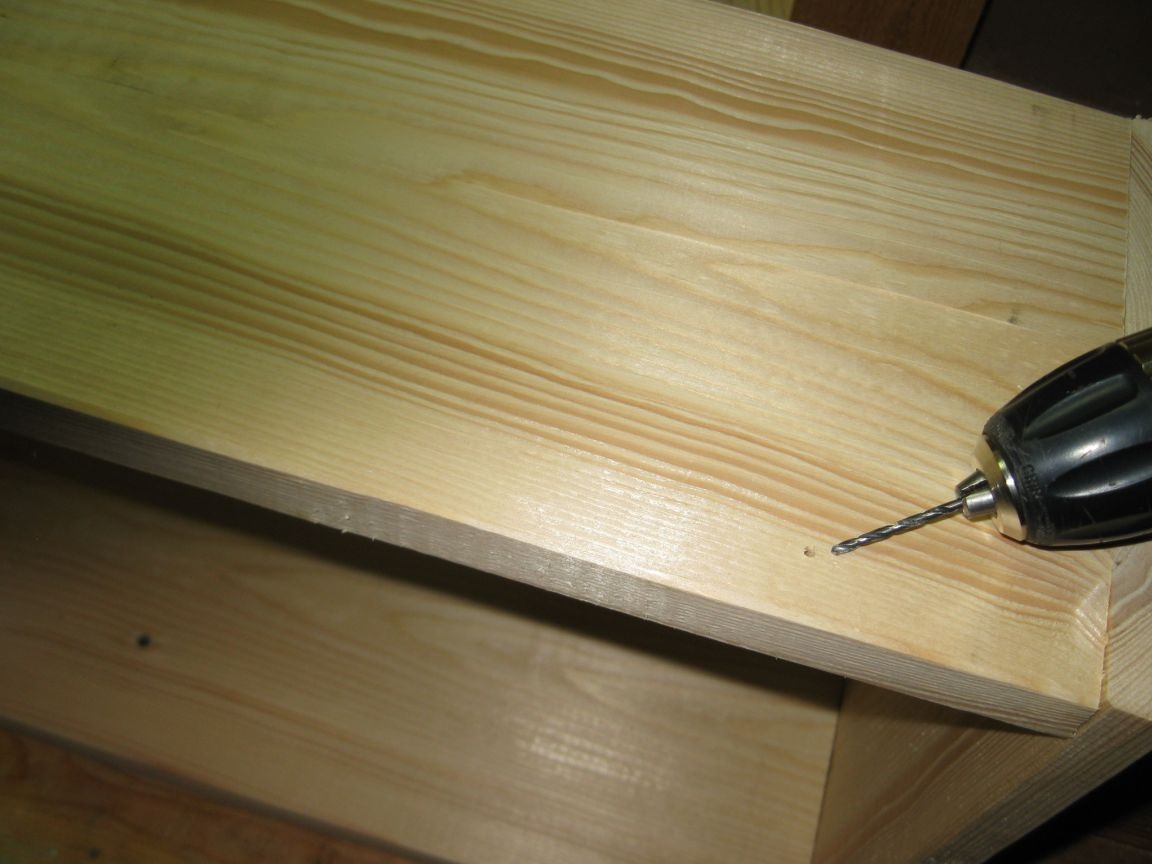
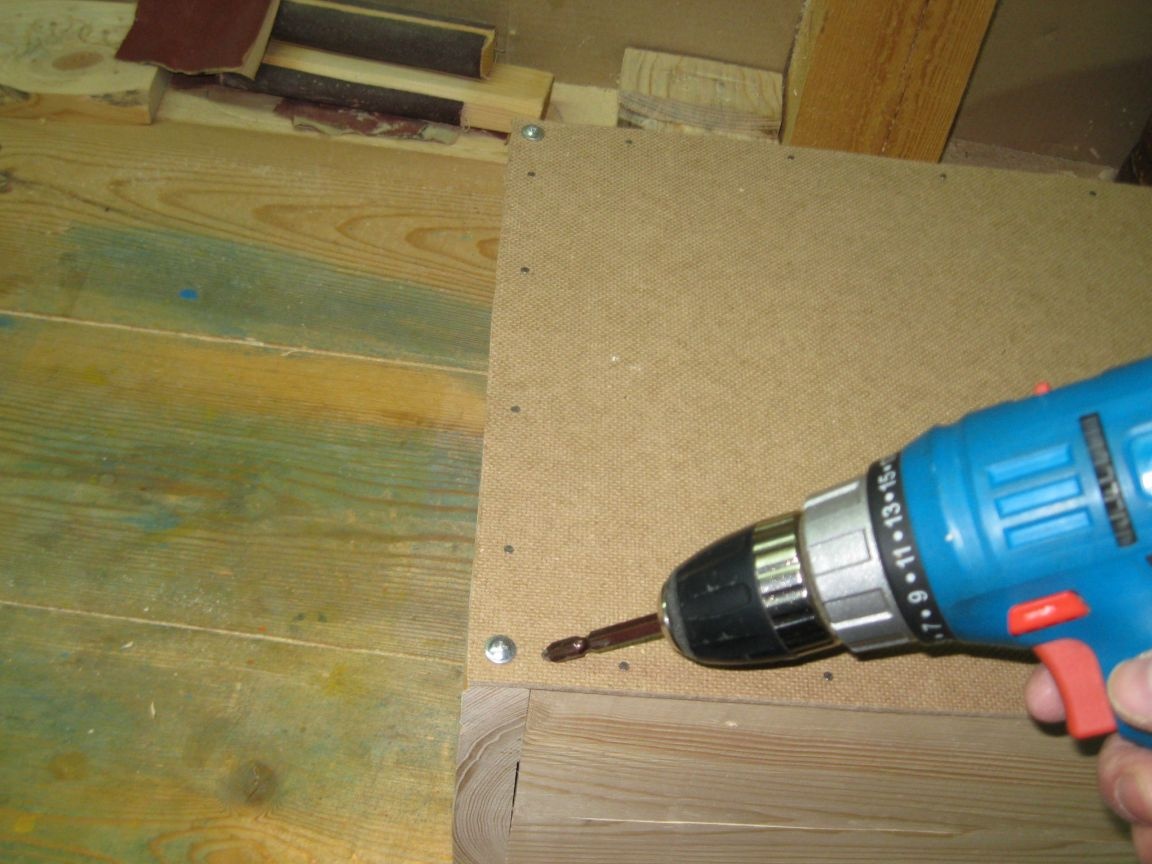
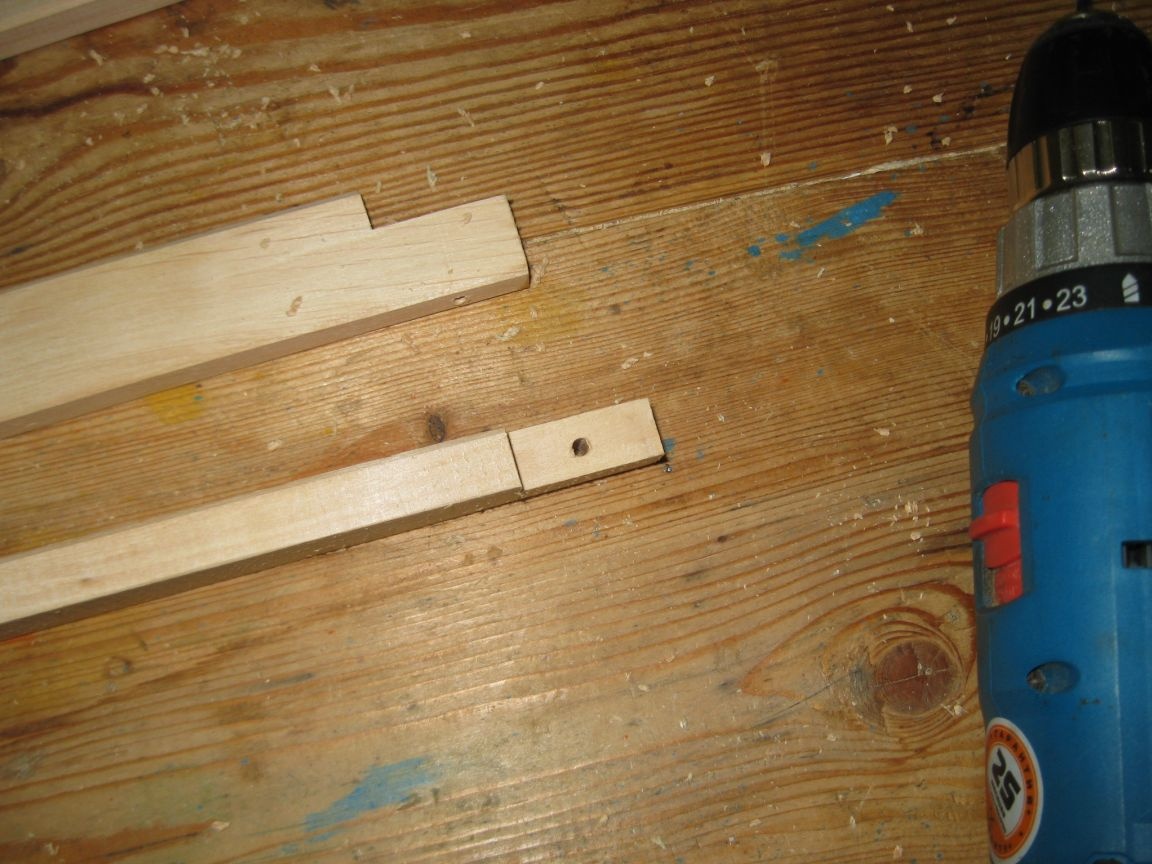
Step 1. Marking and drilling holes for screws.
We mark the boards with a width of 20 cm, and drill holes in it for screws with a diameter of 4 mm.
Step 2. Countersink holes.
Then countersink the ends of these holes for countersunk heads of screws using a spherical milling cutter on a tree.
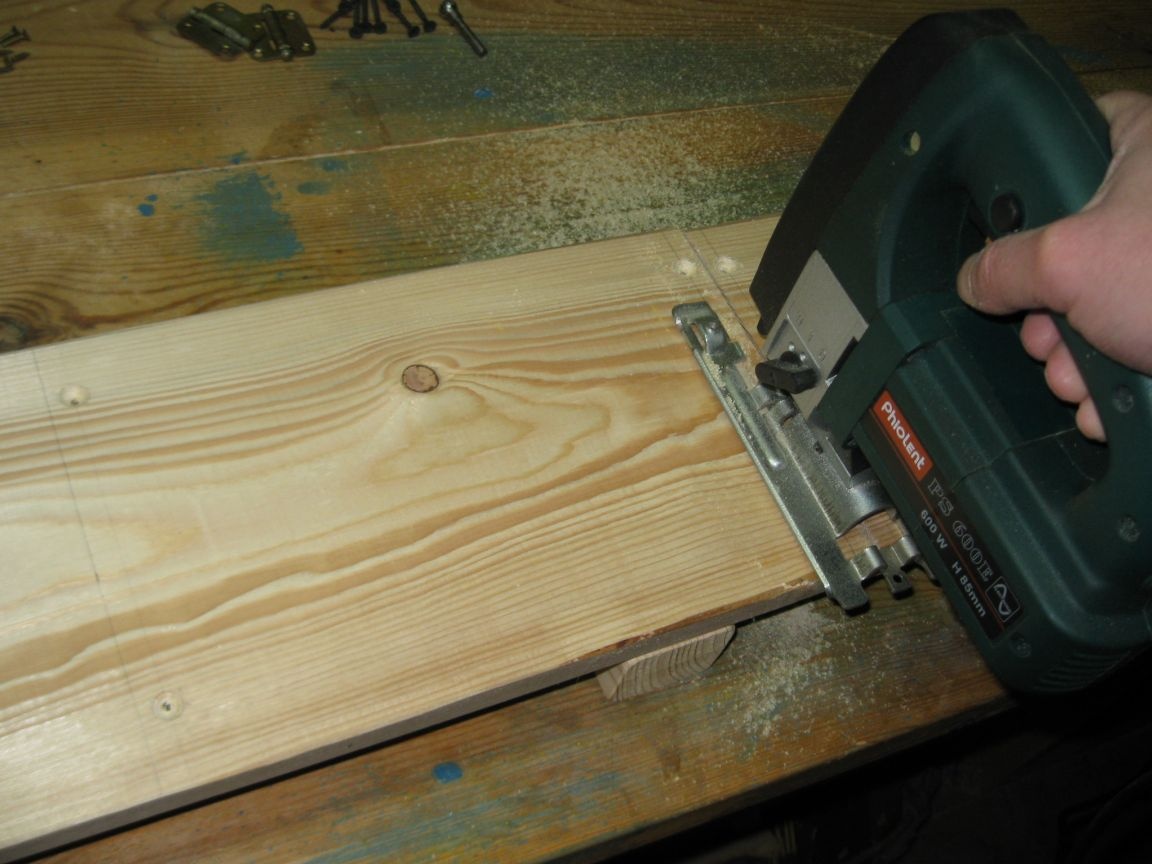
Step 3. Sawing.
Saw our board with a jigsaw into four blanks for the walls of the box.
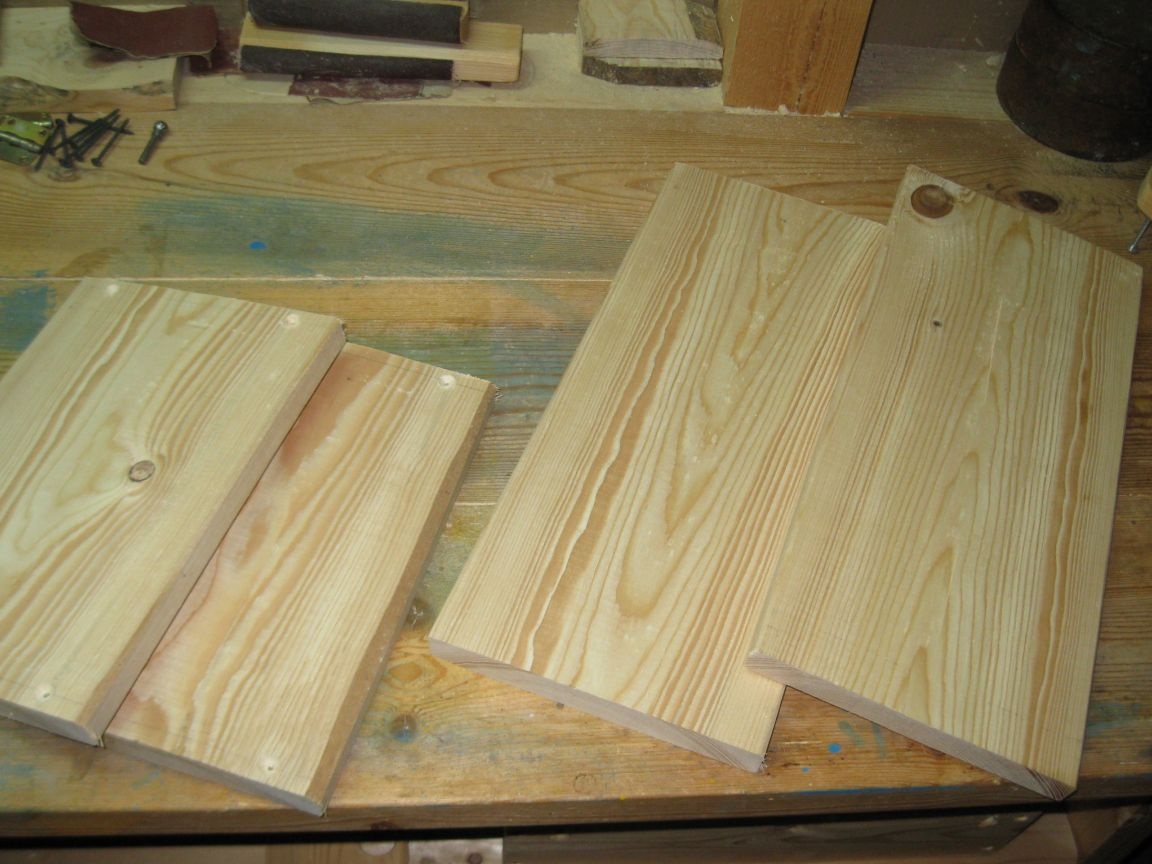
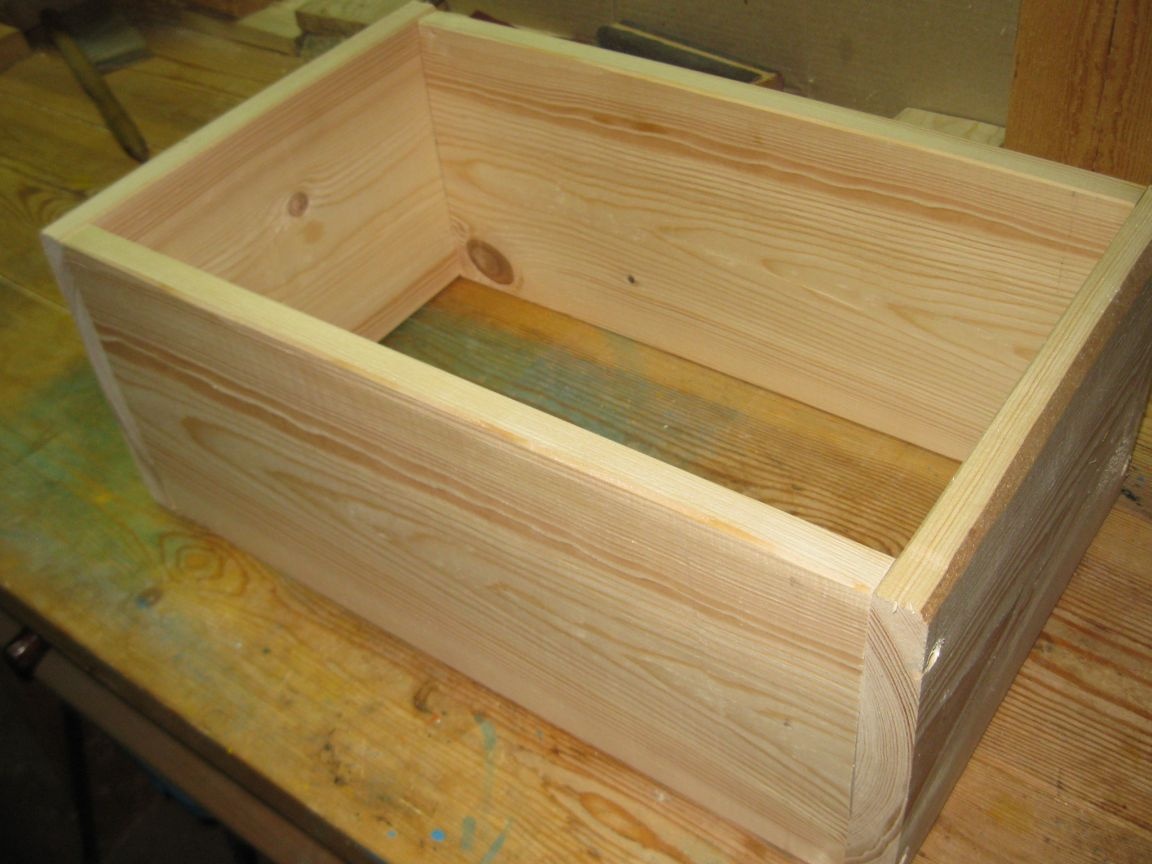
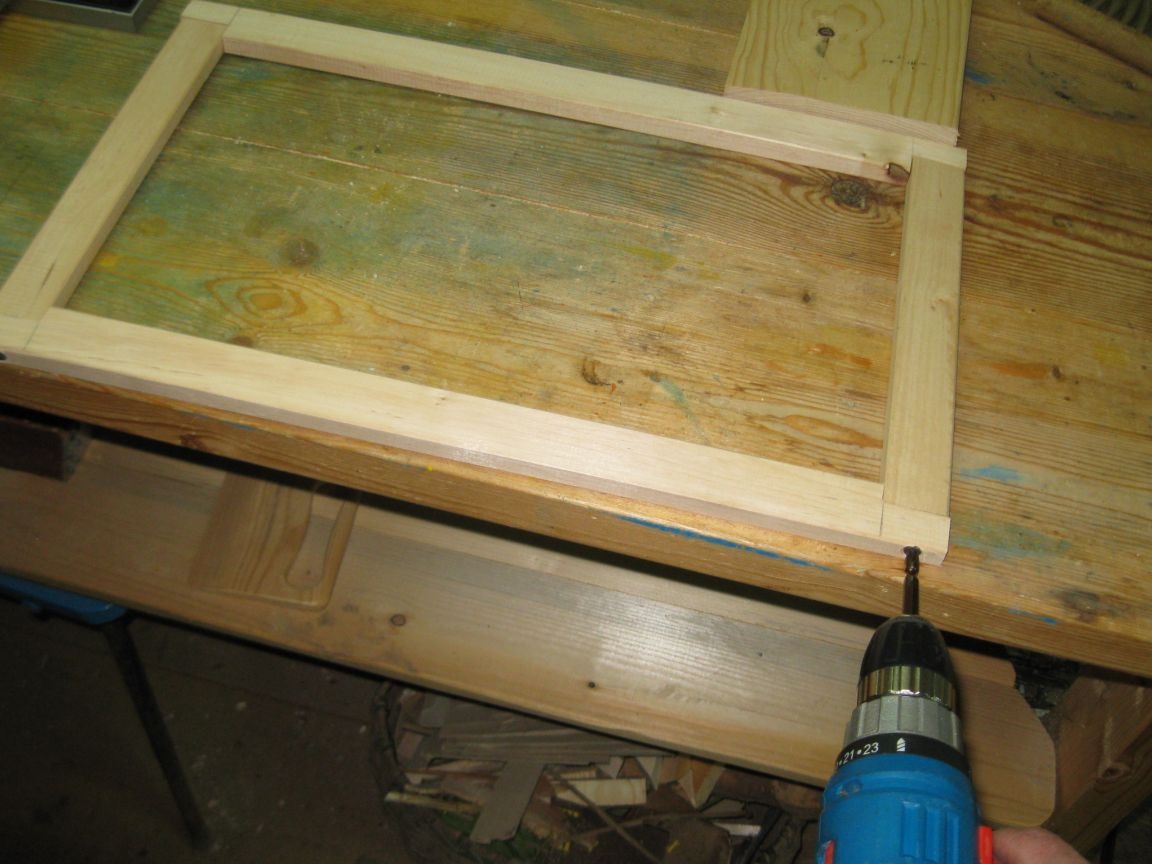
Step 4. Assembling the box frame.
We assemble the frame of our box on wood screws 60 mm long. We use a screwdriver for this.

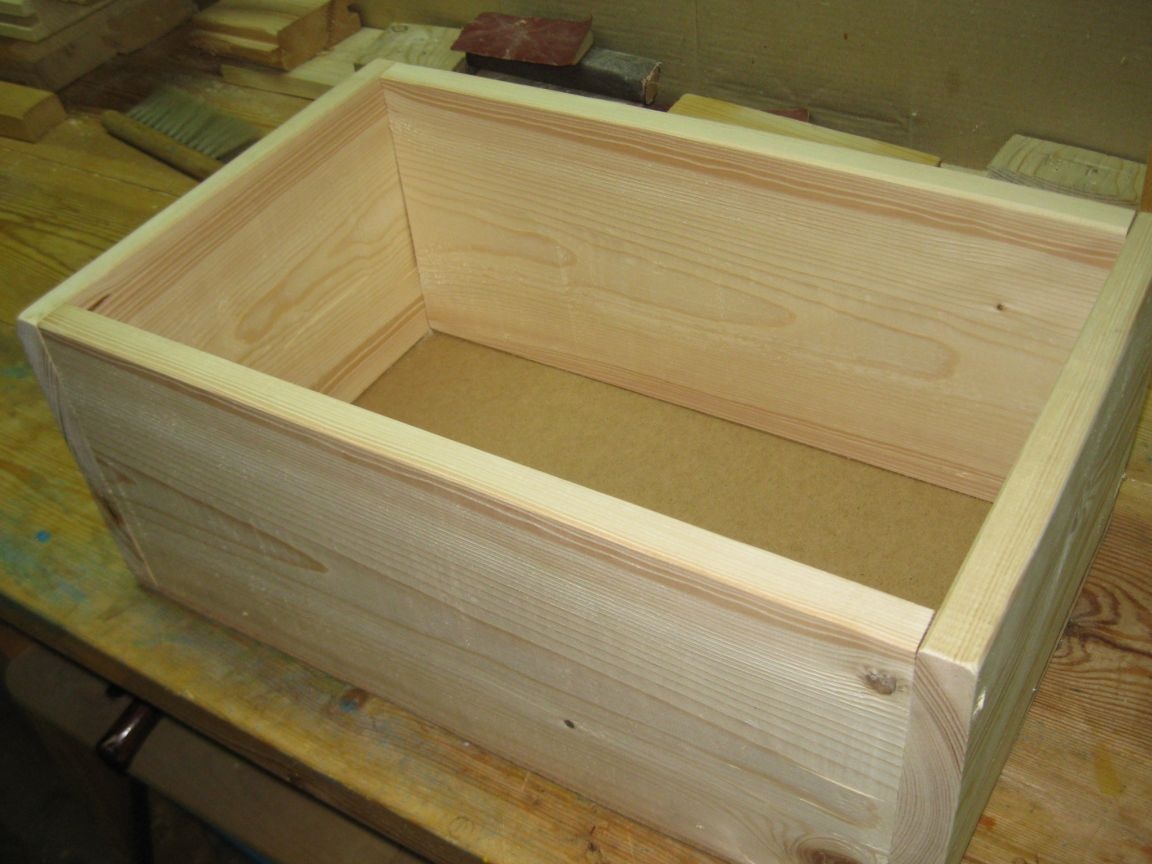
And now the frame of our box is ready.
Step 5. Drilling vents.
We drill two, three holes with a diameter of 2.5 mm in the lower part of the walls of our box for better ventilation.
Stage 2. Production of the bottom of the box.
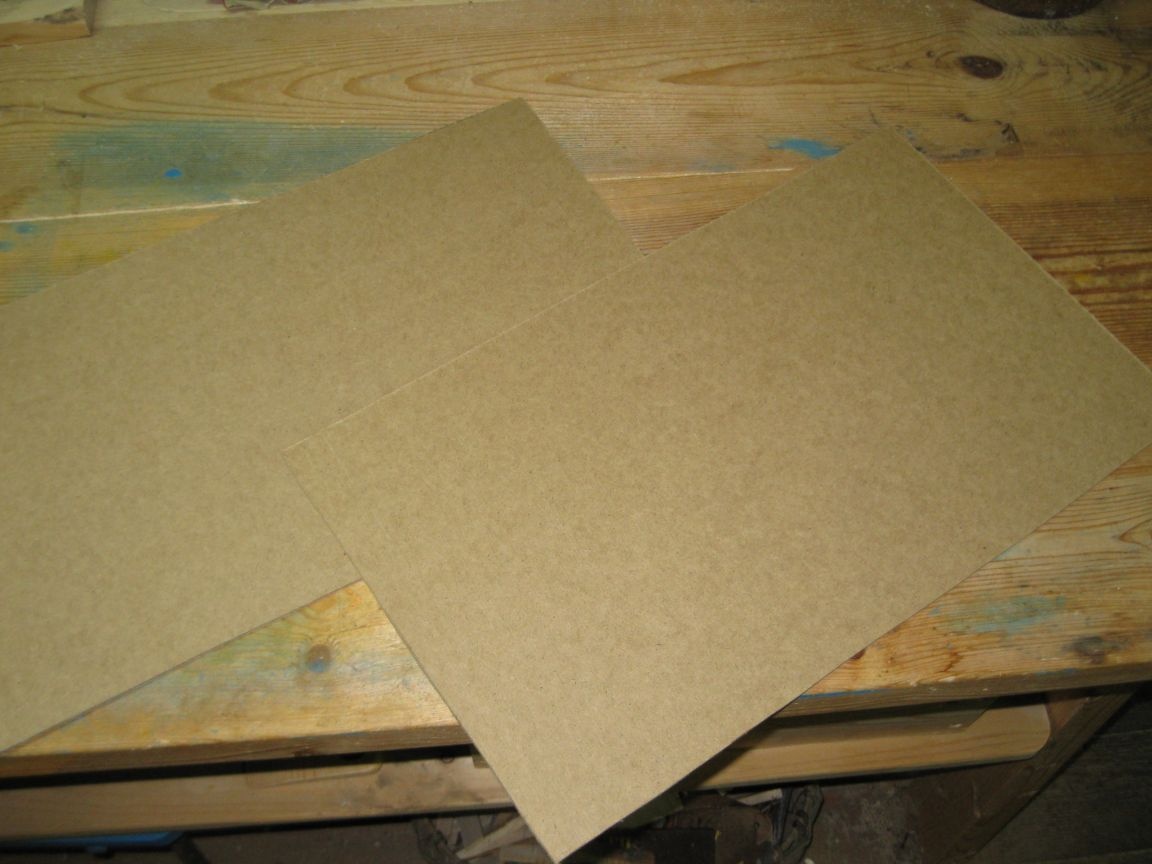
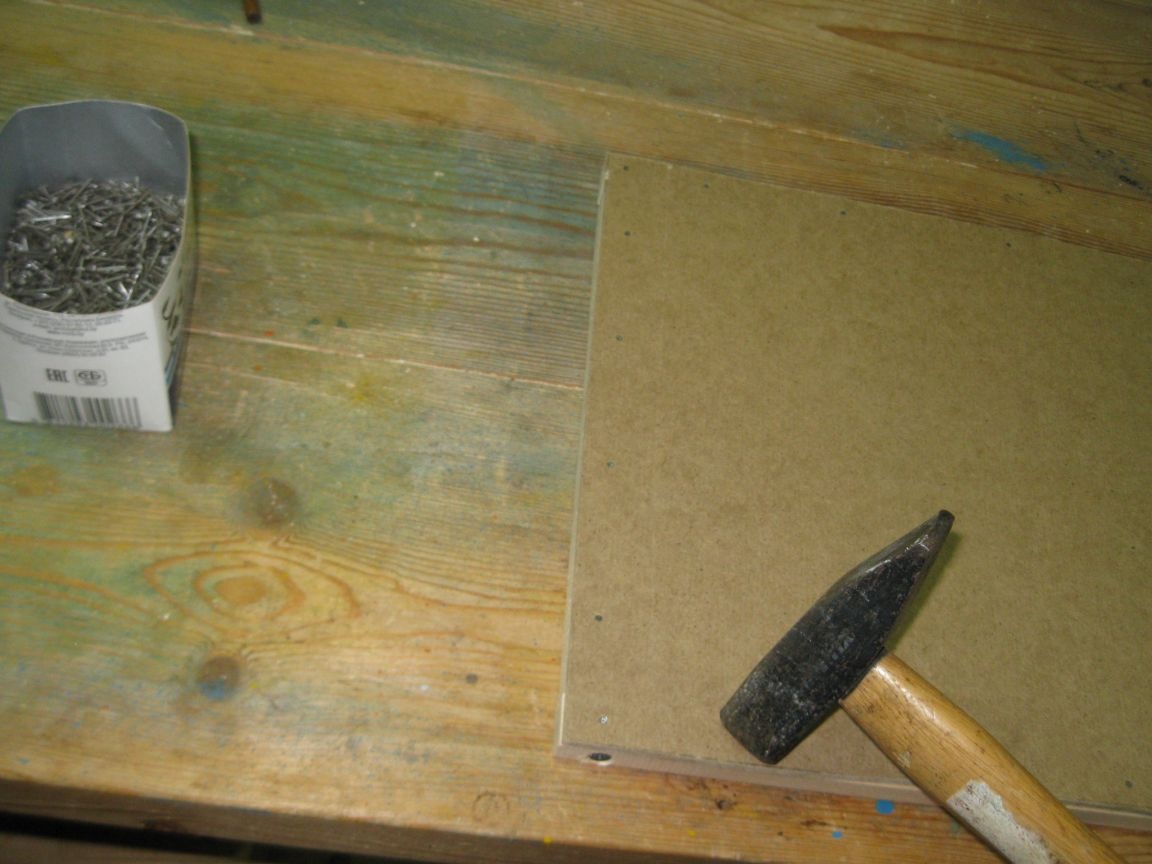
Step 1. Marking and sawing hardboard.
We mark and saw with the help of a jigsaw a hardboard into two pieces measuring 30x50 cm. One piece will serve as the bottom for our box, and the second will go to the lid.
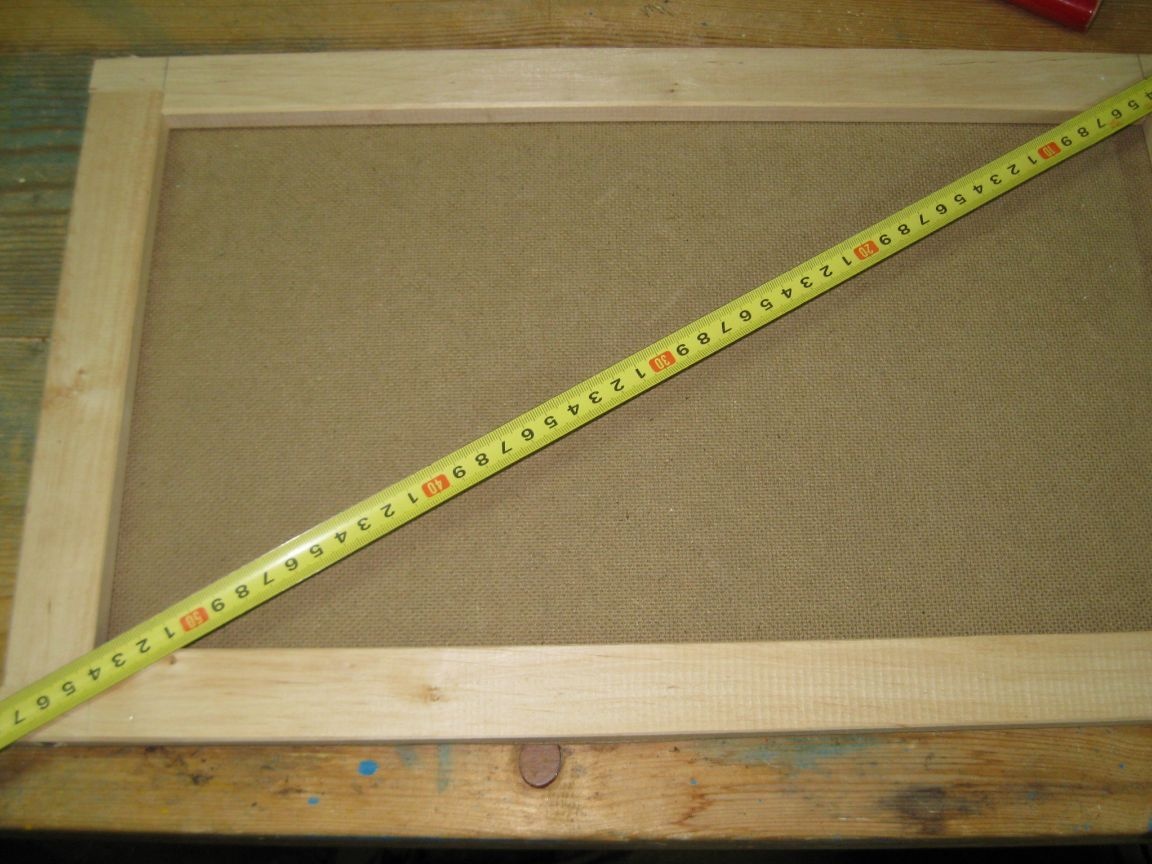
Step 2. Nailing the bottom.
We beat one of the pieces of hardboard, with small cloves to the bottom of the frame of the box, having previously measured the diagonal of the box with a tape measure.
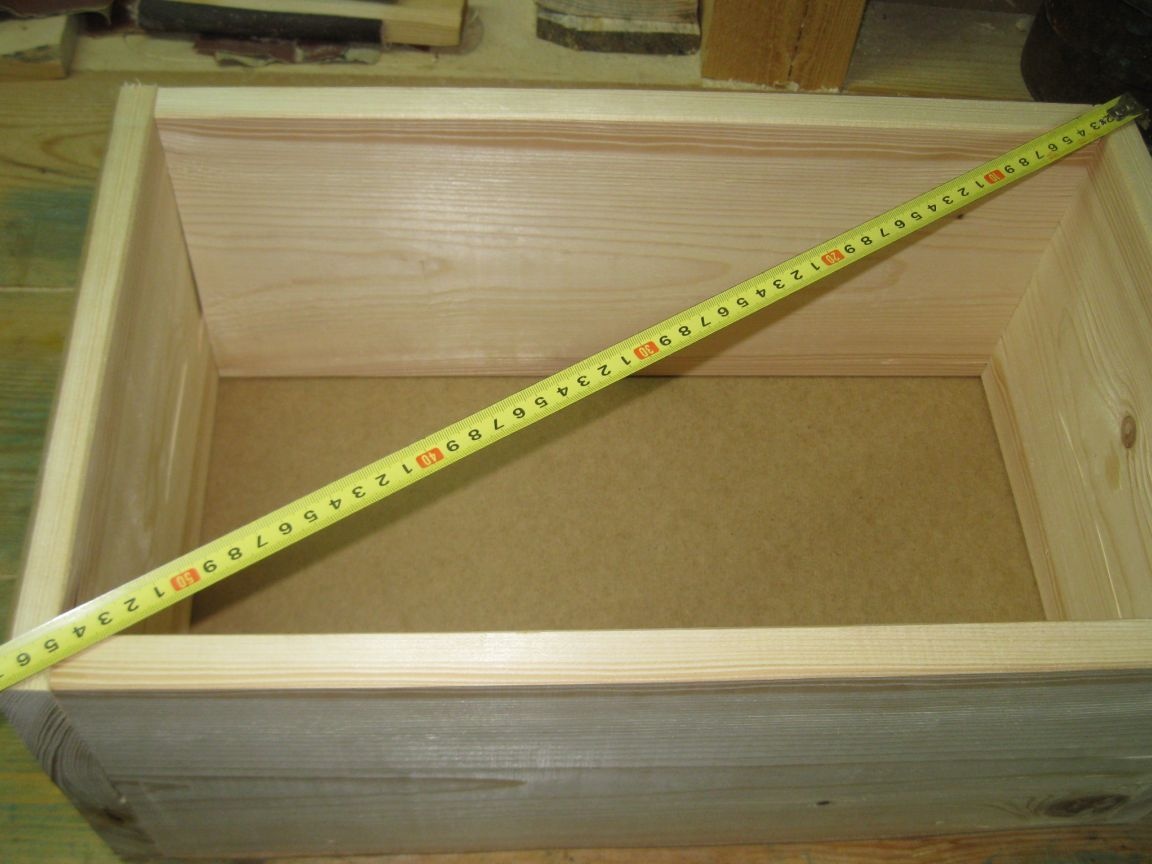
If the diagonals are of different lengths, it means that the box frame is a parallelogram, not a rectangle, and in this case, the diagonals need to be aligned. This can be done while nailing the bottom, by pressing on the opposite corners of the diagonal of the box that needs to be shortened.
If everything is smooth, then you can immediately begin to nail the bottom.
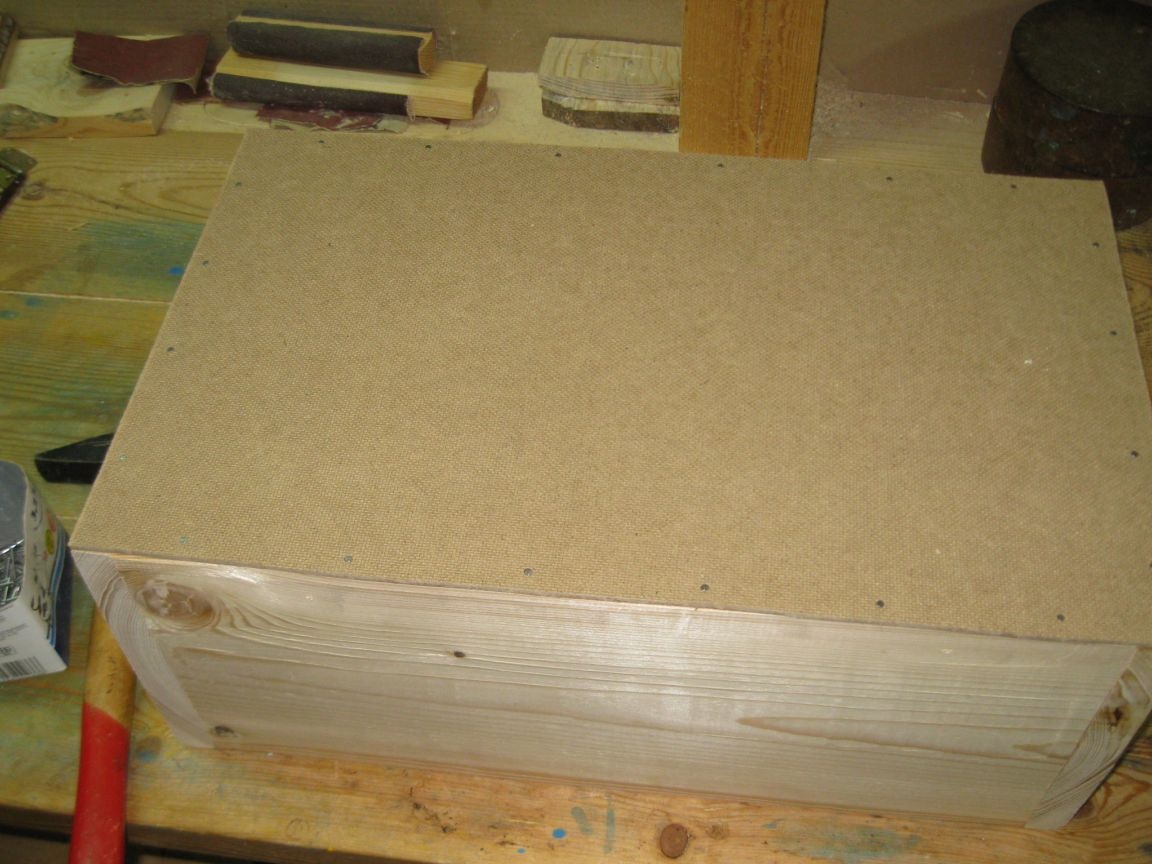
Step 3. Tighten the screw-legs in the corners of the bottom of the box.
In order for our box to be more stable and not to scratch the floor with hats of nails, which we nailed the bottom from hardboard, we wrap four screws with a press washer at the corners of the bottom.
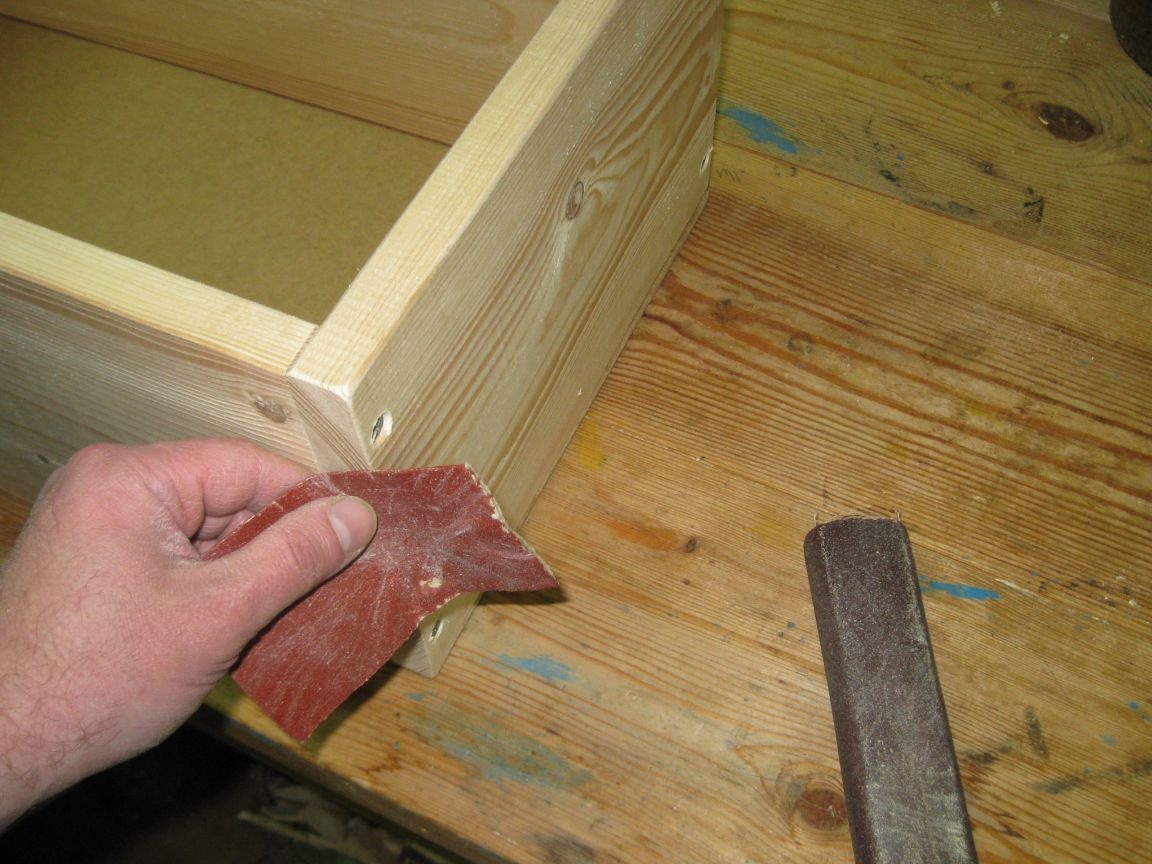
Step 4. Finishing the box.
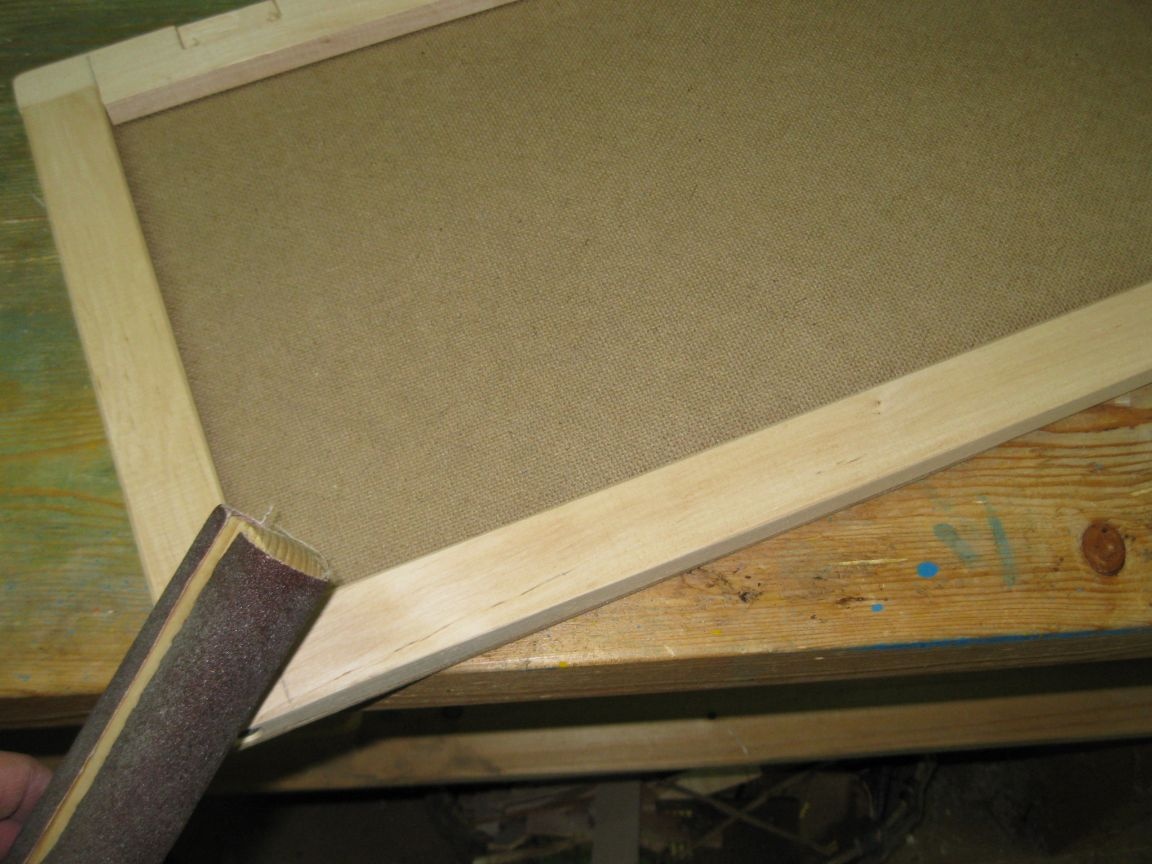
We finish the box (especially the ends and corners) with sandpaper.
And now our bottom box is ready.
Stage 3. Production of a box lid.
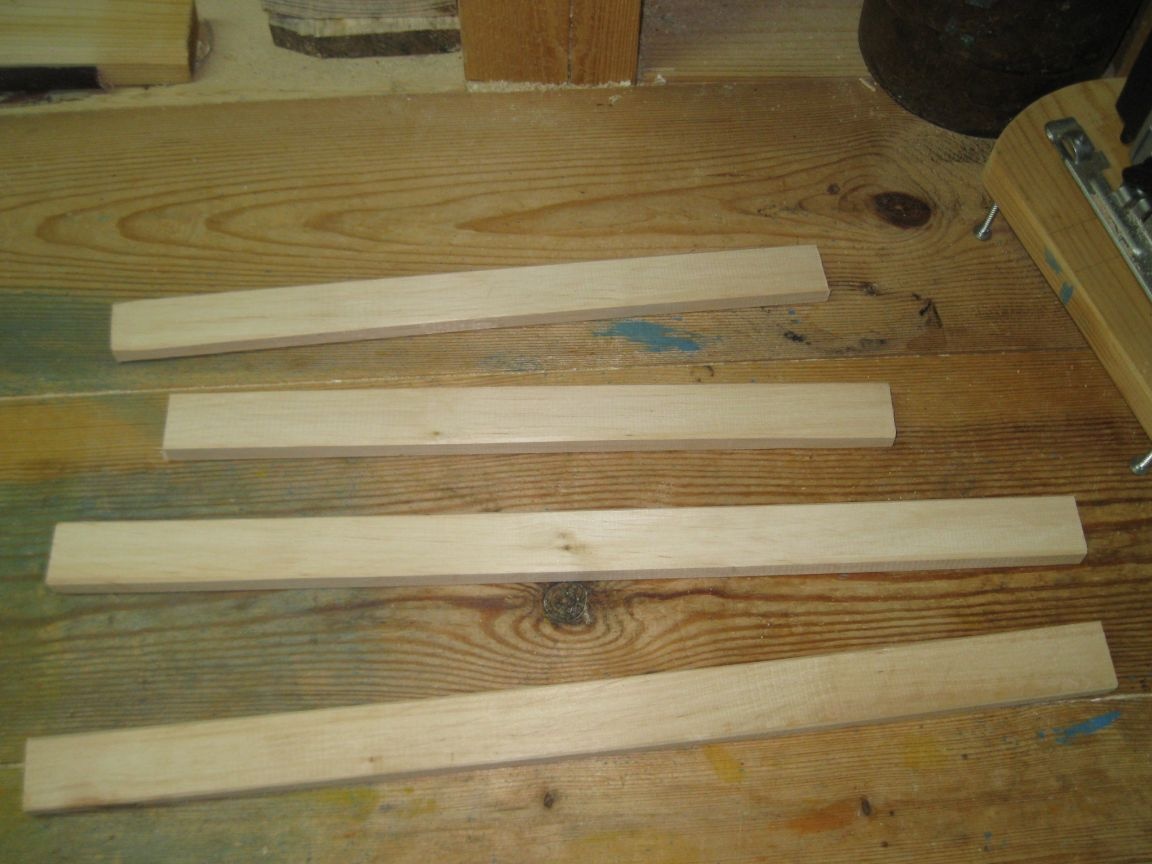
Step 1. Sawing the straps for the cover frame.
We saw wooden planks into four blanks of the required size.
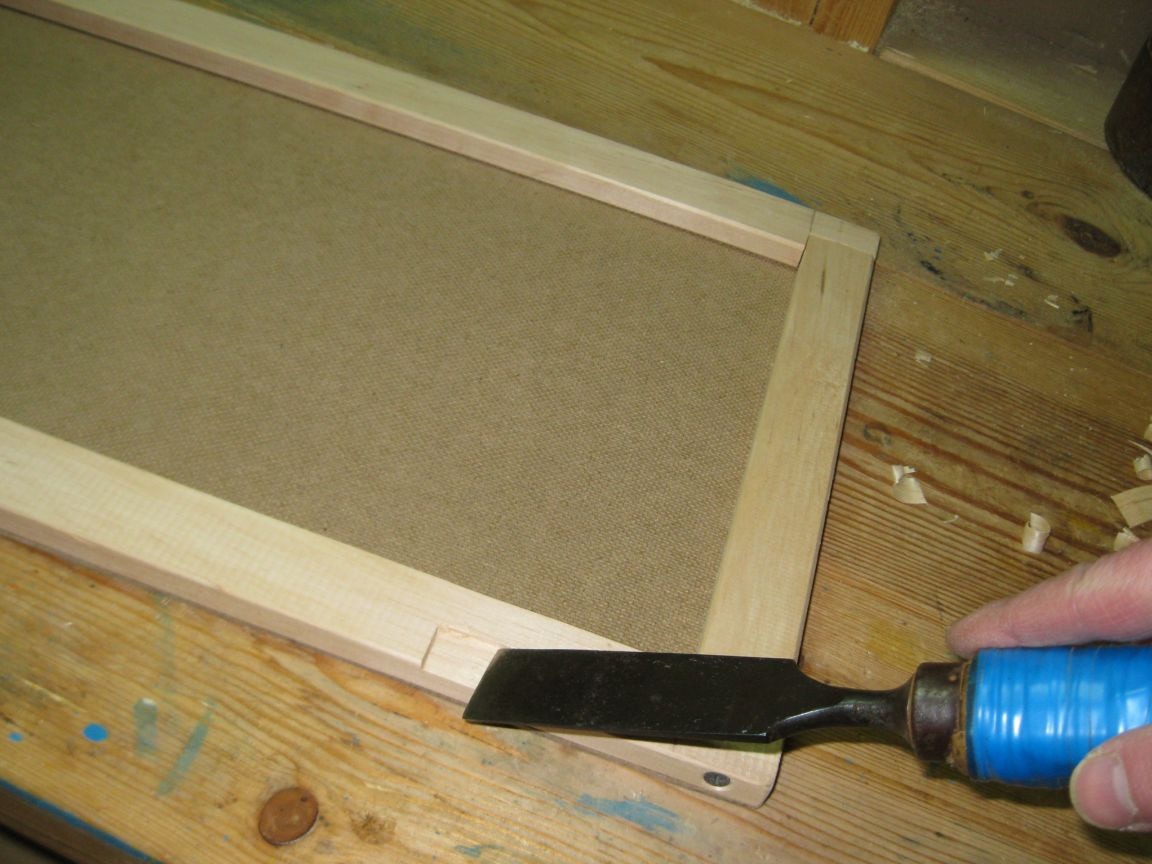
Step 2. Cutting quarters.
Saw with a jigsaw of a quarter at the ends of two long workpieces.

Step 3. Drilling holes.
We drill at the ends of long workpieces holes for the pits, with a diameter of 4 mm.
Step 4. Countersink holes.
We countersink the ends of these holes for countersunk heads of screws using a spherical milling cutter on a tree.

Step 5. Assembling the cover frame.
We assemble the cover frame on the wood screws 60 mm long. We use a screwdriver for this.
Step 6. Nailing hardboard to the frame of the lid.
Nail the remaining piece of hardboard to the frame of the lid, after measuring its diagonals.
If the diagonals are of different lengths, the cover frame must be aligned. If the diagonals are equal, then you can immediately nail the hardboard to the frame.
Step 7. Finishing the cover.
We finish the cover with sandpaper.
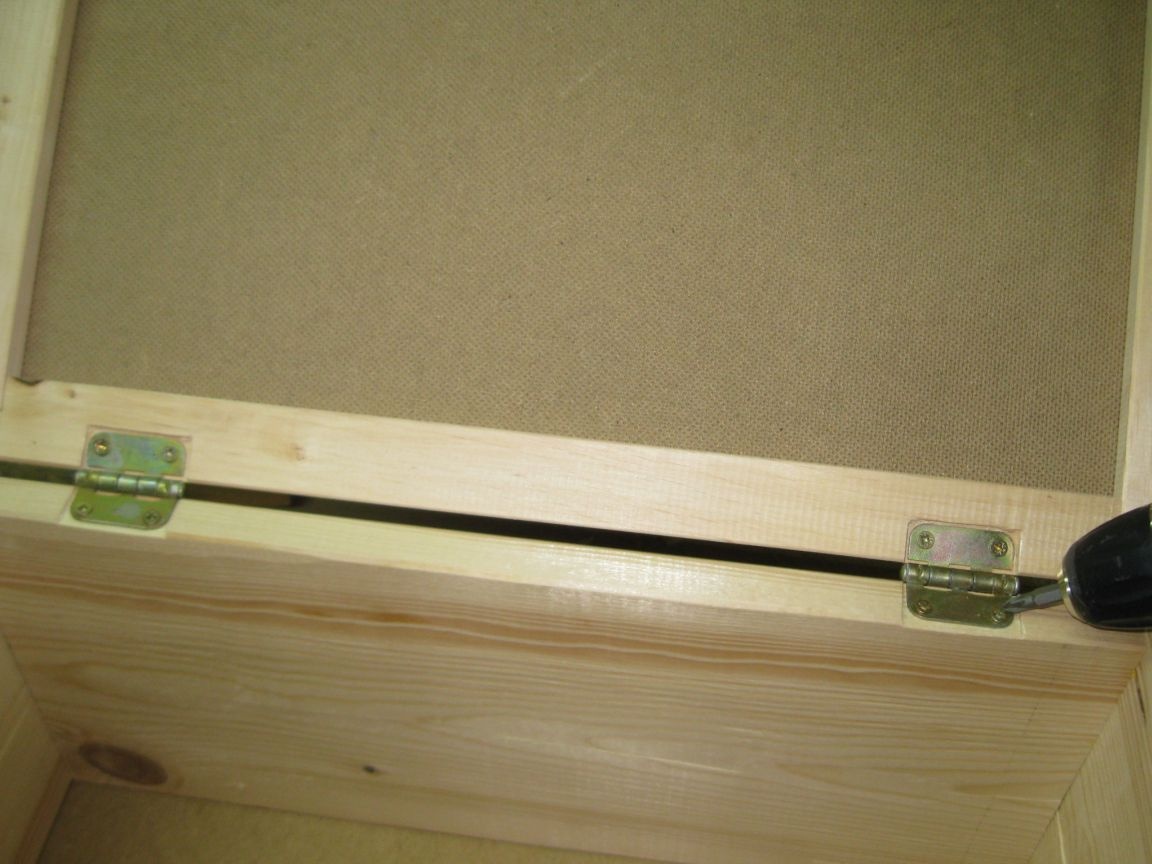
Step 4. Installing the hinges and screwing on the drawer lid.
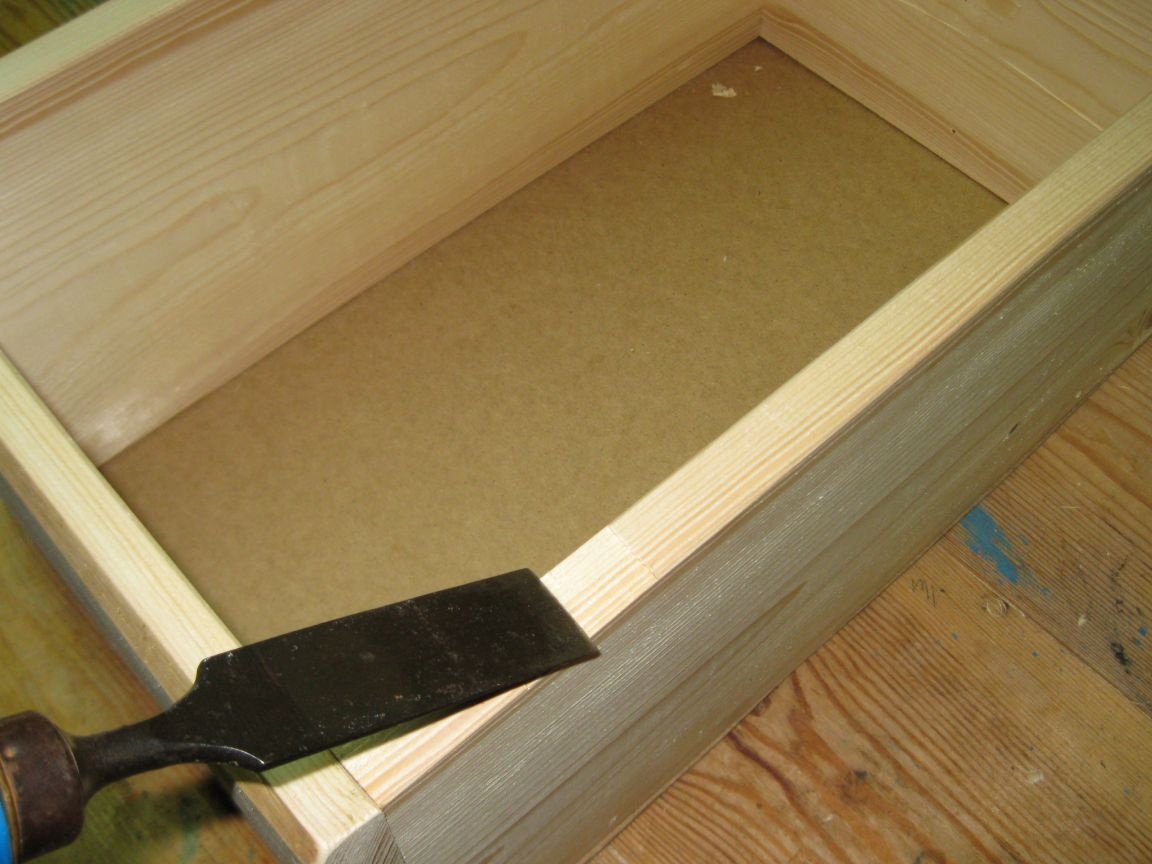
Step 1. Marking and cutting recesses under the hinges on the lid.
Mark the places for installing the loops on the cover and cut out the recesses under them with the help of a chisel and a hammer.
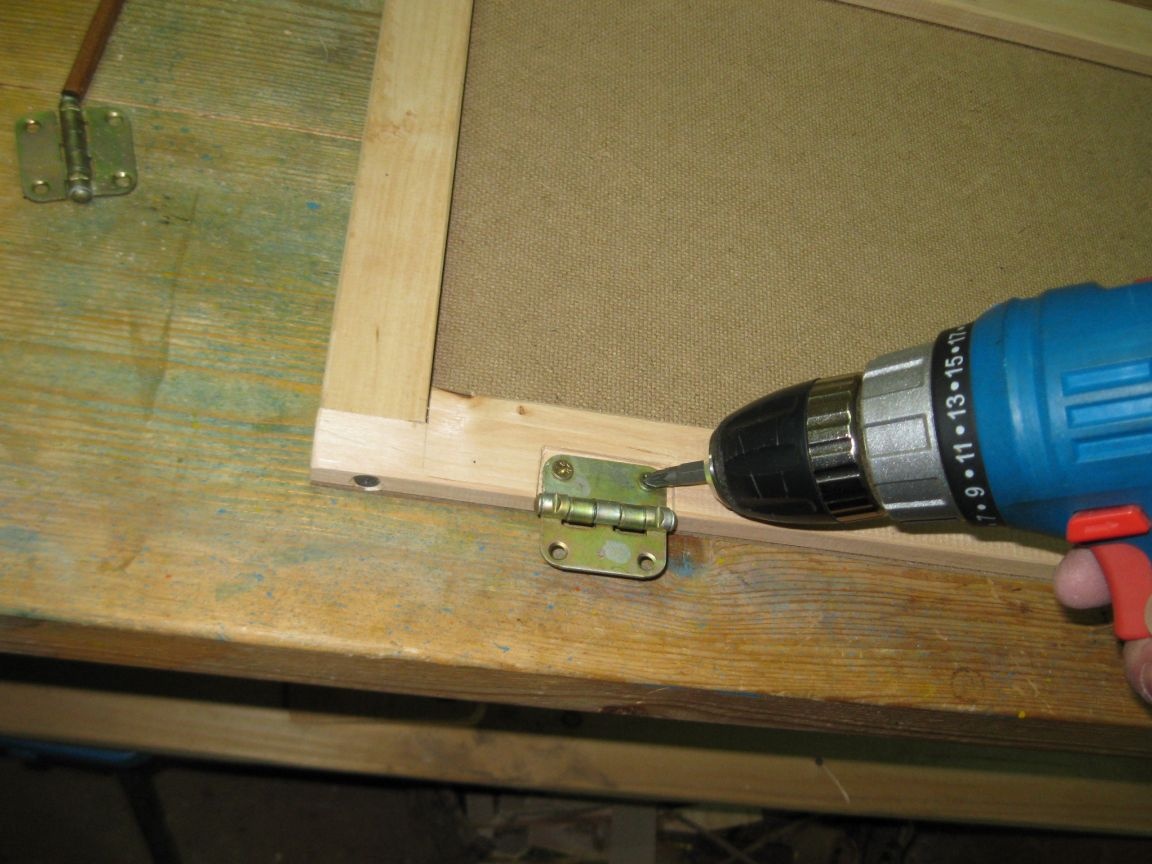
Step 2. Install the hinges on the cover.
We install the hinges on the cover, screwing them with small screws.
Step 3. Marking and cutting recesses under the loops on the box wall.
We mark the places for installing the loops on the box wall and cut out the recesses under them using a chisel and a hammer.
Step 4. Screwing the lid to the drawer.
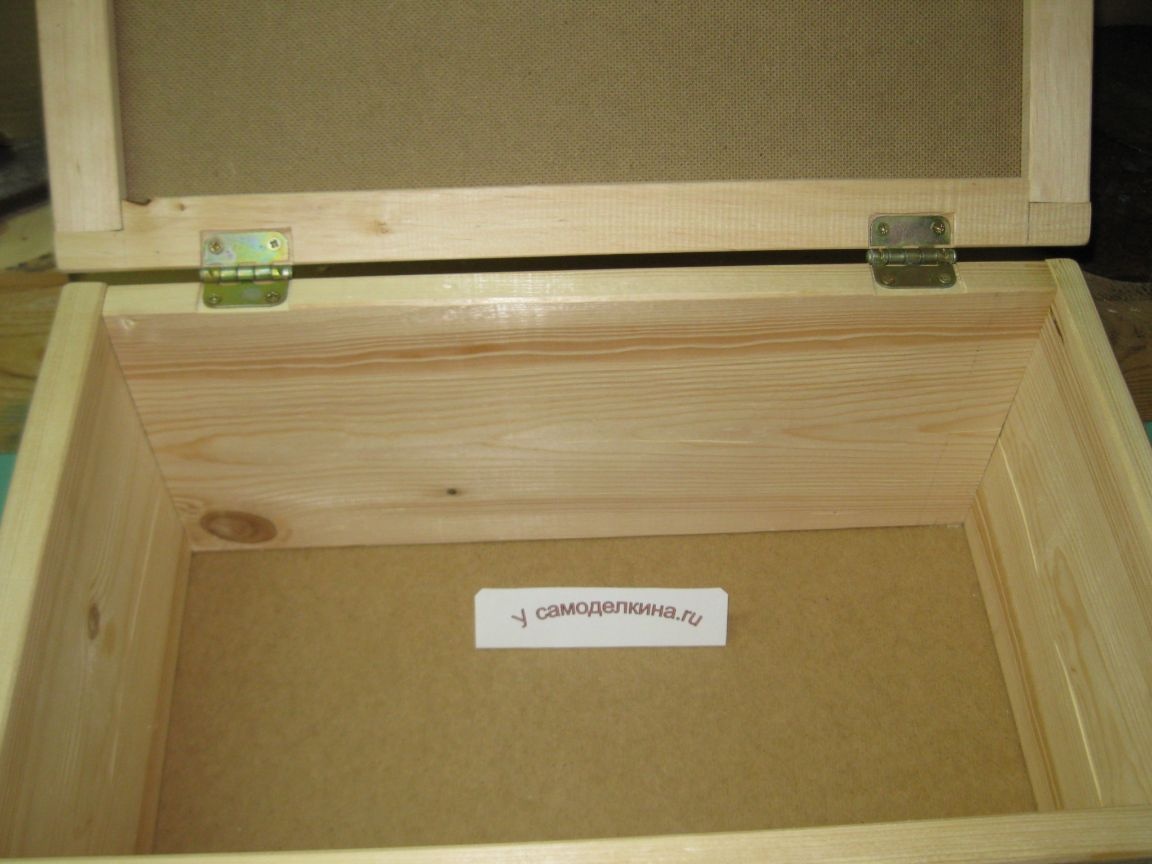
We install the lid on the box and fasten the hinges to its wall.
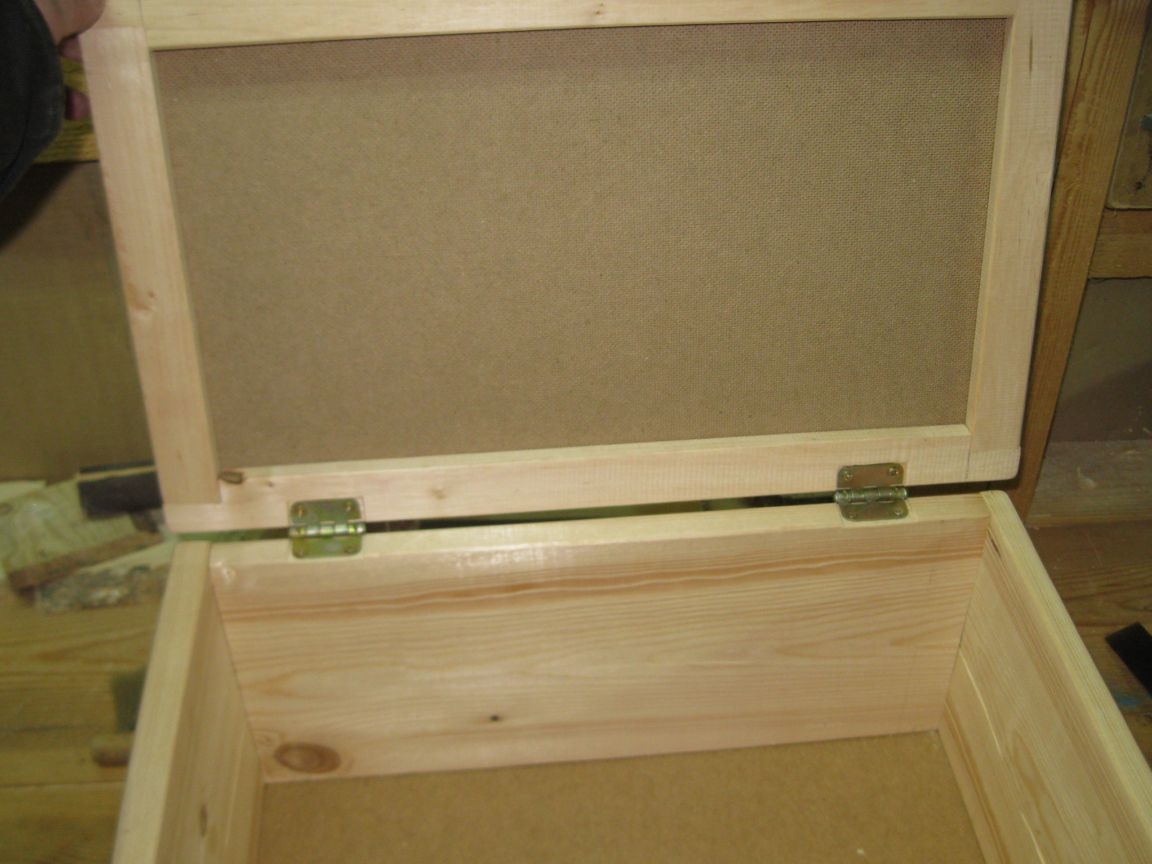
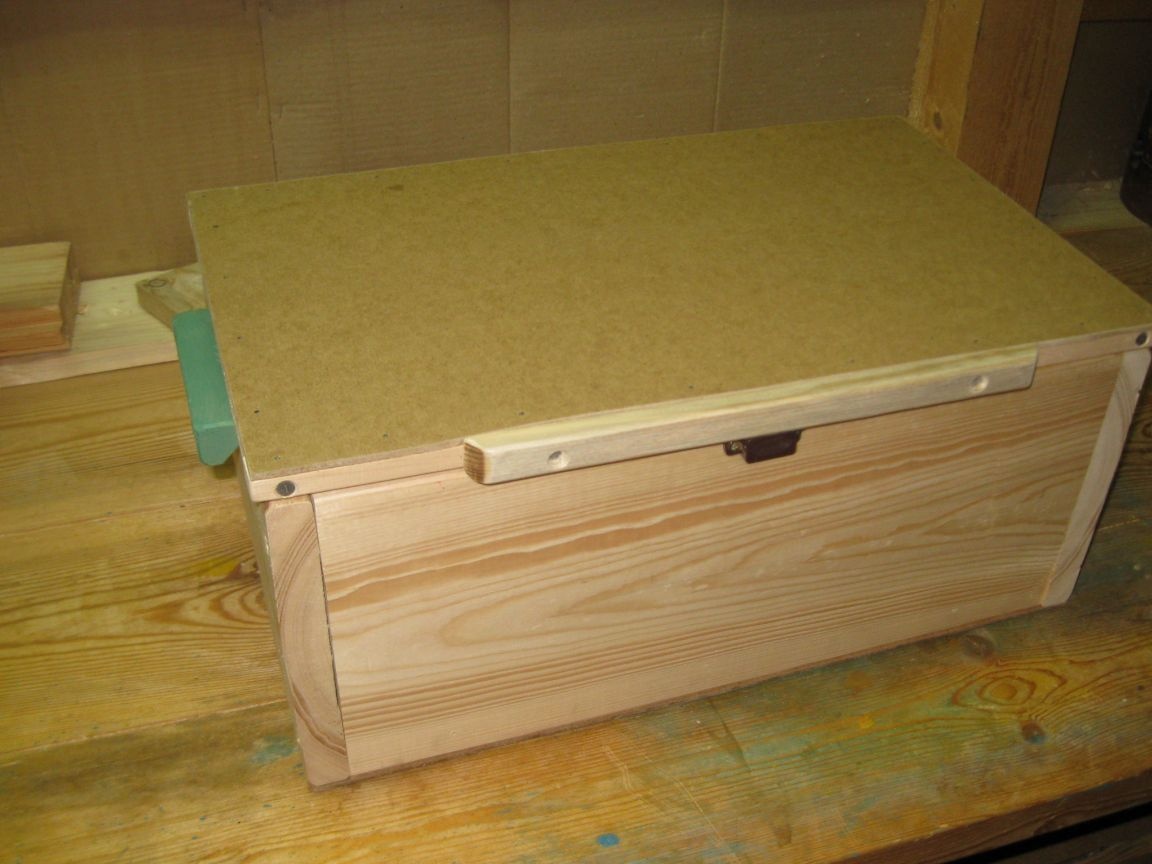
Thus, our box is almost ready, but for convenience you still need to install the handles.
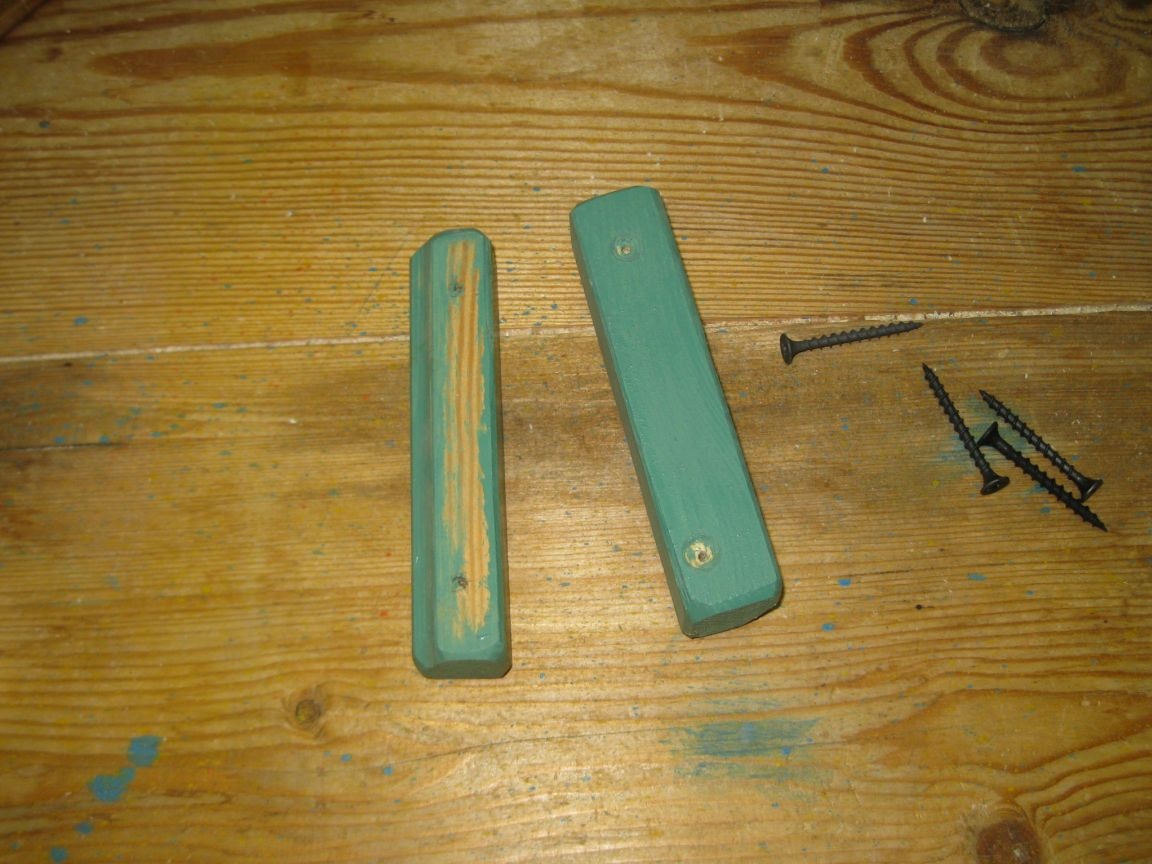
Step 5. Installing the handles on the walls of the box and on the lid.
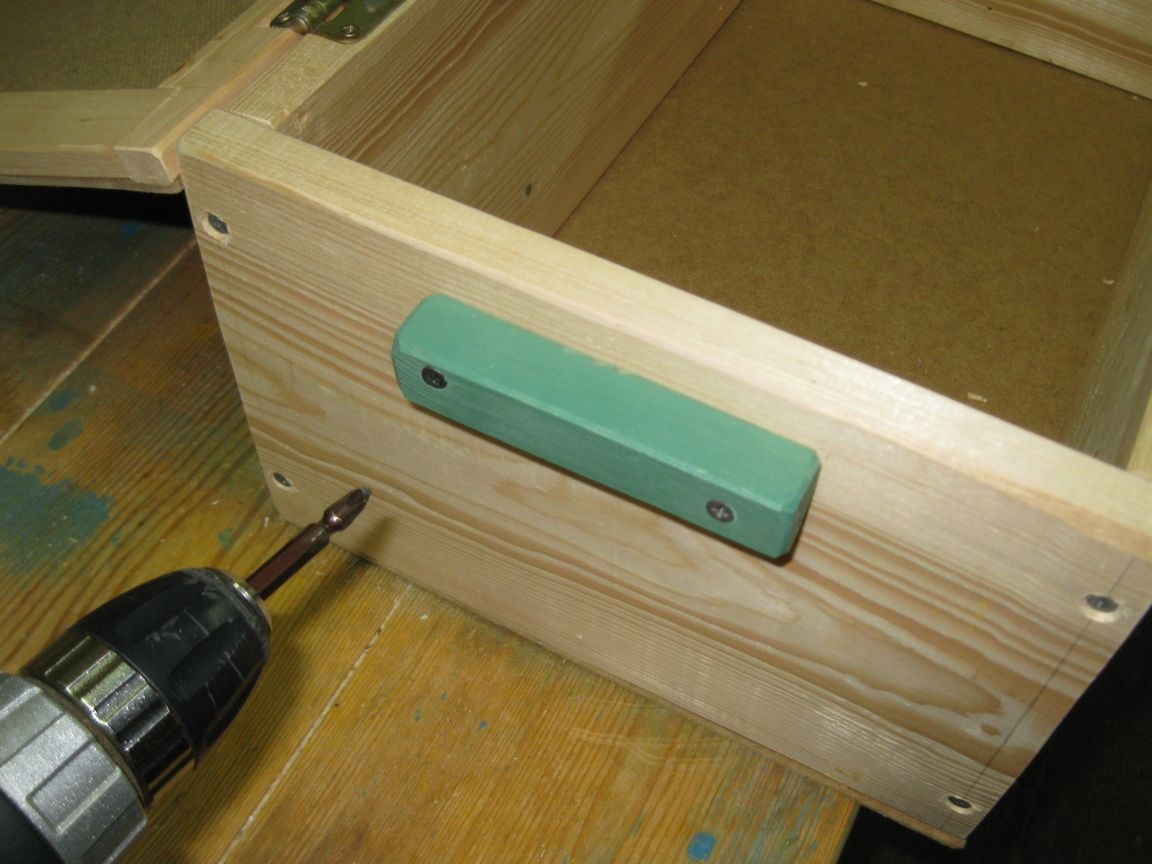
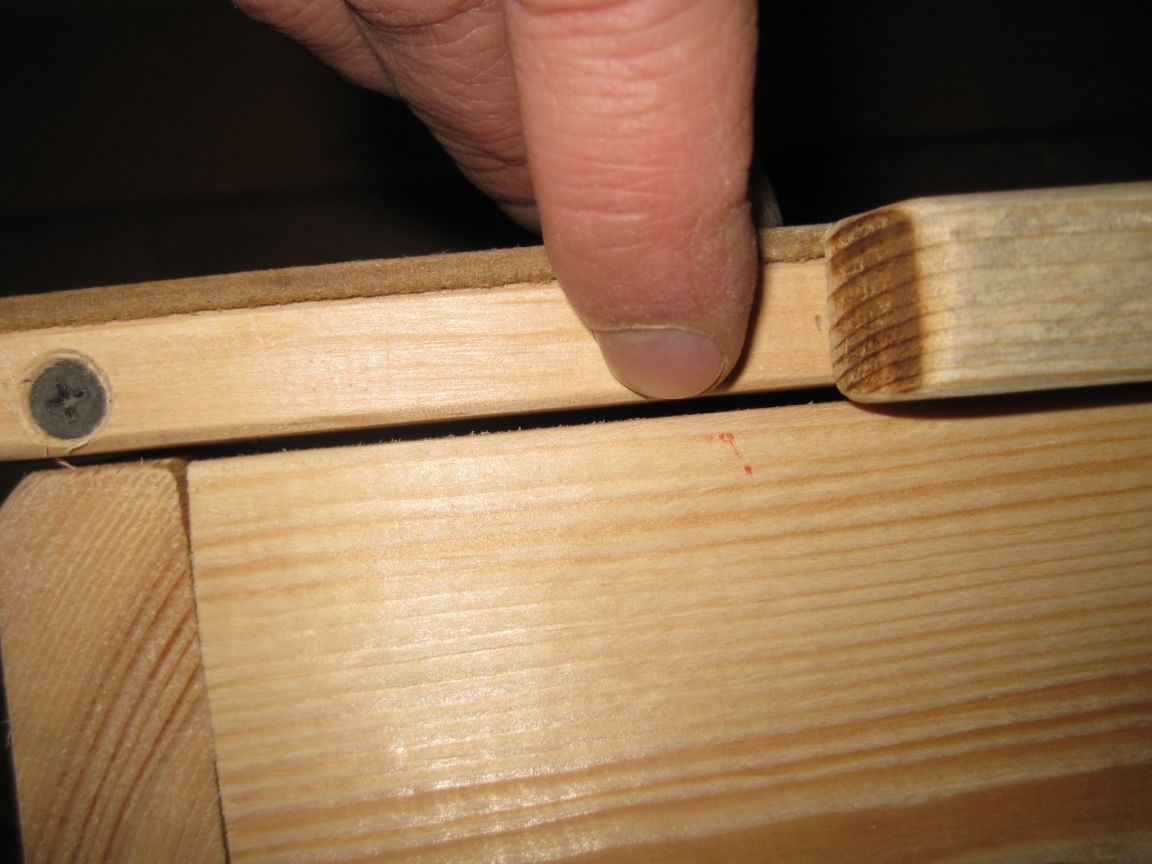
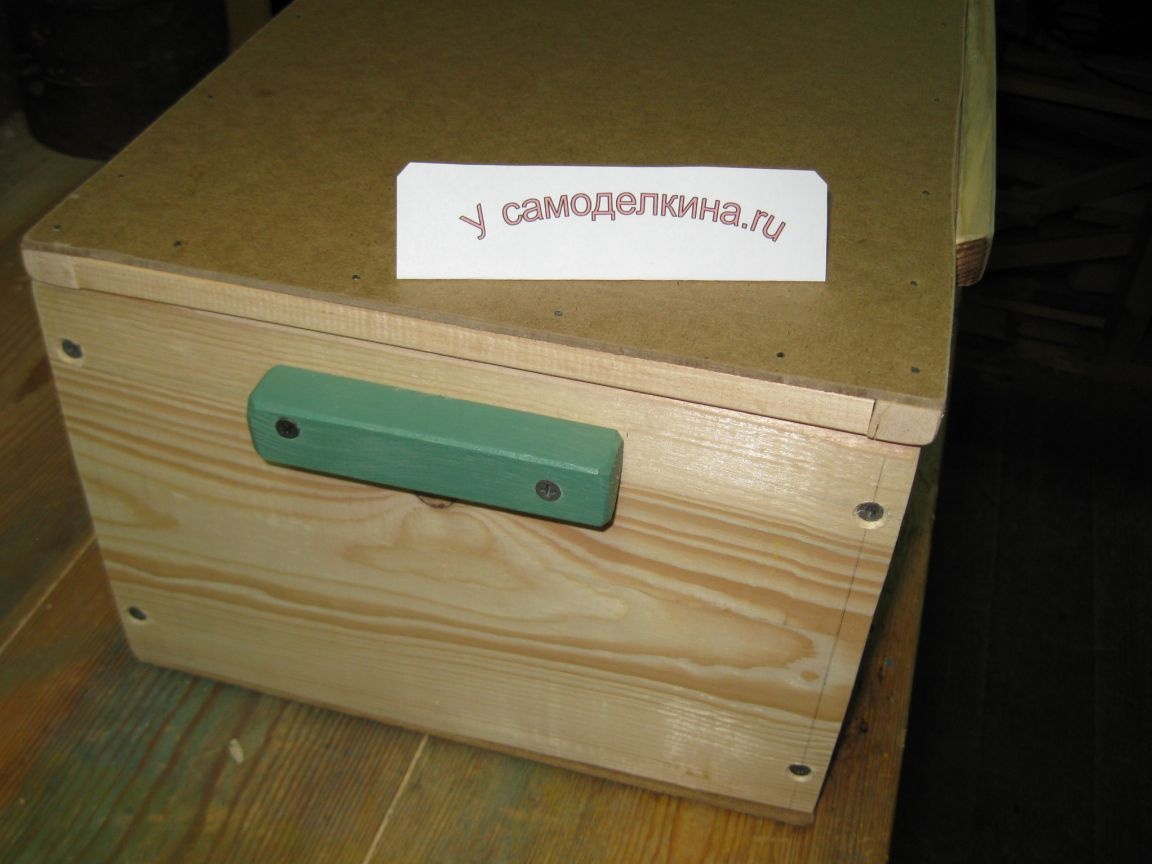
Step 1. Screwing the handles to the side walls of the box.
As the simplest handles for the box, you can use two small wooden blocks. However, I already have ready-made blanks for such pens, which I did a dozen or so at one time, since I often have to make wooden boxes or containers. I will use these blanks.
This is what these pens look like.
We screw them to the side walls of the box, with wood screws with a length of 40 mm.
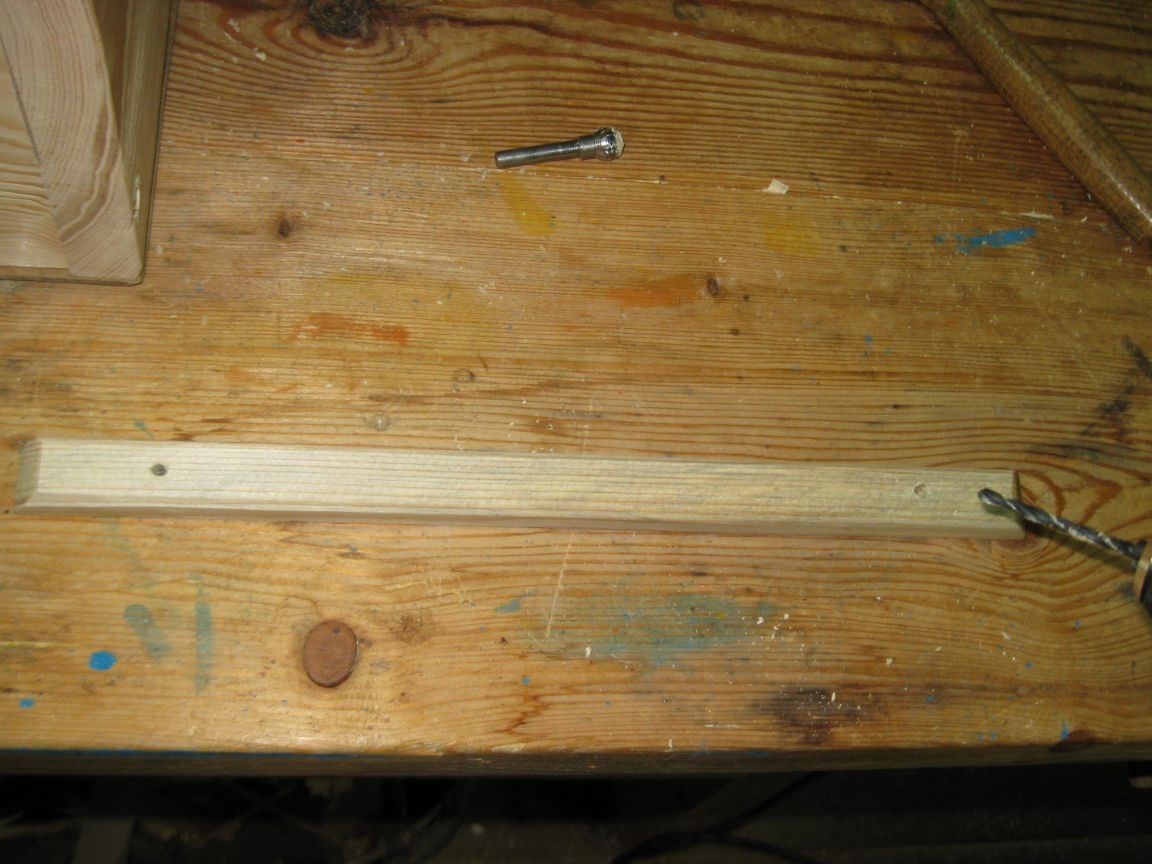
In addition, you need to make some kind of handle for the lid of the drawer, so that it is convenient to open. For this, I also picked up a ready-made bar, which I had left from cutting some old homemade.

Step 2. Drilling holes in the handle for the lid.
We drill at the ends of the handle for the lid, the holes for the holes, with a diameter of 4 mm.
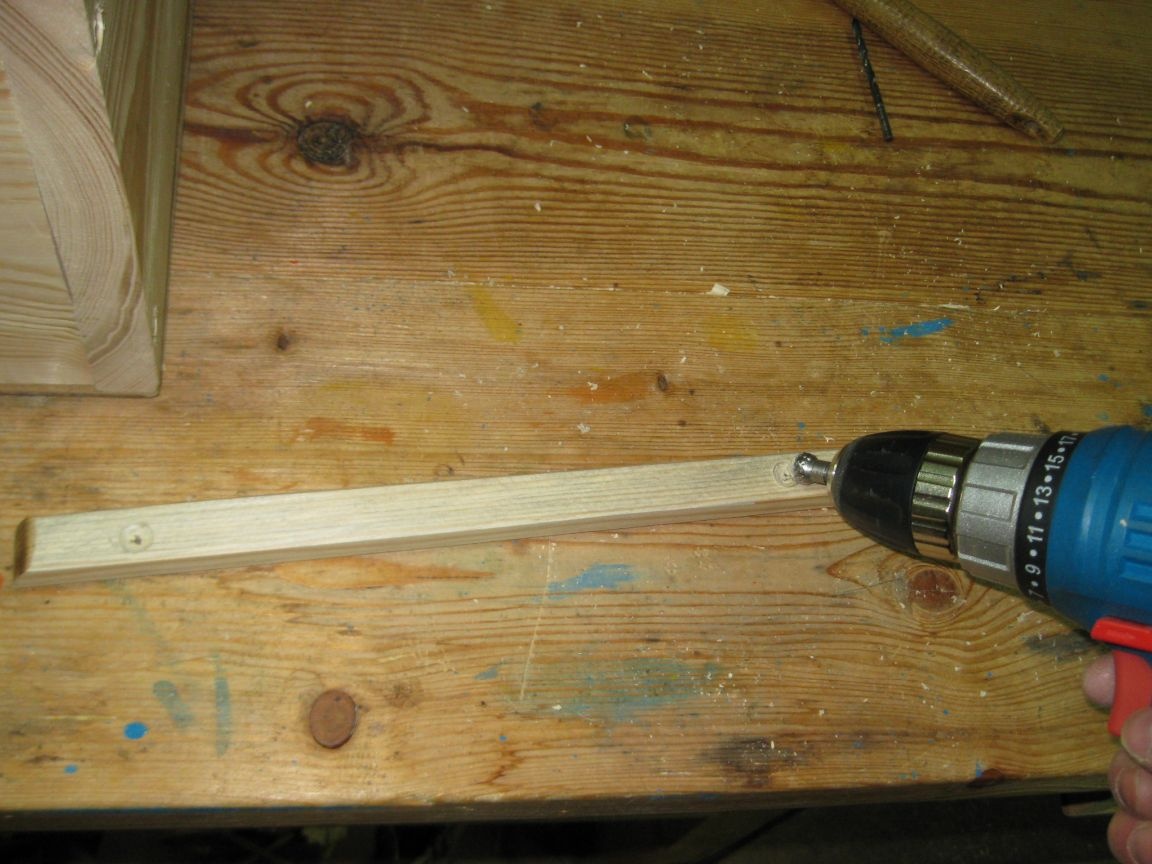
Step 3. Countersink holes.
We countersink the ends of these holes for countersunk heads of screws using a spherical milling cutter on a tree.
Step 4. Attaching the handle to the box lid.
We turn the handle to the front end of the box lid with wood screws 40 mm long.
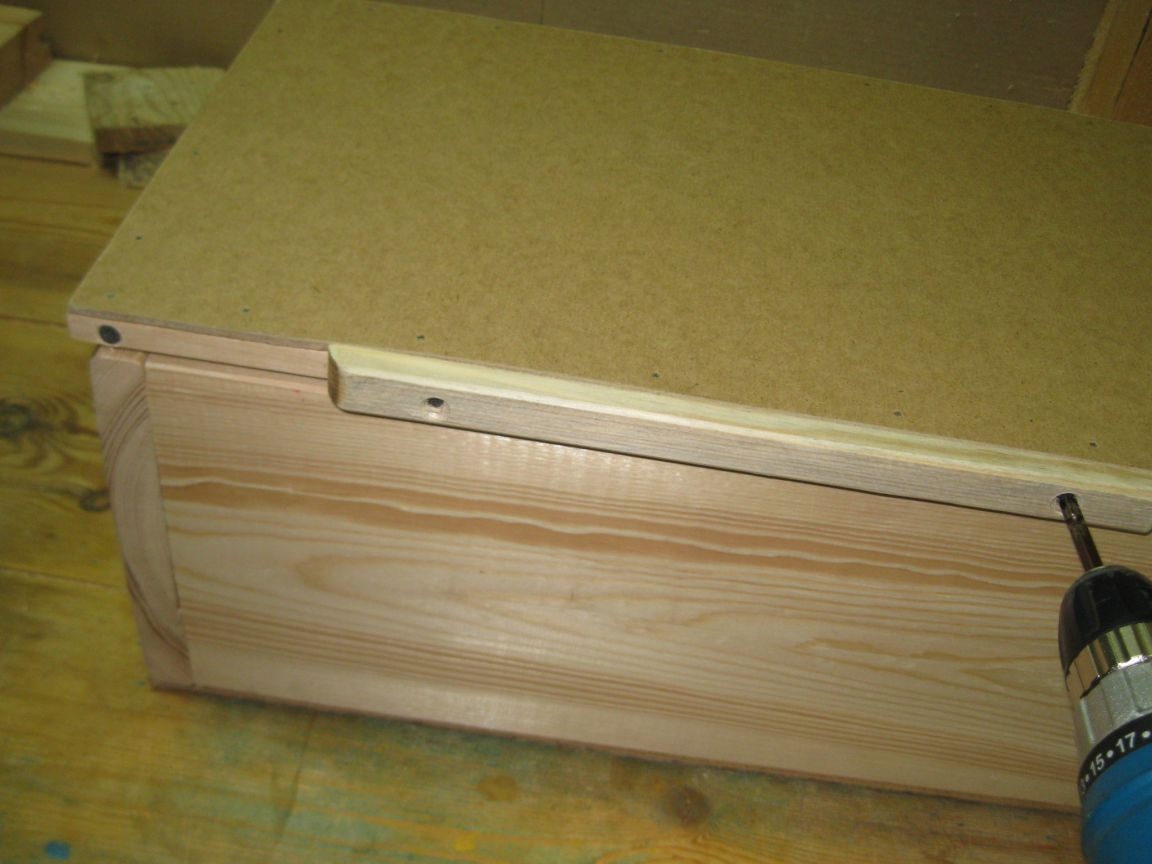
Now our box will be convenient to open.
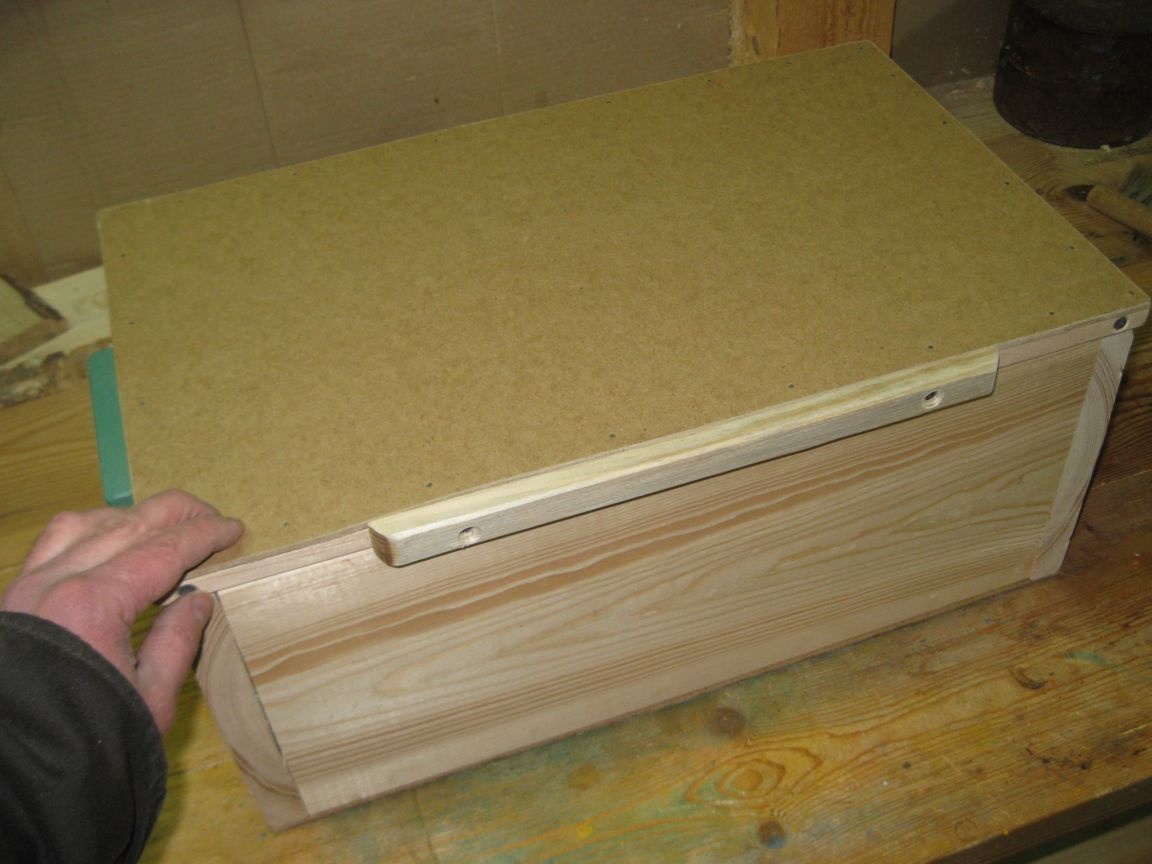
Thus, we can say that the box is almost ready. However, I decided to make a small latch for the lid on it so that the lid does not hang and locks in one position. For this purpose, I decided to use a small furniture magnet.
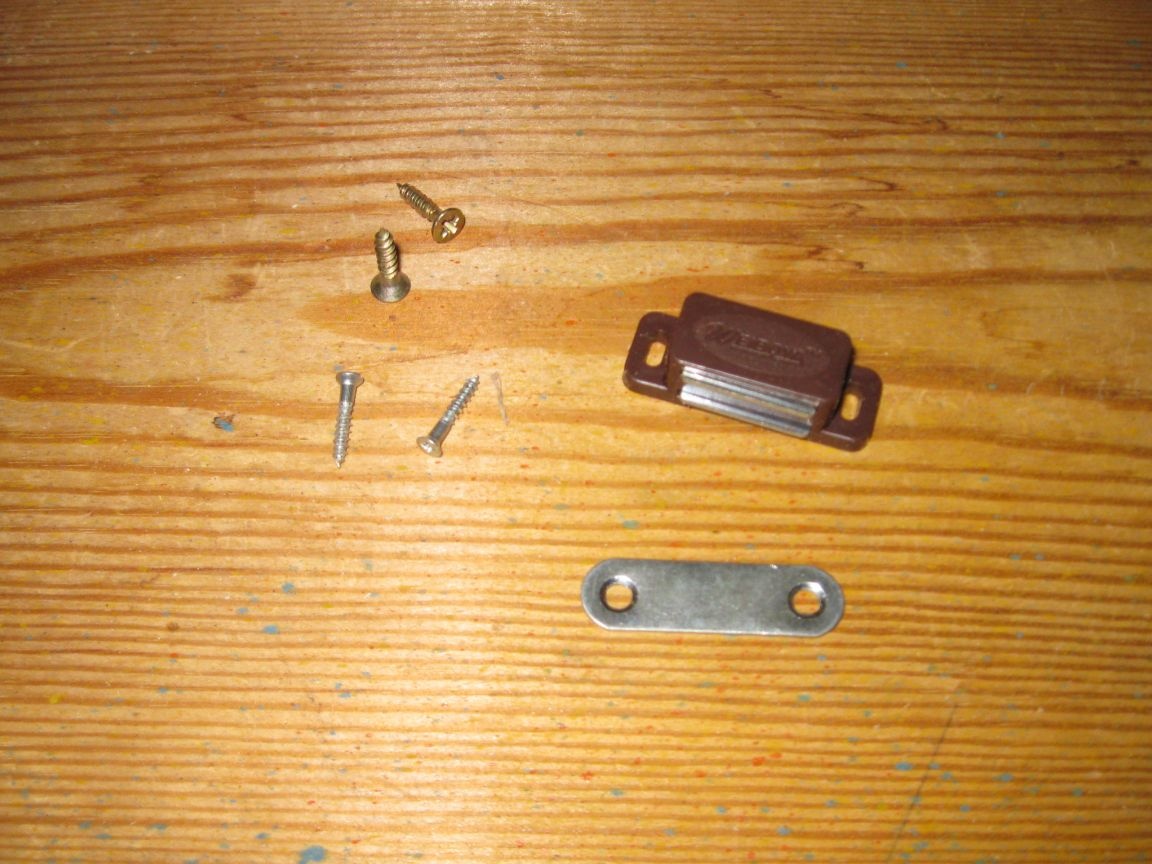
Step 6. Install the magnetic latch for the box lid.
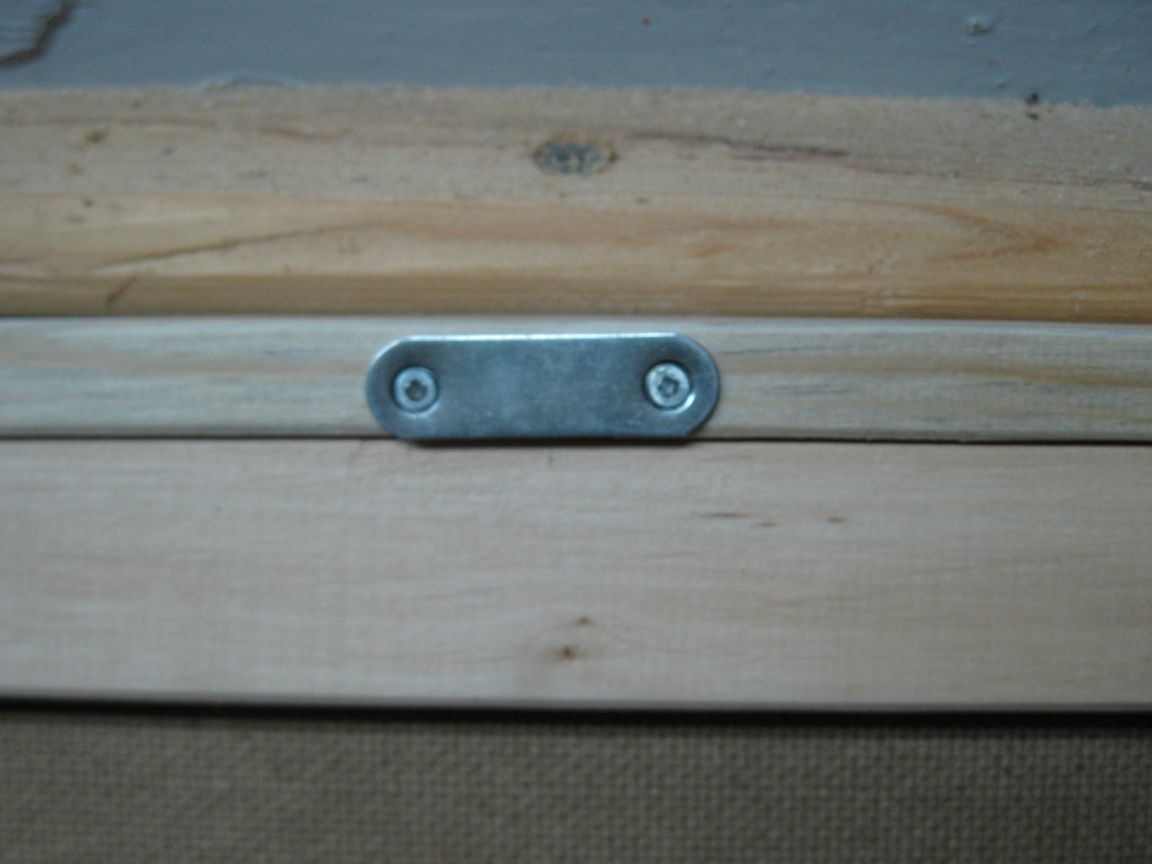
Step 1. Fastening the furniture magnet plate.
We install on the bottom of the handle of the lid, a steel plate from the furniture magnet, screwing it with two small screws 3x15 mm.
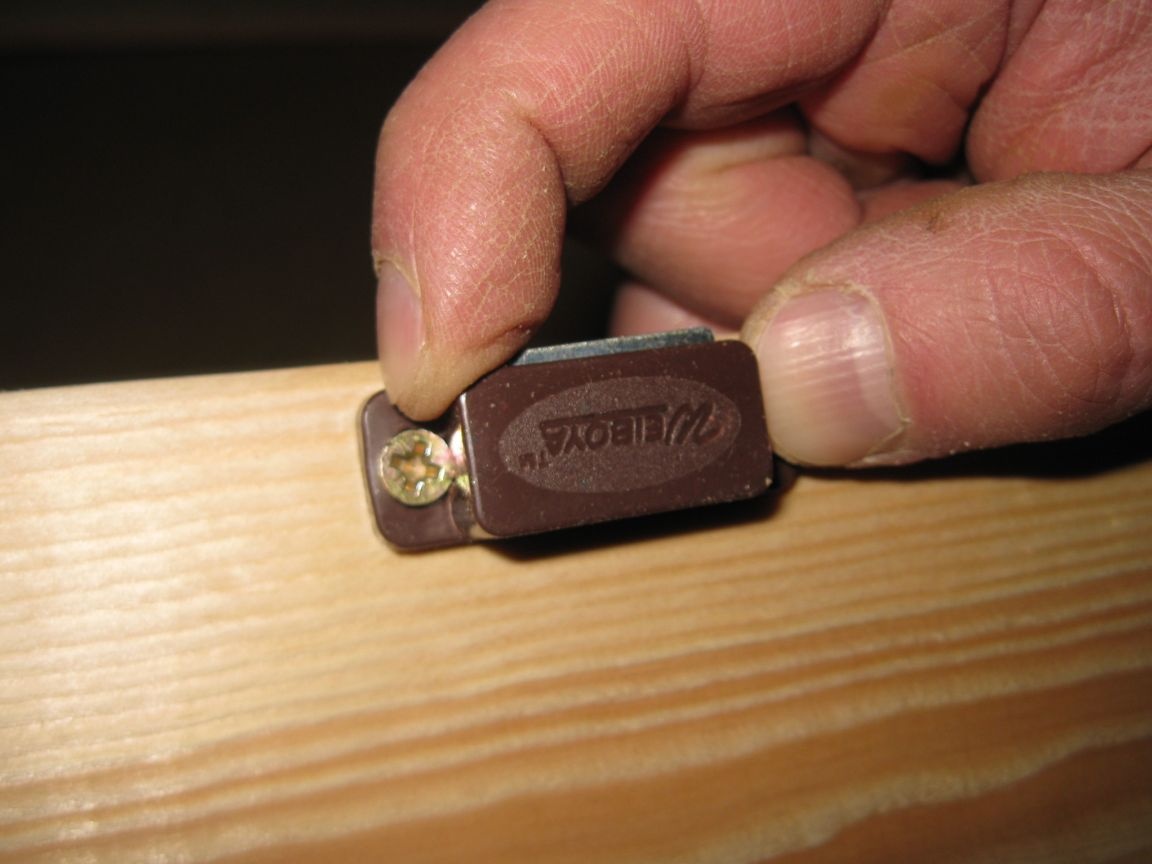
Step 2. Install the furniture magnet.
We install the furniture magnet itself on the upper part of the front wall of the box, also screwing it with small screws.
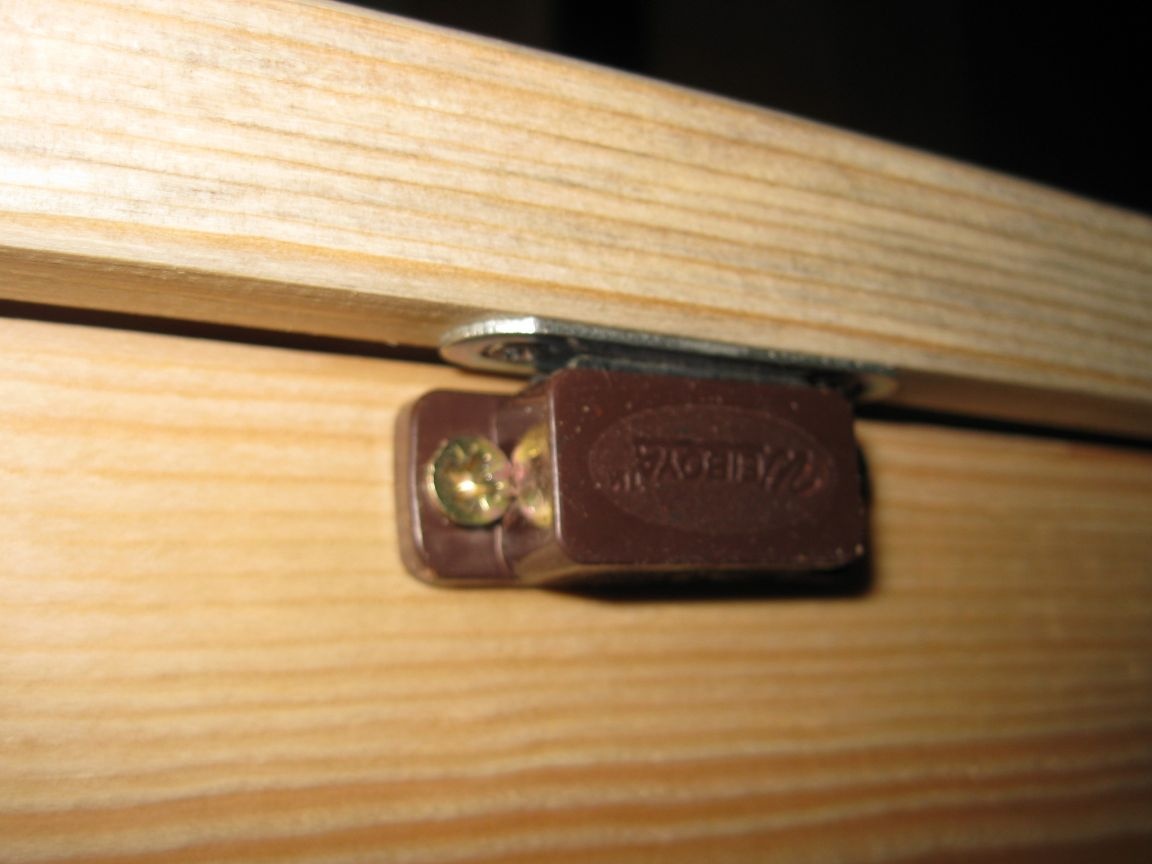
By the way, a furniture magnet as a latch is good in that its height can be adjusted by loosening and tightening the screws that fasten it.
Due to this, we can adjust the density of closing the lid of the box. That is, you can set the magnet so that the lid fits snugly on the box body, or so that there is a small gap between the cover and the box body.
For example, I adjusted the position of the magnet so that when closing the lid, between it and the body, a small gap will be obtained, which will be useful for air ventilation when storing vegetables in this box.
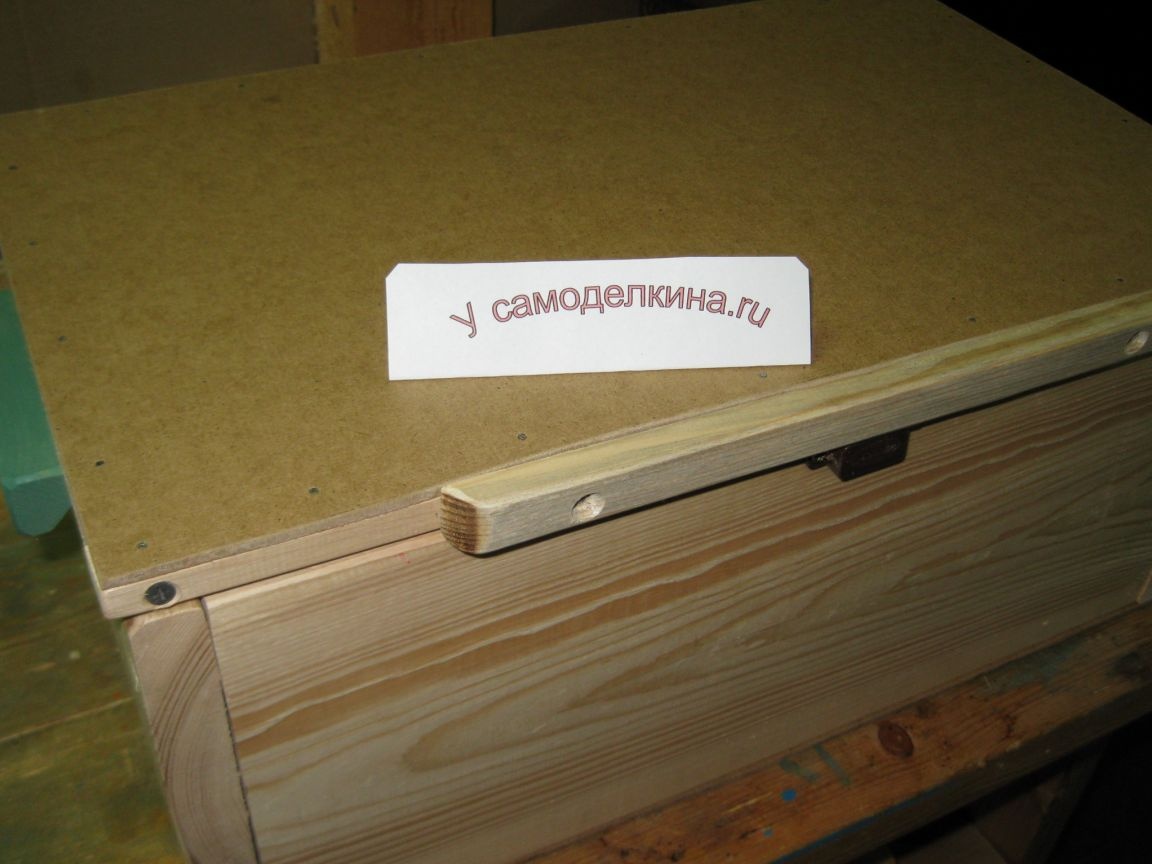
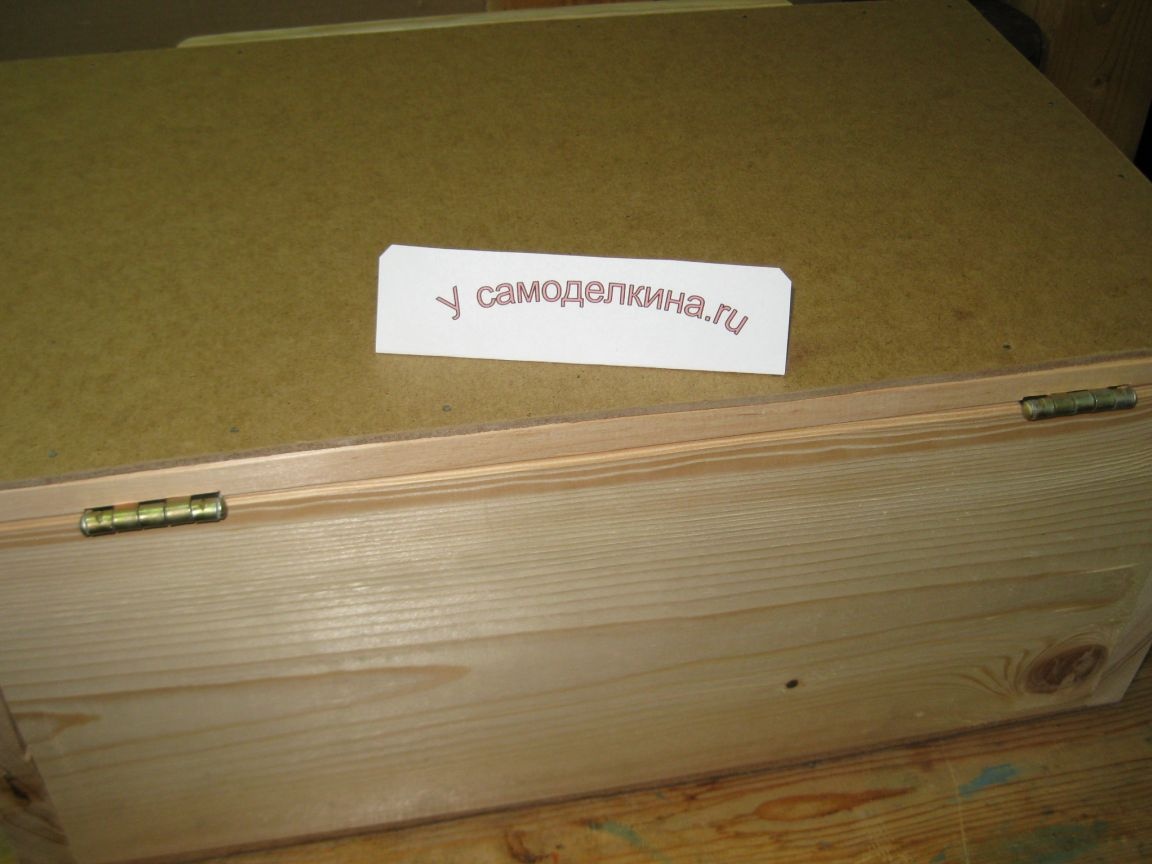
Well, finally, our box is ready!
And so it looks from different angles.
This is on the side.
On the back.
And in the clear.
Now this box can be used to store vegetables.
In principle, it would be possible to cover this box from the outside, with some kind of protective and decorative impregnation, or just paint it, but I have not yet done so. Firstly, this box will be used only at home, and secondly, impregnation or paint can worsen the storage conditions of vegetables. Therefore, I have not yet begun to cover this box with anything, but in the future - it will be seen!