
Here is a great example of how you can make a great desk lamp made of wood. It should be noted immediately that in this homemade The author used the simplest tools, the most difficult of which can be considered a cordless drill. All materials are inexpensive and easily accessible, often they can be obtained free of charge. Mostly wooden timber is used here.
Materials and tools for homemade:
Material List:
- wood board with a thickness and width of 3 cm;
- a board 1 cm thick and wide;
- board 5X13 cm;
- paint in a spray can of brown color;
- glue for wood;
- White paper;
- linen fabric;
- LED bulb with a cartridge and cable.
Tool List:
- a hacksaw for a tree;
- ;
- drawing accessories, including a ruler and a pencil;
- clamps;
- sandpaper.
The manufacturing process of the lamp:
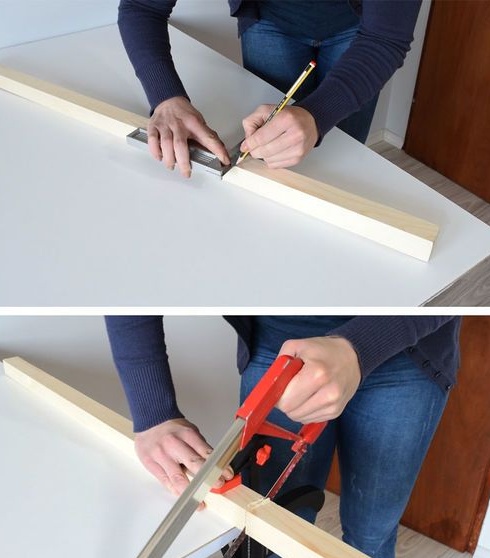
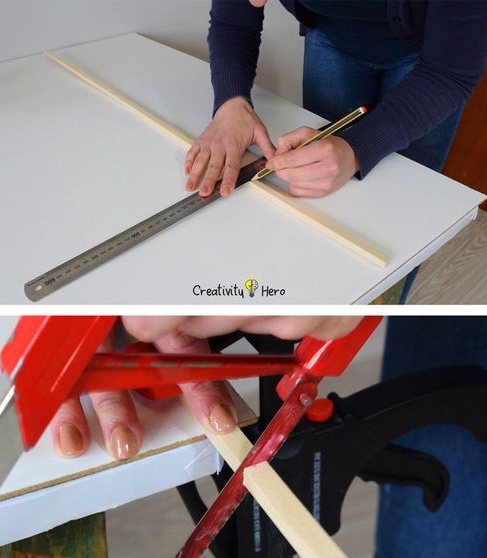
Step one. We cut the blanks for the main frame
First of all, determine the dimensions of the lamp, also here you need to proceed from the sizes of the available materials. Carefully measure and mark everything with a pencil. Well, then you can cut the workpiece. The author works with a hand tool, you need a hacksaw.
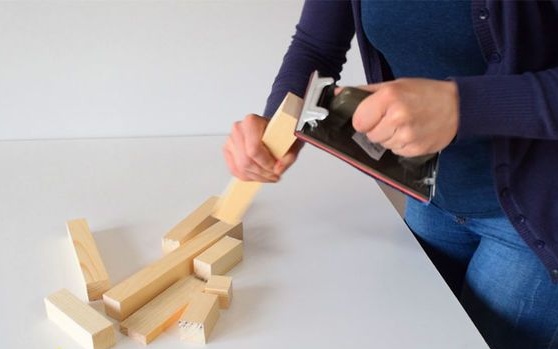
Step Two Sanding and bonding
Cutting points must be carefully sanded. First we use rough sandpaper, and then fine. Our task is to remove the notches and make sure that the planes fit perfectly together.
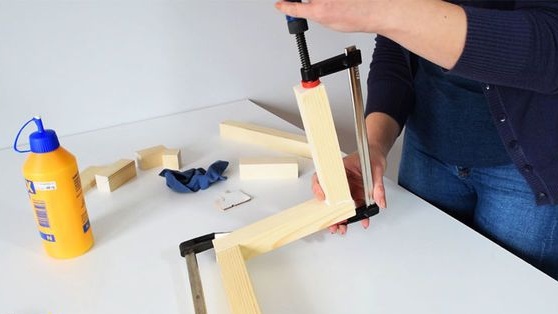
Well, now the workpieces need to be glued to the desired shape. Here you will need a square, as well as clamps. We apply glue, align everything with a square and tightly clamp it with clamps. We are waiting for the glue to dry completely, this is very important.
Step Three Cable hole
At the center point of the lampshade, you will need to drill a hole for the cable. The holes are drilled in two parts. Then a small part sticks to its place. It’s convenient to work.

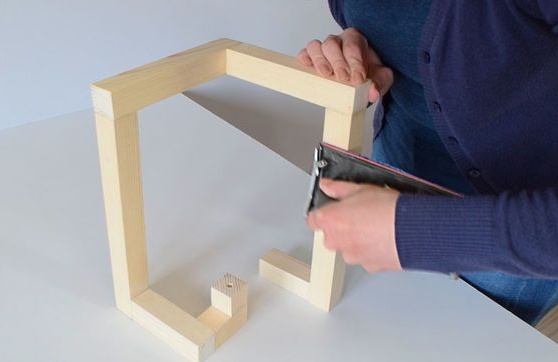
Step Four We cut out accessories for the lamp shade
It is time to prepare all the elements for assembling the lampshade. The author decided to make this element in the form of a cube. You will need thin whetstones, we mark them and cut into blanks.In total, you should get 8 blanks for assembling the upper and lower parts, as well as plus four more long ones. The author's frame height was 20 cm and a width of 15 cm.
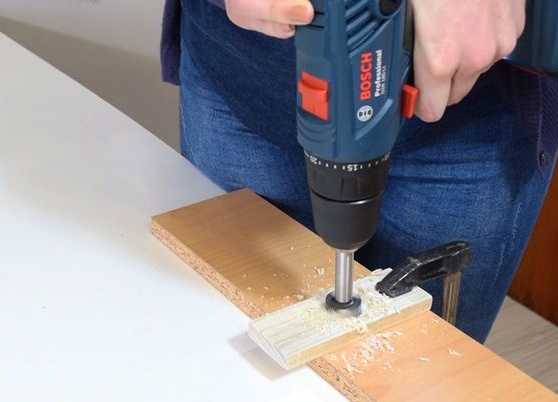
Another important element of the lampshade is the part that holds the bulb holder. It is made of a piece of wood measuring 5 x 13 cm. In it, in the center, the author drills a groove and a hole for attaching a cartridge, as well as a cable outlet. For drilling, you need a drill with a bit of 30 mm. The central hole is drilled with a 6 mm bat.
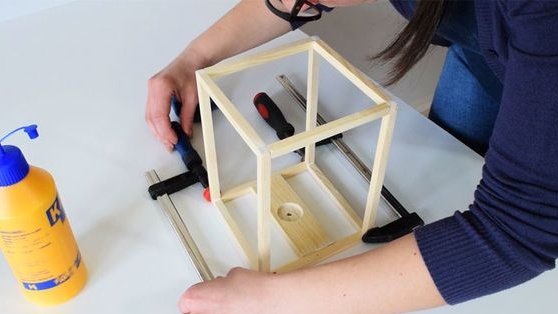
Step Five Putting the frame together
The frame can be assembled, wood glue is also used here. We lubricate all the joints well and assemble the frame. Clamps will come to your aid, also a square. Without a square, assembling exactly this design will be problematic. Clamp everything with clamps and leave until completely dry.
Step Six Grinding parts
To make everything look beautiful and of high quality, the author decided to paint his masterpiece. But for painting, first all the details need to be properly sanded. You will need 120 grit sandpaper.
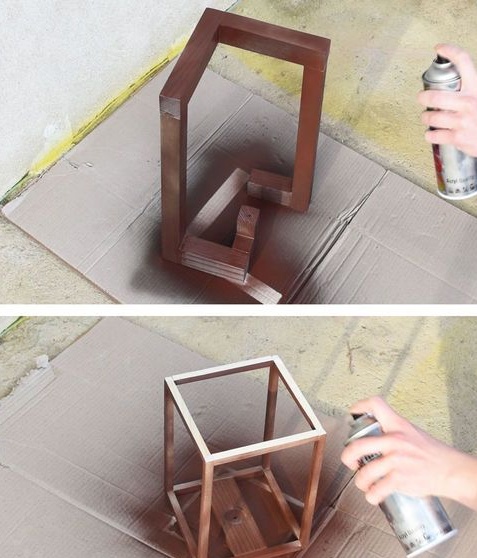
Seventh step. Painting
The author decided to paint both manufactured parts in one color, this is the color of chocolate. We apply two layers of paint with a spray can and let it dry completely.
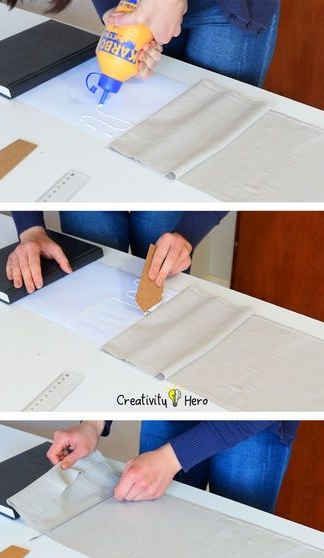
Step Eight. Preparing fabric for lampshade
To make the lamp shine pleasantly, the author decided to glue the fabric with paper; for this, wood glue was used. Due to the fact that this glue dries for a while, in the process of work you have the opportunity to align the fabric if something went wrong. The size of the fabric used by the author is 63 x 23 cm, and the size of the paper sheet is 62 by 21 cm.
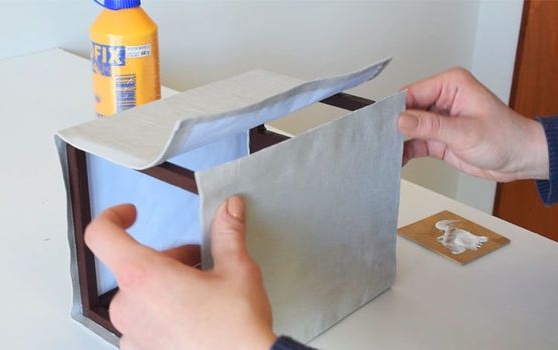
Step Nine. Glue the fabric to the frame
Using wood glue, gently glue the fabric to the lampshade. The main thing here is not to rush and pull the fabric evenly. Bonding should be done gradually, applying glue to each side separately. At the end, trim everything and leave to dry completely.
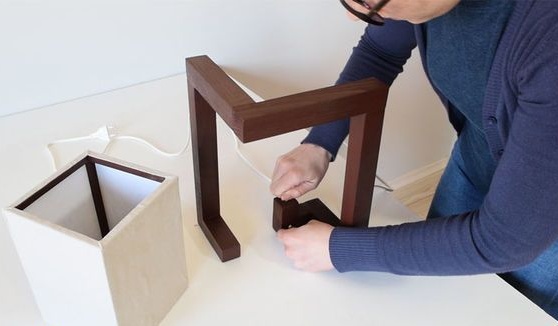
Step Ten Lamp assembly
First, pull the cable through the housing and secure it with epoxy glue. In the central part of the lampshade, in the prepared place, install the bulb holder and connect the cable to it. The author recommends using a LED as a light bulb, as it consumes little energy and does not radiate a lot of heat, which is dangerous.
Well, then you just have to stick the lampshade to the main frame and the homemade product is ready!
Step 11. Testing the lamp
The author is satisfied with his homemade product. You can see her work in more detail on the video.