
Actually, here is the assembly instruction for the simplest, home-made table lamp.
Materials for the lamp:
- 3 cans of peas or corn;
- A little more than 1 meter of timber 2x2.5cm;
- board for stand 25x25x2.5cm;
- 45cm single-core wire (aluminum or steel);
- about 3 meters of a two-wire wire per light bulb, core section 0.75 mm2;
- switch (to wire or stationary);
- cartridge;
- 6 rivets;
- 4 screws with washer.
Let's start assembling a homemade table lamp:
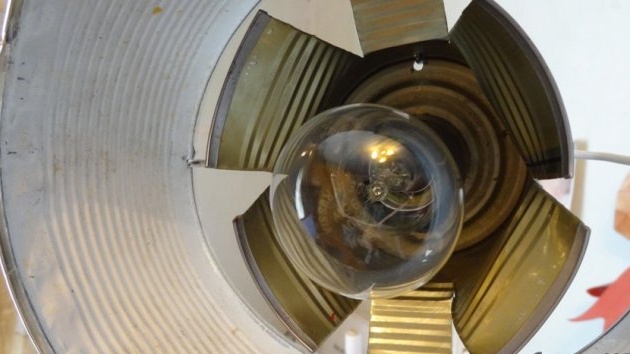
1st step. We collect the ceiling.
The lampshade consists of 2 parts:
- the first part of the ceiling
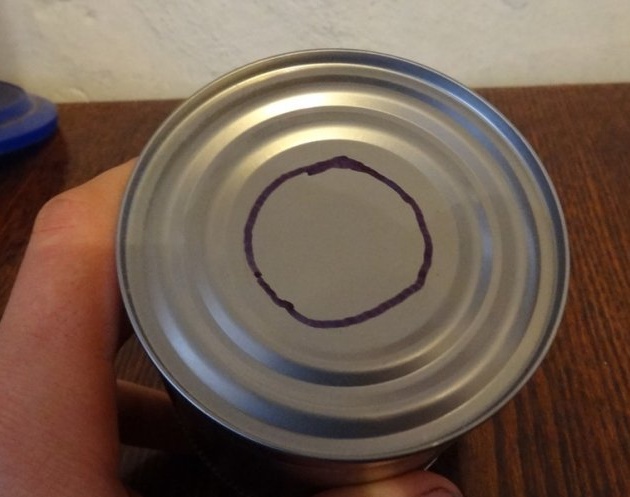
We plan a hole for the cartridge. The diameter of the hole should be equal to the diameter of the threaded part of the cartridge.
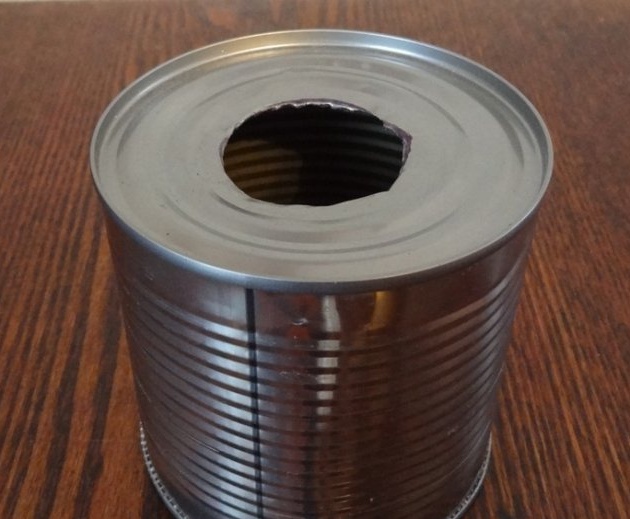
We cut a hole with a knife.
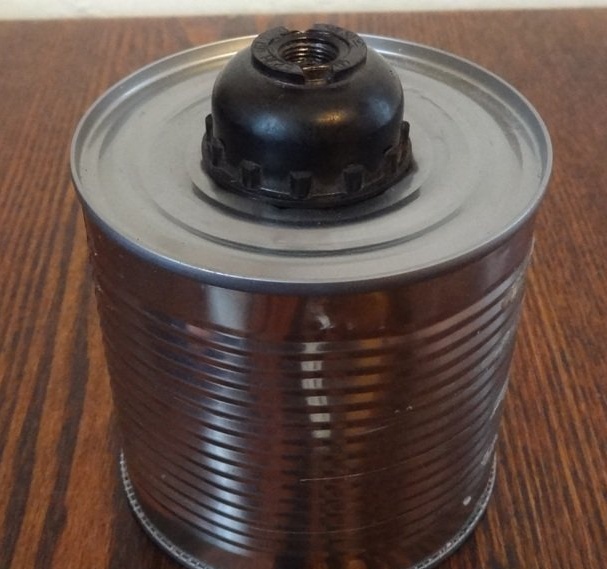
We fix the cartridge in the hole.
the cartridge must be collapsible!
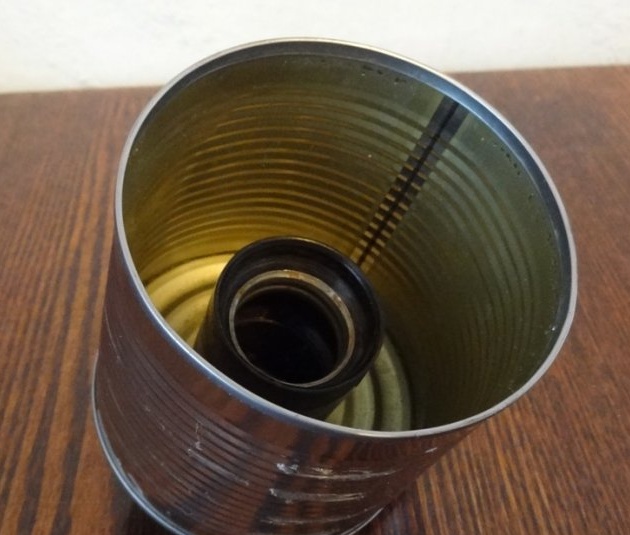
- the second part of the ceiling
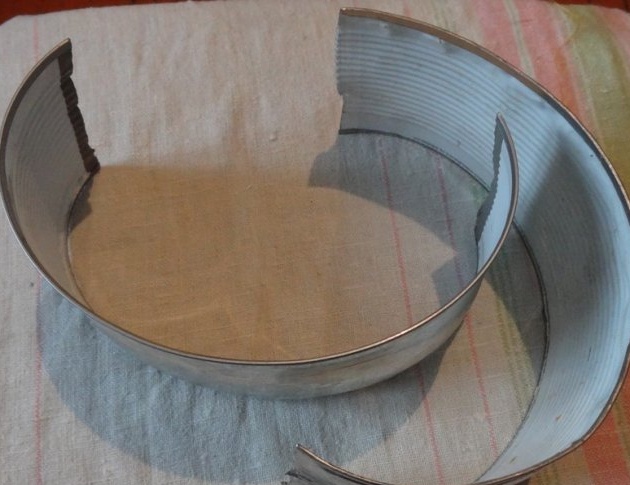
Dissolve 2 cans - we get such strips of tin.
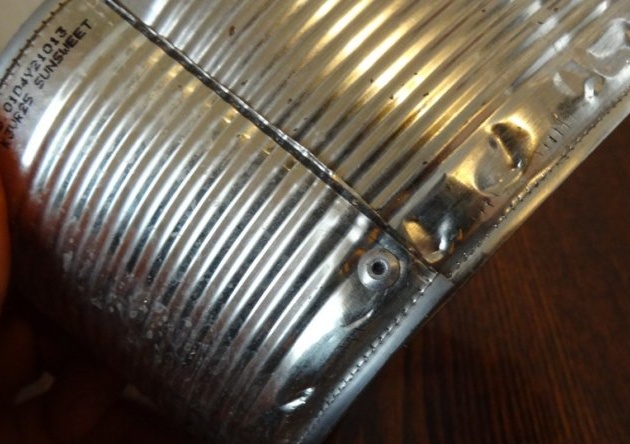
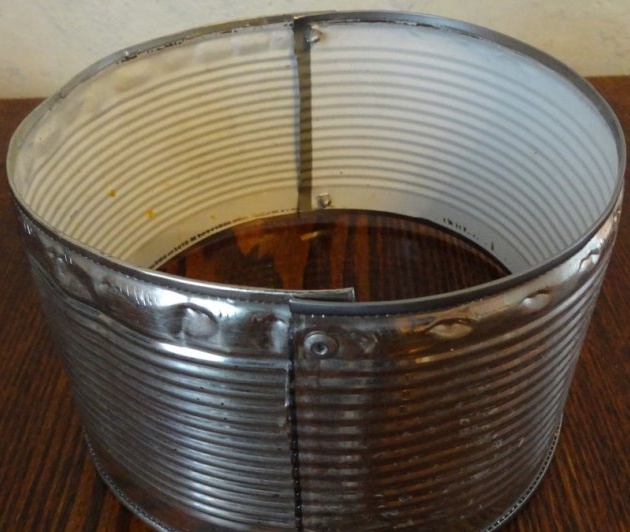
We connect these strips with rivets, as a result we get a cylinder.
Now it remains to combine these two parts into a single whole:

In the first part (with a cartridge) we cut out two petals with a length equal to 2/3 of the height of the can. Using rivets we fix to the second part.
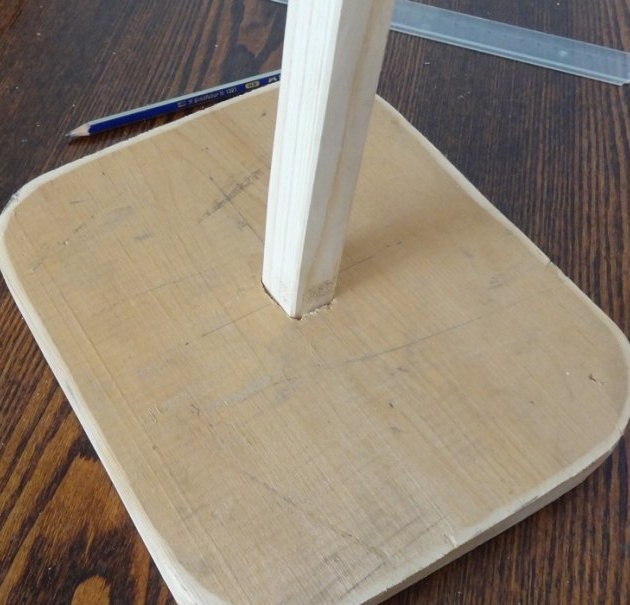
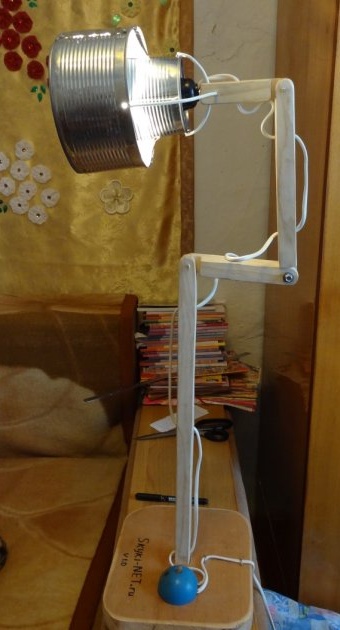
2nd step. We assemble the mast of the lamp.
The mast consists of a 2x2.5cm beam. We saw the bar into 4 parts with a length of 50, 25, 15, 10 cm.
We make cuts at the ends of the segments:
at a length of 50 cm - from one end;
25cm - with two;
15cm - with two;
10cm - with one.
Round off the sawed ends and connect. The connection is made with a screw with a washer, when connecting the mast knees in one part we drill a hole slightly larger than the screw thread, and leave the other unchanged. You get the following picture:

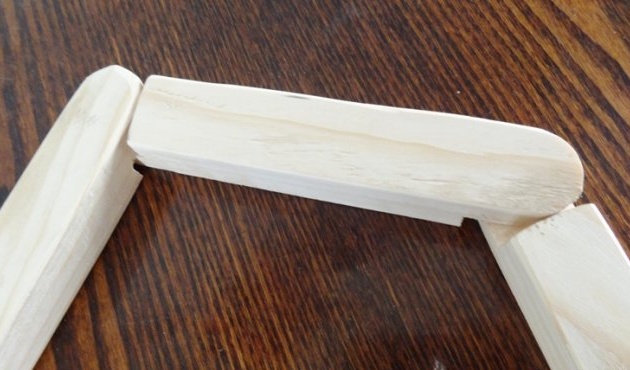
We connect all the parts - the mast of the lamp is ready.
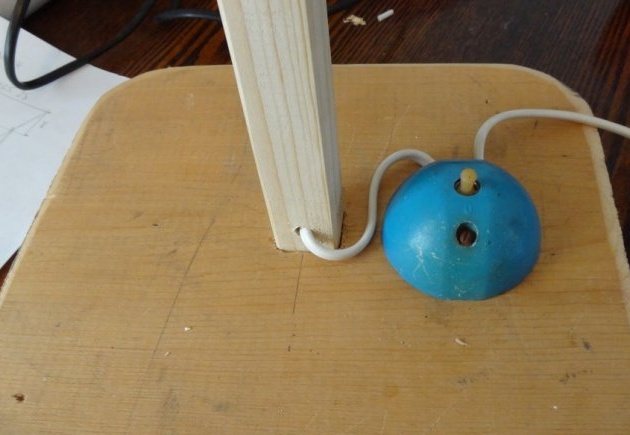
3rd step. We fix the mast on the base.
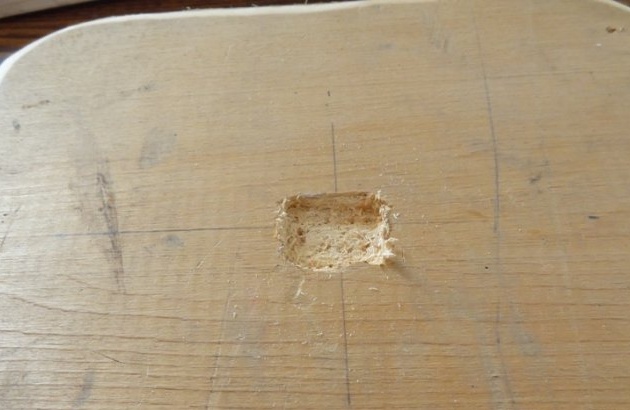
First of all, we prepare the base of the table lamp. I advise you to take a piece of board with dimensions of 25x25x2.5cm, find the middle and draw a 2x2.5cm rectangle under the mast. We drill this rectangle to a depth of about 1 cm. On the back of the stand, drill a hole for the screw's head. The diameter of the hole should be several millimeters and a depth of 0.5 cm larger than the screw head.

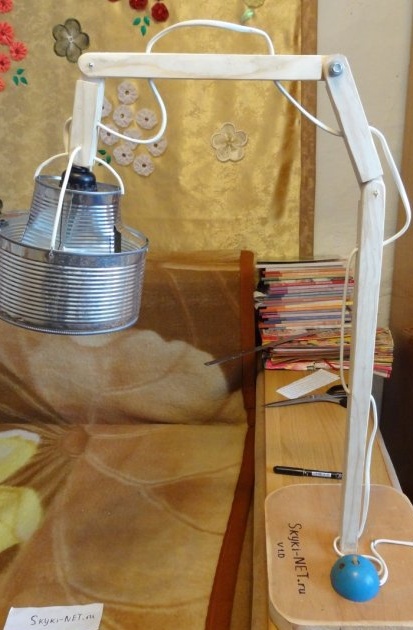
4th step. We fix the ceiling on the mast of the lamp.
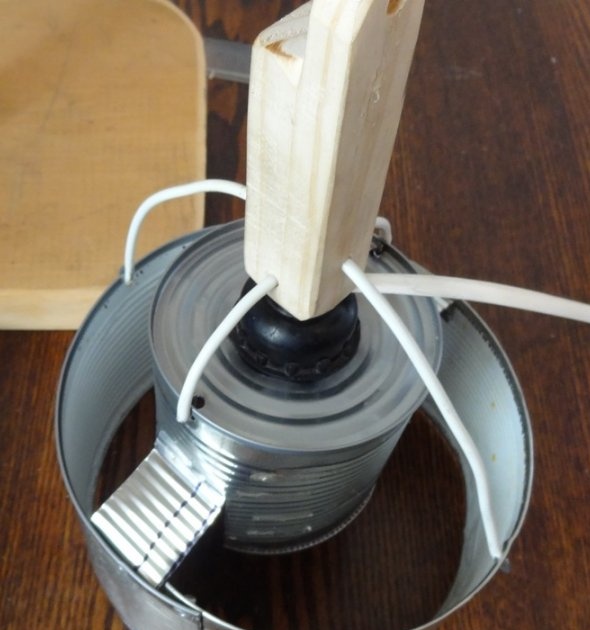
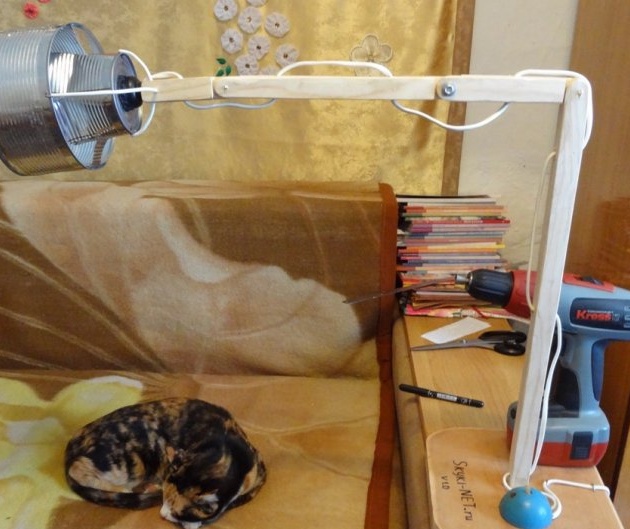
In the last part of the mast (10 cm long) we drill 2 holes, the diameter of which is slightly larger than the diameter of the single-core wire in insulation.As you can see in the photo, the holes intersect, but do not intersect! We divide the single-core wire blank into two parts 30 cm and 15 cm long, thread a short length into the lower hole, long into the upper one.
We drill holes in the lampshade to secure the wire. Before mounting the lampshade, attach the wire to the cartridge, otherwise it will be problematic. It is better to take a wire with a cross section of at least 0.75 mm2 of each core and a length of at least 3 meters.
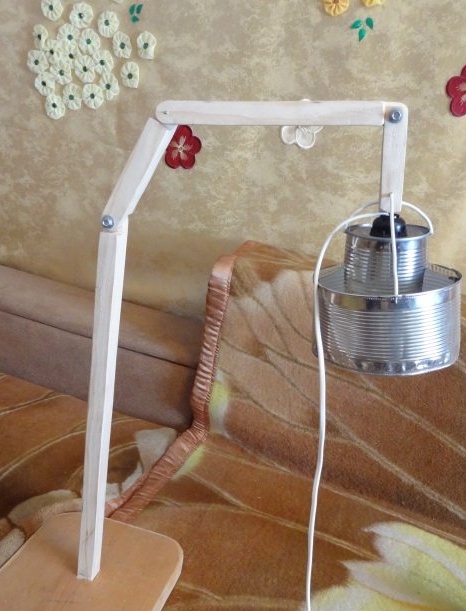
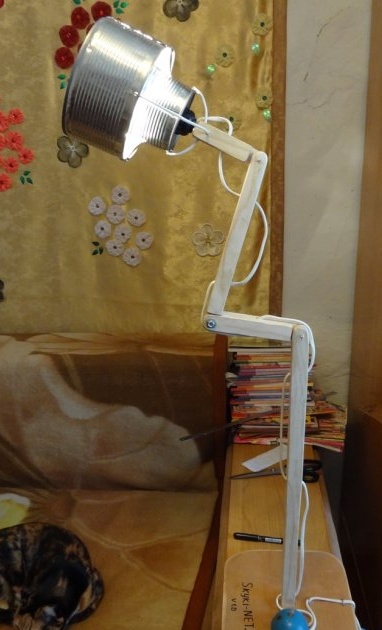
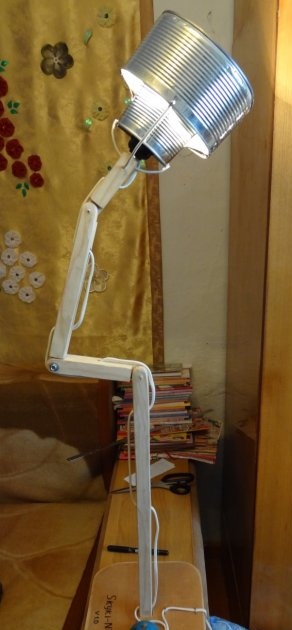
When everything is ready, we connect the ceiling and the mast. We get this picture of a homemade table lamp:
If you use an incandescent lamp in the lamp, it is better to make incisions in the jar and push the petals to the side - this will reduce the heating of the lampshade.
Step 5 We stretch the wire, attach the switch and plug.
It is possible to stretch (lay) a wire in different ways, but I drilled through holes in the mast and pulled a wire through them.
We attach a switch to the stand. You can take the hinged switch and fix it on the wire, but I prefer the stationary one - it looks cooler and more solid :).
At the very end of the wire we attach the plug.
That's all :).
The mast of a table lamp can be bent in different ways, and there are many such combinations. Here are just a few:

But who first chose a makeshift lamp: wink::
And here’s the video instruction, I almost forgot, fuhhh: feel:
Waiting for your questions in the comments: feel: