
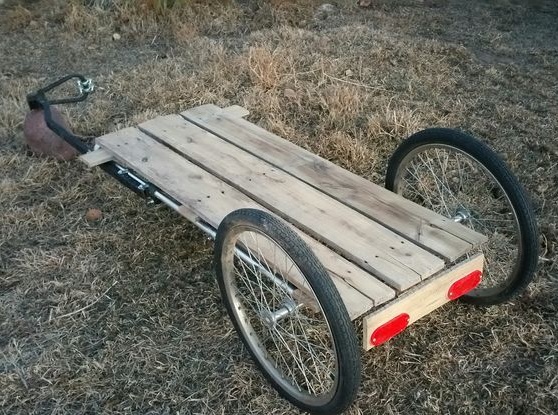
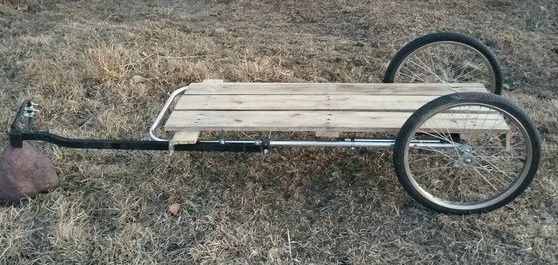
Bicycle trailer - featuring a thing, it significantly expands the bicycle's capabilities in terms of cargo transportation. The simplest trailer, the design of which is described in this manual, is equipped with a platform on which you can transport various items, from personal items, ending with sand, brick and so on. As for the sides, they can also be made, but this is at your discretion.
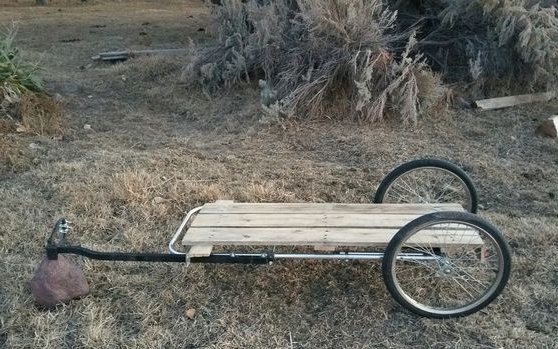
The bike discussed below is made from virtually junk materials. Spare parts from an old golf cart (or something similar) were used as a frame. The platform is made of such common material as wood. Of course, wood adds weight to the trailer, but it is the most affordable material.
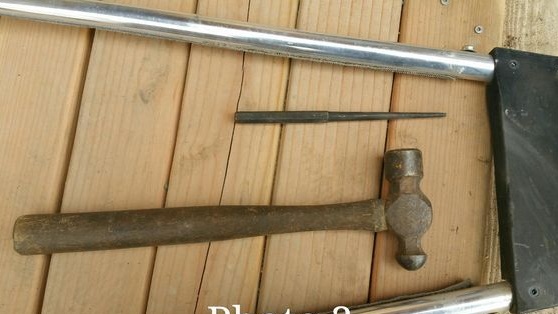
Materials and tools that the author used for homemade:
Material List:
- an old carriage (or other similar spare parts);
- wheels from a bicycle (if they were not on the selected stroller);
- wooden boards;
- self-tapping screws;
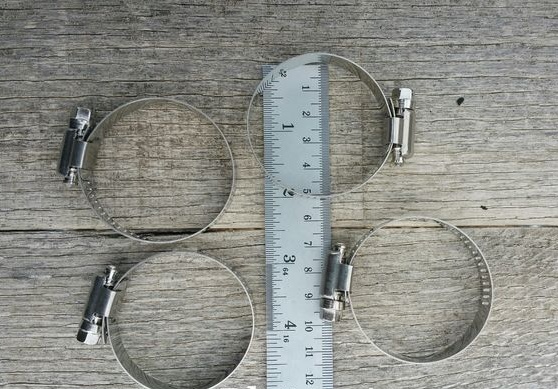
- steel pipe clamps;
- screws, bolts, washers, nuts;
- two wheels from carts (for the manufacture of a mounting device);
- An old cable from bicycle brakes (or the like);
- two reflectors (mounted on a trailer);
- steel fixing loops.
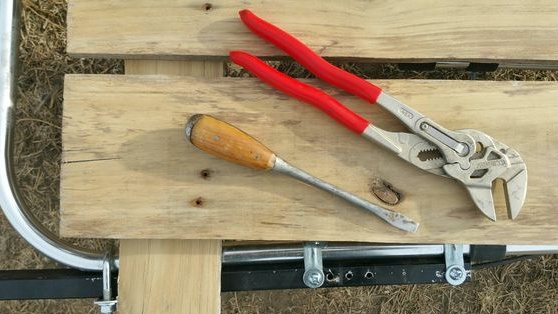
Tool List:
- ;
- Bicycle Pump;
- pliers and nippers;
- screwdriver;
- hammer;
- hacksaw for wood;
- ruler, marker or pencil;
- a hacksaw for metal or grinder (may be needed).
Trailer manufacturing process:
Step one. We prepare materials
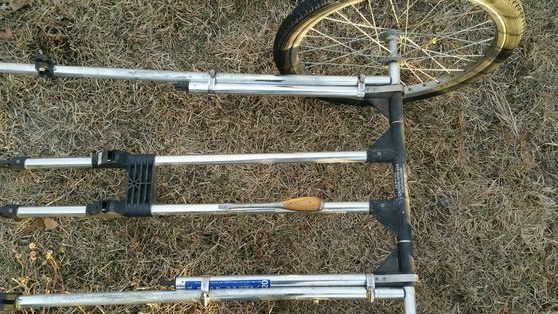
First of all, what you have to get is bicycle wheels. Finding them in good condition is sometimes problematic. Also for the frame you will need metal tubes, you can get them in old strollers, bicycles and so on. By the way, previously excellent aluminum tubes were used in the eaves.
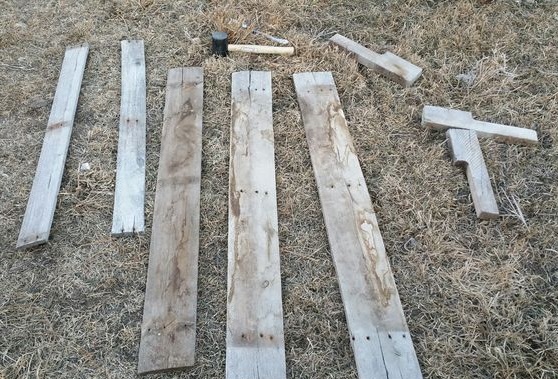
Also prepare the boards, they should be strong, but as thin and light as possible so that the trailer is not hard to pull with a bicycle.
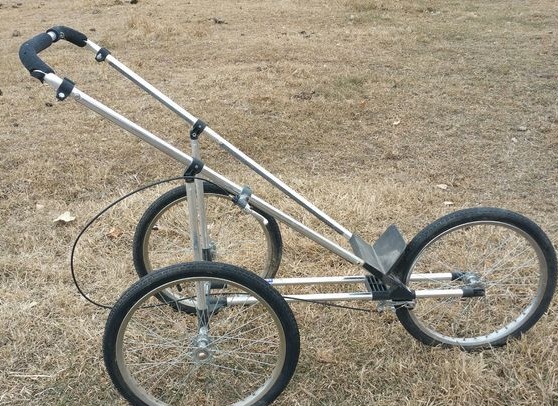
The author parses the stroller using. We remove everything that is not needed.
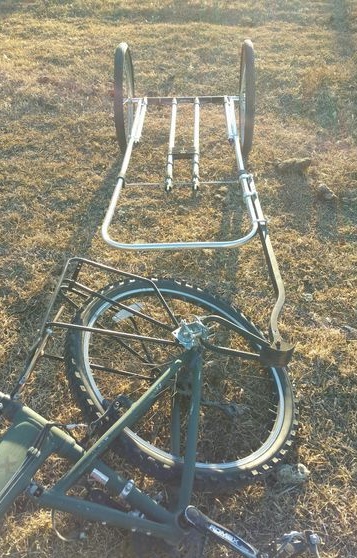
Step Two Getting to the frame assembly
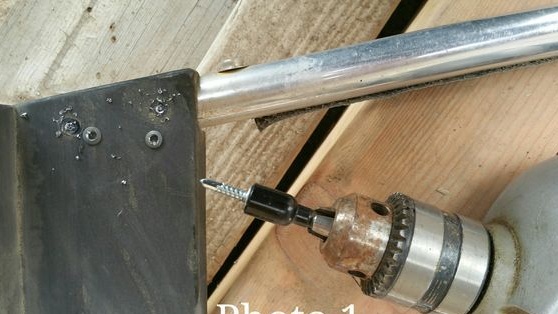
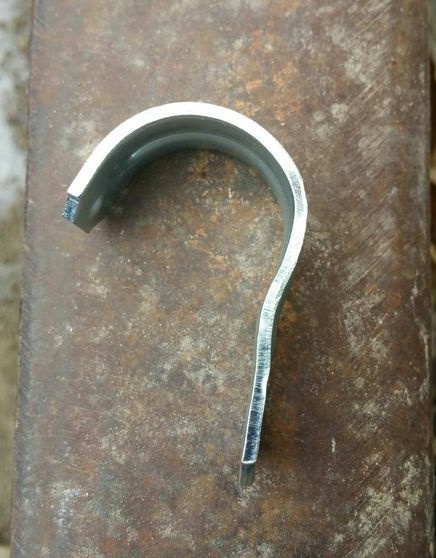
After disassembling the stroller, the author still has axles with wheels, as well as an element in the form of the letter “P”. These components needed to be connected. You won’t be able to weld aluminum; you can only drill or do as the author does. Just take the steel pipe clamps and carefully pull the elements together.For the reliability of the clamps, you can put more. To strengthen the design, the author drilled holes in the pipes and secured them additionally with bolts and nuts. Now the parts are securely connected.
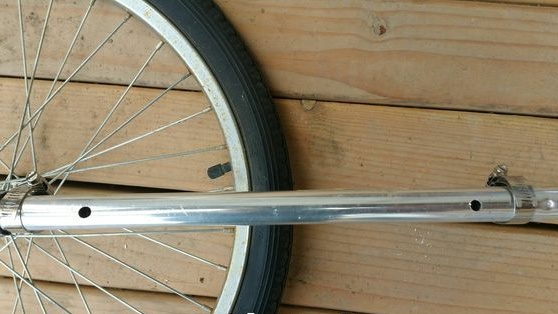
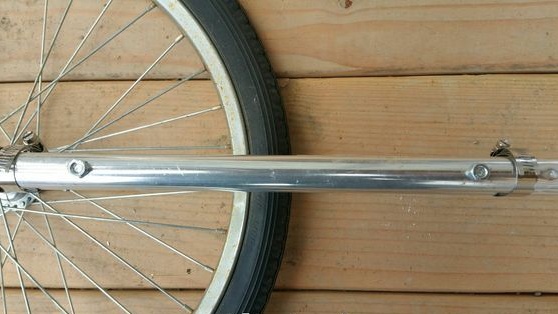
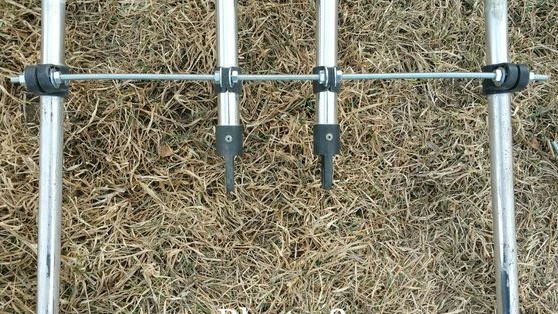
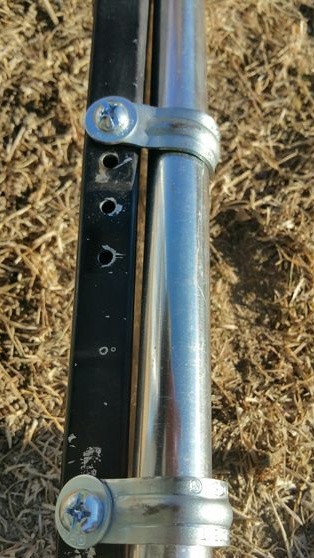
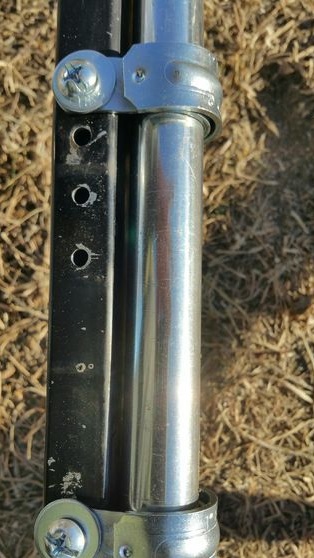
Step Three Central supports
In the center of the frame, it will be necessary to make supports so that the platform does not sag under load. Here you will find the pipes you need to fix. On the one hand, the author was already fixed, and on the other, he inserted a threaded rod across the entire frame and secured the tubes with nuts and washers.
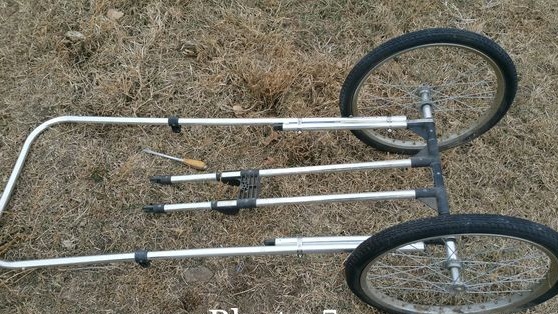
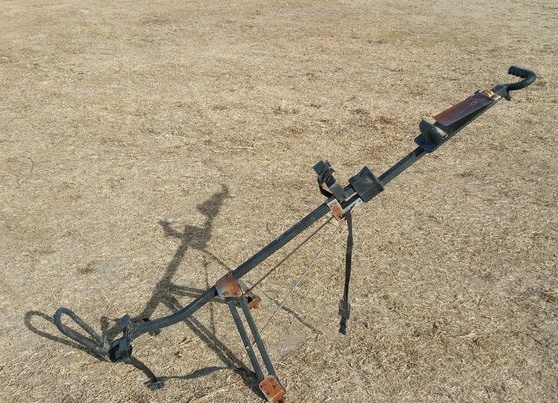
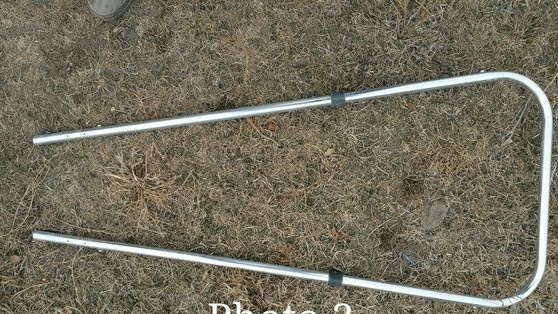
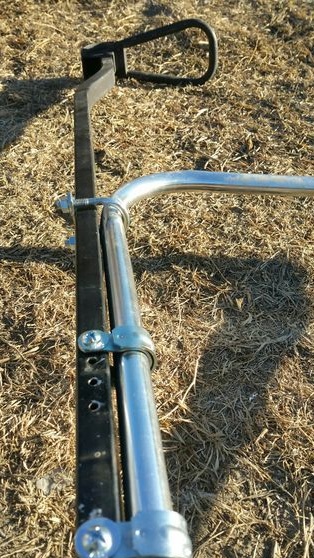
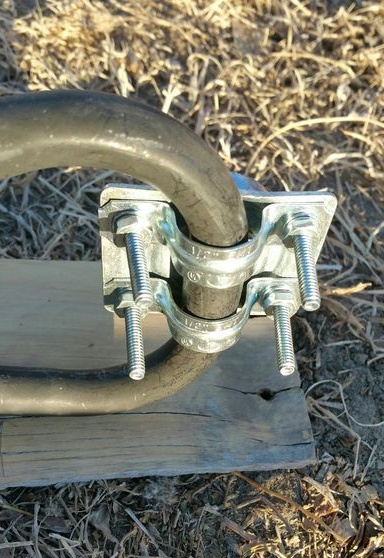
Step Four Trailer drawbar
To connect the trailer to the bike, you will need a piece of square steel pipe or other similar part. Cut it to the desired length and fasten to the trailer frame. How to do this, choose a convenient method for yourself. The author used a steel clamp with nuts, as well as metal hinges for these purposes. However, it is possible to drill holes in the pipe and bolt it down with bolts and nuts. Additionally, the design can be strengthened with the same clamps. Most importantly, when loading, the drawbar does not come off the trailer.
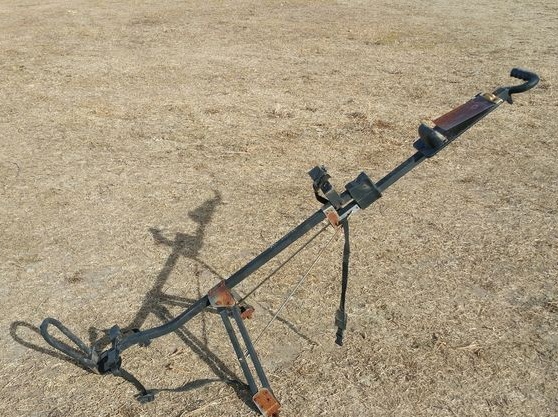
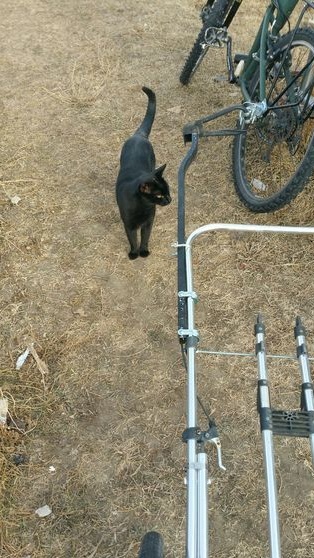
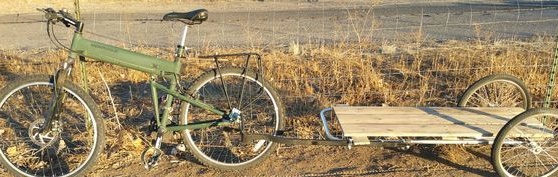
Step Five Trailer connection to a bicycle
Due to the fact that when driving on rough roads, the trailer must move up or down, it cannot be fixed rigidly to the bicycle. Also, the trailer must be able to turn. In this regard, the hinge must have at least 2 degrees of freedom, that is, the movement must be available in the horizontal and vertical directions.


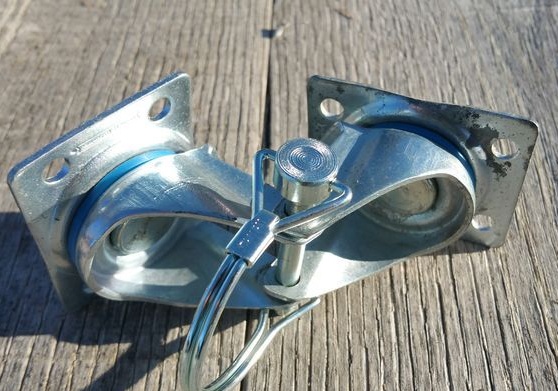
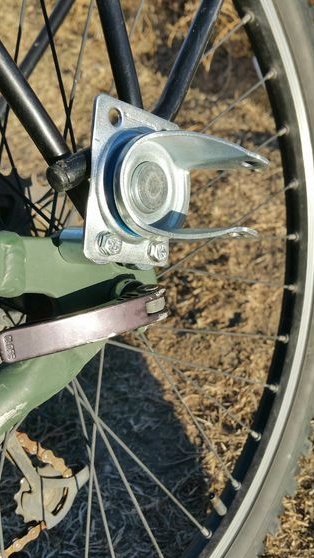
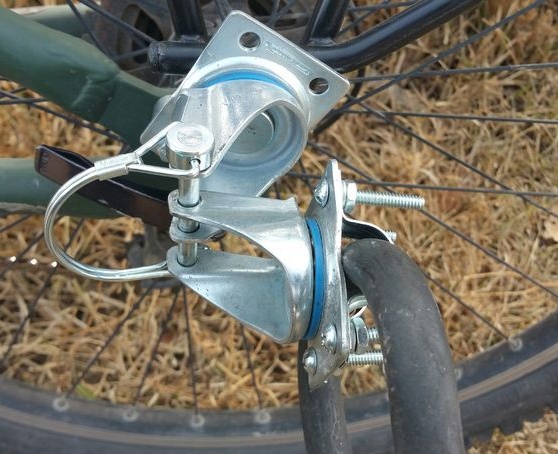
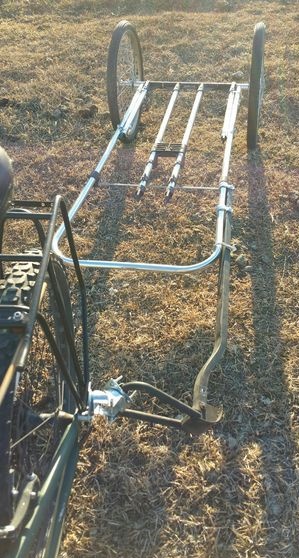

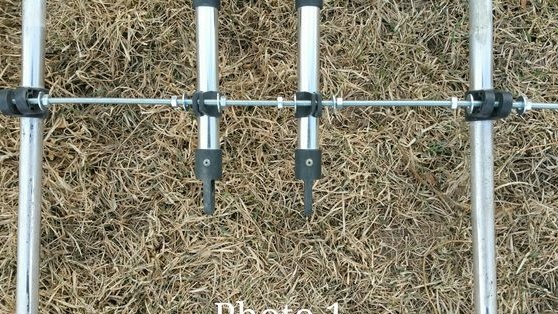
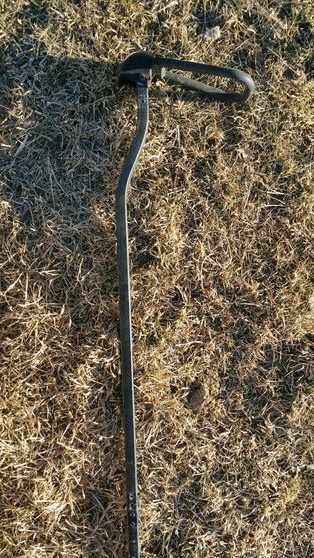
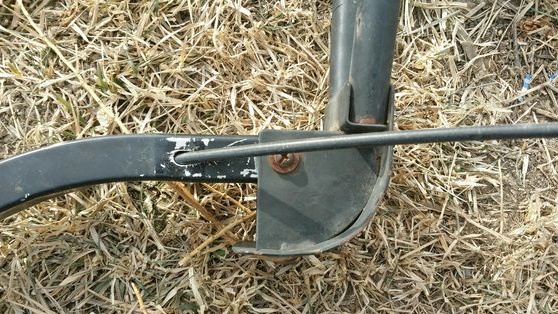
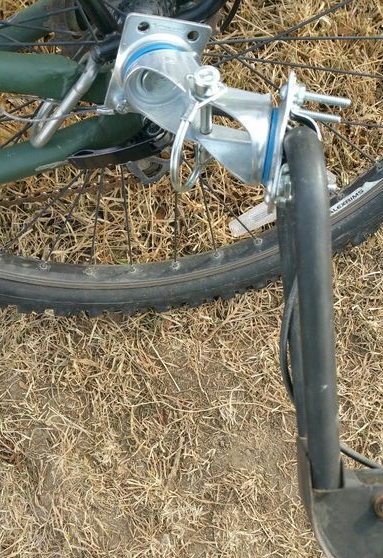
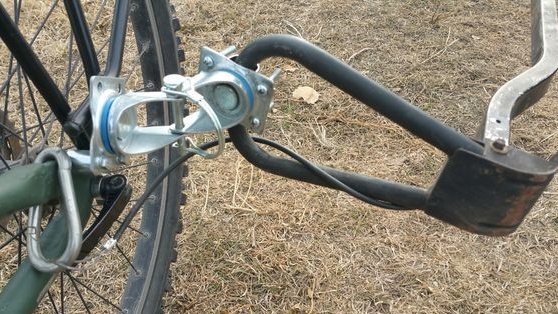
To solve this problem, the author purchased two wheels from the cart. Each such wheel can move around its axis at an angle of 360 degrees. Just remove the wheels from them, and then connect both structures with a bolt and nut. Instead of a bolt with a nut, the author uses a special rod. This unit is important because it will allow you to quickly unfasten the trailer from the bike if necessary.
Fix one part on the bicycle frame, the author mounts it on the rear fork near the axis, there are just two suitable holes. Fix the second part on the drawbar of the trailer, the author reliably pulled it with loops with bolts and nuts. Choose the correct mounting angle so that the trailer can change the angle in a given range. That's all, we got a great knot for attaching a trailer to a bicycle.
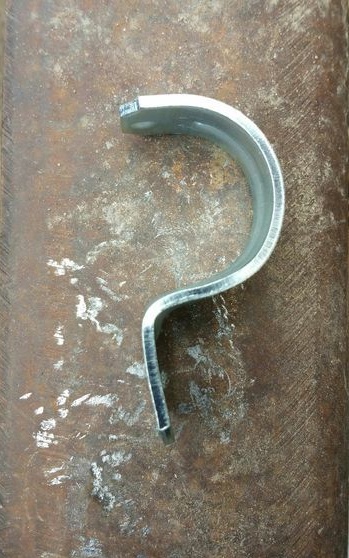
Step Six Insurance
Just in case, you need to make insurance that will hold the trailer, if suddenly the main mounting unit is disconnected. For these purposes, the author used a bicycle brake system. Remove from one end the part on which the brake pads are located. Make a reliable loop at the end of the cable. As for the brake lever, it can be left.
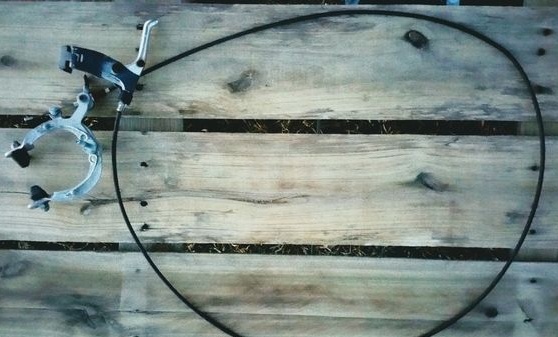

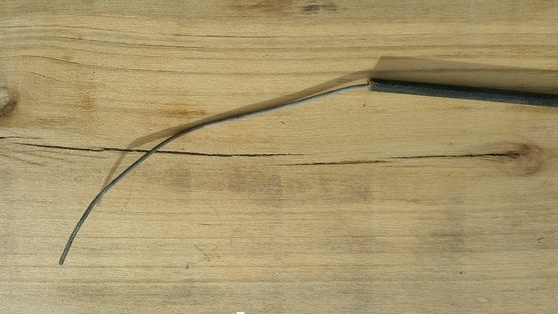
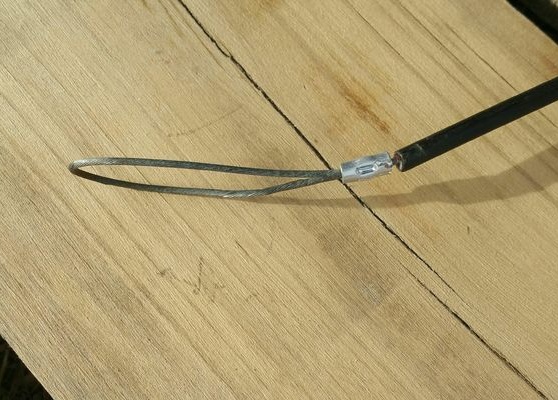
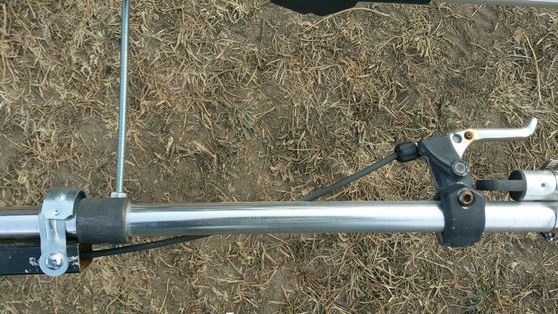
Attach the brake lever to the trailer frame, and pull the cable inside the drawbar. As a result, the tip of the cable with the loop should come out near the rear fork of the bicycle. Attach it to the frame in any way possible. Now, if the main mounting unit fails, your trailer will be held by a cable until the emergency stop.
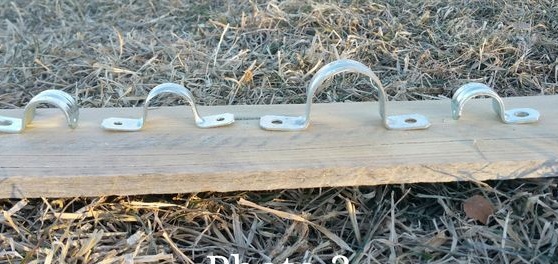
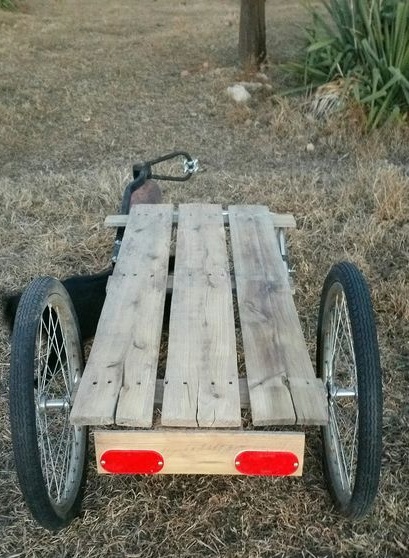
Seventh step. Production and fastening of a wooden platform
We prepare the boards, cut them depending on the size of the trailer and grind them so that the platform is easy to wash and does not tear packages if you carry them. It is also highly recommended to paint the tree so that it does not absorb moisture.
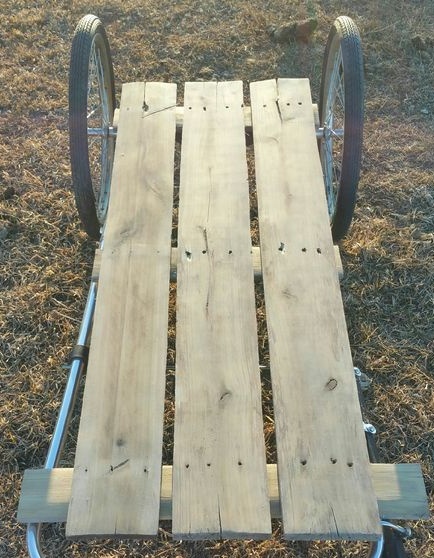

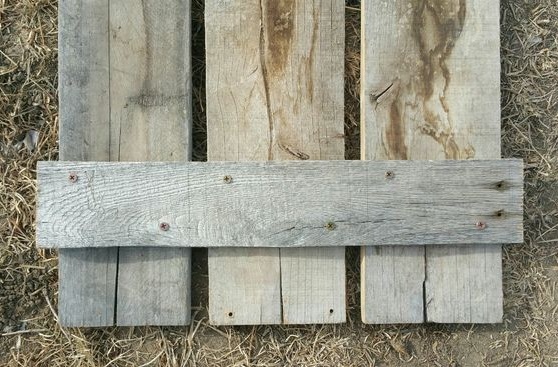
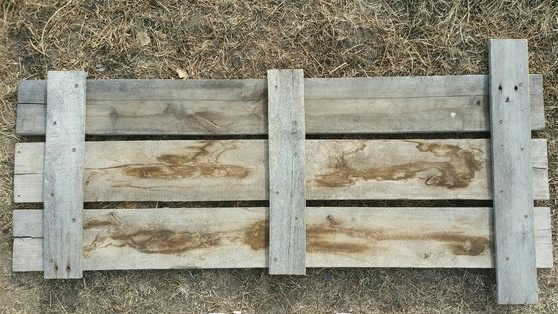

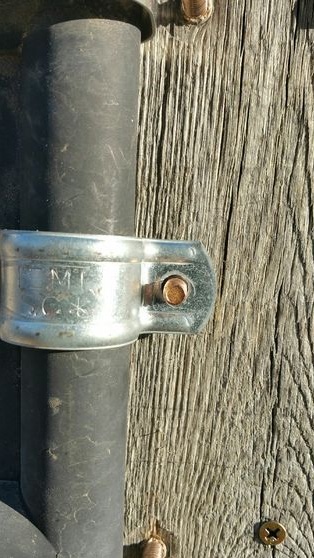
Well, then we use self-tapping screws and assemble the platform. It is attached to the frame with bolts and nuts, using special metal fasteners for pipes.
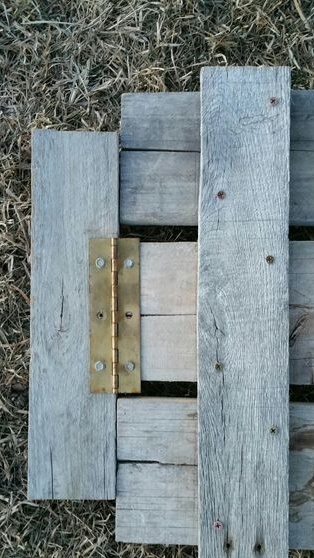
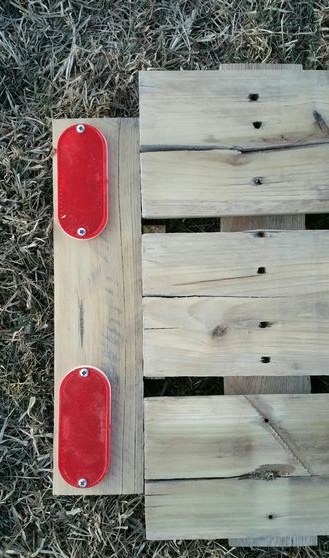
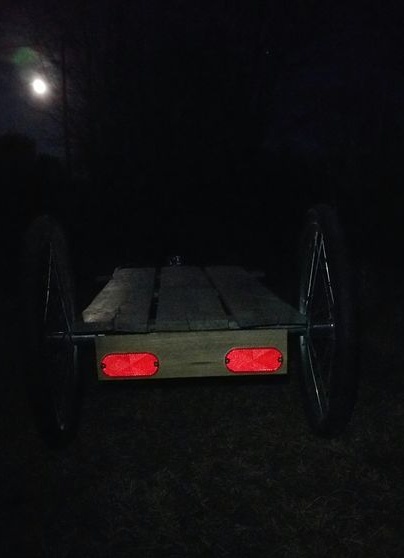
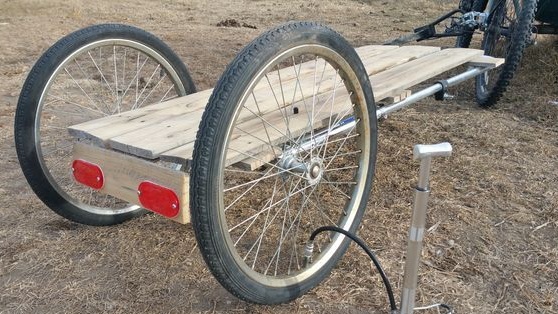
Step Eight. We mount reflectors
To make the trailer clearly visible in the dark, reflectors must be installed on it. To do this, take a piece of the board and fasten the reflectors to it using self-tapping screws. Further, the author hangs this board from behind the trailer using a door hinge.
Step Nine. Recommendations for use
This trailer is not designed for heavy loads, as the frame is made of aluminum pipes.In addition, to facilitate weight, the author did not make sides for the trailer, the load is fastened with straps.
Another point concerns the wheels, they are not mounted on a fork, but only at one point. In this regard, this design does not withstand heavy loads, if the trailer is heavily loaded, the axles can bend.
However, if you look at the eye, such a trailer may well carry a load of 20-30 kg on a flat road.
Check the pressure in the chambers of the trailer wheels regularly. Now on your technical tool, not two, but four wheels, remember this. Check all fasteners from time to time, as over time nuts may become loose when shaking. Wherever possible, it is best to place a grover under the nuts or use nuts with a plastic insert, they will not loosen.
As for the tree, it is highly recommended to soak it with at least linseed oil or linseed oil to protect it from moisture. Even the board can simply be painted, so the trailer will become beautiful and durable. Good luck