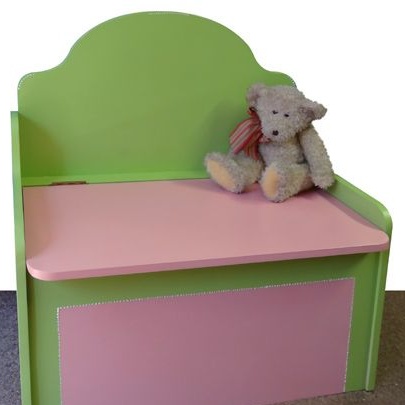
It’s customary to pamper modern children, that's true. The collection of toys multiplies with each new holiday. Another year will pass, and children's wealth will have nowhere to go. But the children are in no hurry to part with the toys, because each is in its own way to their heart. Common situation?
And it doesn’t work at all when hordes of dolls and toy cars are scattered throughout the house. Like clothes or souvenirs, they also require storage systems. One of the solutions could be the construction of a special box for toys.
Such boxes are very practical. They combine several functions at once. For example, a toy box at the same time can serve as a small sofa and at the same time have a couple of convenient shelves. Thus, you save space and effectively maintain order in the house.
The box from this workshop can be turned over time into a convenient bench with a compartment for storing things. Moreover, it will not be difficult at any time to repaint it, refresh it and give it a completely different look.
In order to do it yourself To make a box for toys you will need:
Materials:
1. MDF sheets with a thickness of approximately 16 mm:
- 16 x 680 x 800 mm - back wall with curly top;
- 2 pcs x 16 x 400 x 550 mm - sides;
- 2 pcs x 16 x 370 x 680 mm - front panel and seat;
- 16 x 50 x 680 mm - rear rail for mounting seat hinges;
- 16 x 50 x 648 mm - rear rail of the harness;
- 2 pcs x 16 x 50 x 370 mm - side rail rails;
- 16 x 358 x 680 mm - the base of the box.
2. paint on wood in two colors;
3. varnish on wood, if necessary;
4. two loops and self-tapping screws for fastening loops;
5. glue for woodwork;
6. furniture screws.
Instruments:
1. jigsaw;
2. electric drill;
3. orbital sander;
4. a screwdriver;
5. building tape;
6. pencil;
7. sewing pattern.
Step One: Part Marking
You can mark up parts directly on MDF sheets. Use a simple pencil to ensure that you always have the opportunity to correct errors and inaccuracies.
Of course, you will need some skill and experience in such work. If you do not have such an experience, make paper parts to begin with. Here you can make any number of mistakes - the paper will tolerate everything. But at the end of the work, you will get ready-made patterns with exact shapes and perfectly smooth lines, which are enough in the project.
In the process of marking, use a sewing plastic piece. It's a little simple devicewhich allows you to draw smooth lines. You can find it in any sewing store, and the price will pleasantly surprise you, because such a pattern costs a penny, but in the future you will need it more than once.
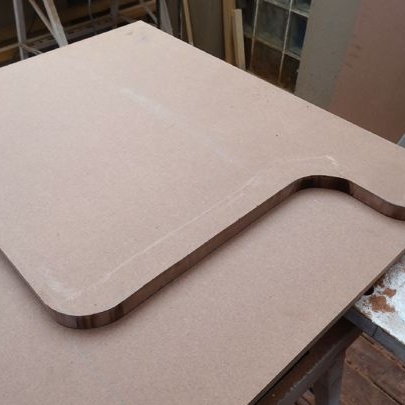
So make patterns for the figured top of the back, as well as a universal pattern for the rounded corners of the sidewalls and the base of the seat.
Mark up on an MDF sheet using the resulting patterns. Try to place parts in such a way as to save material. Do not leave large gaps between them.
If your sidewalls have the same shape, tune in to the fact that you will cut both of them at a time. So draw only one side, this will be enough.
Tip. MDF can easily be replaced with plywood sheets, and some elements, such as strapping parts, can be made from pieces of planks left over from previous work.
Step two: manufacturing of parts and their preliminary processing
Cut parts from MDF using a jigsaw. Before you start, check the canvas you are using. It should be sharp and have a tooth type suitable for sawing such materials.
Make both sides in one go. Only in this way you will get identical parts, identical in shape and size.
Armed with a grinder, carefully process each part, paying special attention to the edge. The surface of the MDF must be fully prepared for painting. No pollution, especially chemical nature. And any irregularities should be either simply sanded or filled with putty and all grinding work should be carried out only after that.
Already at this stage you can start painting. However, the author chose to color the already assembled product, and you could also follow his example.
Step Three: Assembly
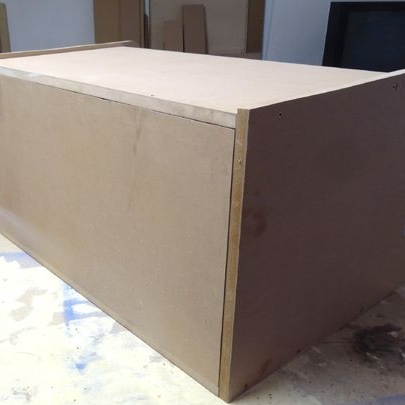
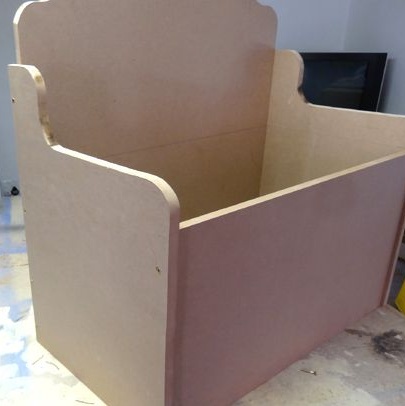
Assemble the frame of the future toy box: its back, side elements and front panel.
The author used furniture screws and glue for woodwork. Therefore, mark the joints beforehand and drill holes for small diameter screws. If the screw cap is convex, widen the holes for the caps with a larger drill bit so that they go flush and can be hidden under a putty layer in the future.
After that, apply a small amount of glue to the edge of the part, gently press it to the joint and fasten it with screws so that the parts are tightly attracted to each other. Remove excess glue thoroughly with a damp cloth; otherwise, only a grinder can handle this task later.
Thus, assemble the frame and fasten the bottom of the box using the same principle. After proceed to the harness.
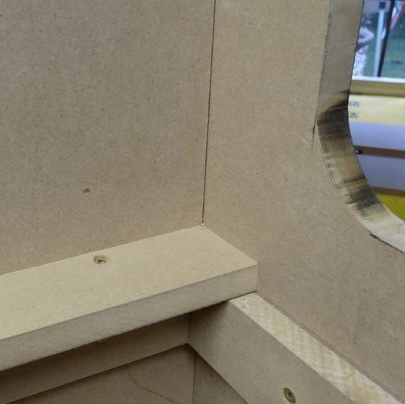
The binding details are prepared in advance and can be made either from the remnants of an MDF sheet or from a wooden board. At one level, fix the three rails on which the seat cover will rest.
Also fix the second long rail on the back wall, but this time flat. It will serve as the basis for the loops.
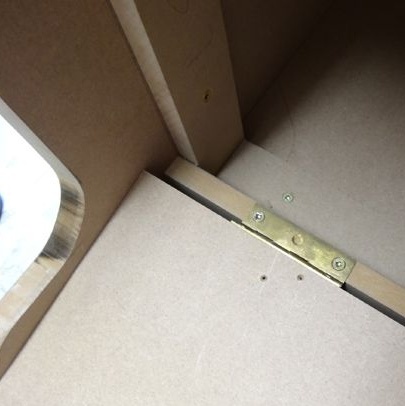
Attach the hinges to the rail and mark the joints. Choose one-piece hinges with at least six screw holes. They have less backlash and do not break loose over time.
Drill holes for screws and fasten the hinges on the rail. Lay the seat base on the frame and fasten the hinges on it. Check the design in operation and make sure that the cover opens and closes easily. Remove the adjusted cover and proceed with painting.
Step Four: Paintwork
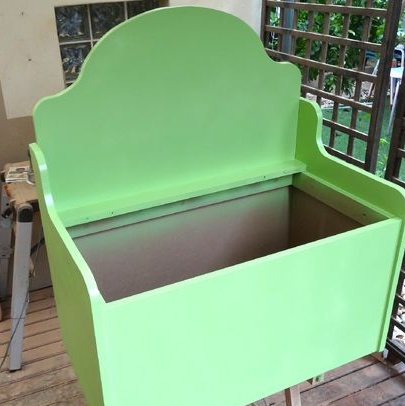
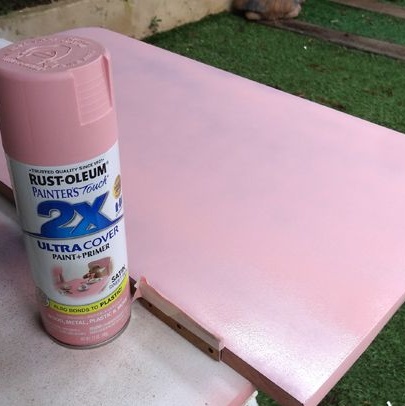
You have pre-selected the paint of the type and shade you need. The author used two-color oil-based spray paint: light green and light pink.
When painting such bulk products, spray paint is very convenient to use.However, if you also opted for oil paint, remember that this is a paint based on a solvent. It has an unpleasant odor and is very toxic until it solidifies.
Therefore, think in advance about where you will carry out all the painting work. Apply two to three coats of paint in turn, allowing each of them to dry. Apply the paint until you get the expected shade declared by the manufacturer.
You can also apply varnish on a painted surface. It insures your product against minor mechanical damage and significantly extends its life.
Apply varnish in a couple of layers. Be sure to choose a varnish that is compatible with your type of paint. In this case, polyurethane varnish is suitable for you. He is very persistent and reliable.
Before applying varnish, you can complicate your task a little and apply the painting. The box will look very original with illustrations from children's cartoons, as well as with modest floral motifs.
Step Five: Final Touch
In order to complement the image and turn all the box into a functional element of furniture, prepare for the top a pair of flat colorful pillows and several voluminous - decorative for the back. So you get a wonderful place to relax and chat with children.
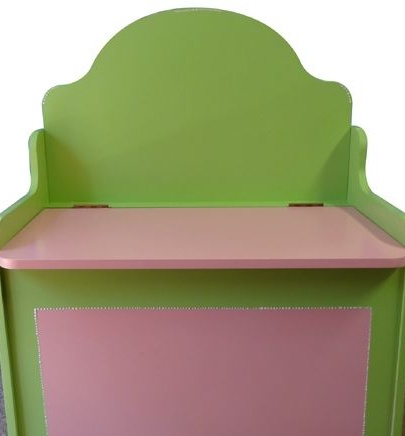
In the meantime, the MDF toy storage box is ready!
