

Hello everybody! I offer my own homemade version fixtures for straightening knives. As the name and photo show, this device consists mainly of plywood and several other parts that are easily accessible. Assembly of this homemade not take much time and can be done by anyone. Some will say why to collect when the store is full of ready-made and inexpensive solutions. The answer is, it’s one thing to buy and quite another to assemble do it yourself, especially if you are reading this article, then you are bgm.imdmyself.com, and here people share their homemade products. Do not think that this device is necessary only for those who handle knives, I personally corrected several kitchen knives with this “device” - I am pleased with the result!
To build, you will need:
18mm plywood
Neodymium magnet from PC hard drive
6mm hairpin + nuts, washers
PVC tube (cambric)
Screws
Drill
Screwdriver
Fine tooth hacksaw
File handle
Sandpaper
PVA glue
Neodymium magnet from PC hard drive
6mm hairpin + nuts, washers
PVC tube (cambric)
Screws
Drill
Screwdriver
Fine tooth hacksaw
File handle
Sandpaper
PVA glue
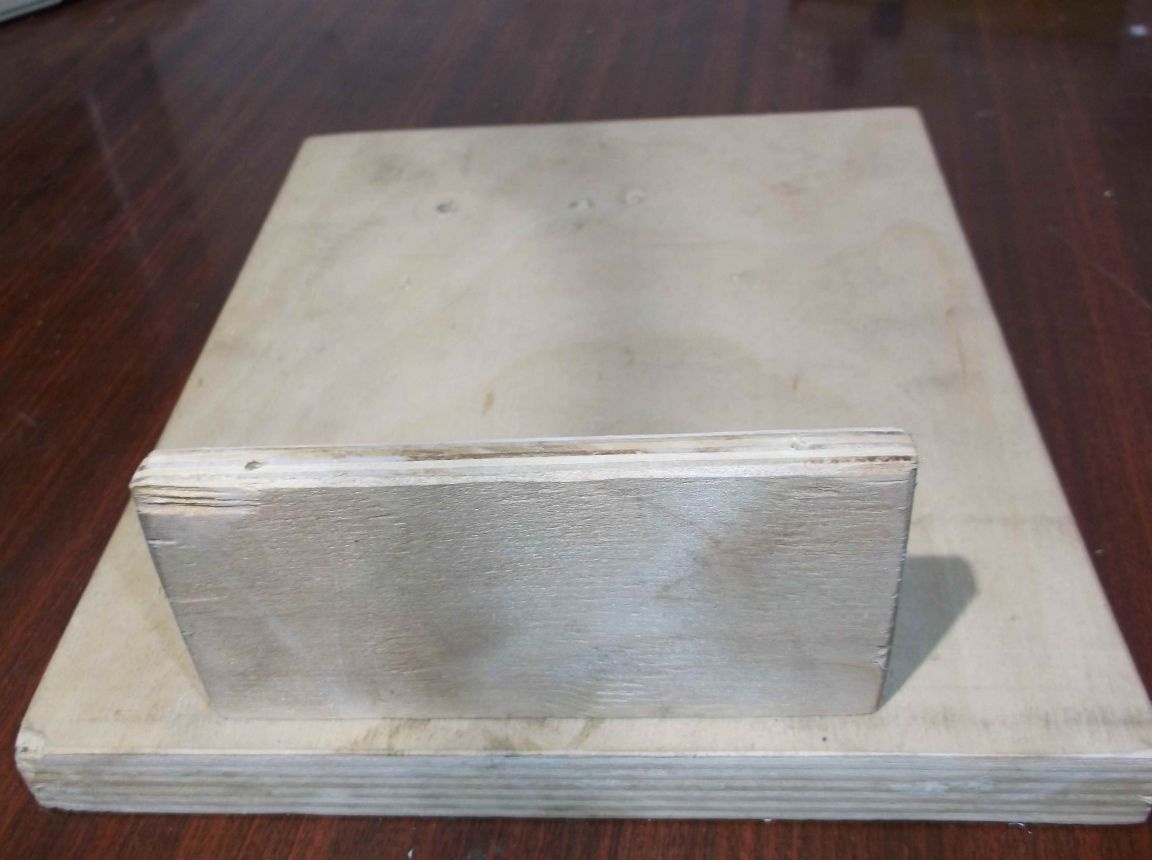
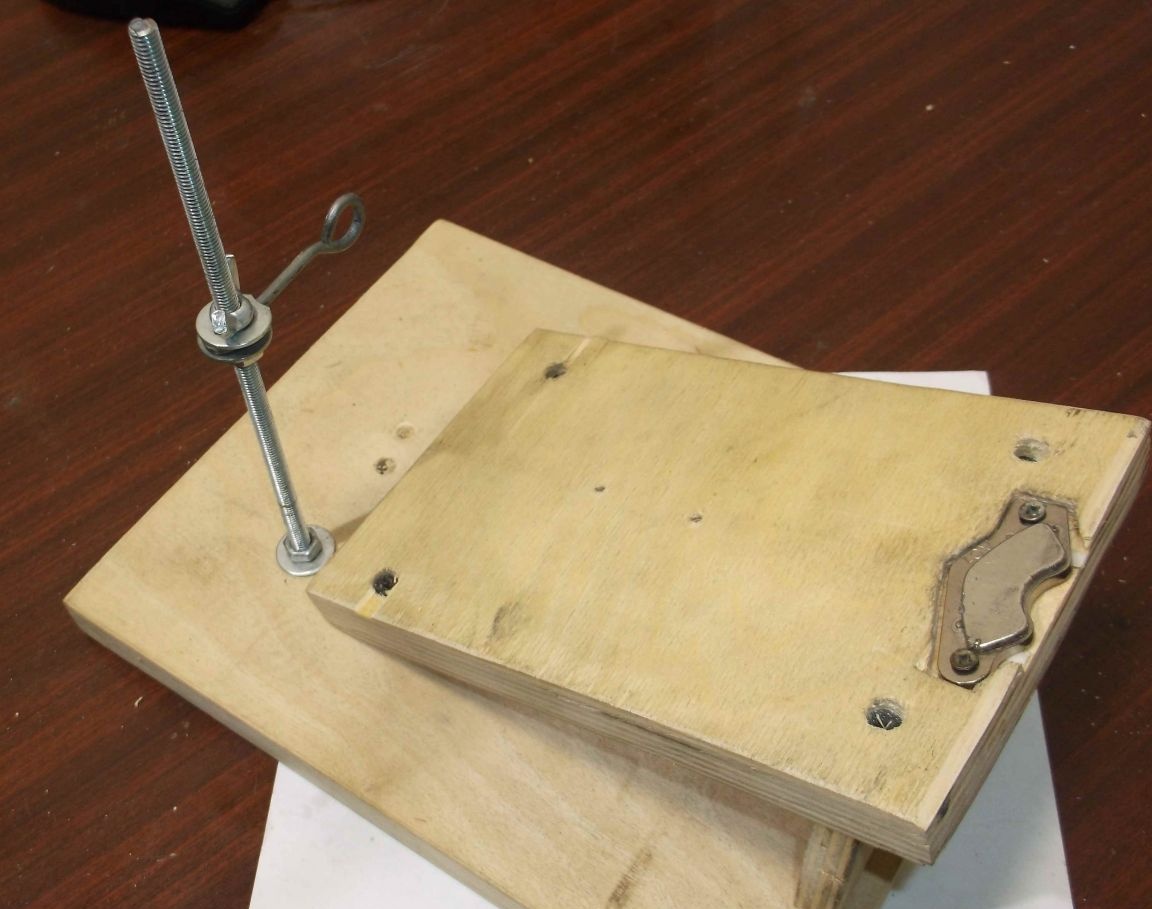
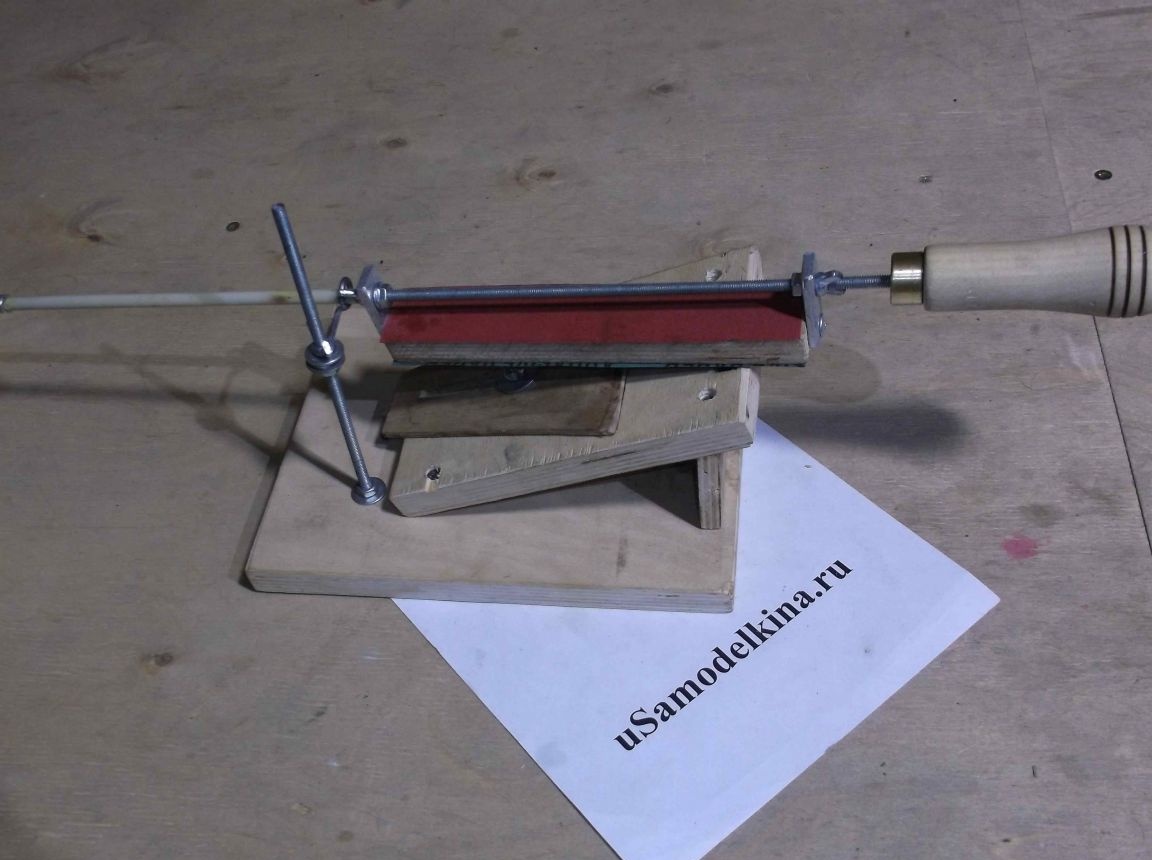
First, the base is cut out of eighteen millimeter plywood of about 25 by 18 centimeters. A block is fastened to the prepared base, on the edge, from the same plywood with dimensions of 11 by 5 cm using self-tapping screws, with preliminary drilling, to prevent cracking of parts. It should be the same as in the photo.
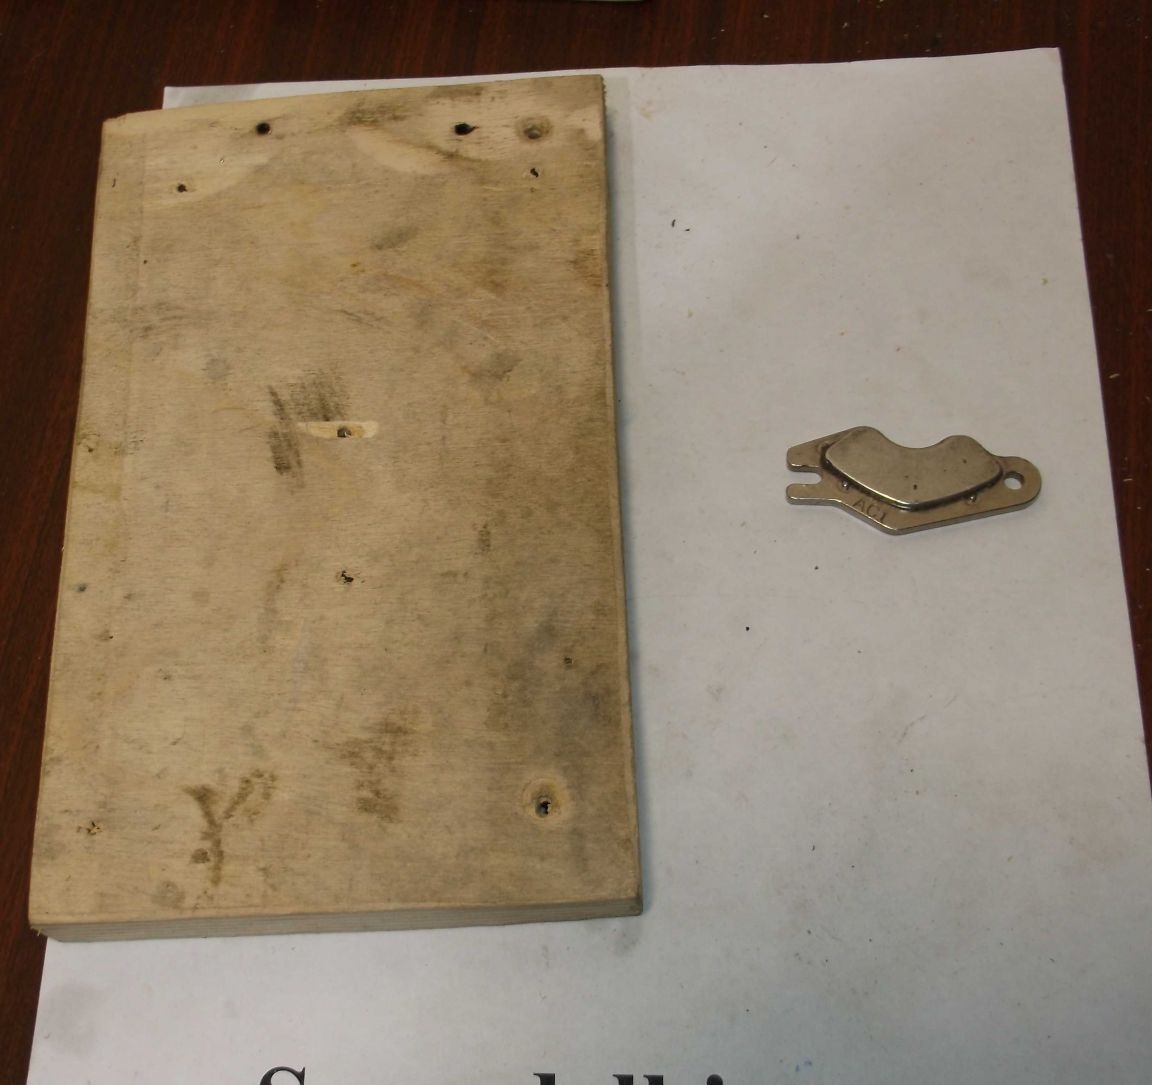
From plywood with dimensions of 11 by 18 centimeters and a magnet from the computer's hard drive, a working plane will be made to fix the knives.
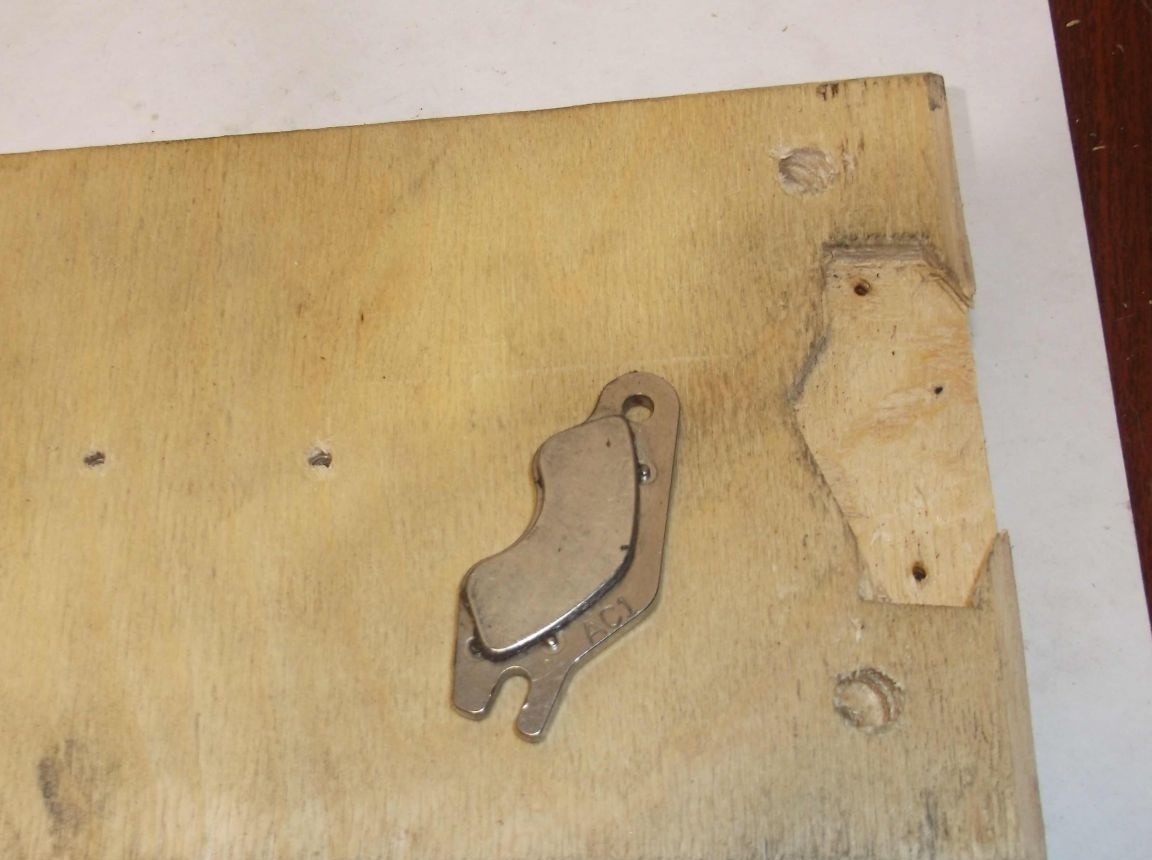
As can be seen from the photo from the end in the center, a recess is cut down along the contour of the magnet.
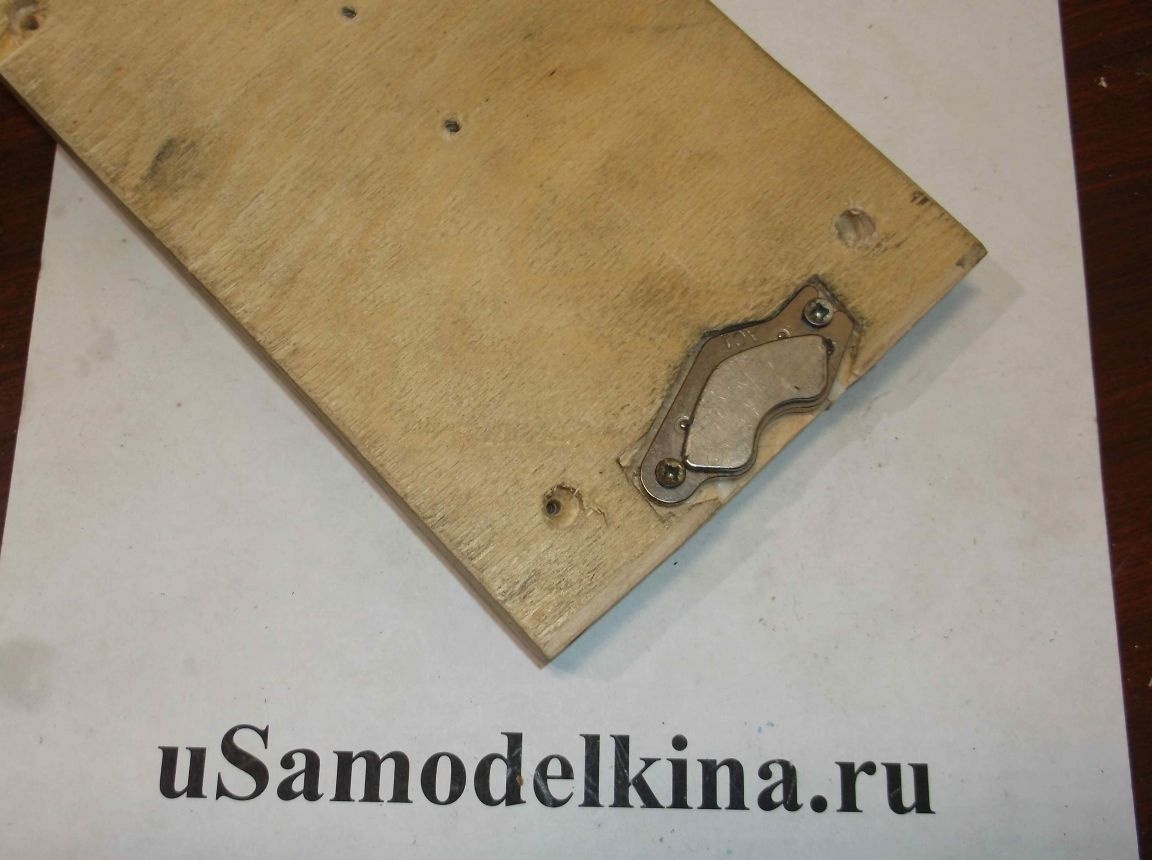
The magnet is fastened with two small screws and should be flush with the surface of the workpiece.
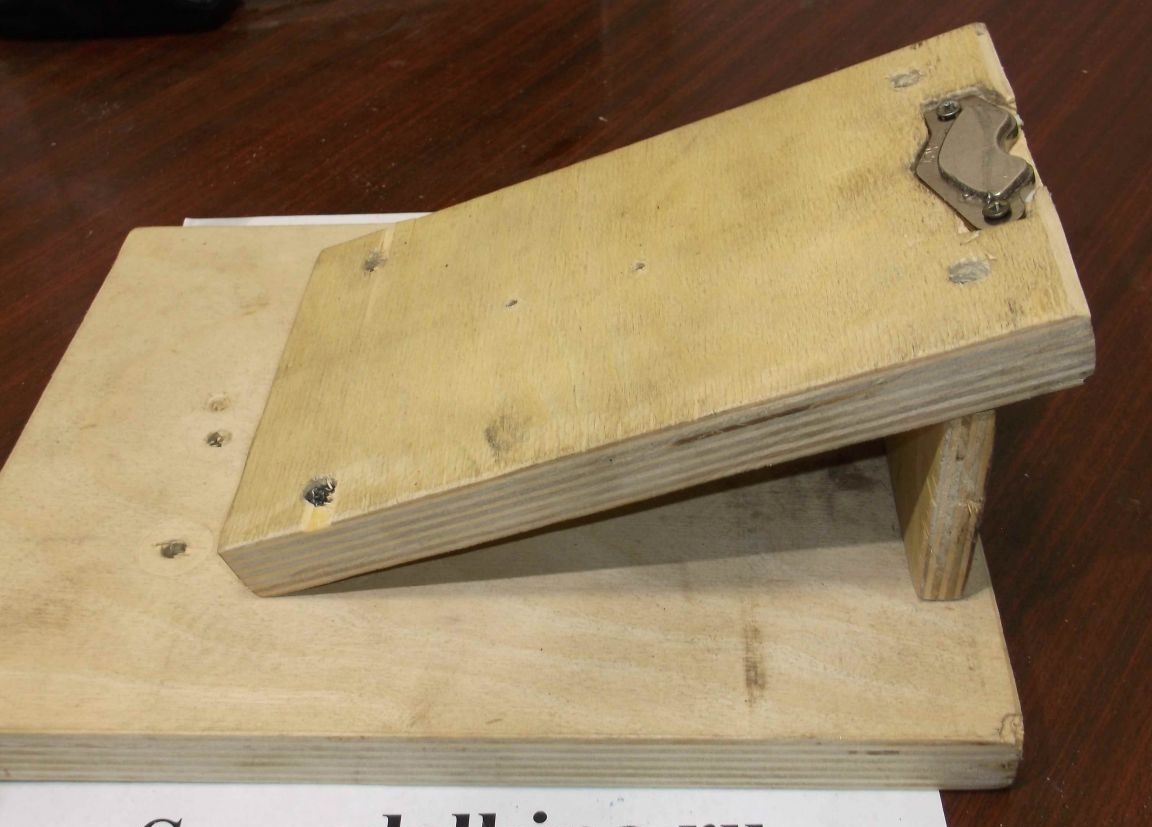
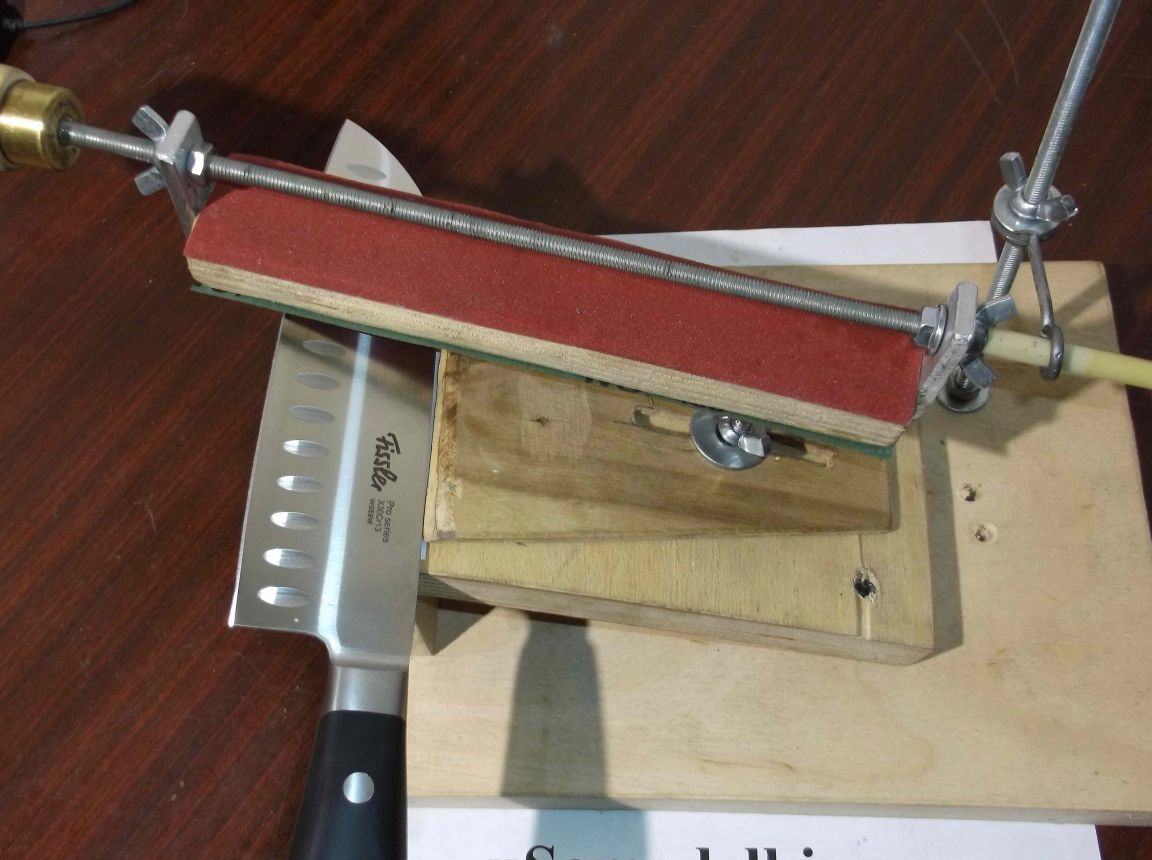
On the base with a fixed bar at an angle, a work surface is installed and fixed with self-tapping screws in the pot.

Next to one of the bottom corners of the “countertop” a 6mm hairpin is fixed, and approximately 20 cm long. Using this hairpin, the grinding angle will be adjusted.
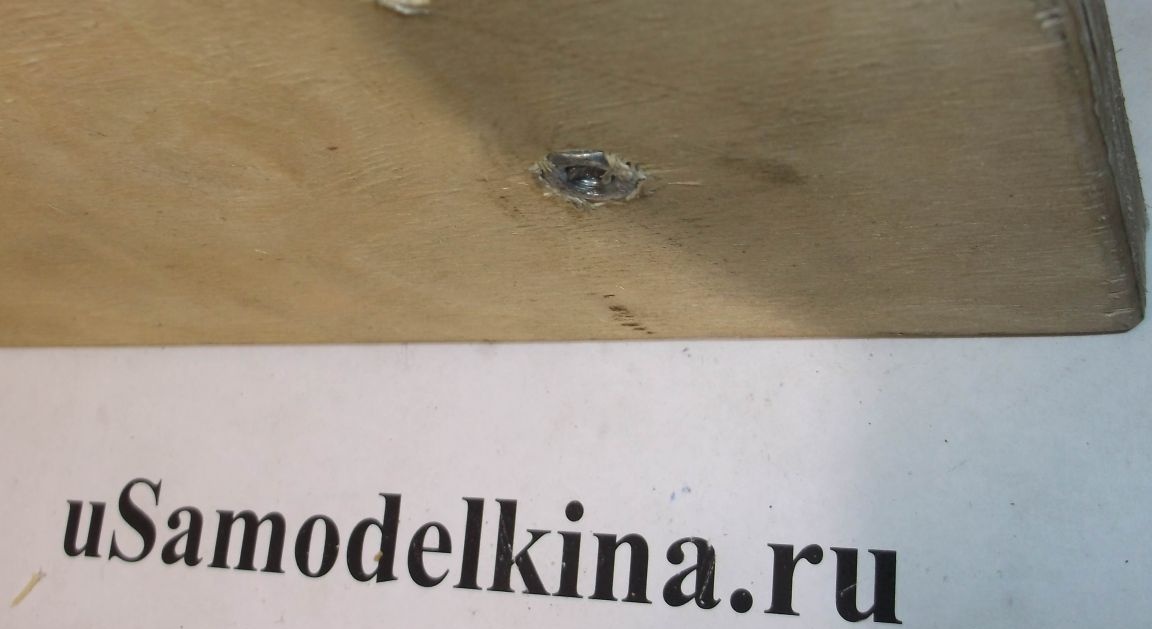
On the reverse side, the nut with which the stud is fixed is recessed into the base.
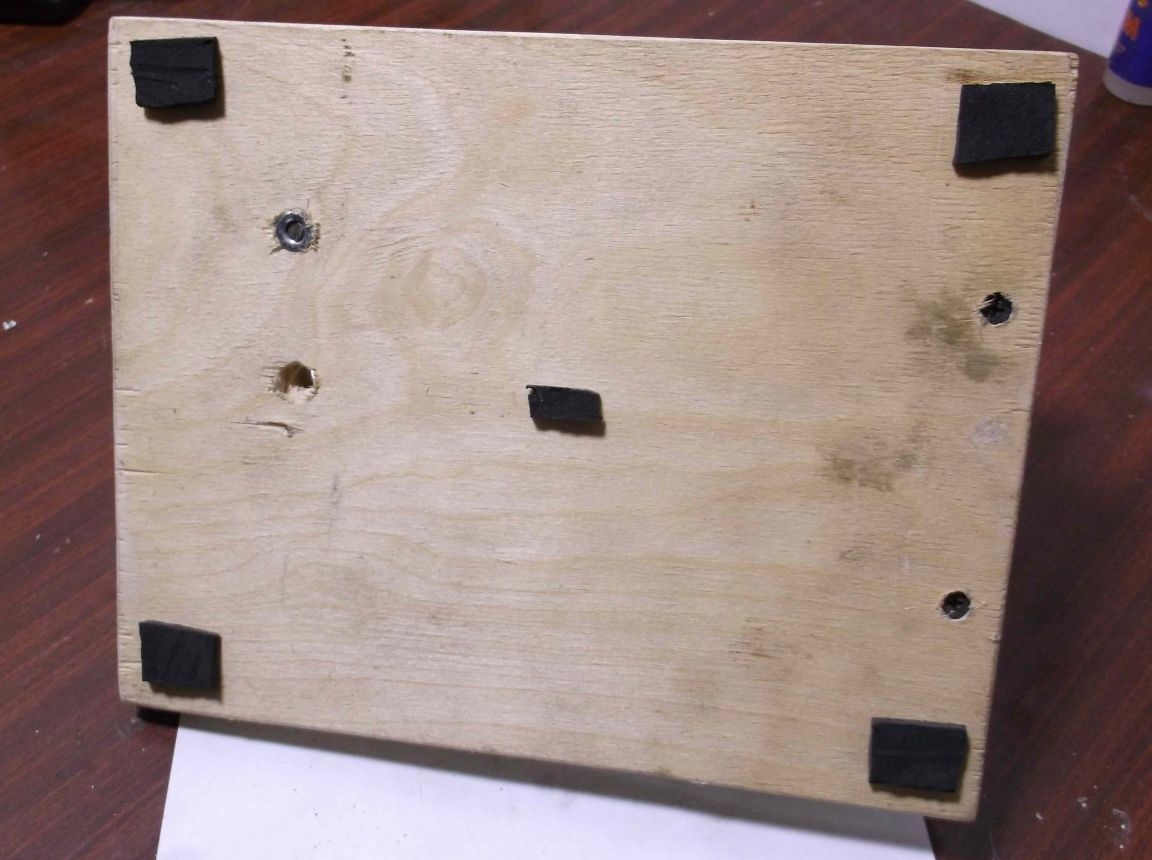
On the bottom side of the base, pieces of rubber or an eraser are glued at the corners to prevent slipping.
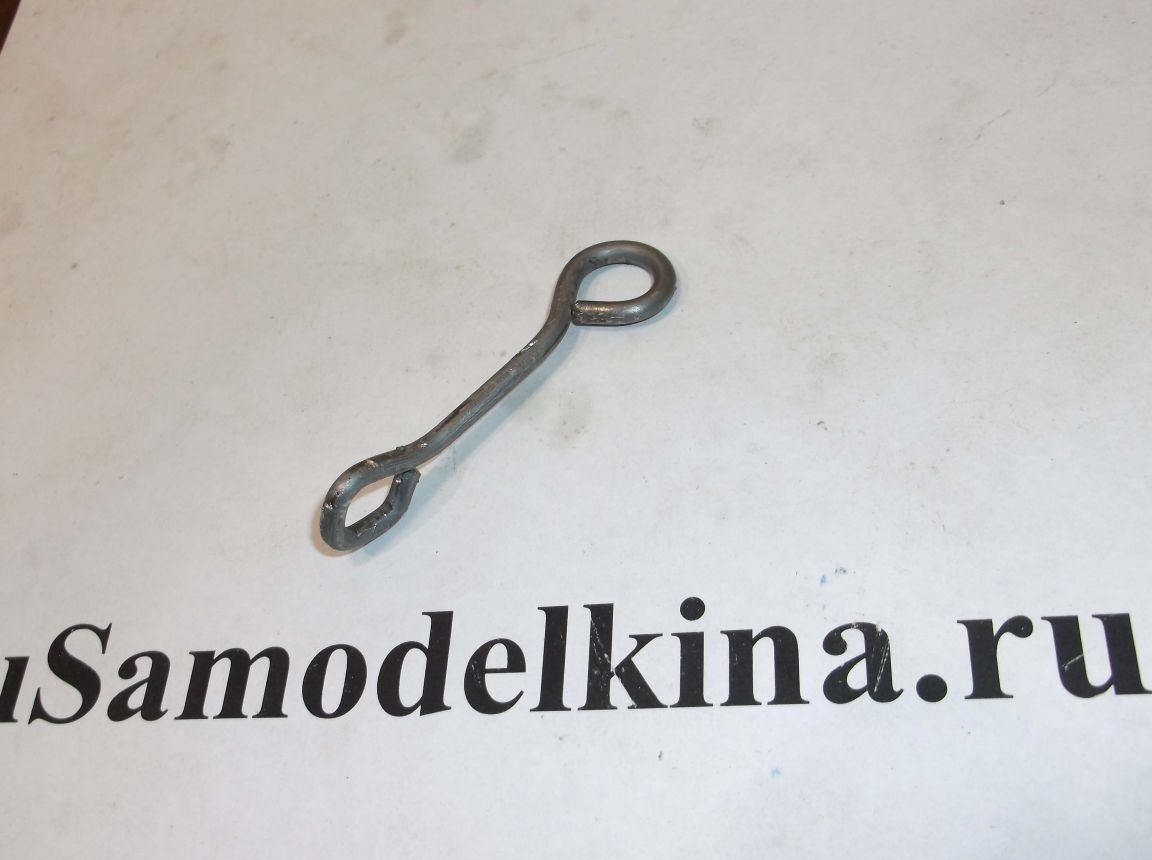
From a 3mm wire, in this case, such a loop guide is bent from the electrode.
It is fixed on a hairpin by means of washers, a nut and a "lamb" for convenient adjustment.

An emphasis was cut out of three-layer plywood: length - 13 cm, width on one side - 9 centimeters on the other 3 cm and a cut in the middle with a width of 6.5 mm and a length of 60 mm as in the photo.
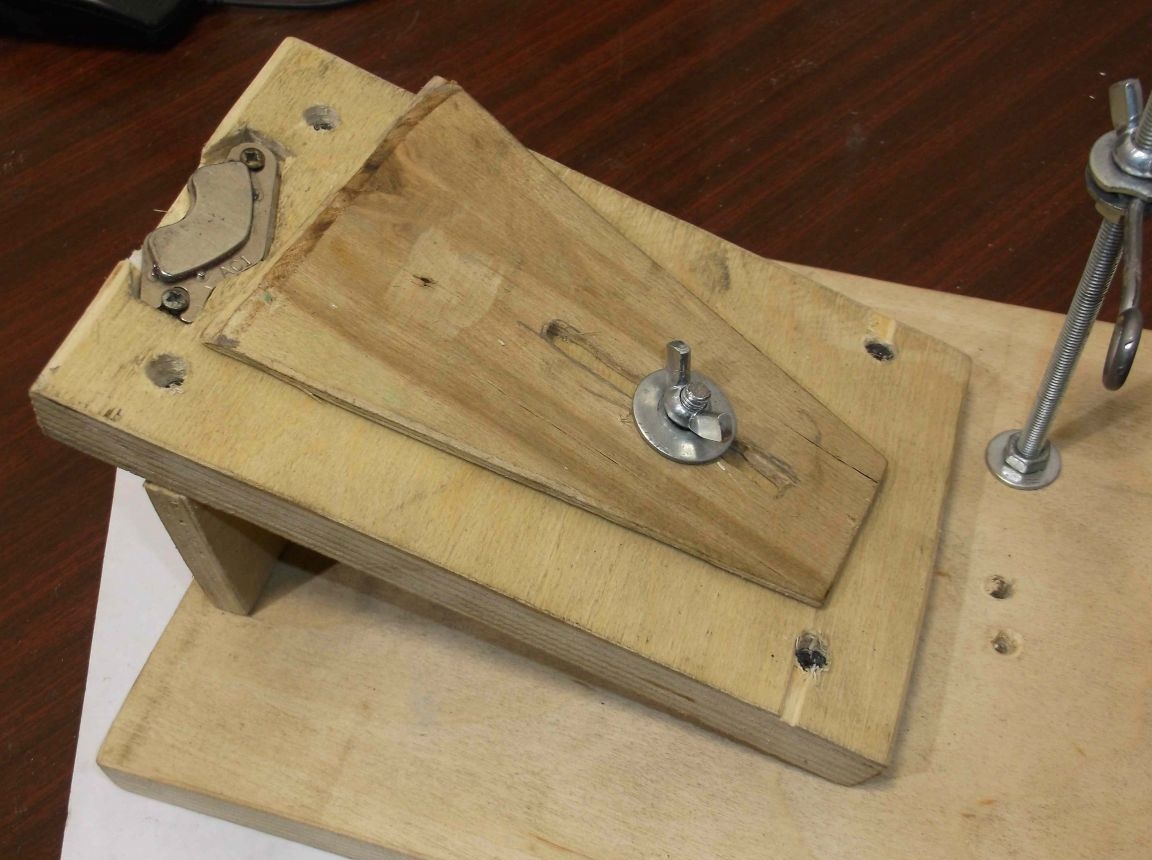
The emphasis is fixed with the help of a piece of the same, a stud screwed into the “countertop” in the middle and a washer with a “lamb”. This emphasis when fixing slightly departs from the surface of the table and it is better to make it from a duralumin sheet. With the same thickness, but much tougher.
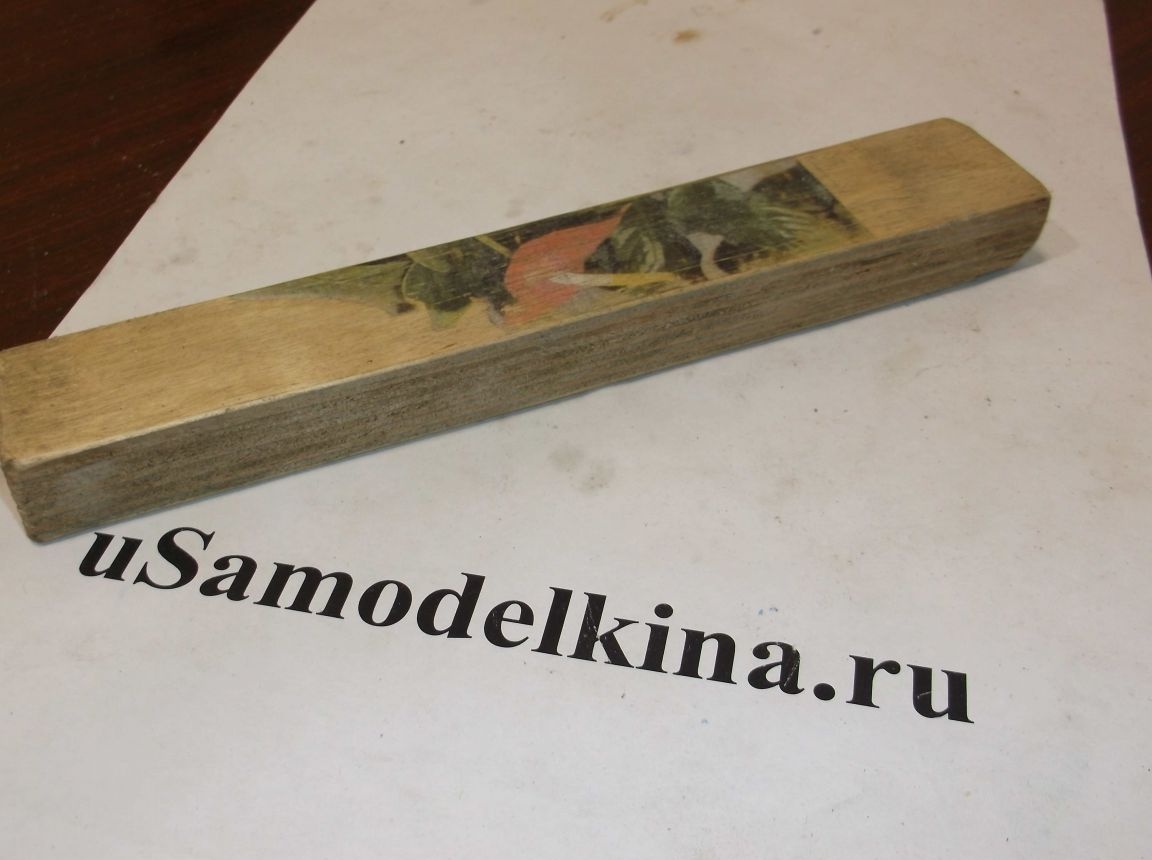
The whetstone is made of 18 mm plywood with dimensions of 3.5 by 9 centimeters.
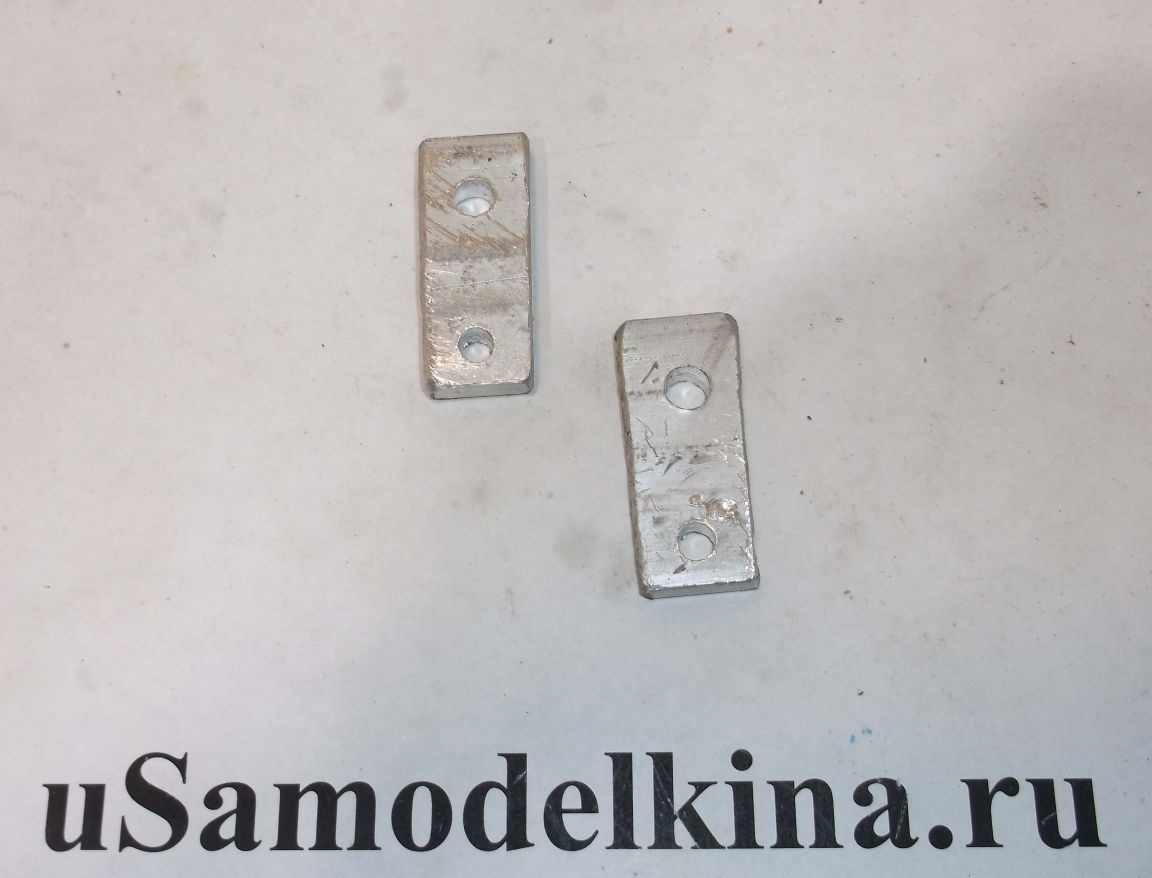
Holders for a bar were made from 1.5 to 4 cm segments made of steel or duralumin plate, in which two 6.5 mm holes were drilled at the edges.
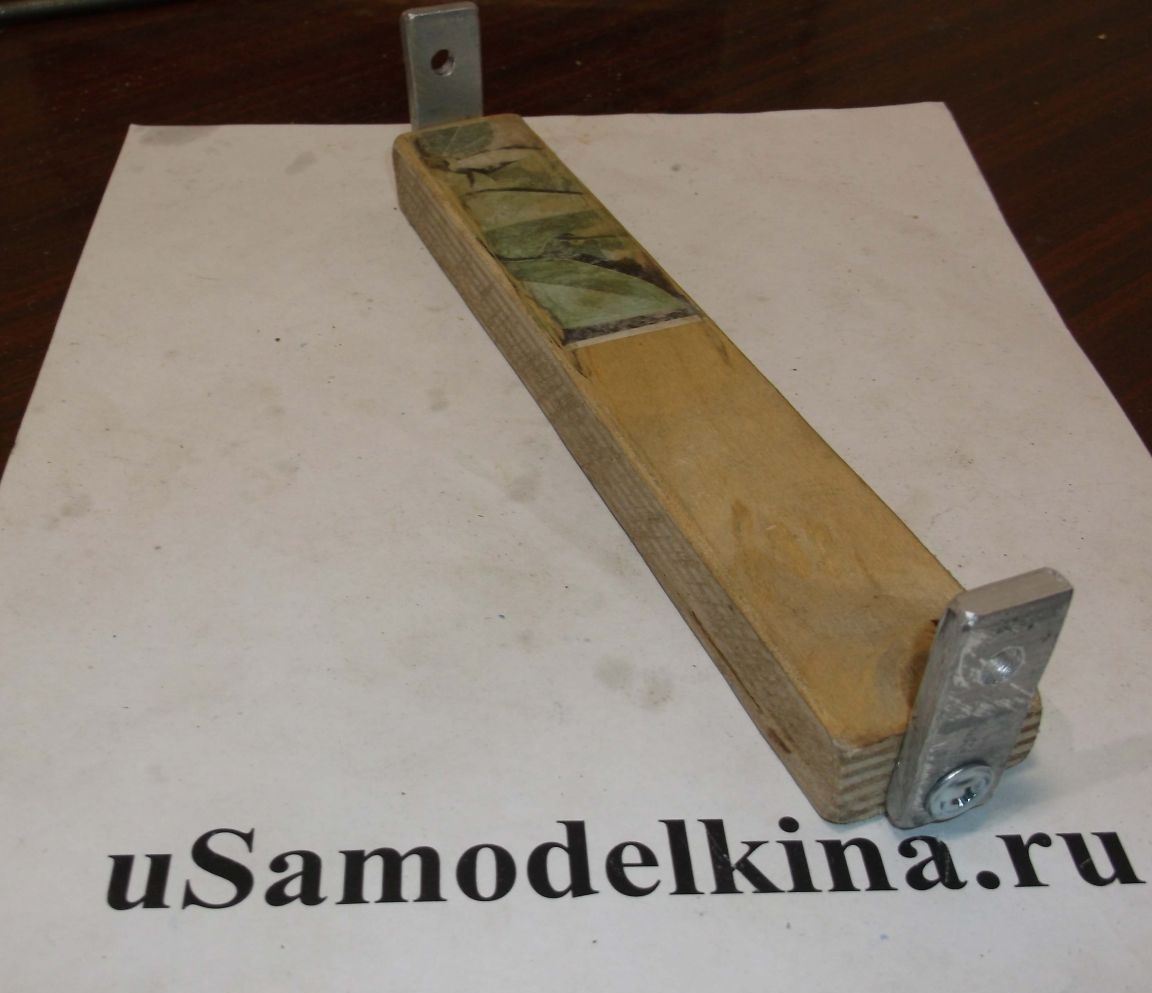
The holders are attached to the bar using self-tapping screws with a press washer. Pre-drilling required.
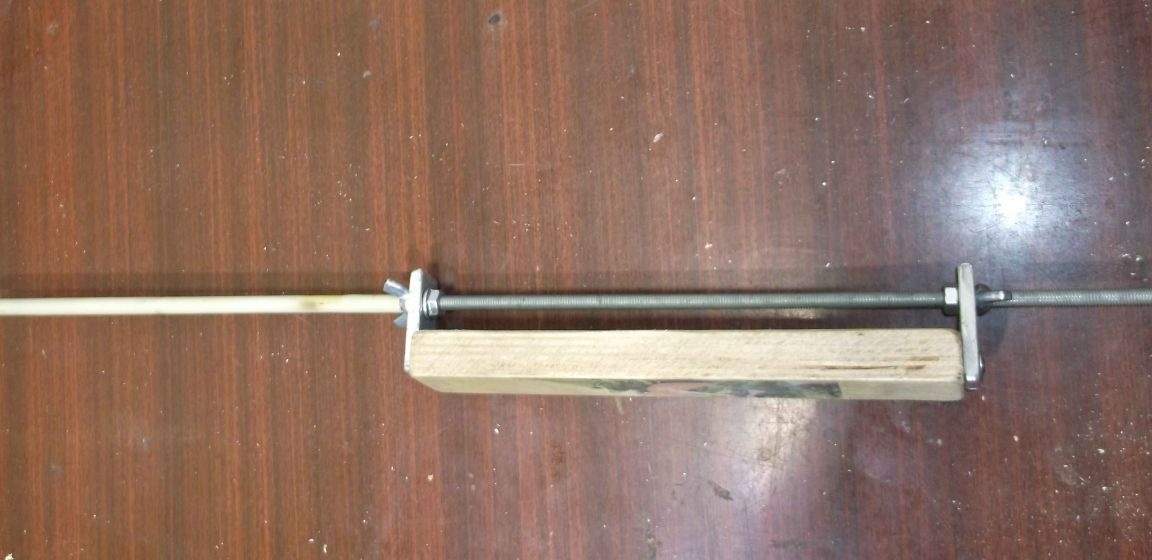
The bar is fixed on a half-meter hairpin, which is also a guide. On one side of the hairpin, approximately 10 - 12 cm is put on a PVC tube of suitable diameter for uniform sliding.
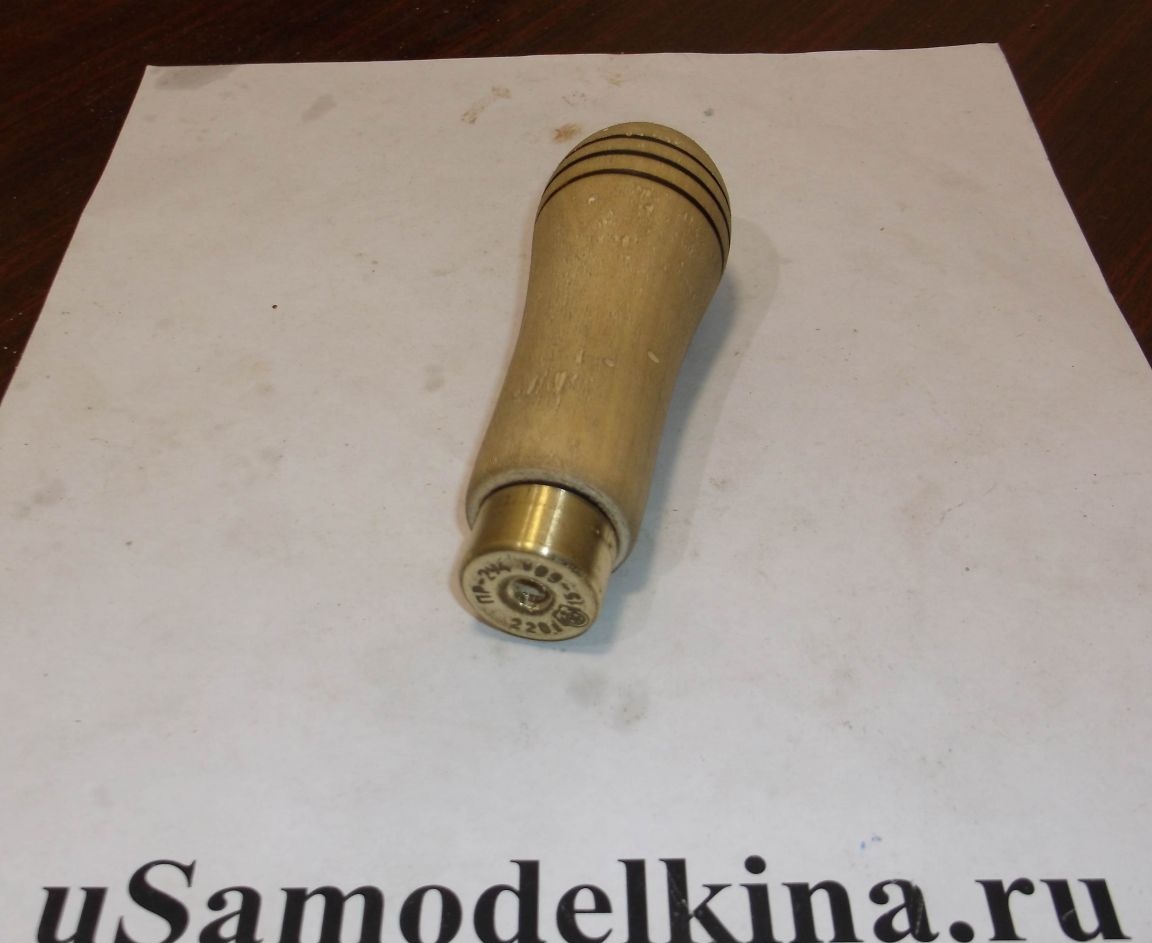
A handle made or prepared in advance is mounted on the other side of the stud.
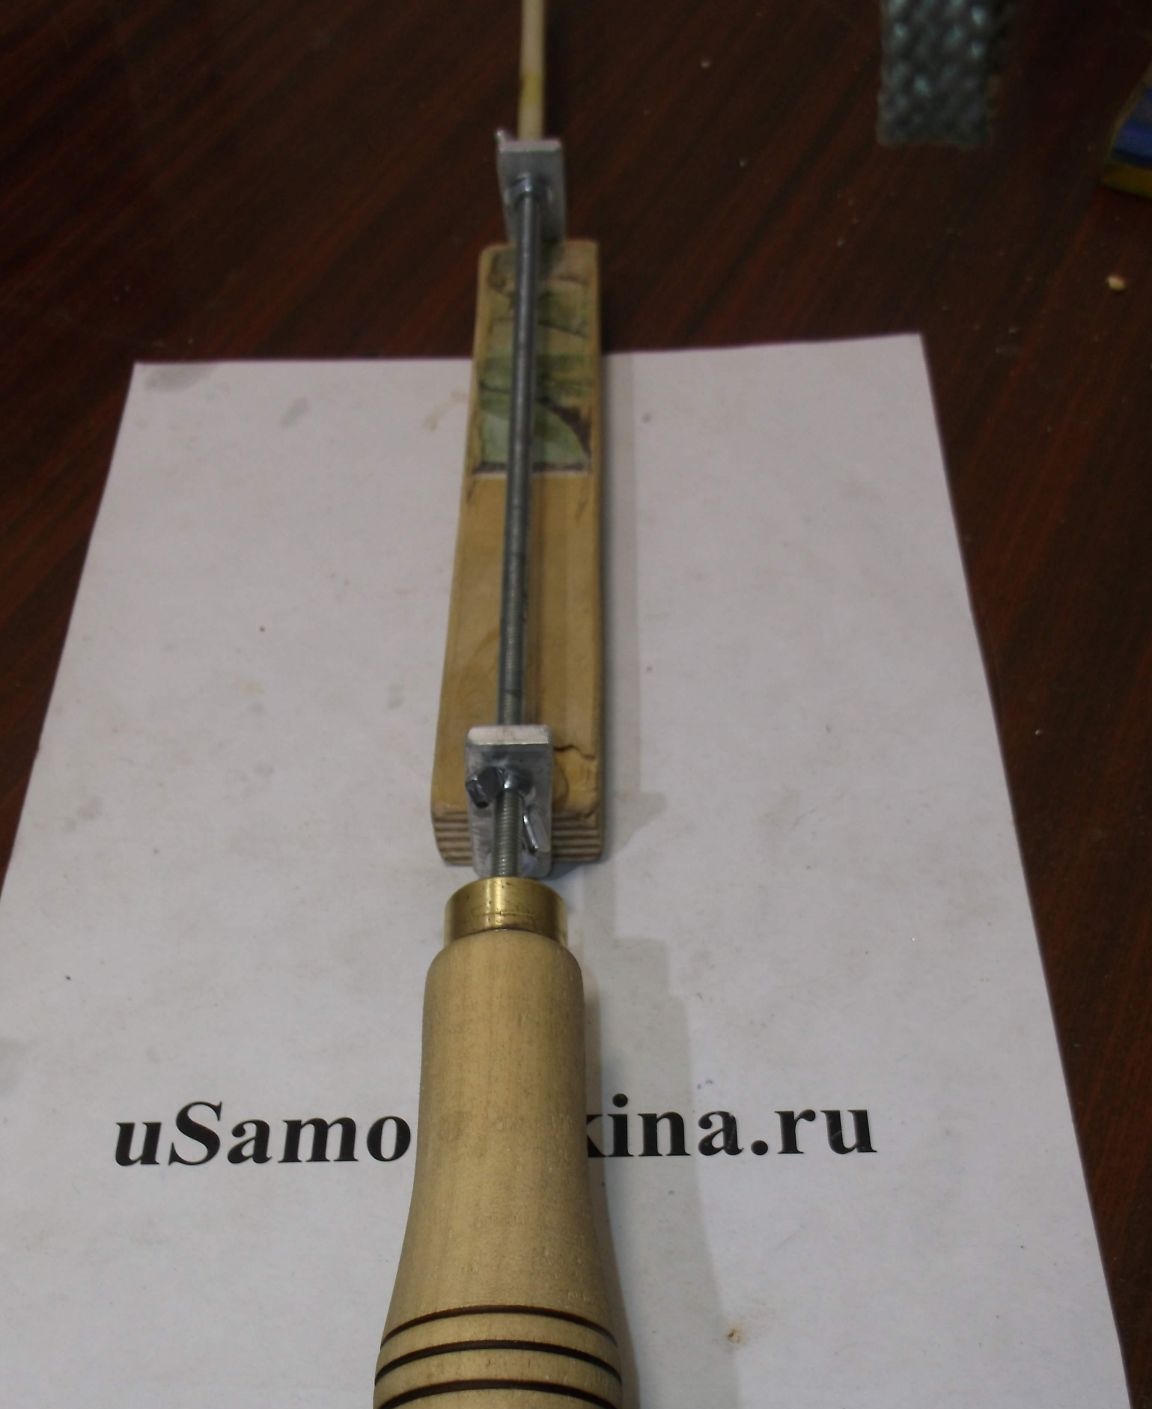
A guide hole was drilled in the handle with a 5mm drill and the pin was simply screwed into the handle.
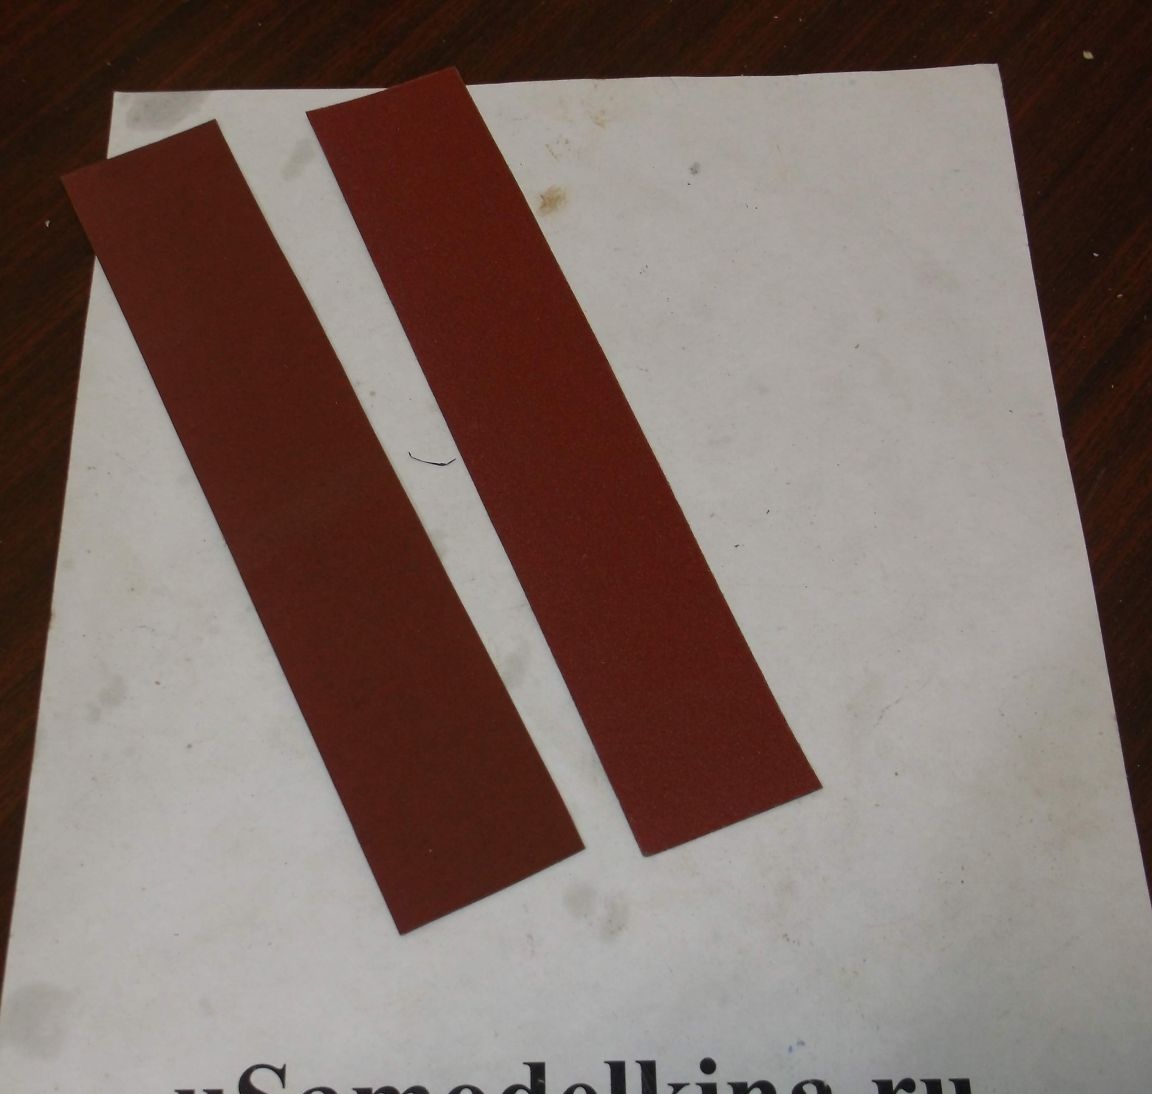
Stripes of the size of a bar are cut out of sandpaper of the desired “grain”. The paper is glued to the bar using PVA glue. You can stick paper with different sizes of abrasive on both sides, and then change to smaller or larger crumb is carried out by simply turning the grindstone. You may have to slightly loosen the self-tapping screws fixing the block. Worn paper is replaced with a scraper and water.
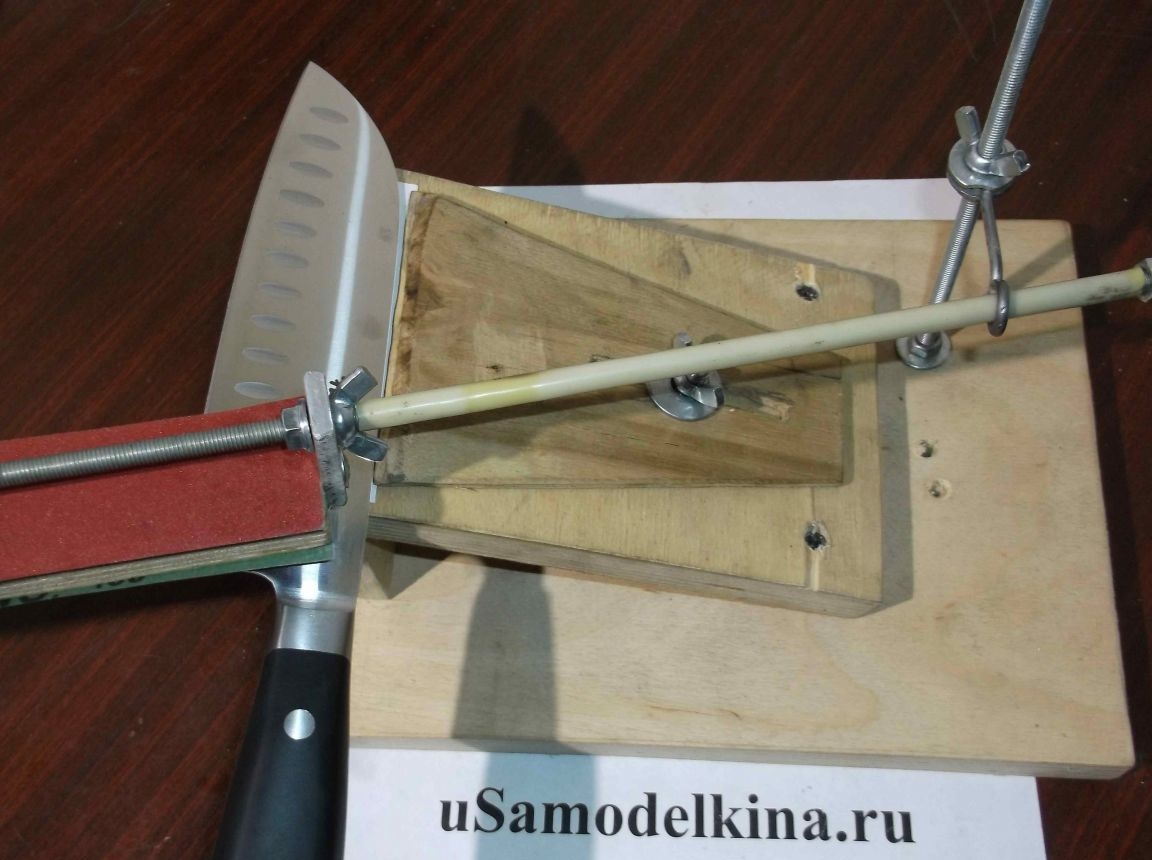
Here's what happened in the end. Before installing the knife on the work surface, you can put paper or a piece of cloth to prevent accidental scratches on the knife.