
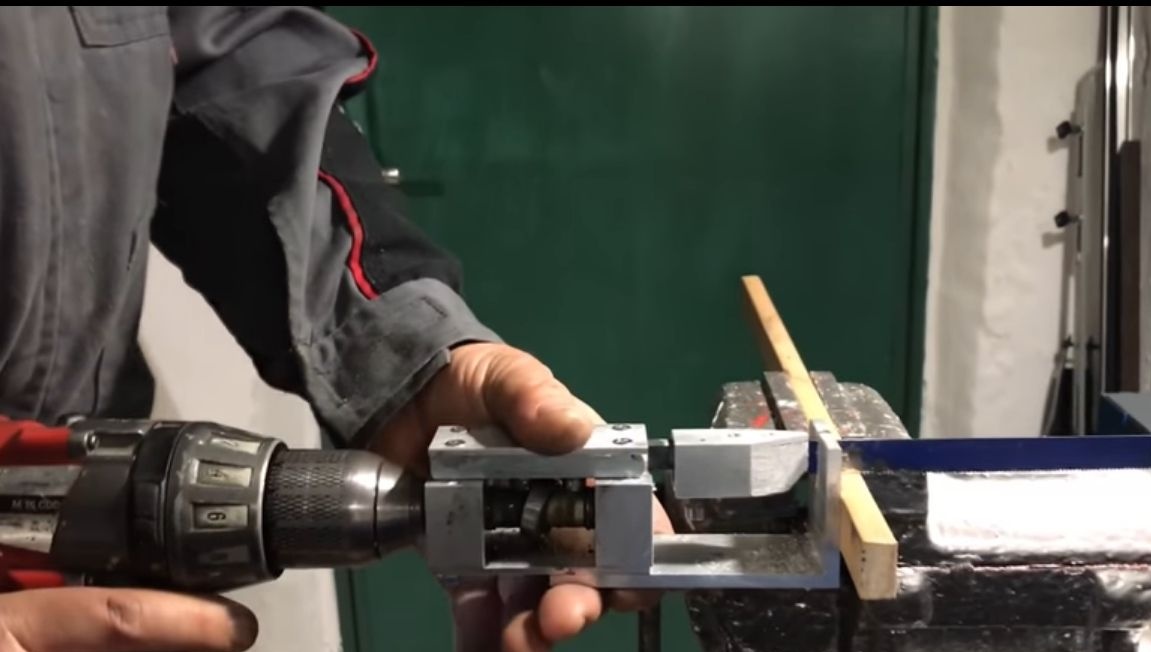
Hello everyone, today we will learn how to turn a conventional drill into. Theoretically, on such device any saws can be installed, the author as an experiment decided to install a blade hacksaw blade.
Everything is collected quite simply, materials are scarce and they are quite common. You can make all the details with a minimal set of tools, you will need a grinder, a vice and a file, this is the main tool with which you can make this device.
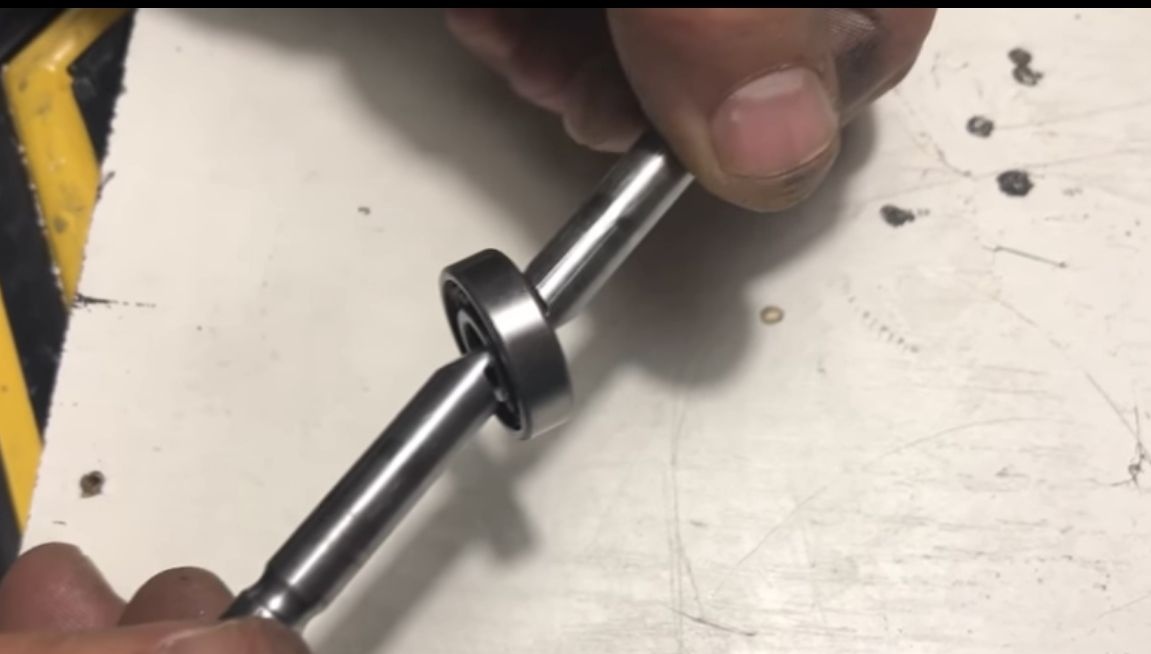
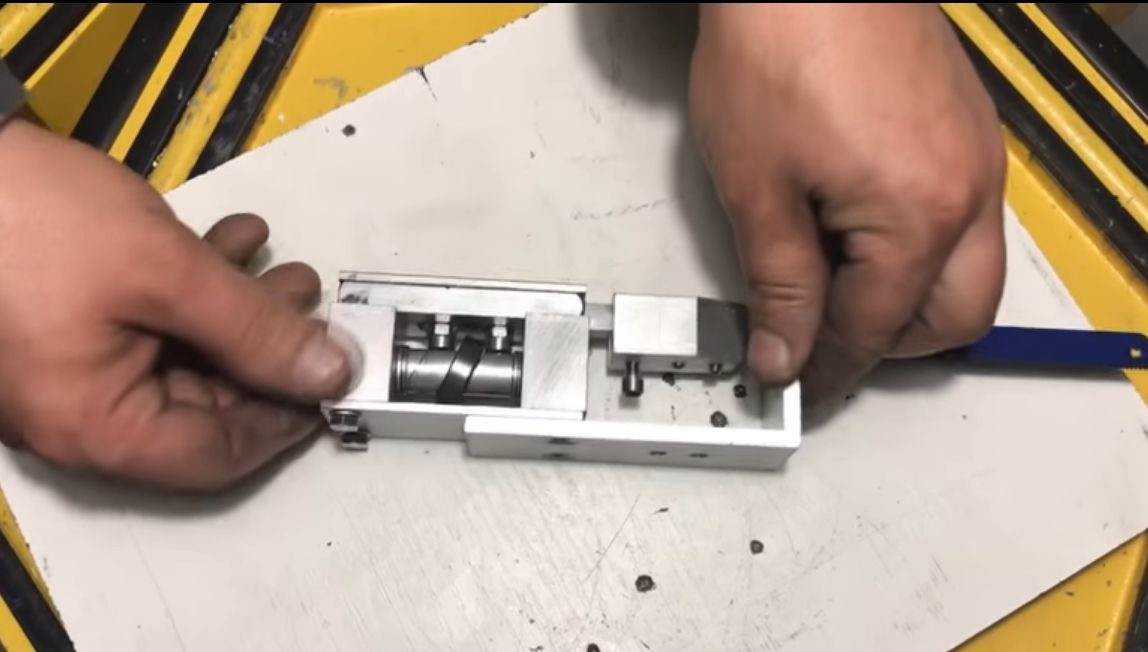
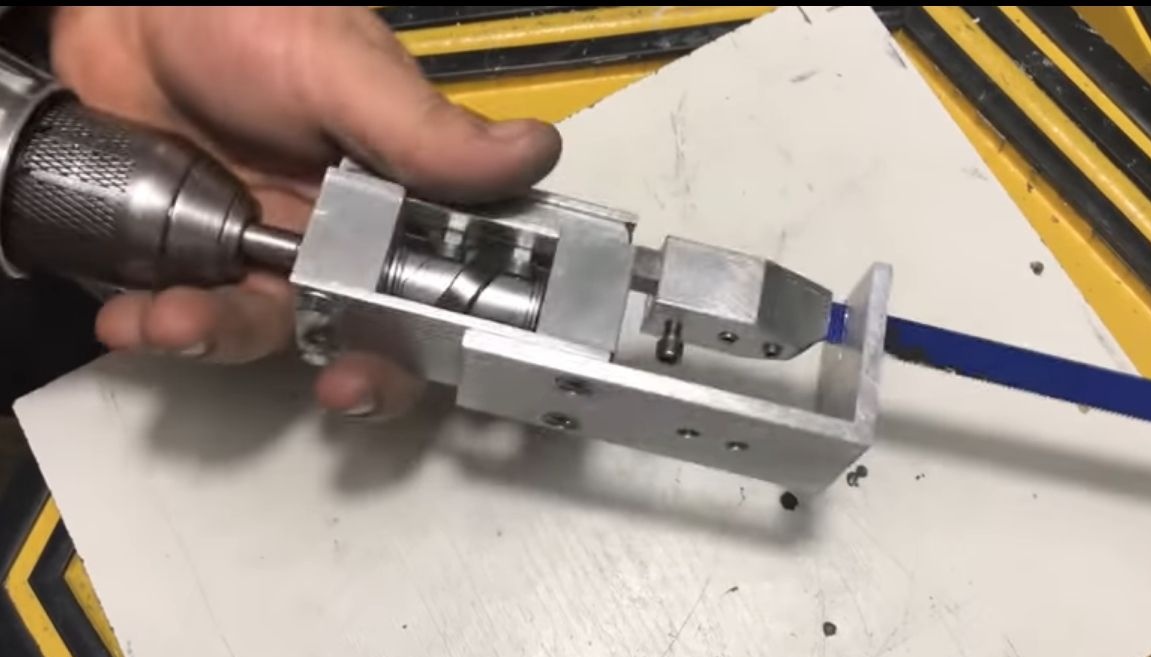
Everything works very simply. The heart of the device is a bearing that is mounted on the shaft at a certain angle. When the shaft rotates with a drill, movement through the bearing is transmitted to a special upper support with two bearings. This support begins to make reciprocating movements, which are then transmitted to the saw. The more turns the drill will have, the higher the frequency of the saw will be, and the better it will cut.
Materials and tools that the author used for homemade:
Material List:
- steel rod;
- bearing;
- washers;
- two persistent bushings (fix the bearing);
- plates and corners from aluminum;
- screws;
- steel rods of rectangular shape;
- hacksaw blade.

Tool List:
- screwdrivers and hex keys for screws;
- vise;
- file;
- ;
- ;
- taps.
The process of making an electric saw:
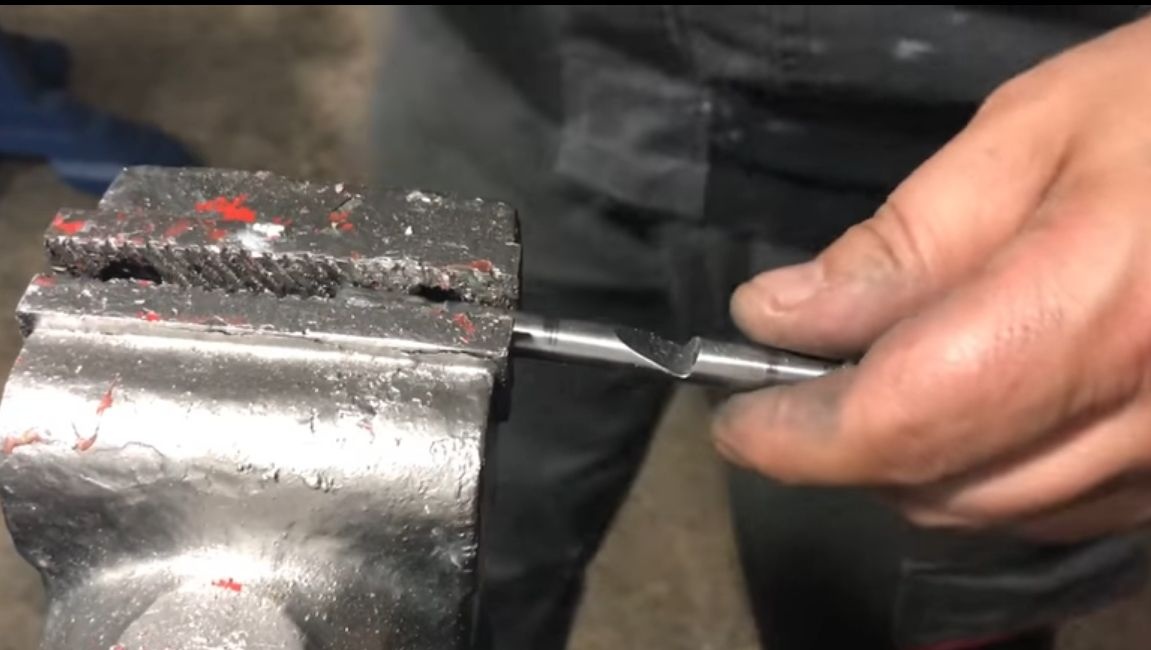
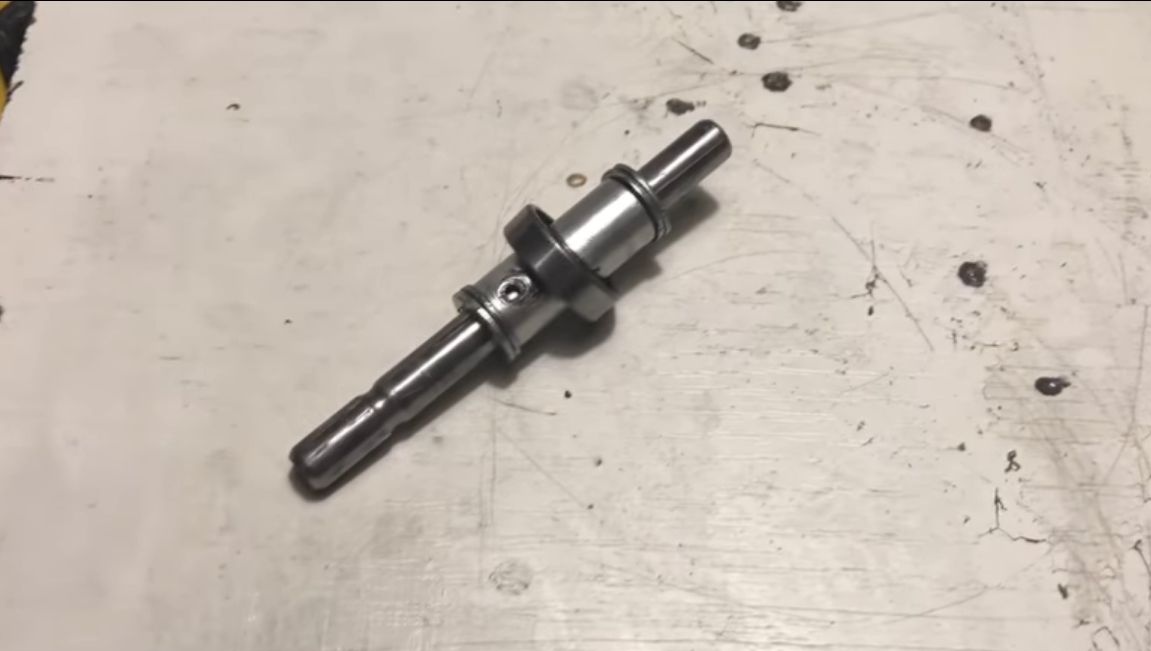
Step one. We make a shaft
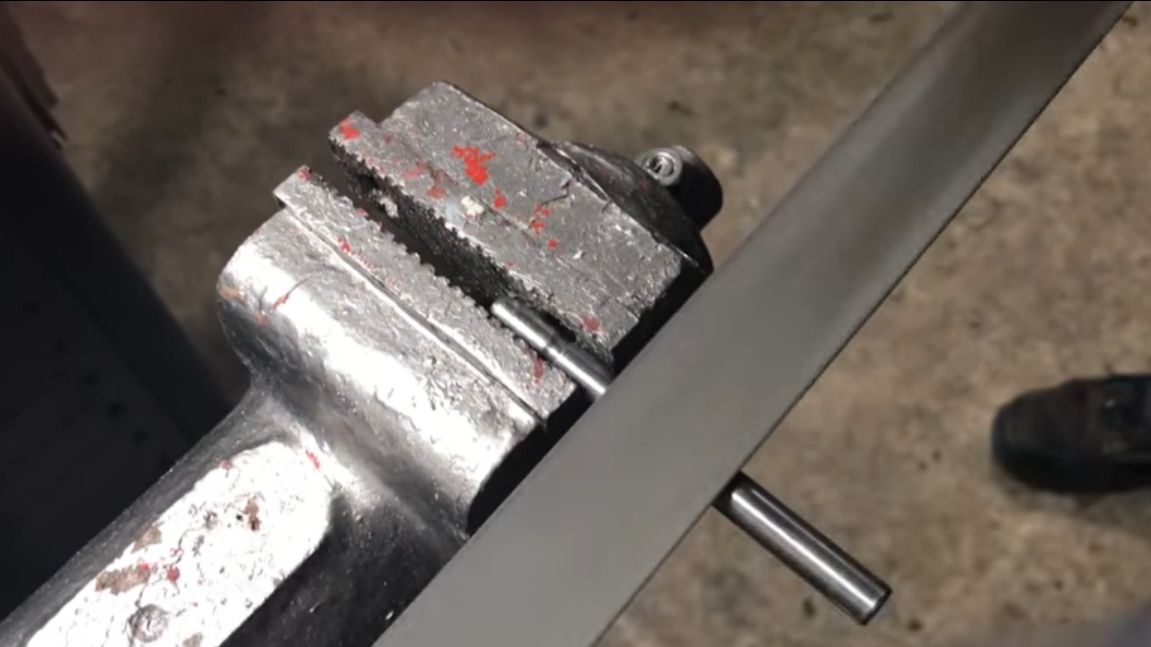
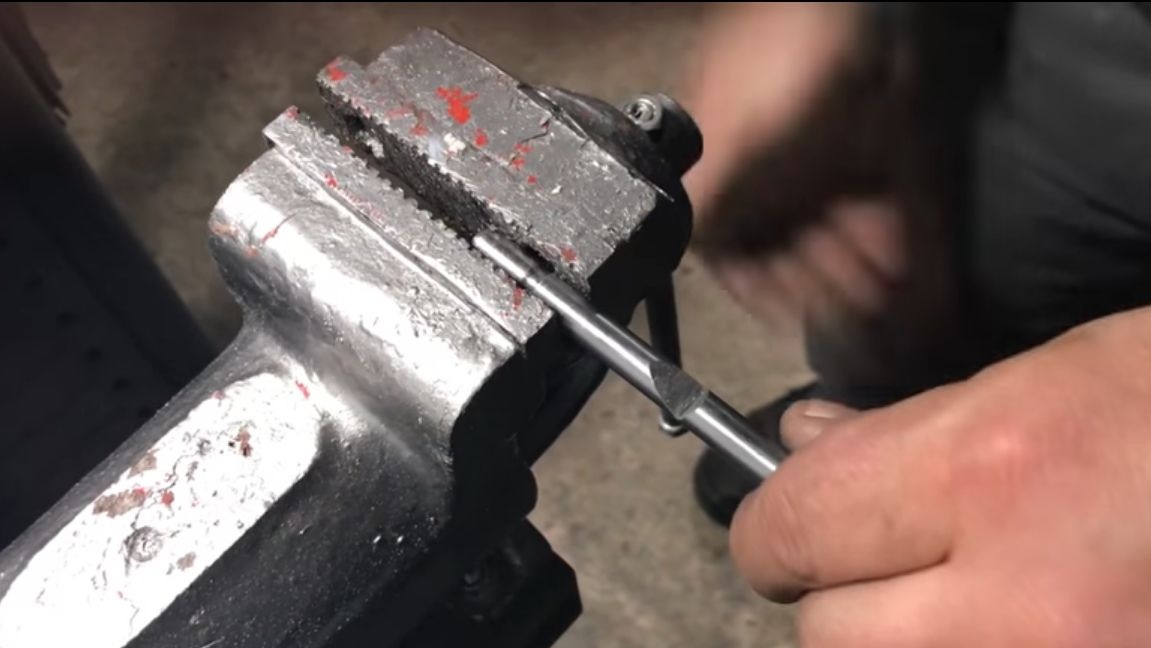
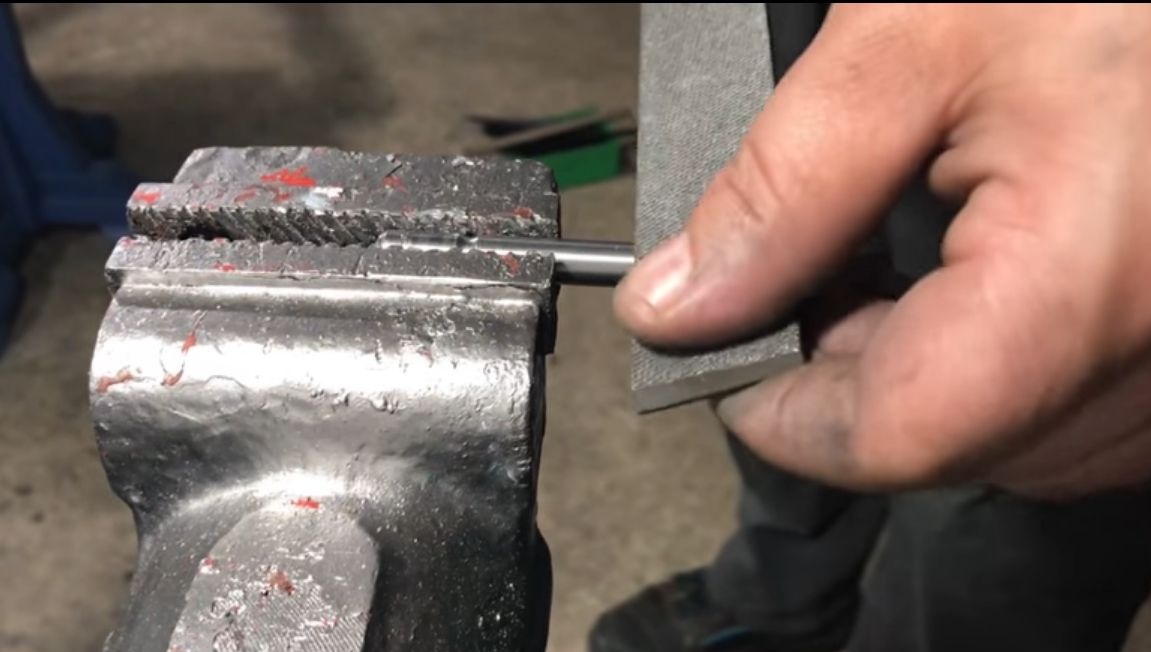
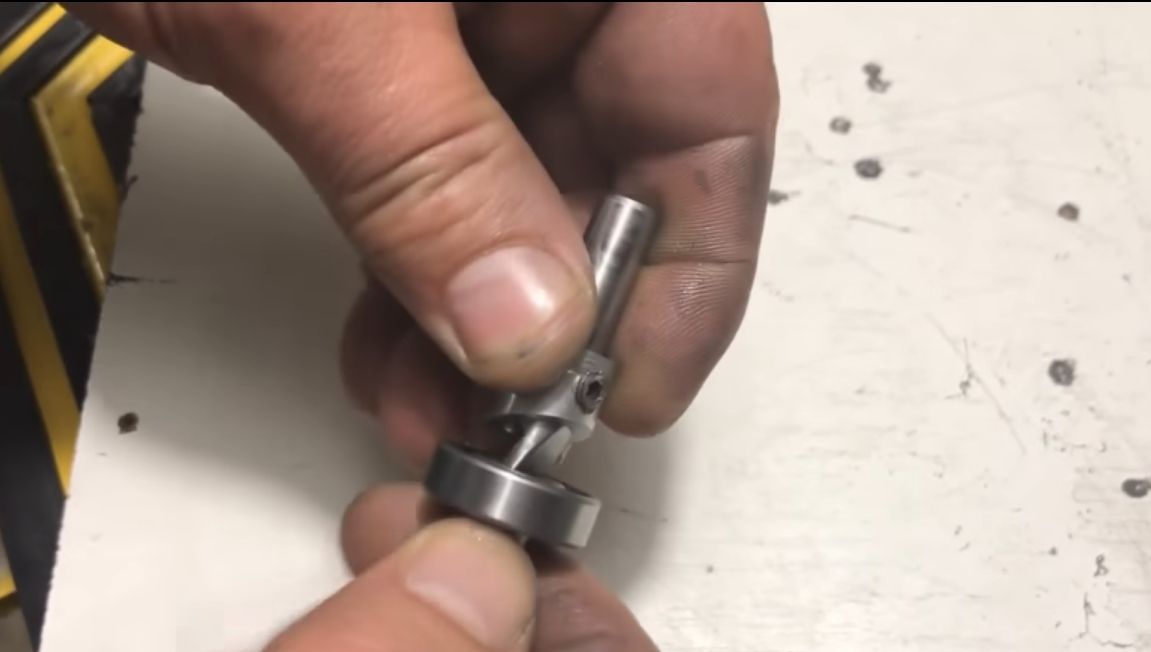
First of all, the author makes a shaft, for this you need a steel rod. Clamp the rod in a vise and cut out the grooves on it, as seen in the photo. The meaning of these grooves is to place the bearing on the shaft at an angle. The author forms the grooves using a conventional metal file. First, one is made on one side, and then the second on the other.
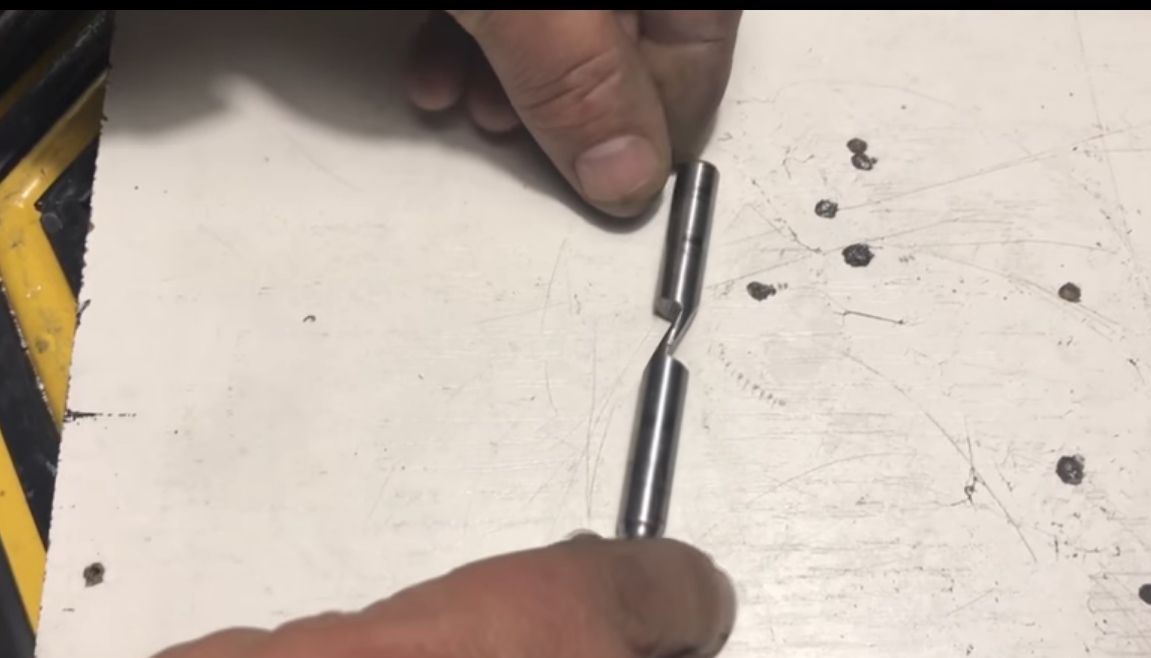
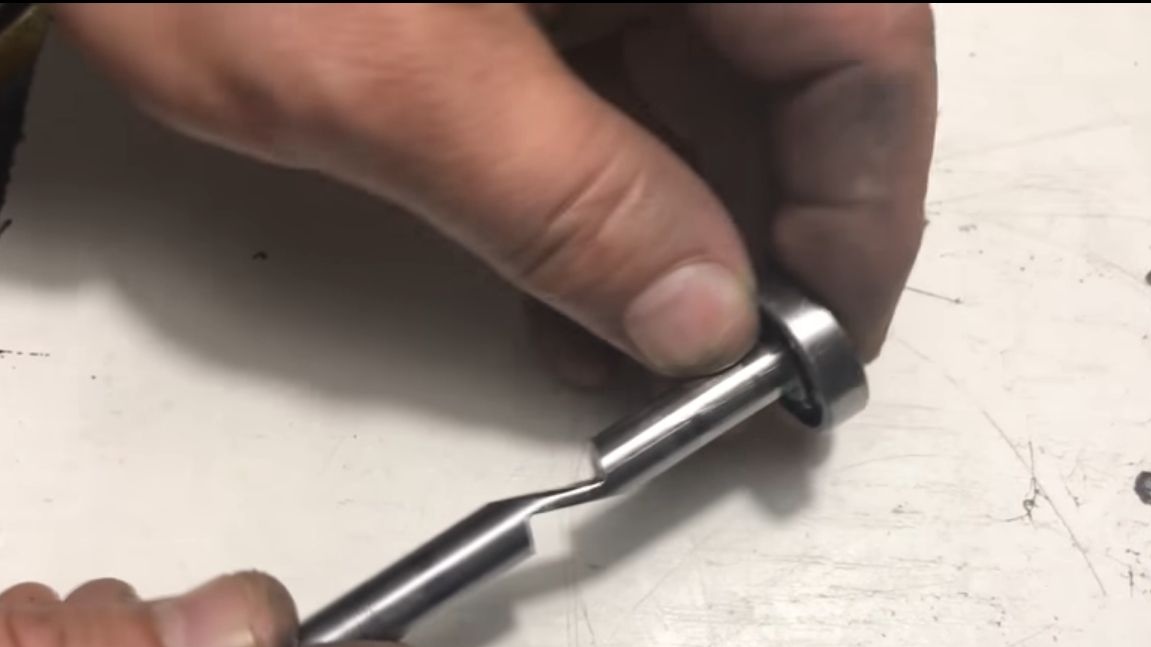
Step Two Install the bearing
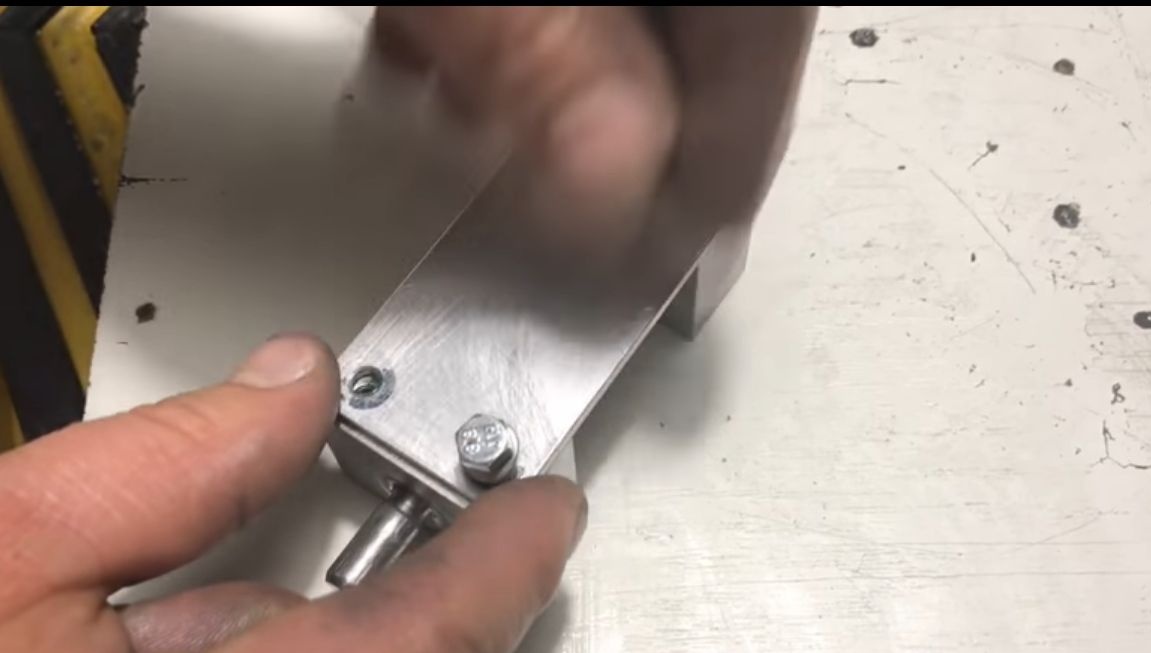
Now you can install the bearing on the shaft. Place it in the groove so that it is at the right angle. Now the bearing needs to be fixed on both sides, here you will need special bushings. They can be made from an aluminum tube. We are looking for a tube with a suitable inner diameter, cut off the necessary pieces at the right angle and drill holes. In the holes you need to cut the holes for the screws. Now we put the bushings on the shaft, wrap the screws and the bearing is firmly fixed, and if necessary it can be replaced.
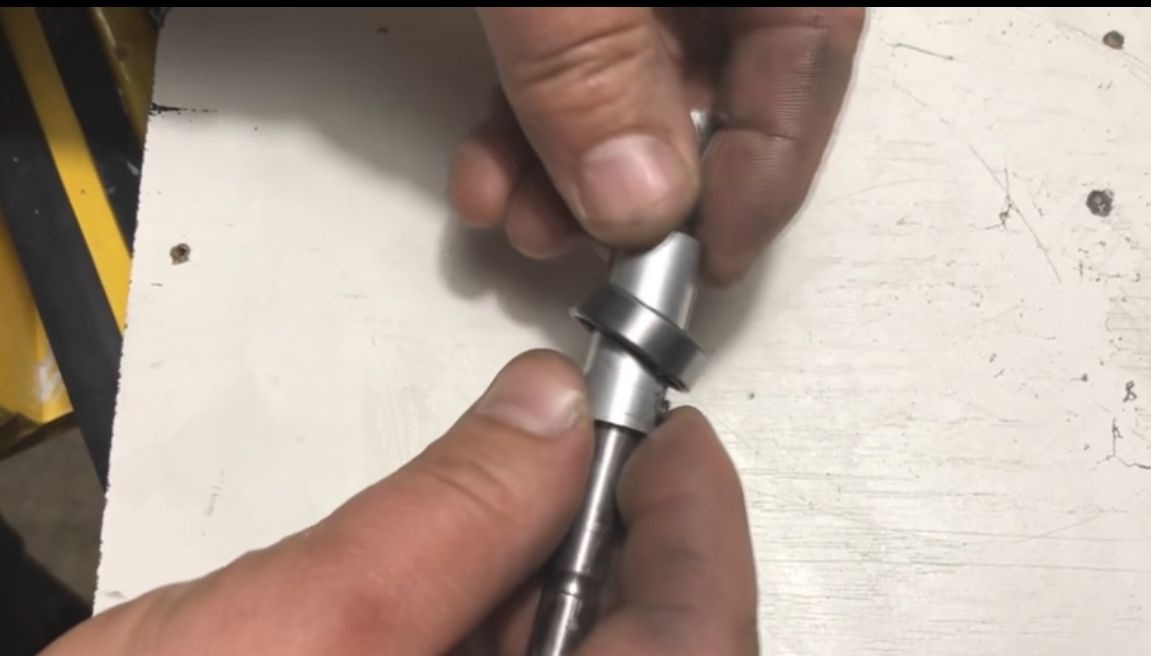
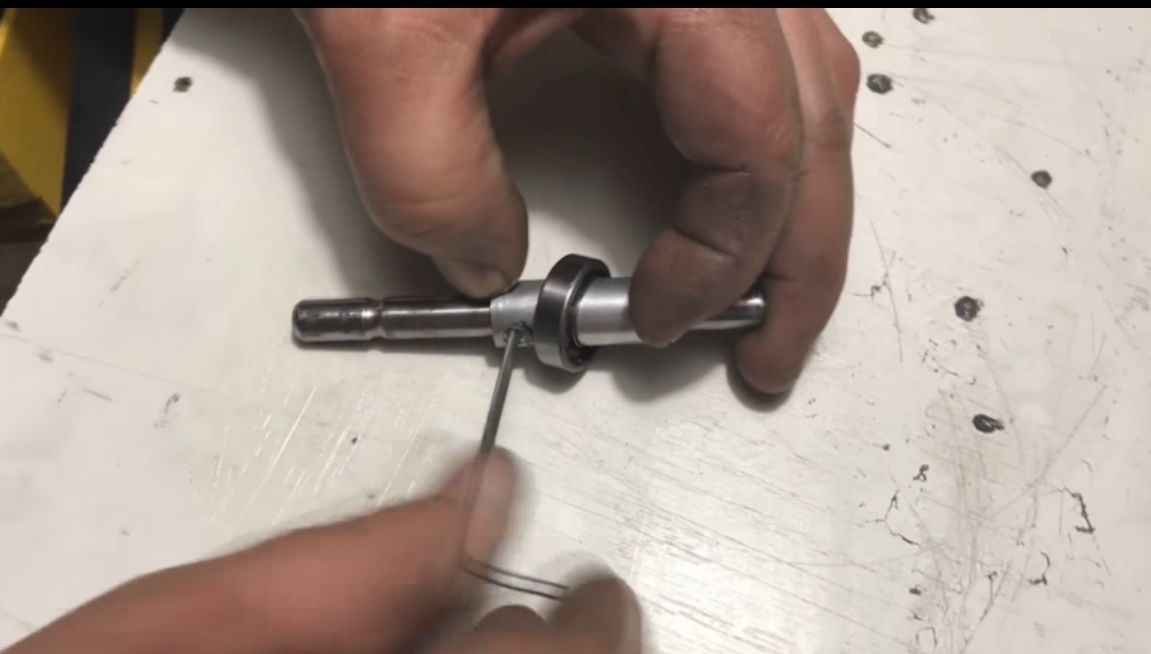
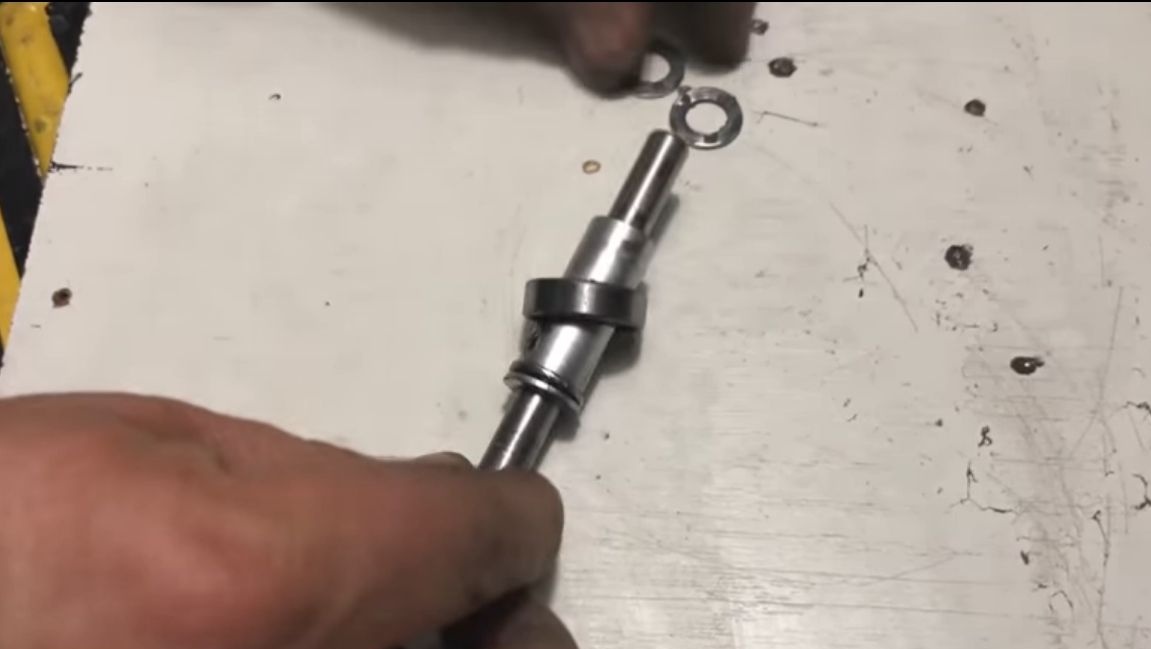
Step Three Thrust washers
During operation, the axis will move back and forth, and the greater the load, the better support it will need. The author uses washers as a support. We select the necessary quantity and install from both ends. It is important here that the result is not a very large gap, since the device will make a lot of noise during operation. It is advisable to lubricate the washers periodically.
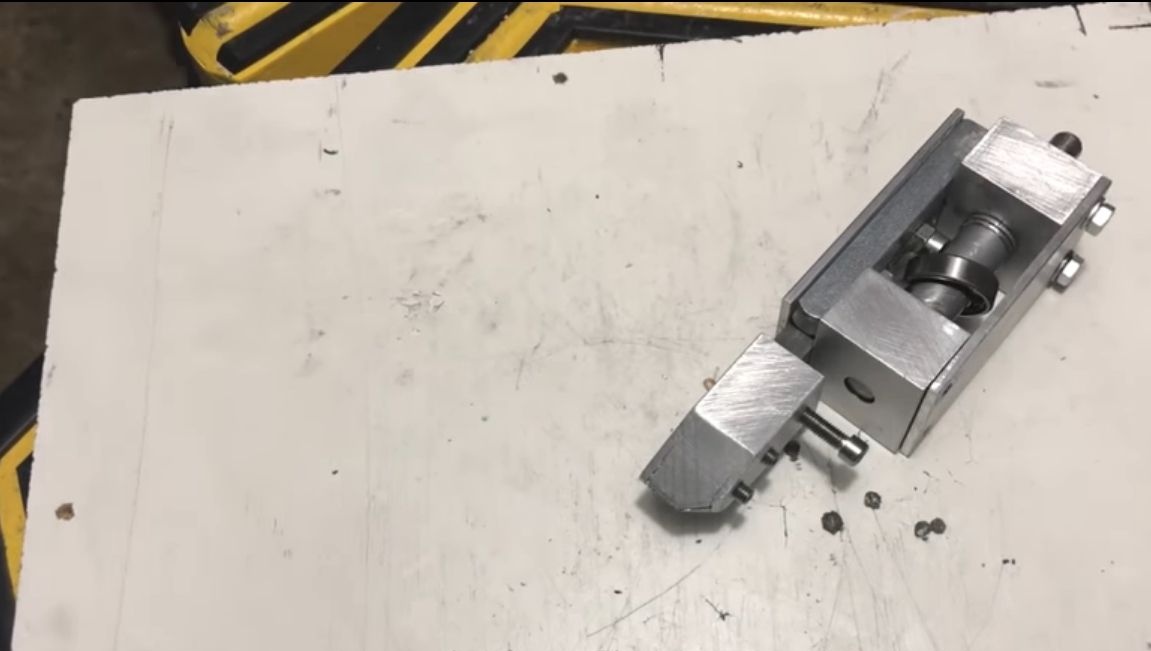
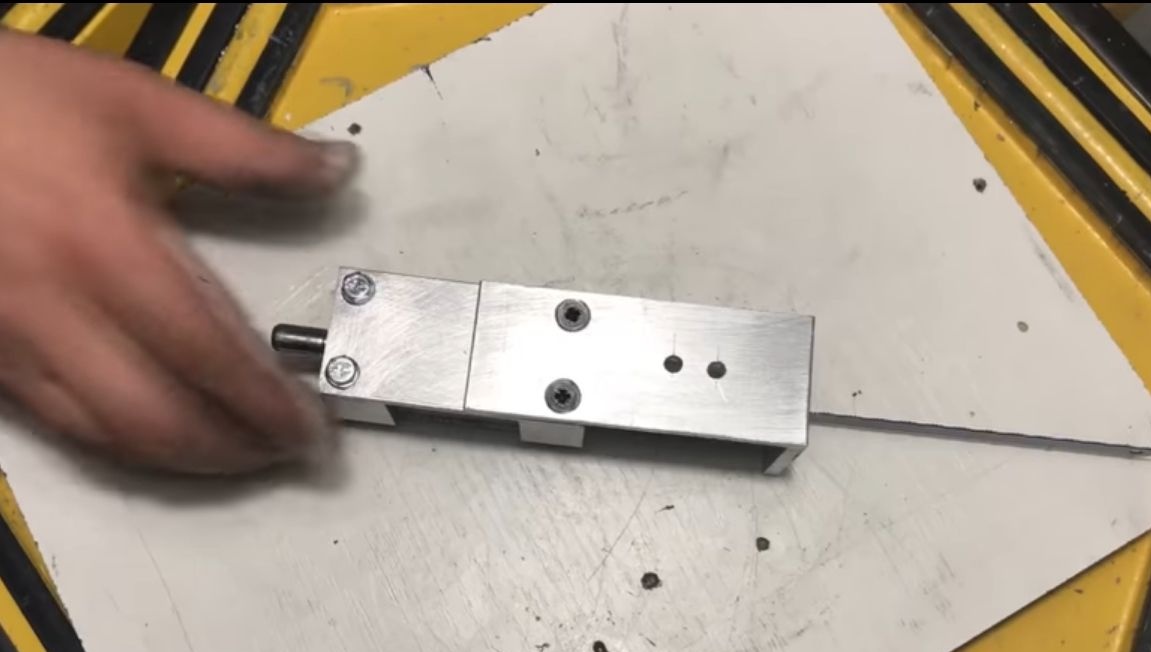
Step Four Vertical shaft bearings
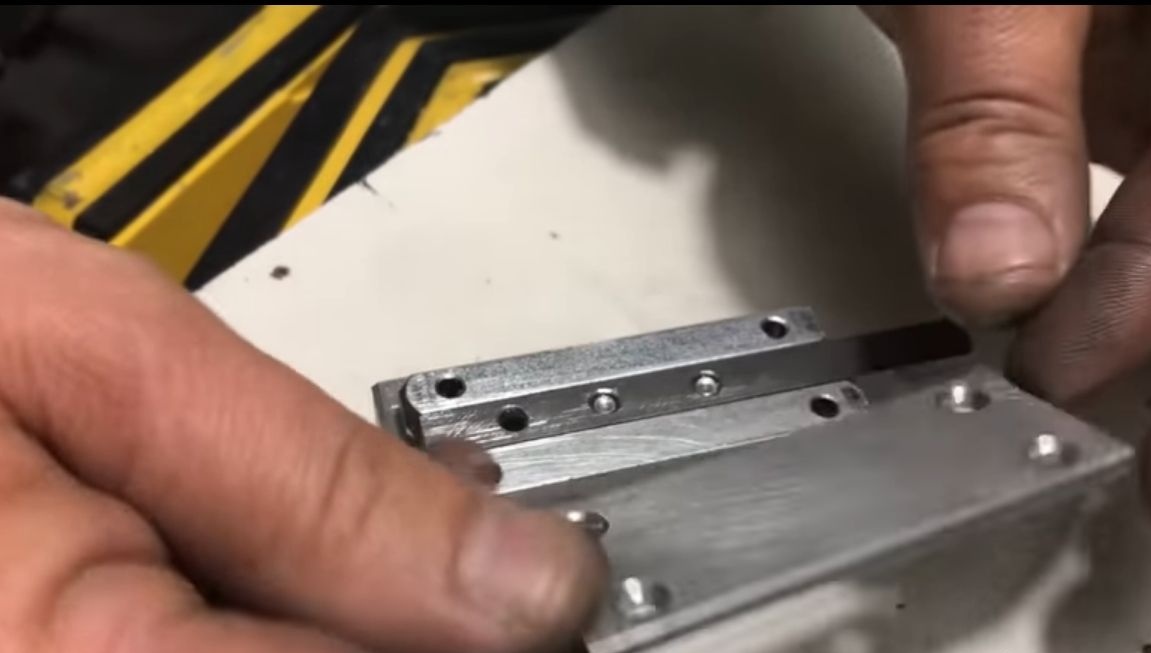
The shaft is between two bearings, they are made of aluminum. The author concealed the methodology for their manufacture. Judging by the connecting lines, these blocks are made of pieces of aluminum corner, which then were probably glued together. You can also use solid aluminum bars, if you can find them.
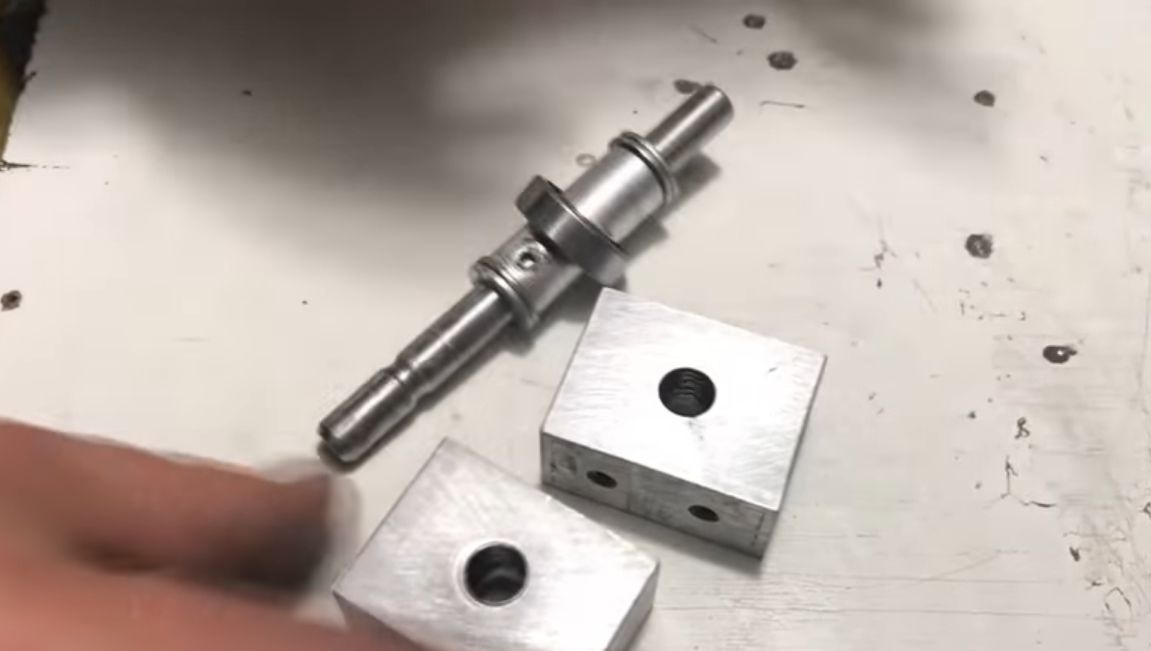
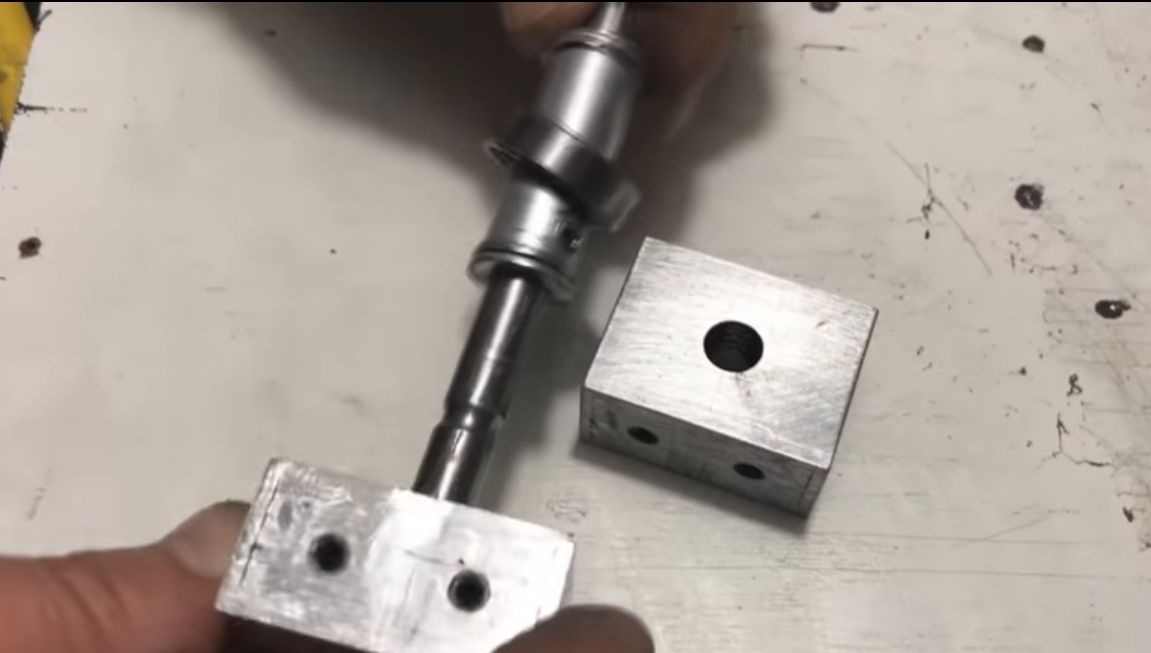

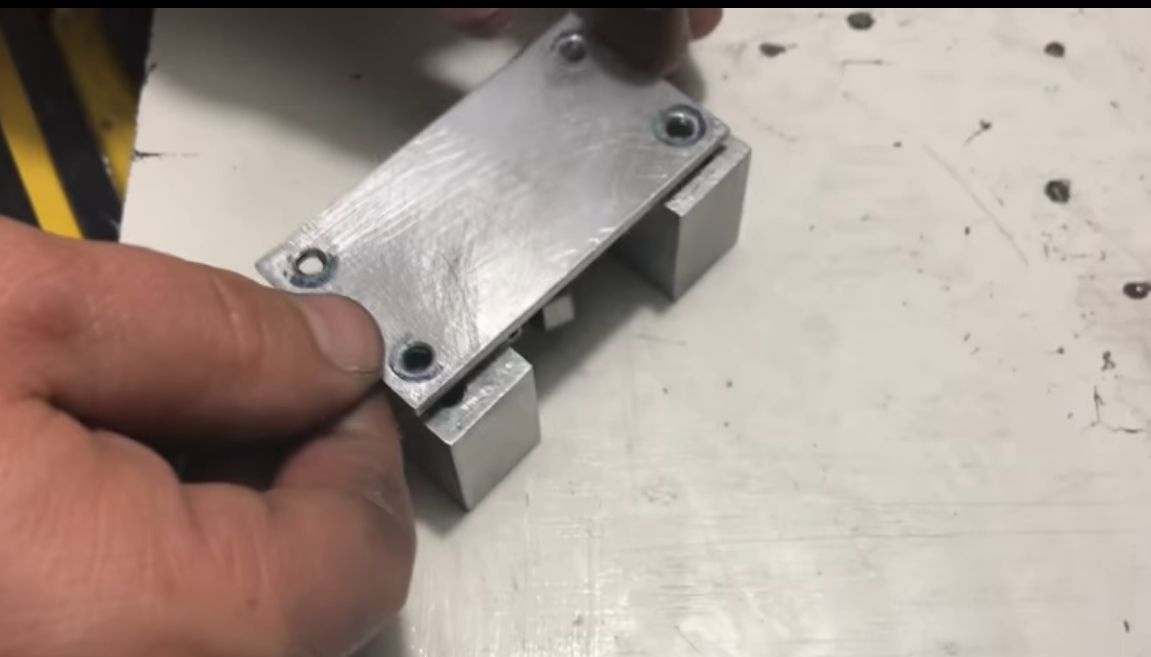
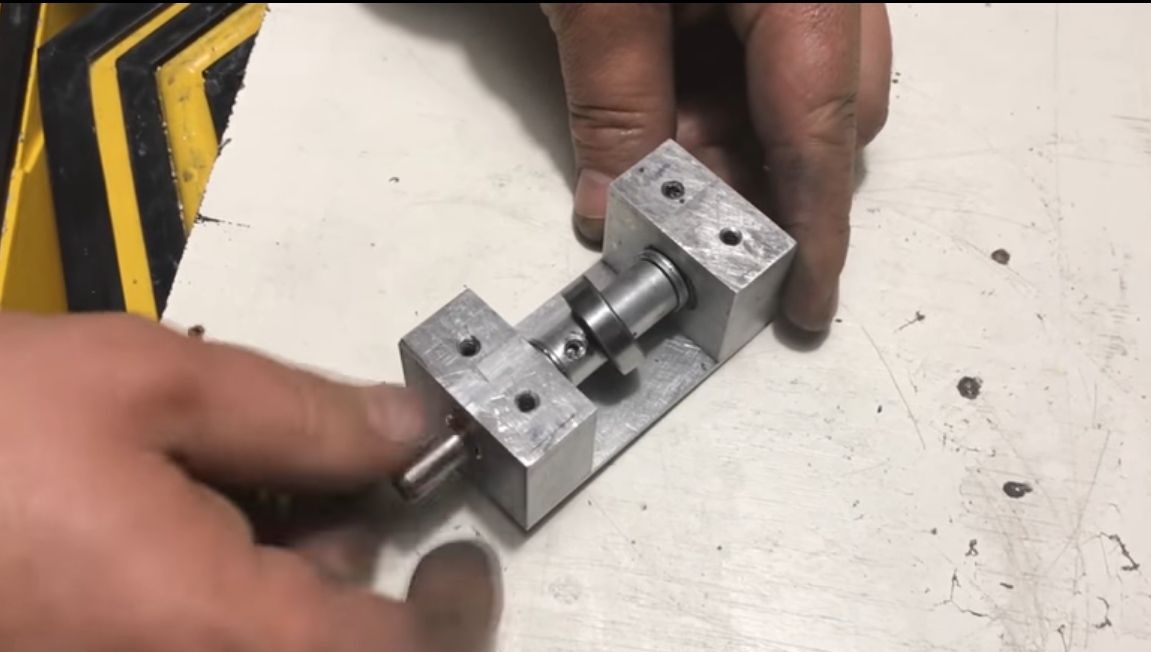
We drill two large holes in the bearings along the diameter of the shaft, the gap here should be small, during wear the diameter of the holes will increase. Two mounting holes are drilled on both sides of the supports. To connect the two supports, you will need an aluminum plate, drill holes in it in the appropriate places, and then fasten them to the supports with screws or bolts.
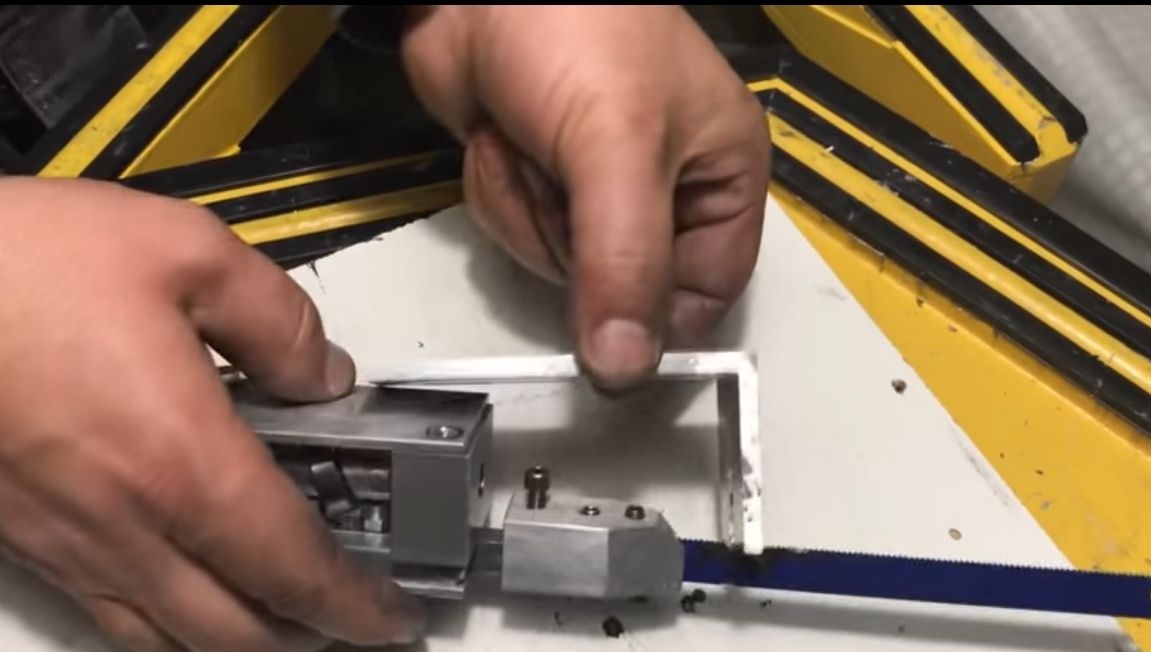
Step Five Mobile platform
A moving platform is placed on the other side of the structure, to which movement from the bearing is transmitted. This platform is a plate on which two rods are fixed. As rods, bolts with nuts can be used, if desired, they can be welded.
A moving platform is located in the center of the structure, two metal bars are placed on the sides slightly less than the thickness of the platform.
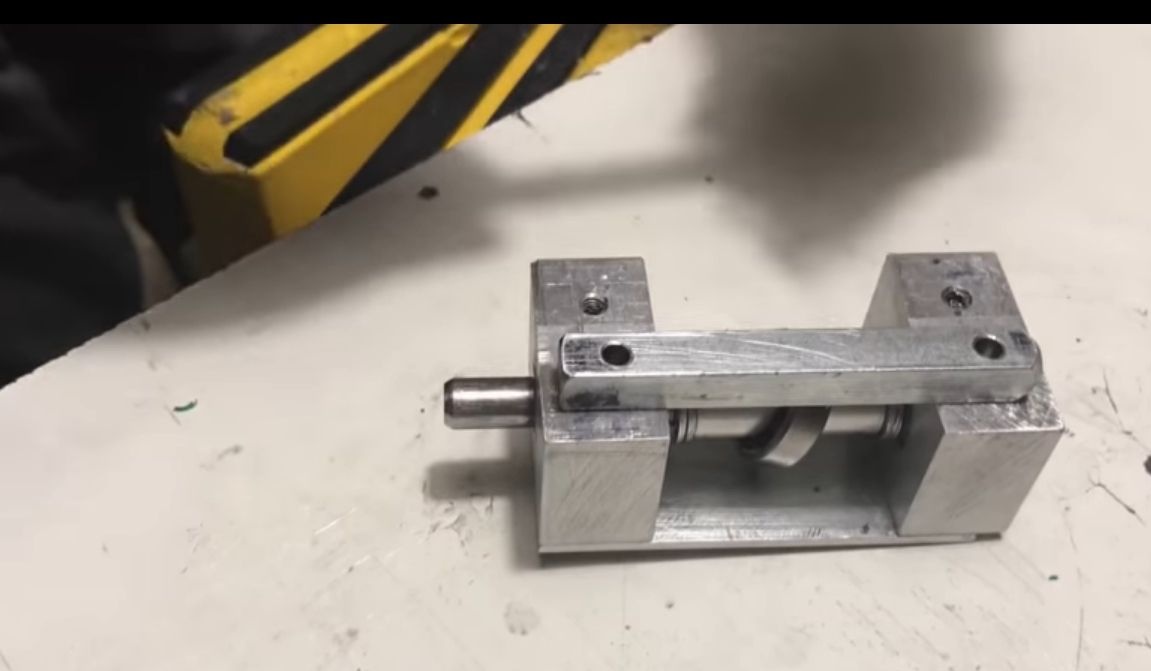
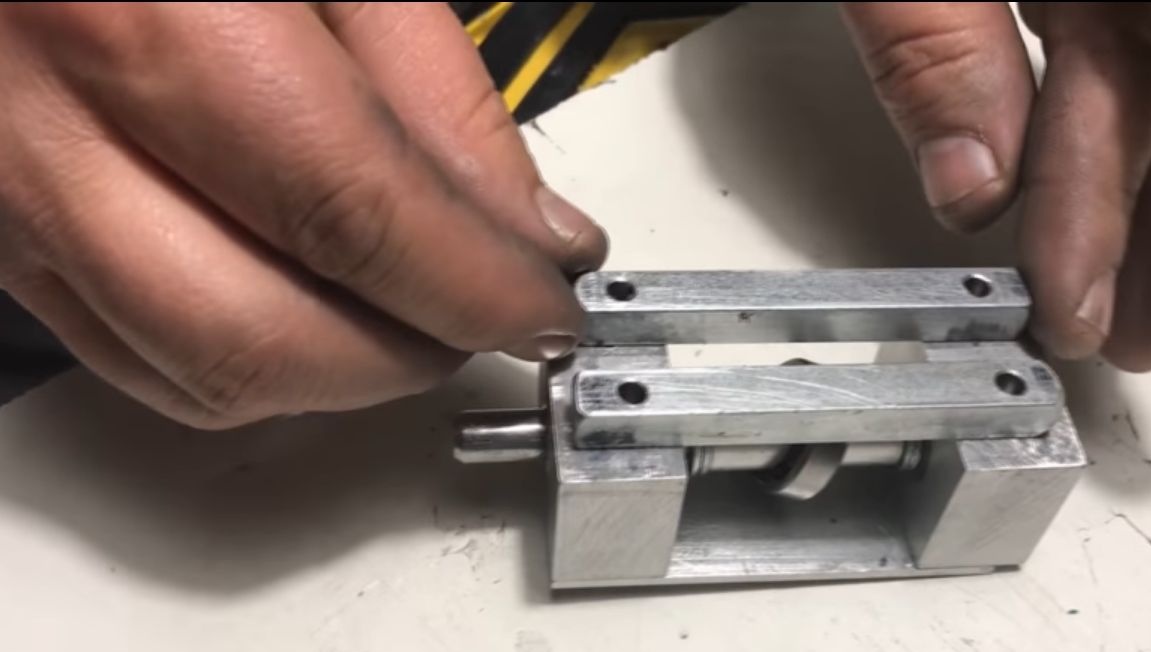
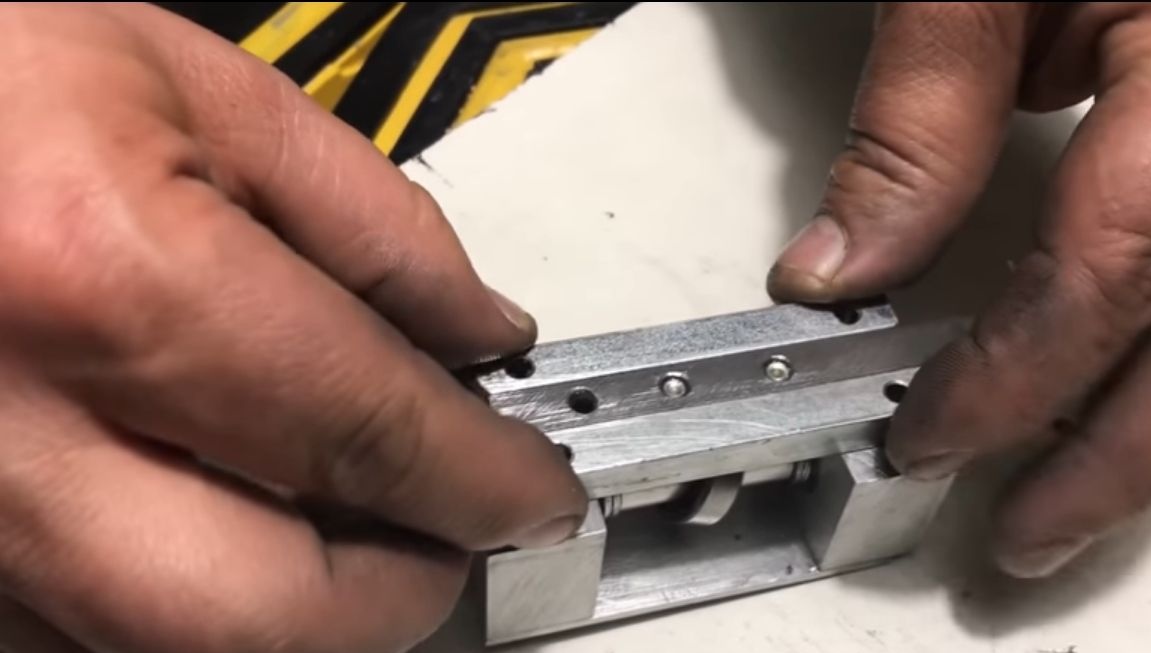

From above, this whole structure is also fixed using a plate of aluminum or steel. Here, long screws are used for fastening. Do not forget to maintain the minimum gaps between the rubbing knots. It is also recommended to lubricate friction points to reduce wear and load.
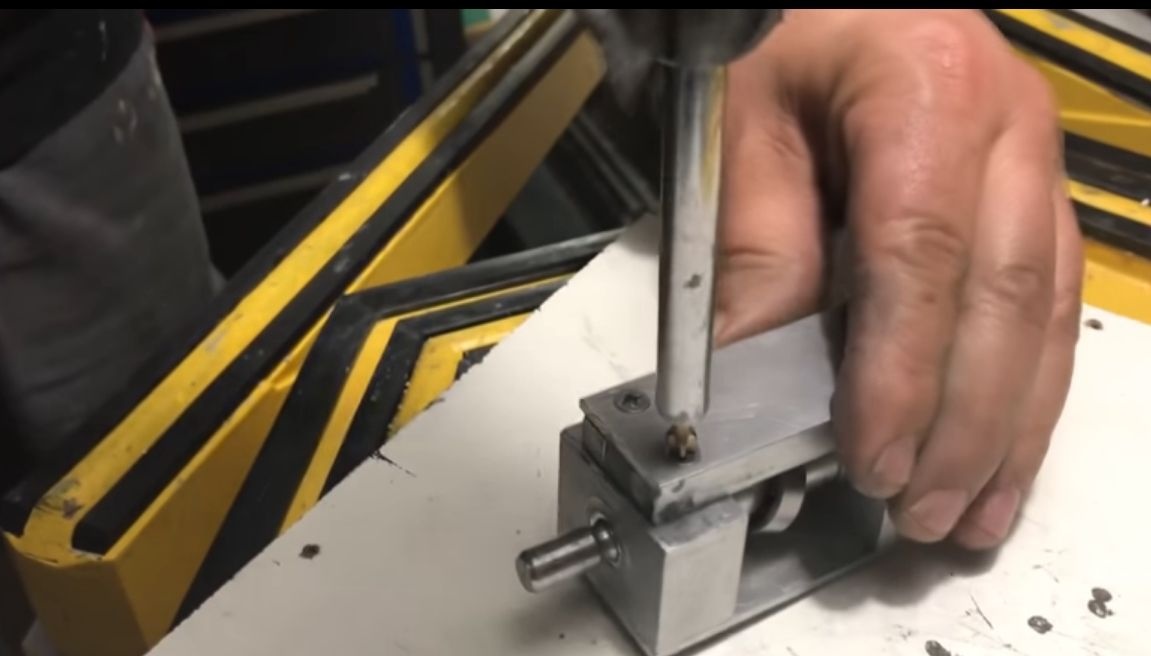
Step Six Holding head
To the end of the moving platform, the author attaches a holding head, which is needed to attach the hacksaw blade. How to make it, too, remained behind the scenes. It is made of corner and aluminum plates. The part is fastened with screws, first you need to cut the thread under them.
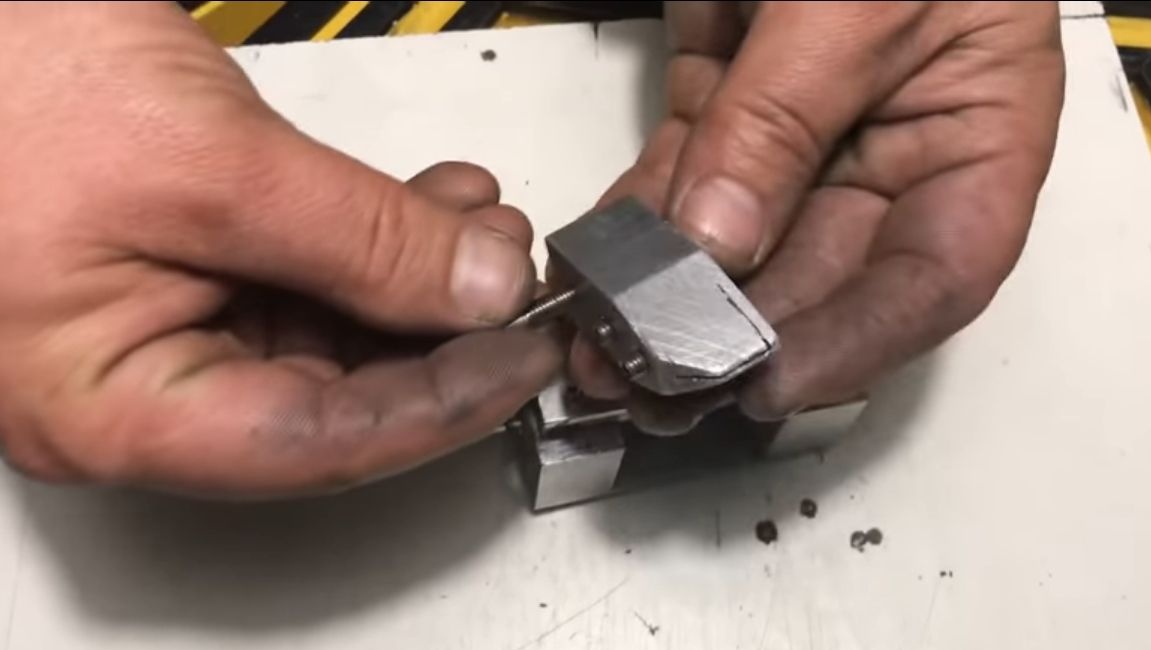

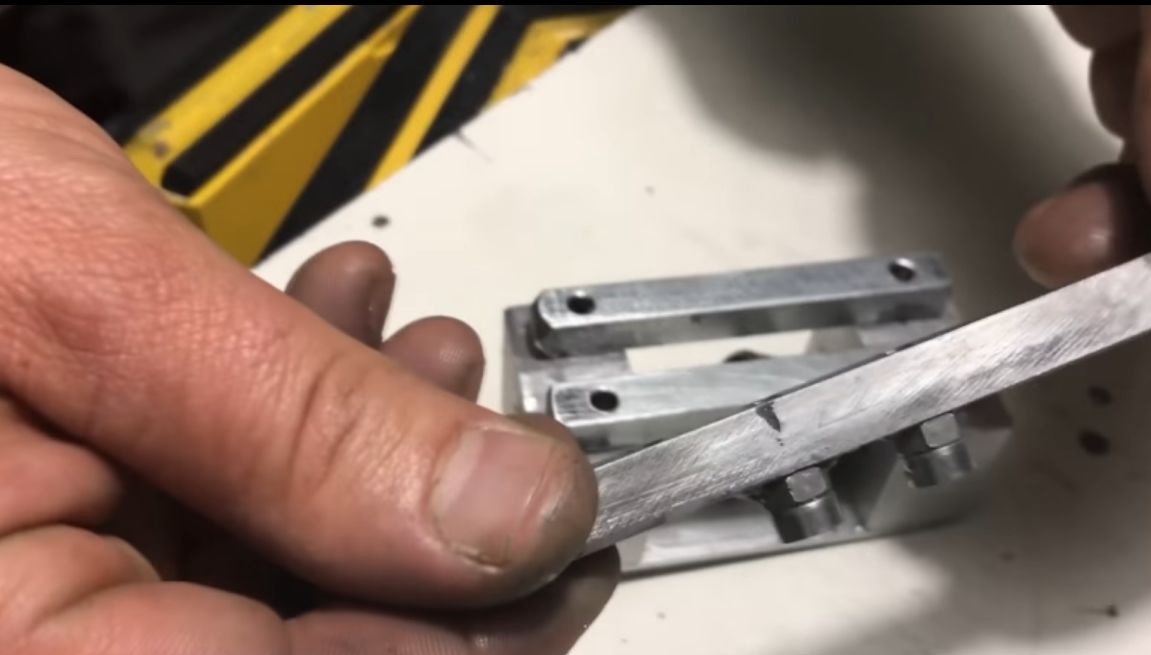
Seventh step. We establish a hacksaw cloth
There is a slot in the front of the holding head. A hacksaw blade is inserted into it. Then it is fixed with a screw.
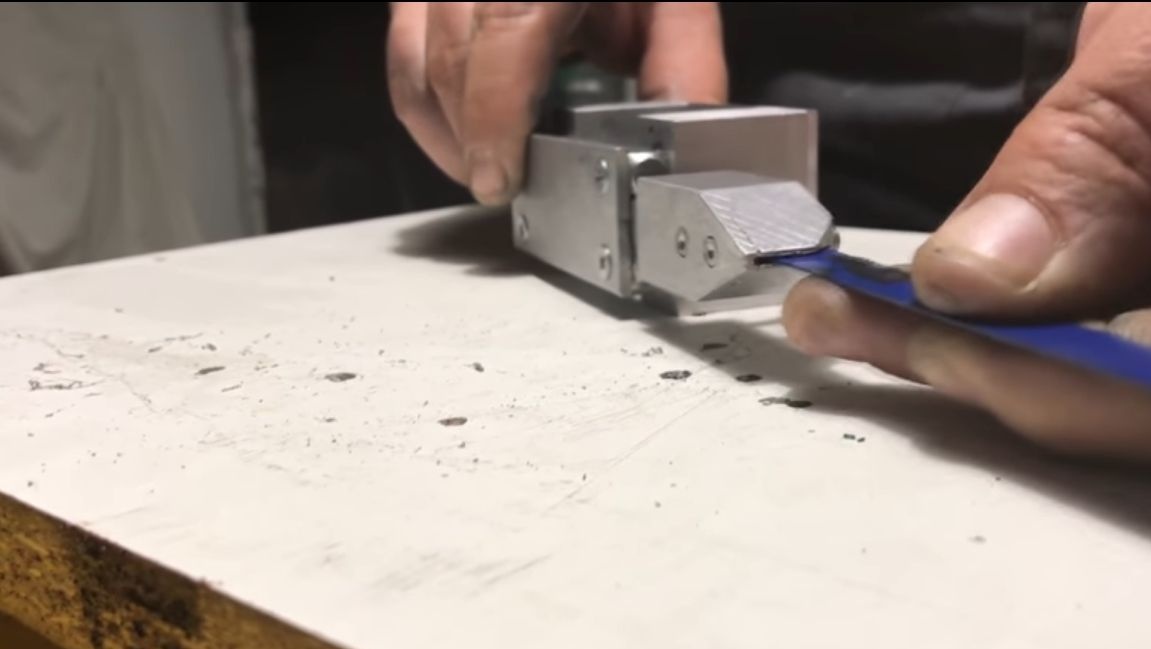

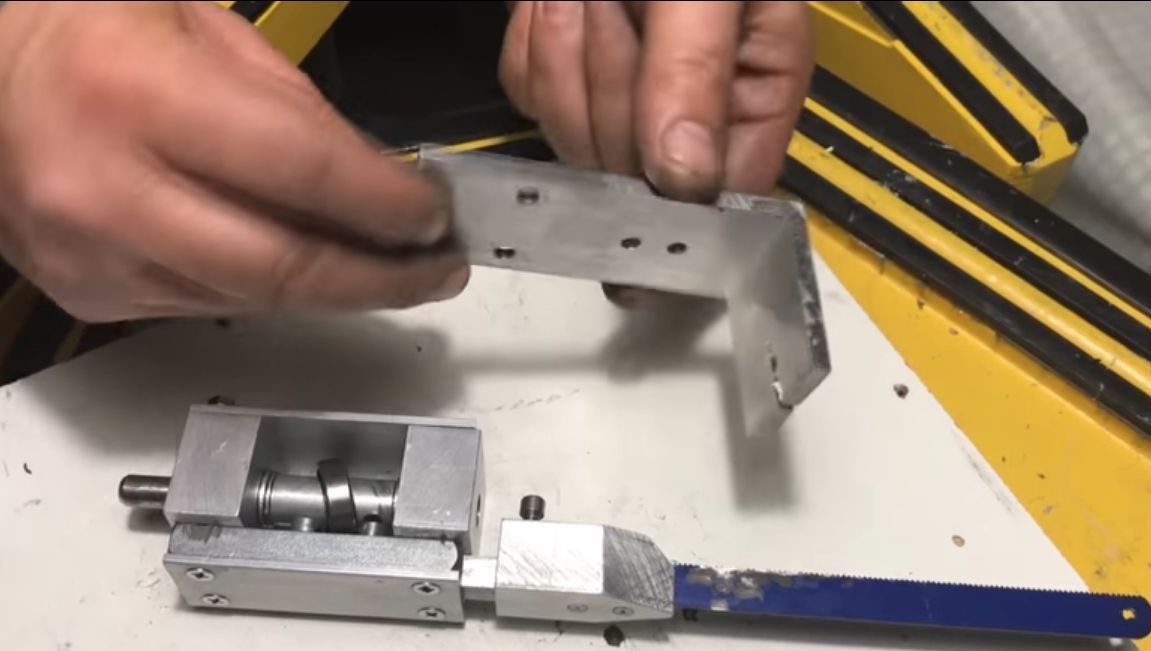
Step Eight. Protective bracket
In order for the device to be handled without problems, you will need to make a protective bracket. Its author made of an aluminum corner. We make a slot under the hacksaw blade and drill mounting holes. Tighten the corner with the screws.

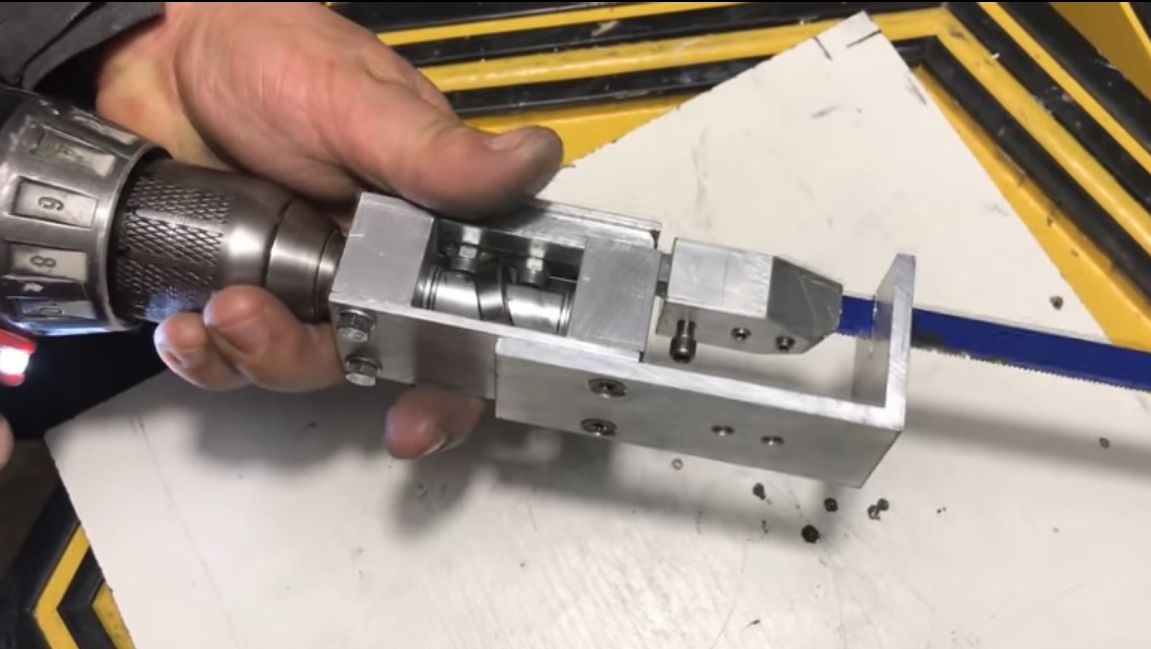
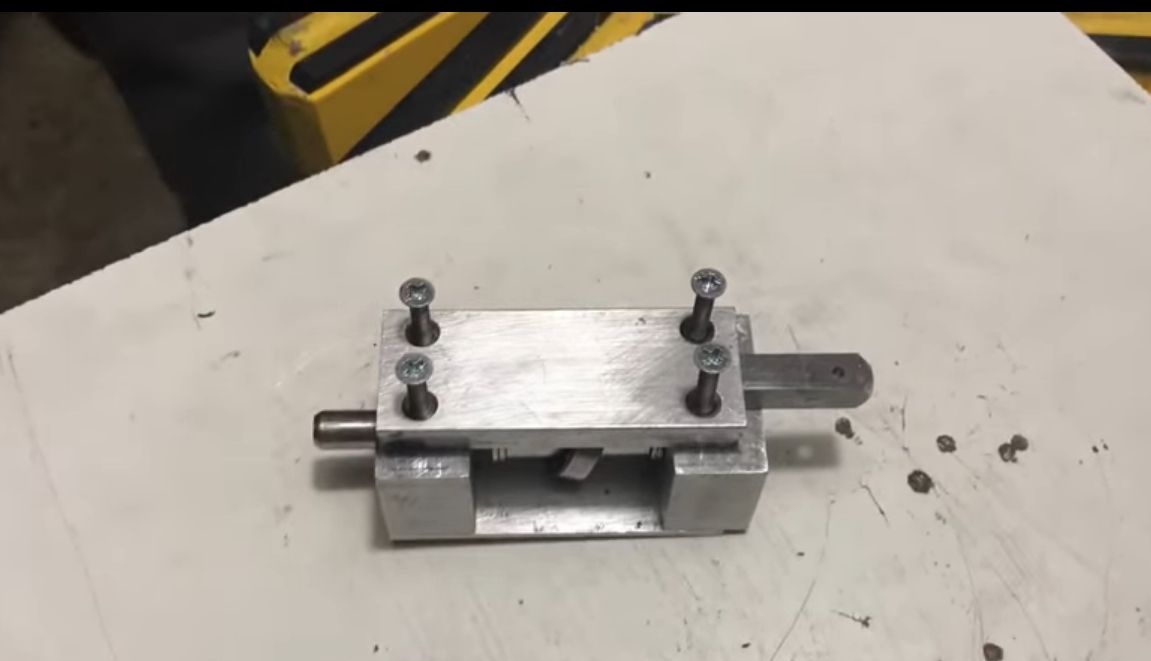
That's all, the nozzle is ready. Clamp the working shaft in the drill chuck and you can begin the tests. Good luck