
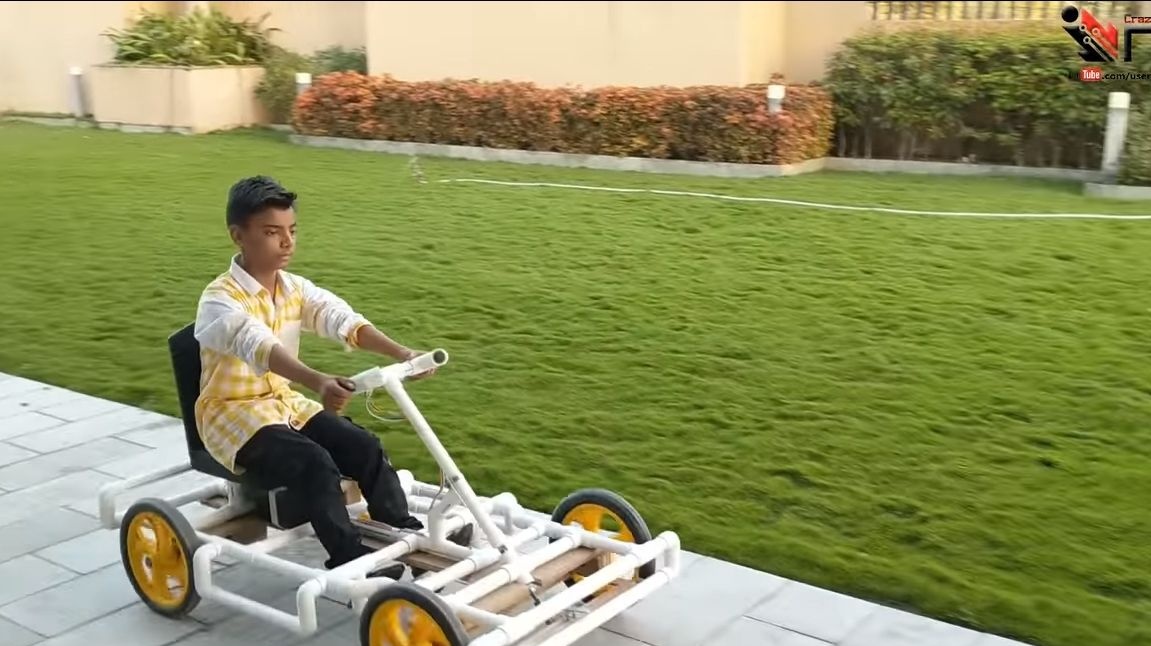
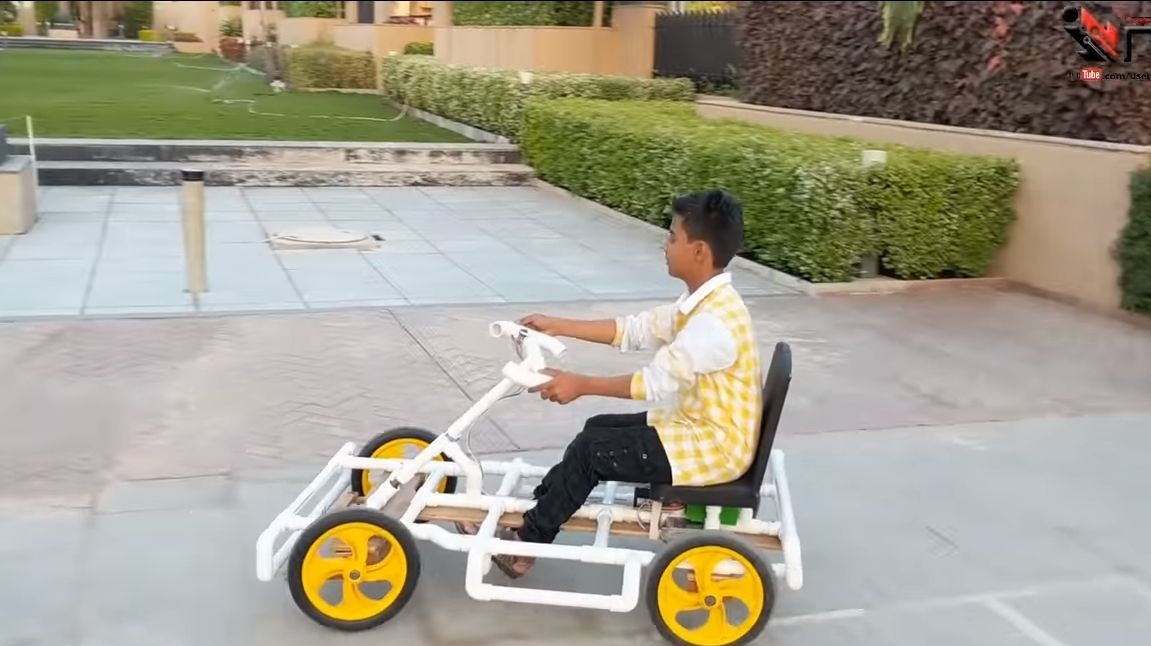
I present to your attention an interesting card from PVC pipes and plywood. Everything is going to be quite simple, but the device looks quite stylish. This car will be a great gift for your child. And you can do car together than instill in the child the talent of a master.
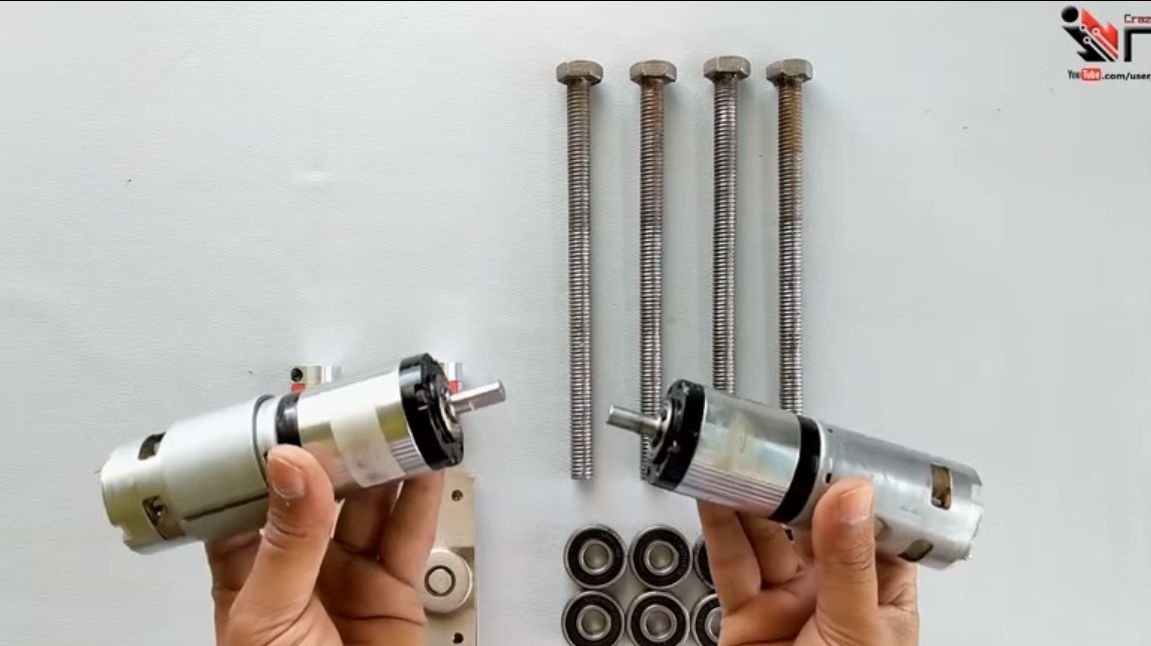
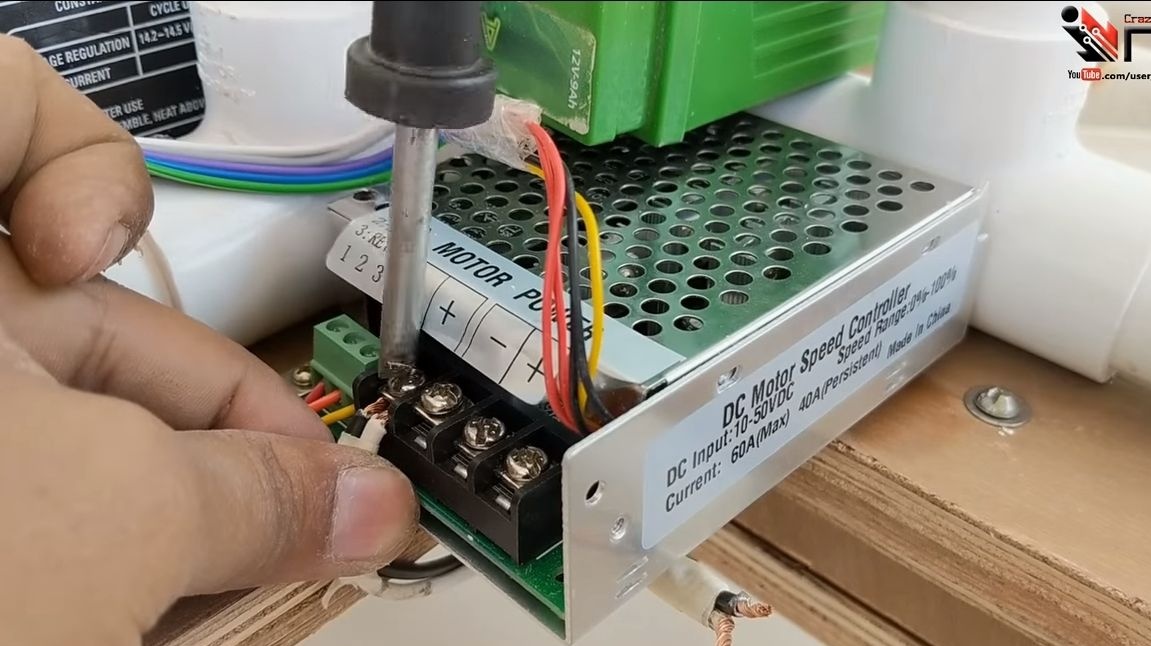
The machine is driven by two engines, one for each wheel. It was not possible to understand exactly what these engines are, they are visually similar to 775, most likely they are 24V. The engines are equipped with reduction gears, which allows you to immediately get a good torque for driving on the map. Engines are connected through the controller, so you can use the knob to set the desired ride speed.
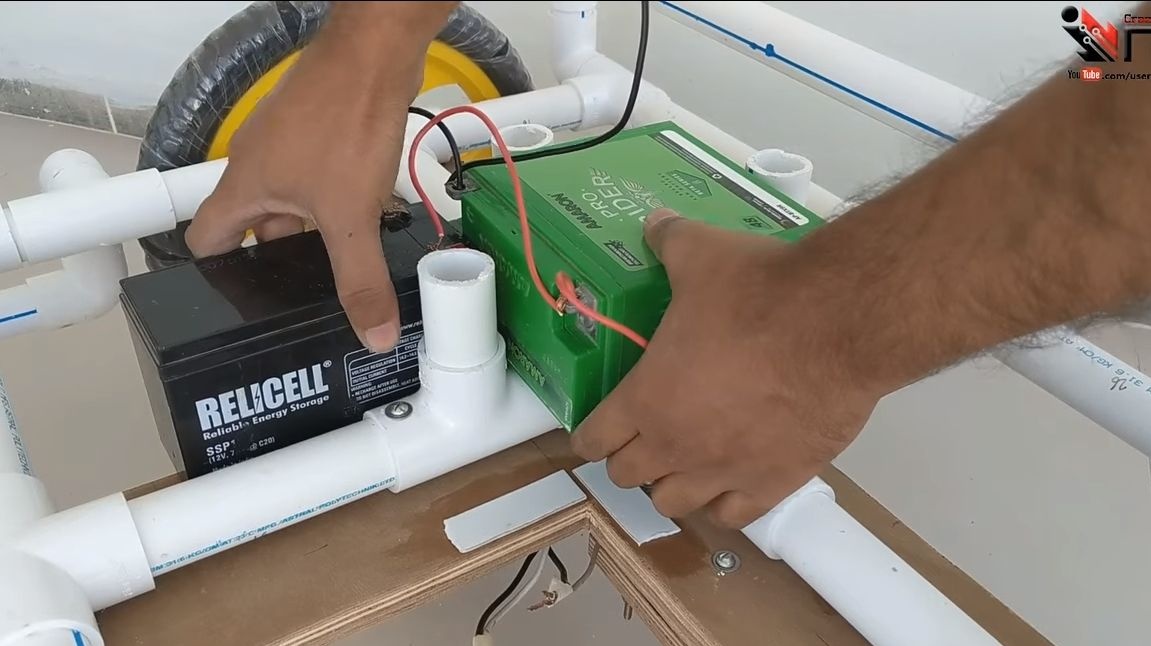
The power source are two 12V batteries for powering the 24V motor. So, let's start making the card!
Materials and tools used by the author:
Material List:
- ;
- reducer adapters;
- controller for the engine (up to 60A);
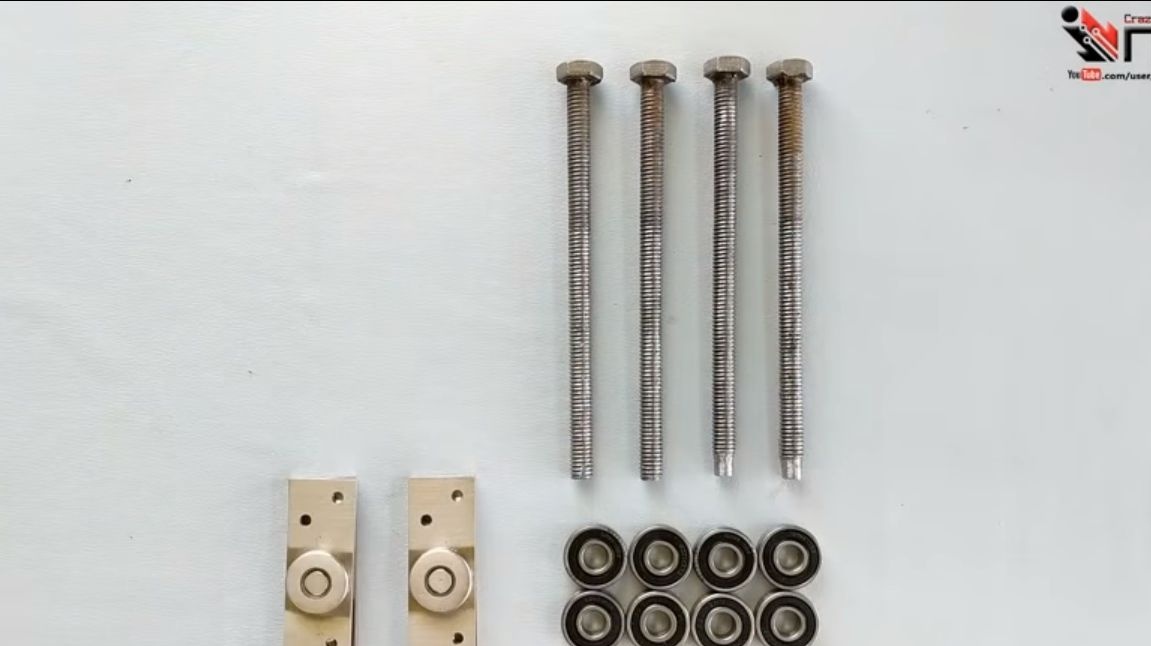
- 4 bolts + 8 bearings (for wheel axles);
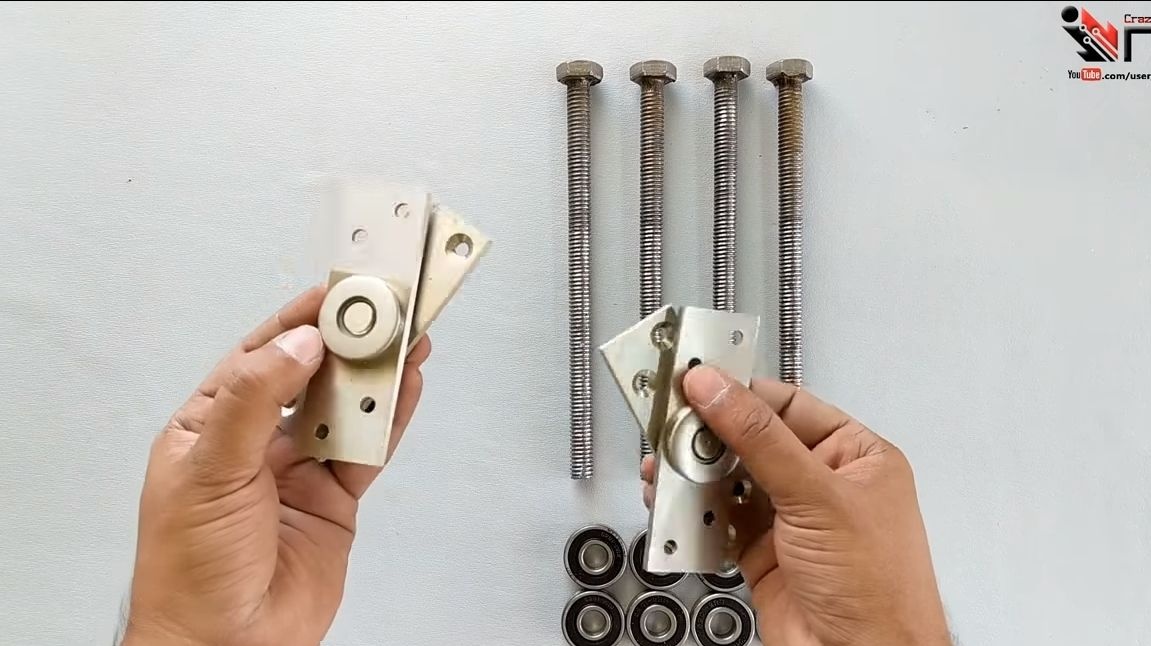
- two furniture hinges or something similar (for the steering);
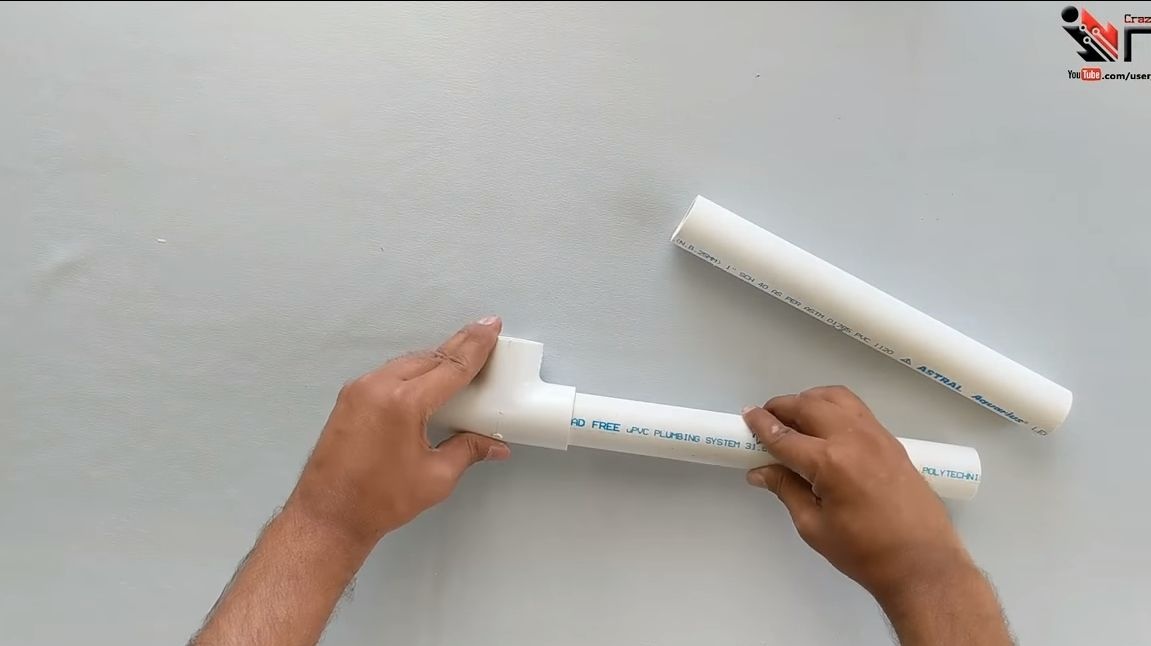
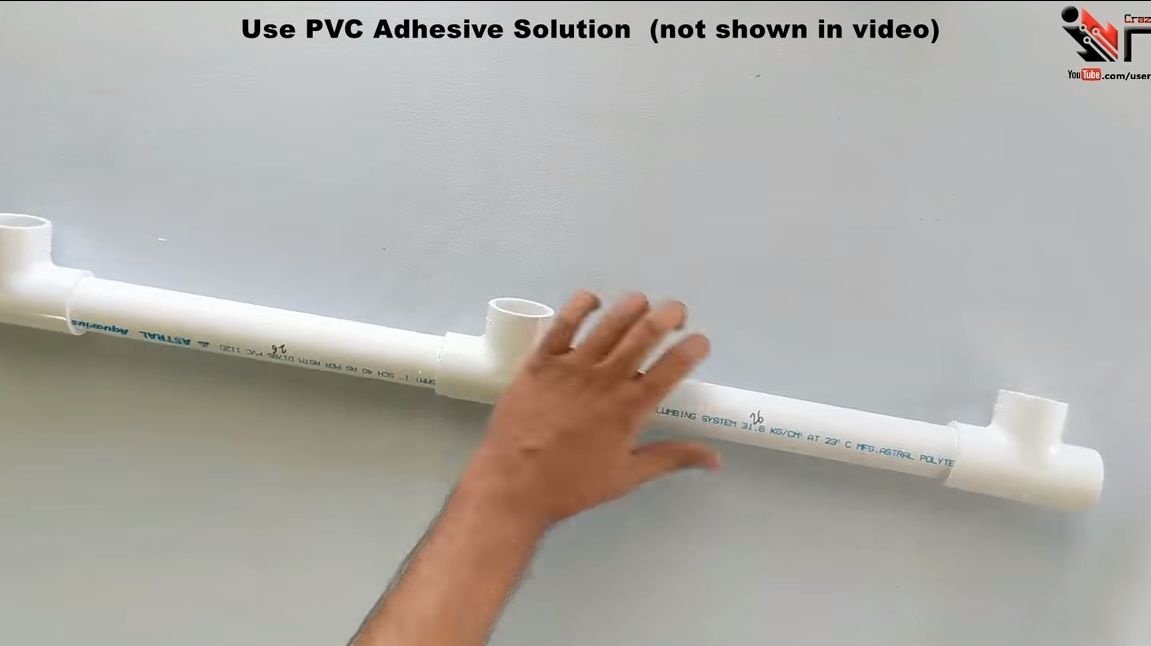
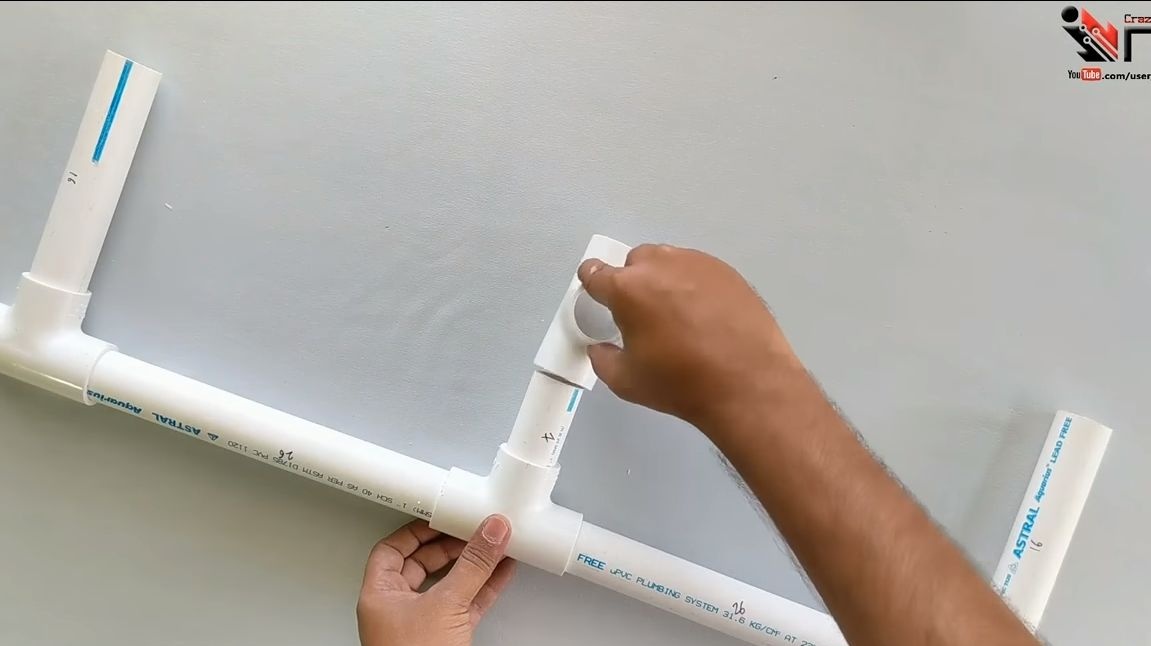
- PVC pipes, tees, crosses, etc. (see the photo);
- 12V batteries;
- wires;
- plywood;
- 4 wheels;
- self-tapping screws, bolts, nuts, etc .;
- glue for wood and superglue.
Tool List:
- drilling machine;
- screwdriver;
- spanners;
- a hacksaw or other pipe cutting tool;
- jigsaw;
- clamps.
Card manufacturing process:
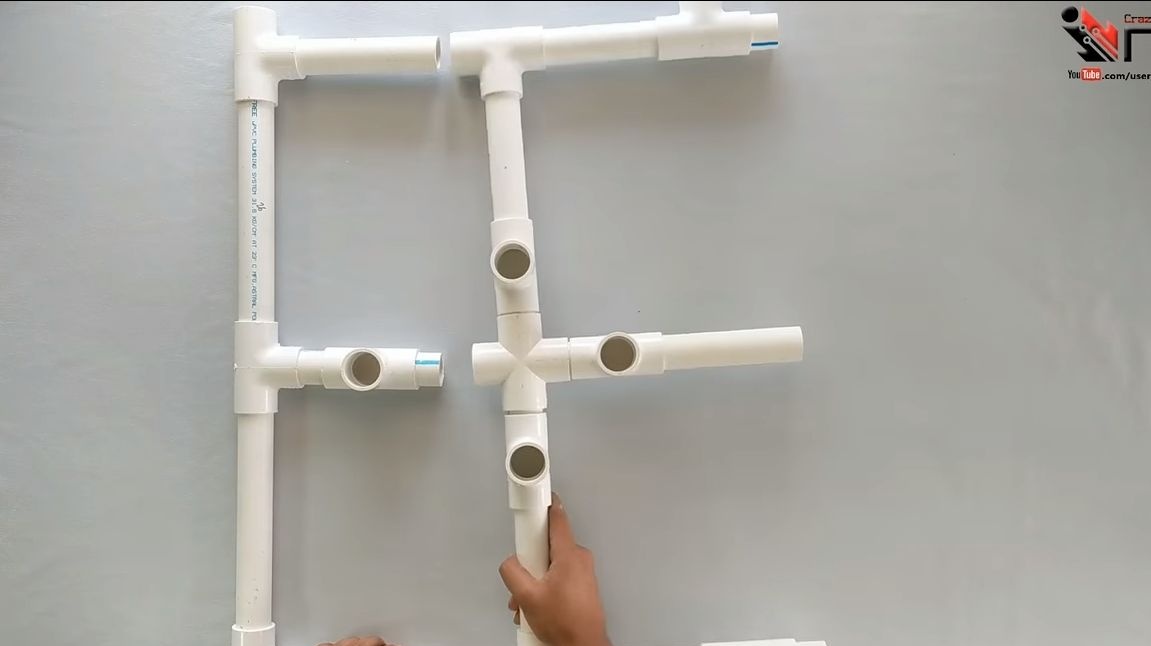
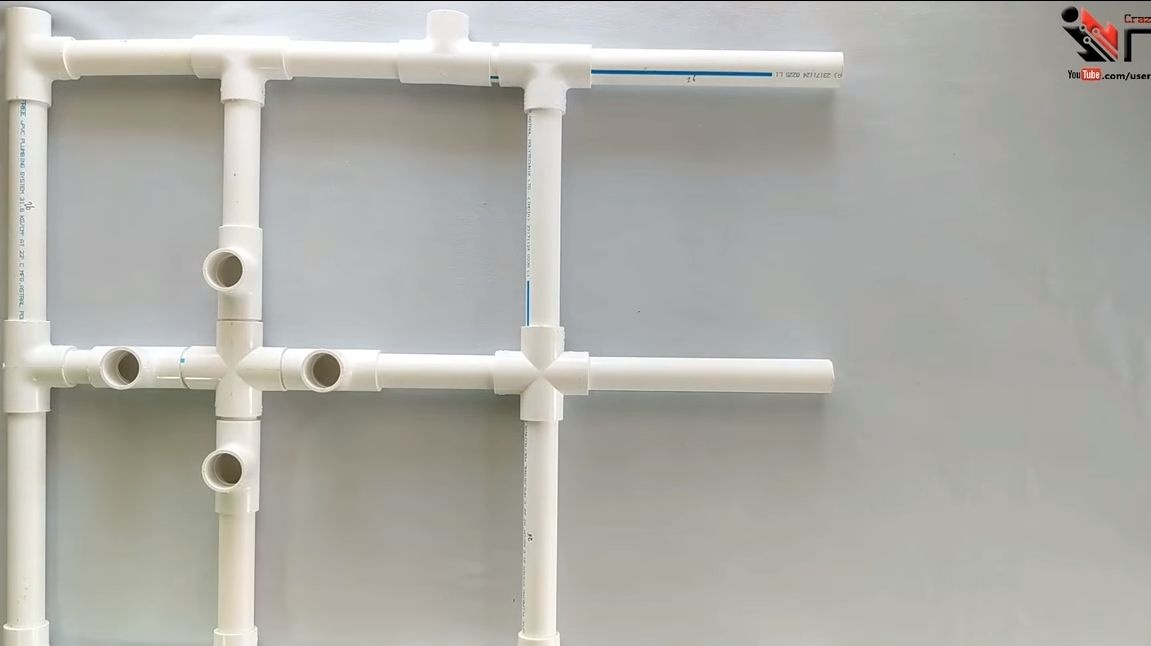
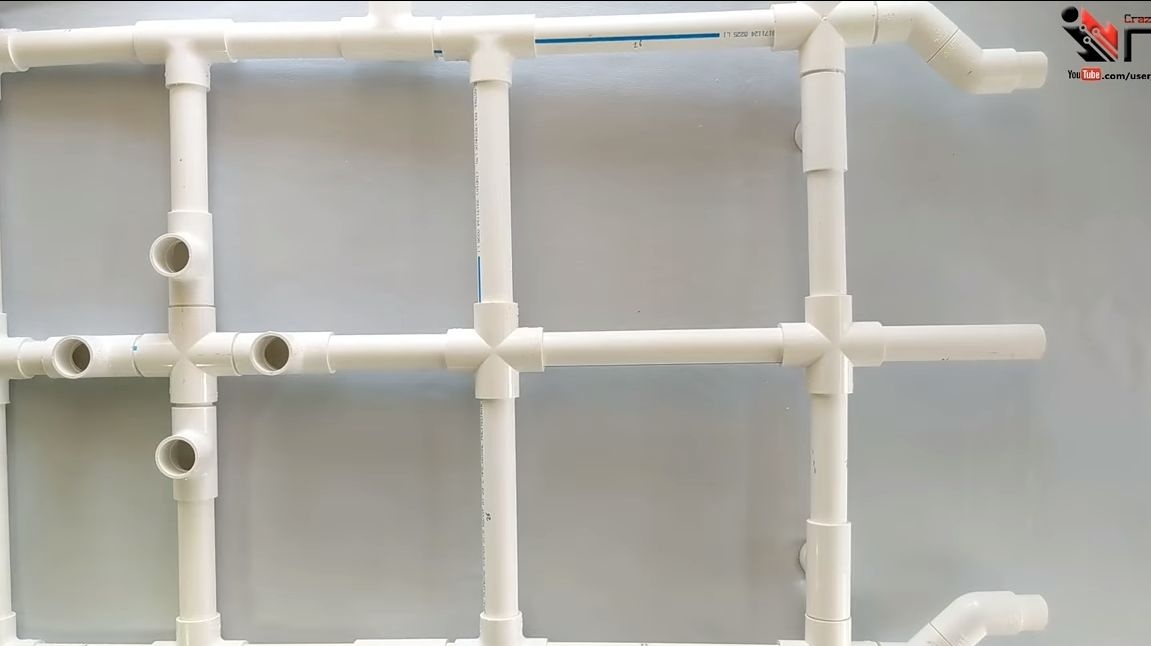
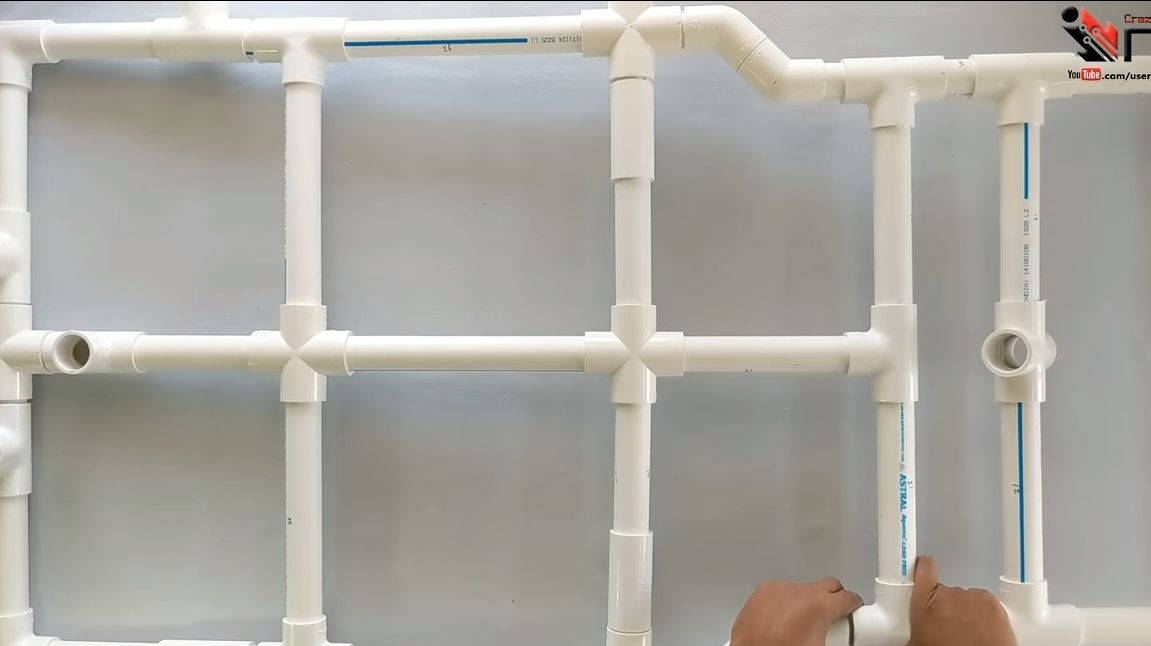
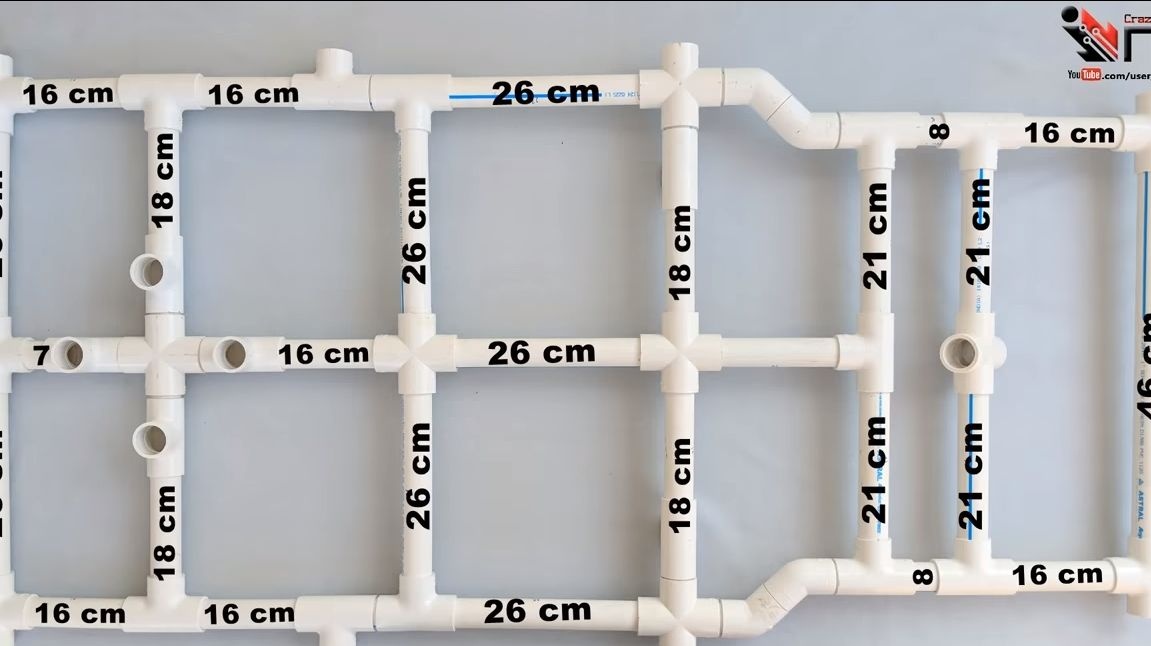
Step one. Body assembly
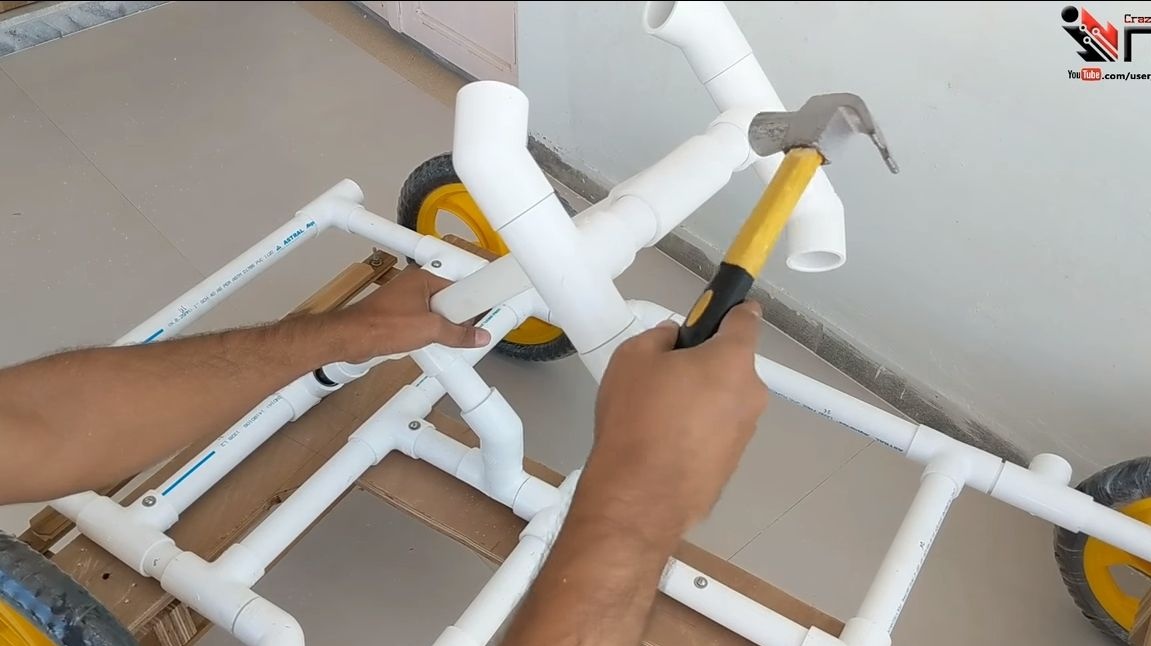
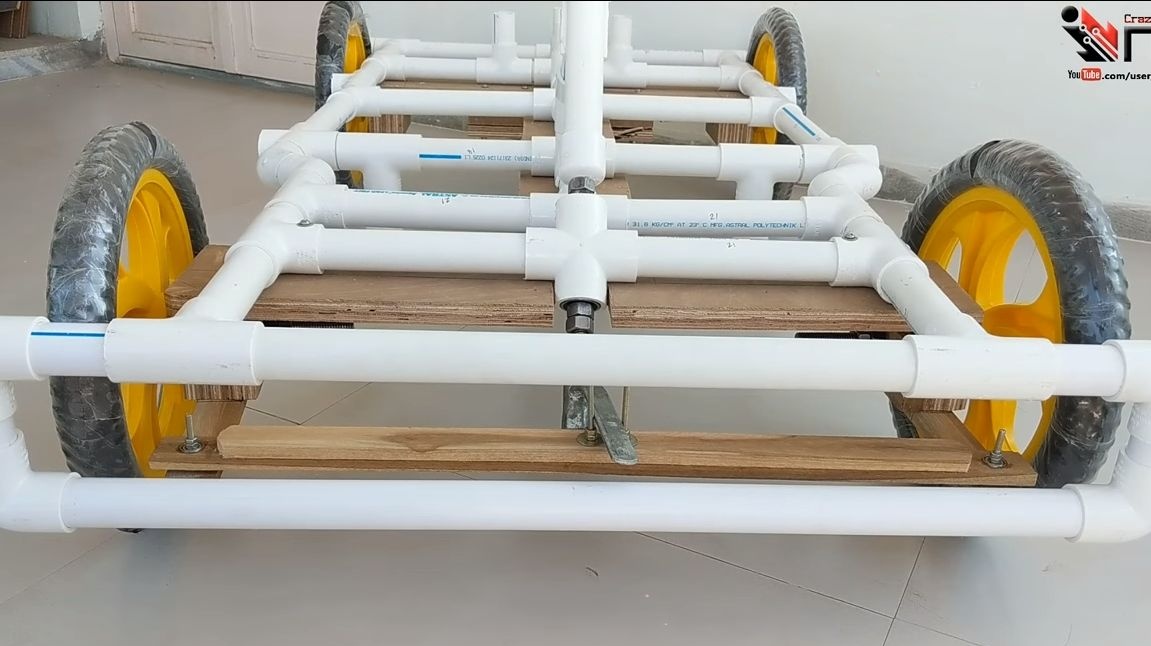
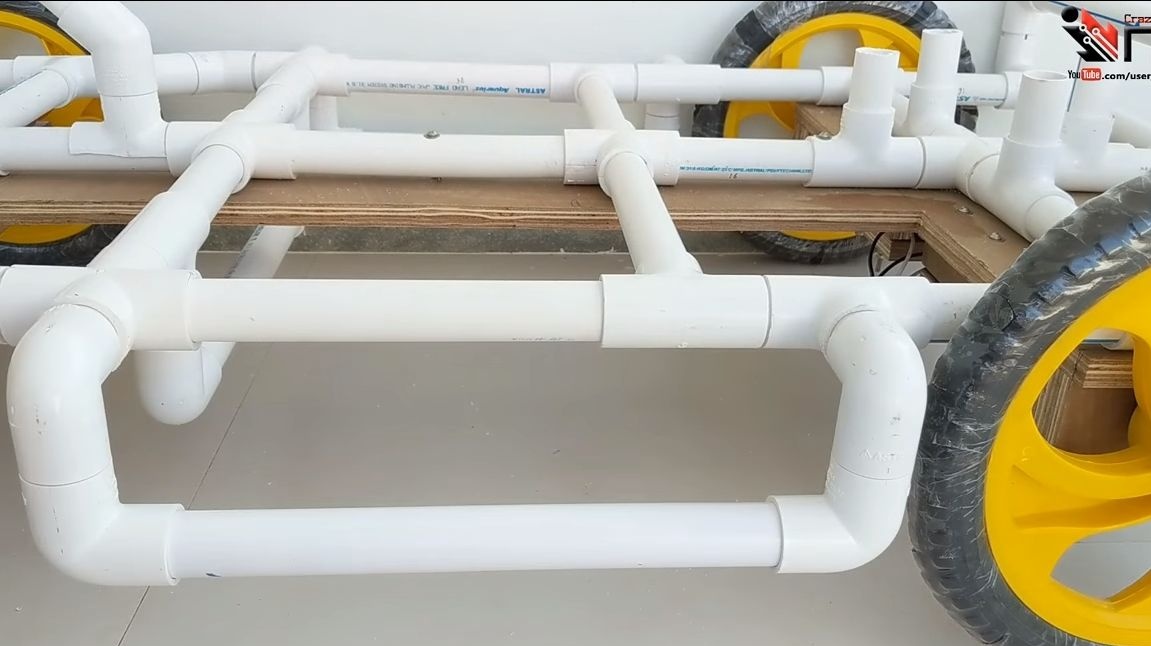
"Body", if you can call it that, is made of PVC. That's all, just nothing special to describe. How everything is done can be seen in the photo. Here you can see all the necessary components and sizes. All components can be assembled with glue or screws so that everything is reliable.
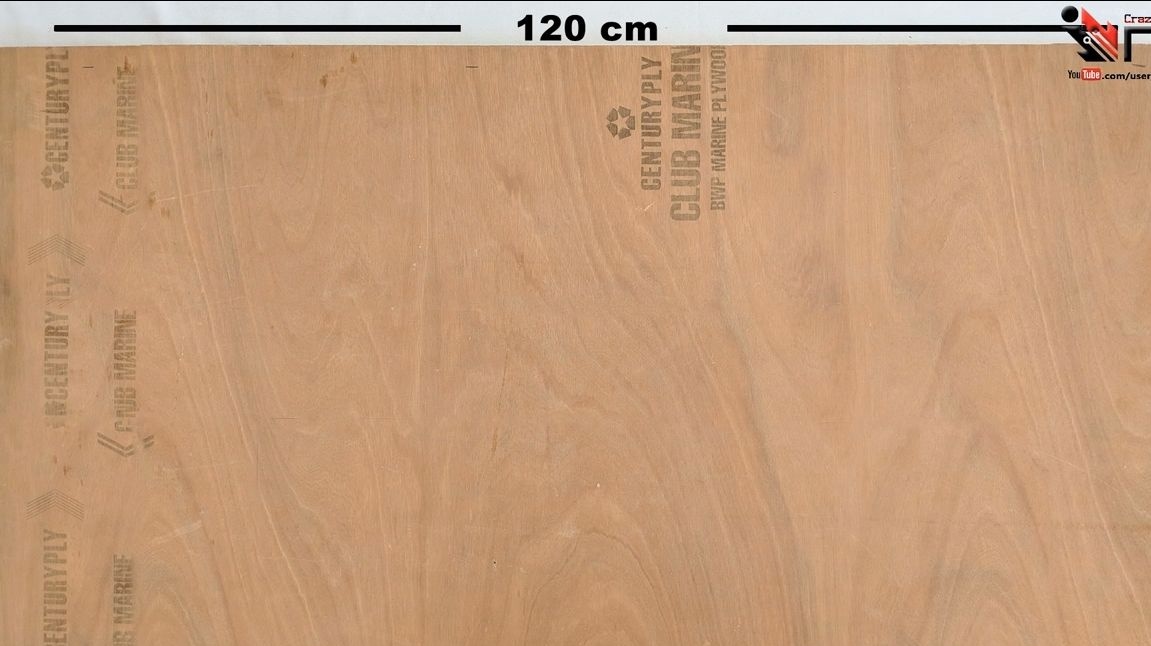
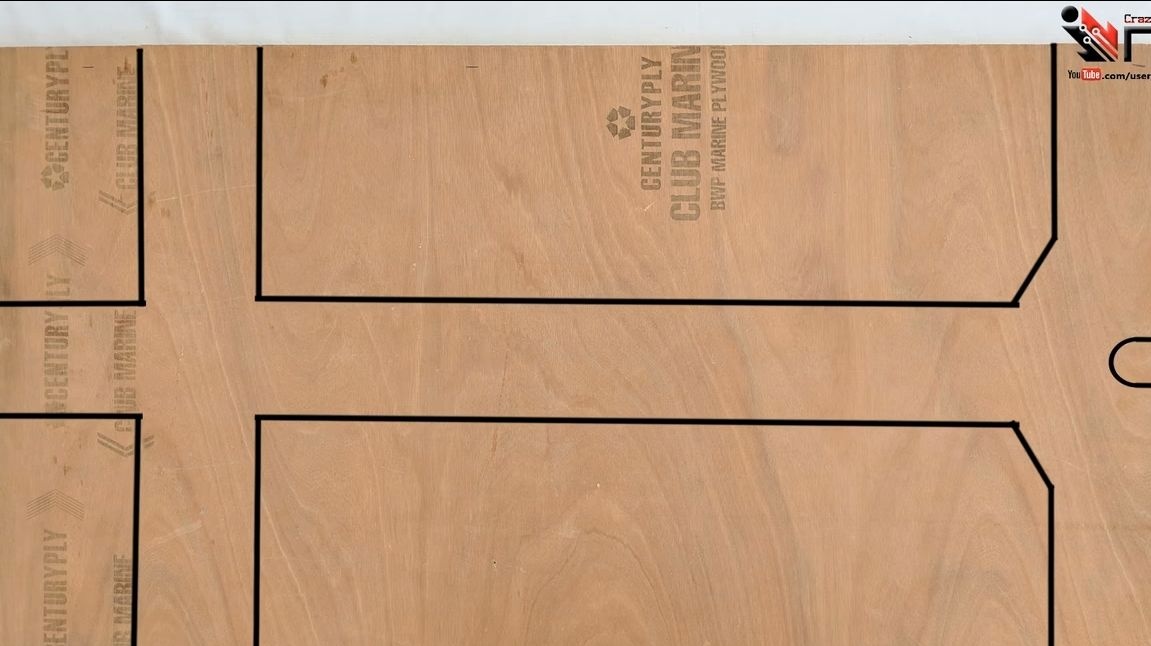
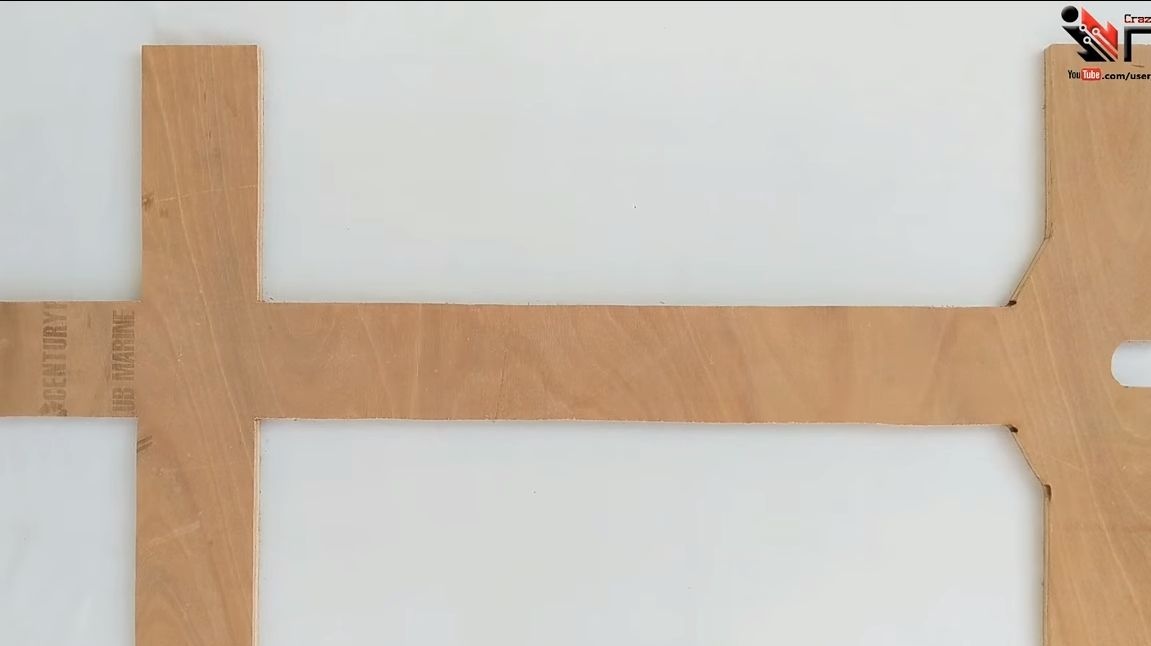
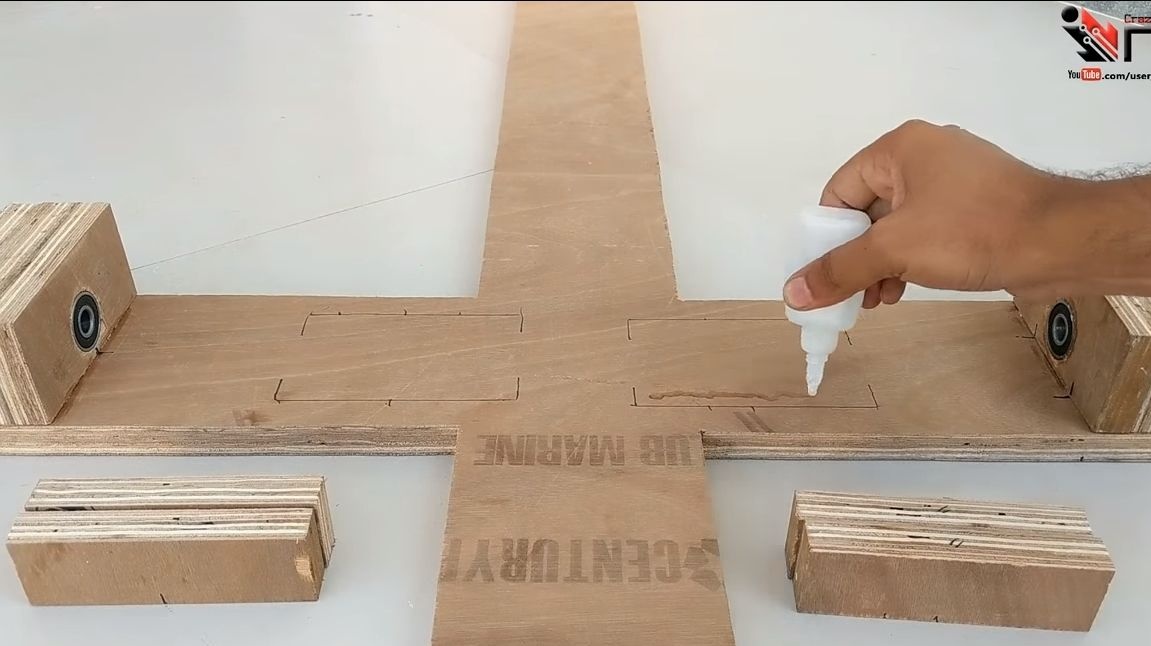
Step Two Frame manufacturing
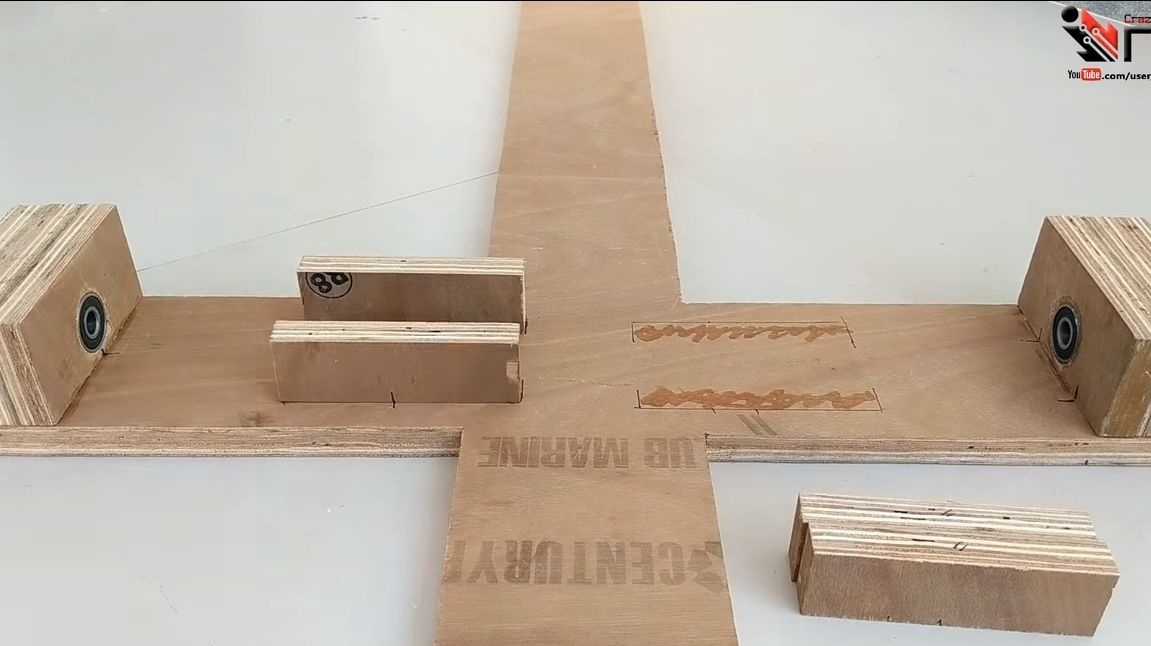
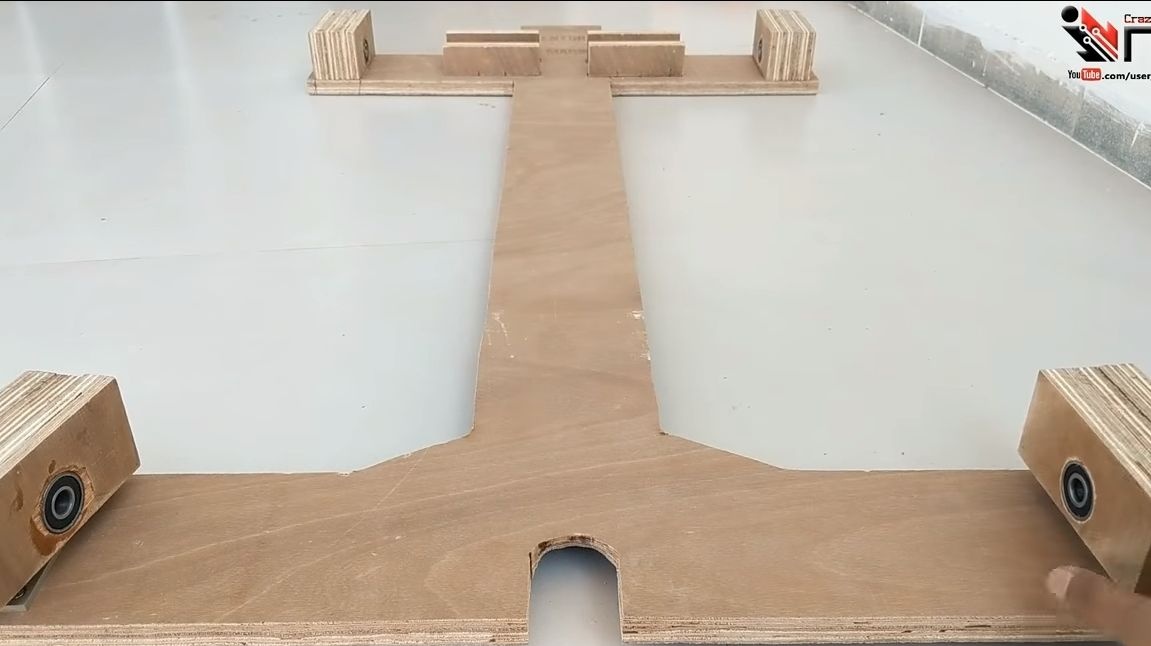
We need a strong frame, its author decided to make plywood. We take a sheet of plywood and mark it up as the author in the photo. The plywood sheet should be 120x64 cm in size. The visually cut figure resembles a cross mounted on a tombstone. The easiest way to cut the frame will be with a jigsaw.
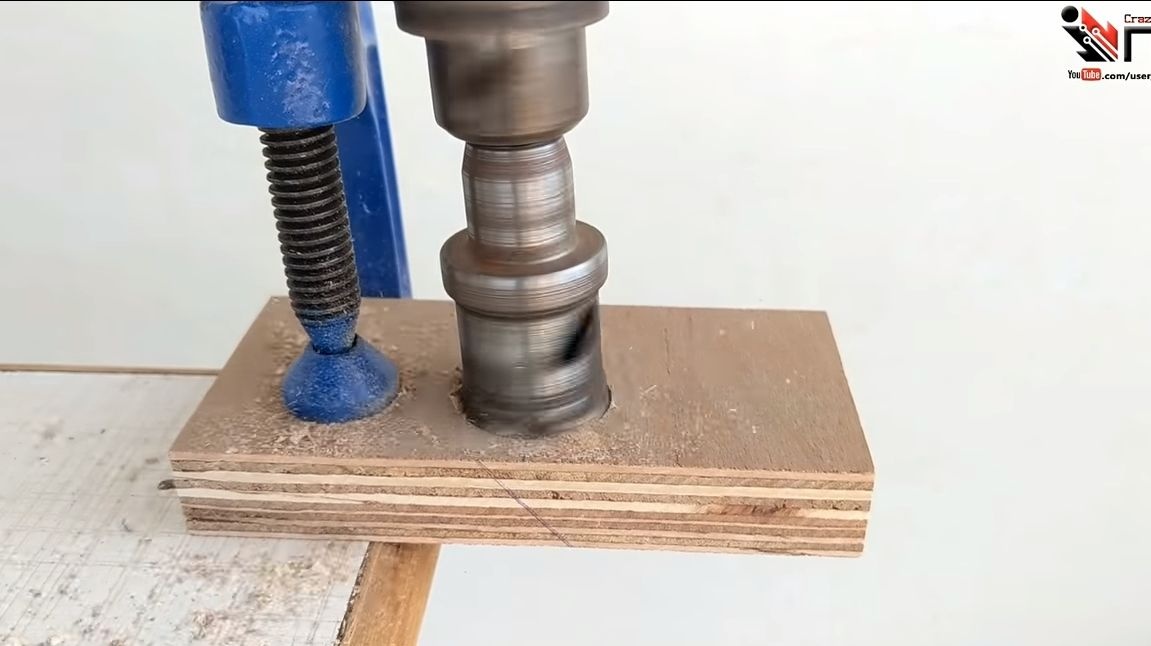
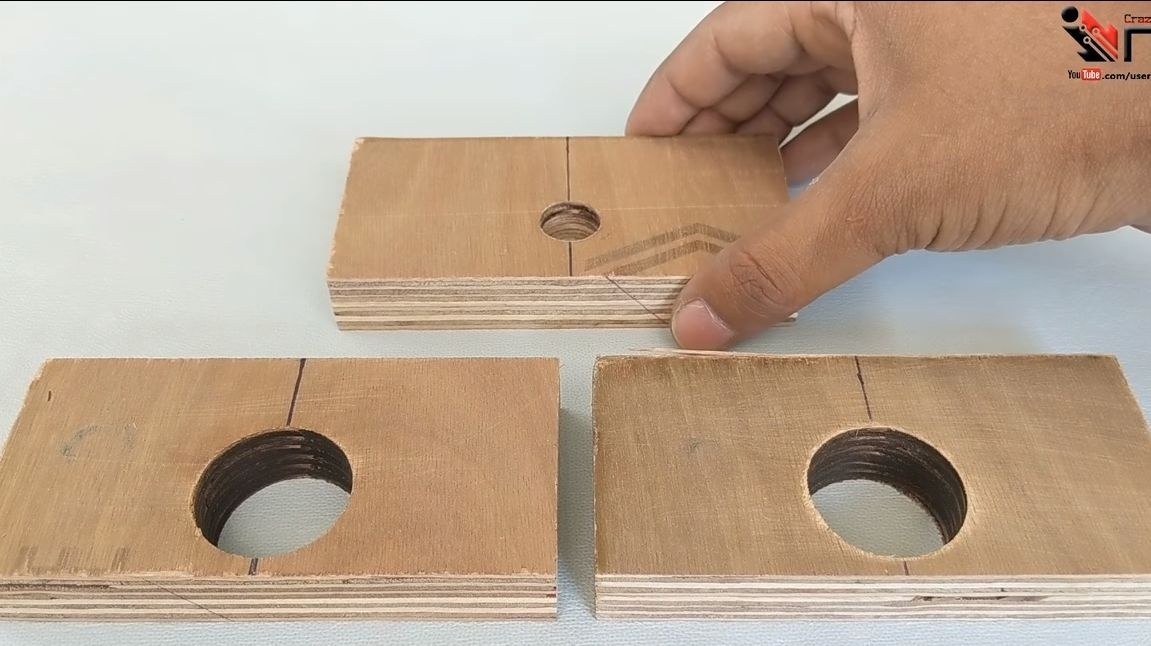
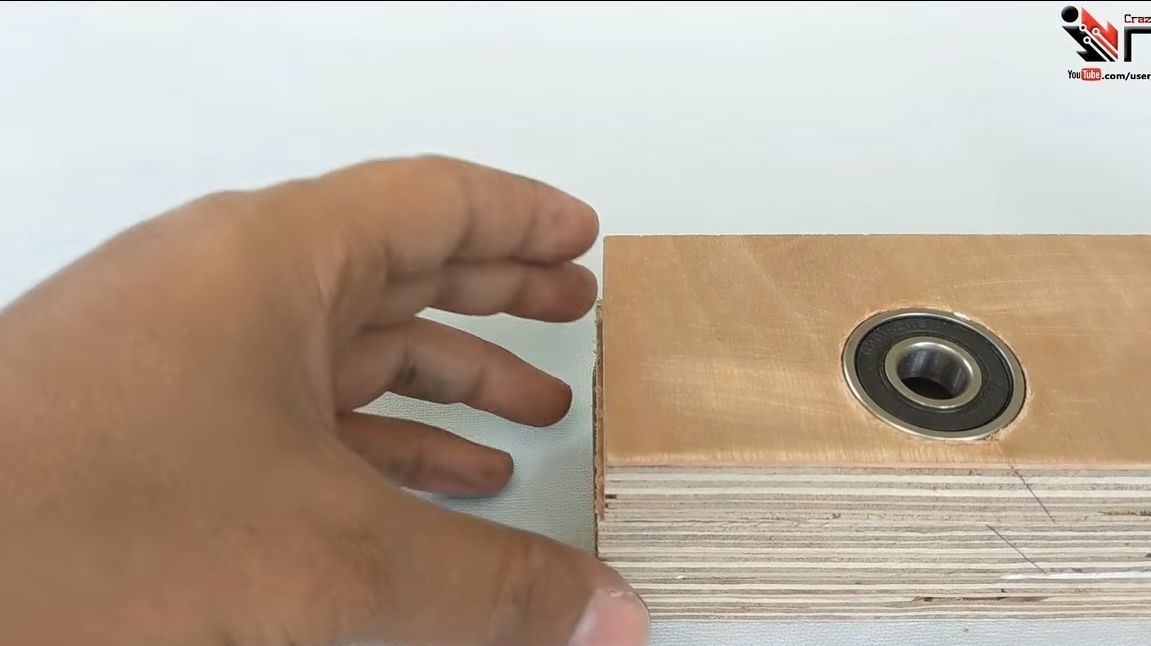
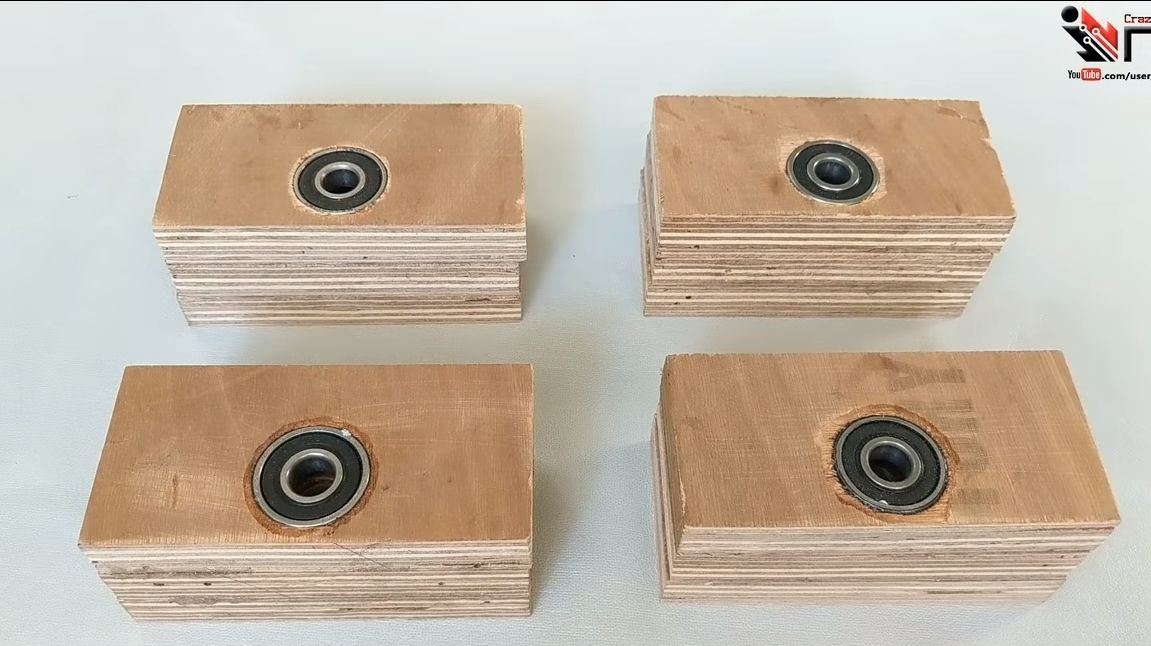
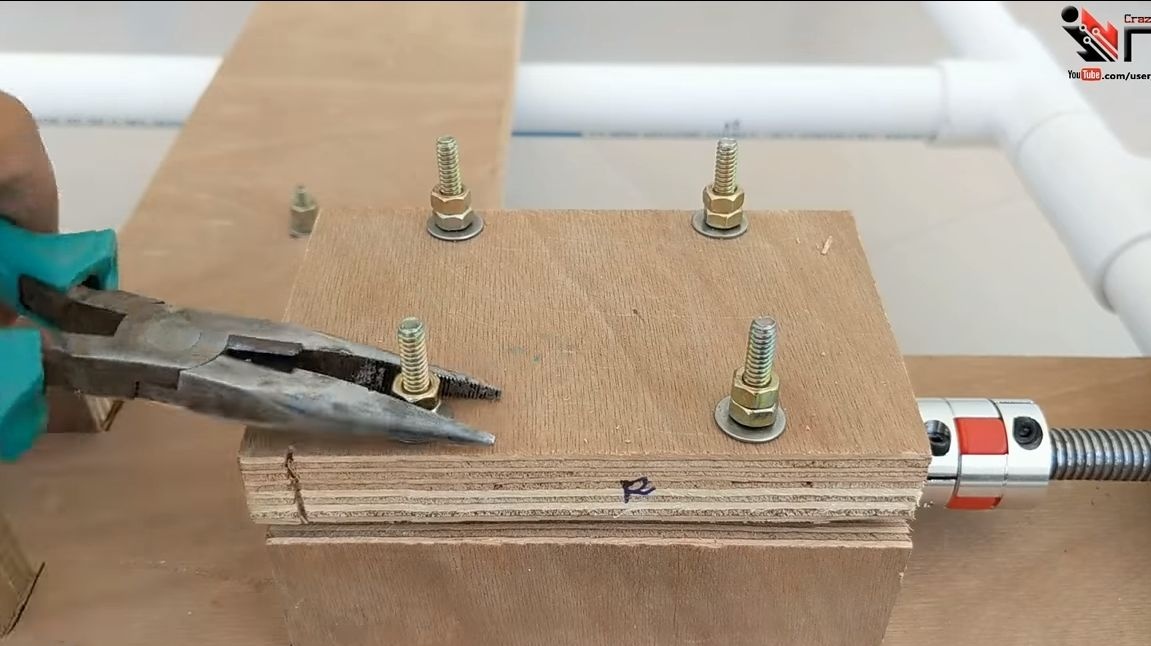
Step ThreeProduction of blocks with bearings
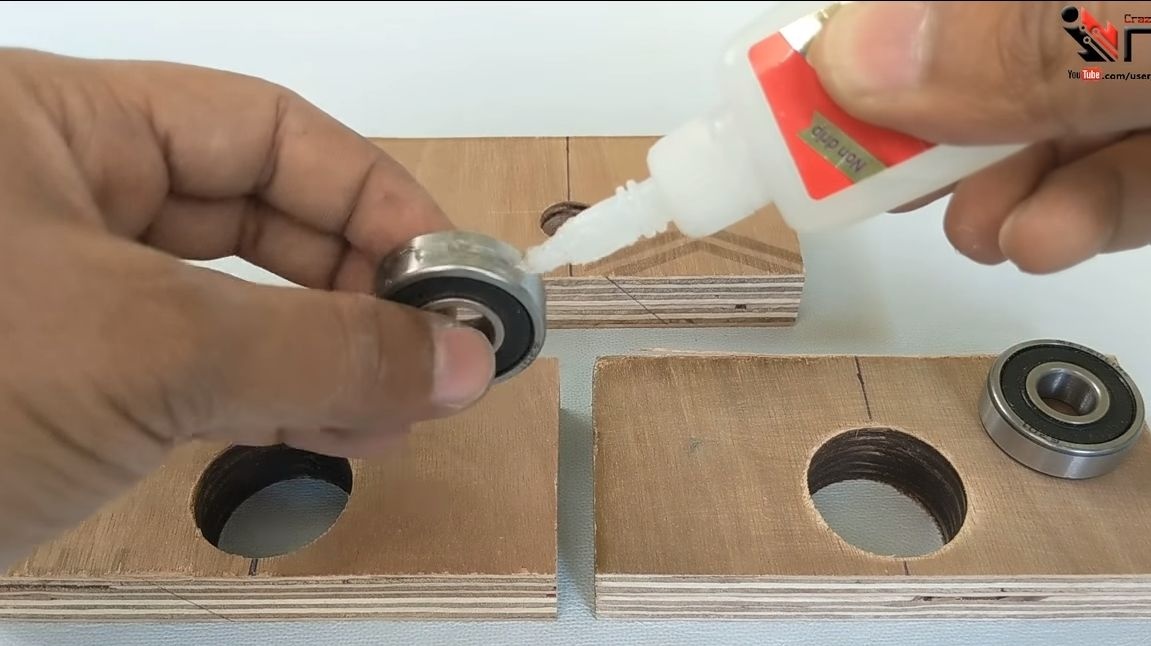
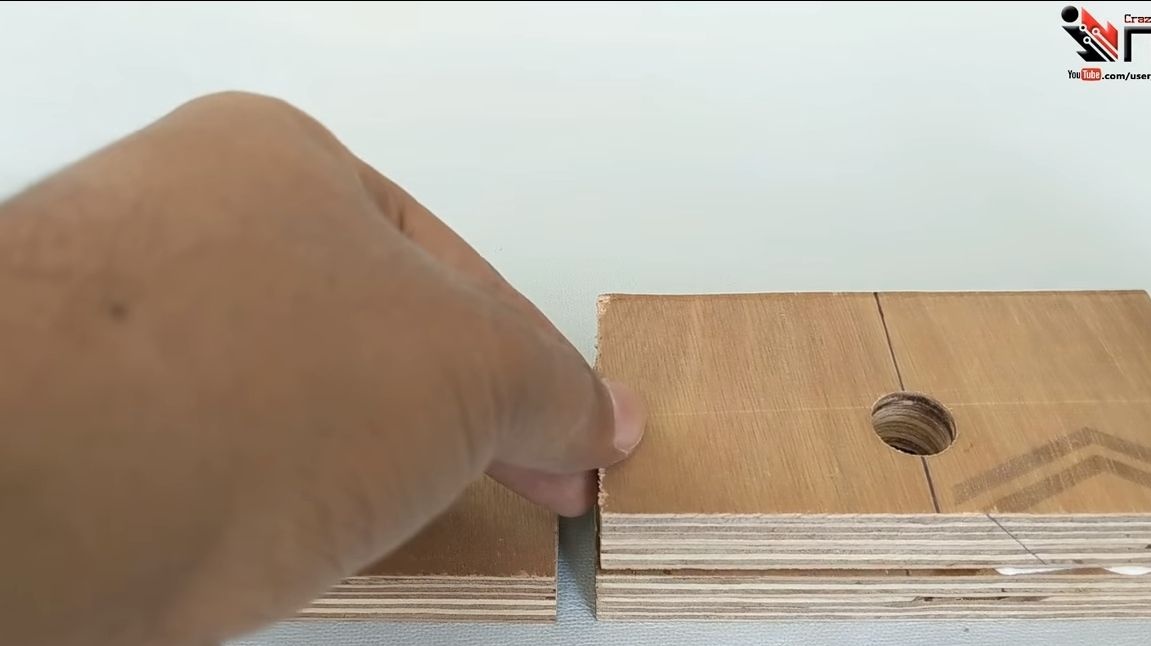
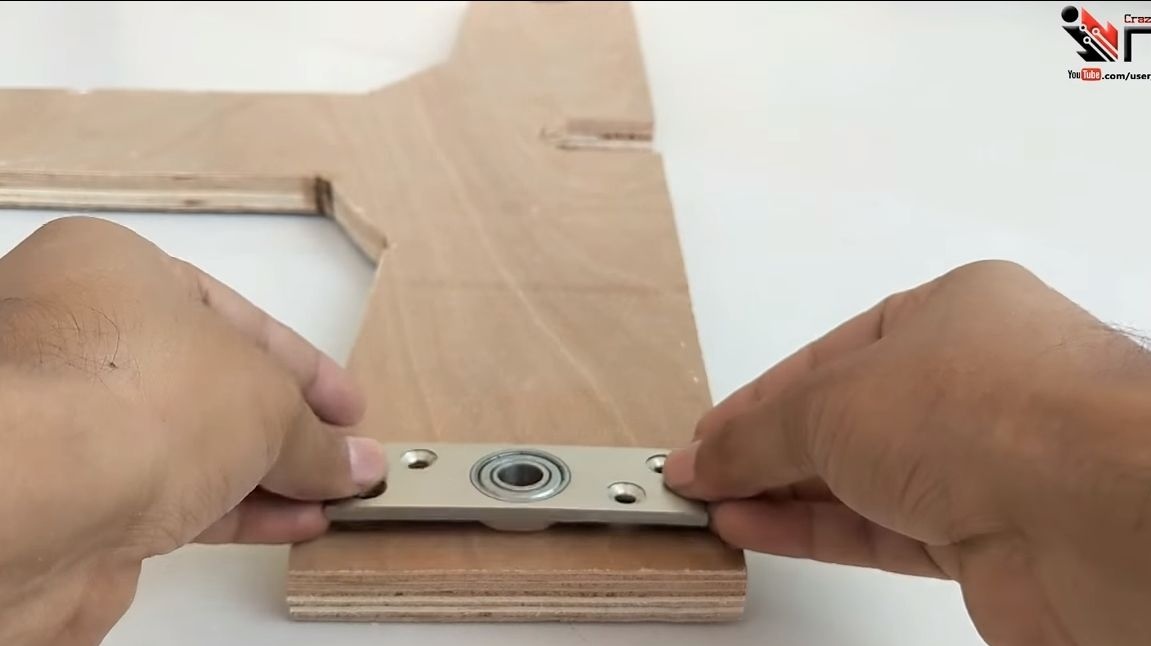
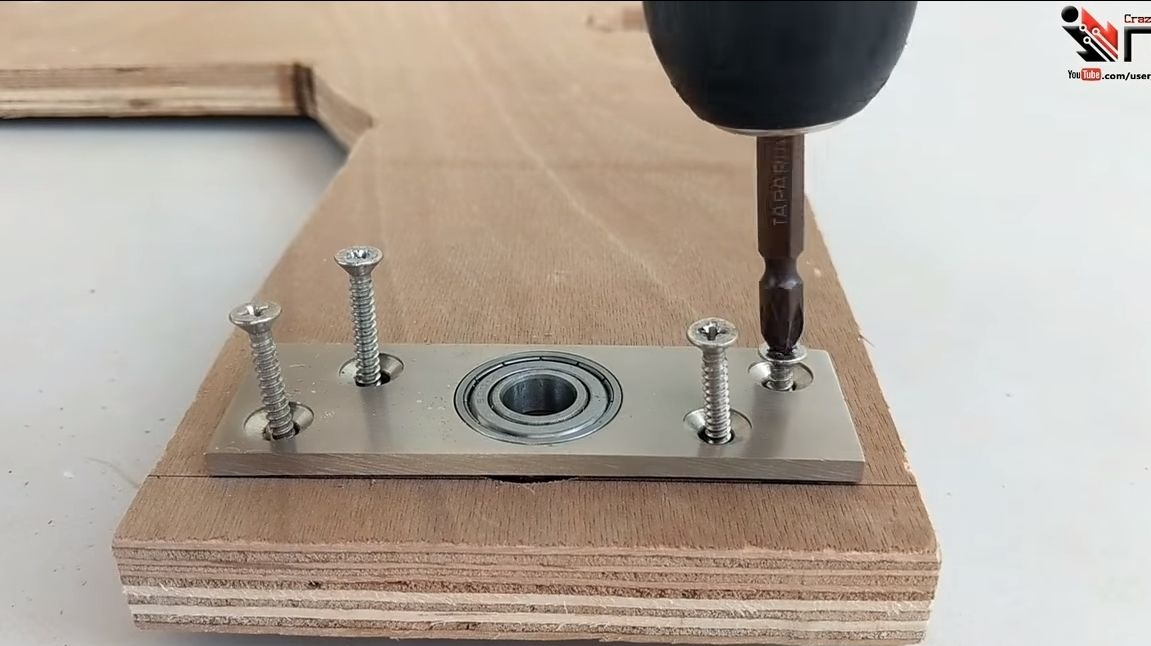
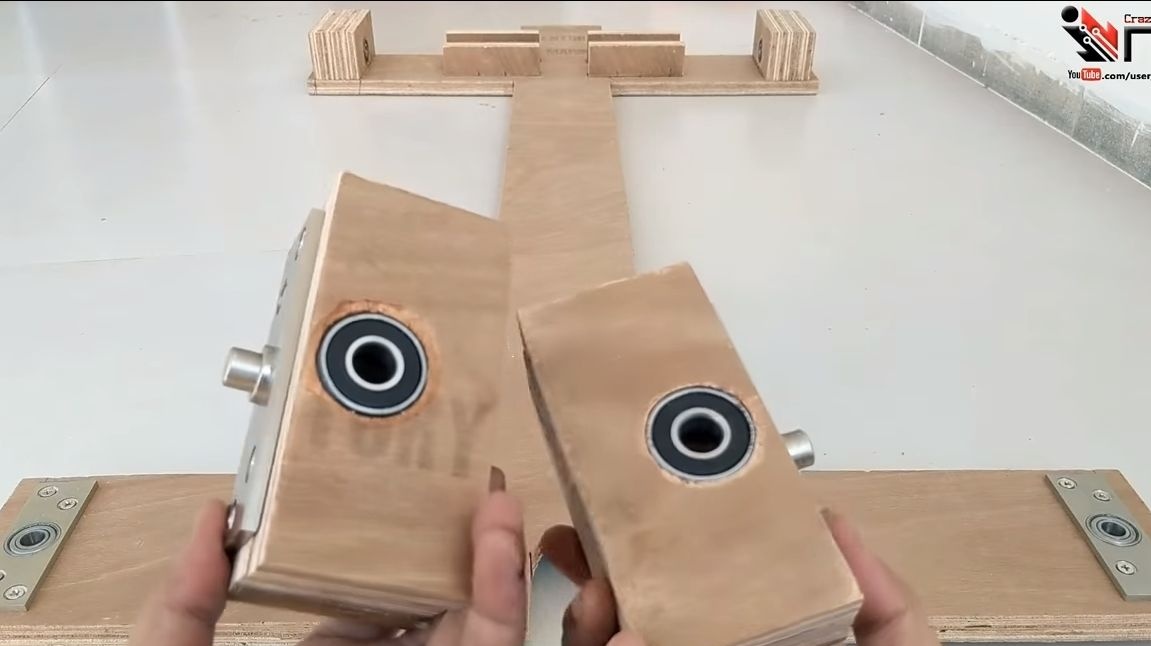
To make one block with bearings, you need three pieces of plywood. We will have two bearings in each block. In two workpieces, we drill holes in the diameter of the bearings, and in one in the diameter of the wheel axis. We install bearings, not forgetting to lubricate, and assemble the blocks using wood glue. We tighten the blocks with clamps so that they stick together well.

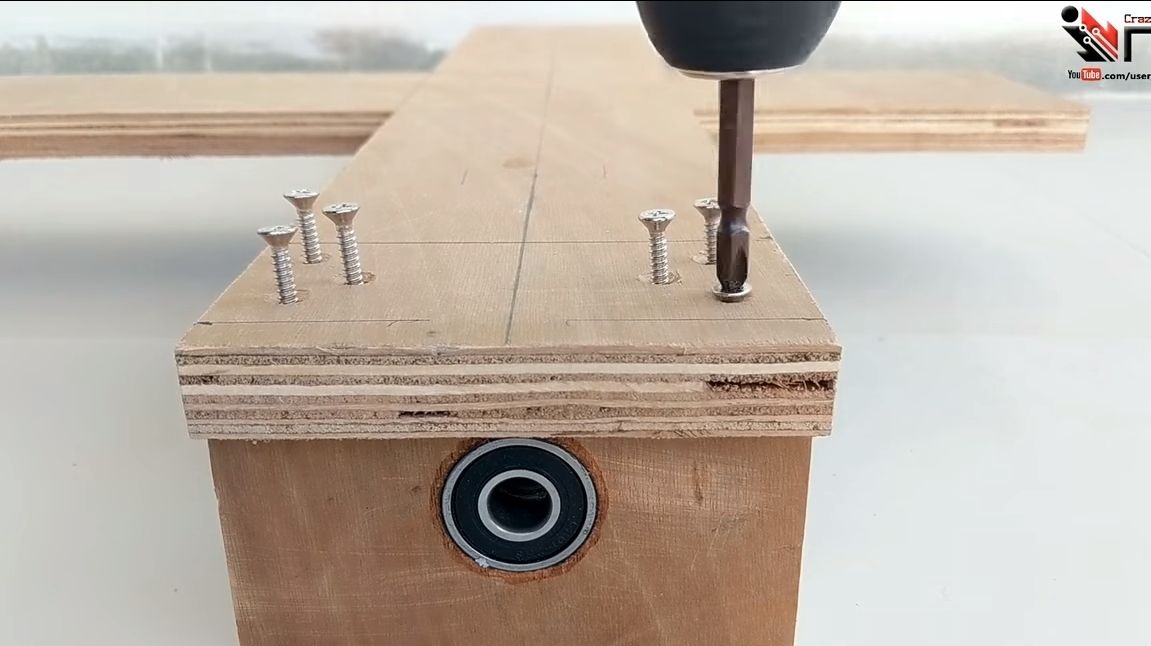
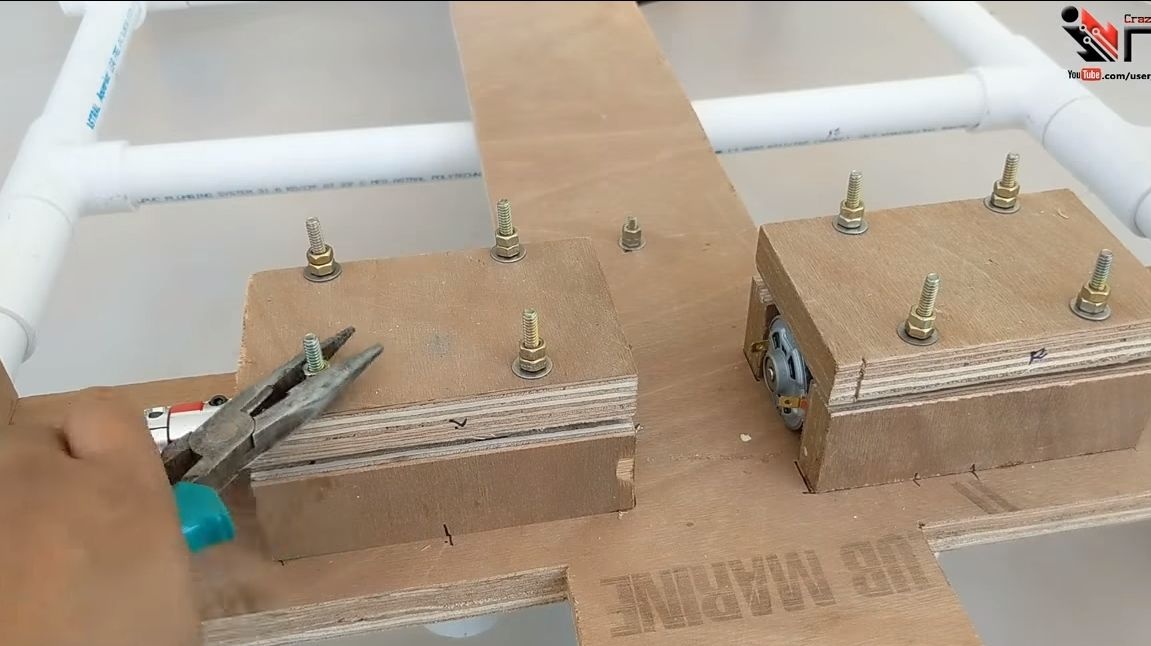
Step Four Installation of blocks with bearings
To install blocks with bearings, we use screws for wood. We drill holes and apply wood glue to strengthen the joint. In addition, the author also glues parts from plywood that will hold the engines.


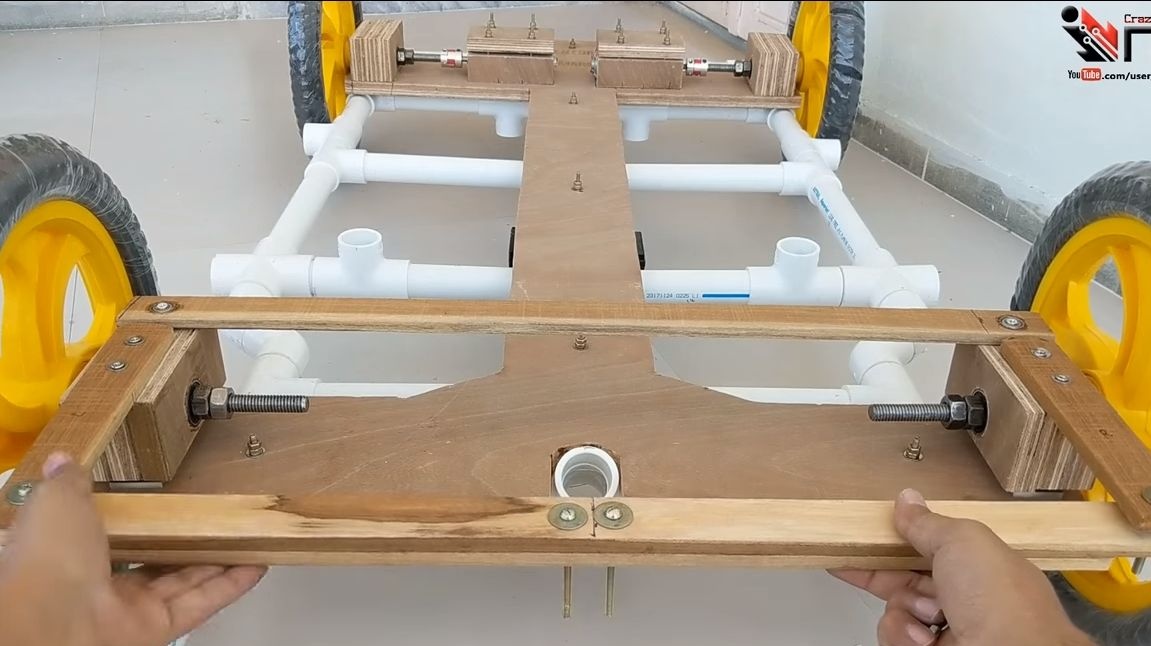
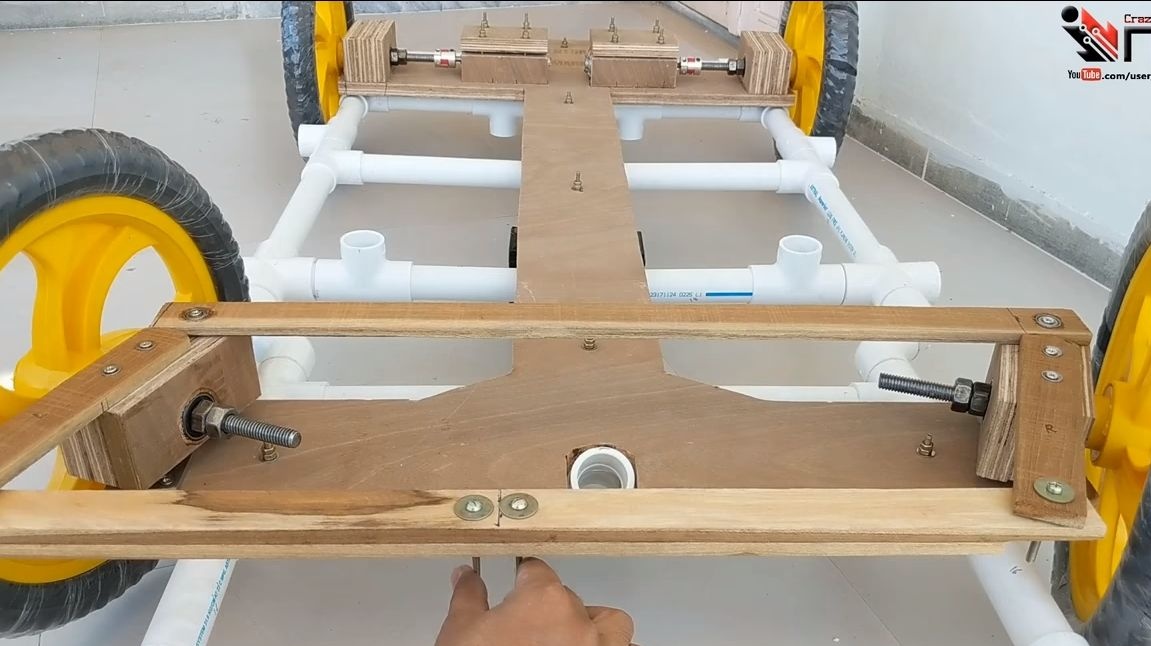
Step Five Installation of “steering” blocks with bearings
The front blocks must rotate so that the wheels can turn. Here you will need a swivel joint from of furniture or something similar. In more detail, what is at stake can be seen in the photo.
Step Six We connect the "body" with the frame
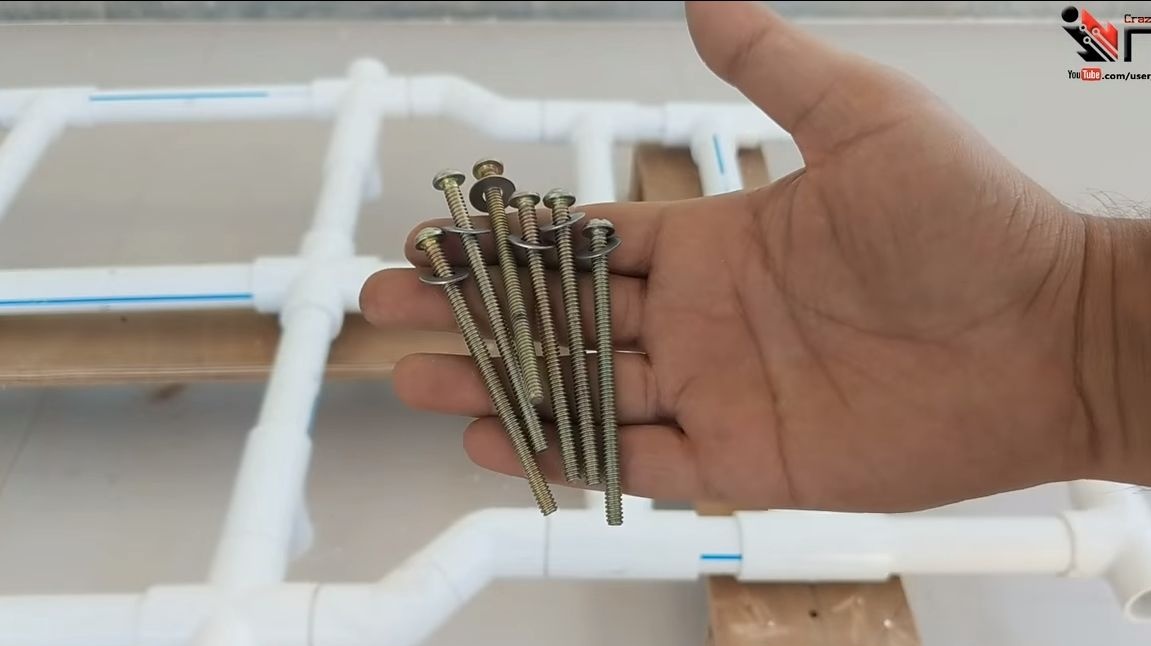
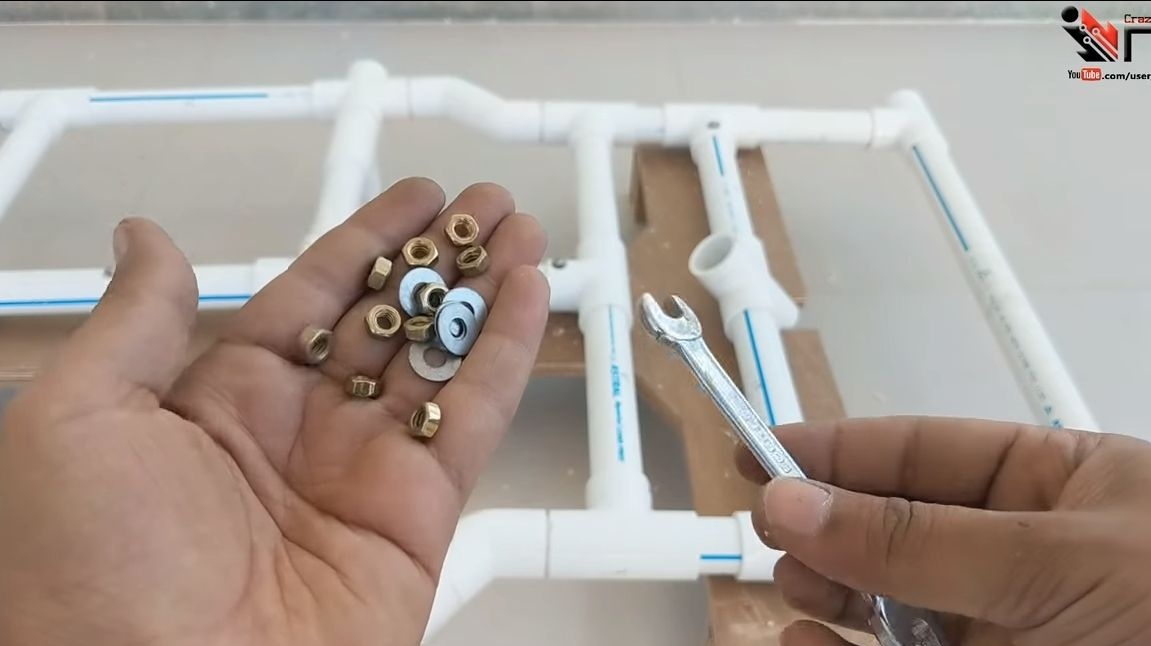
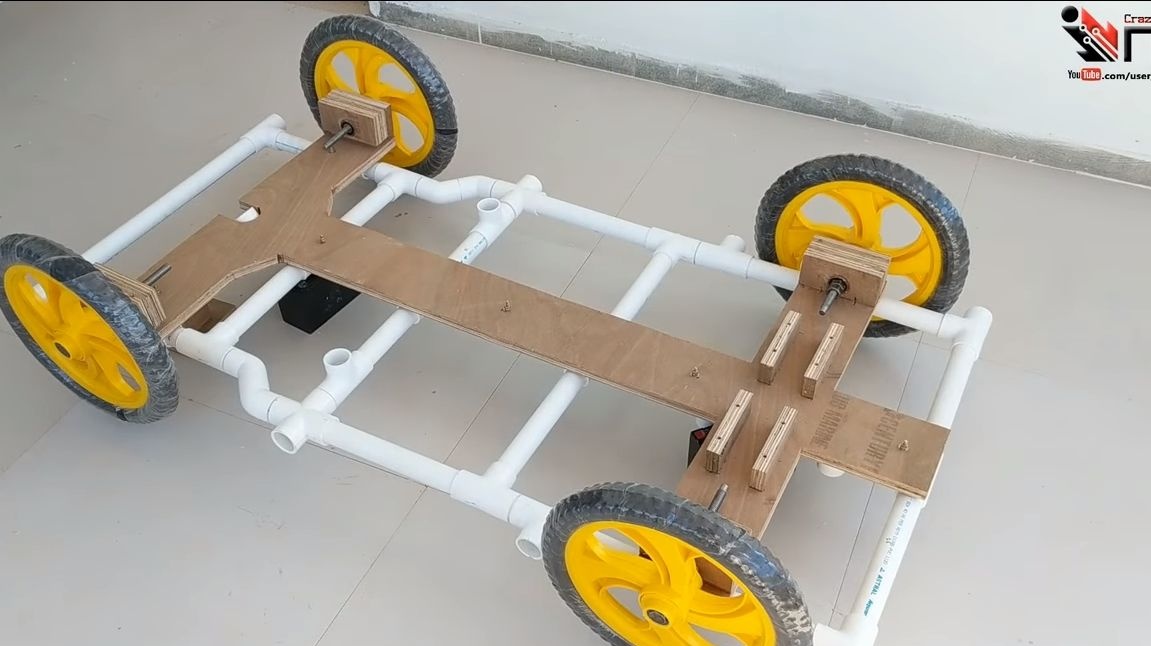
Now you can fix the body of PVC on the basis of plywood. To do this, drill holes in the right places, and for fastening we use bolts with nuts and washers. If you use a sufficient number of bolts in the right places, the frame of the pipes can be completely glued.

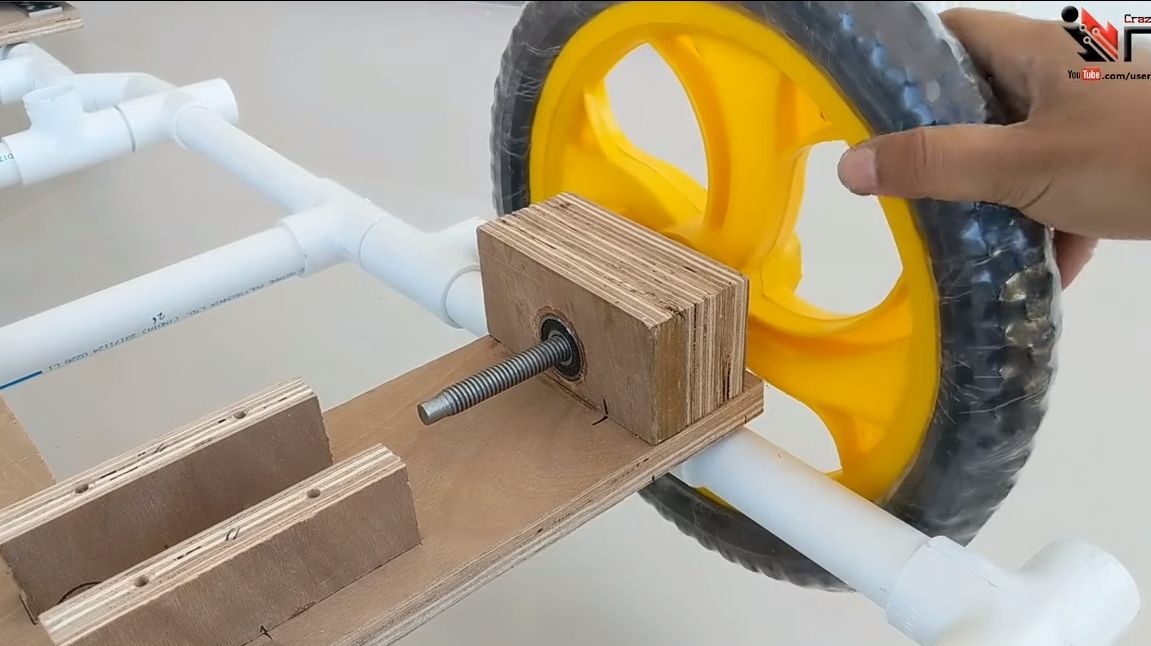
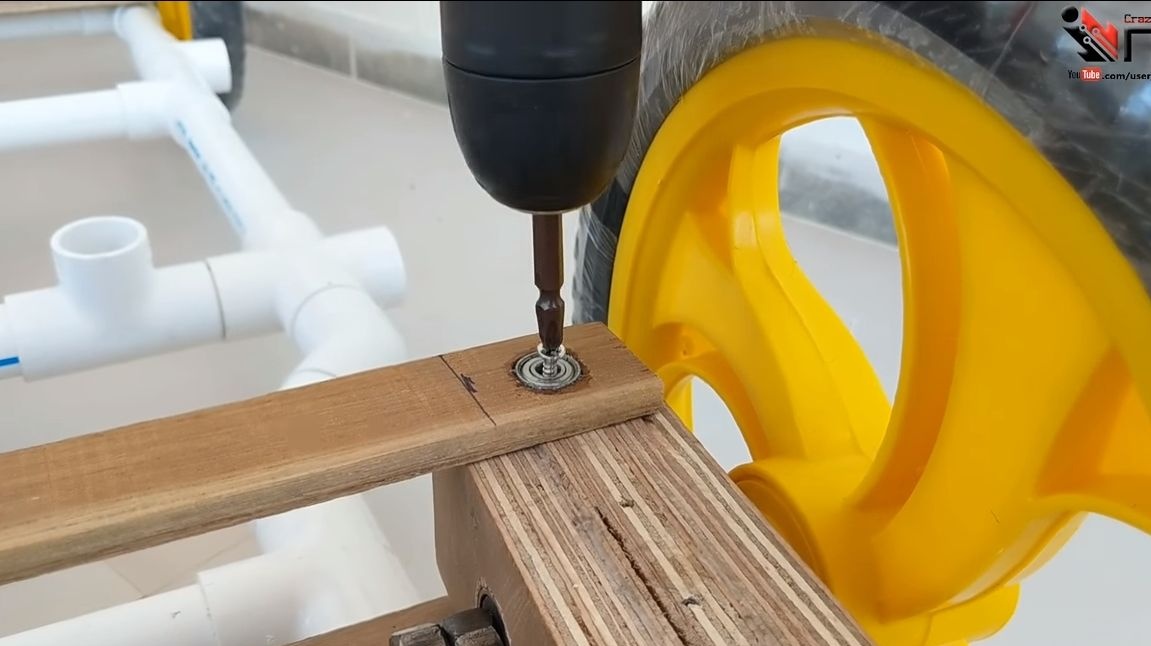
Seventh step. Set the wheels
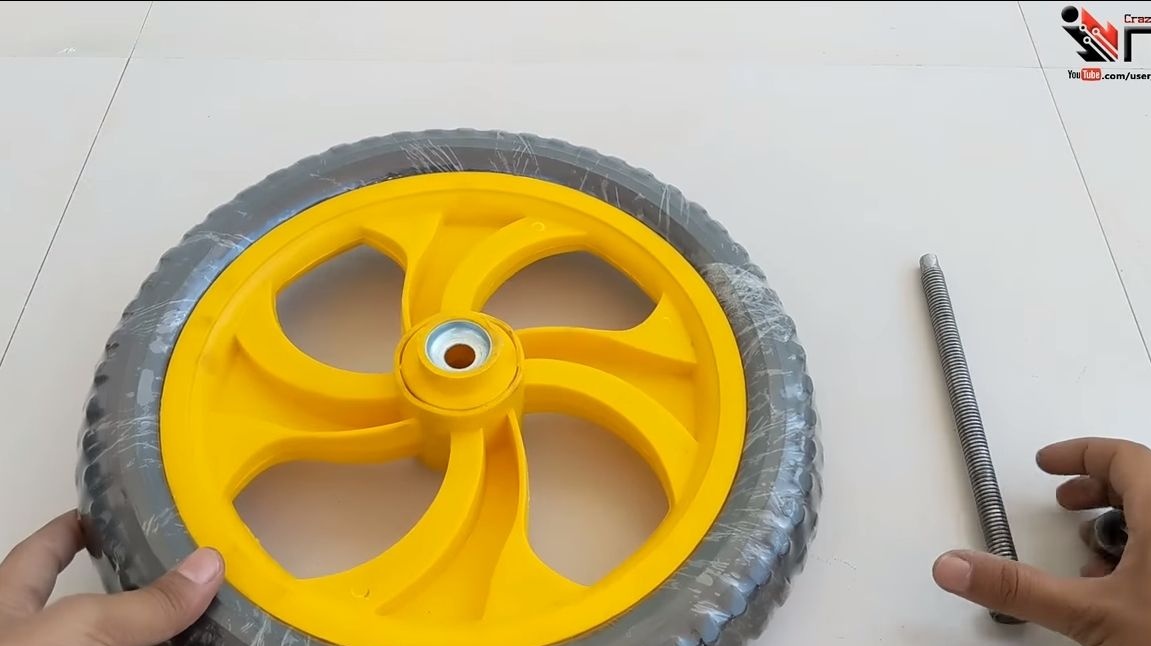
The wheels are installed very simply, for this we install bolts of sufficient length in them and tighten the nuts. After installing the bolts in the bearings, we adjust the tightening torque using the nuts. To fix the desired tightening torque, use another nut. Similarly installed front and rear wheels.
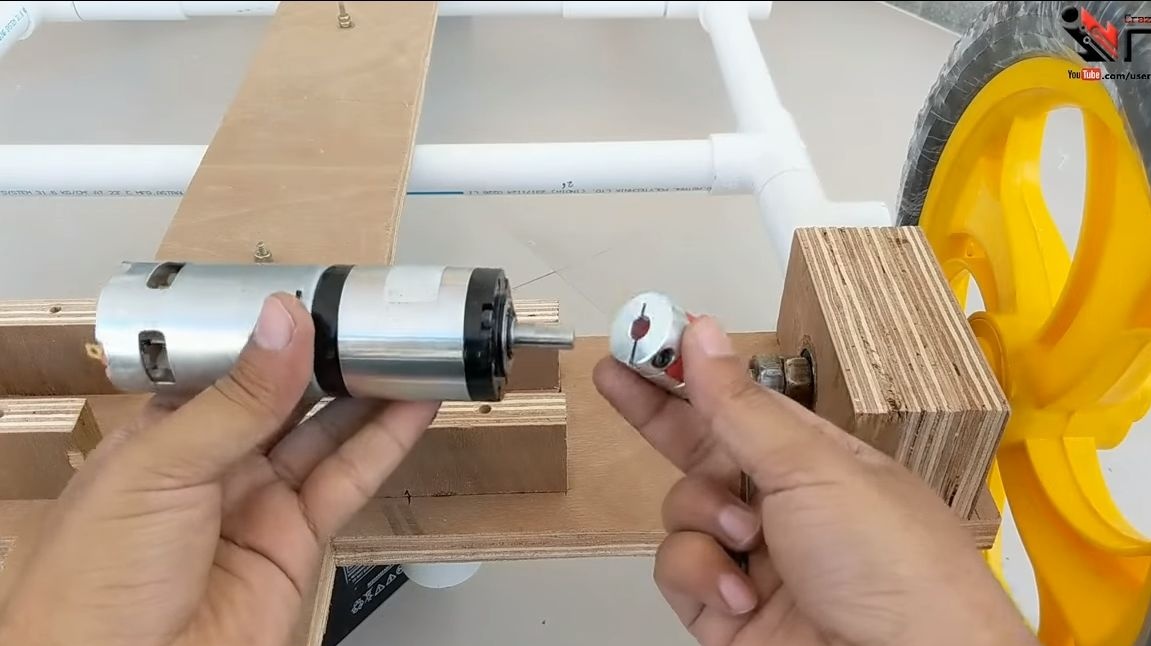
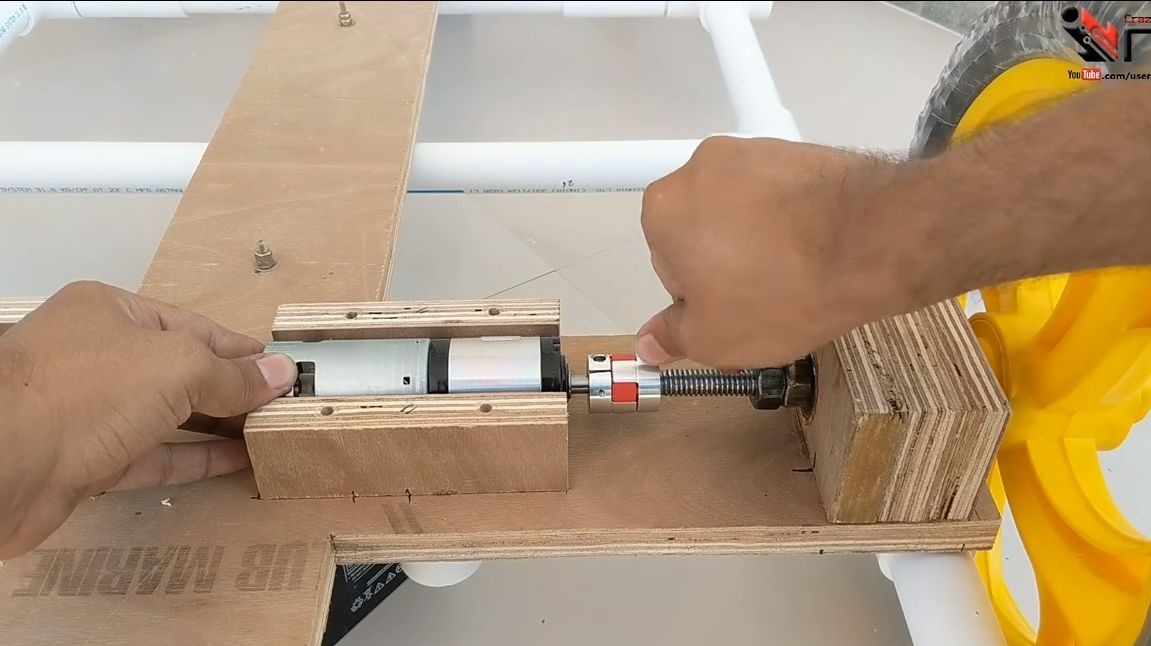
Step Eight. Install engines
We install adapters on the shafts of the reducers, with which we can transmit the rotation of the shaft to the axis of the rear wheels. We fix the engines with the cover of plywood, which is attracted to the engines with bolts and nuts.
Step Nine. Installing steering rods and steering
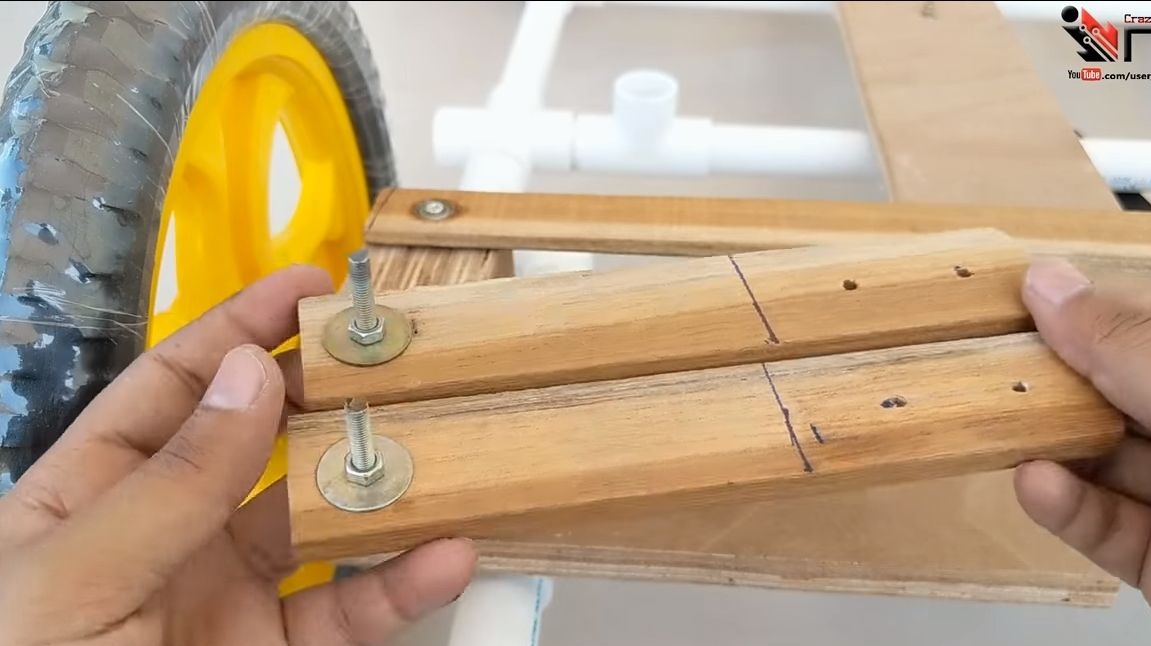
We take a piece of the board and install bearings on the edges, this will be one of the steering rods. The purpose of this thrust is to combine the steering fists so that they rotate synchronously. The second steering lever is installed in front, and we will connect the steering to it.
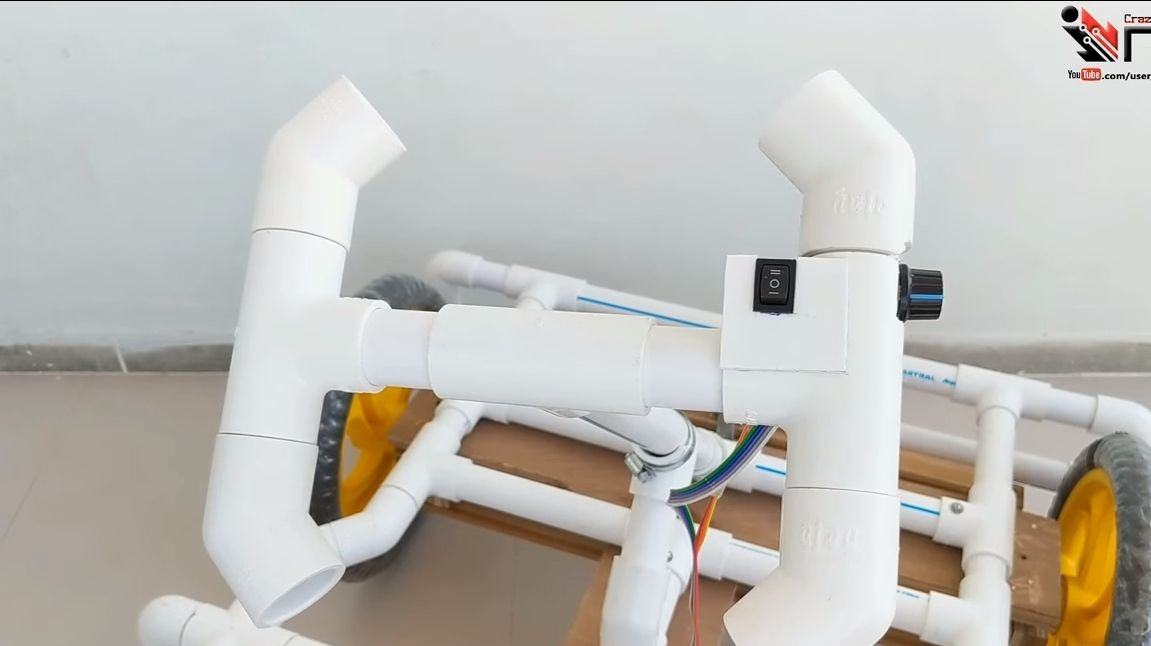
The steering wheel and steering shaft is made of PVC pipes, it is connected to the shaft of metal, which is mounted on a bearing on the base. As everything is connected, look at the photo.


Step Ten The final stage of assembly
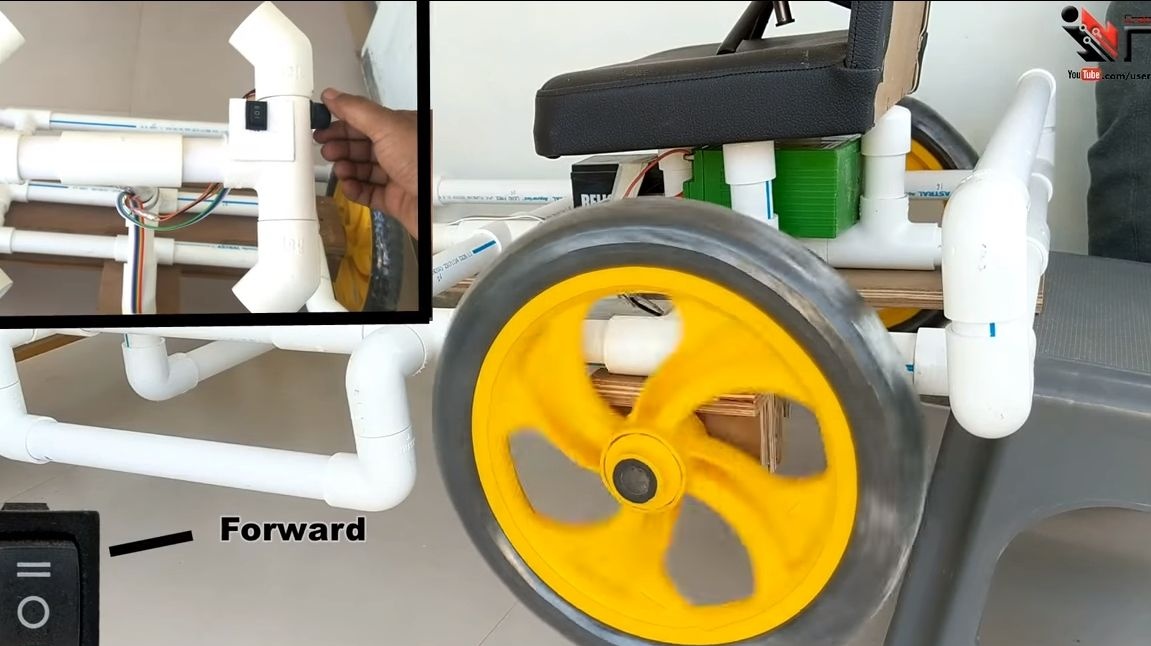
You can install batteries on the car, as well as a controller. The essence of the controller is to control the engine speed, for this a handle is installed on the steering. To turn the engines on or off, a switch is installed on the steering wheel. Of course, it would be more professional to make a pedal, because it is not so difficult.
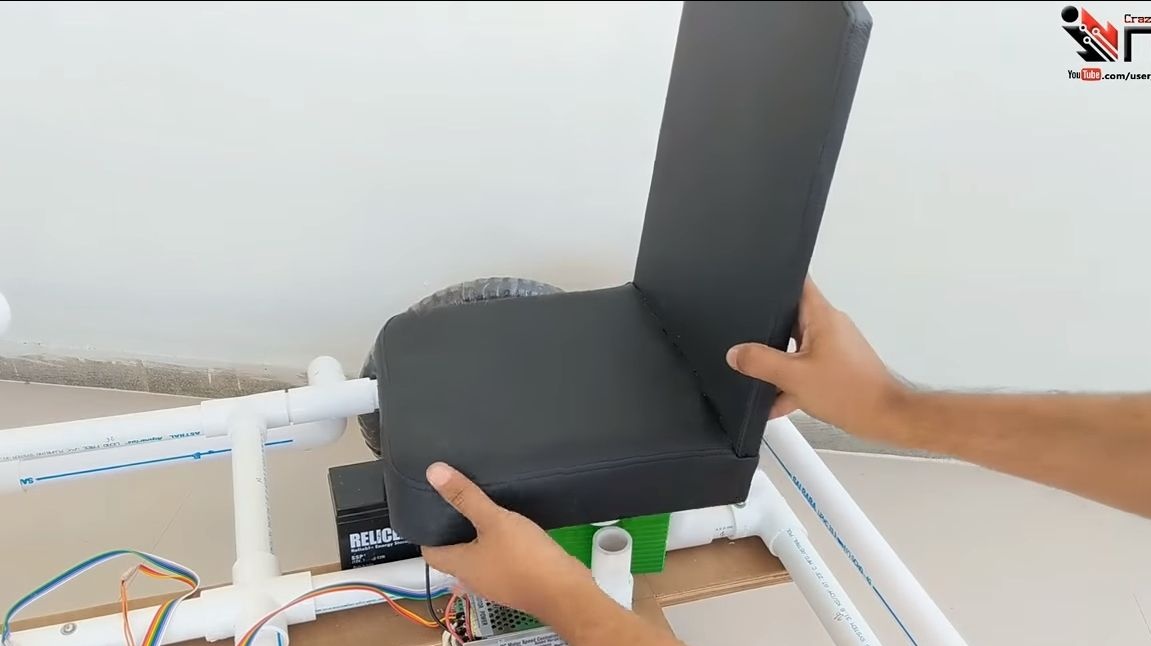
The final step will be the installation of the seat.


Cards can be tested! Start with a low engine speed to see if everything is working well. That's all, the car is ready for battle! I hope you enjoyed the project. Good luck and creative inspiration in the manufacture.