

Hello to all lovers homemade. In this article I will tell you how to do device for disassembling the suspension struts do it yourself. Such homework will be needed by those who serve their car yourself and not afraid to get your hands dirty. Also, this device will be convenient for fixing various pipes for processing or welding.
Before reading the article, I suggest watching a video in which the assembly process of this device is shown in detail, as well as a small test of the finished homemade product.
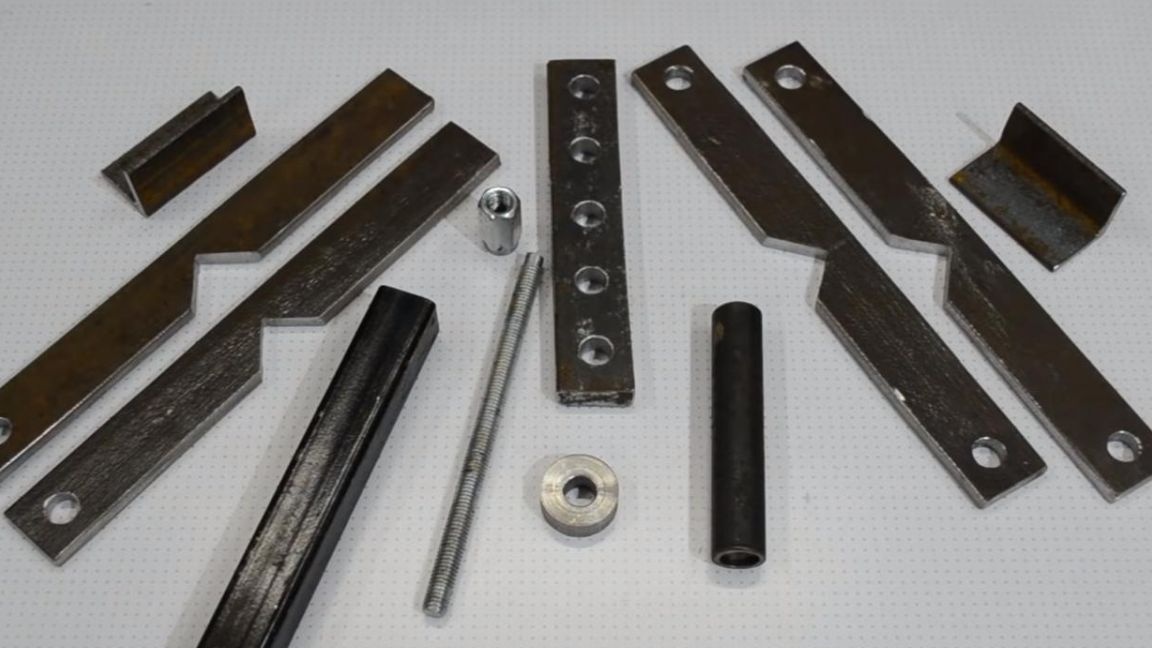
In order to make a device for disassembling the suspension struts with your own hands, you will need:
* Angle grinder, cutting wheel, scrap metal brush
* Metal Lathe
* Drilling machine, drill bit for metal 10 mm
* Metal angle 25 mm
* Manual vise
* Vernier caliper
* Pencil, tape measure
* Drill or screwdriver
* Channel 200 mm
* Stud M12 and a long nut to it
* Profile pipe 20 * 20 mm
* Welding machine, electrodes
* Safety glasses, welding mask, gaiters, earphones
* Vise
* Plastic plug for profile pipe
* Spray paint can
Step one.
First you need to clean the workpiece from rust, an angle grinder with a cleaned metal brush copes with this task.
When working with an angle grinder, be careful when wearing safety glasses, gloves, and headphones.
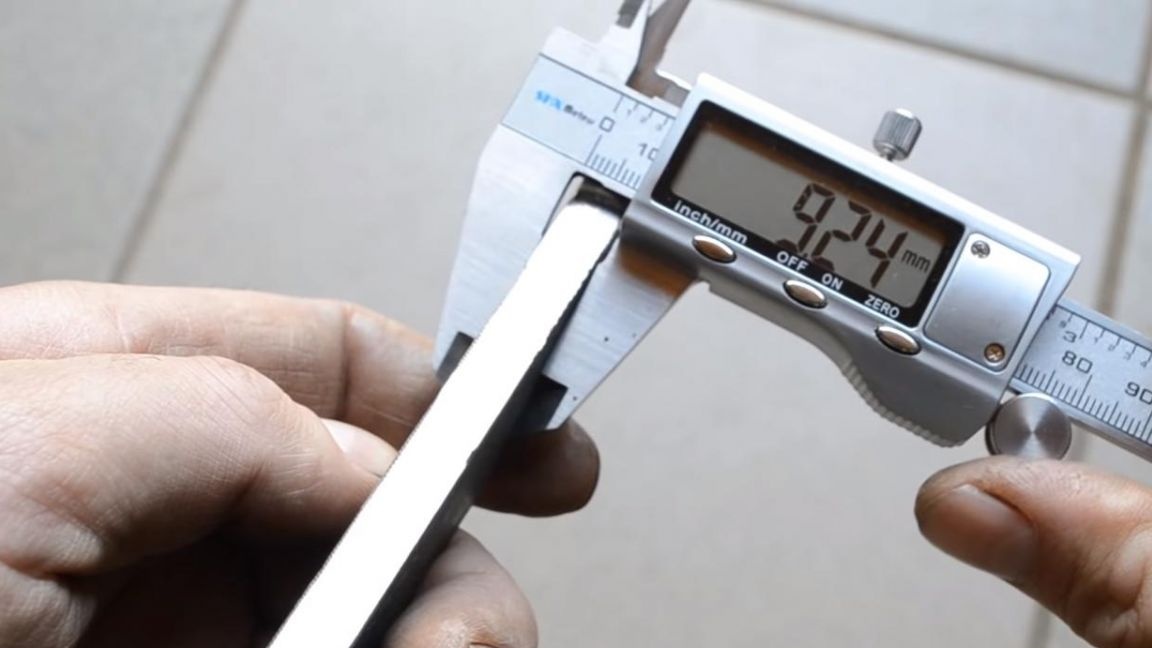
Since a shink is needed for this homemade product, we will make it from a corner of 63 mm in size. Using a vernier caliper, make a marking on a metal corner, the tire should be 25 mm wide.
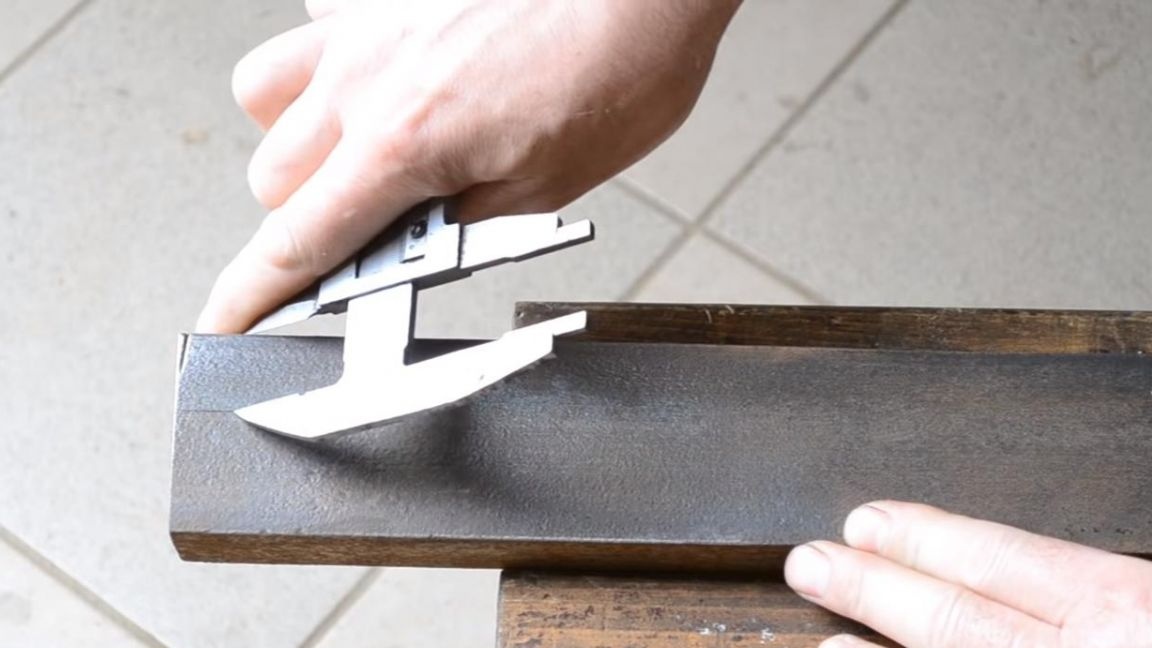
Next, we begin to saw off the necessary part from the corner with the help of a angle grinder with a cutting wheel installed in it. After sawing we get two such workpieces 25 mm wide.
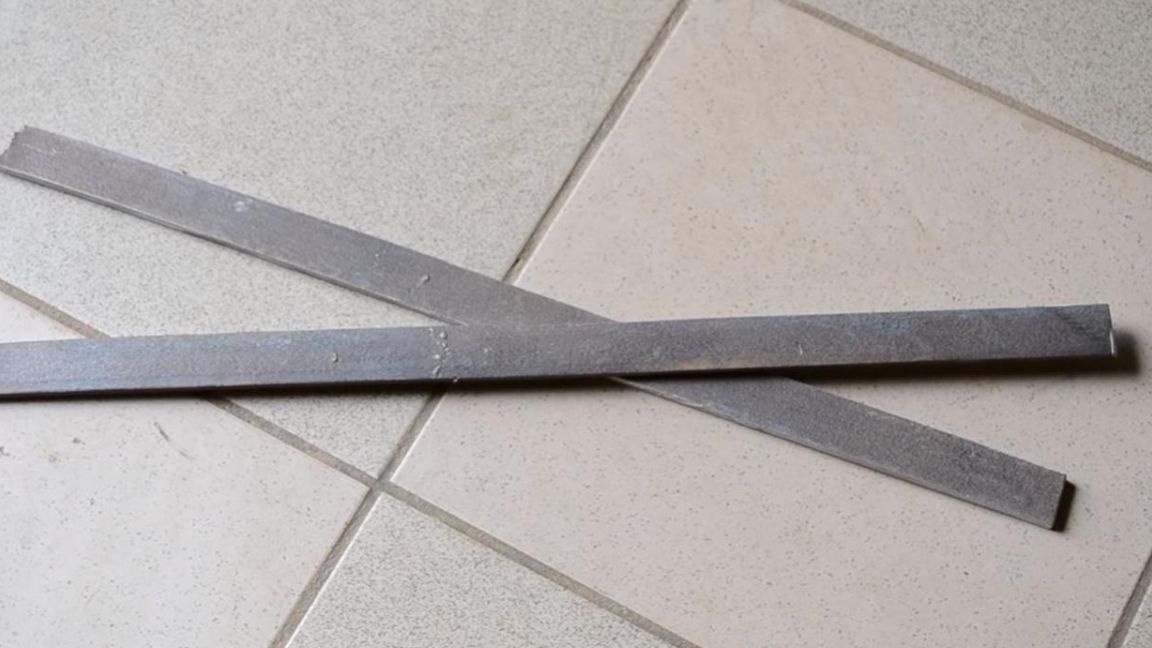
We measure 200 mm from the tires and cut off four identical blanks using an angle grinder.
It is advisable to polish their edges a little so as not to get hurt.

Step Two
Next, set the punch on the edge, backing off about 10 mm and make a small depression.
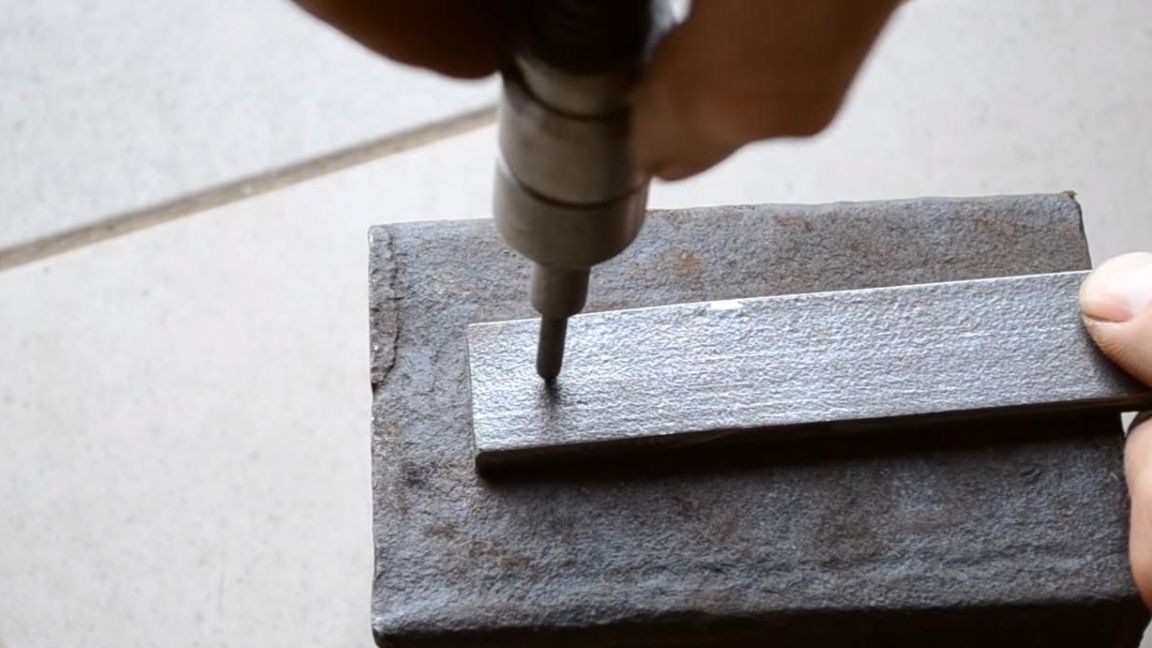
After that, we fix the workpiece in a vice and with the help of a drilling machine we make two holes along the edges with a diameter of 10 mm. In the process of drilling, we periodically add technical oil, so the drill will be less loaded, which means it will hold the sharpening of the cutting edge longer. Also do not forget about personal protective equipment, safety glasses are required.
From a corner with a size of 25 mm, we cut off two blanks with a length of 50 mm using an angle grinder.
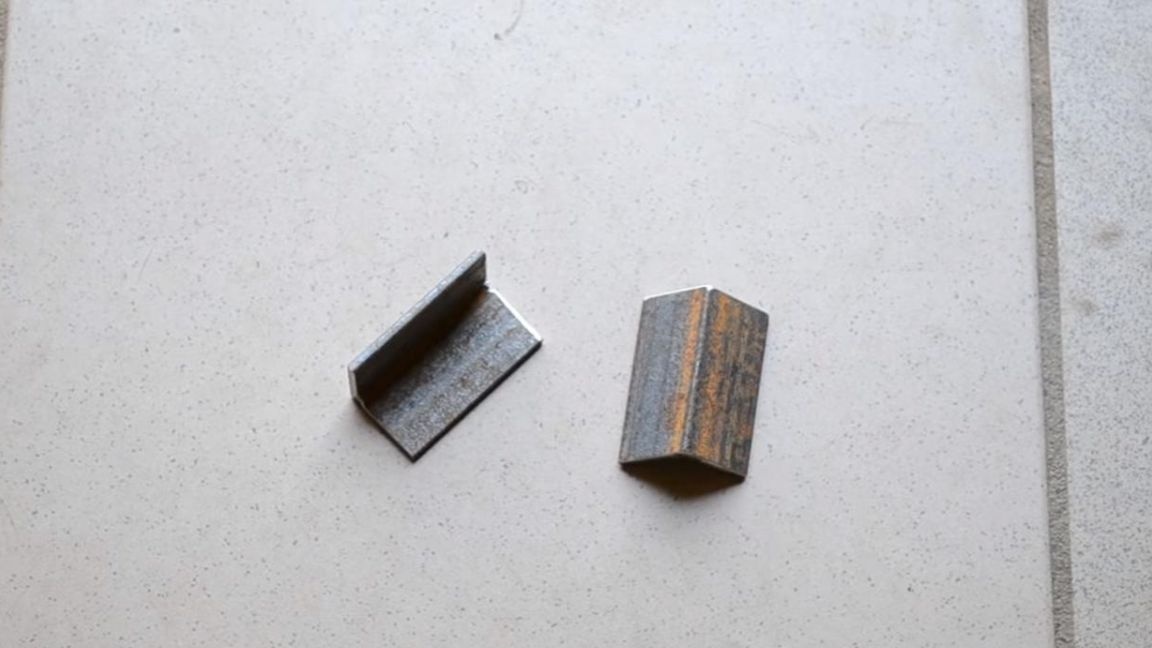
If necessary, this size can be increased.
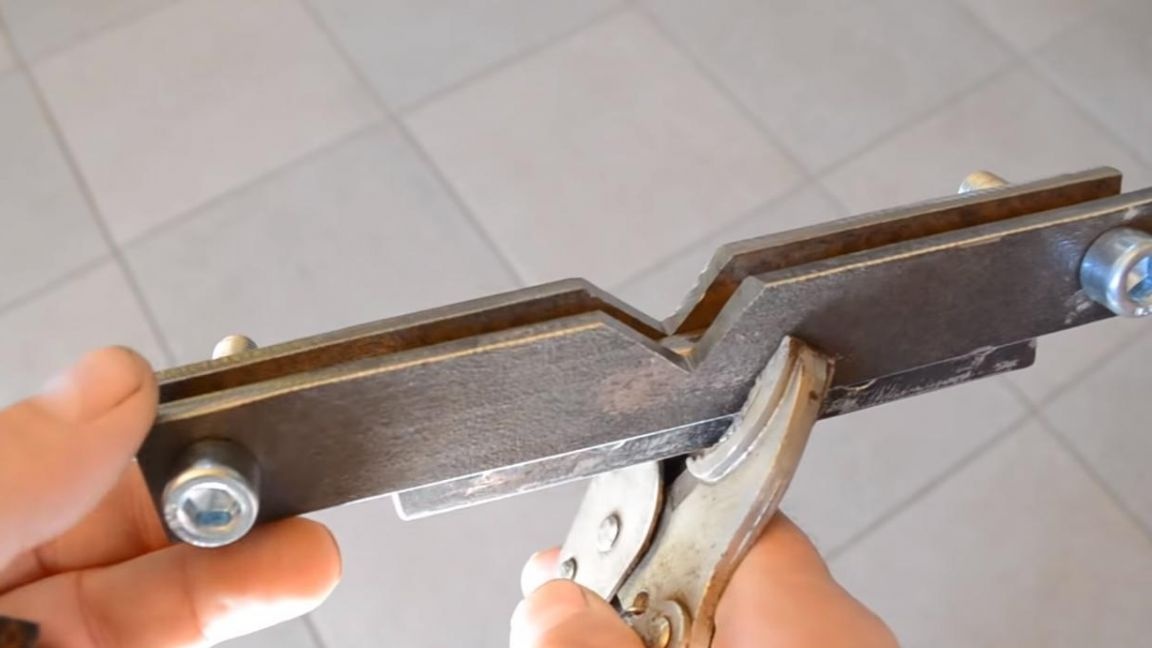
Step Three
Divided at the edges of the tire divide exactly in half.

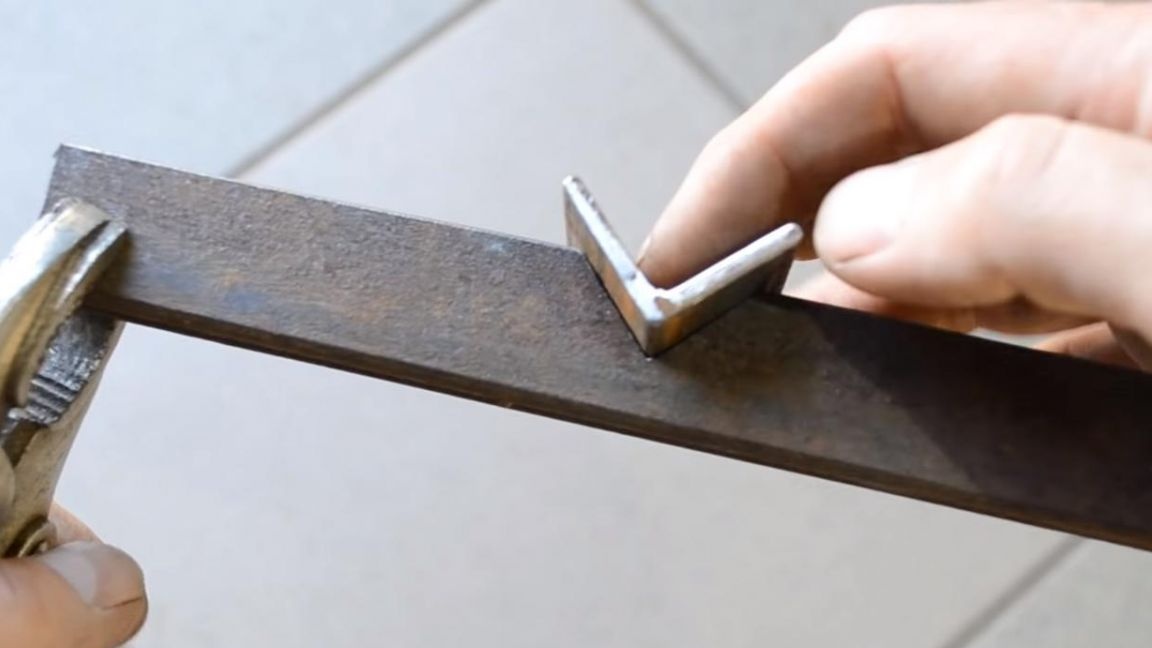
We set the previously cut piece of the corner on the middle line and use it to do the markup.
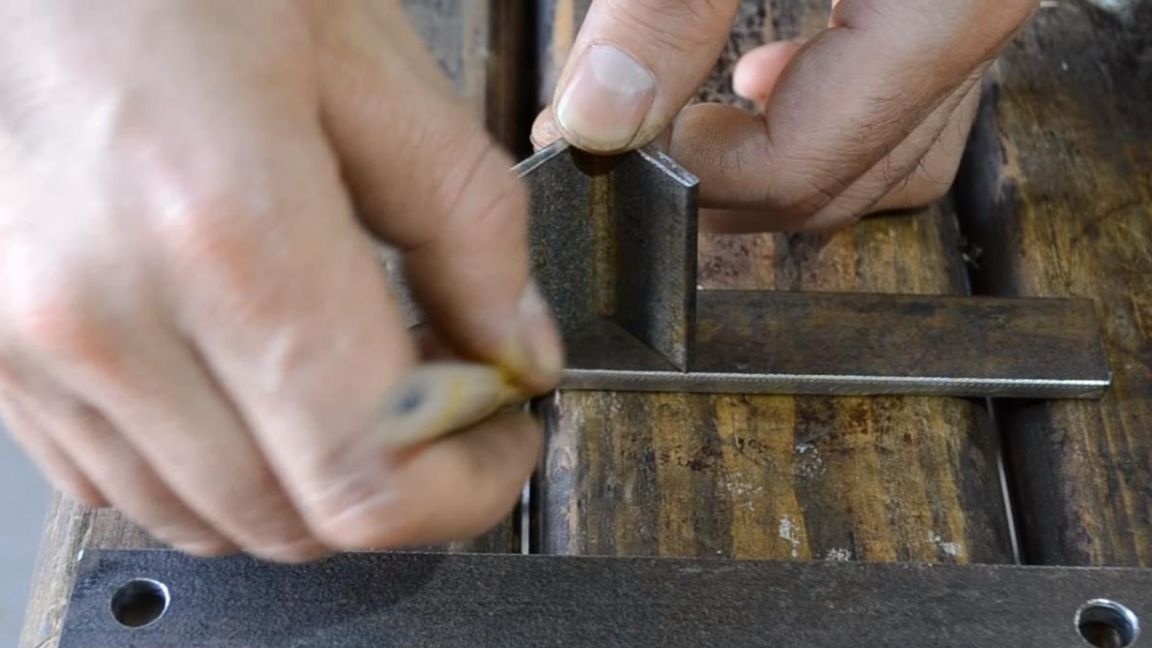
Next, we mark off the unnecessary part using the angle grinder, marking the tire in a vise, and then try on the 25th corner.
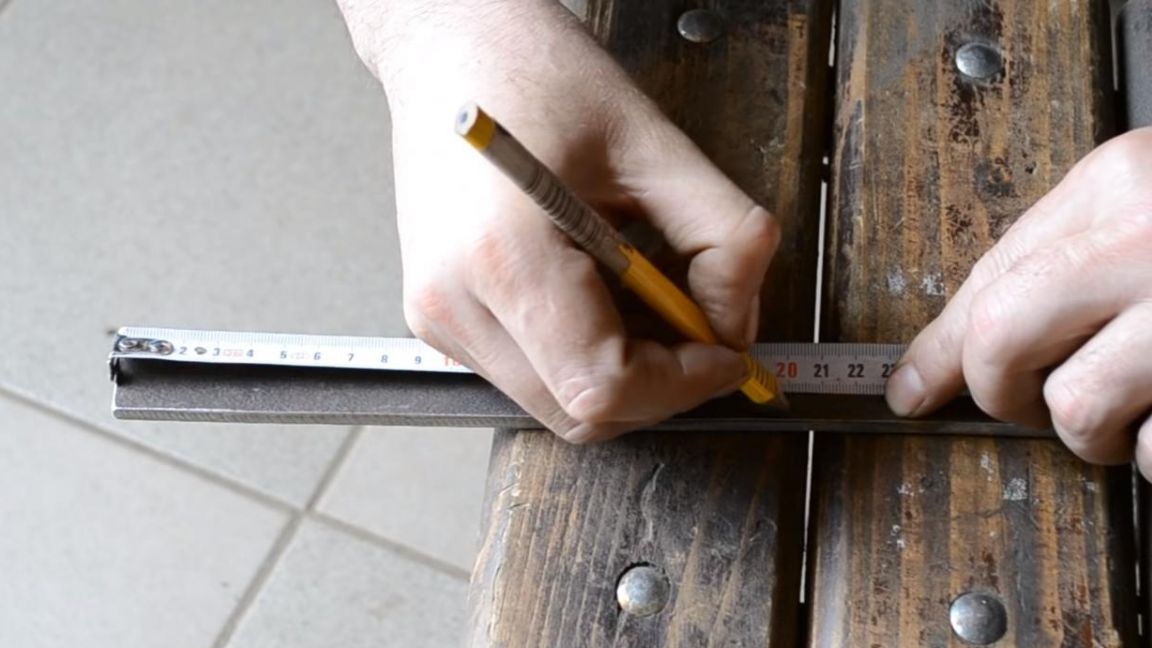
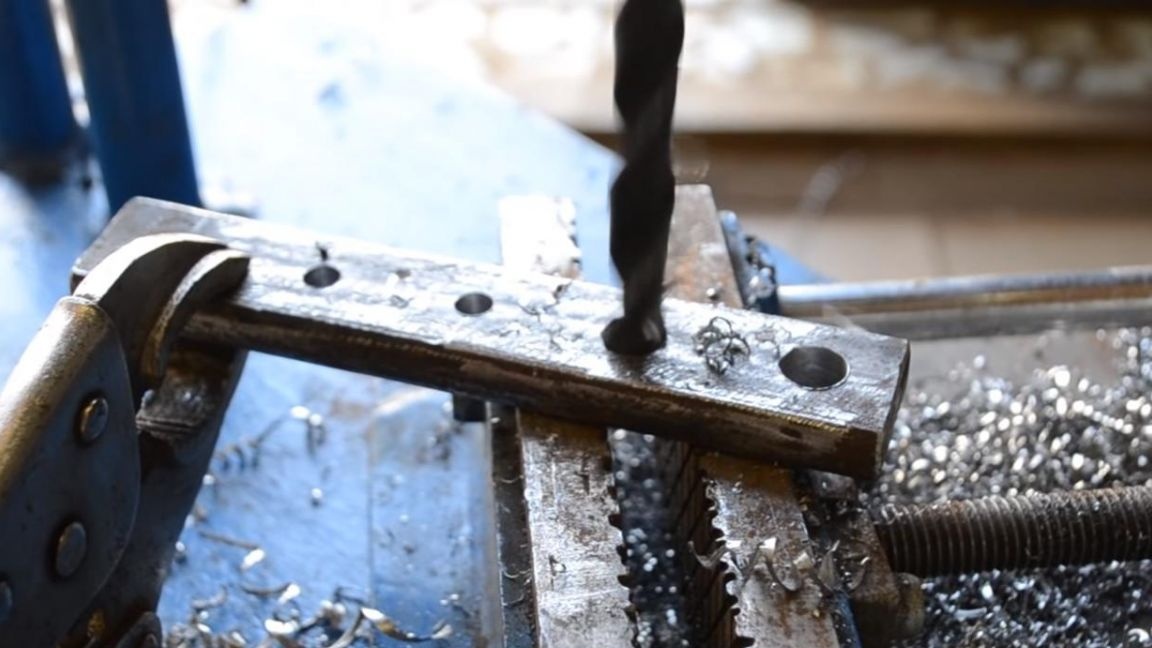
Then, from a piece of the 200th channel, we cut off a strip 25 mm wide and 140 mm long, using an angle grinder. The result is a workpiece with a thickness of 9 mm, which is quite enough for a rigid structure.
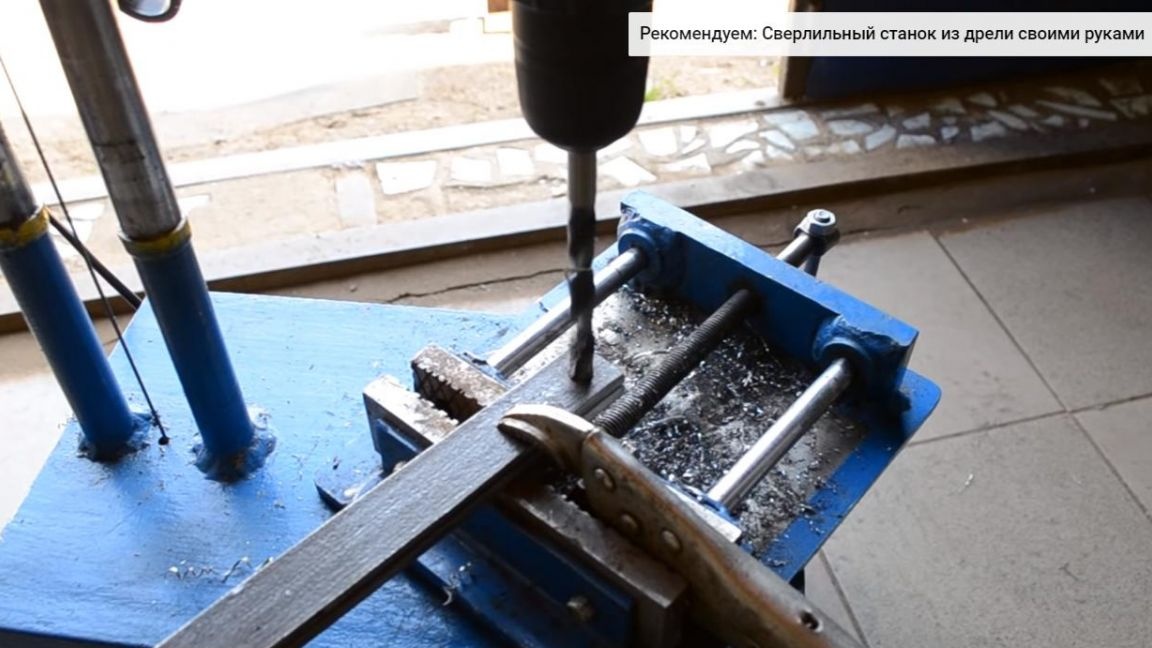
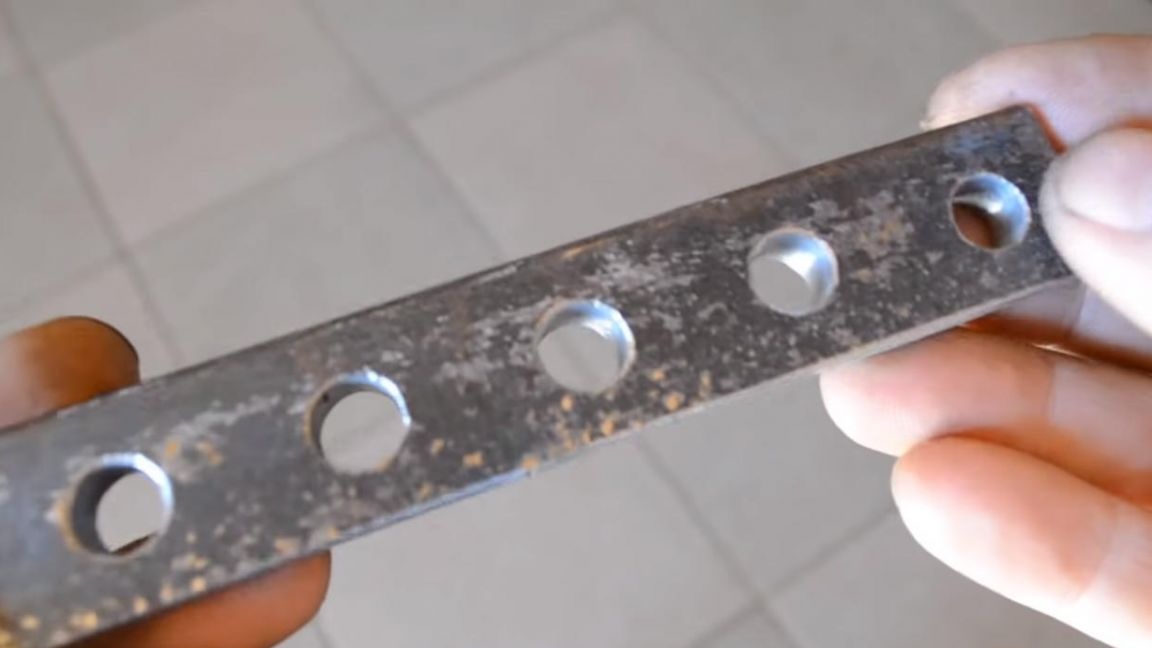
On this blank, we mark five points for future holes at the same distance. Then we do the punching and drill holes with a diameter of 10 mm on a drilling machine, securing the part in a manual vice.
The result should be such a detail with five holes.
Step Four
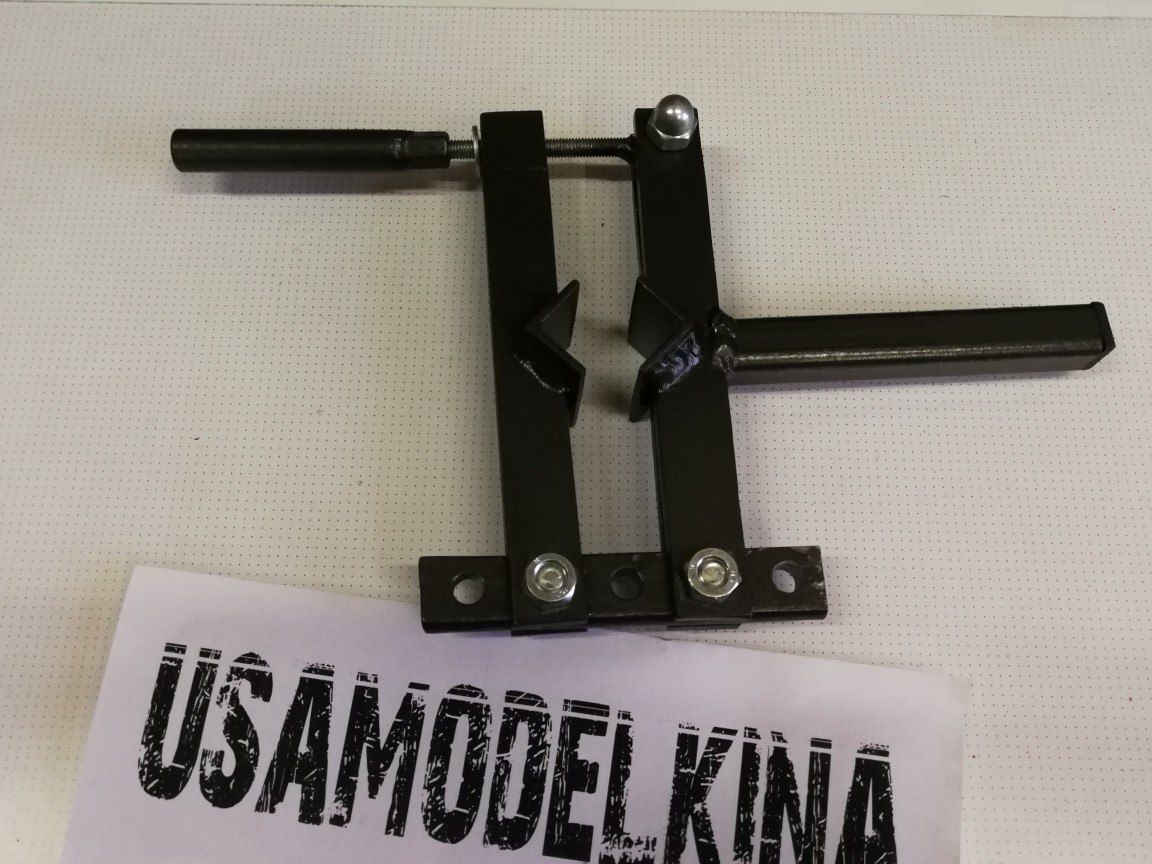
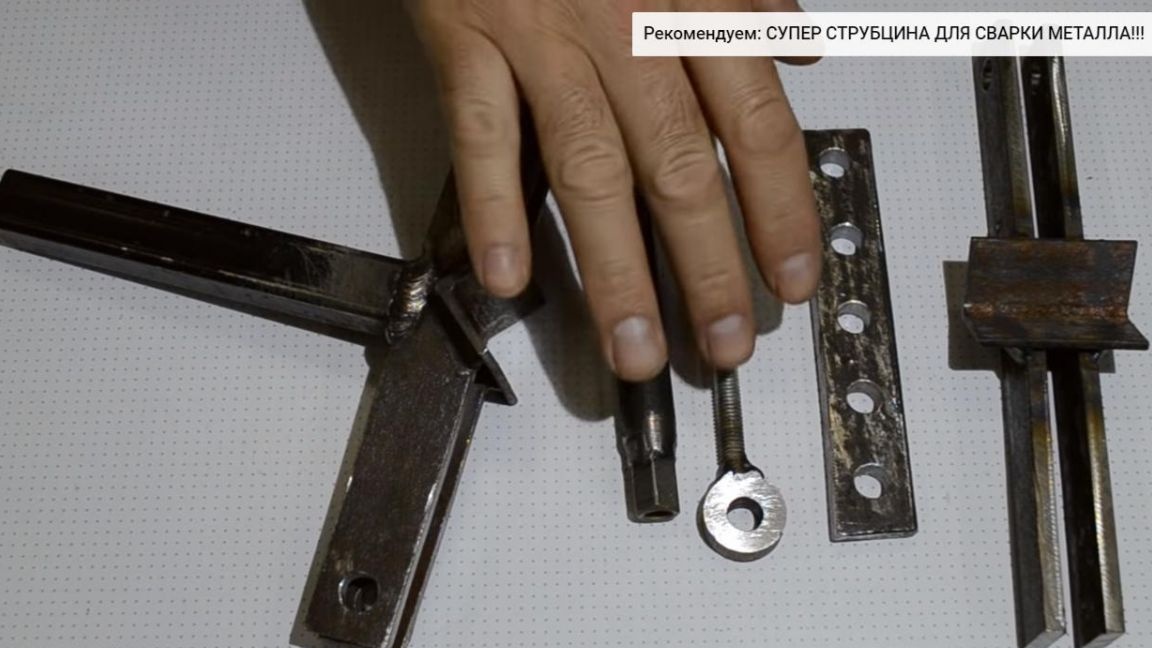
All parts are almost ready, you need to make a washer on a metal lathe, which we just grind from a metal rod of the required diameter. We also manufacture a bar with a through hole, to replace which you can take a regular pipe of the desired diameter. Then you need to weld a long nut to it. The basis for fixing in a vice will be a profile pipe measuring 20 * 20 mm.
Step Five
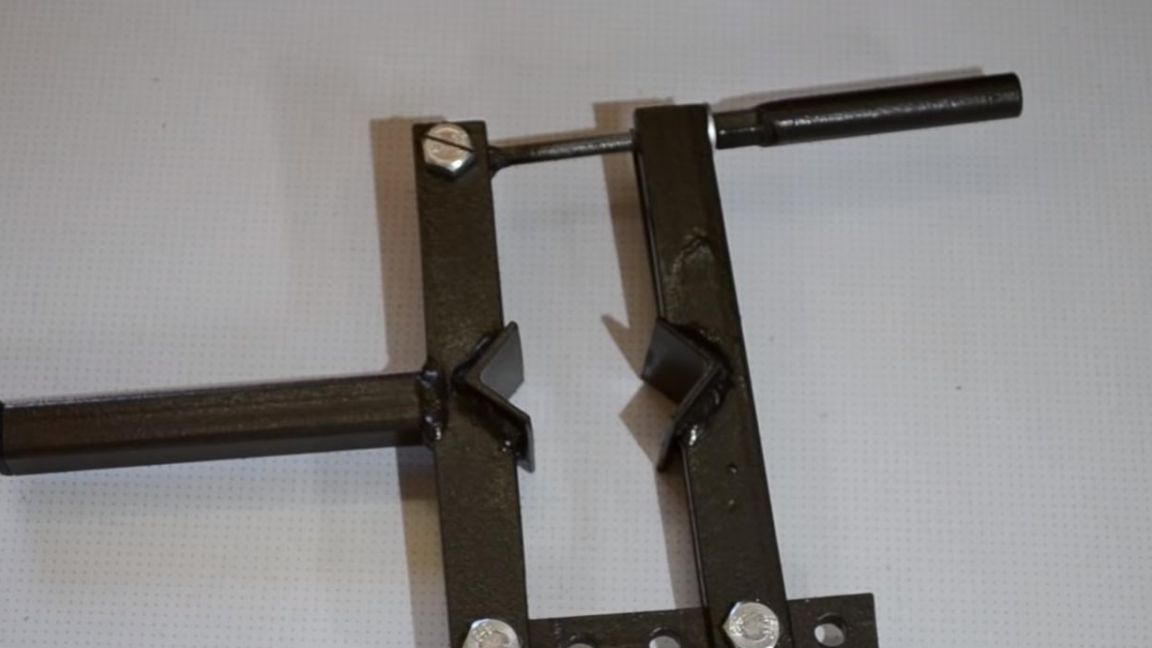
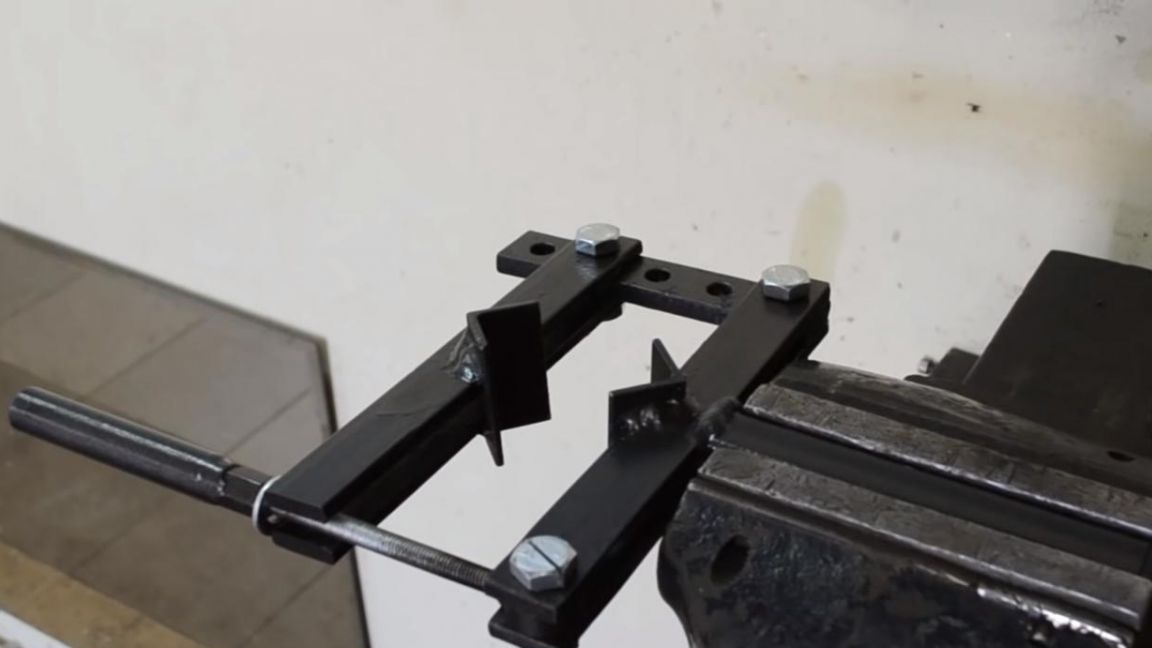
Now we are doing the welding work. Using bolts and a manual vise, we assemble the structure from the tires. We weld a corner to it in a special cut made in advance. When working with the welding machine, be careful and use personal protective equipment, such as a welding mask and gaiters.
After welding, such a detail is obtained.
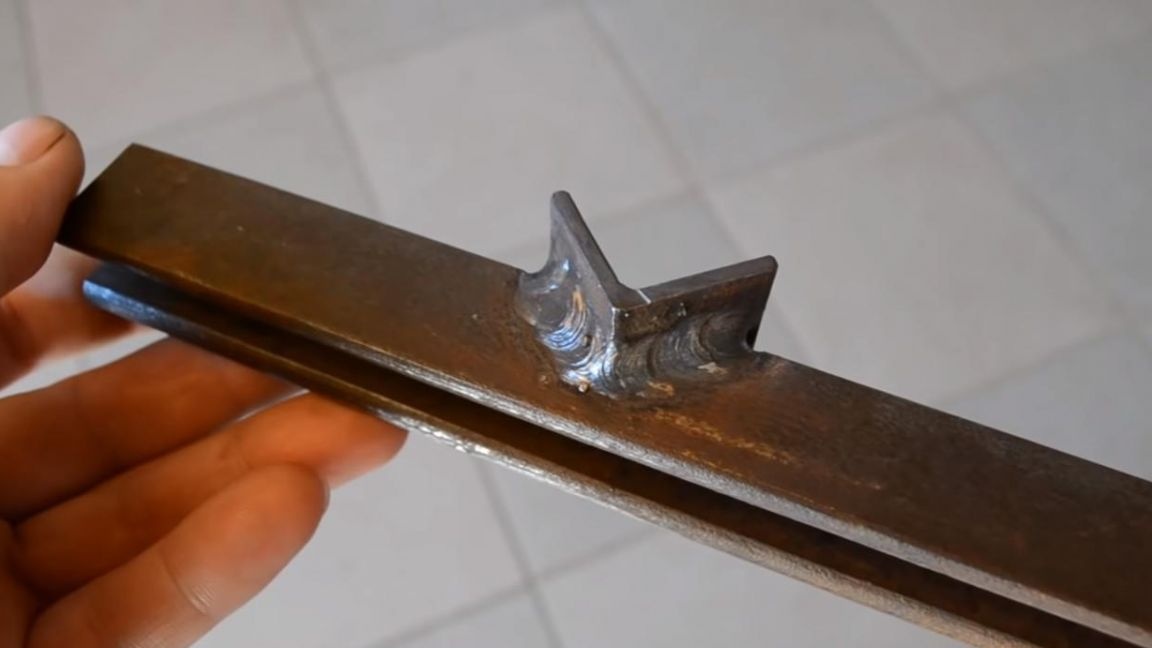
We remove the slag with a hammer, after which we clean the welding seam with a metal brush installed in a drill or screwdriver. We need to do two of them, we perform similar actions with another workpiece. To one of such parts with a corner we weld a profile pipe strictly in the middle.
The washer made on the machine is welded to the stud.
At the end, we paint all the details of the tool with a spray can of hammer paint and wait for complete drying.
Step Six
After the paint has dried, we fill the plastic pipe on the profile pipe and proceed to the assembly of all parts into a single whole.
We fasten the parts with screws with M10 nuts, after which you can fully check the device in operation.
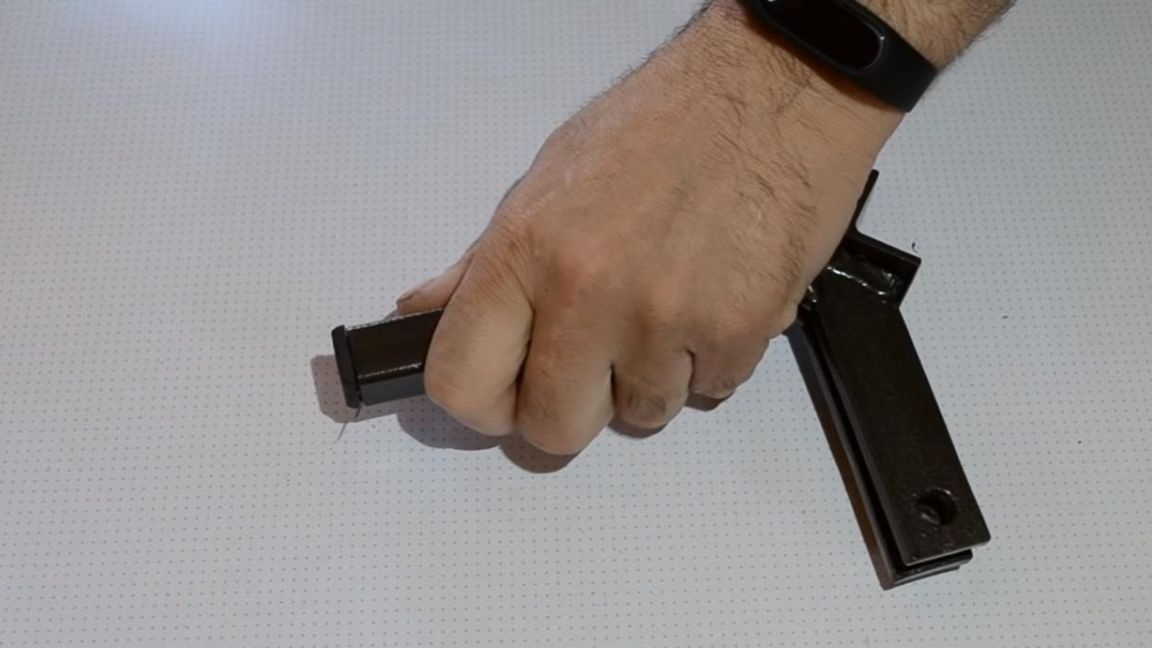
Clamp the profile pipe in a vice in the desired position.
Between the two corners we insert the stand that you need to disassemble, then rotate the handle with the welded nut and firmly fix the part to be repaired.

Also in this device you can clamp various pipes for subsequent processing, sawing, welding to another pipe and so on.

That's all for me, thank you all for your attention and creative success.