

Hello to all lovers homemade. In this article I will tell you how to do device for marking the center of the part do it yourself. It is useful for marking the centers of profile pipes, wooden blocks and other details. Materials for assembling this homemade product are easily accessible, so there will be no problems with this.
Before proceeding to reading the article, I suggest watching a video with the complete assembly process of the device, as well as testing the finished homemade product on a profile pipe and bar.
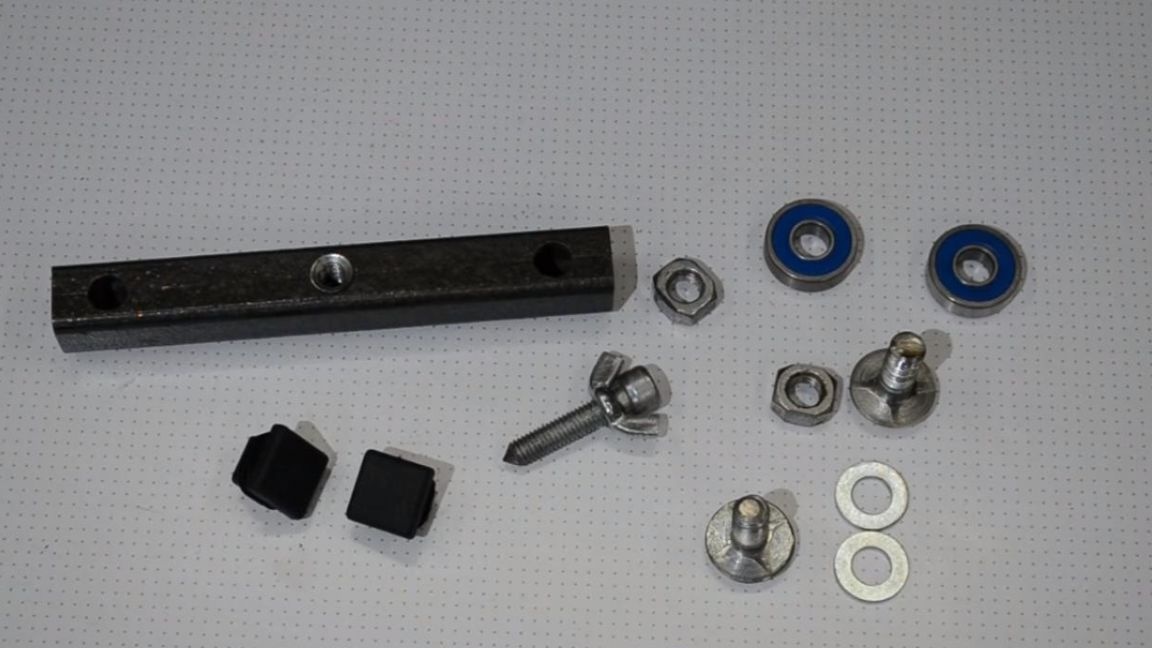
In order to make a device for marking the center of the part with your own hands, you will need:
* Section of a profile pipe 20 * 20 mm
* Two bearings with an inner diameter of 10 mm
* Two M10 bolts and nuts with washers of the same diameter
* Long nut M8
* Two end caps for a profile pipe
* Angle grinder, cutting wheel
* Vernier caliper
* M8 wing nut
* M8 bolt with hex head
* Spray paint can
* Metal Lathe
* Safety glasses, gloves, earphones
* Drilling machine, drill bit for metal 6 and 10 mm
* Broken drill with a diameter of 4 mm
* Masking tape
* Kerner
* Bench vise
* Ball from bearing
Step one.
First of all, we measure 150 mm from the profile pipe using a caliper.
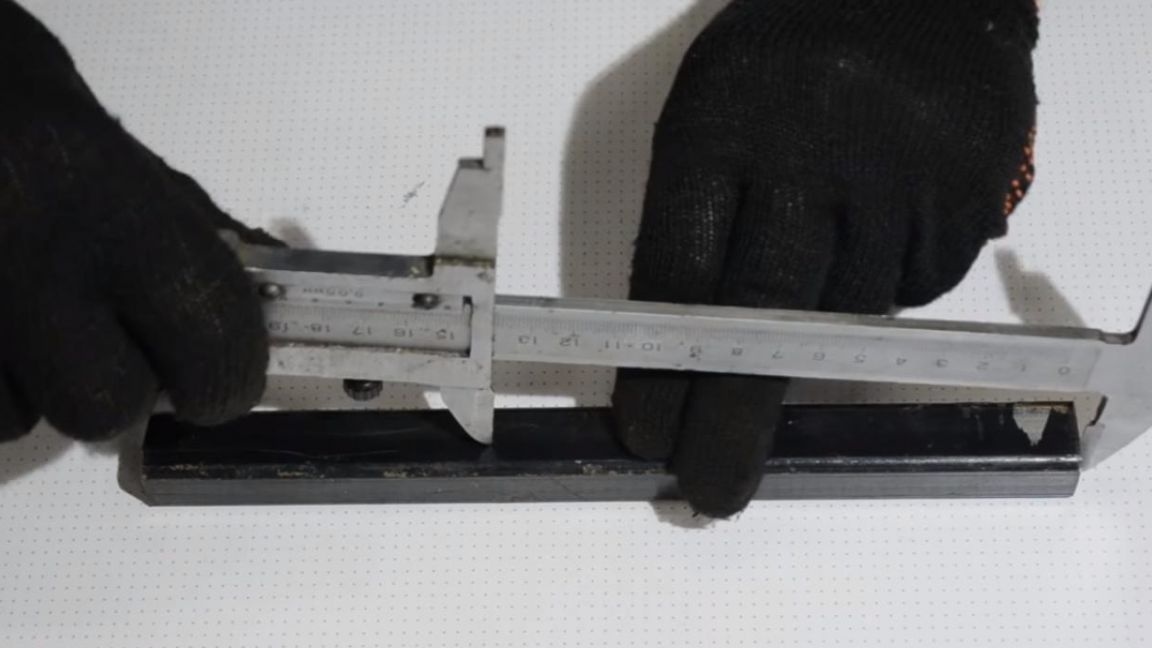
For greater accuracy, we glue the masking tape along the line, this method is great for marking pipes, profiles and other metal structures.
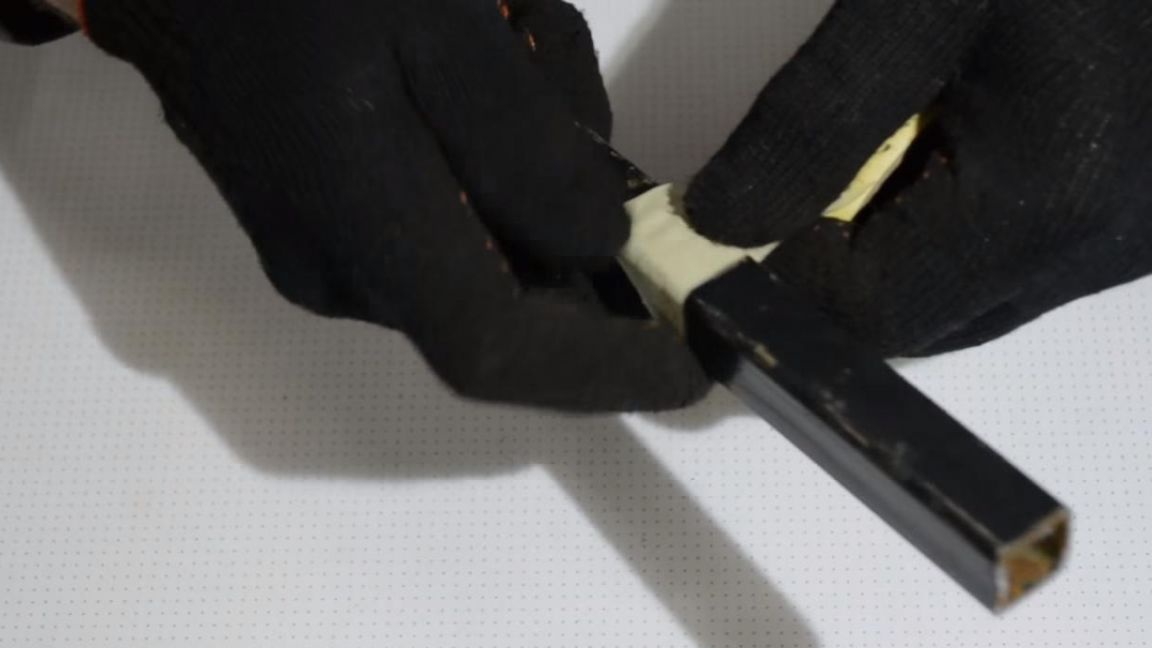
Then, holding with your hand, we saw off the profile pipe according to the marking using an angle grinder with a cutting wheel. When working with an angle grinder, be careful when wearing gloves, earphones, and safety glasses.
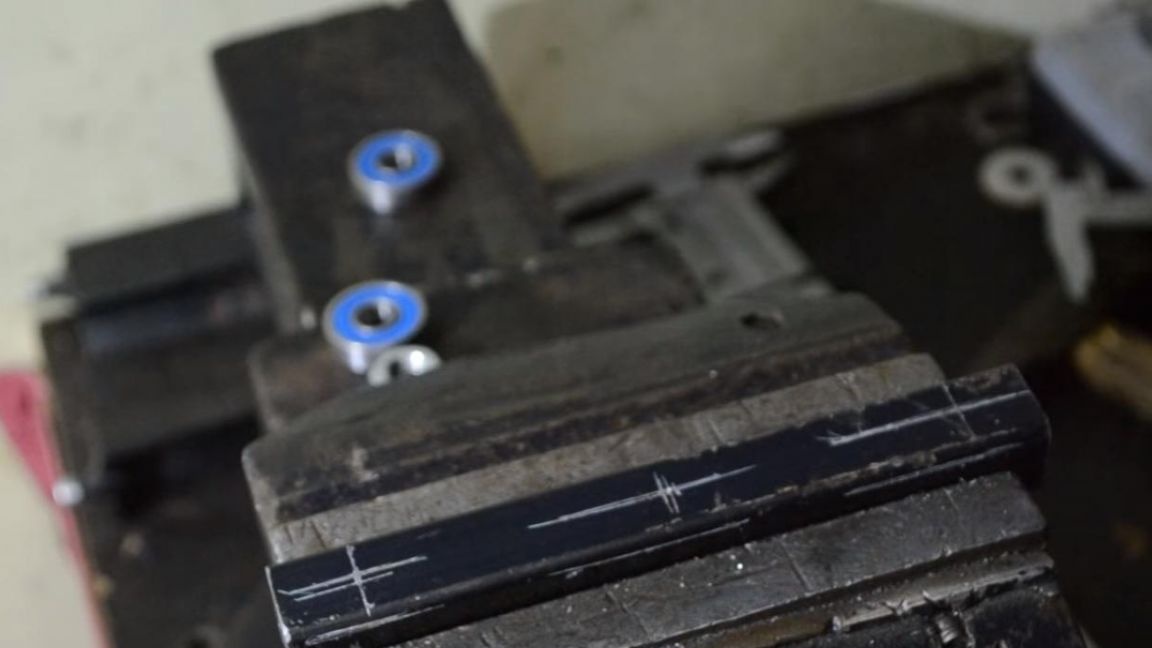
Step Two
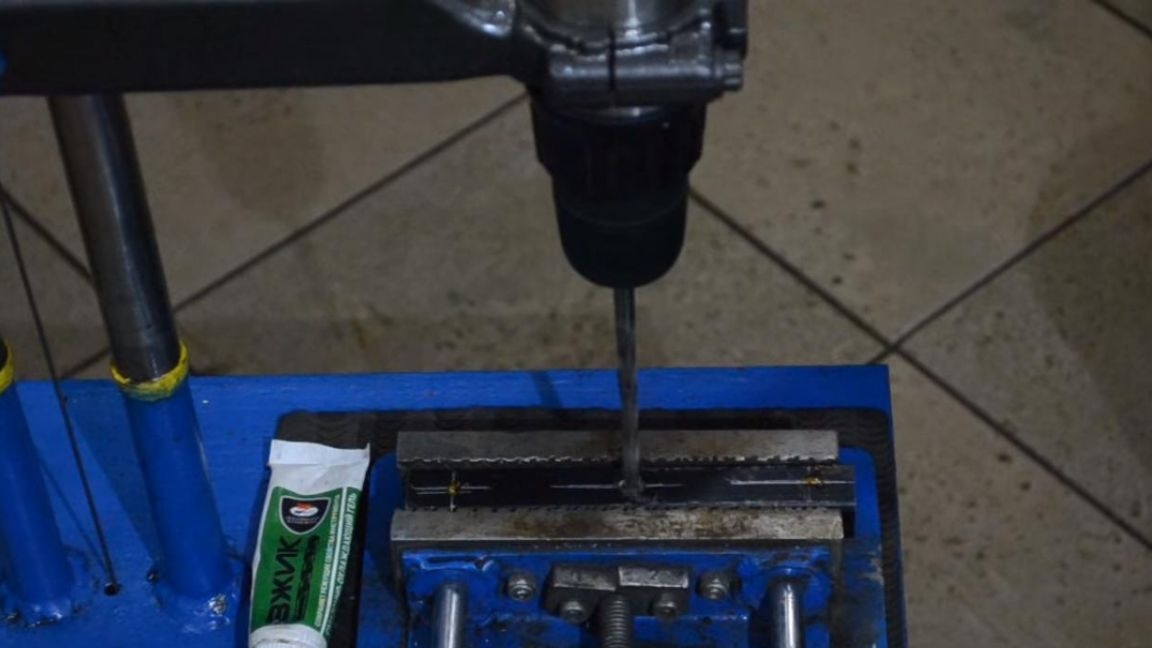
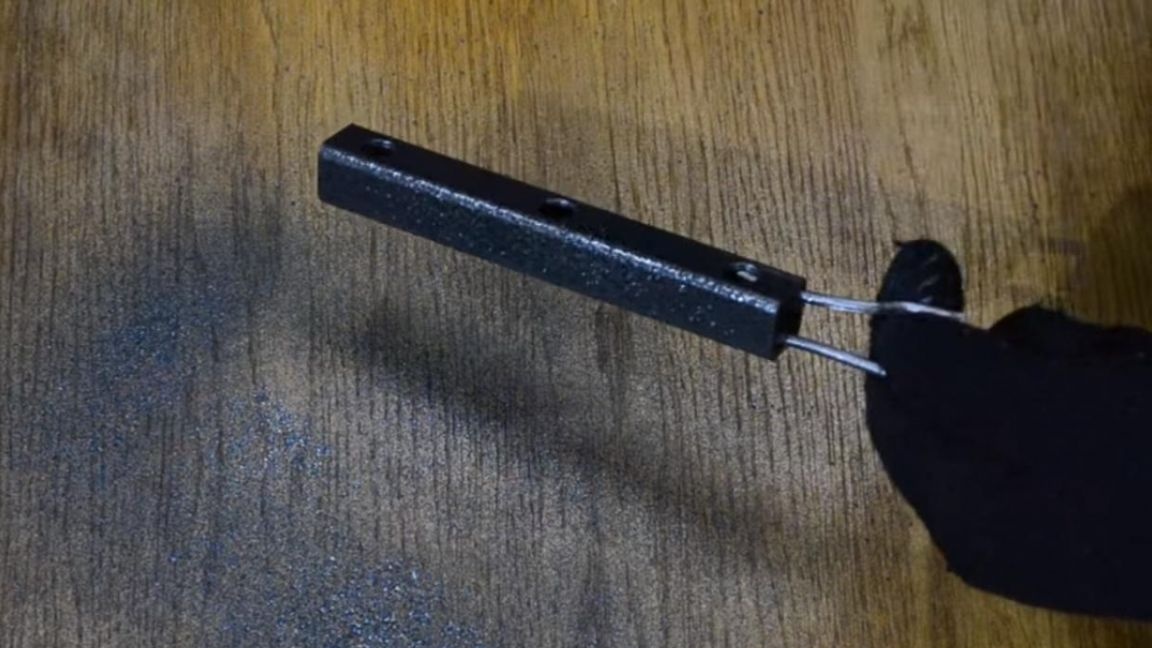
We apply the marking to the places of future holes, the more accurate this markup is, the higher the accuracy of this device will be. On the profile pipe, clamped in a vice, leave marks for the installation of bearings, as well as the tip, which will be located strictly in the middle.
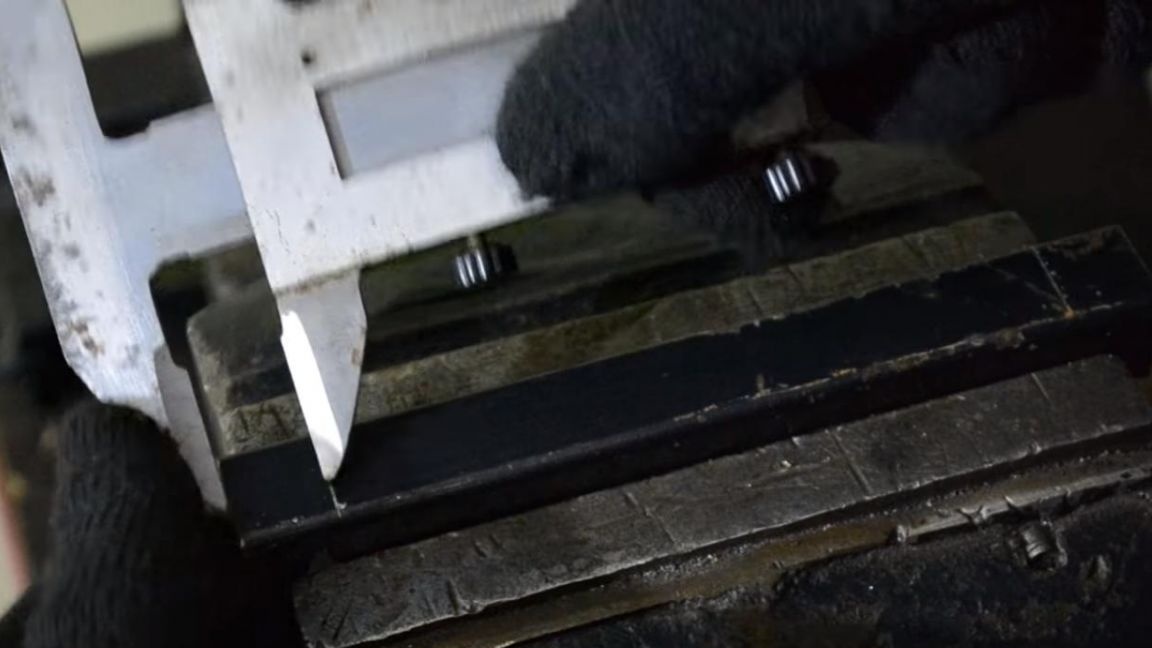
Next, we do the core marking and drill, for this we set the workpiece in a vice and, using a drilling machine, drill it first with a 6 mm drill, and then 10 mm. In the process of drilling, add technical oil or special grease so that the sharpening of the drill lasts longer and it does not jam in the part.
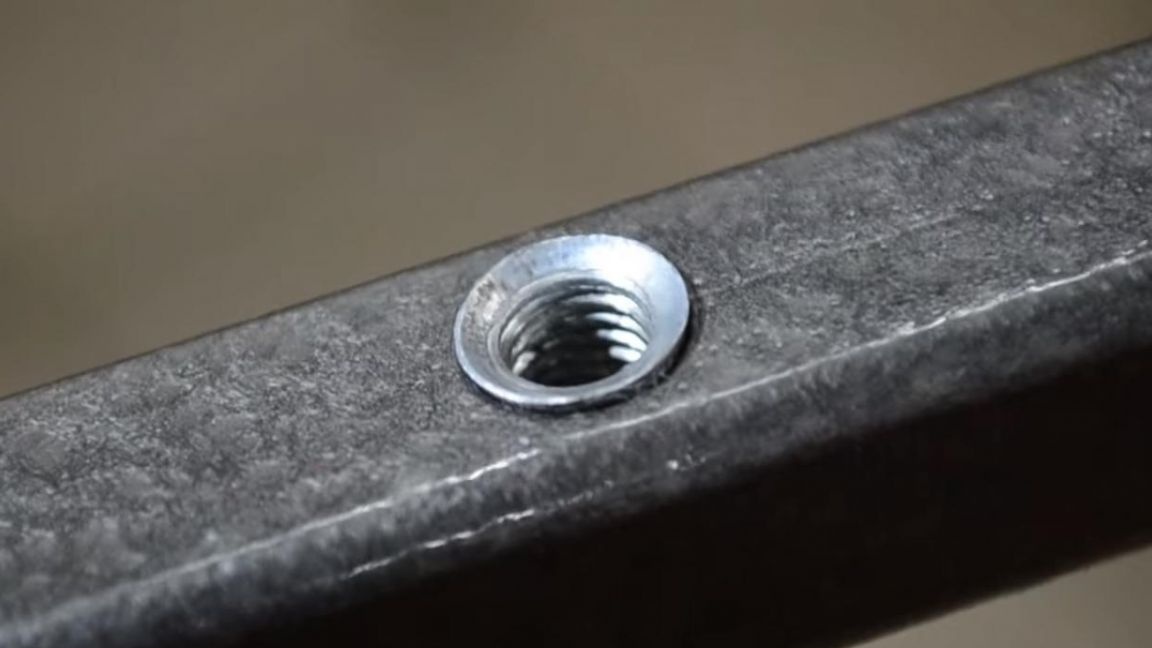
The result is such a profile pipe with holes, where the central hole is drilled through, and the two extreme ones in only one wall.
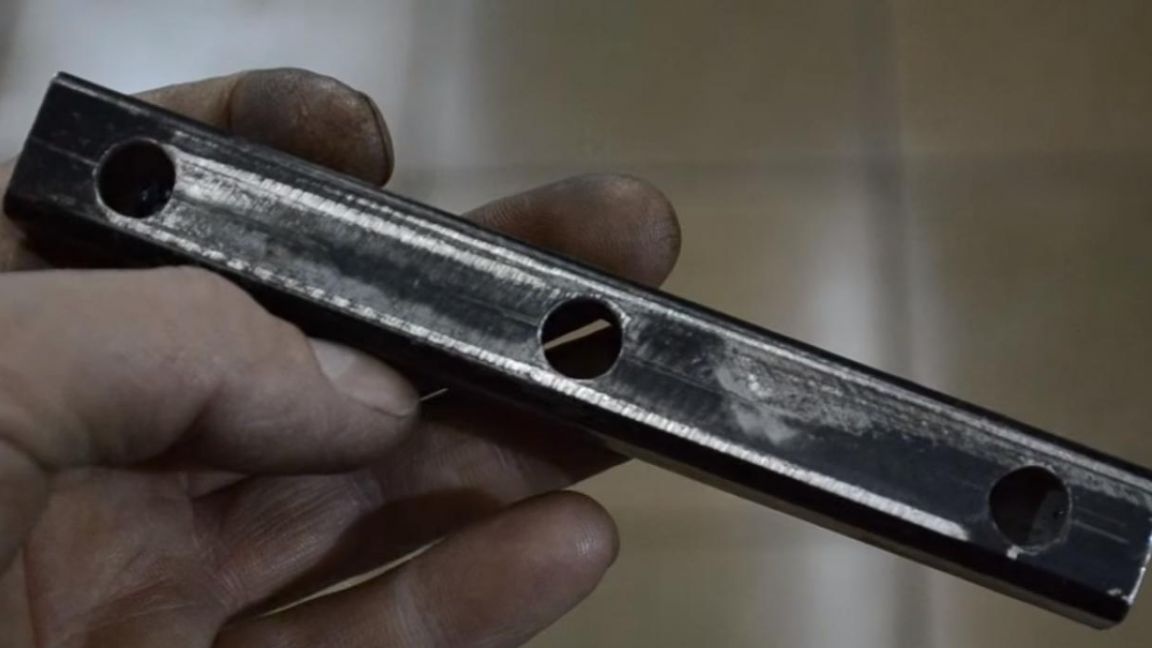
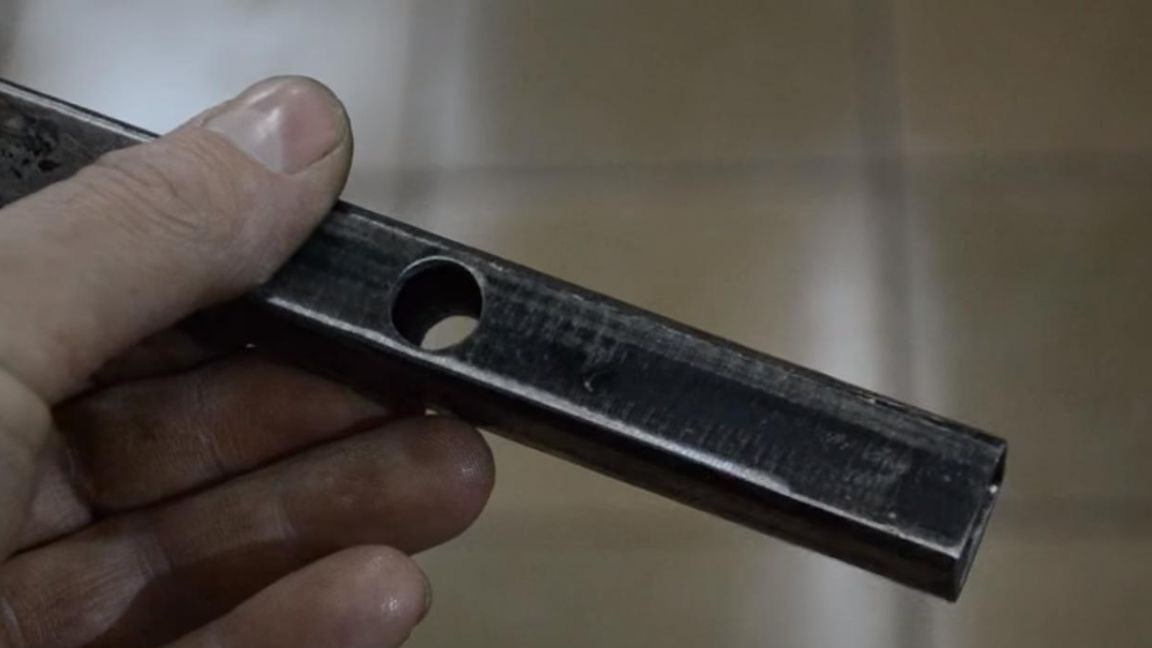
The central hole on one side has a diameter of 10 mm, and on the other 12 mm, this is done to install a long nut.
Step Three
We paint a profile pipe with a spray can with a hammer paint.
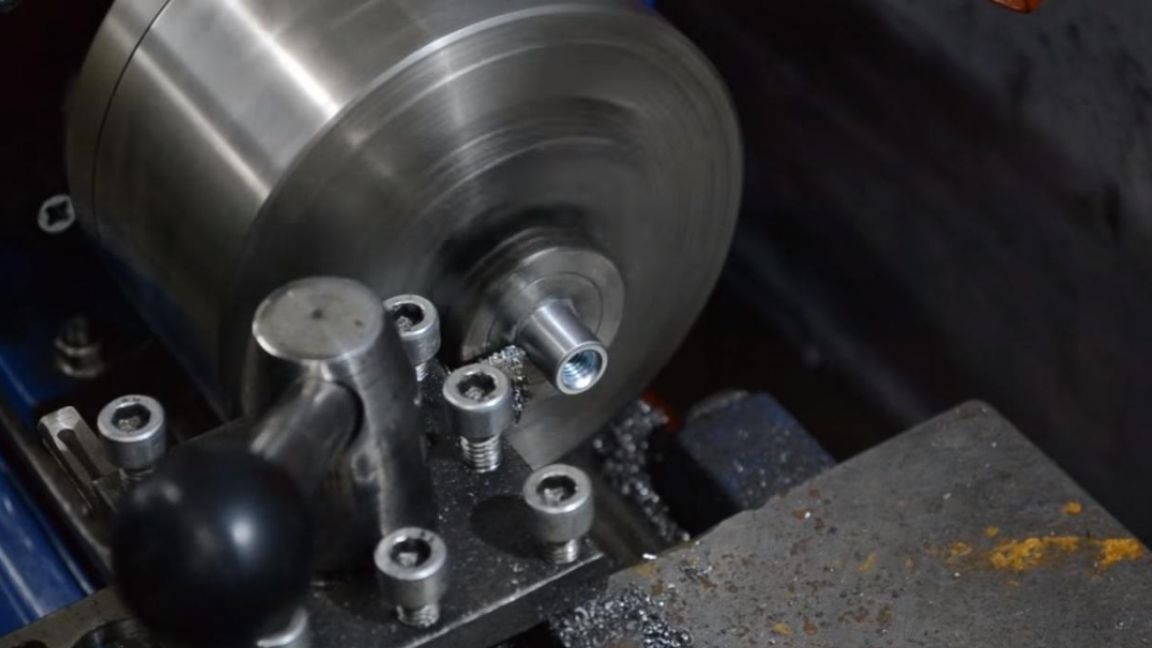
Next, install a long M8 nut in a three-jaw lathe chuck for metal and begin to drill it to an outer diameter of 12 mm with a step of three millimeters with a diameter of 10 mm.
Step Four
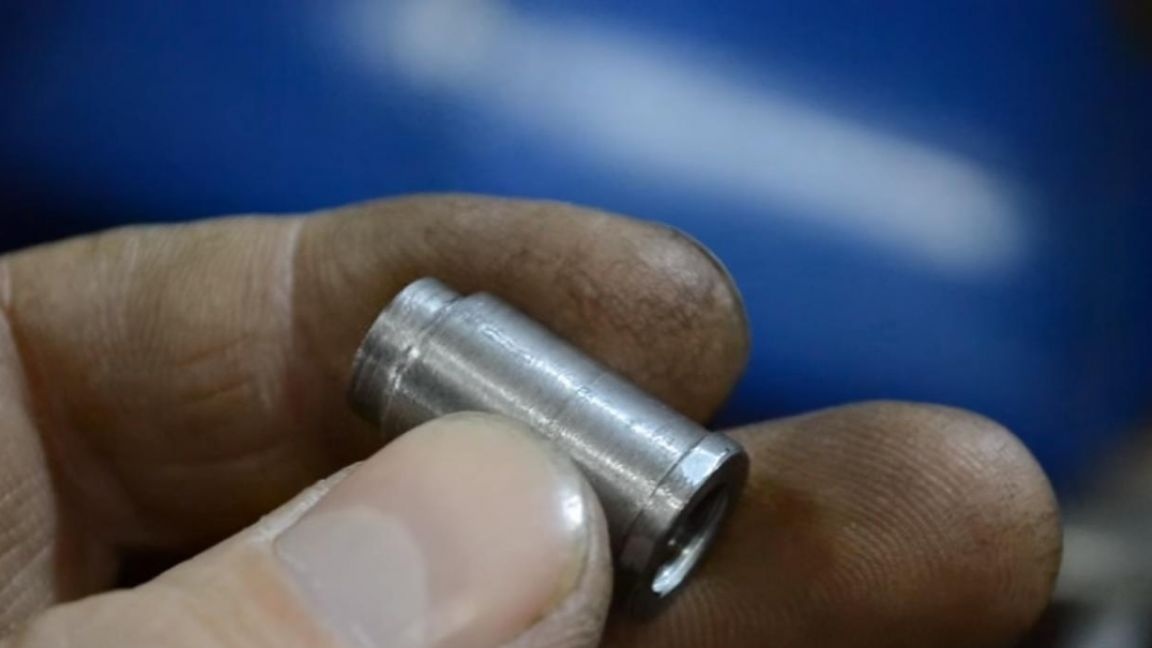
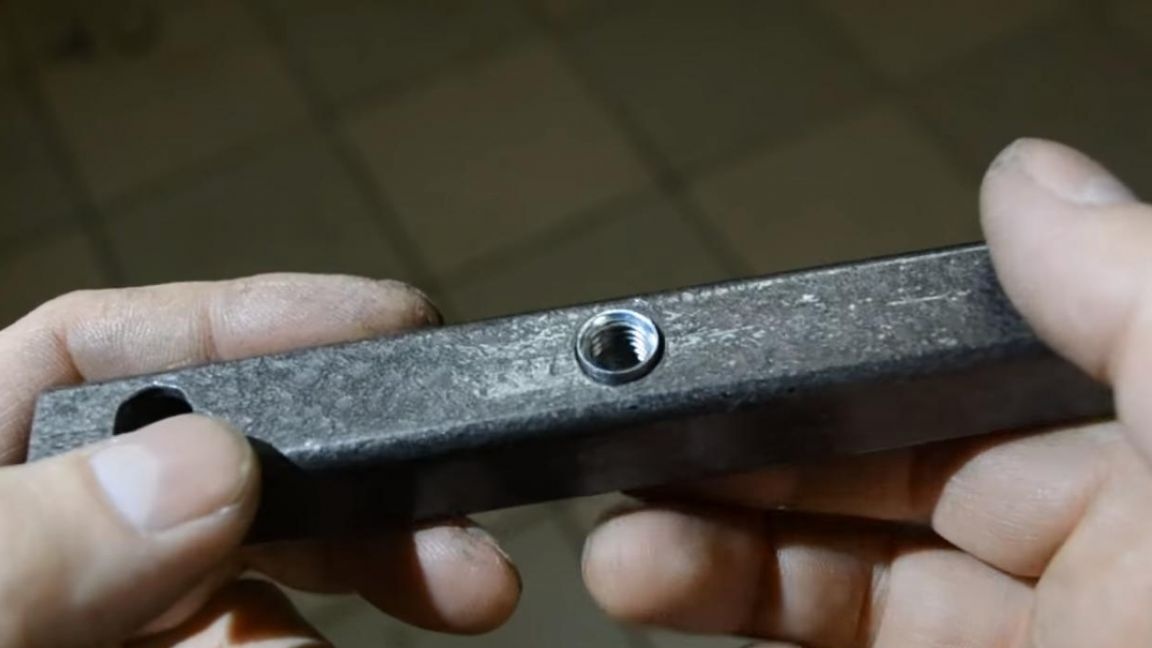
Now we insert the finished threaded sleeve made earlier in the central hole of the profile pipe.
Next, using a vice and a large ball from the bearing, we expand the protruding part of the sleeve so that it does not scroll in the workpiece.
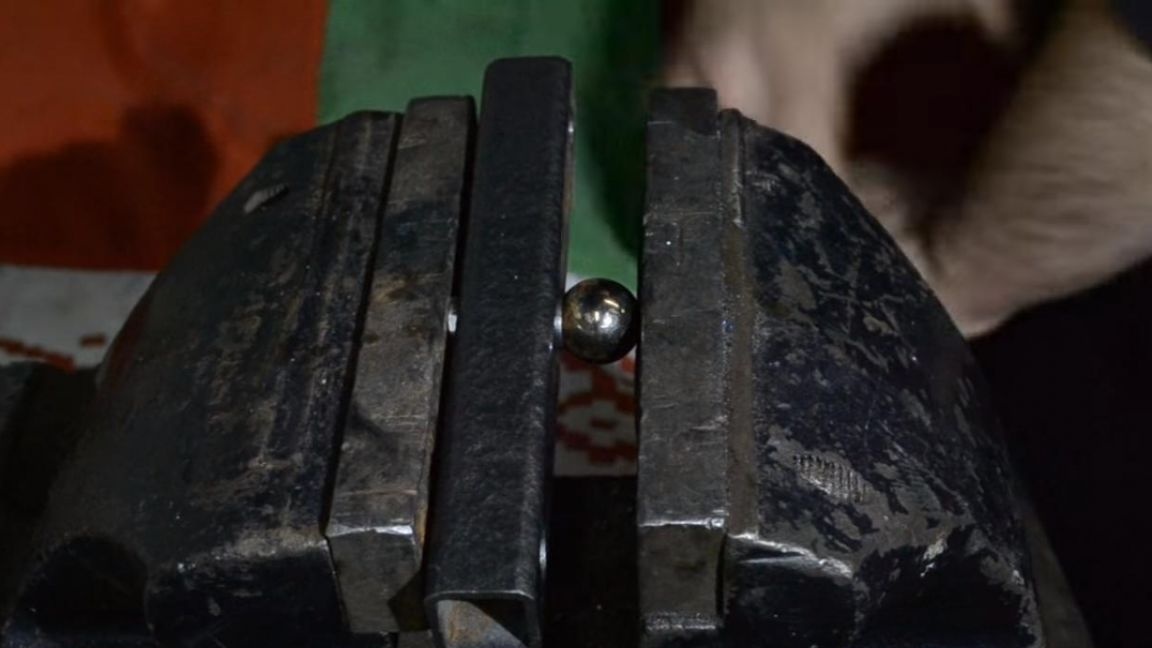
The result is such a strong and reliable rolling.
Step Five
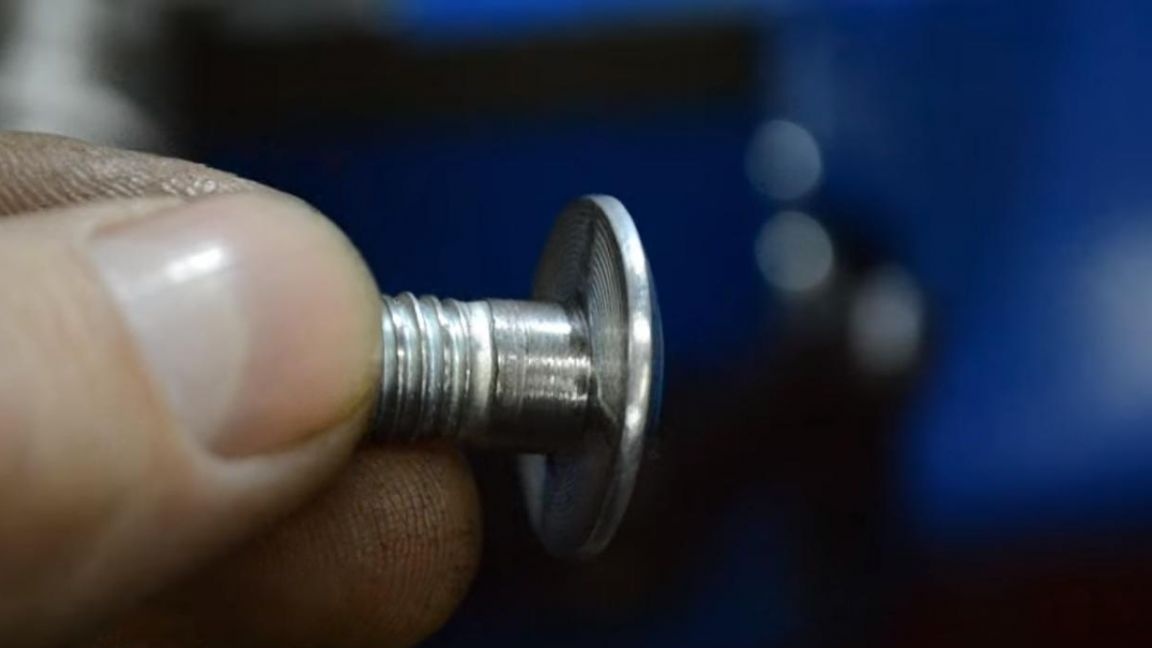
We clamp the bolt into the chuck of the lathe and grind the square base to a diameter of 10 mm, this is necessary for its landing on the bearing.
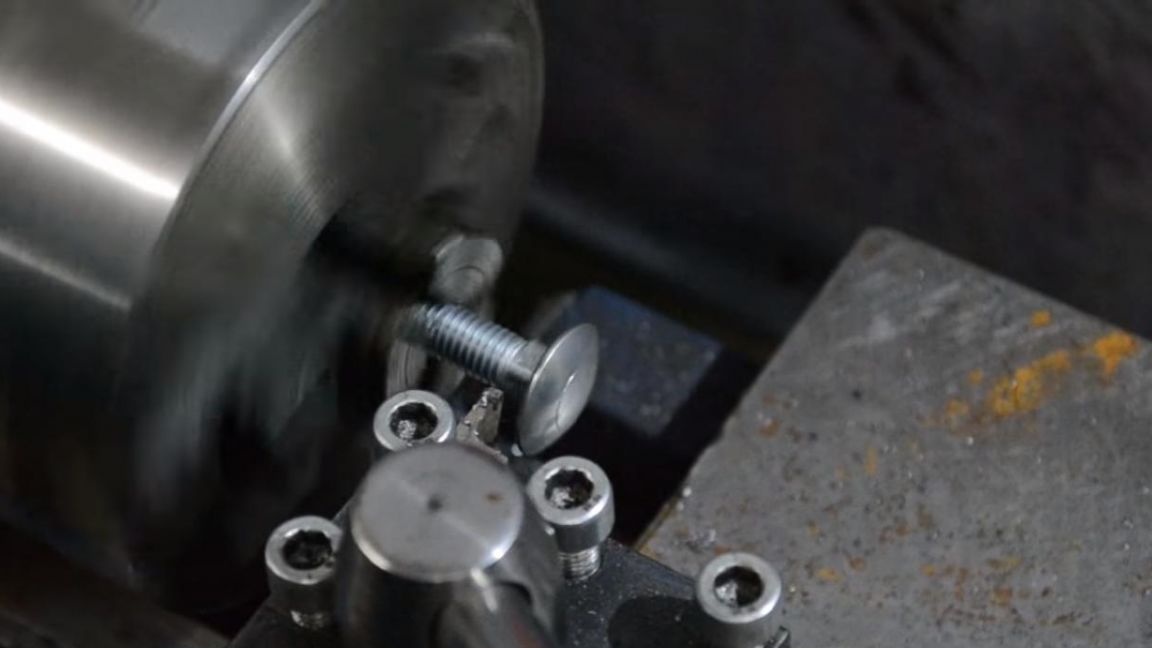
It looks something like this.
For the central bolt you need to make a point. We drill a hole in the bolt and install a broken drill with a diameter of 4 mm in it, then sharpen it and get a sharp tip at the base of the bolt. From two faces, we drill two M12 nuts on a lathe so that they enter the profile pipe.
Step Six
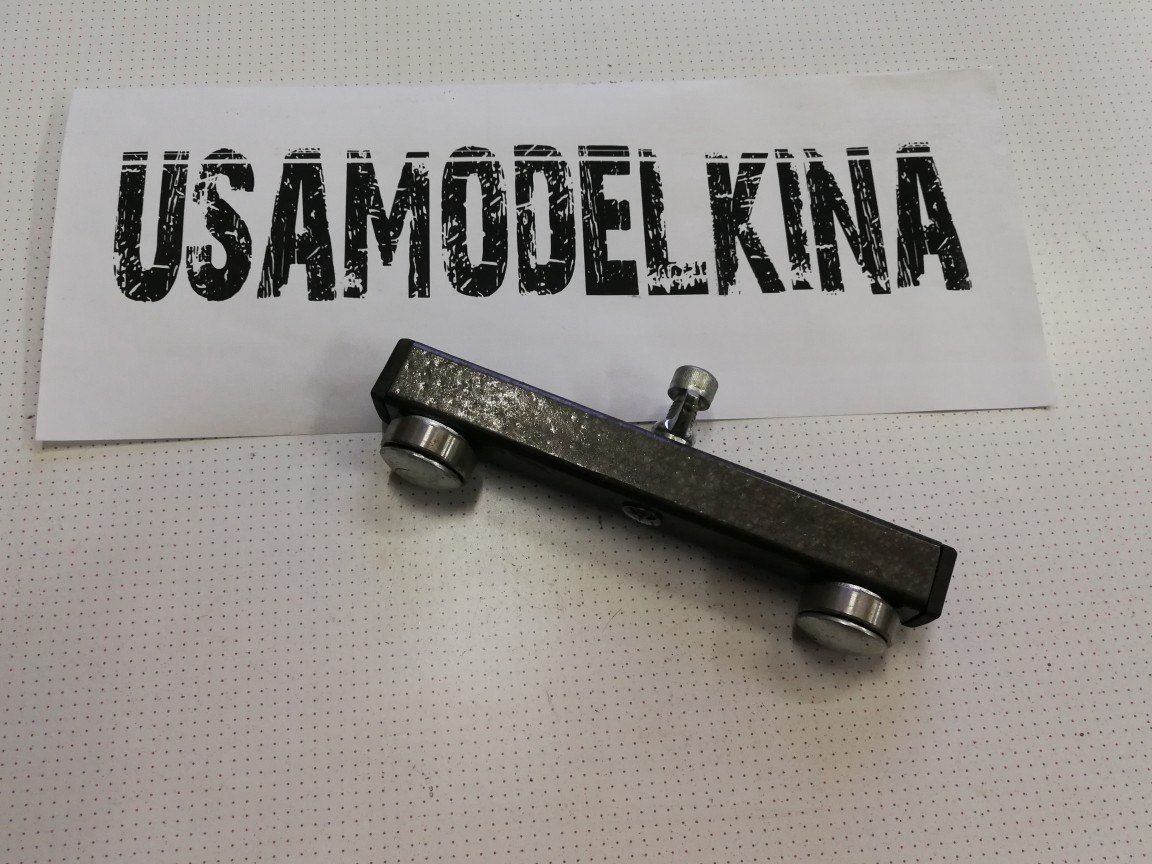
All parts for the tool are ready.
We assemble the device, first we fasten the bearings, placing the washers, and then install the plugs on the profile pipe, and then screw the central bolt with the wing nut into the sleeve. This turned out to be such a useful tool for the workshop.
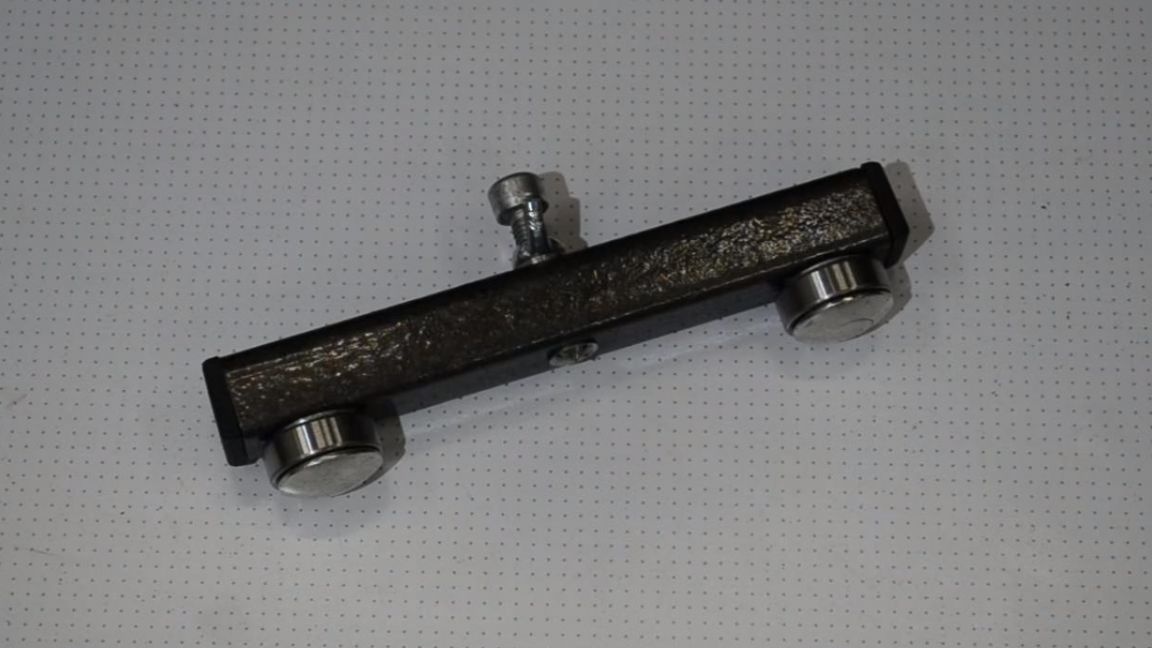
If necessary, its tip can be replaced with a regular pencil for marking wooden parts.
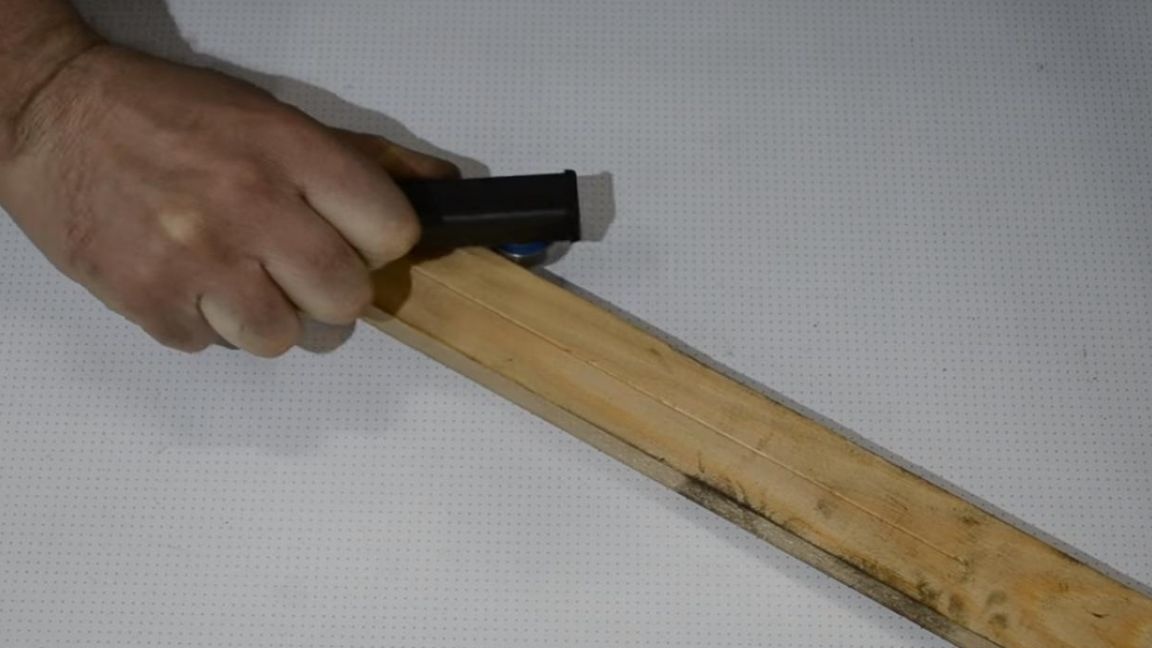
The time has come to check the tool for marking the center of the part. We take a profile pipe, in this case we found a size of 50 * 50, we install the tool and pressing on it, we conduct from the beginning to the end of the part.
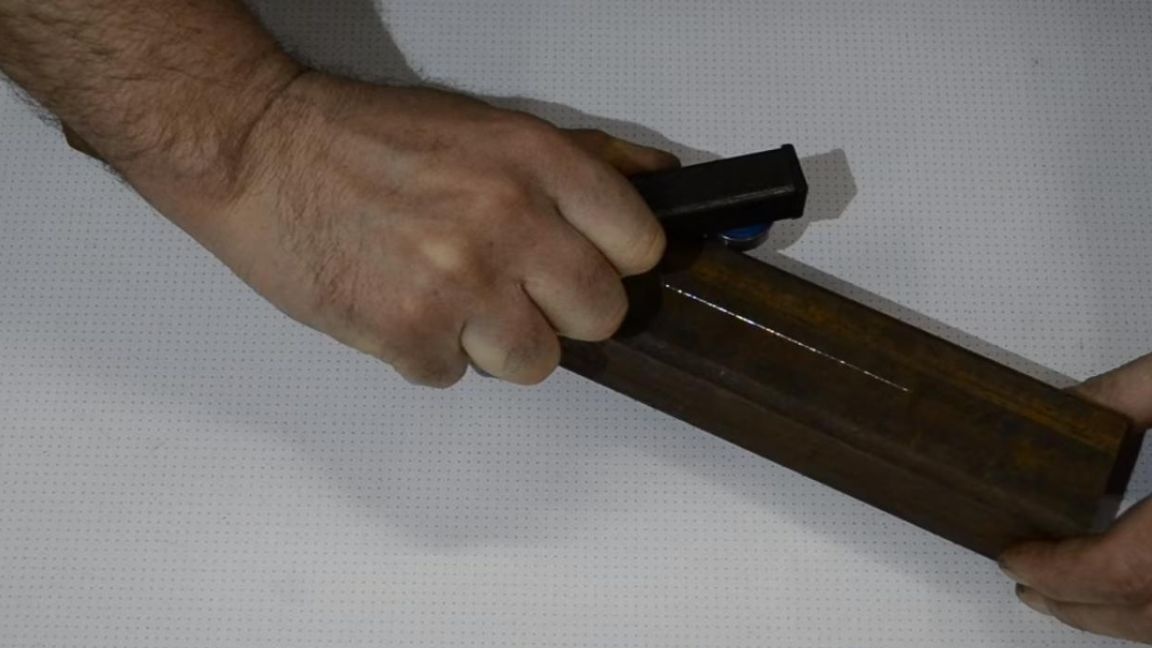
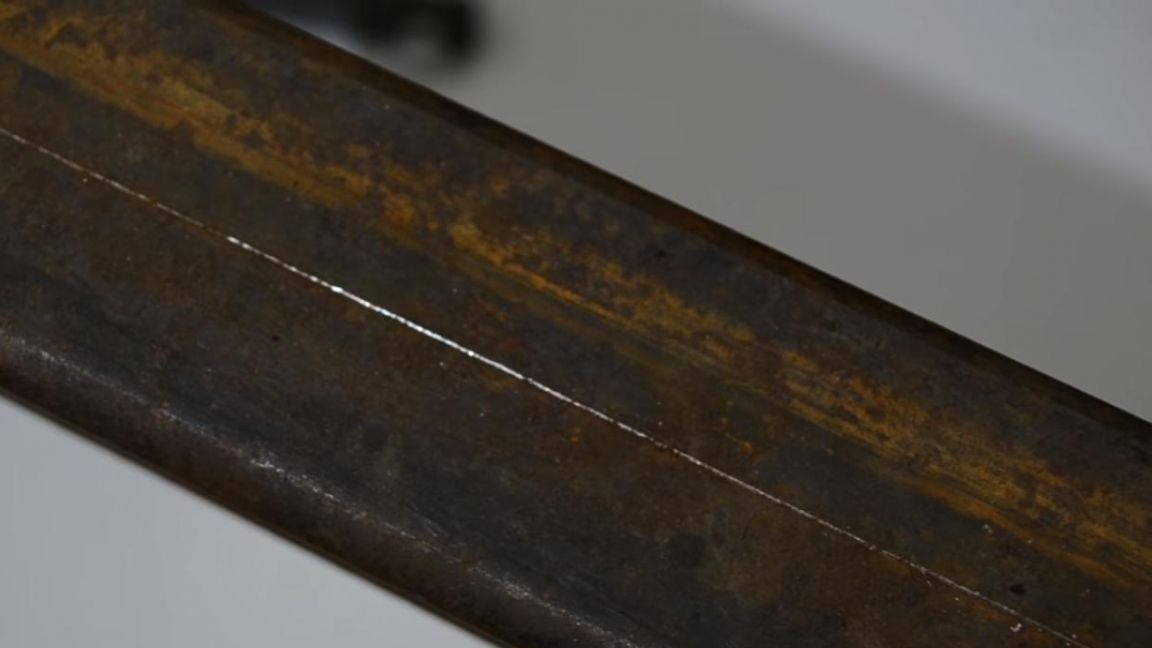
The result is such a central line.
So the markup with the help of this homemade product looks on a wooden bar.
That's all for me, thank you all for your attention and creative success.