

Now more and more devices are using lithium batteries. Even cheap radios use lithium-ion batteries.
I decided for myself to remake screwdrivers on lithium-ion batteries. I will redo it in the simplest way, without protection boards. I have no such priority. I do for the home and control the discharge by the loss of power. It’s possible to repack (I’m doing these things), but this alteration suits me.
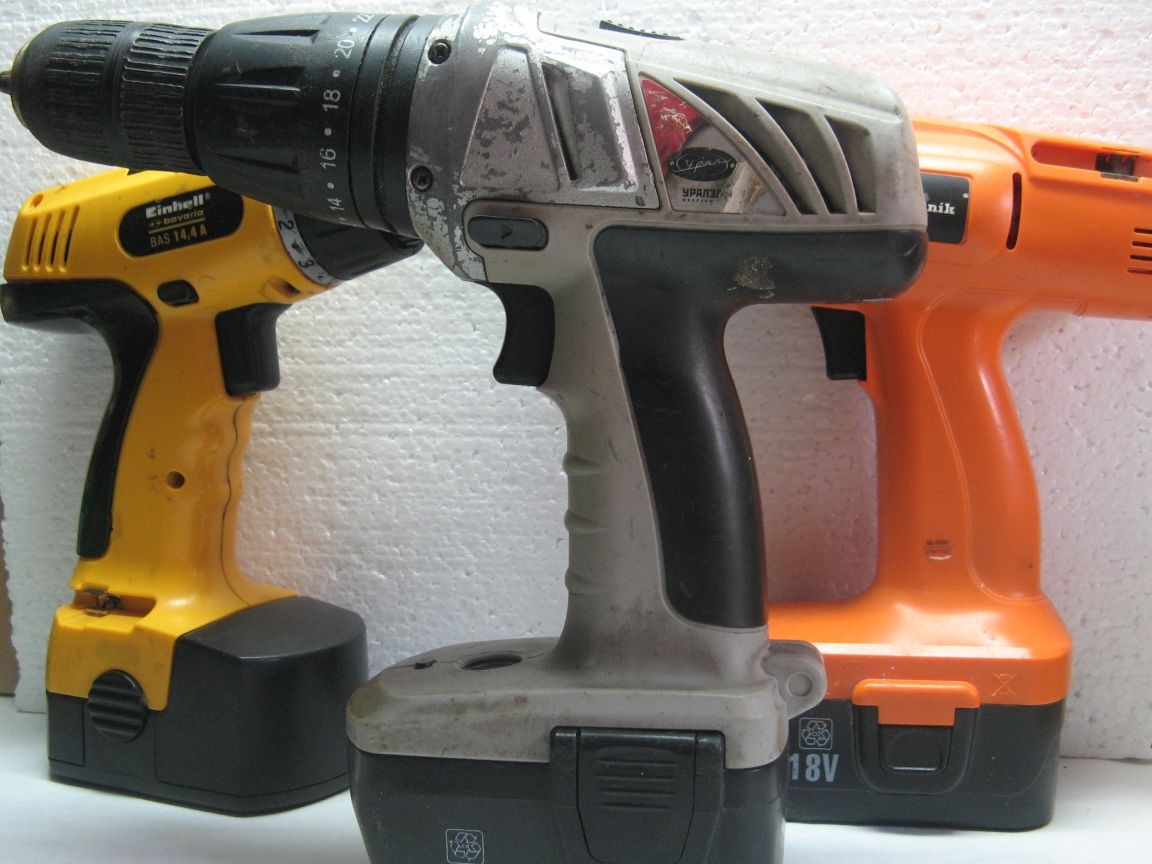
For the alteration, I will use a screwdriver for 14.4 V. Since most use the same motor with a wide range of supply voltage. I will remake this screwdriver for three 18650 format batteries.
Tools and materials:
- screwdriver;
- batteries 18650;
- wires;
- 4-pin connector (sockets);
- 4-pin connector (pins);
- connector from floppy drive;
- instruments.
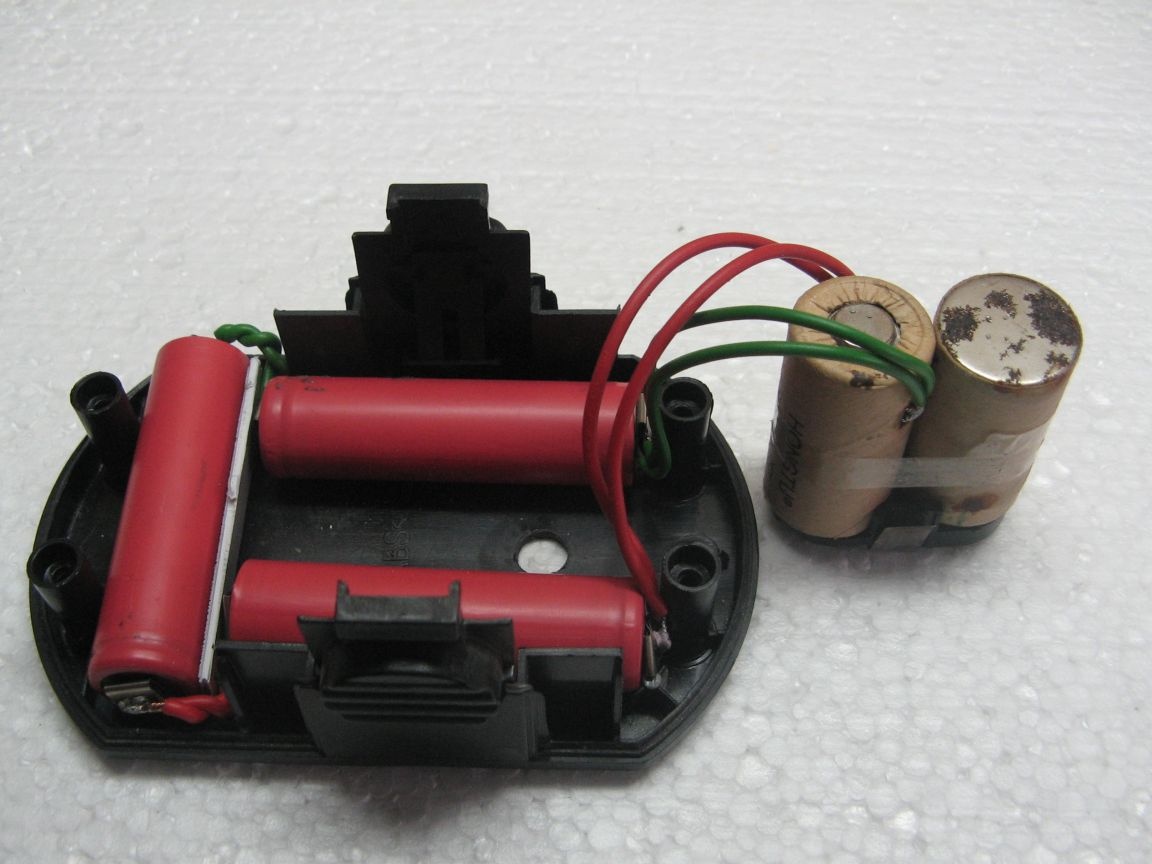
The first step is to disassemble the battery from a screwdriver. I don’t have 12 SC format elements. We leave only a couple of elements with a contact group, they will be useful to us. We hand over the remaining elements for recycling and protect nature.
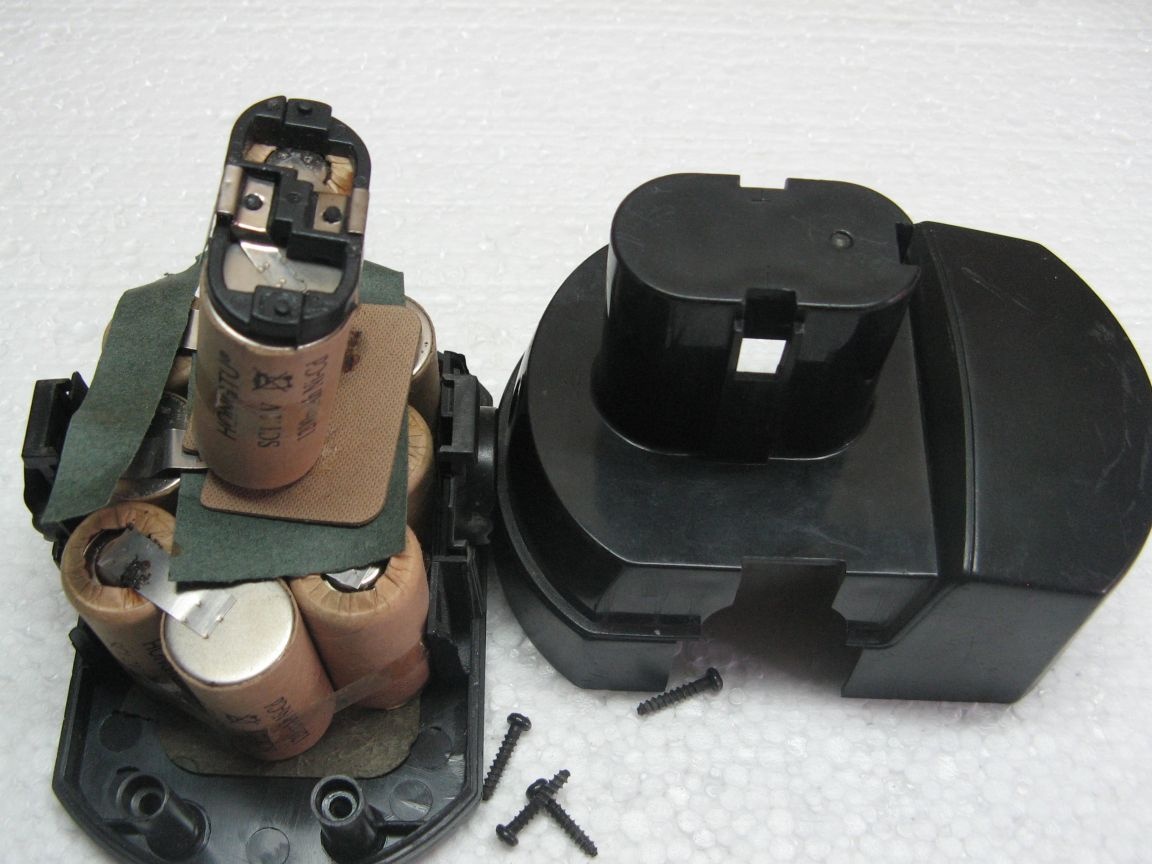
Two elements of the head serve as the holder of the contact group. Solder thick wires. The polarity is indicated on the plastic of the battery cover. I didn’t have a thick wire, I put the thin ones in parallel. Red, respectively, plus, soldered to the plus of the old element. The minus is green and soldered to the case, since the case is a minus.
Initially, I wanted to solder the wires to the contact plate, but they didn’t want to be torn, I soldered it as it was.
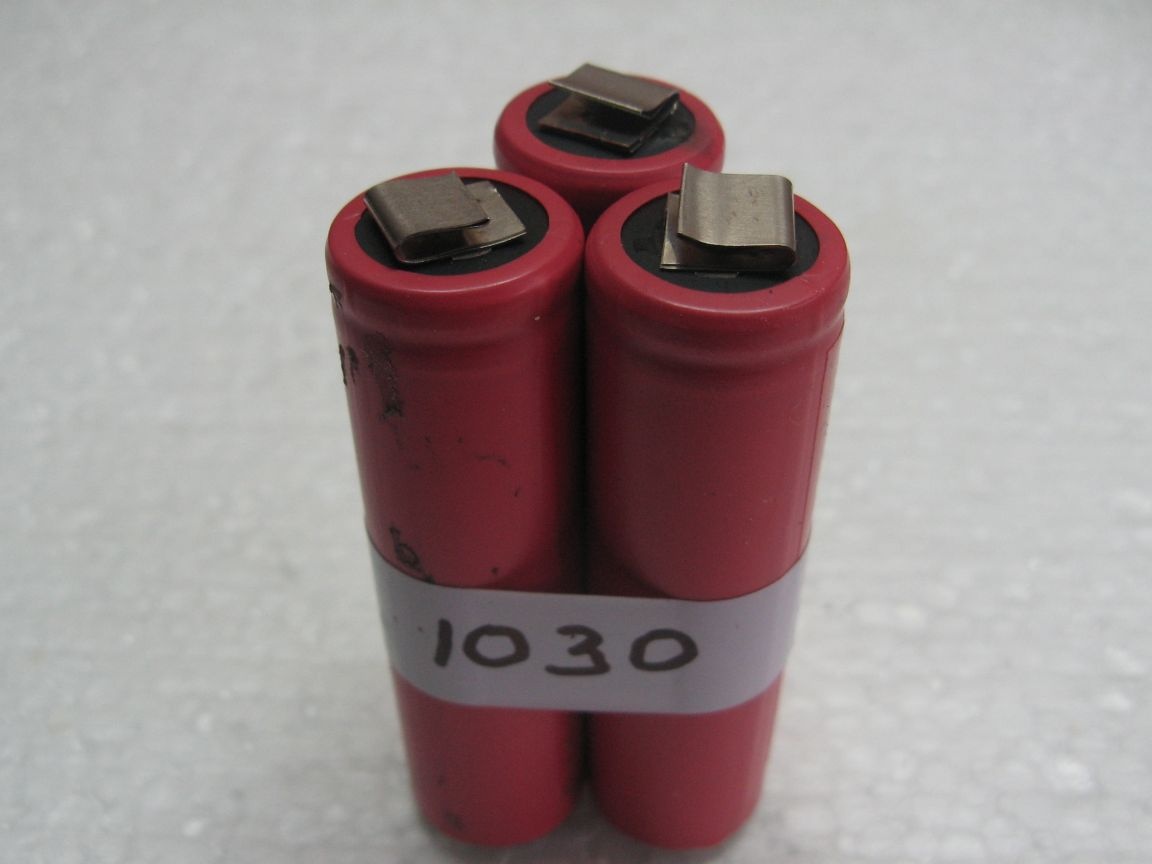
In the alteration I will use Sony high-current boo elements. Since the elements were used, their heat shrinkage was damaged, I changed the heat shrinkage from Sanyo elements.
I picked up the elements closest to each other by residual capacity. The capacity was a little more than 1Ah.
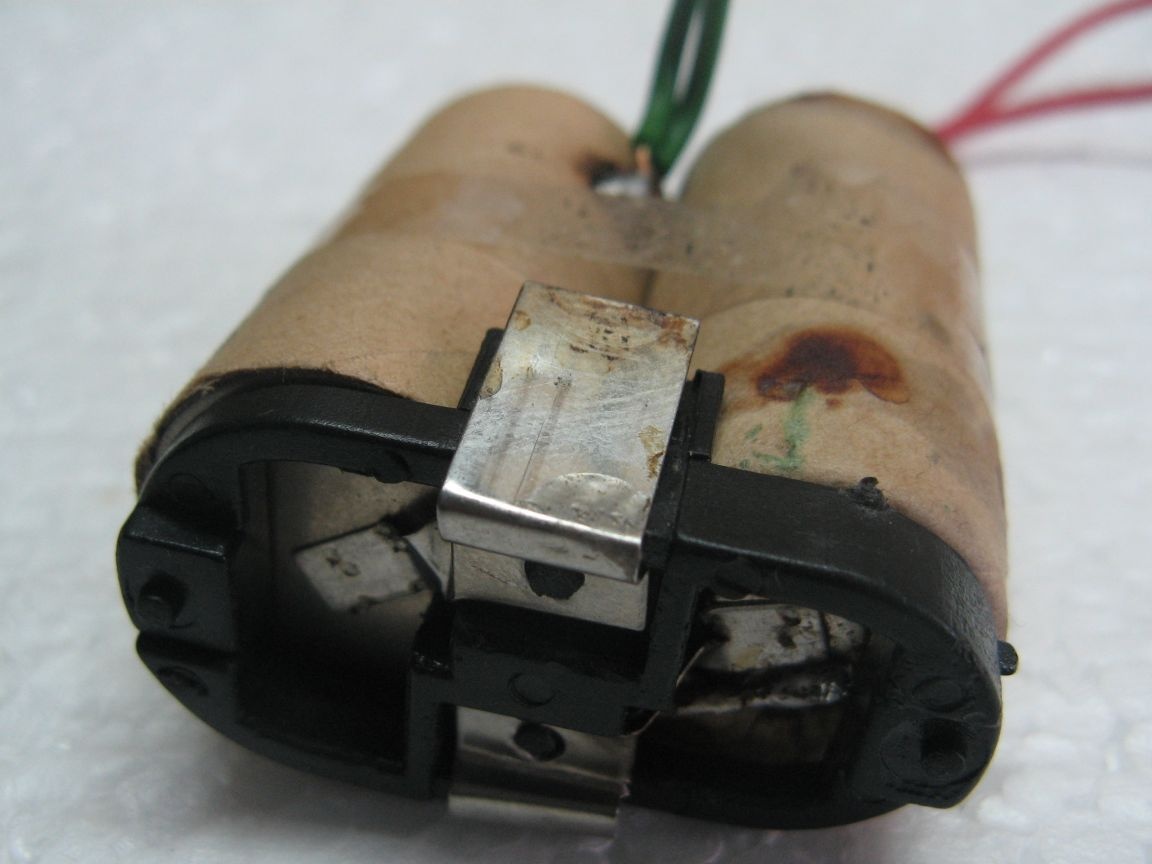
We solder the wires to the elements, also the wires are thicker, I have two wires. We connect in series. Solder the wires to the elements with a contact group.
Testing disassembled. We control for heating, heating when tightening screws is not observed. I chose this revision as more affordable. For home use, great. The first modified battery proved to be positive, more than one hundred screws were screwed on (orange in the photo).
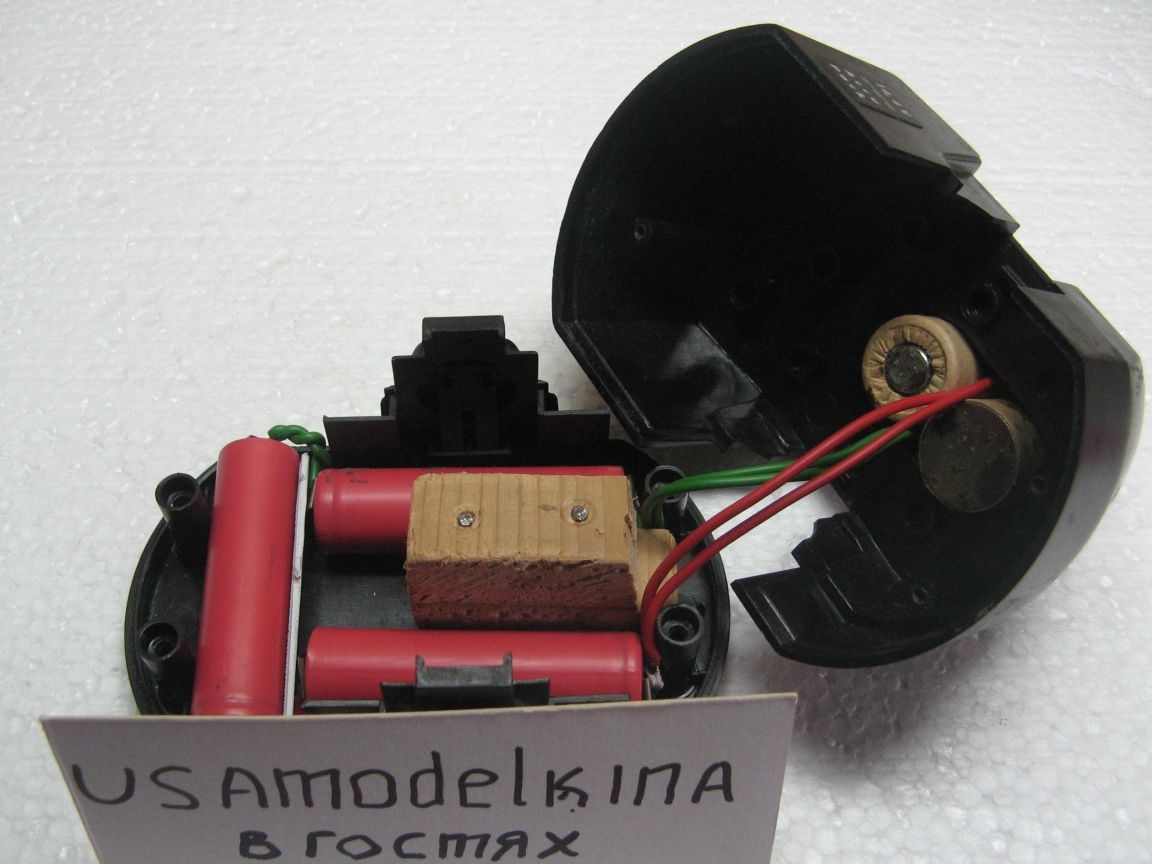
To support batteries with a contact group, made a stand. The stand is made of a wooden block, knocked down by carnations.
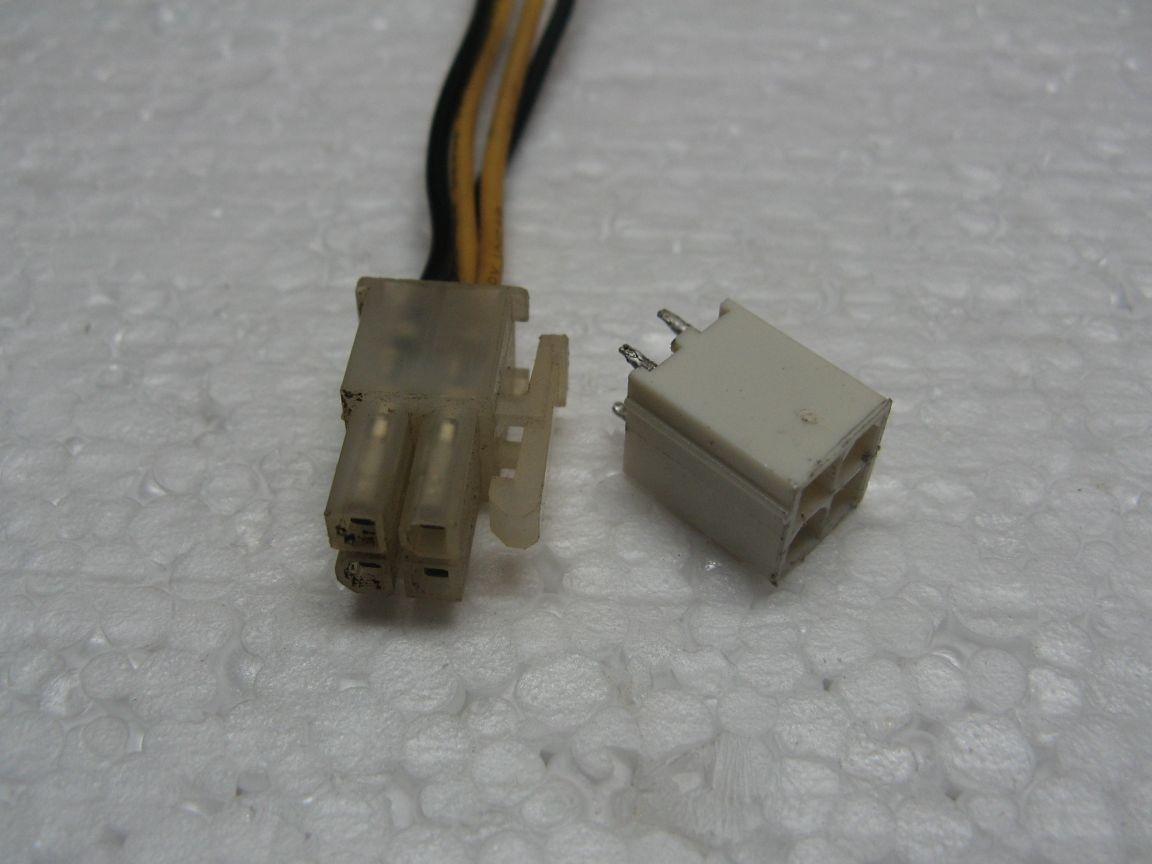
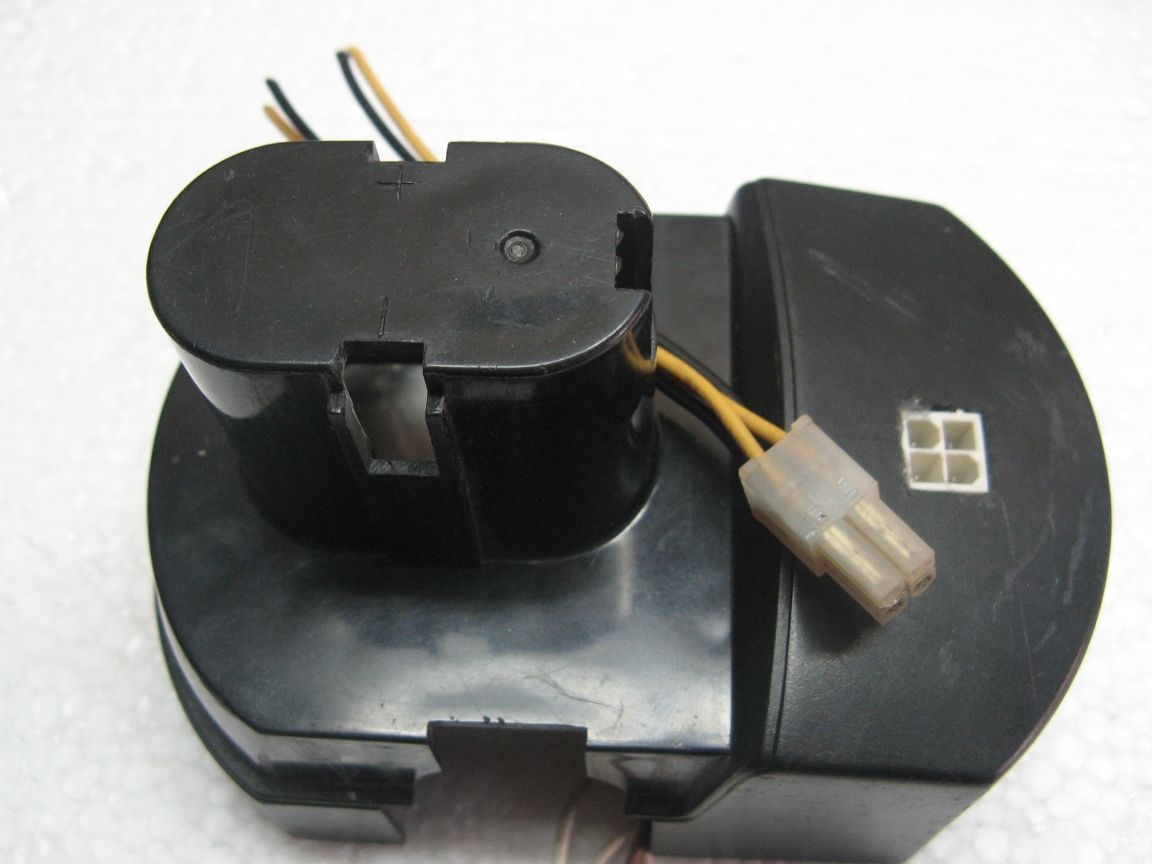
We proceed to install the balancing connector.
The connector was removed from the old motherboard. You can use any connector. The maximum current passing through it, in the region of one ampere. Mating connector, applied from a computer power supply.
The connector from the motherboard must be installed on the battery case, but previously unsoldered. A window for the connector is cut with a sharp knife. Plus, the battery assembly is soldered to the first contact of the connector. Plus the second element to the second contact. Third to plus third. The fourth wire to minus the assembly. After desoldering the wires, fill the connector with epoxy glue. Before assembling, I advise you to sketch on a piece of paper what and where it is soldered. I have everything in my head.
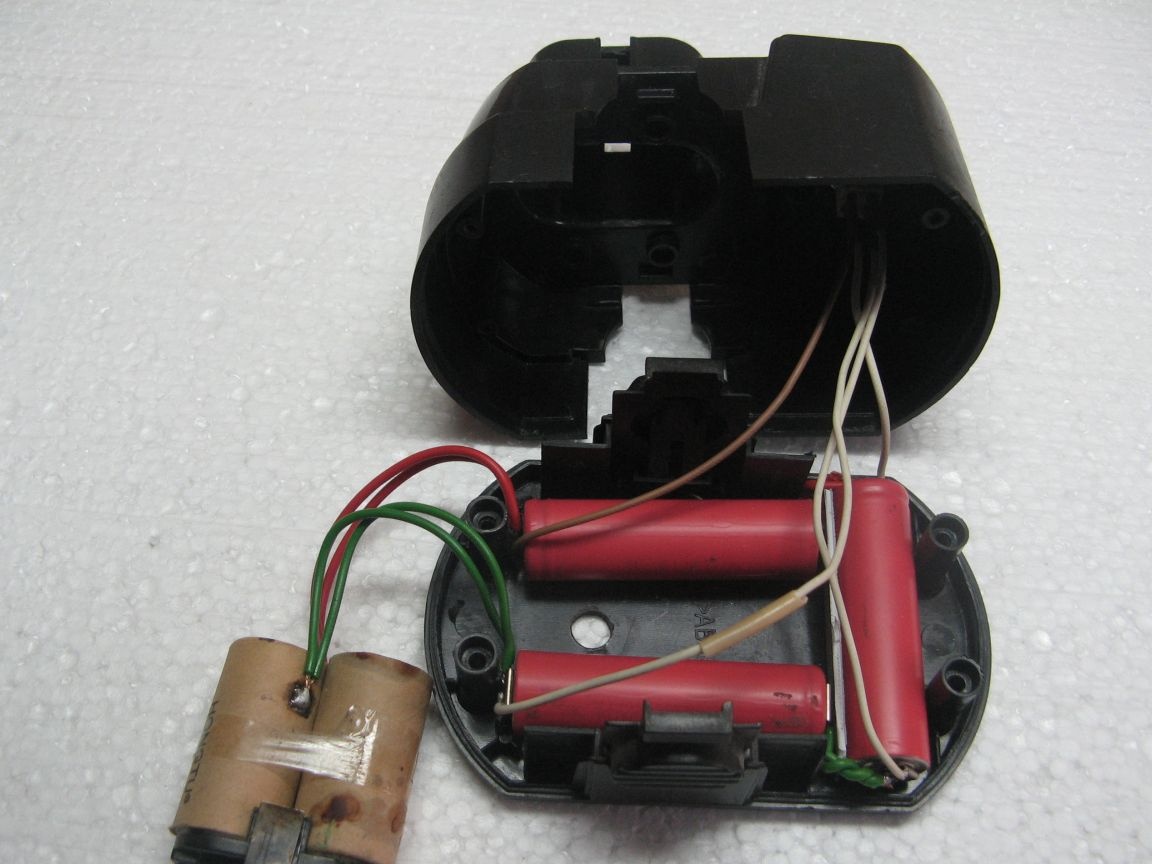
When the glue hardens, we collect the battery and set it aside.
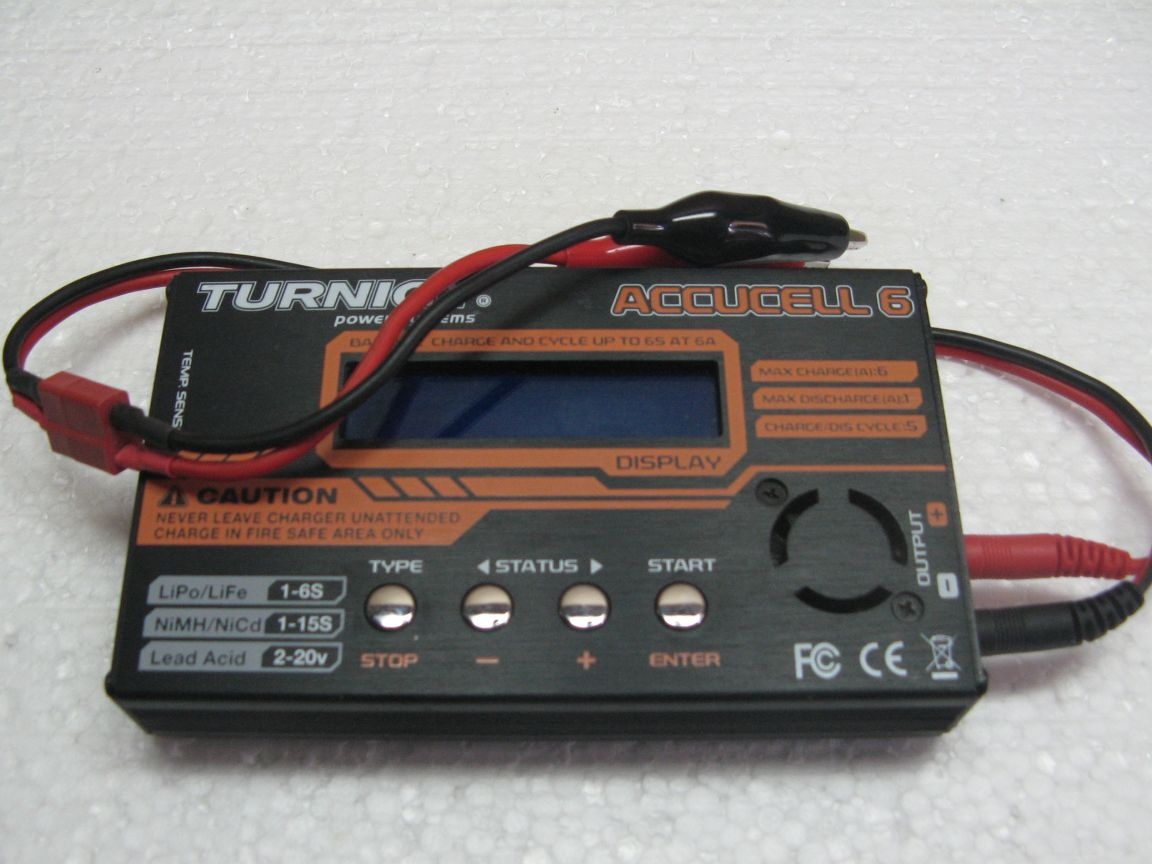
I will charge with a smart charger, but I do not have a wire for balancing charging. Need to make it.
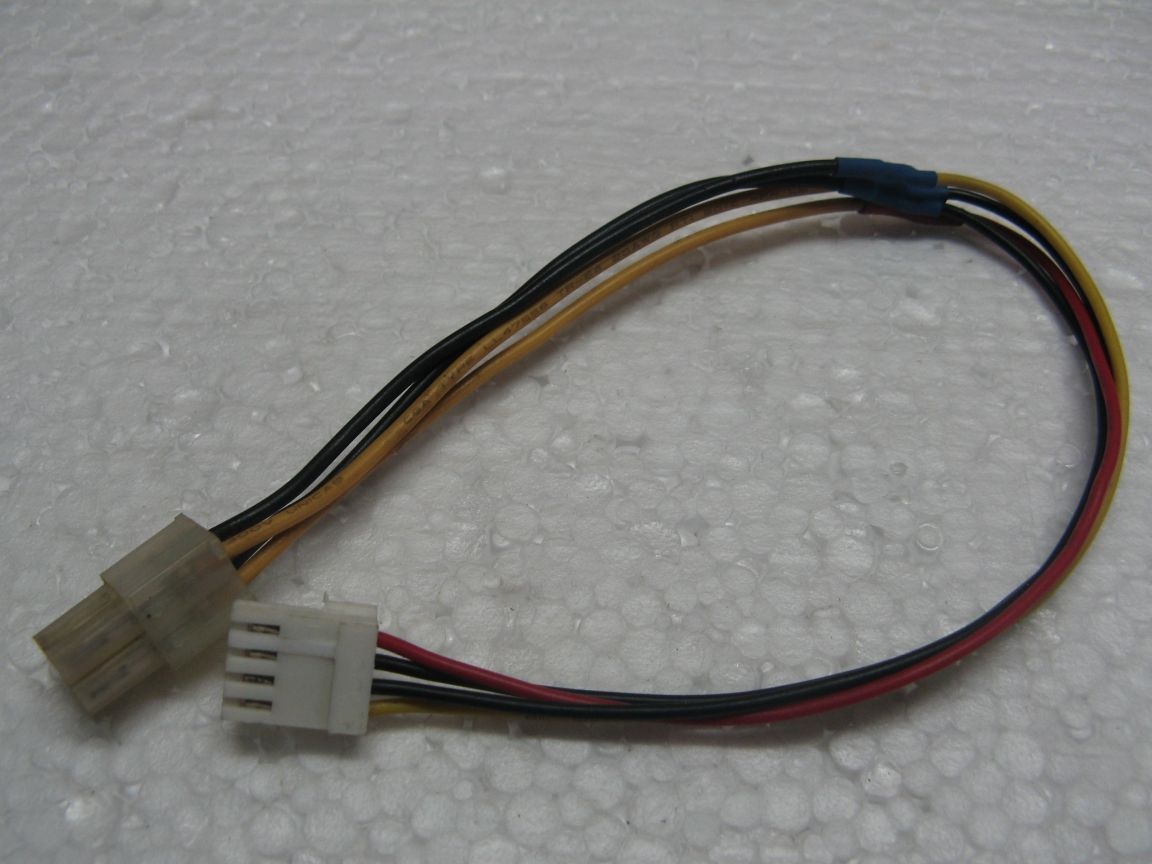
To connect the balancing wire to the charger, you need a mating connector. I did not have it, but it does not matter. Its role will be played by the connector from the computer power supply, the one that fed the floppy drive. Cut it off with wires.
He simply solders. The battery plus wire (we look at the leaflet with the wiring of the battery wires), solder to the red wire. Plus the second element to black and so on. We connect the joints of the wires with a heat shrink tube. All guides and keys are cut with a sharp knife, otherwise it does not fit into the balancing connector of the charger.
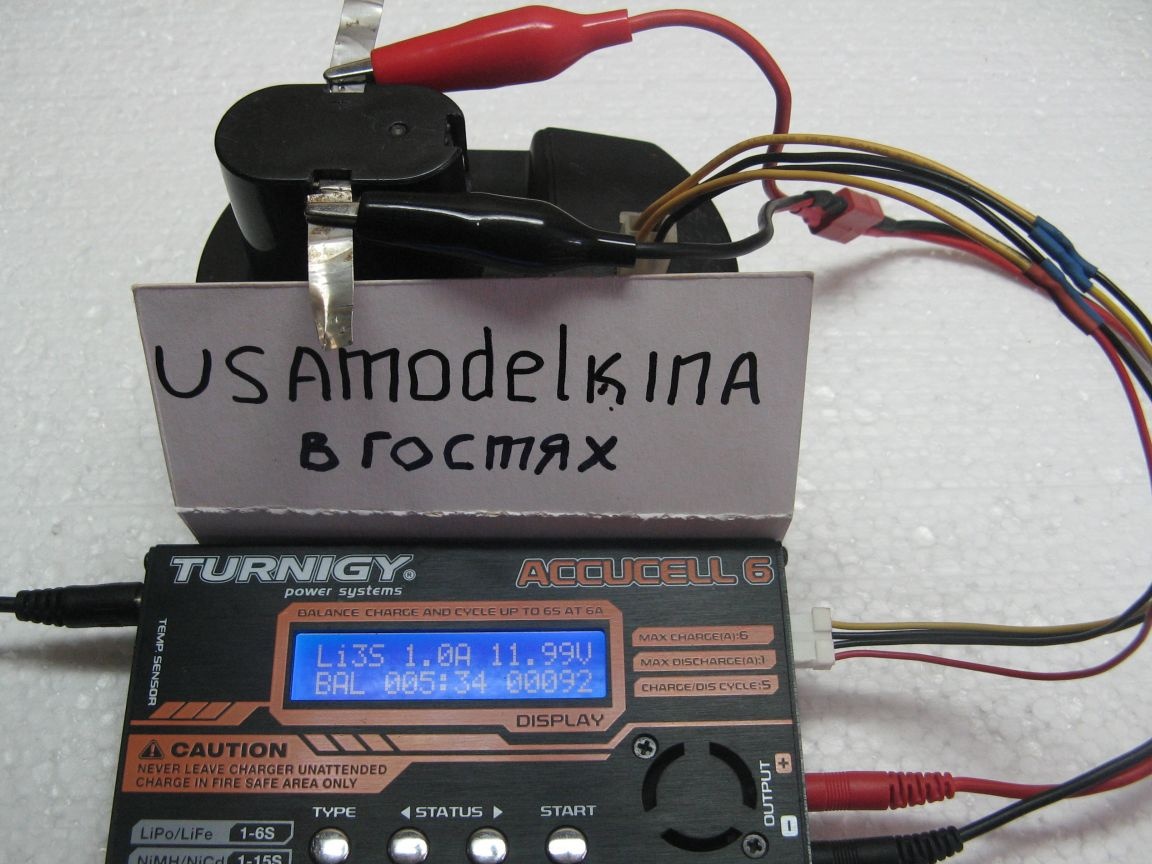
We connect the battery to the charger through the balancing connector, do not forget about the power wires. We set the charging of three elements (3S) and wait for the battery charge. We use it.
Conclusion.
Is it possible to do a similar refinement for the home?
I decided for myself what it costs, although I could repack it for cadmium. Since I bought screwdrivers bu, there were no native chargers from them. Alteration costs are minimal. Provided that there is a charger, but if there are more than a dozen, even a hundred lithium batteries, then this charger is necessary.
I repeat once again that the first modified battery for the home, proved to be excellent.
Soon I plan to make a simple charger for balancing charging batteries reworked with this technology.
The video shows more detailed work: