
Hello to all lovers homemade. In this article I will tell you how to make an LED lamp do it yourself, in the assembly of which the kit kit will help us, you can order it by the link at the end of the article. This radio designer will be interesting to those who want to try themselves in this direction and gain experience in assembling kit kits. Also, such a lamp is useful, for example, in the kitchen or in some night lamp. The energy consumption of such a lamp is scanty, and the service life is several tens of times longer compared to a conventional incandescent lamp.
Before you start reading the article, I suggest watching a video where the assembly process is shown, as well as checking the health of this kit.
In order to make a LED lamp with your own hands, you will need:
* Kit
* Soldering iron, solder, flux
* Side cutters
* Device for soldering "third hand"
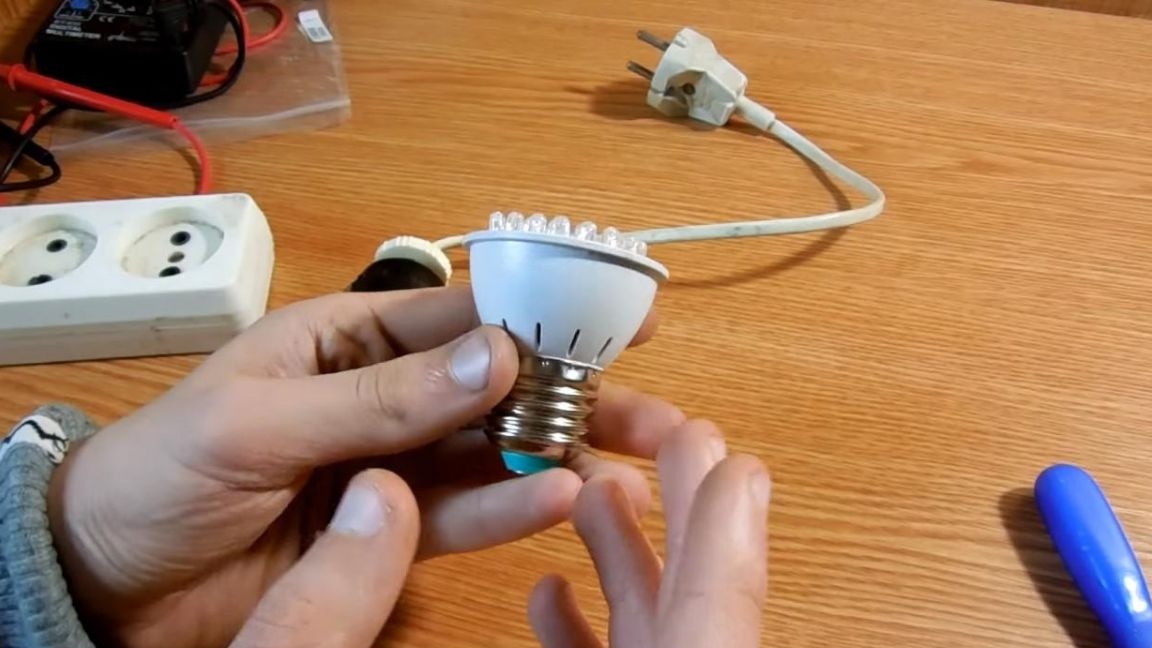
* Standard E27 bulb holder
Step one.
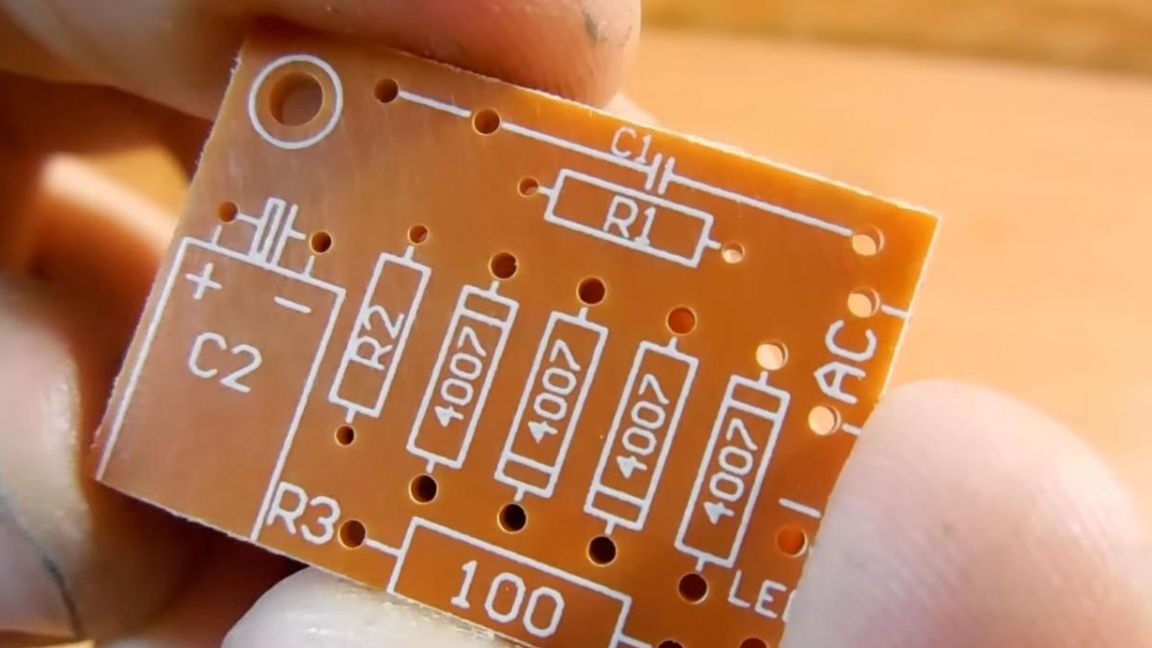
To begin, consider what is in the kit kit. There are two small bags, one of them contains 38 LEDs, and the other has radio components and printed circuit boards. Everything is signed in detail on the power supply board, so there is no piece of paper with instructions.
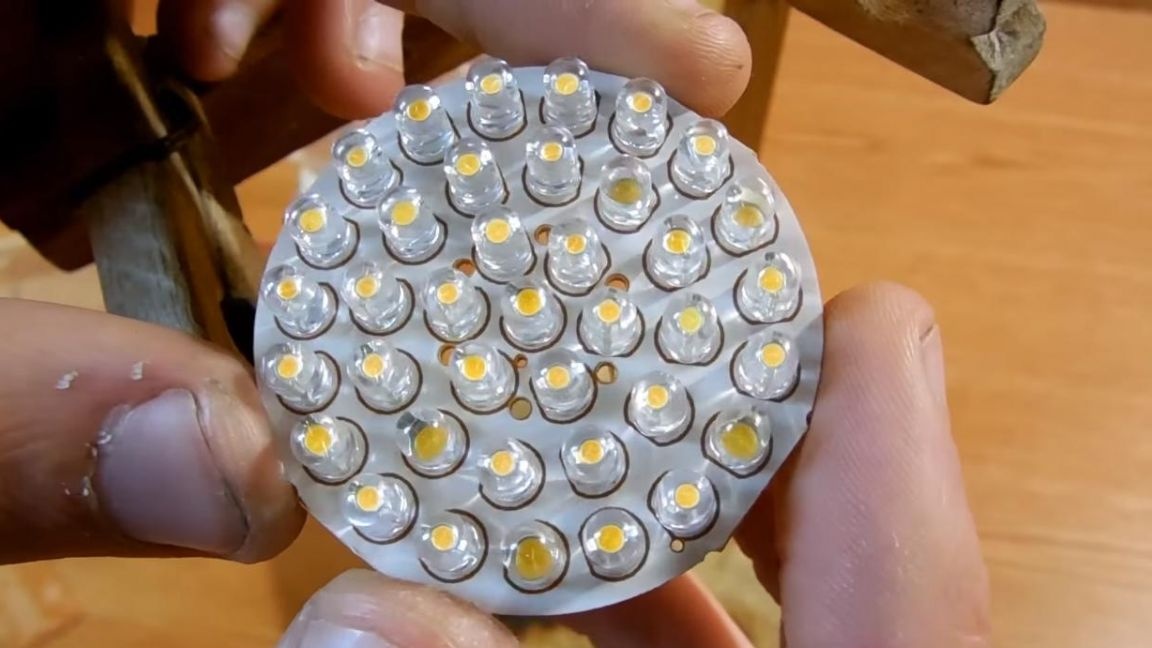
We begin assembly with a round printed circuit board. We install the printed circuit board in the device for soldering "third hand" and arrange 38 LEDs.
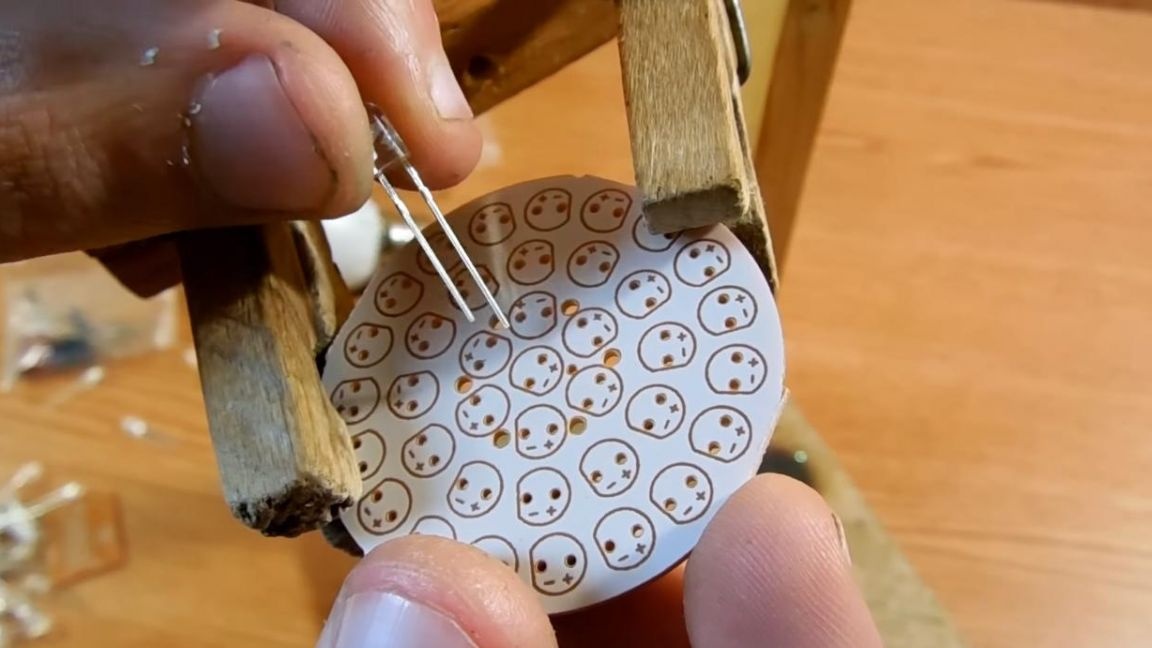
Plus and minus are signed on the board marking, and on the LED the plus is a long leg, a short minus, also on its case there is a lap, which is indicated on the board.
Now we take a soldering iron, apply a flux to the board contacts for better soldering and solder the LEDs. So that they do not fall out when soldering, we fix them with adhesive tape, since it will not be convenient to bend such a large number of legs, and then it will be problematic to solder them.
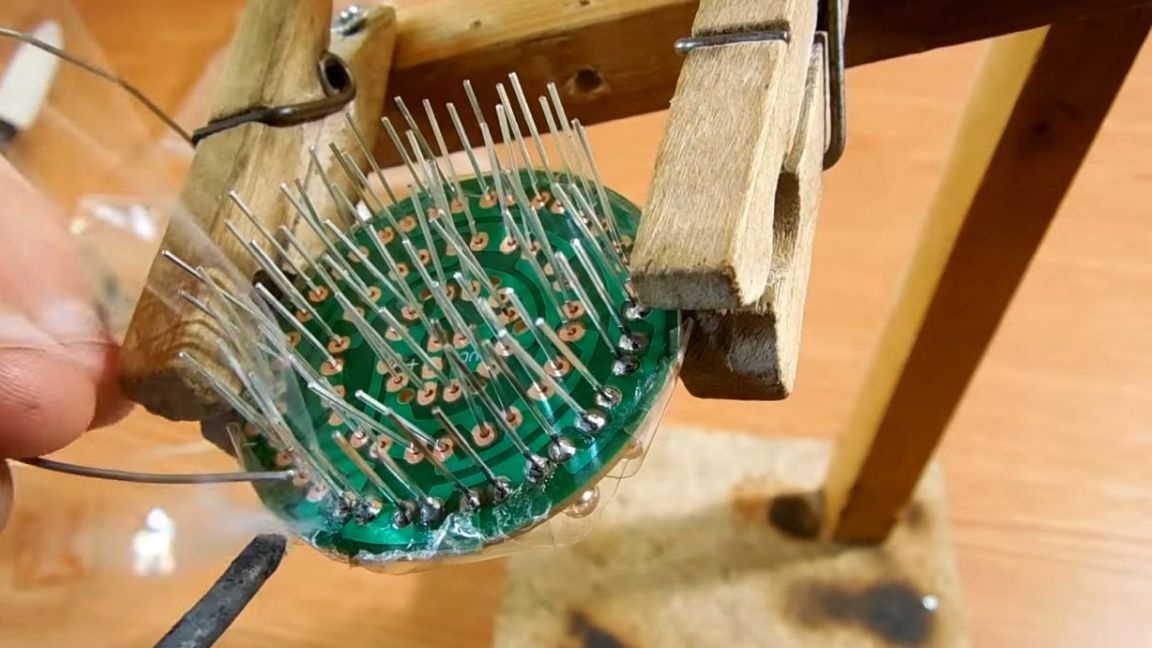
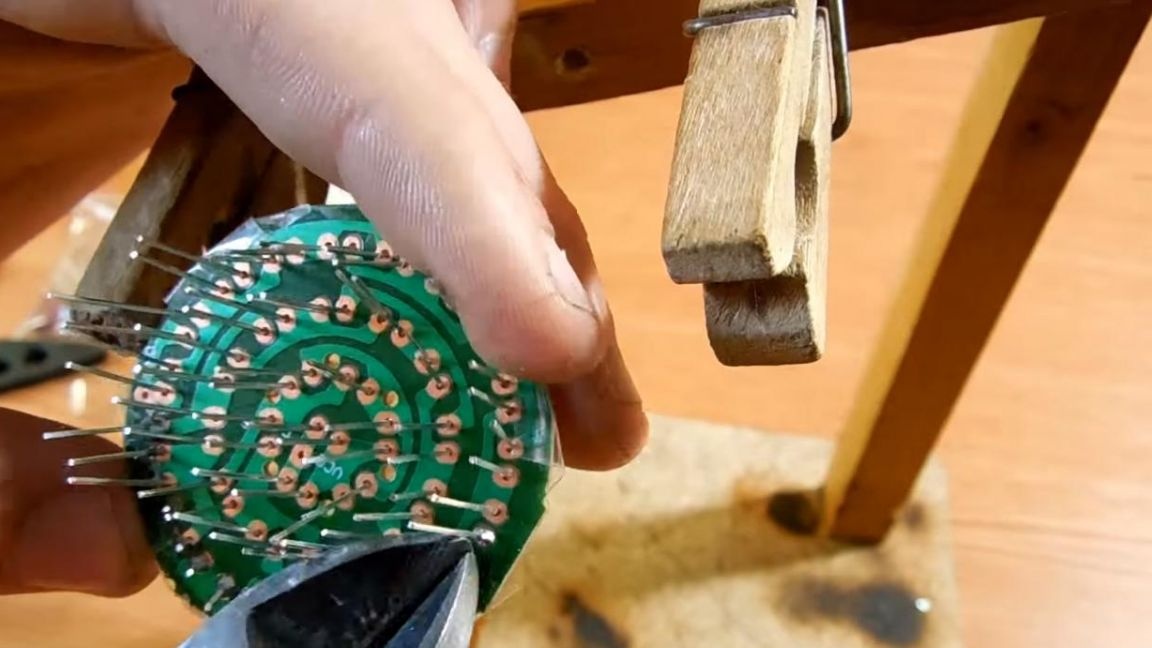
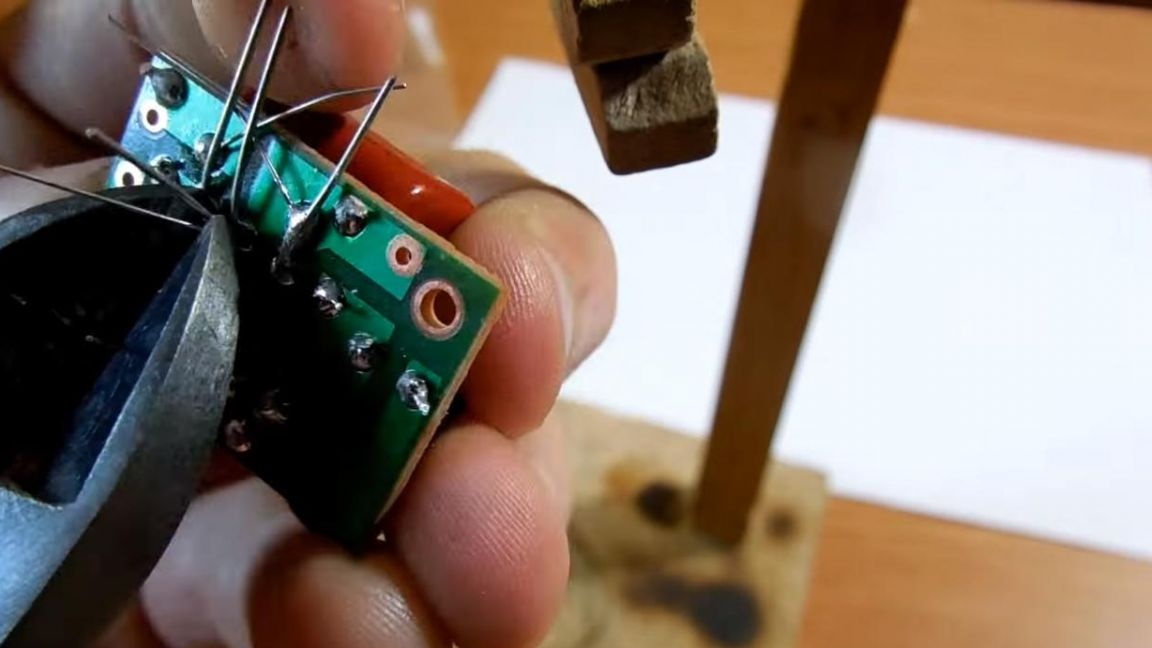
After soldering all the leads of the LEDs, you need to remove the excess using side cutters. When biting off the excess parts of the legs of the radio components, be careful, with an awkward movement, you can accidentally remove the track itself from the board.
Step Two
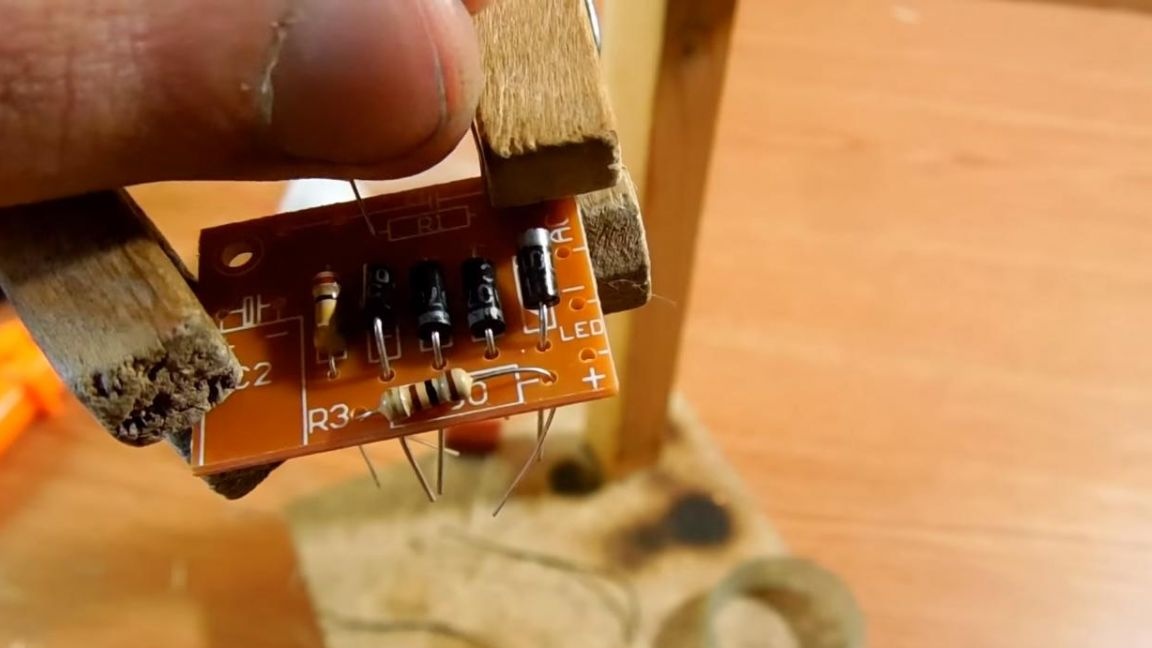
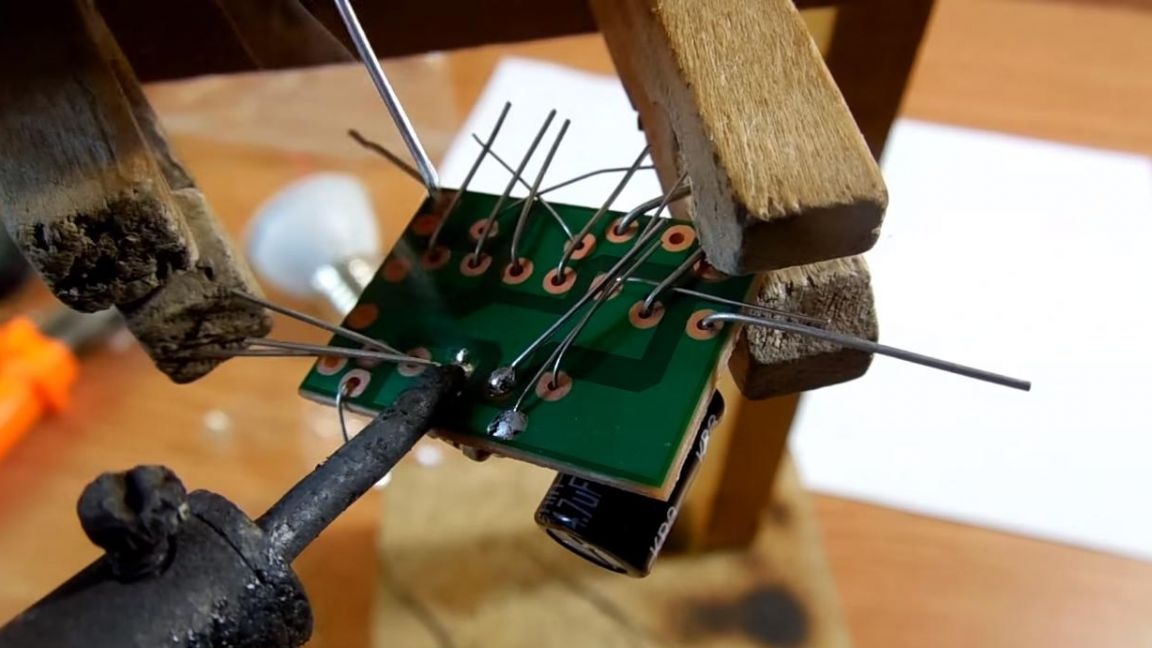
For the LEDs to work, the kit includes a power supply board with a fairly modest set of components. We fix the board in the soldering device "third hand" and begin to install diodes.

There are four of them on the board, they form a diode bridge. On the board itself, a dash is shown, which must be combined with a gray strip on the diode case.

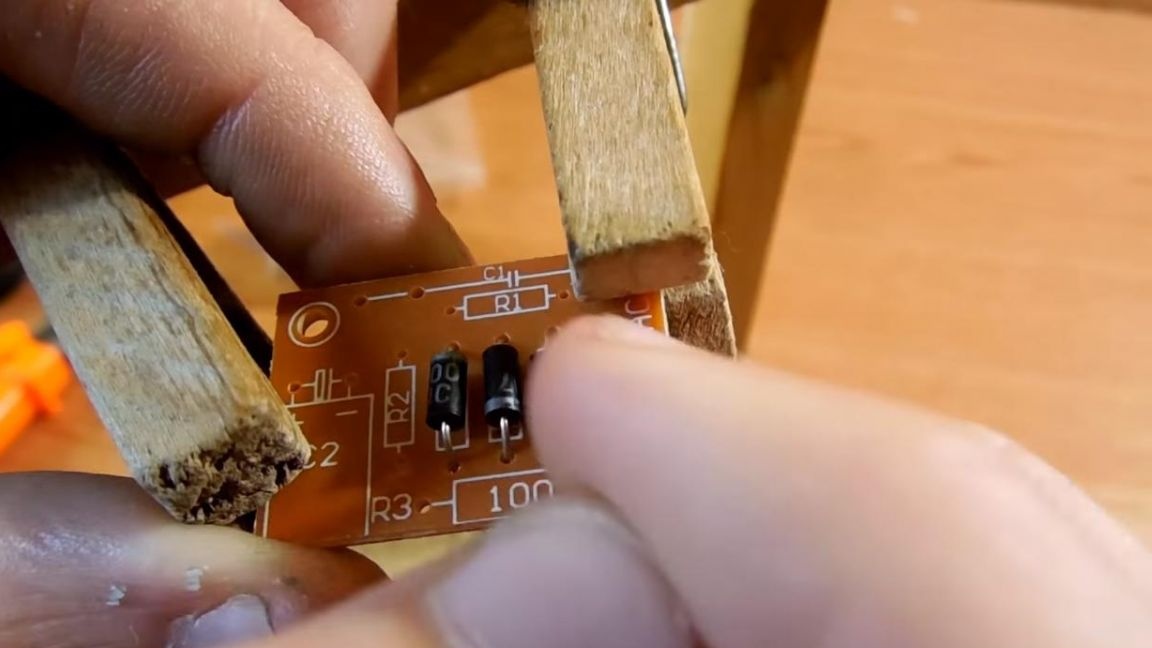
Next, put the resistors.The values of the resistors can be determined using a multimeter or color coding, but in this case you can do without it, since there are only three resistors, two of them have the same resistance, and the third on the board is signed with a value of 100 Ohms.
We install the resistors in their places, slightly bending the legs on the back of the board so that they do not accidentally fall out when soldering.
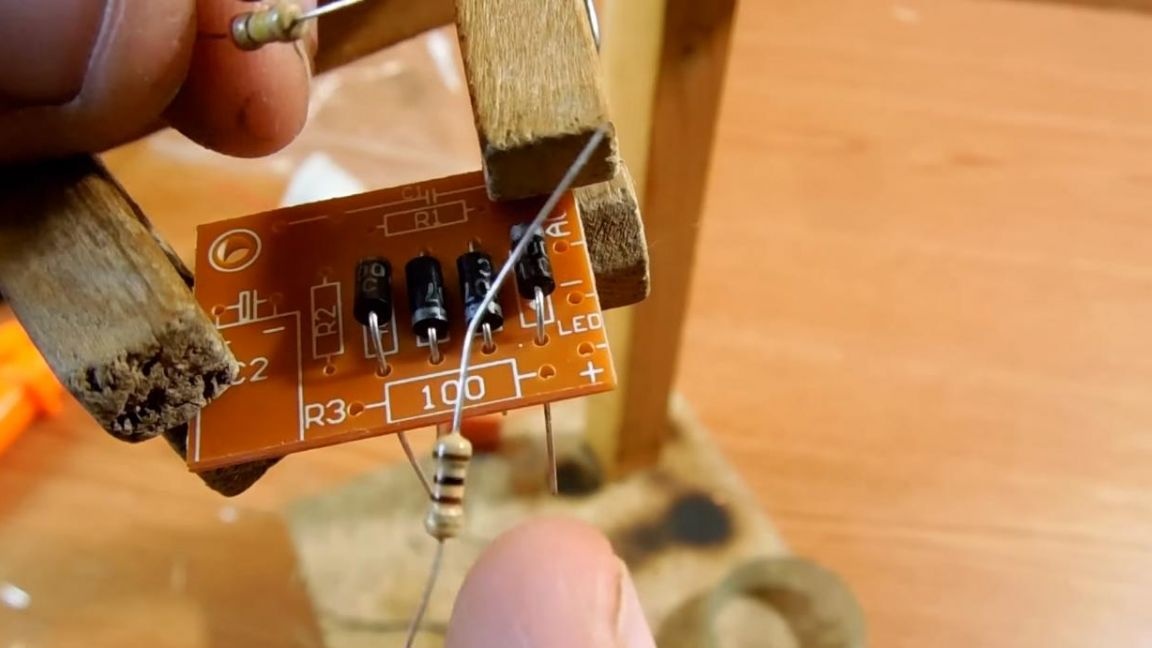
Then we insert the electrolytic polar capacitor, on the board it is designated as C2, plus and minus are also indicated there, and on the case itself a white strip is located on the negative output side, and plus, as usual, this is a long output.

To fit the capacitor in the housing, install it horizontally.
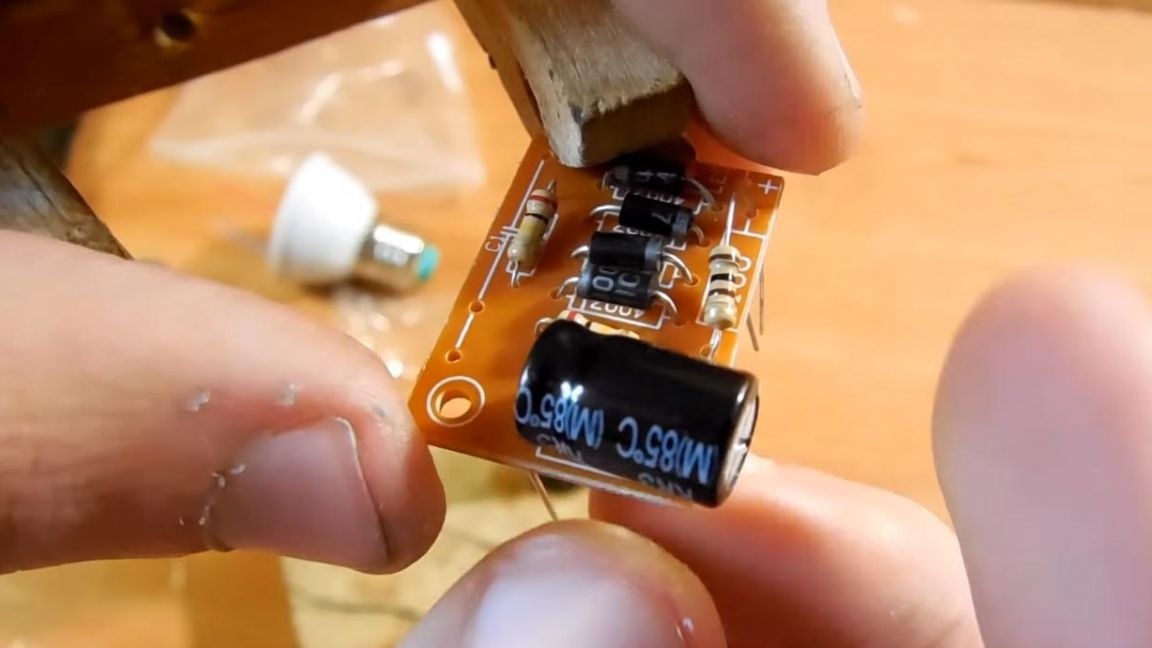
After that, we put a non-polar ceramic capacitor, on the board it is signed as C1.
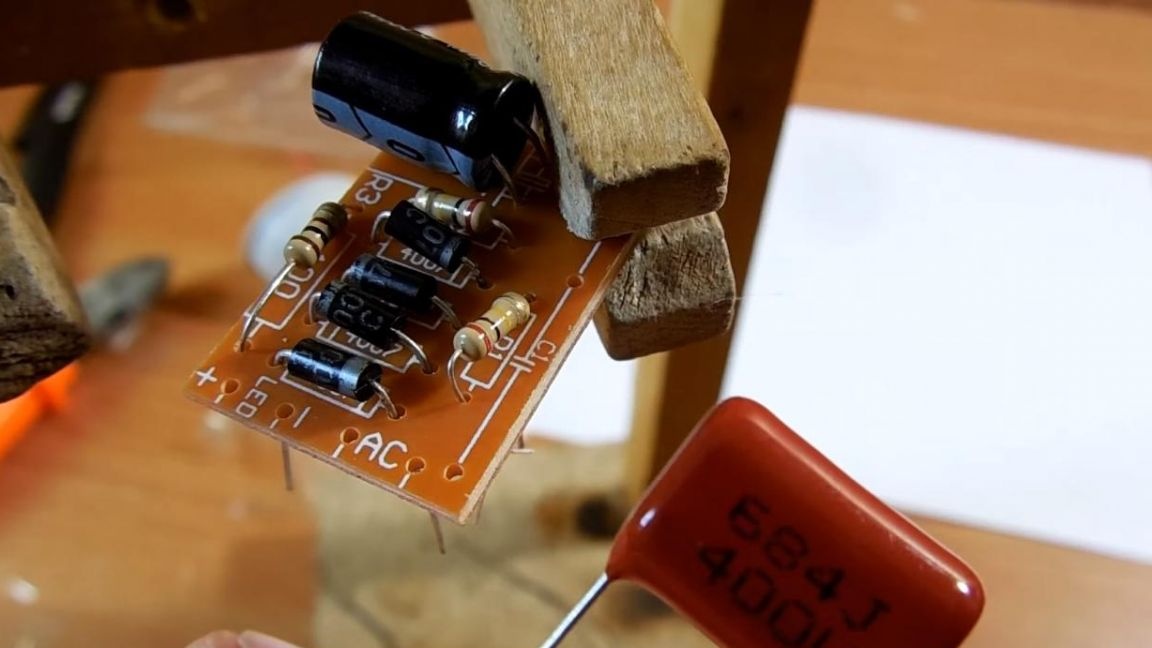
Then we solder all the conclusions with a soldering iron and remove the remains of the legs with side cutters.
Step Three
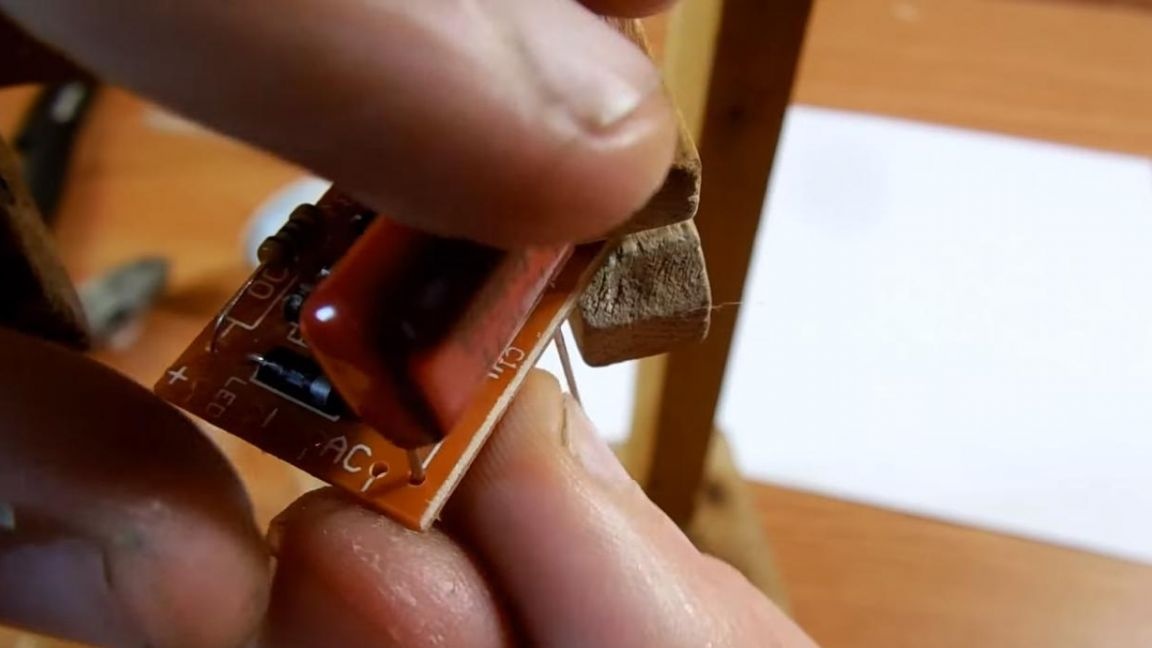
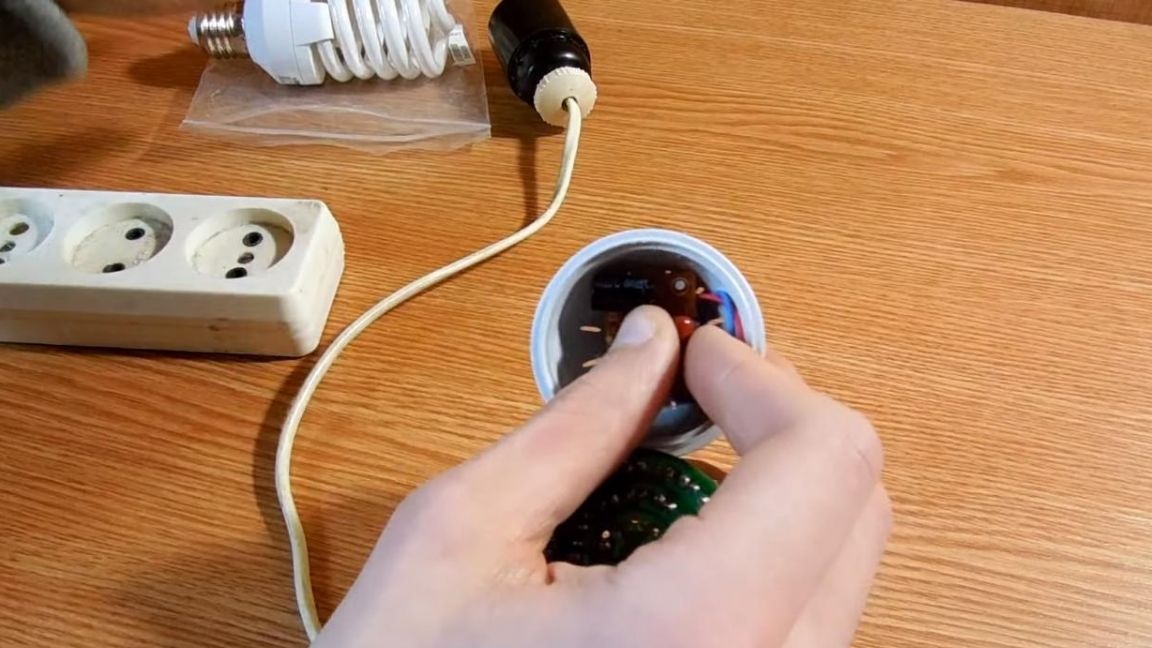
Ready-made boards need to be installed in the lamp housing, but before that you need to solder the wires. Solder the wires from the base to the contacts on the power supply board, signed as AC.
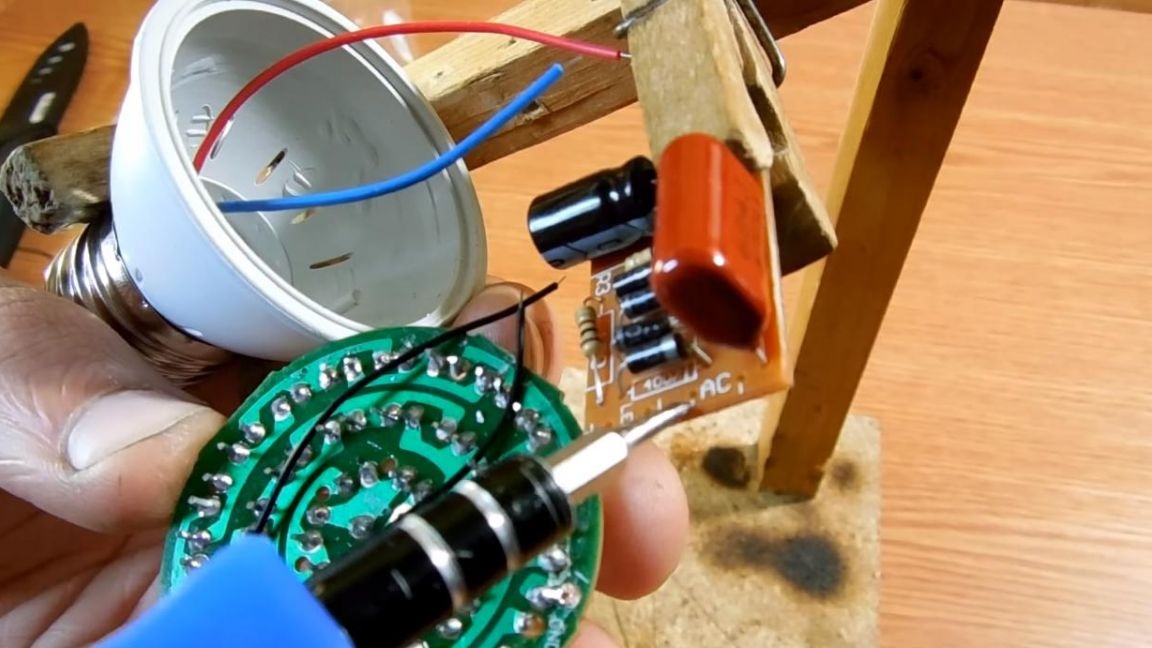

And already from the unit itself to the board with LEDs, you need to solder the wires, observing the polarity.
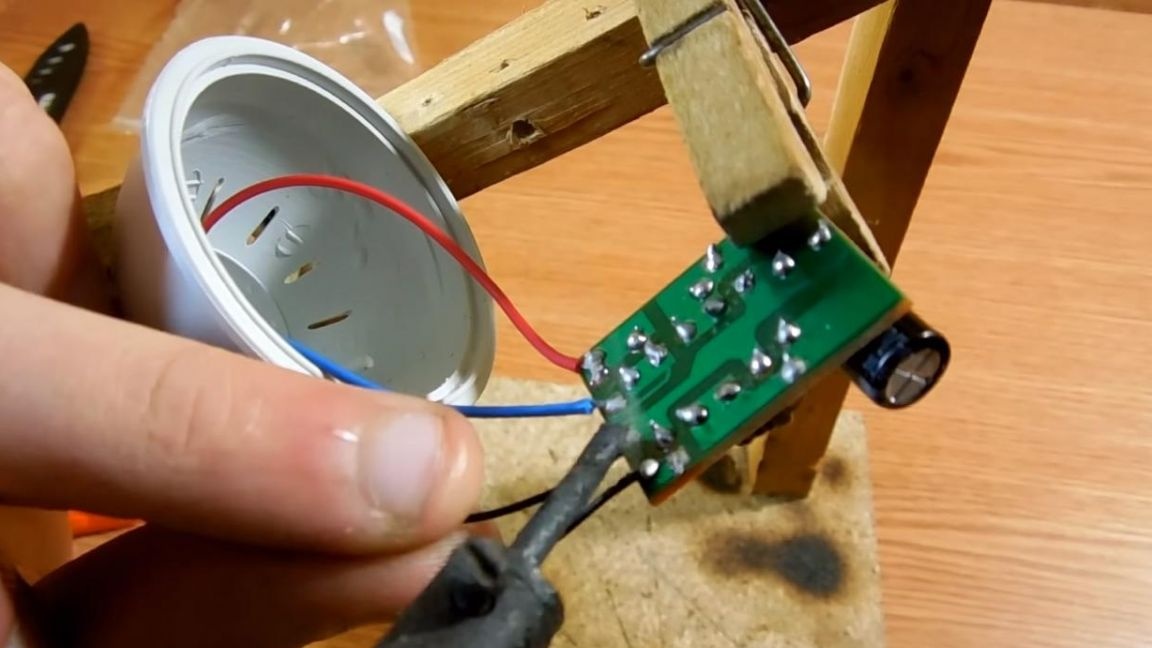
Next, install the power supply board inside the lamp housing and close the LED board.
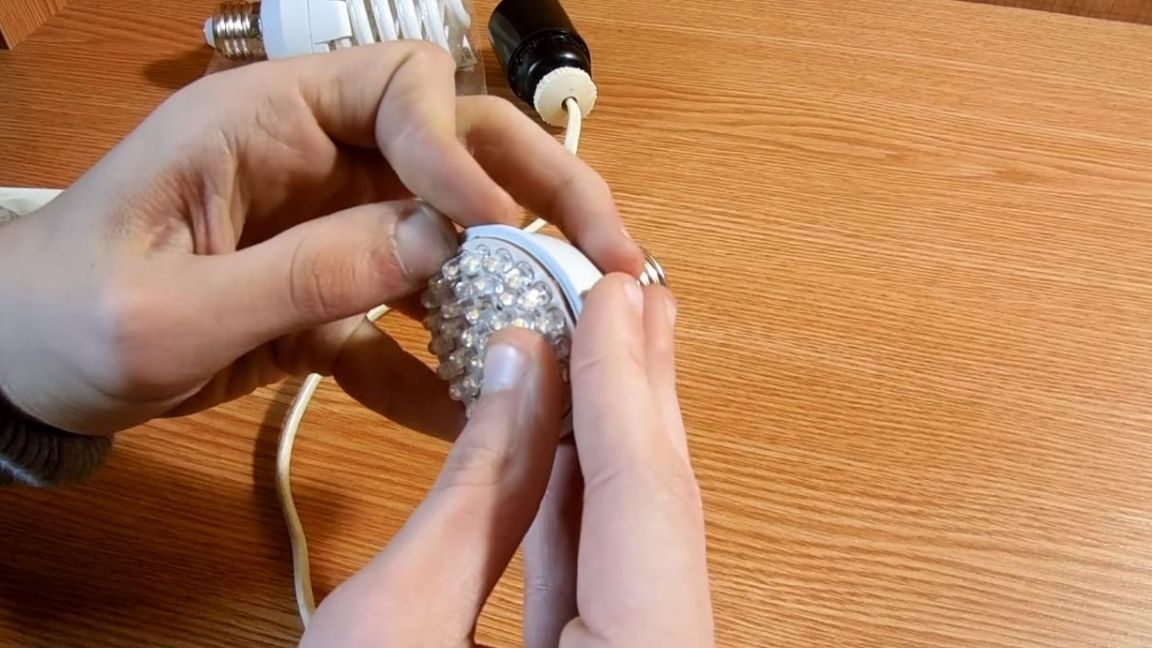
Step Four
The LED lamp is ready, now we check it in operation. We screw the lamp into the cartridge and plug it into the outlet.
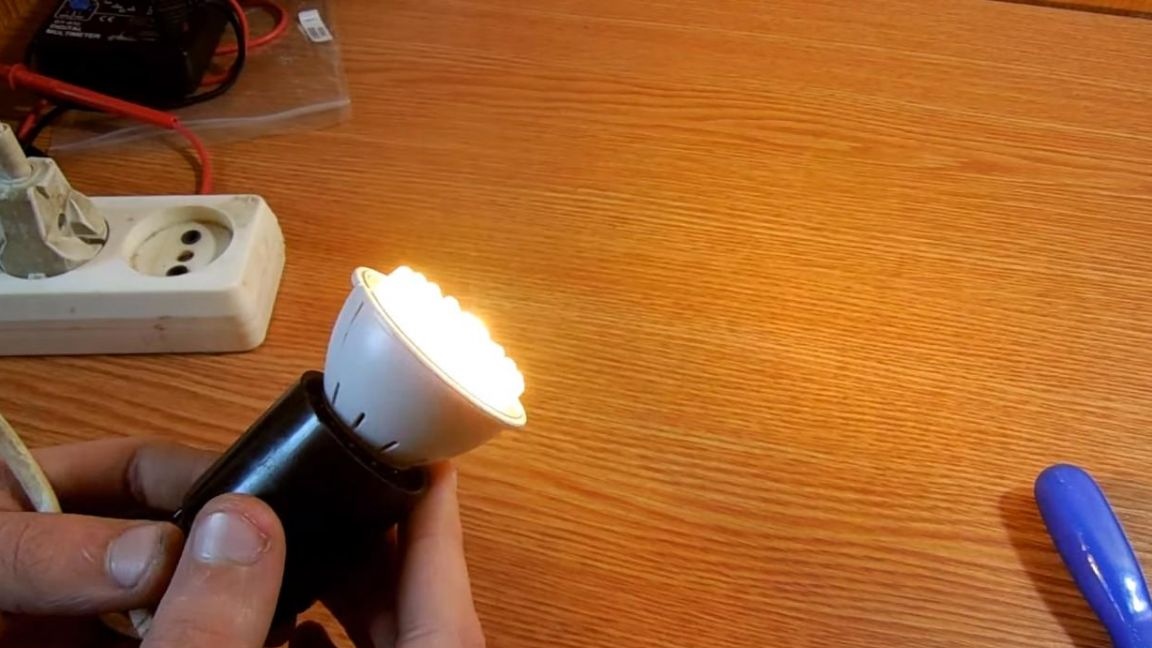
All LEDs are lit, which means that the kit is working.
This LED lamp does not shine as bright as a conventional incandescent lamp, but if your task is to highlight the work area, for example, in the garage or workshop, then it fits perfectly.
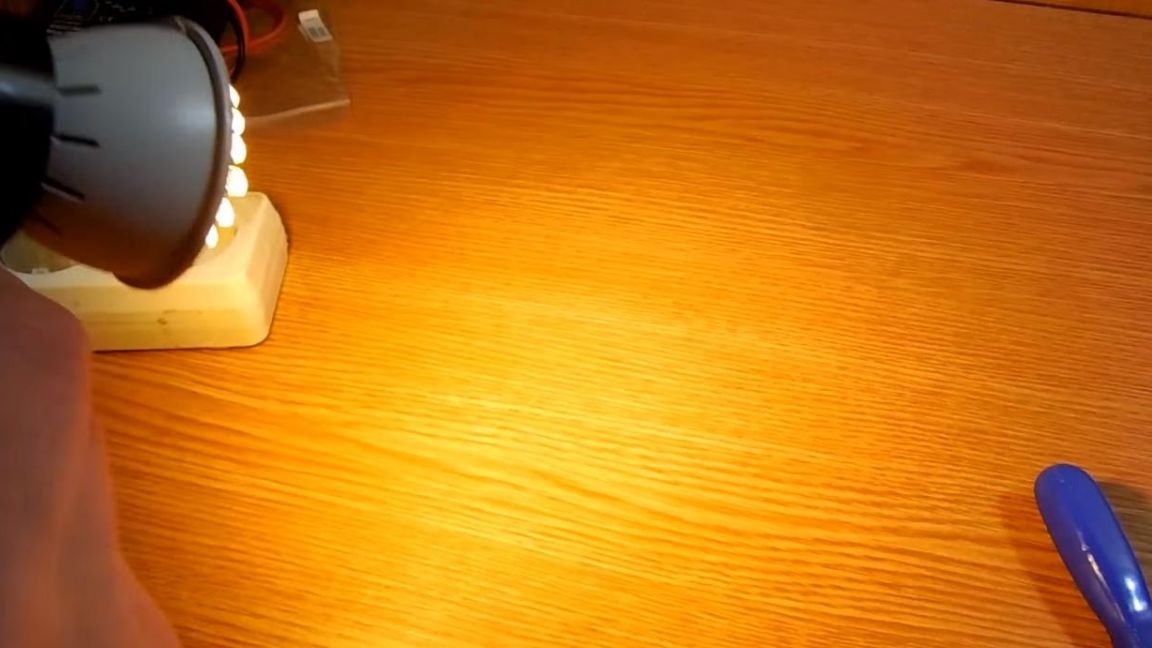
Nevertheless, it will serve you much longer than an incandescent lamp, and also save on energy costs.
That's all for me, thank you all for your attention and creative success.