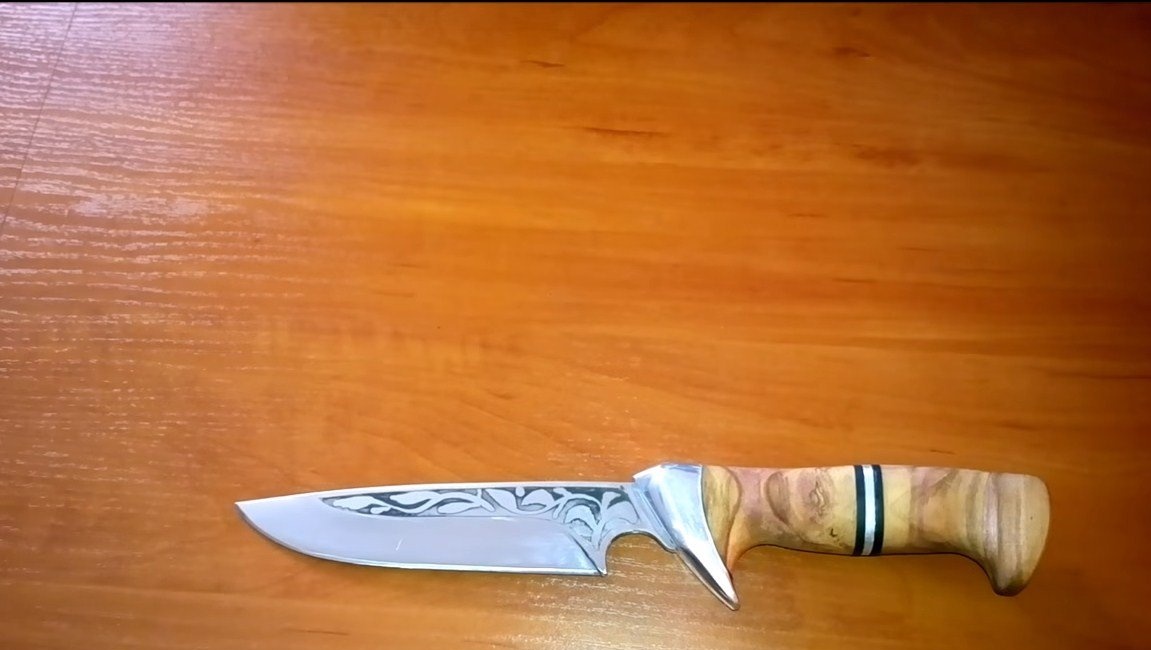
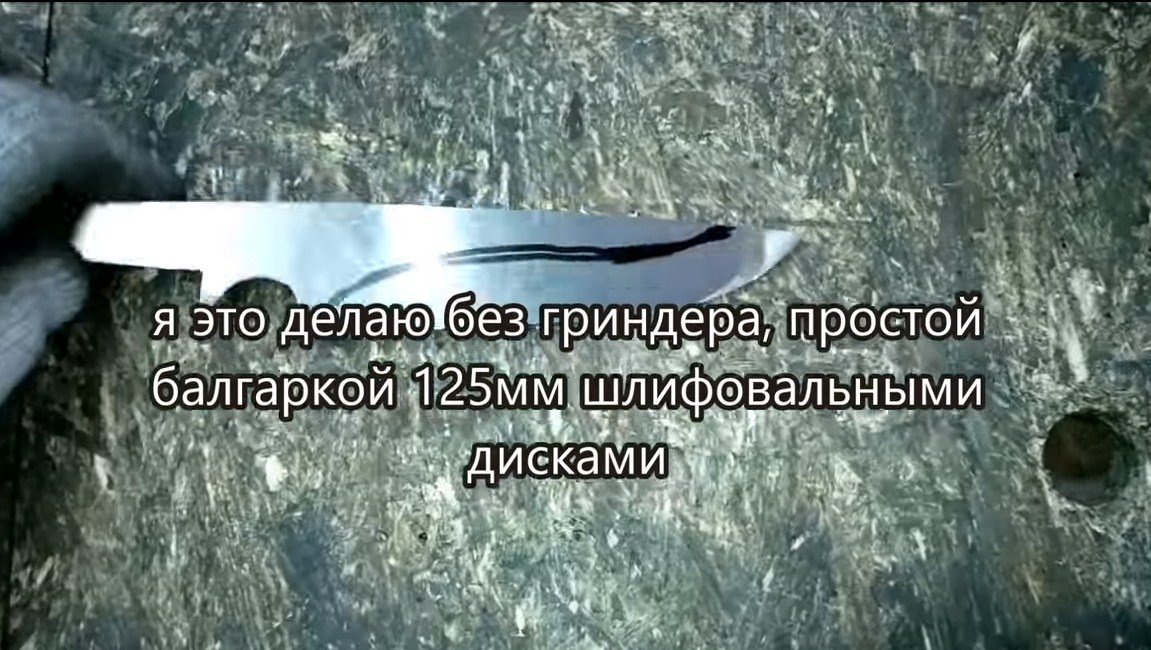
I welcome fans to knock on red-hot pieces of iron, I present for consideration an interesting, high-quality and strong knife that can be made do it yourself without special tools. During its manufacture, the author did not use a belt sander, grinding, descents, cutting, all this was done with the help of a small grinder.
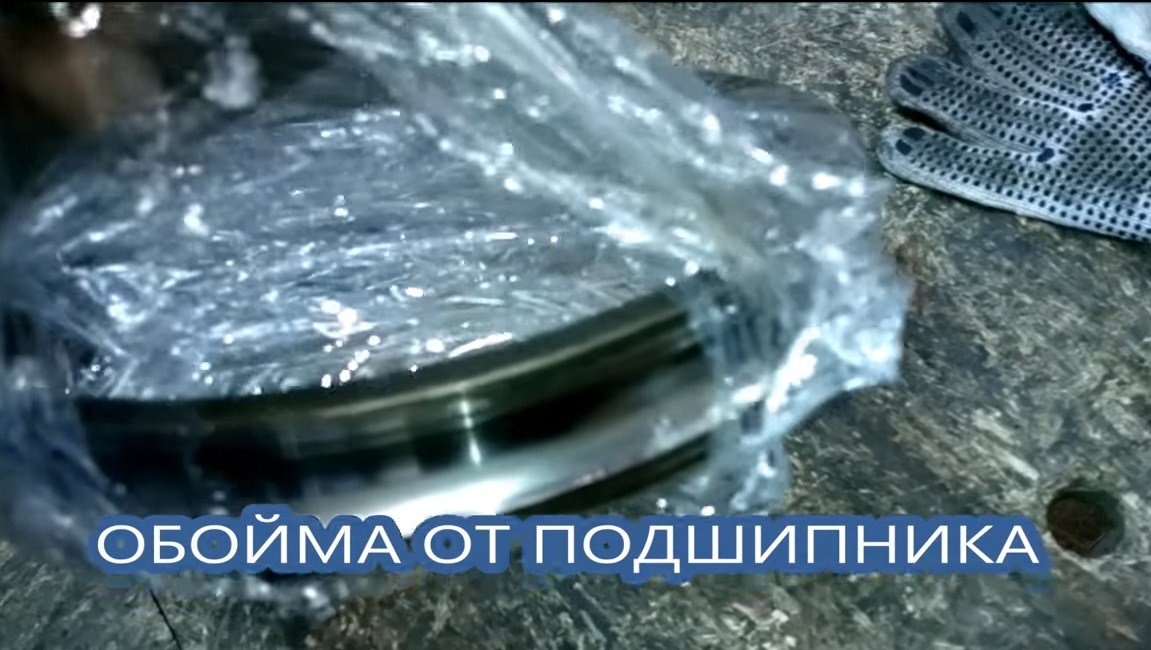
Of course, not everything is so simple and easy, since the knife is made of a bearing race. It will need to be warmed up, leveled, and it will also be necessary to carry out a small forging of the blade. So you will need forge and metal skills.
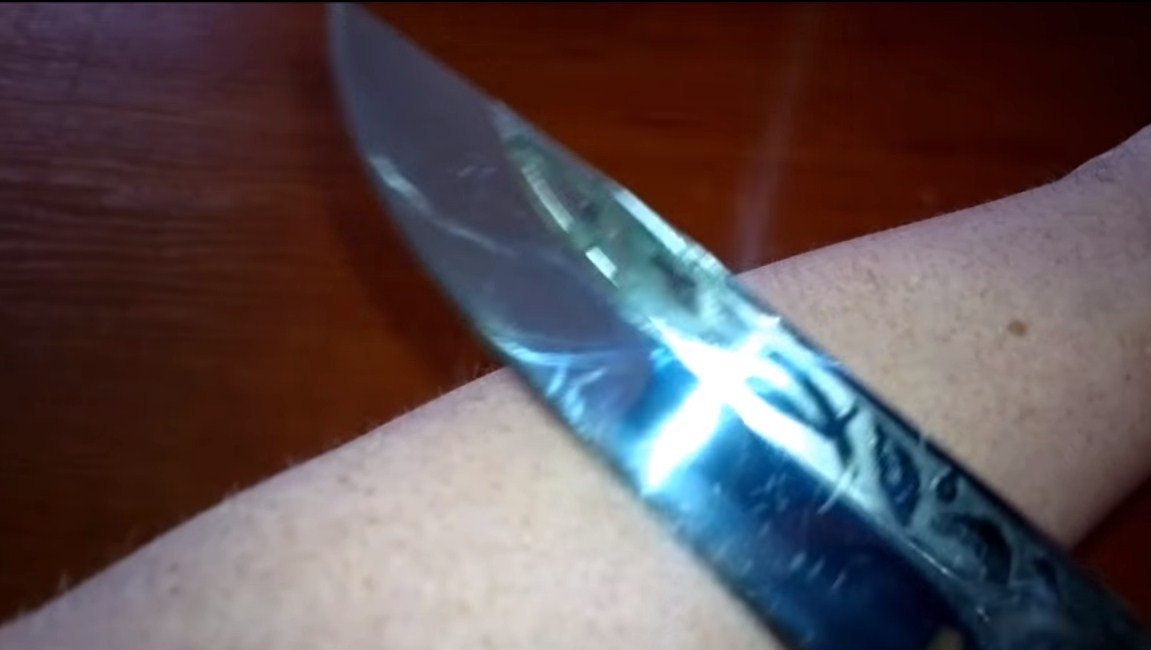
The steel used in the manufacture of bearings is quite durable. Such a knife can be sharpened to the state of the blade, and it will hold the grinding for a long time. The author’s knife turned out as sharp as a razor, he easily shaves his hand, not to mention anything about cutting paper. If you are interested in the project, I propose to consider it in more detail.
Design Features:
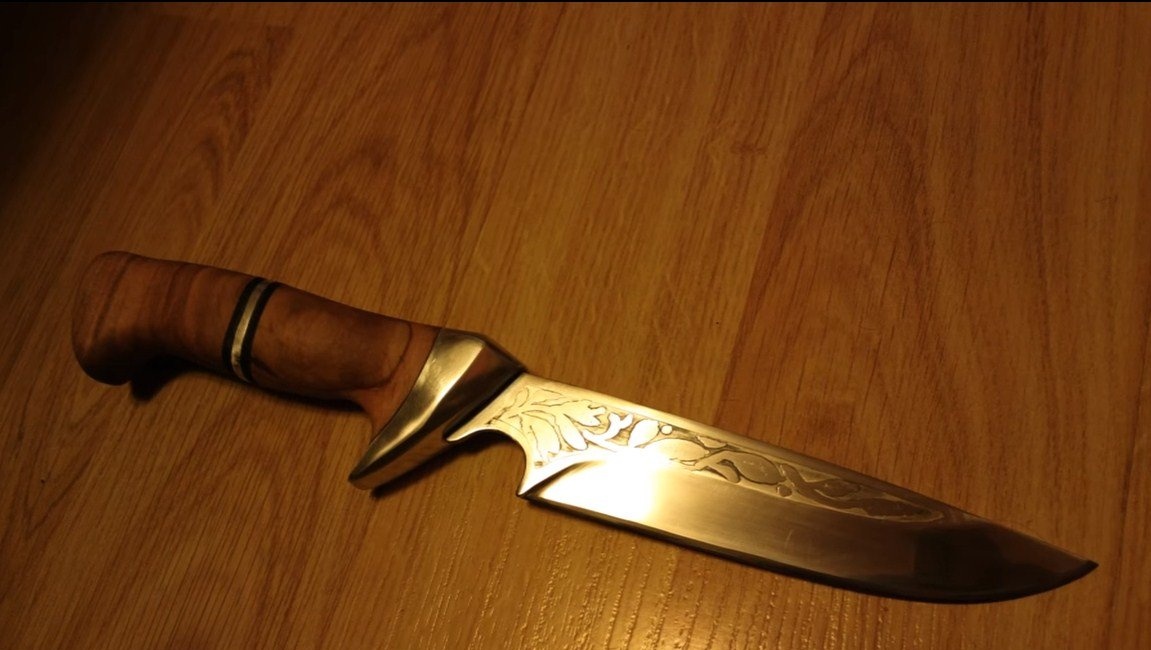
1. The handle is made of plum, it looks respectable
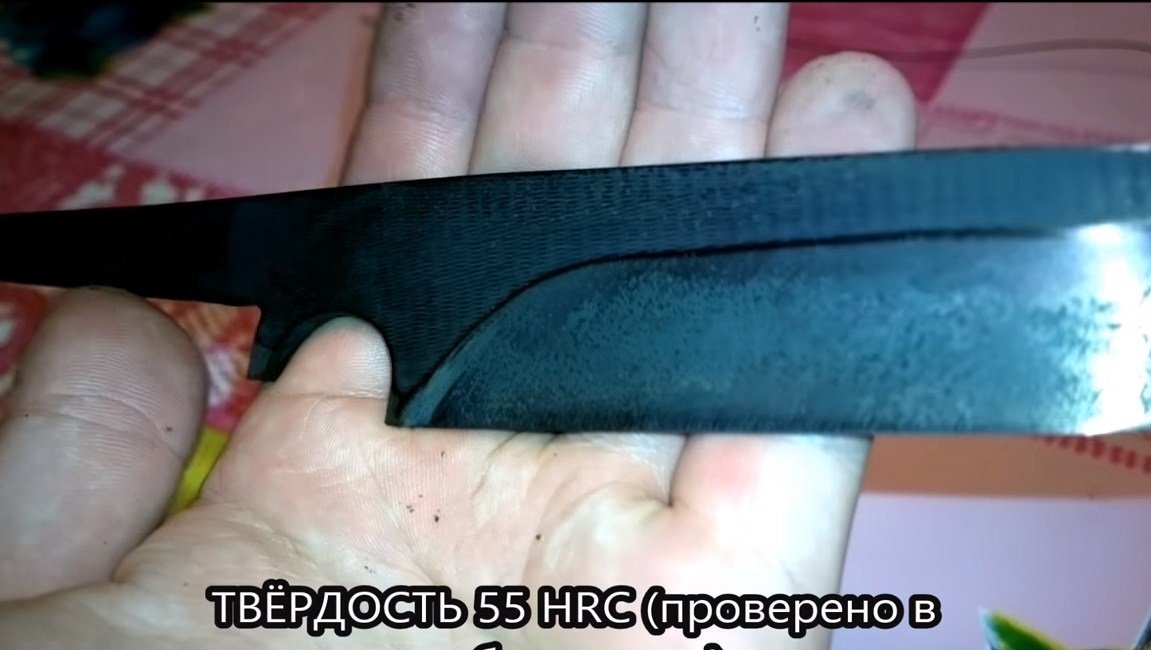
2. The blade is made of a bearing race, so that the steel has a hardness of 55 HRC
3. The presence of aluminum bolister
Materials and tools that the author needed:
Material List:
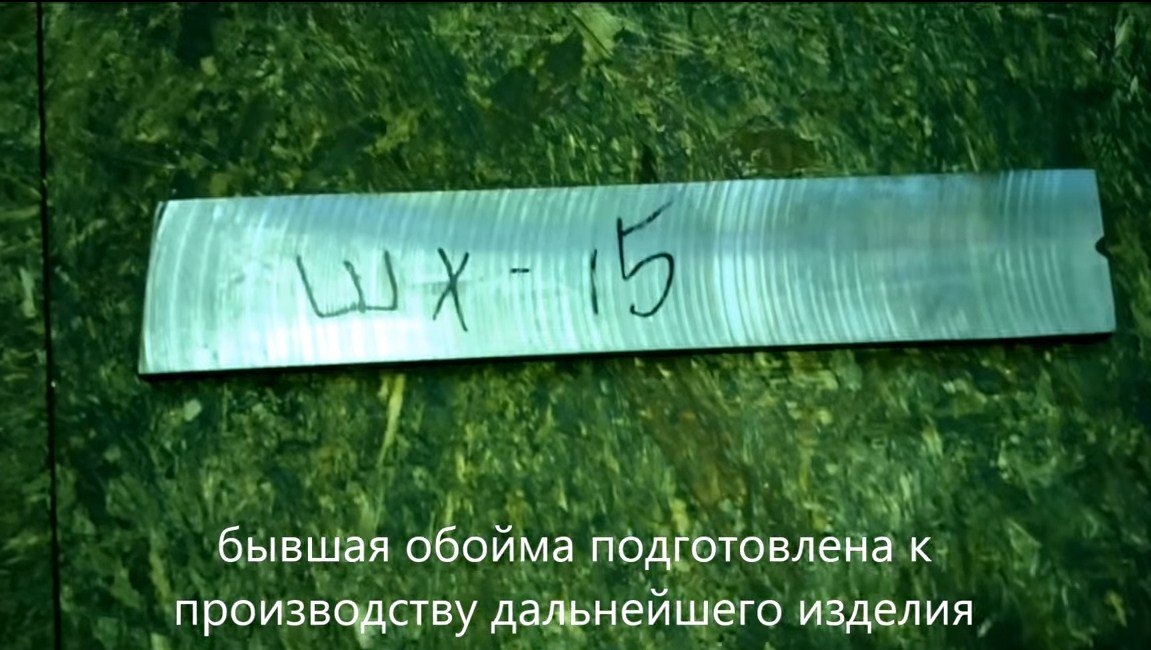
- bearing cage of suitable sizes ()
- wood for a pen (the author used plum);
- sheet brass or aluminum (for inserts in the handle);
- aluminum for a bolister;
- epoxy adhesive;
- linseed oil or other for wood.
Tool List:
- device for etching (to burn out the pattern on the blade);
- a grinder with grinding and cutting discs;
- sandpaper;
- blacksmithing supplies;
- drilling machine;
- files;
- domestic oven;
- marker, vernier caliper, etc.
Manufacturing process homemade:
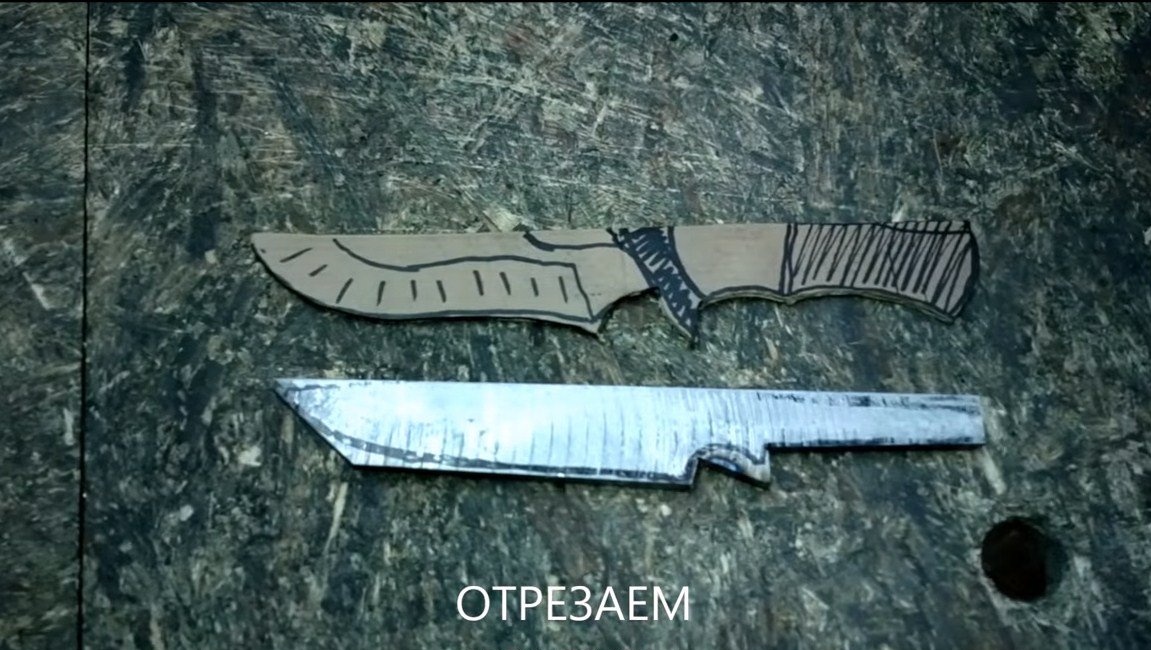
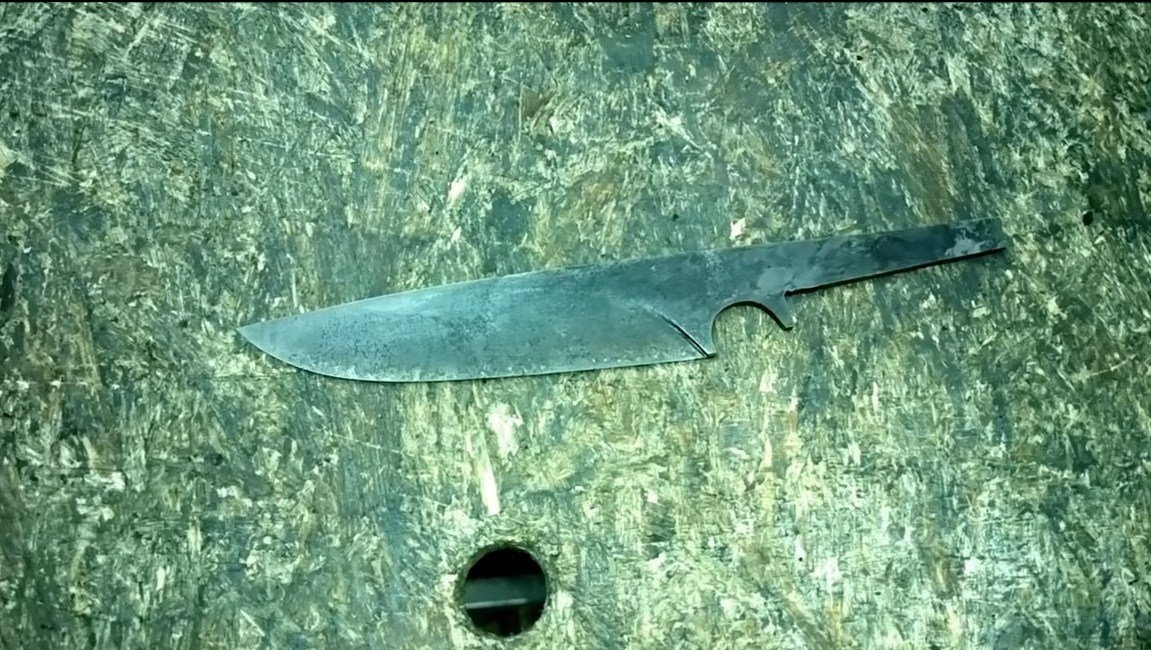
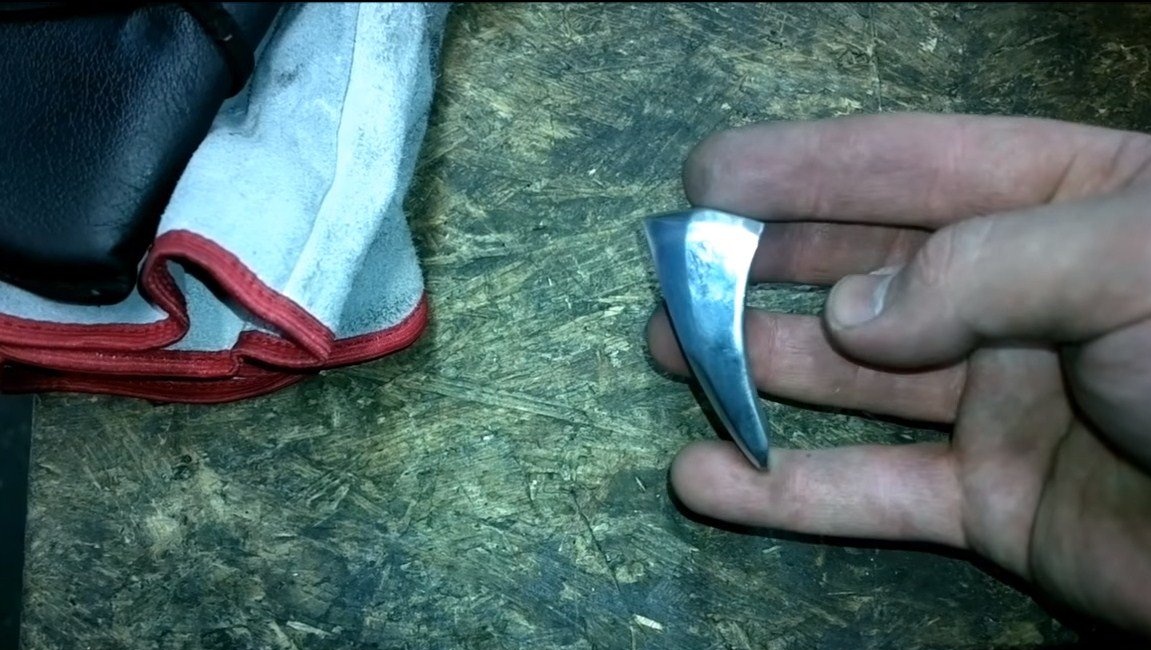
Step one. Primary profile
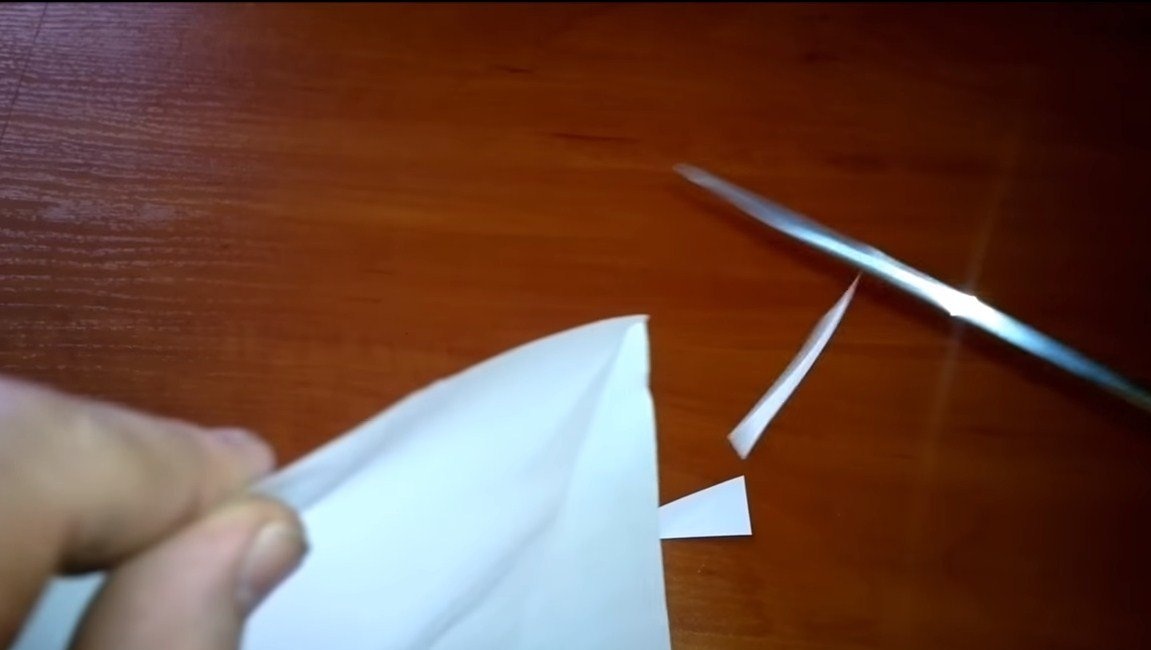
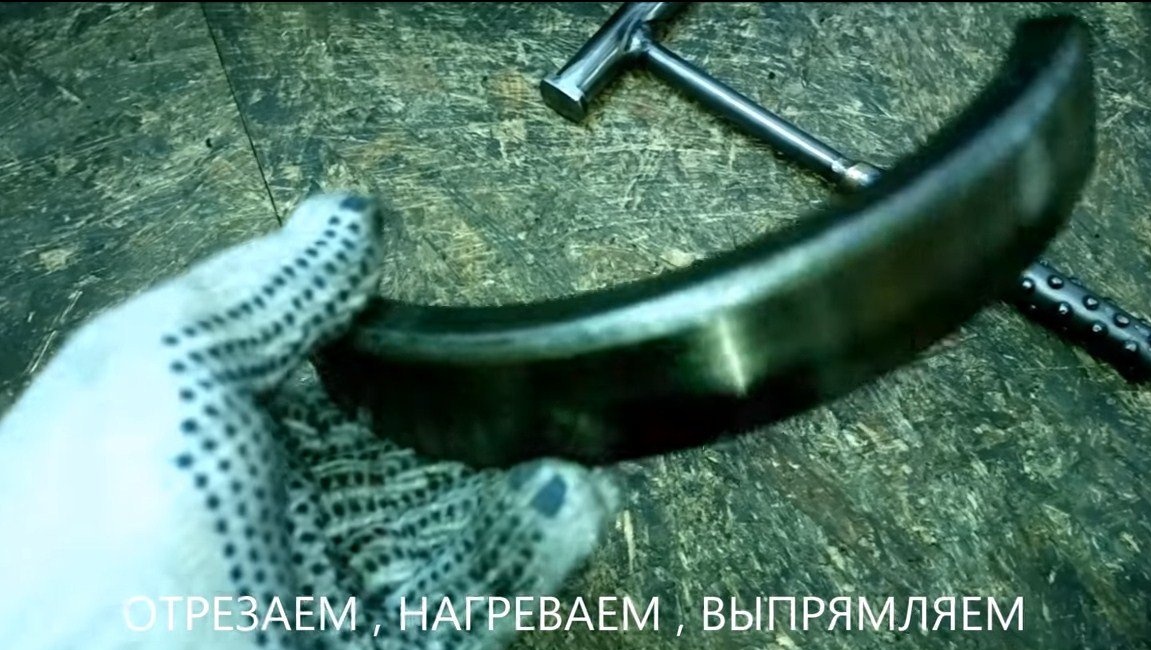
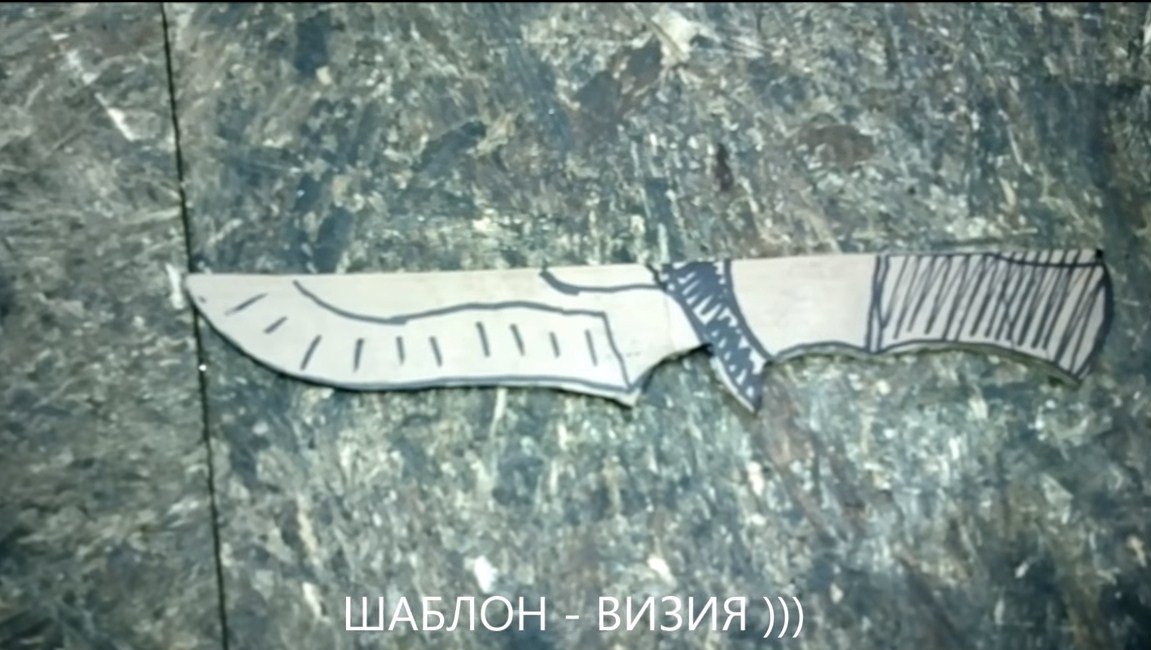
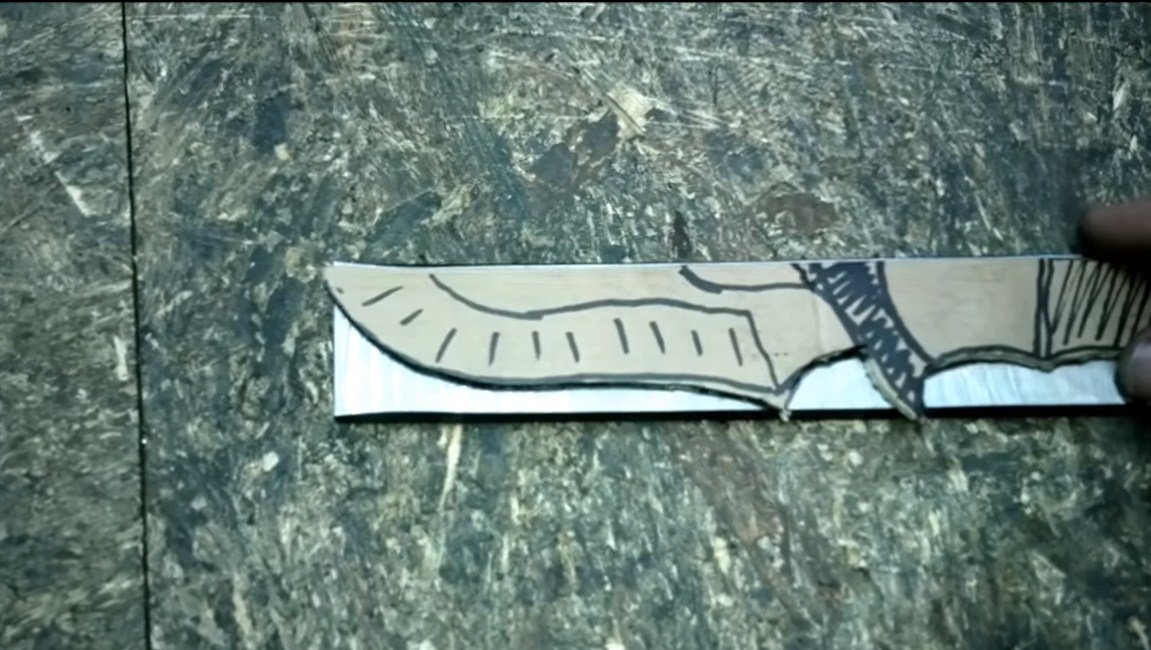
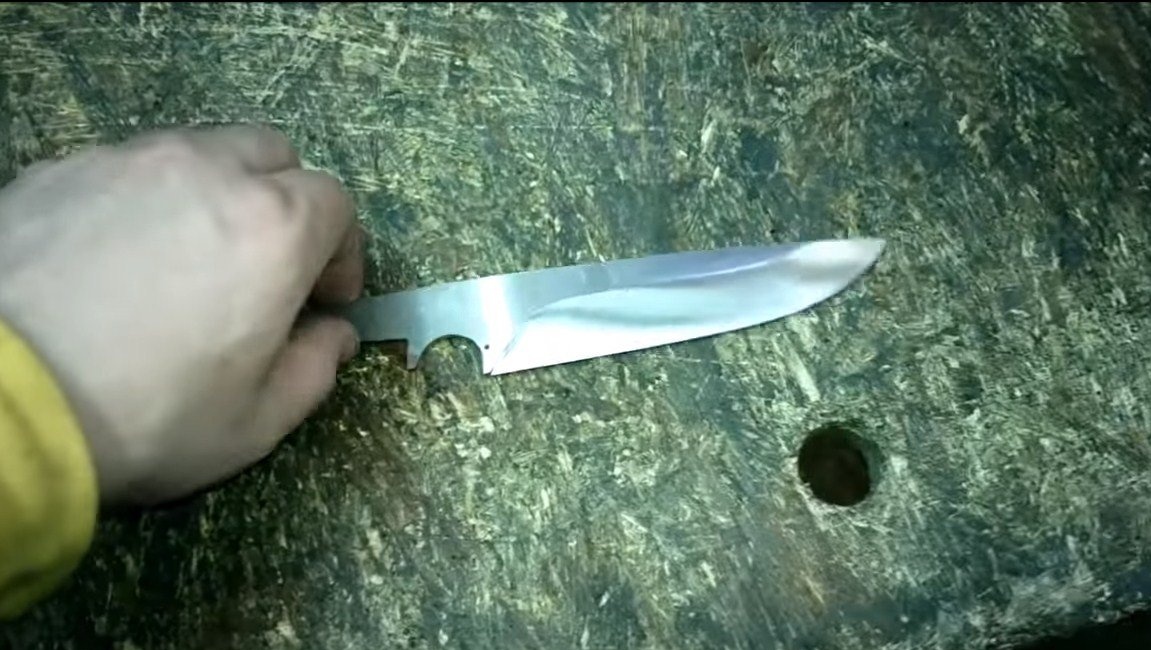
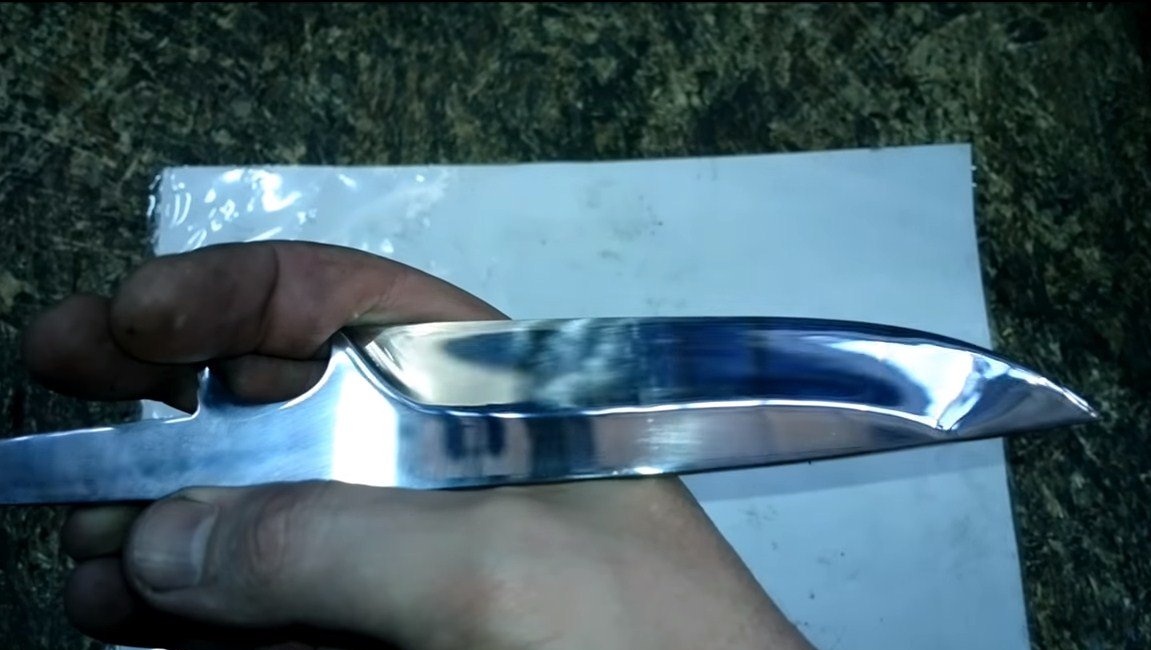
First, prepare the blank, for it we need a clip. We cut it, heat it and straighten it. When the workpiece is ready, transfer the template to it, the author simply draws a marker around it. You can create a template yourself or print it on a printer found on the Internet. It is best to make a template out of cardboard or other heavy paper. You can hold such a template in your hand to better imagine what the knife will look like and whether it will be convenient.
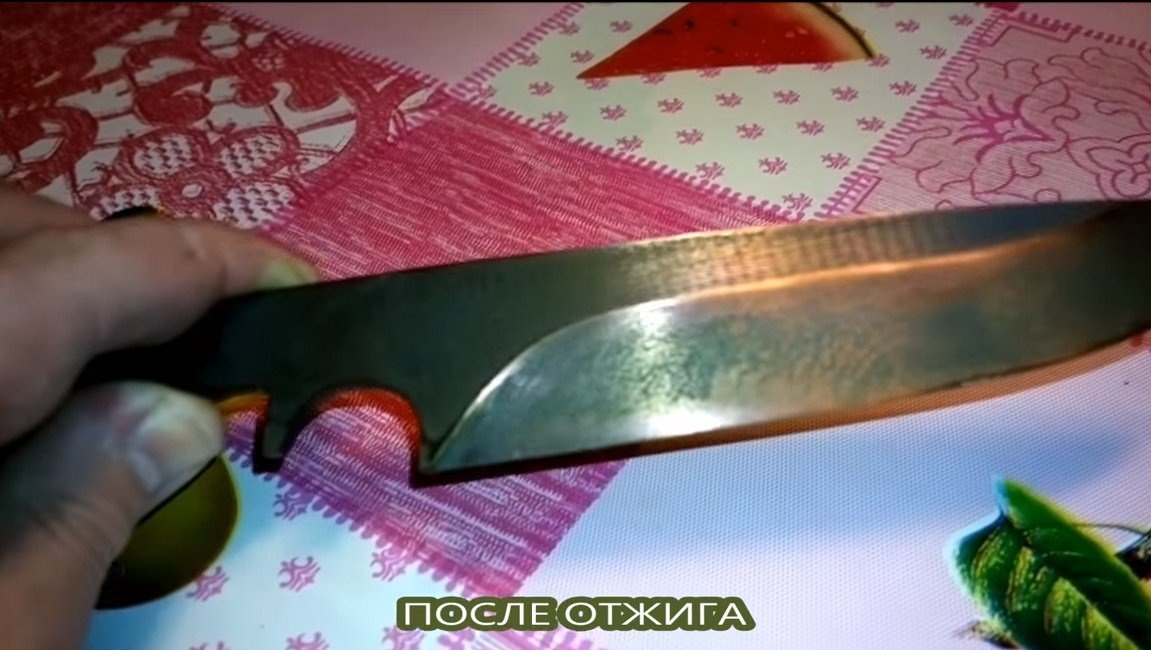
Next, we start cutting, cut off the excess with a grinder. What remains will be possible to level during forging, or it can be cut off immediately with grinding disks.
Step Two Forging
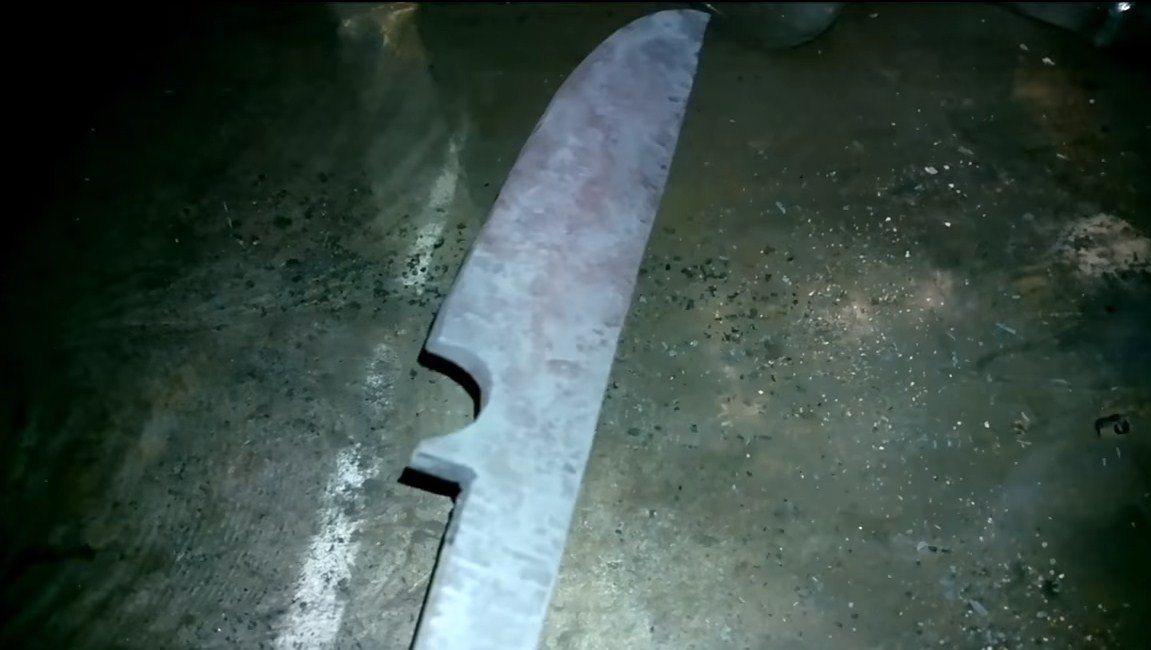
Further, the author conducted a small forging of the blade, thereby we will increase the strength of the metal. As a result, the blade was “flattened” by 2 mm, instead of 6 mm it turned out 4 mm.


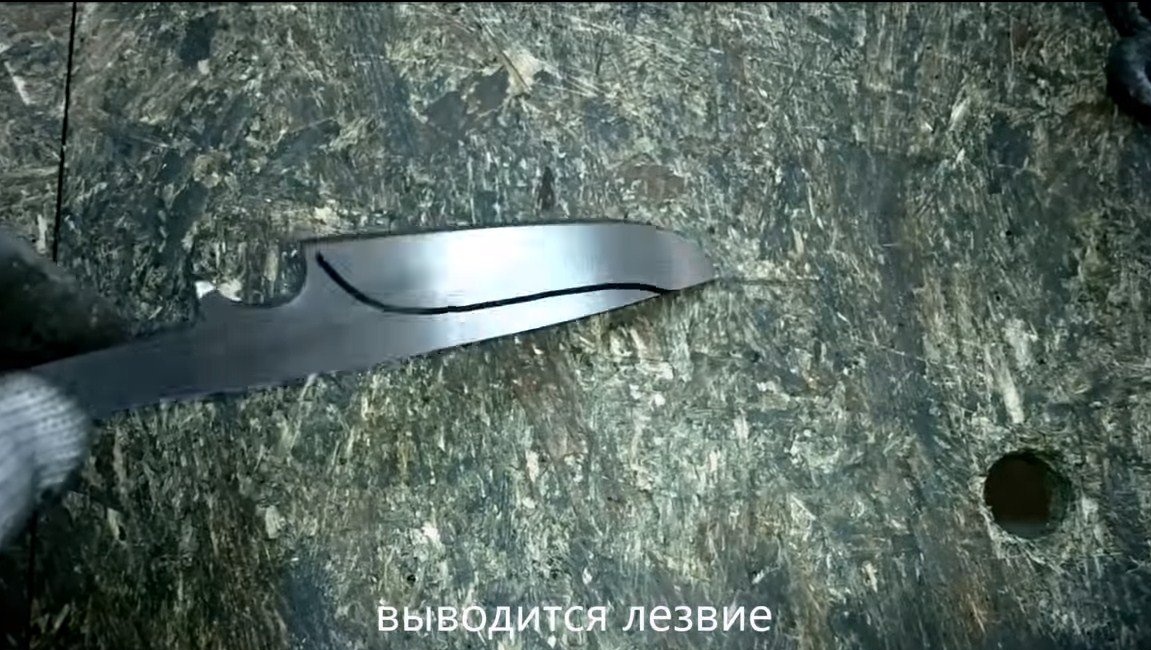
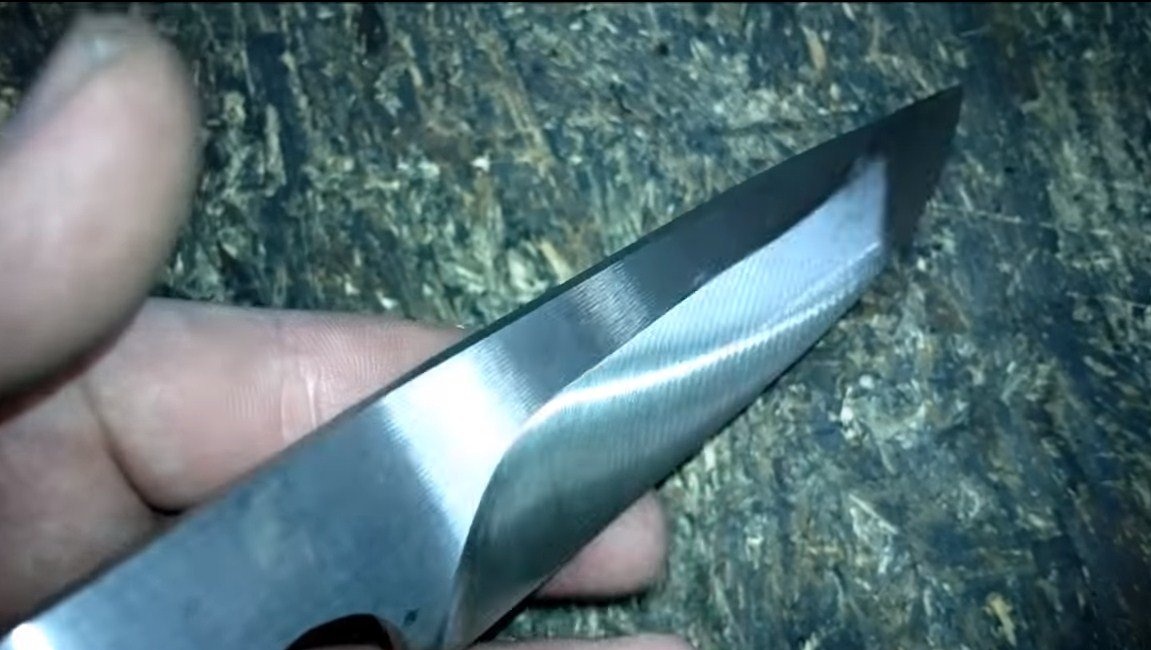
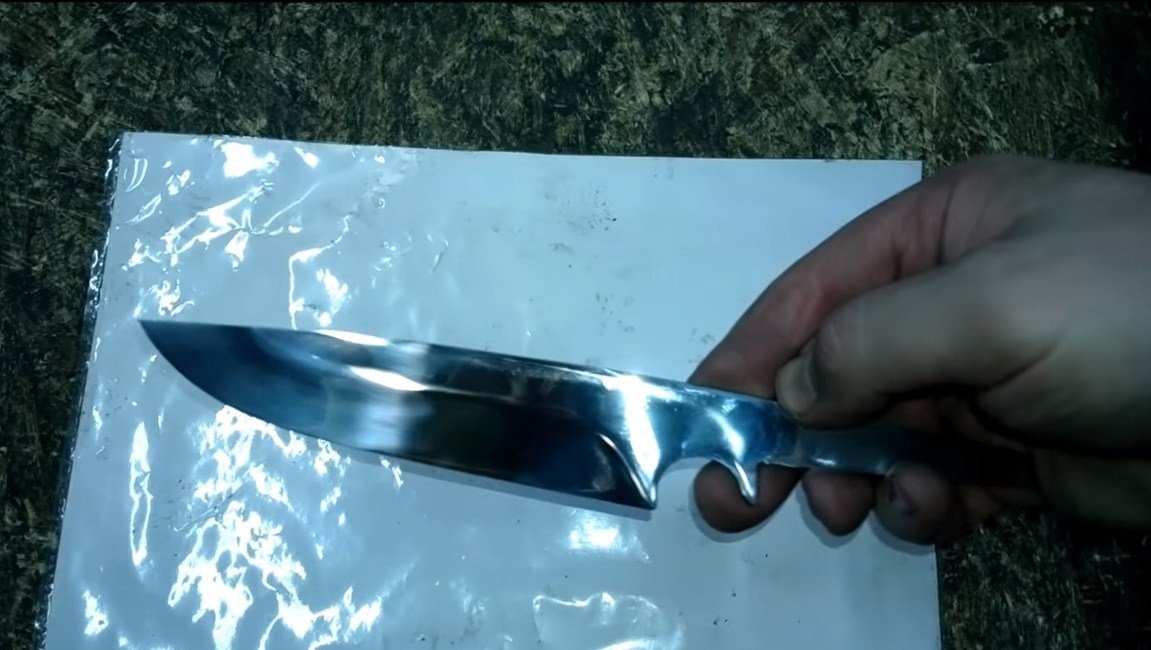
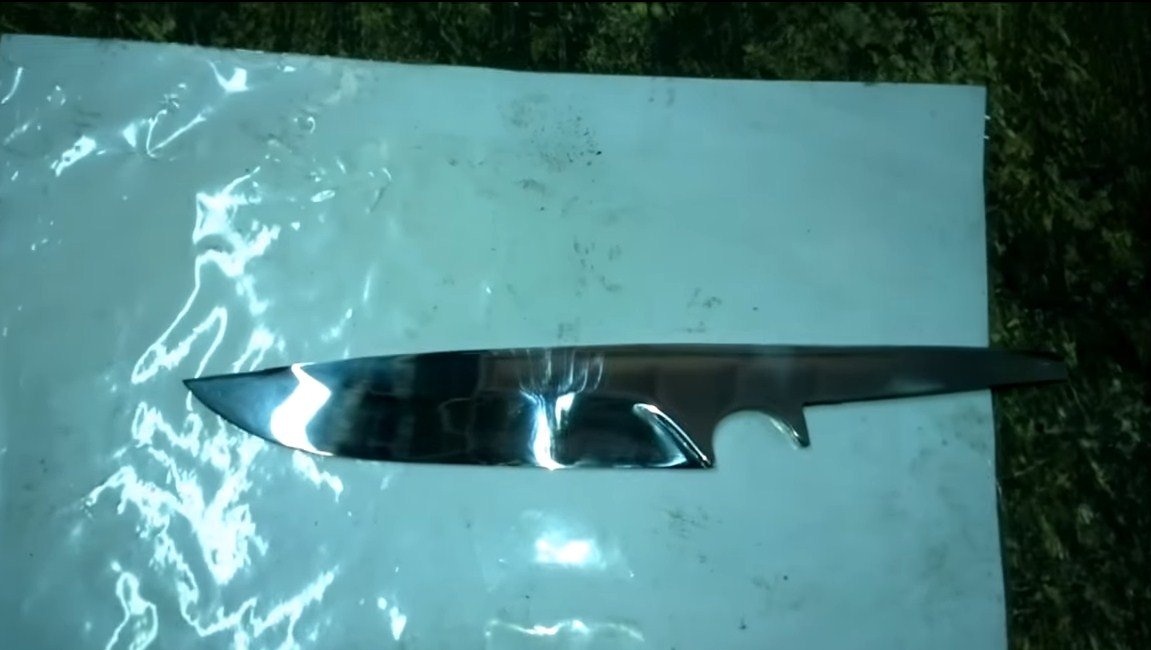
Step Three Grinding and beveling
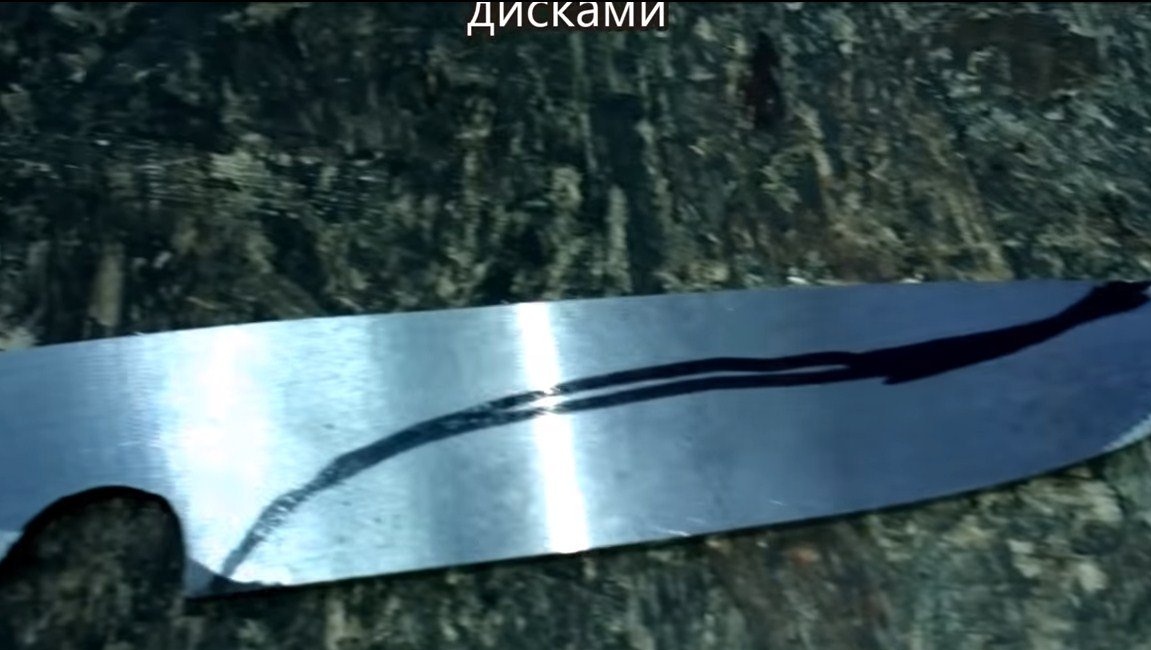
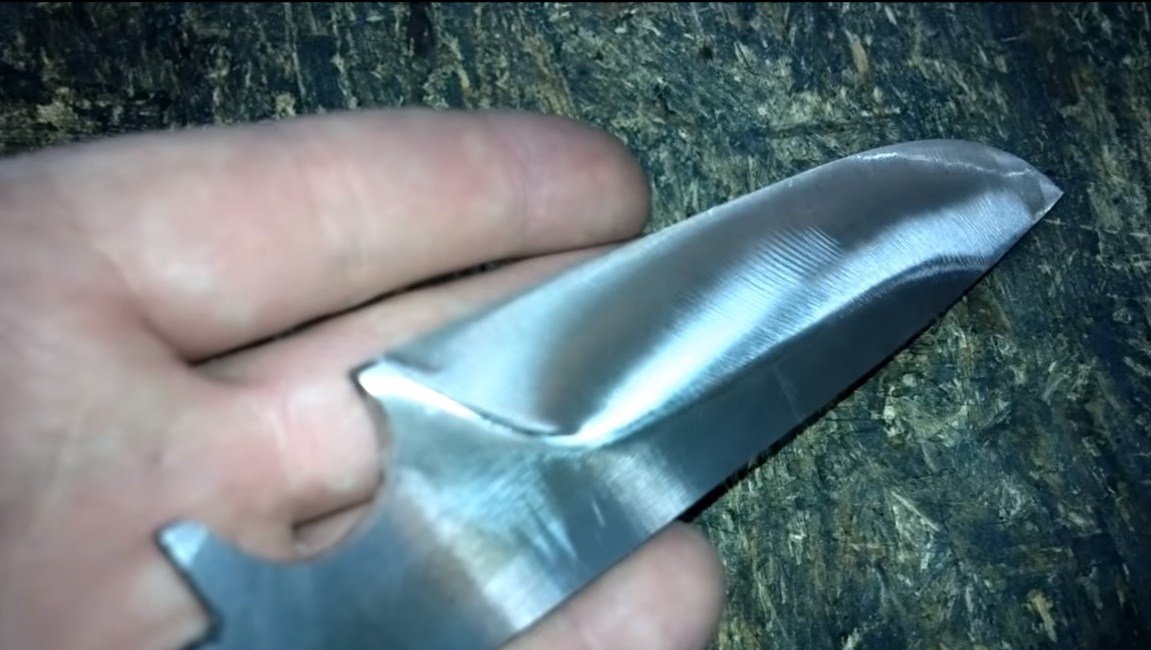
After forging, we carefully grind the blade, rough work can be carried out using a grinder and grinding disks. Grind the planes manually using sandpaper. At the end, we form the bevels on the blade, quickly and professionally, this is done on a belt grinder. But you can get by with the grinder, however, it will take a lot of experience. We grind the blade well to a shine with sandpaper, wetting it in water. We get a respectable blade, which remains to be tempered.

Step Four Heat treatment
First, we temper steel so that it reaches maximum hardness. The author warms the blade to a temperature of about 850 ° C and cools in oil. If you are afraid of cracks, it is advisable to heat the oil with a pre-heated piece of iron.


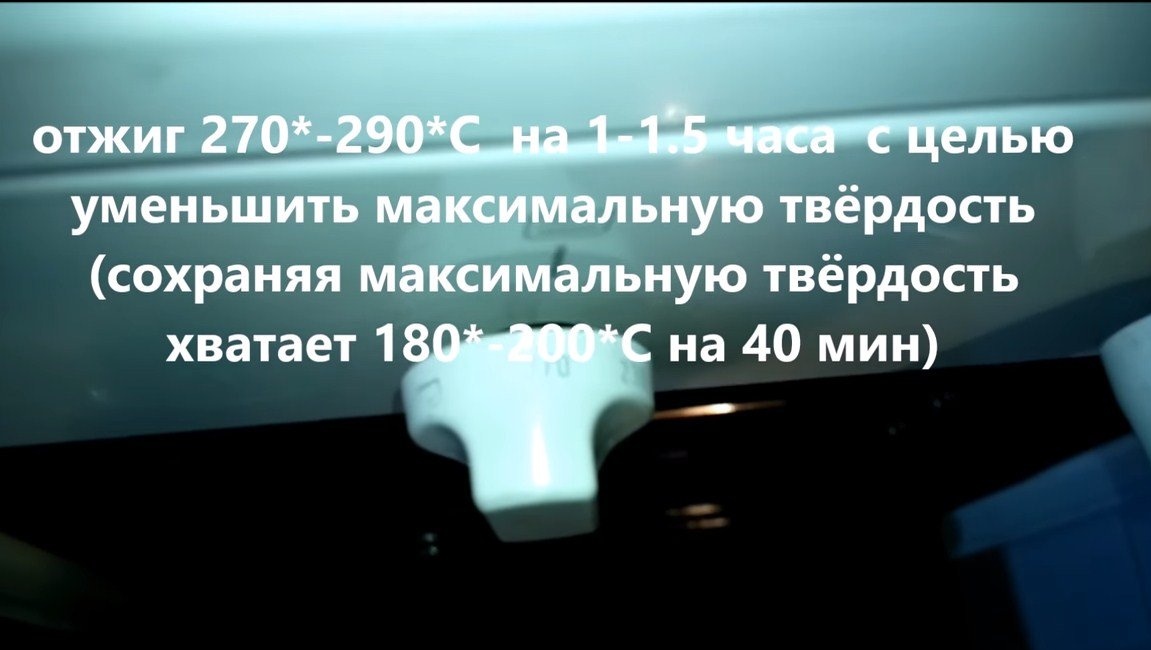
The blade is hardened, be very careful with it, since the metal is fragile now. Do not knock or drop the knife. A good quality blade should not be fragile, it should spring. To achieve this, steel must be let go. Here we will need an oven, we need to warm the blade for at least 40 minutes at a temperature of 180-200 ° C. But if the thickness of the blade and the dimensions of the blade are large, higher temperatures and more time may be required. If tempering is made, the metal should turn a straw color.
Another properly hardened blade should ring if it is hung on a rope and hit with a metal object.

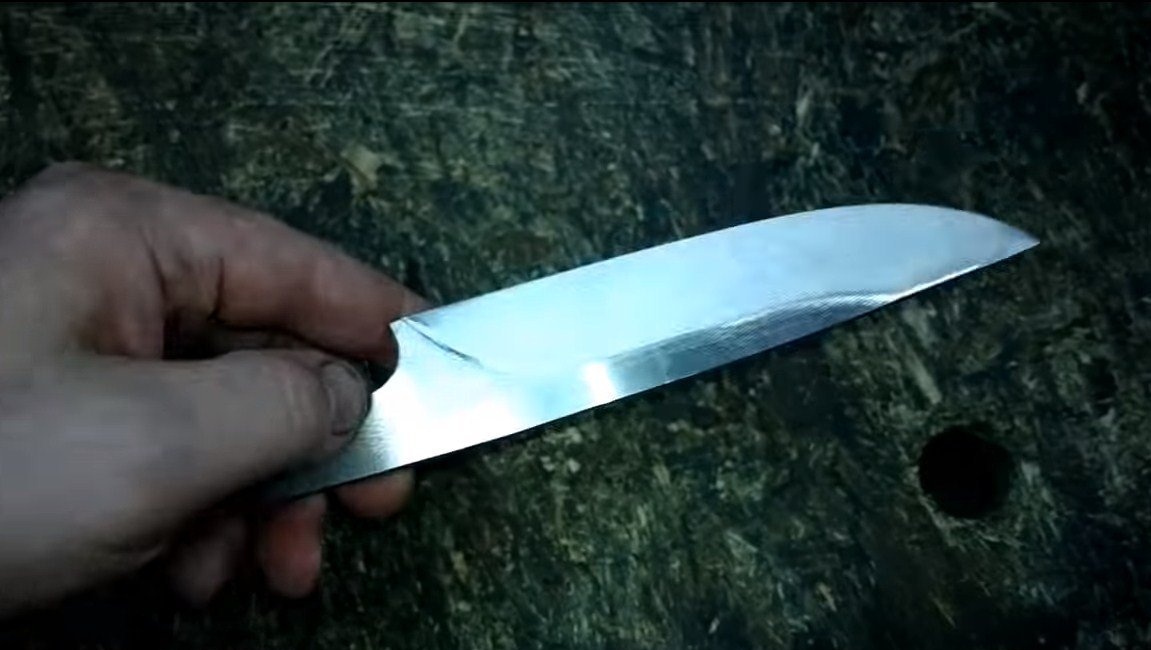
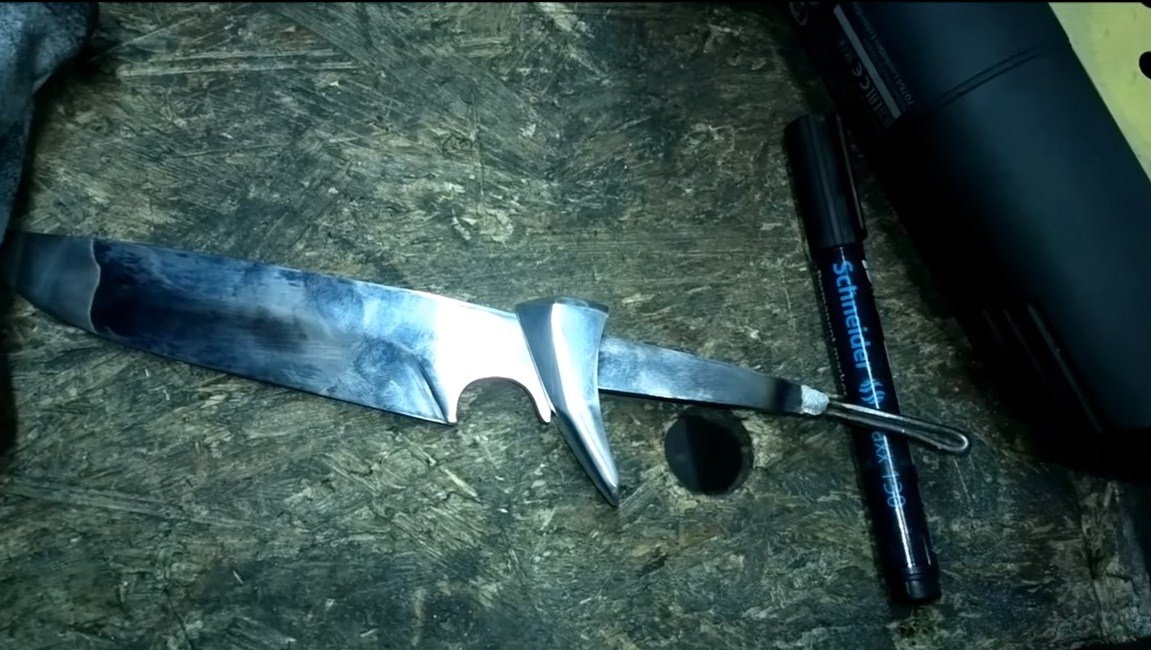
Step Five Grinding
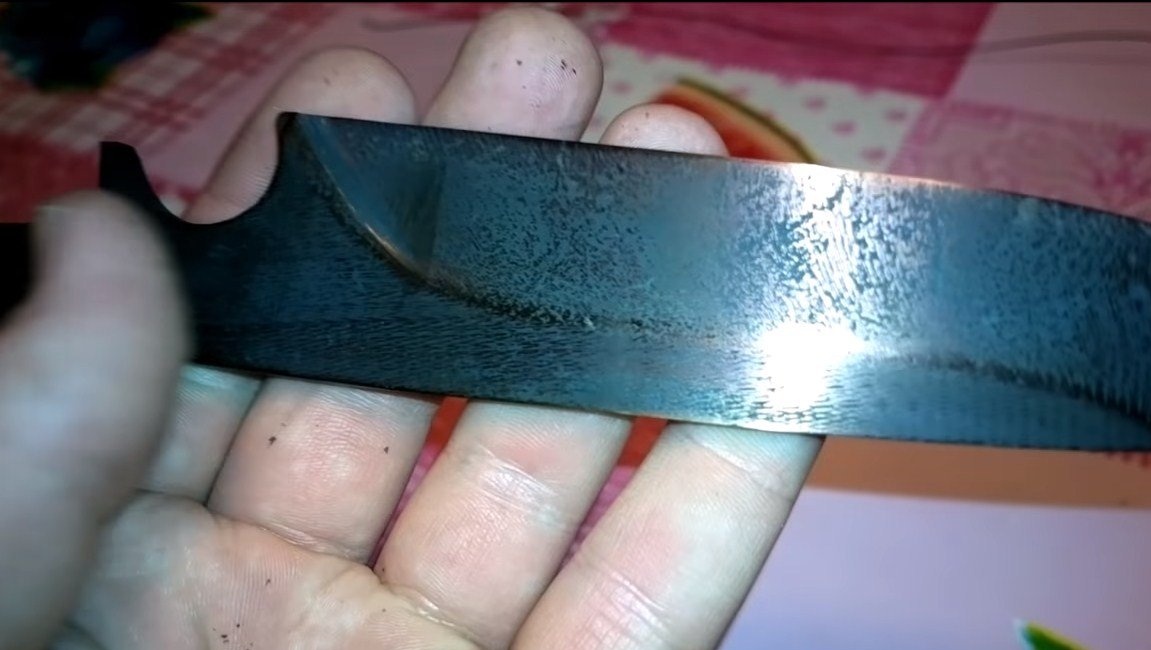
After heat treatment, the blade will have patina and scale, it must be removed. All this is done manually, using sandpaper and water. We wet the sandpaper in water and grind it, thanks to the water it is better cleared of dirt and works like new. In this way, you can easily bring the blade to a mirror shine.
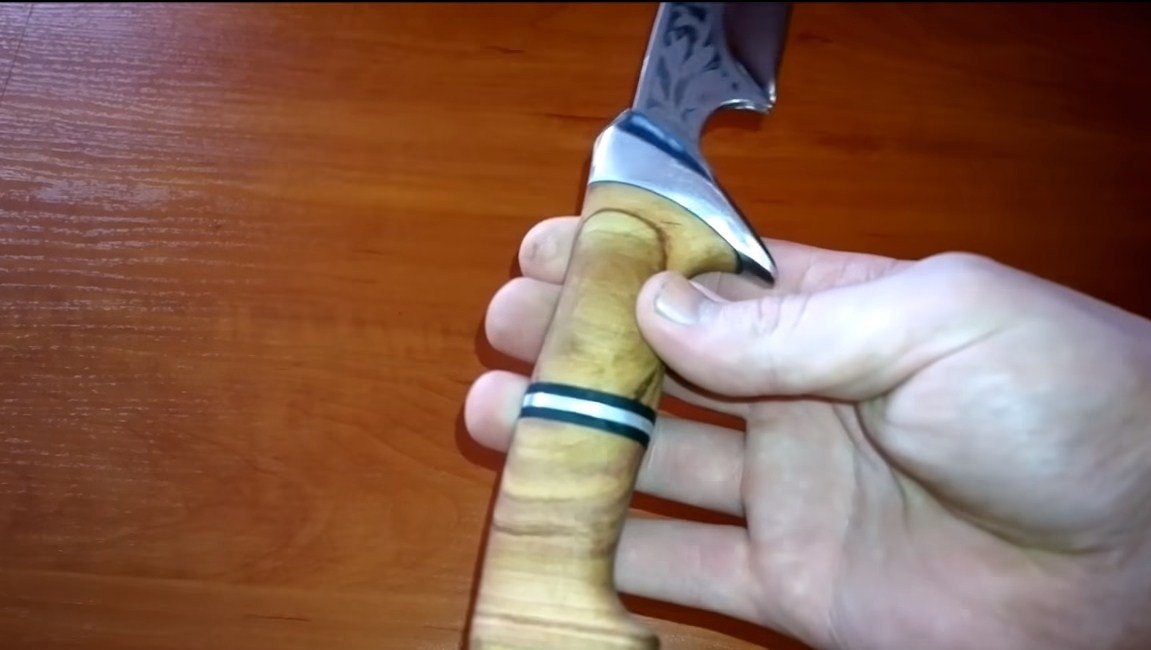
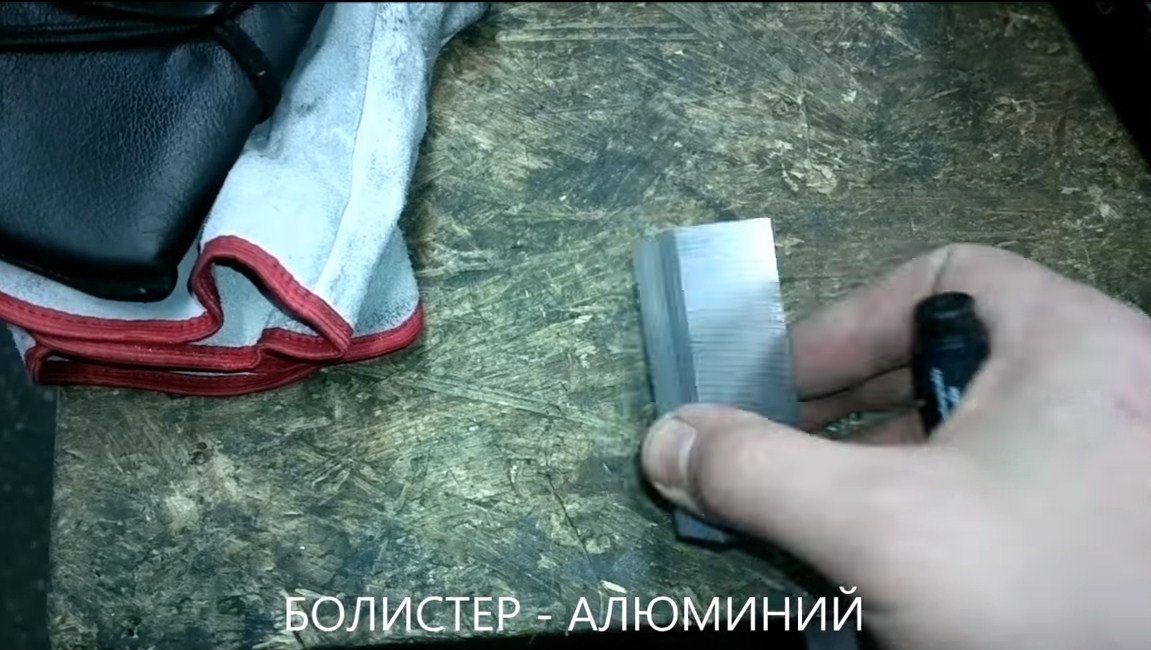
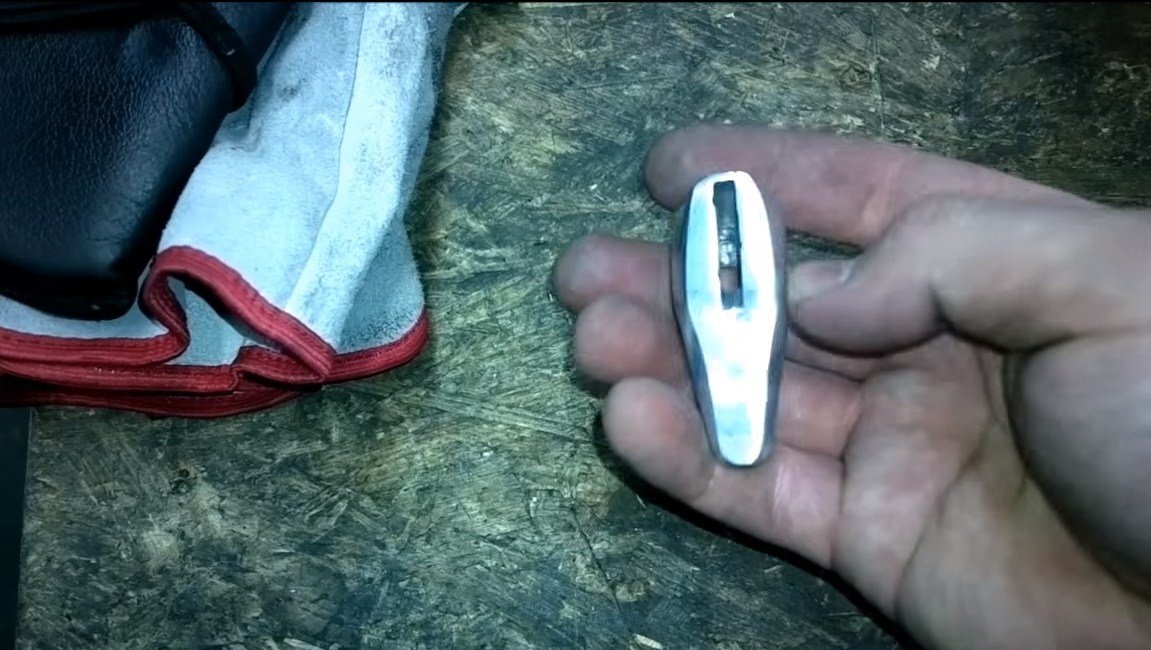
Step Six Bolister
The author made a bolister of aluminum, for this you will need a suitable block of material in dimensions. We grind excess, drill and bore a slotted hole under the knife shank. Aluminum is processed quite easily and you should not have problems with this.

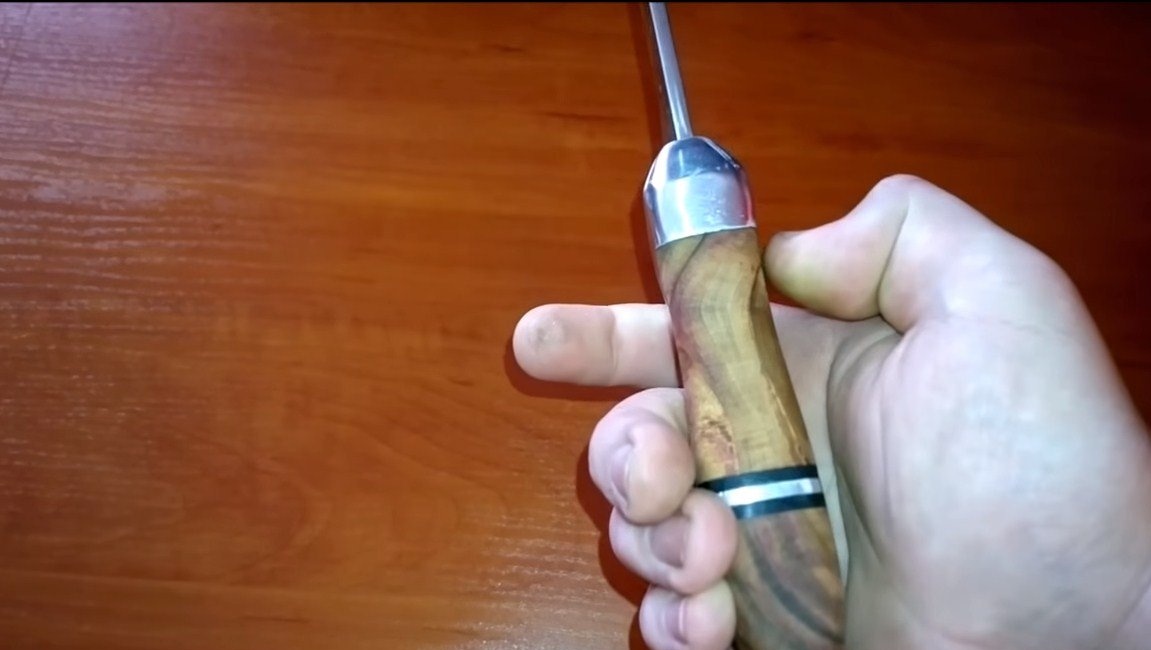
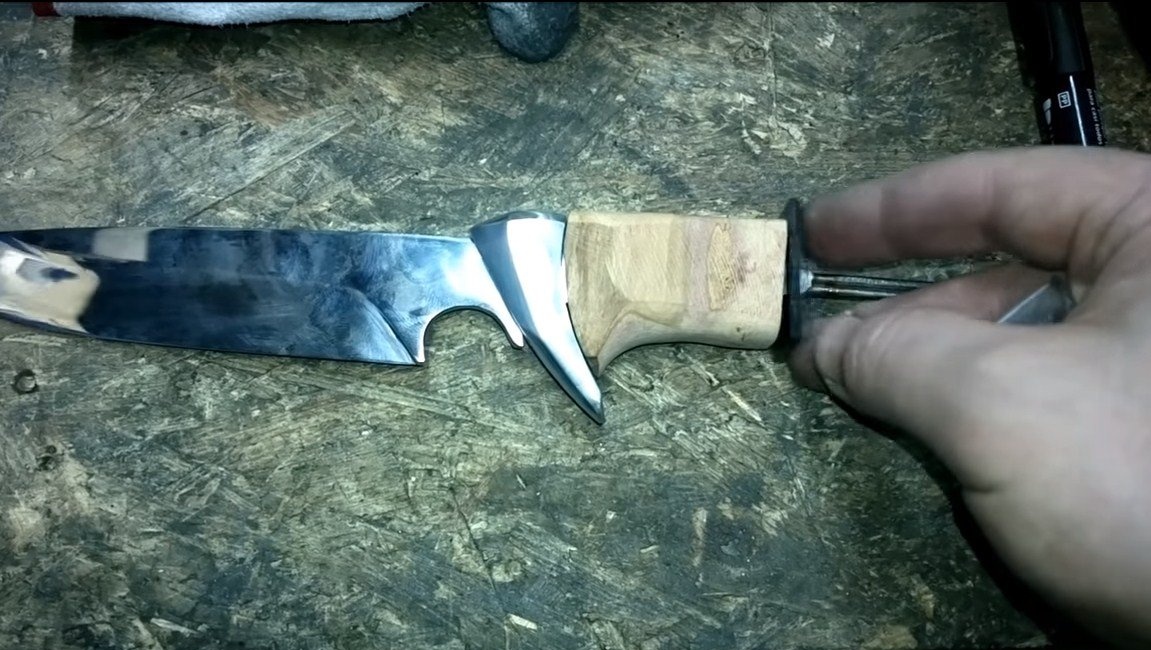
Seventh step. A pen
The author’s pen is typesetting, the main material for its manufacture is wood. Plum looks great here, it has a beautiful pattern, and in terms of hardness it occupies not the last places. There are inserts in the handle to make everything look more interesting. Here you can use sheet aluminum, brass, textolite and other material at your discretion.
The handle can be turned using rasps, then finishing with sandpaper. Of course, this can be done quickly with a belt grinder or a drill.


Step Eight. Knife drawing and assembly
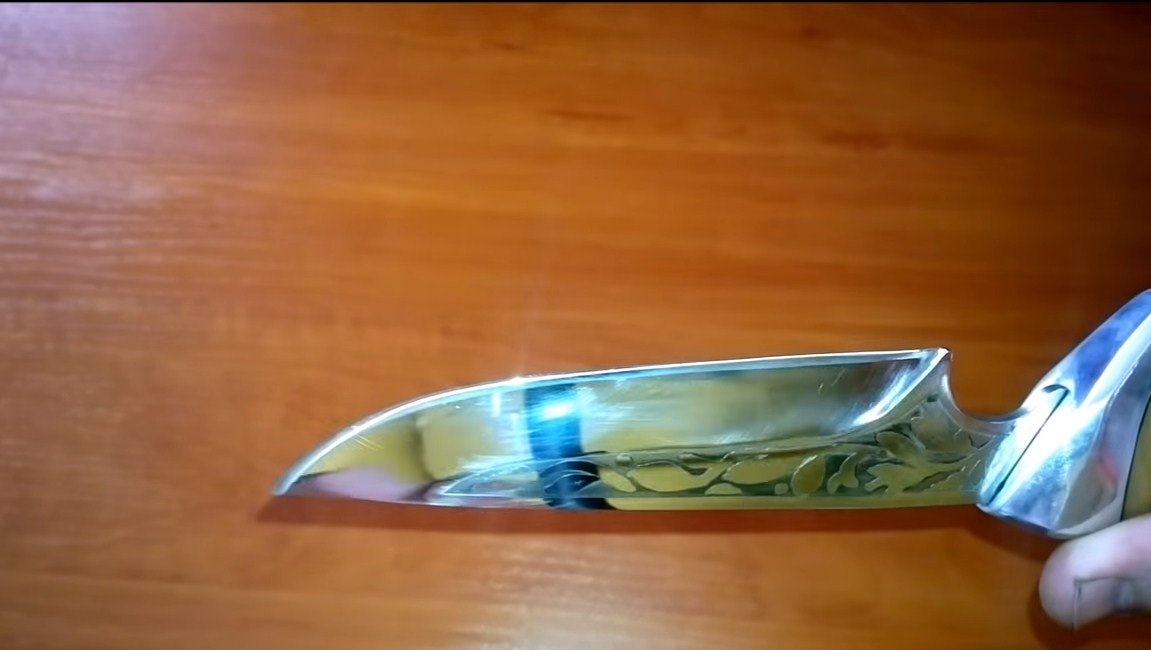
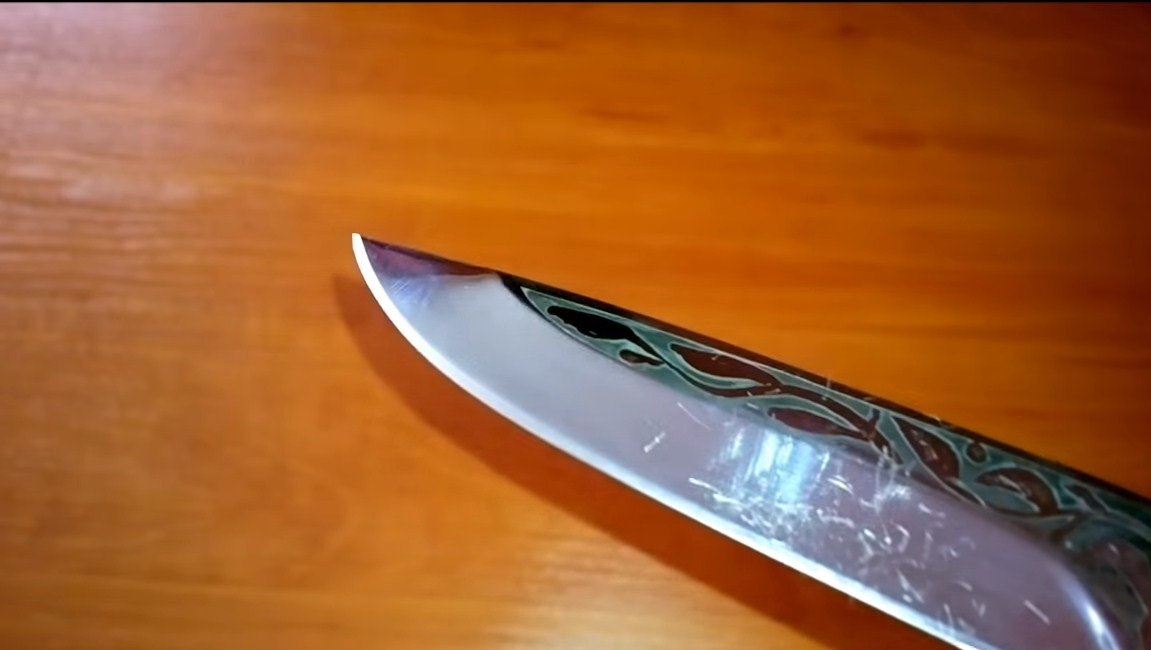
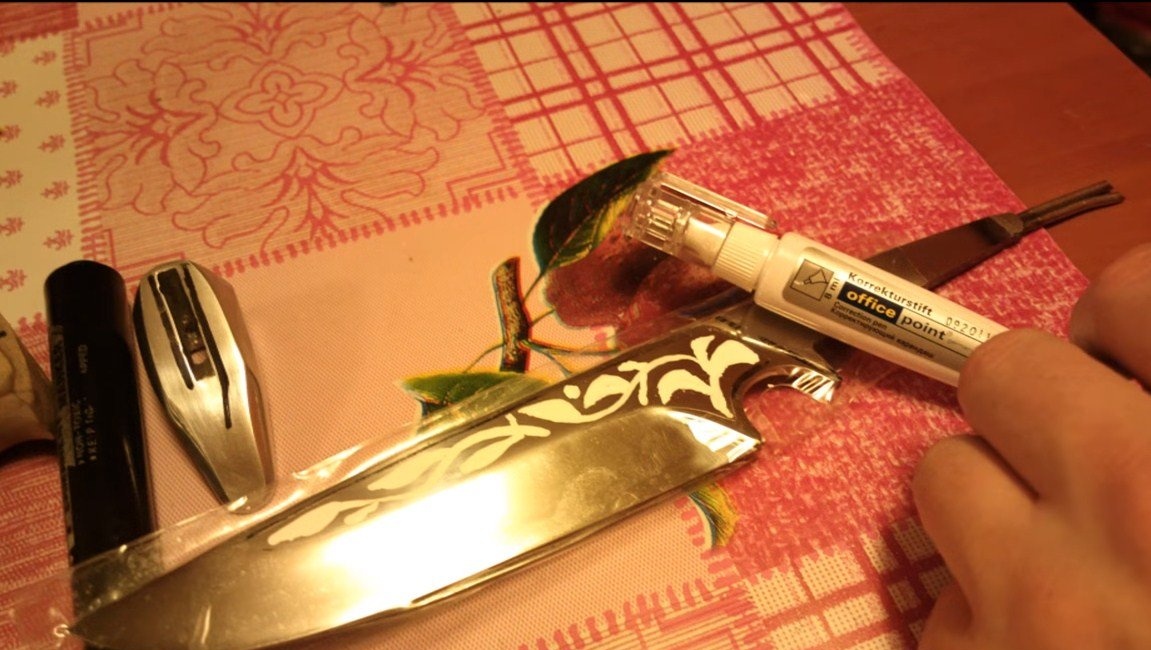
On the blade, the author made an interesting drawing. It can be made by etching or by electrolysis. Just apply the picture and varnish it or paint over it. Well, then acid or electrolysis will remove the metal around, and we will get a durable and beautiful pattern.
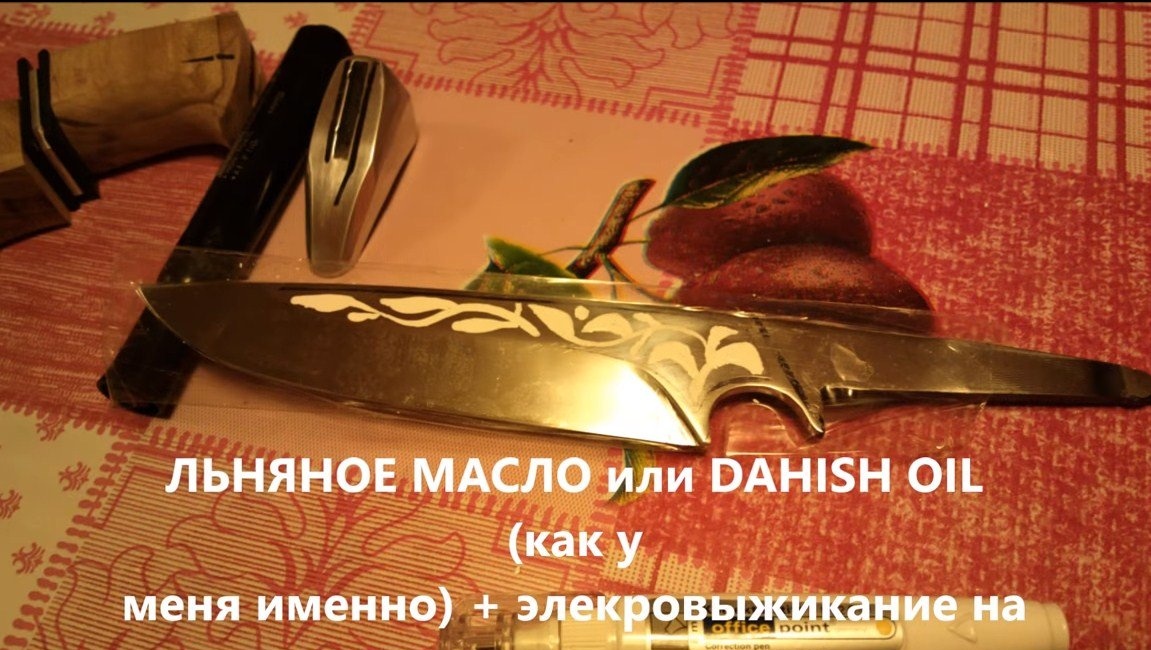
We collect the handle on epoxy glue, and when everything dries, we finish sanding with sandpaper. Do not forget that the tree is afraid of moisture, so it definitely needs impregnation. Flaxseed oil or DAHISH OIL is a good impregnation for plums. Everything looks pretty nice and the tree is now not afraid of direct moisture.
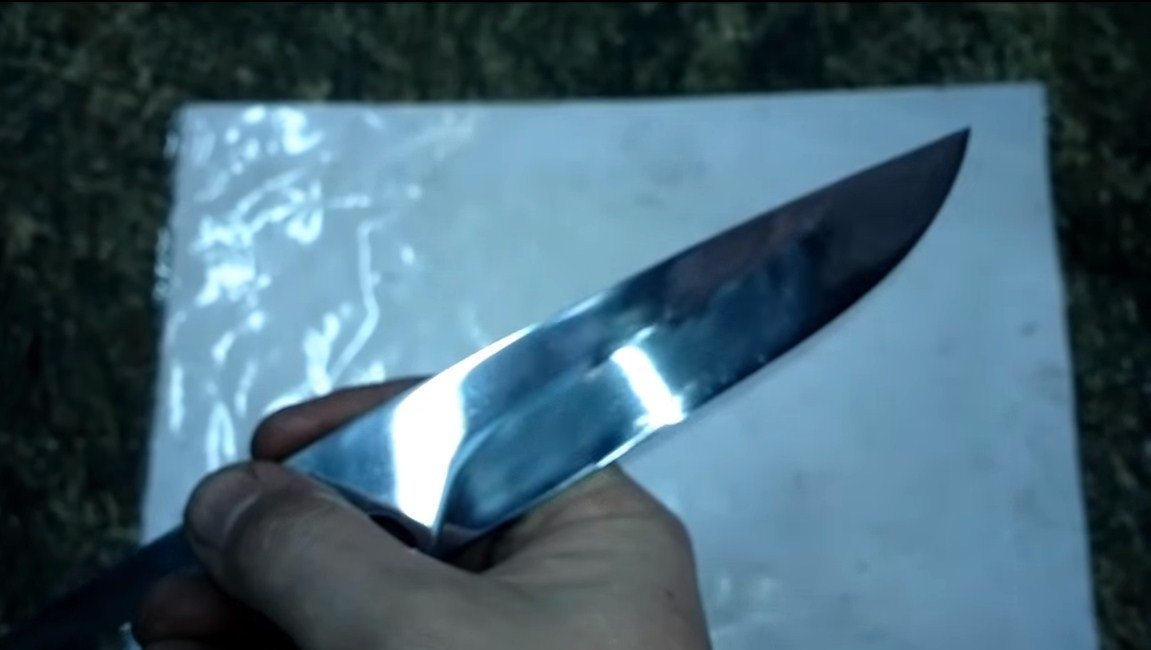
At the end, we sharpen the knife to the state of the blade. The special tool-grinding machine with grinding stones will help you with this. But you can use just whetstones or even sandpaper. The author’s knife turned out to be very sharp, he easily shaves the hair on his hand and cuts the paper. That's all, the project is over, I hope you liked it, and you found useful information for yourself. Do not forget to share your ideas and homemade products with us!