
In this article, we will cover the topic of budget LED lighting made by do it yourself, which is perfect for lighting garages, workshops, as well as other rooms.
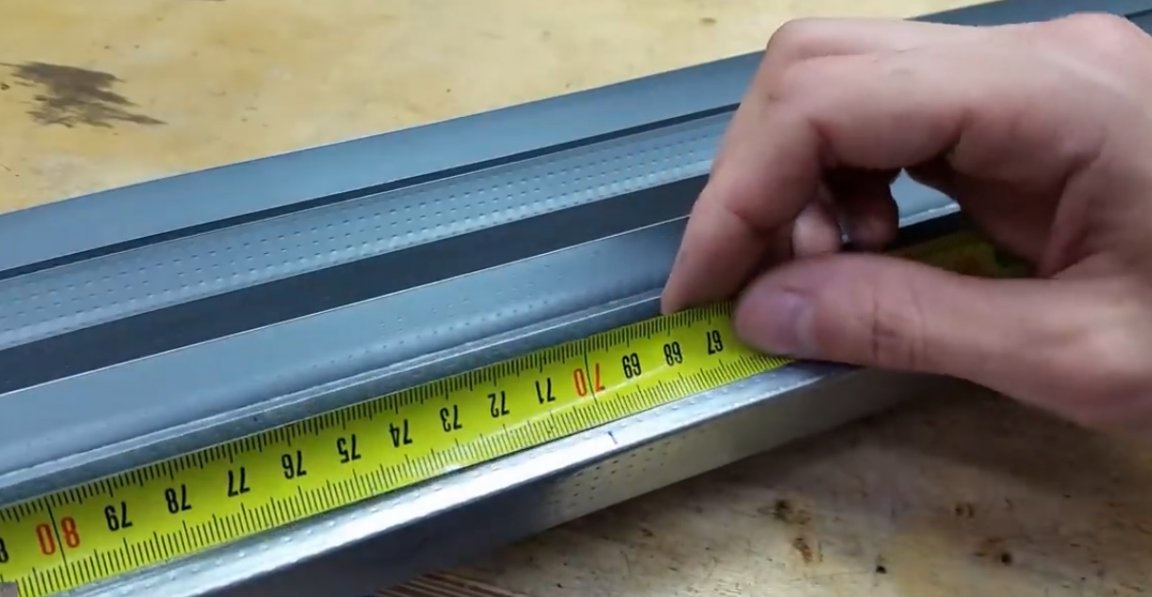
So, the basis of our creation will be the usual ceiling guide profile for drywall with a width of 28 mm. The type of profile here is not fundamental and you can use absolutely any one that suits you best. The length of the profile is 3 m, we determine the dimensions of the future lamp and apply the marking. The author will make a lamp measuring 70 by 70 cm.
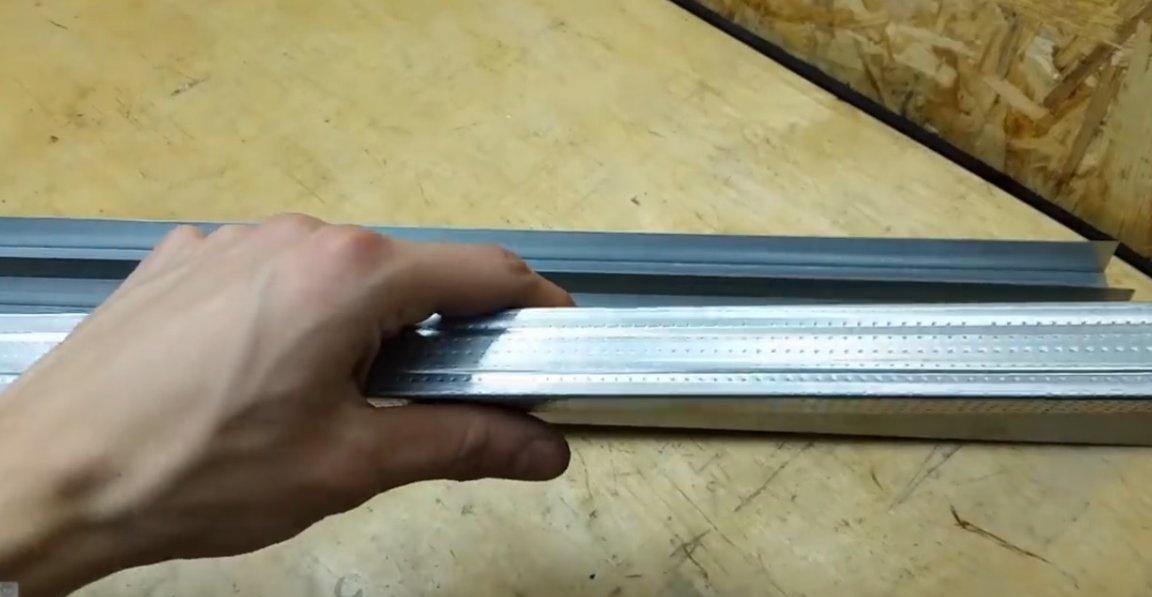
Using scissors for metal, we make cuts from 2 sides. It is very convenient to navigate through the perforation applied to the profile.
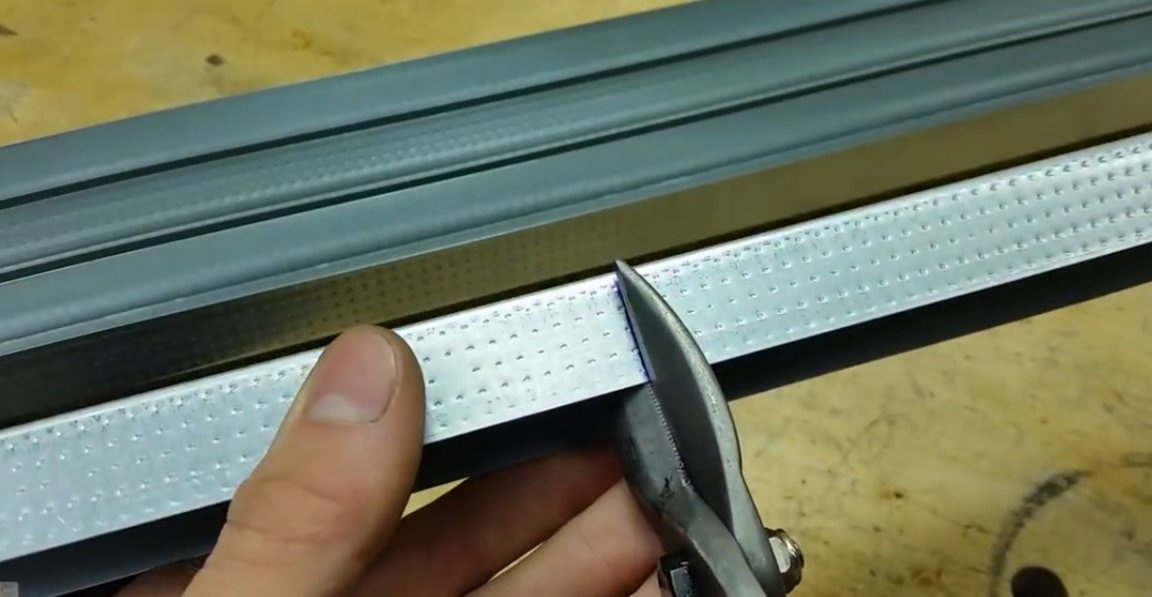
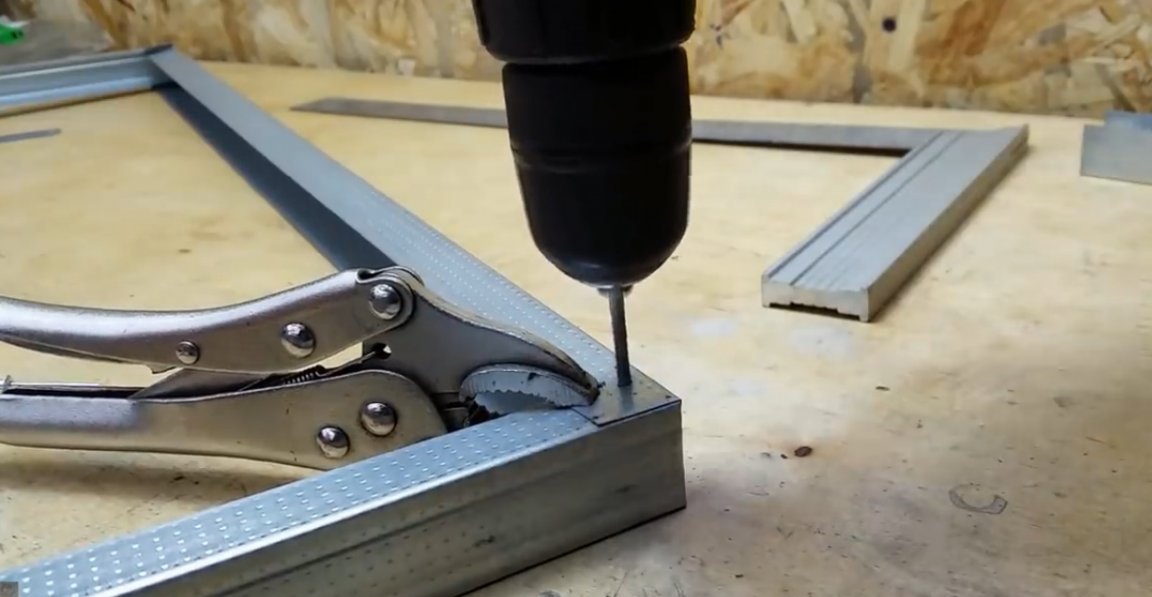
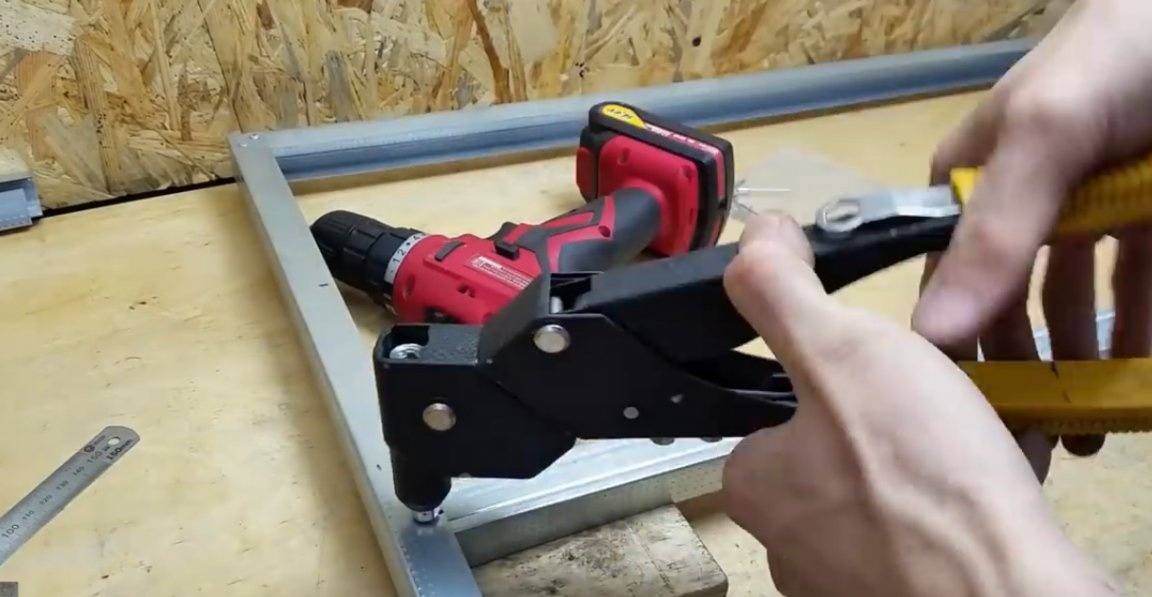
After making incisions in 4 places, we bend the profile into a square and leave a small tail in a couple of centimeters for fixing. Using the angle set the angle of 90 degrees and fix it with a clip.

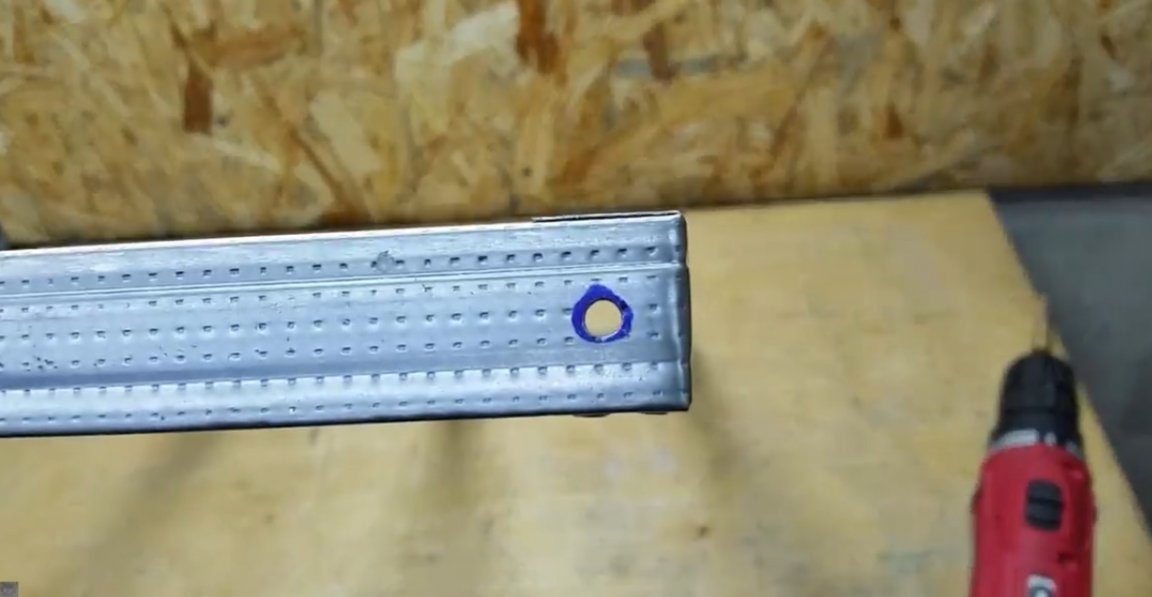
We drill a hole and assemble it for rivets.
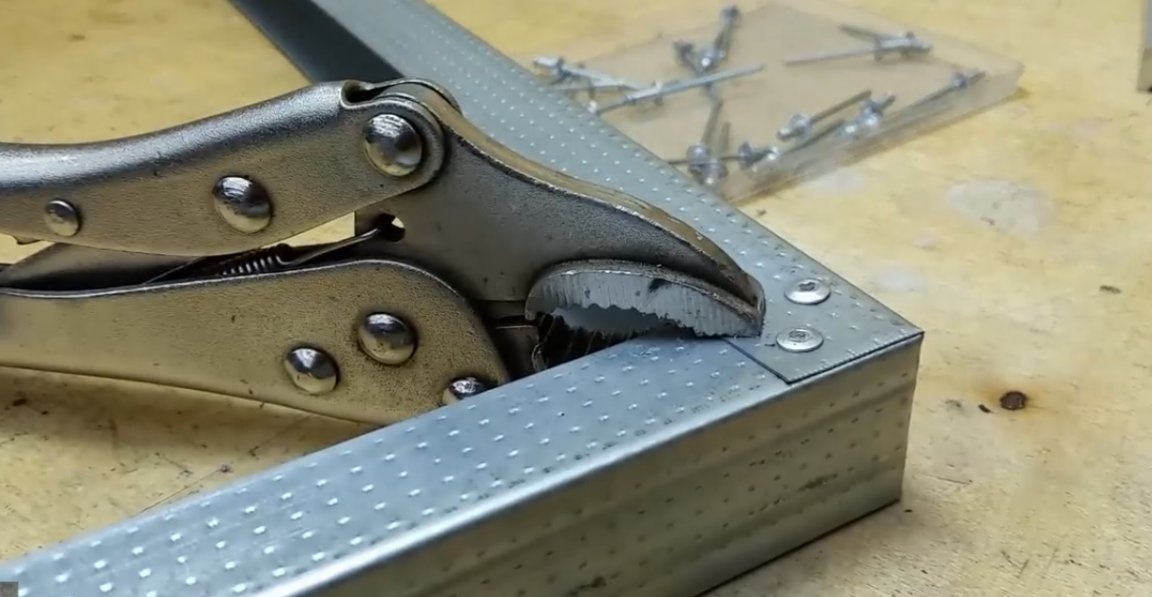
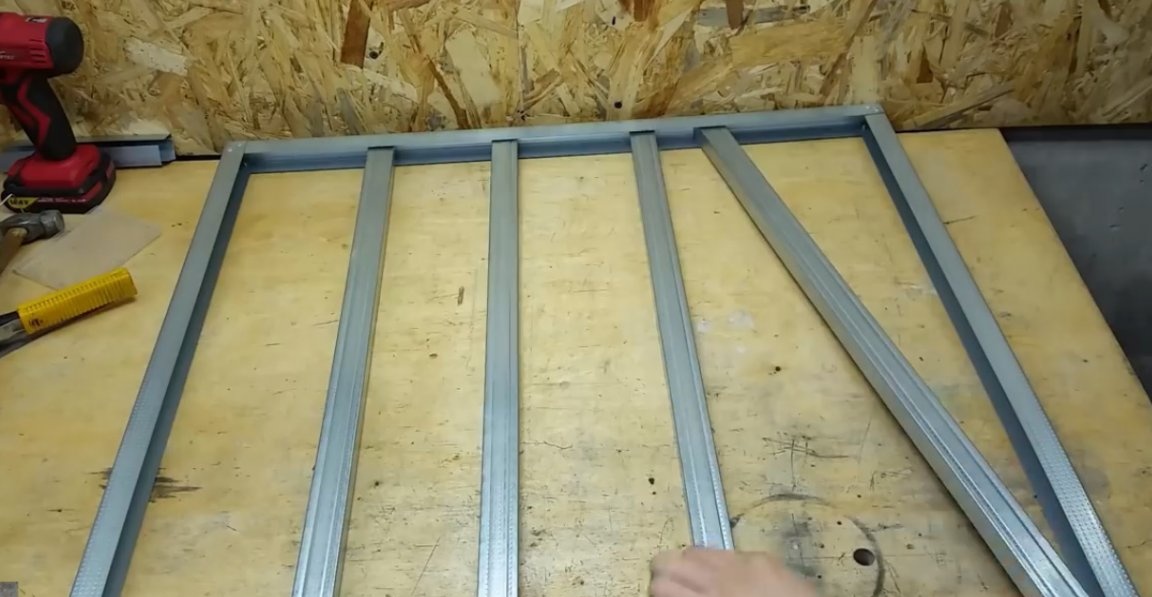
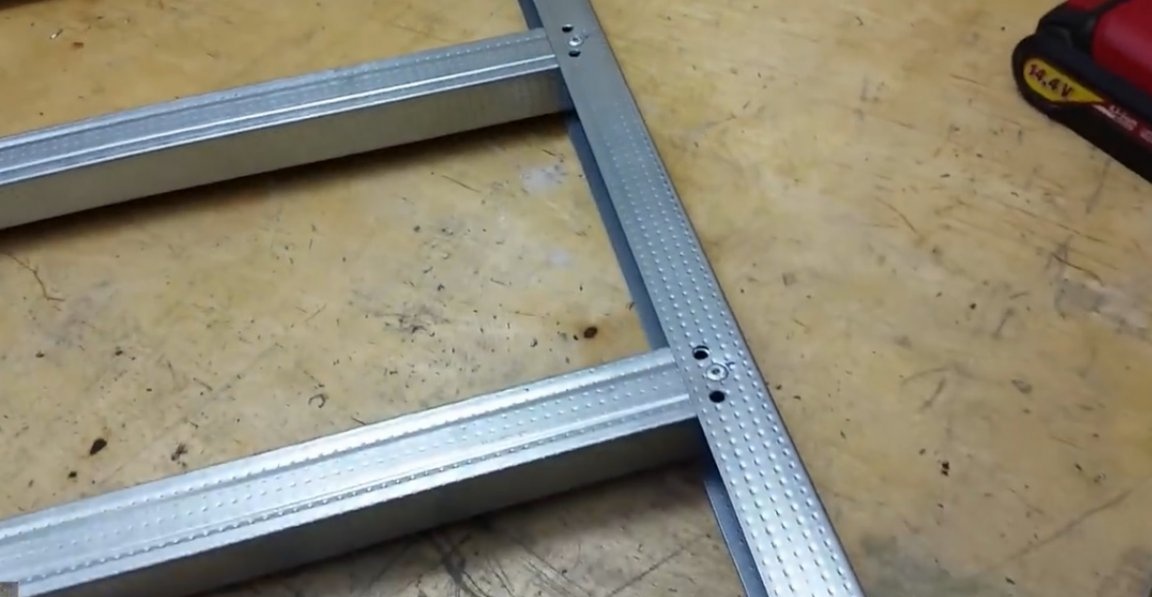
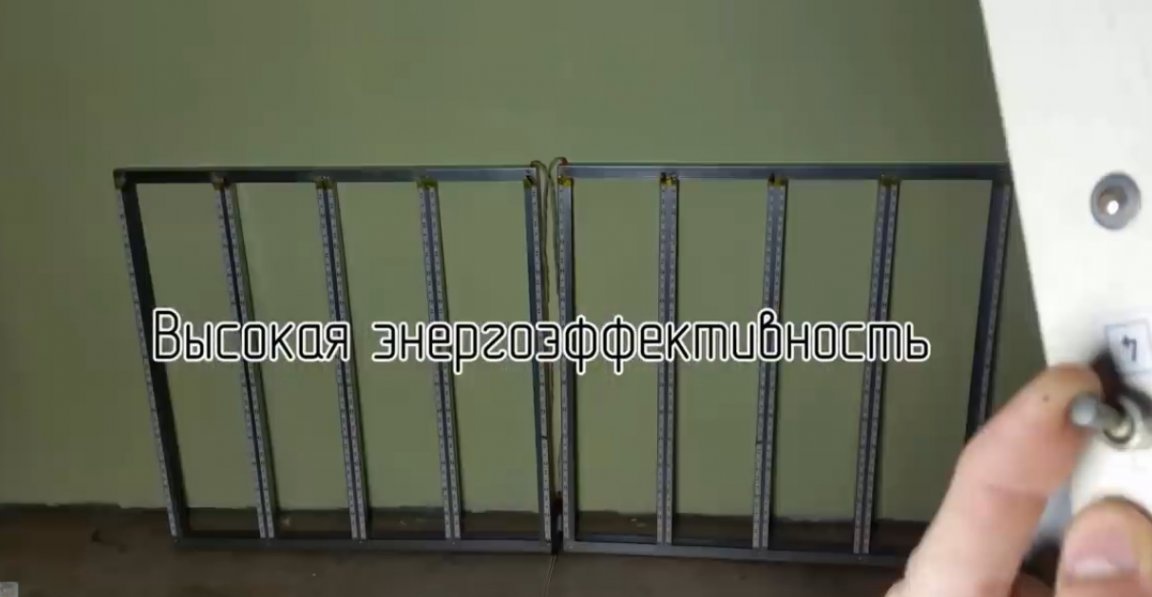
You can certainly use screws, but the author likes the rivet option more. When the frame is ready, from the same profile we cut the cross-beams. We do their number at our discretion. We drill and rivet.
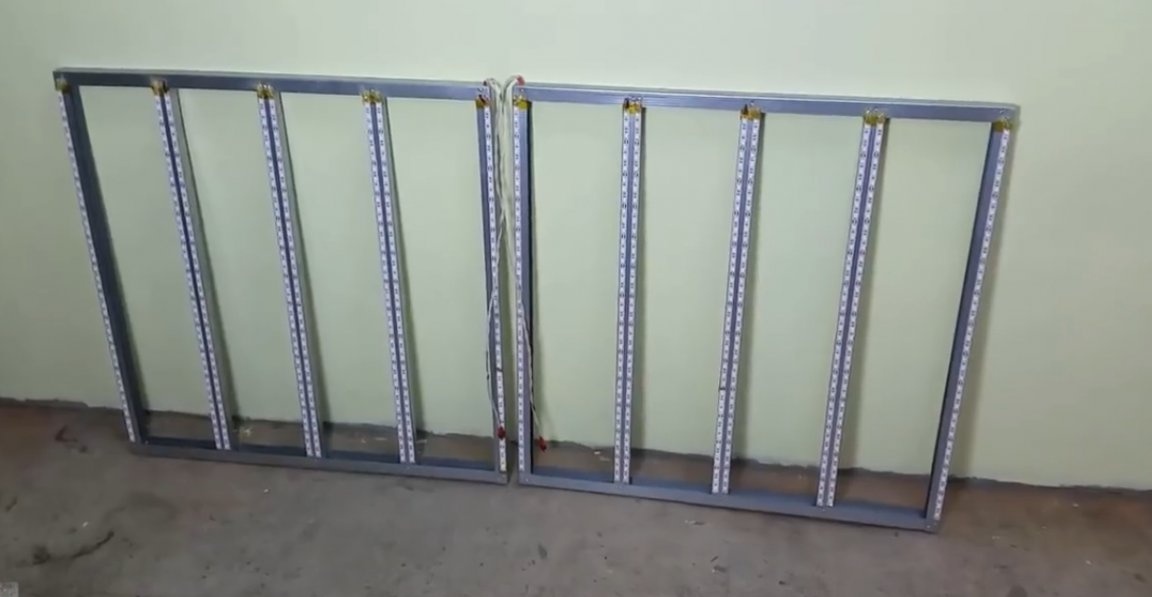
The frame is ready. Now we make all the necessary holes for the wires.
Next stage. Here we need the most ordinary LED strip, for example, with Aliexpress.
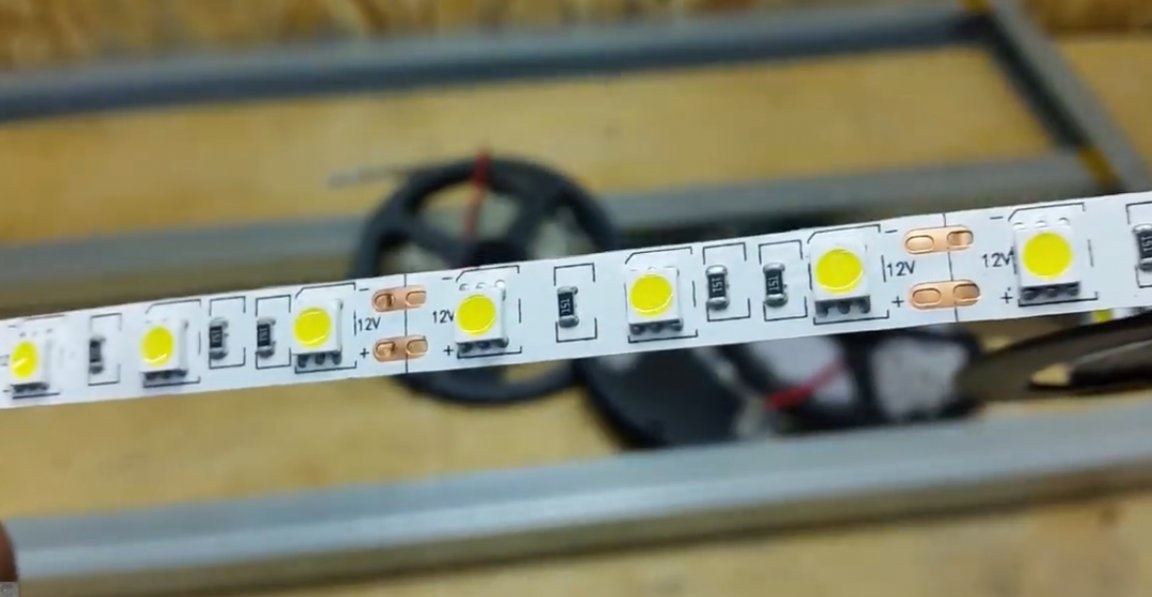
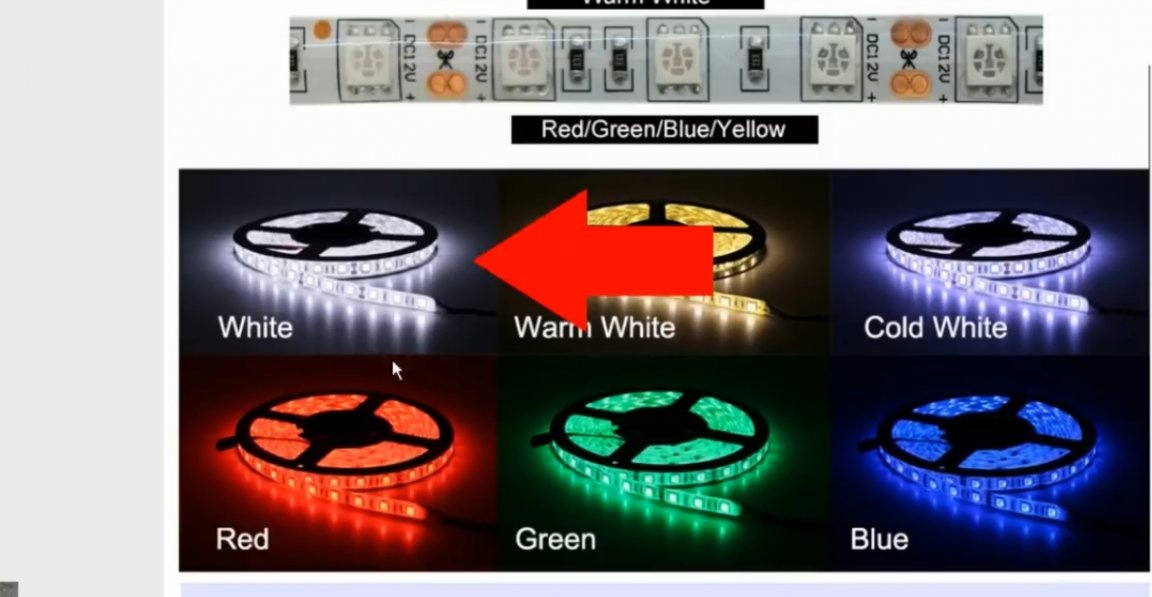
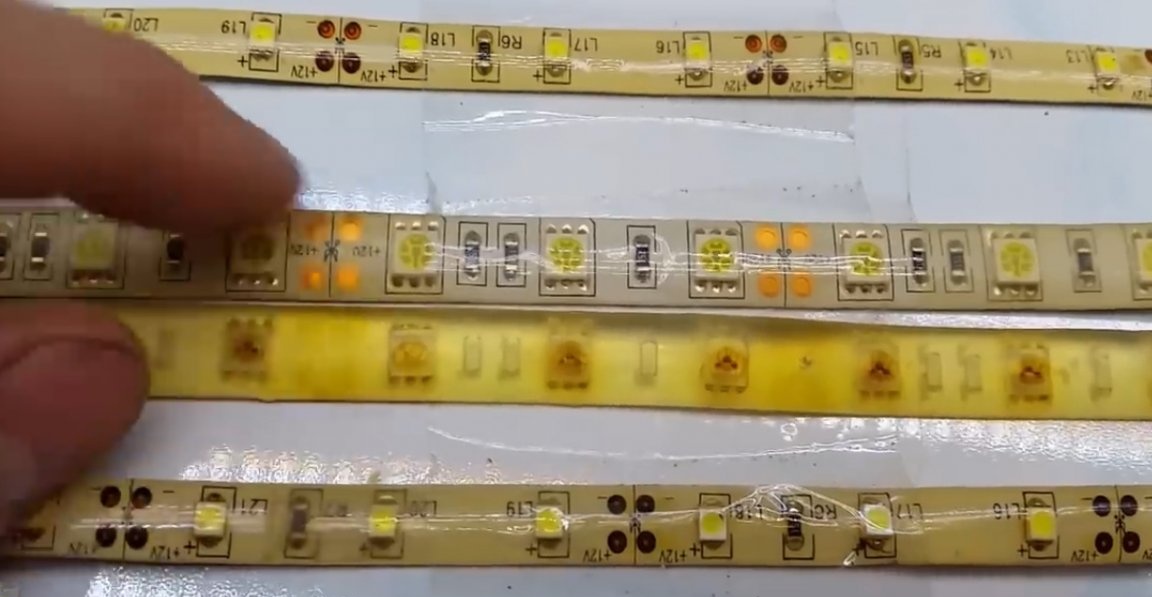
The tapes there can be found completely different, with different types of LEDs, multi-colored and one-color, with and without moisture protection. In this case, we will use a regular LED strip on LEDs of size smd5050. We will use a ribbon with a pure white glow (white).
The light from it will not yellow and give blue. If you plan to use the lamp in rooms with high humidity and with the possibility of condensation, as well as with direct contact with water, it is necessary to use a waterproof tape in silicone insulation (waterproof).
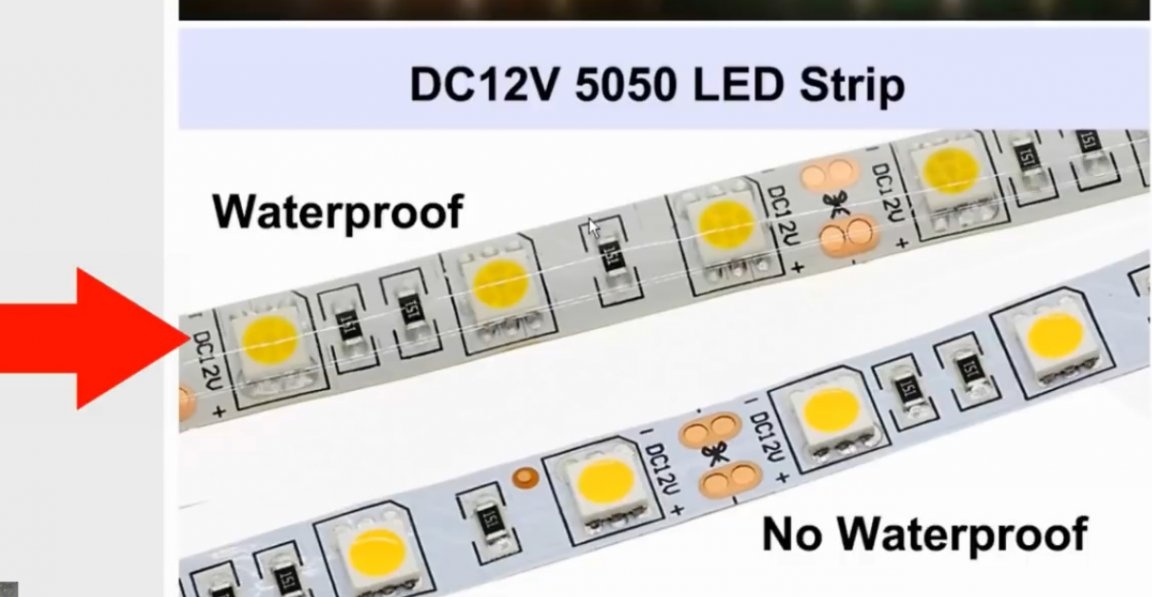
Without an urgent need, it is better not to use an LED strip in silicone, and there are several reasons for this. Firstly, it costs more, and secondly, that the most unpleasant, silicone coating over time begins to turn yellow, cloud and pass less light.
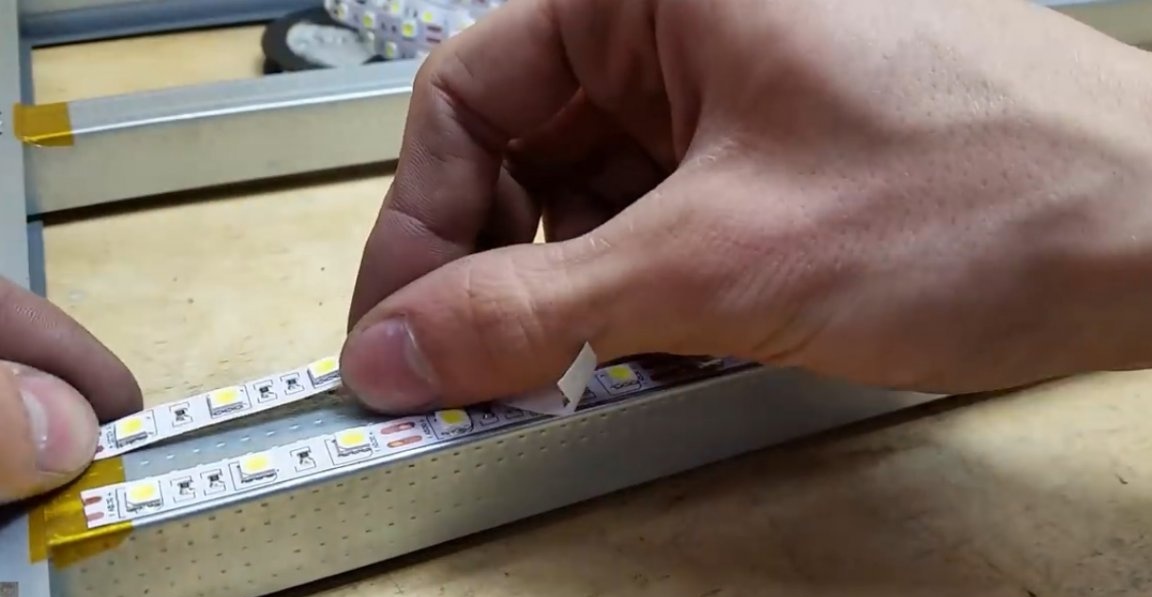
So, with this, perhaps, figured out. Before sticking the tape, degrease the surface of the profile. For greater reliability, we isolate the places where the wires are soldered with heat-resistant kapton tape.

In extreme cases, the blue electrical tape will also work. Now take the tape and cut it into the necessary segments. You need to cut in specially designated places. In this case, the length of one segment is 65 cm.

Now proceed to the sticker. For better adhesion, the tape and profile can be preheated with a hairdryer.

When the whole tape is pasted, we will make small conductors for soldering. This is quite boring and monotonous work, if you work with the help of wire cutters. But the Chinese do not stand still and allow you to make it several times faster, with the help of such a miracle of invention as stripper.
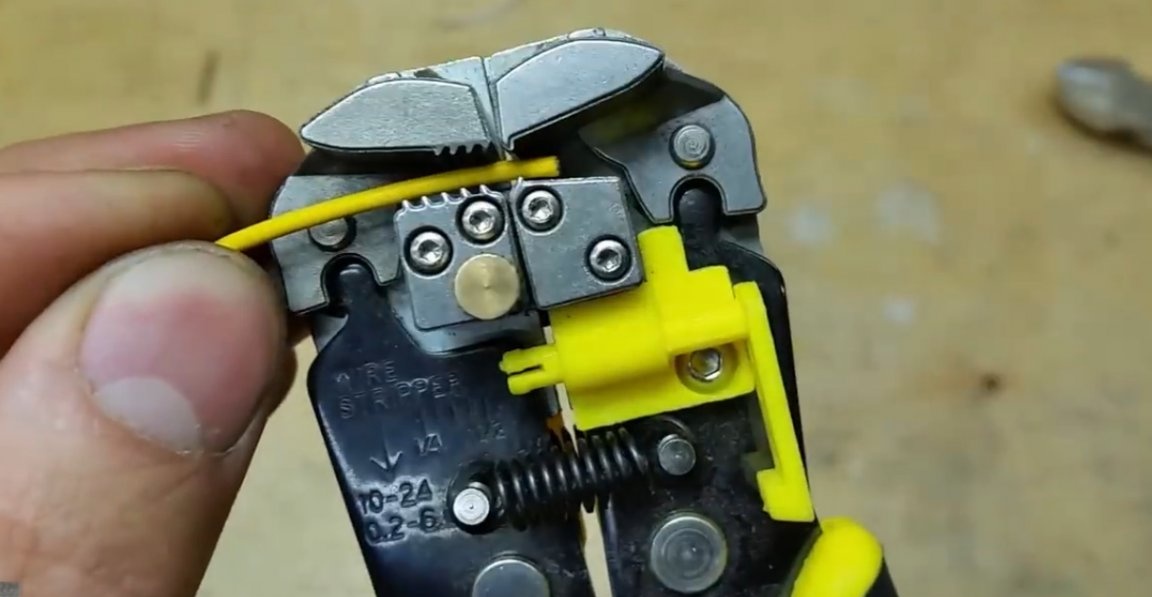
When the wires are protected, tin them and gently solder them to the LED strip. For these purposes, it is better to use a soldering iron with a thinner tip.
It is not necessary to power each LED strip with a separate wire, as the author did. It is enough to power 1 segment, and then through the jumpers to power the rest. But note that with such a connection, small voltage drops on the extreme lines can be observed. That is why the author did not choose this connection option.
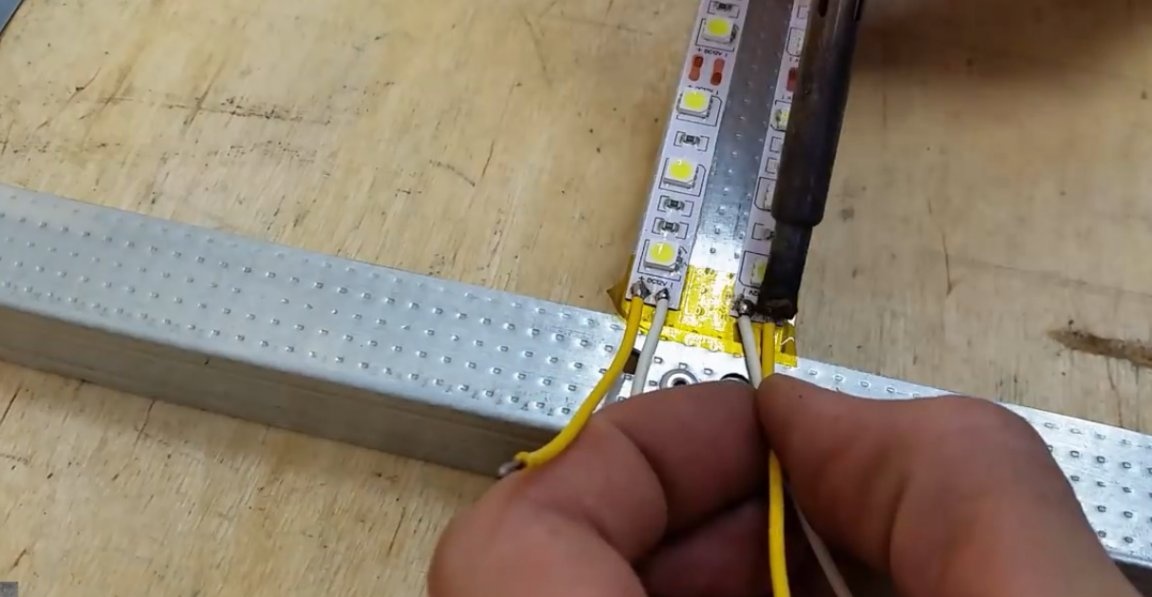
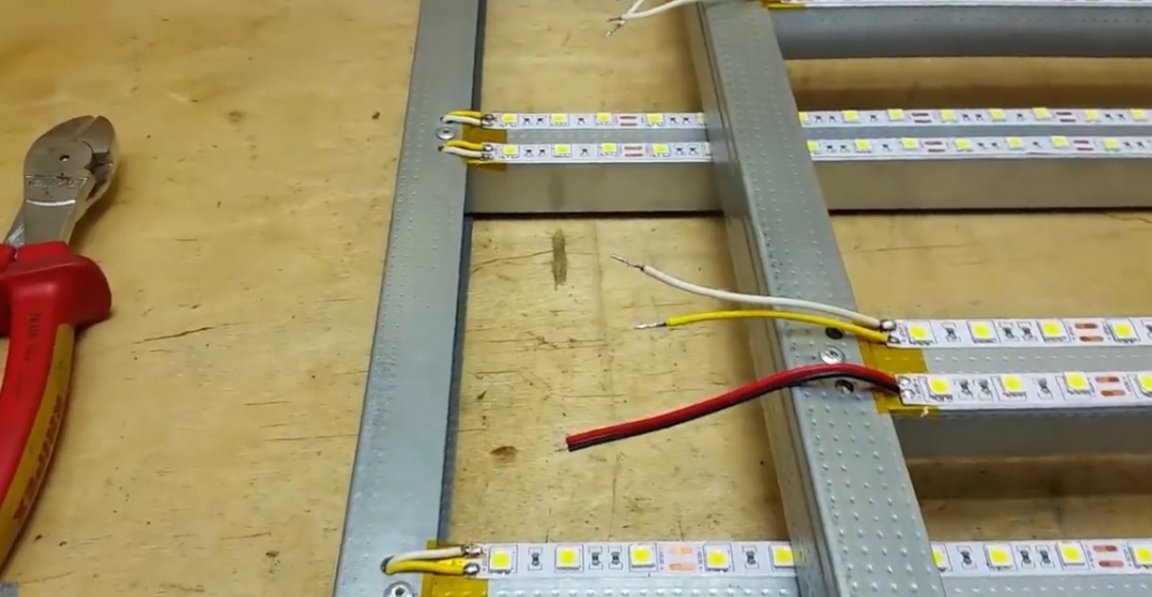
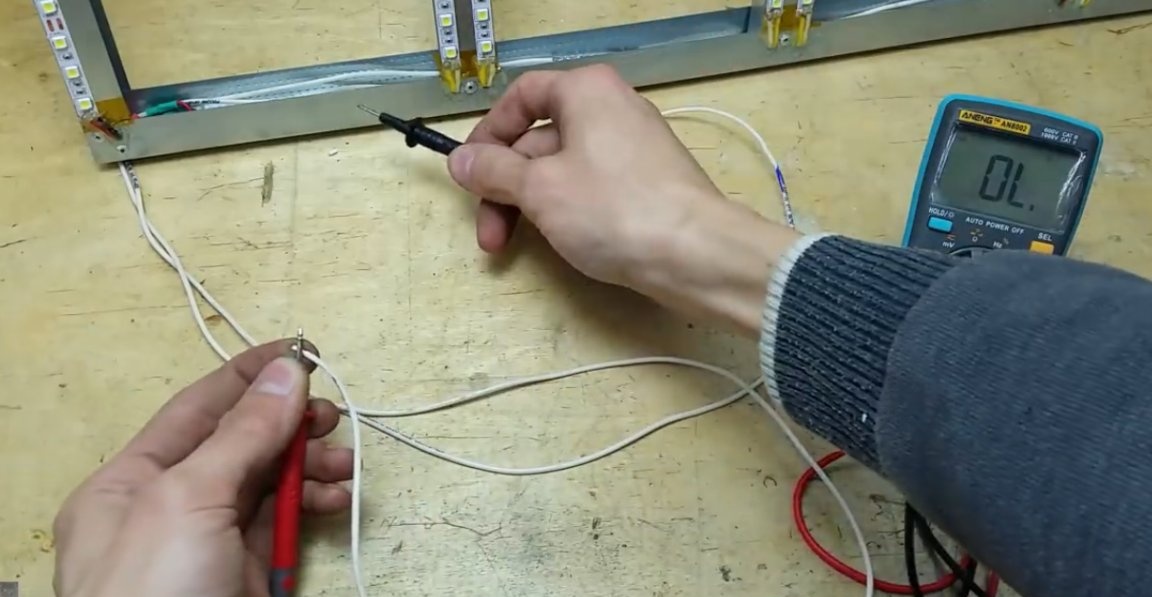
The next step is to thread all the wires into the previously made holes. If desired, you can protect the contact pads from breaking with hot melt adhesive. Next, we bring the main supply wires. We solder all the pluses (+) from the LED strips to one, and all the minuses (-) to the other, thereby we get a parallel connection of all segments of the tape.
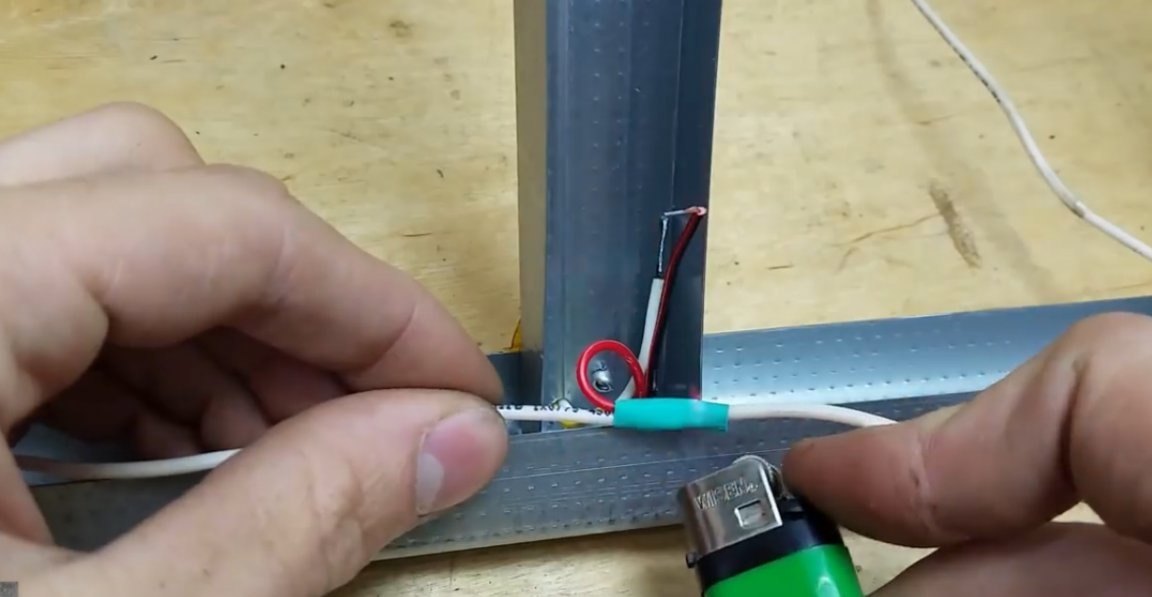
For insulation we use heat shrink. When everything is ready, we lay the wires in profile, we take a multimeter and set it to the continuity mode of the chains. We call the power wires for short circuits on the case.
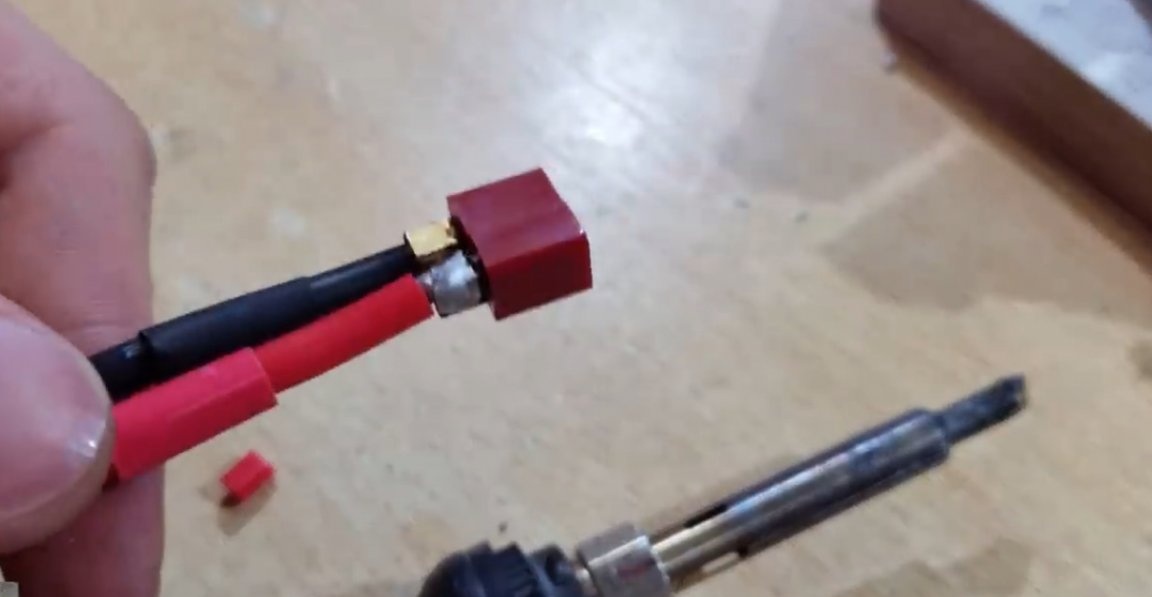
If the device is silent, then everything is fine. Finally, solder the power connector.
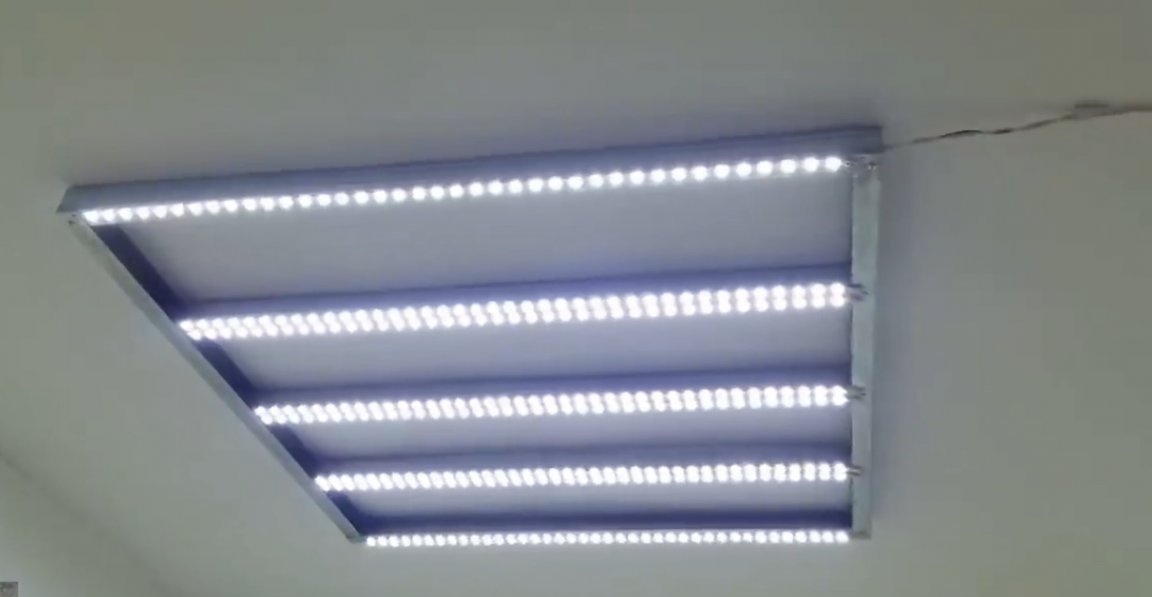
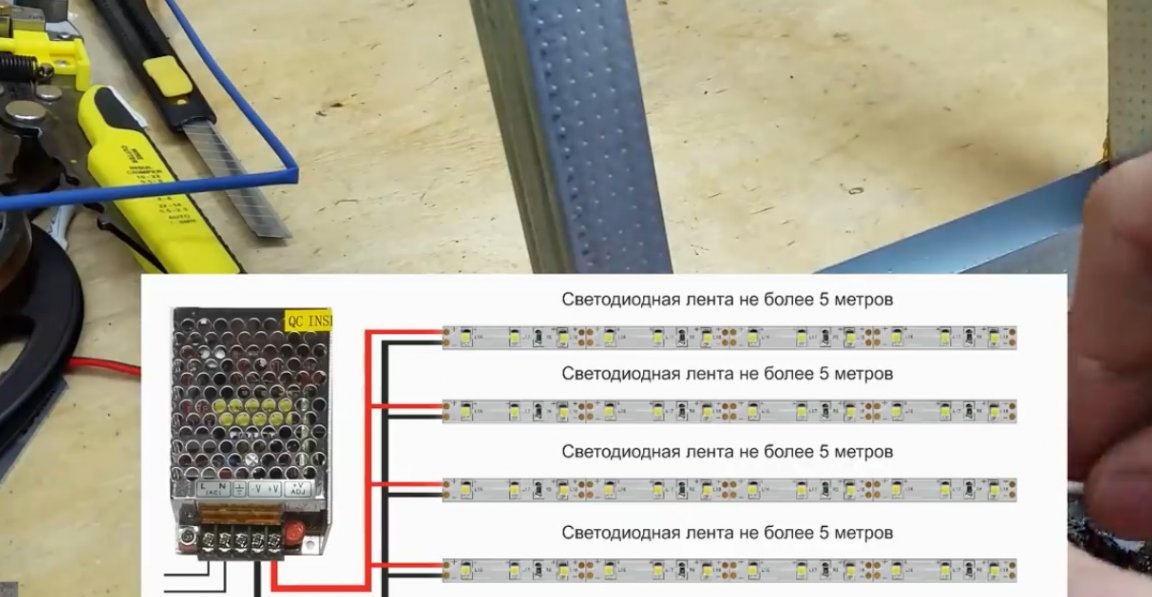
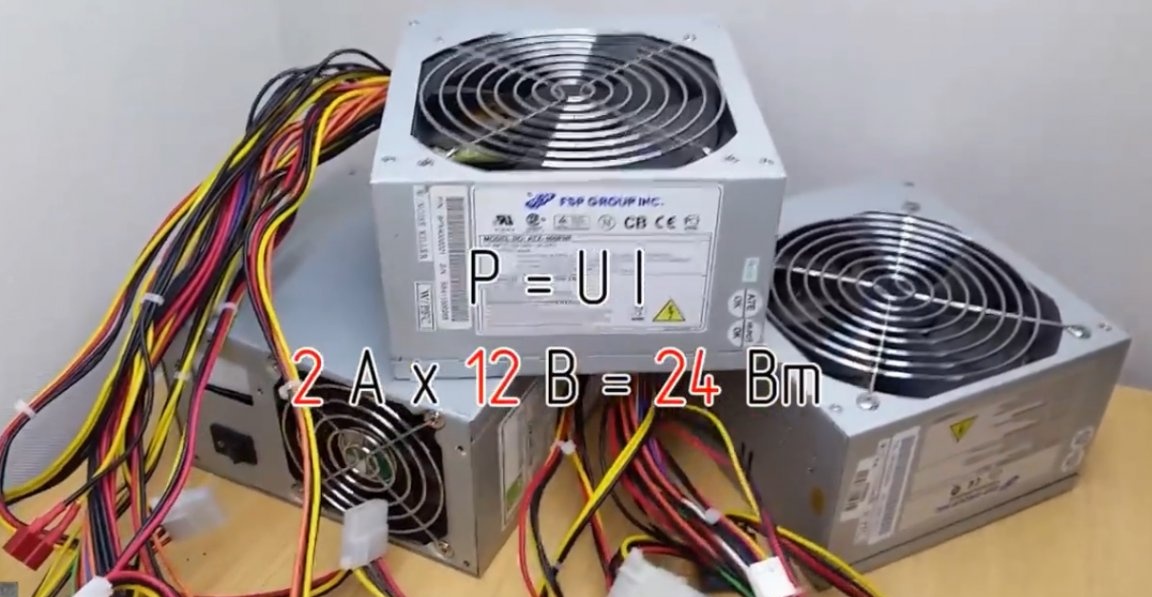
Well, that’s all, the lamp is ready. As a power source, any 12-volt power supply of sufficient power is suitable. For these purposes, old computer power supplies that can now be obtained for free, well, or practically for nothing, are great. The current consumption of one such lamp at a voltage of 12V is about 2A. After simple calculations, we get 24W of power.
Knowing these parameters, you can easily find out how many such lights we can connect to any power supply. For example, this computer power supply is capable of delivering 18A current through a 12-volt line.
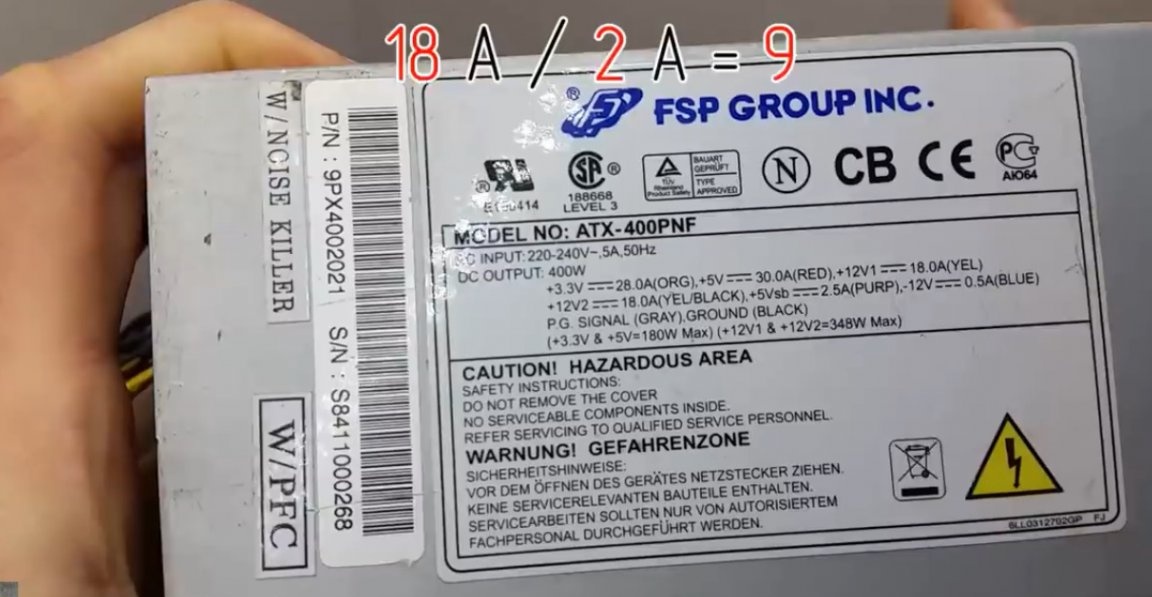
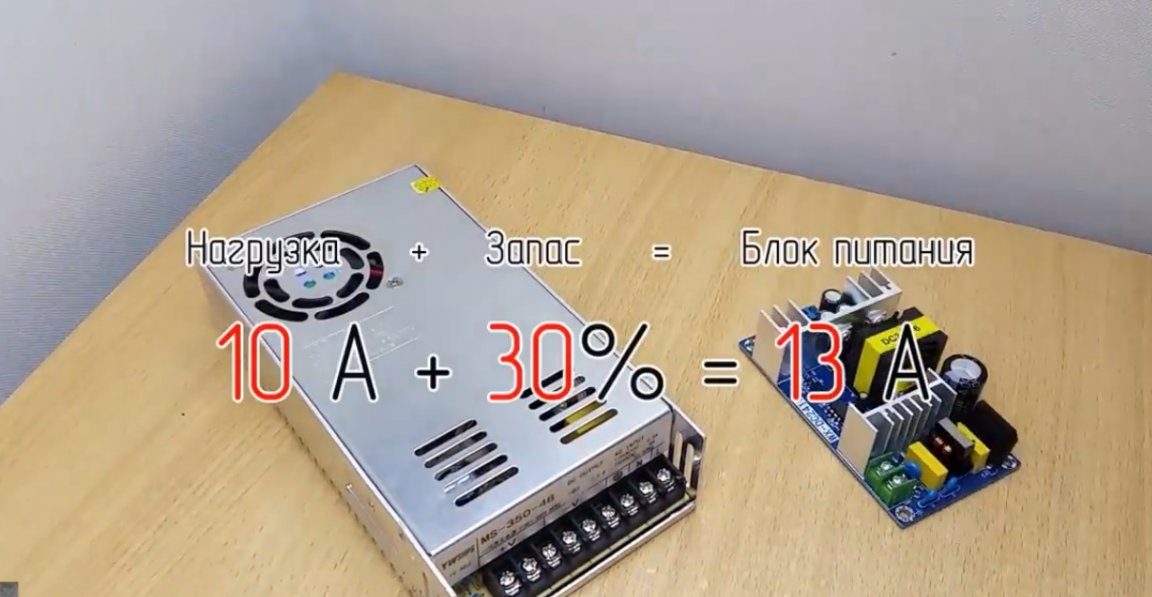
According to calculations, it is enough to power as many as 9 of these fixtures. And now a few words regarding the Chinese switching power supplies. Everything is a bit more complicated here. It is necessary to choose such a unit with a power margin of 20-30%, or more. For example, if we have a load of 10A, then the power supply will be better to take on an ampere 12-13. This simple rule will protect your power supply from premature failure.
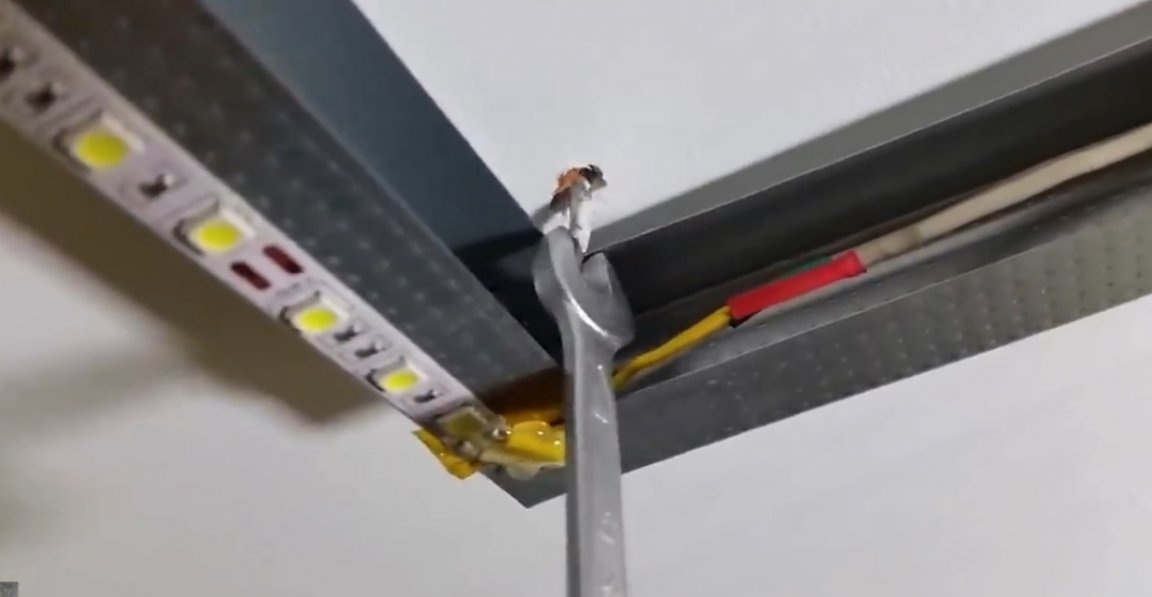
Well, let's hang the lamp in its rightful place. Mounting to the ceiling is carried out using 4 ex-l-shaped screws.
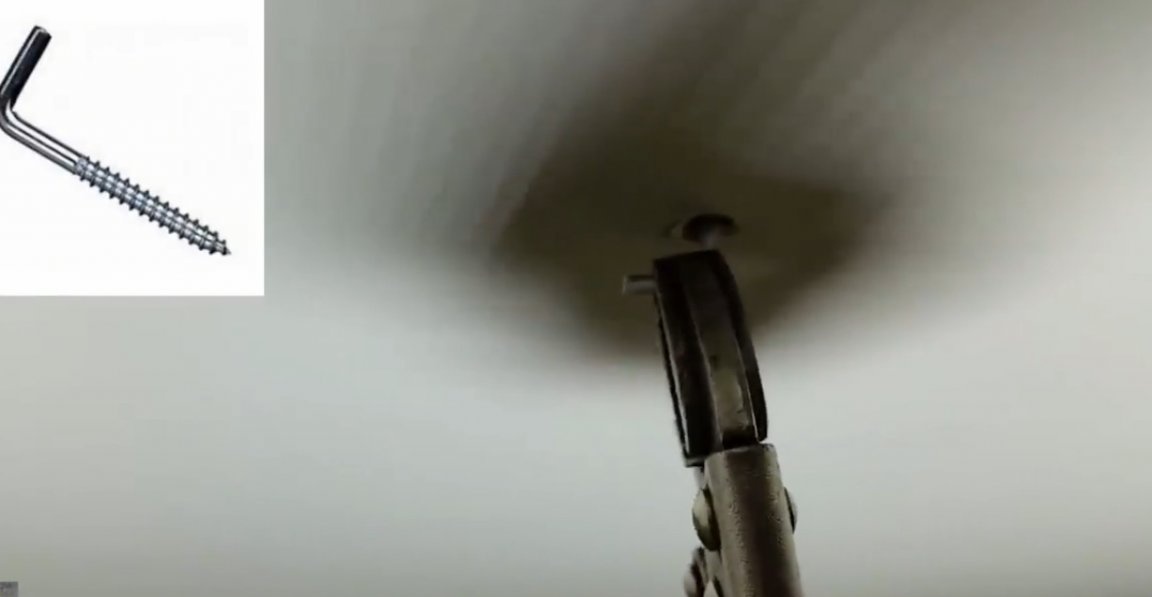
We install the lamp in its place, after which we use the open-end wrench to turn the screws and thereby fix.

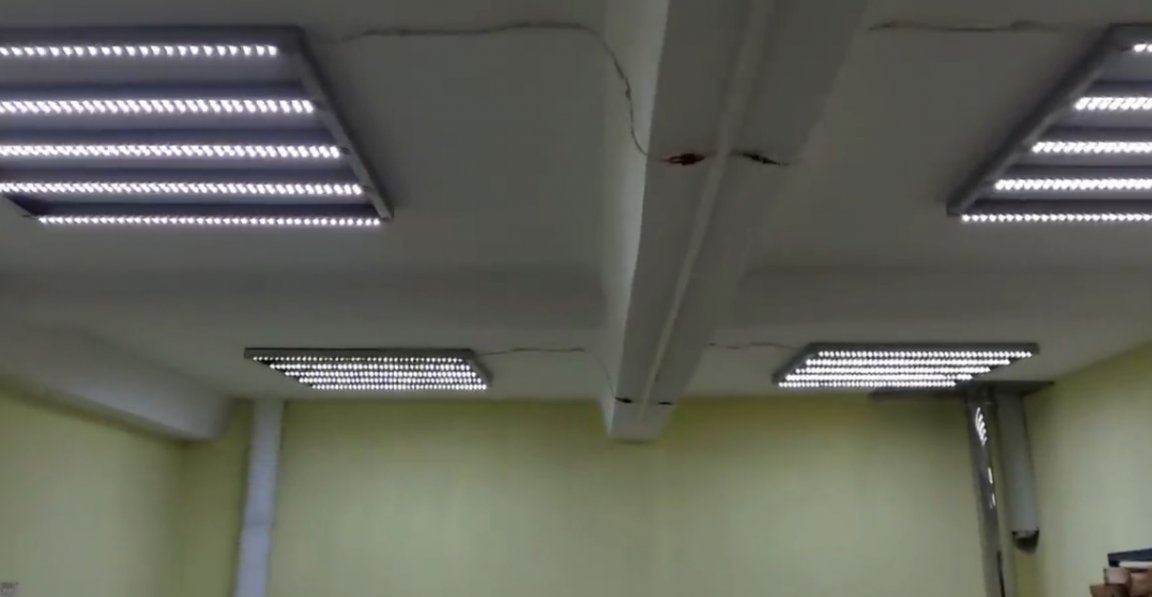
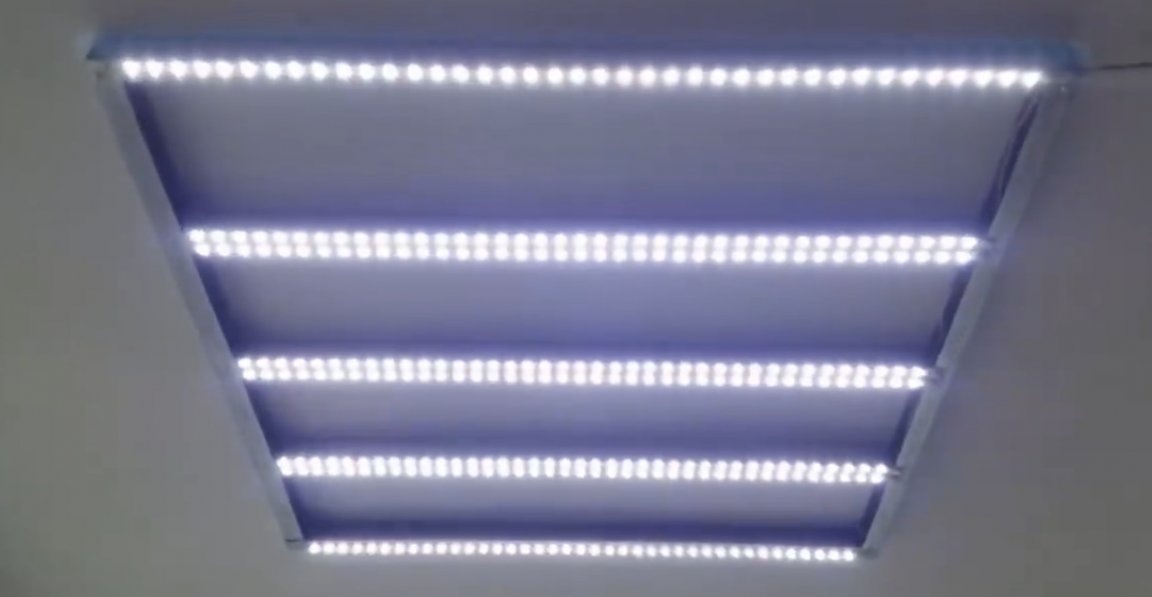
Well, now, shed the light.
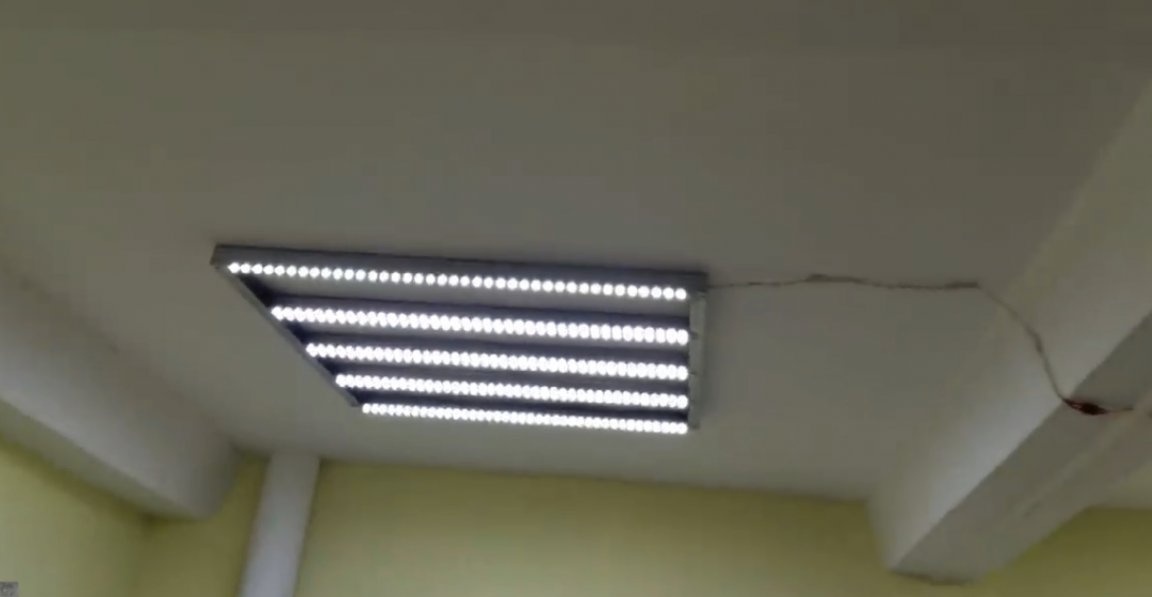
Due to the large number of LEDs, the lighting is soft, without sharp shadows and very pleasant for work. All lamps are powered by one computer power supply. If necessary, the brightness can be continuously adjusted using a dimmer or PWM control.
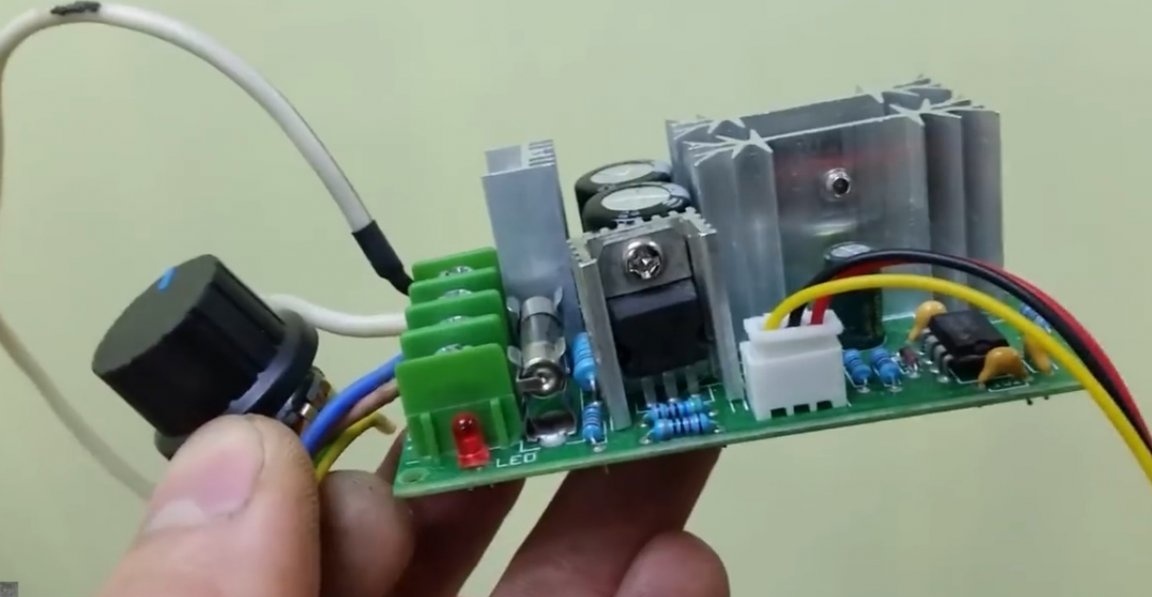
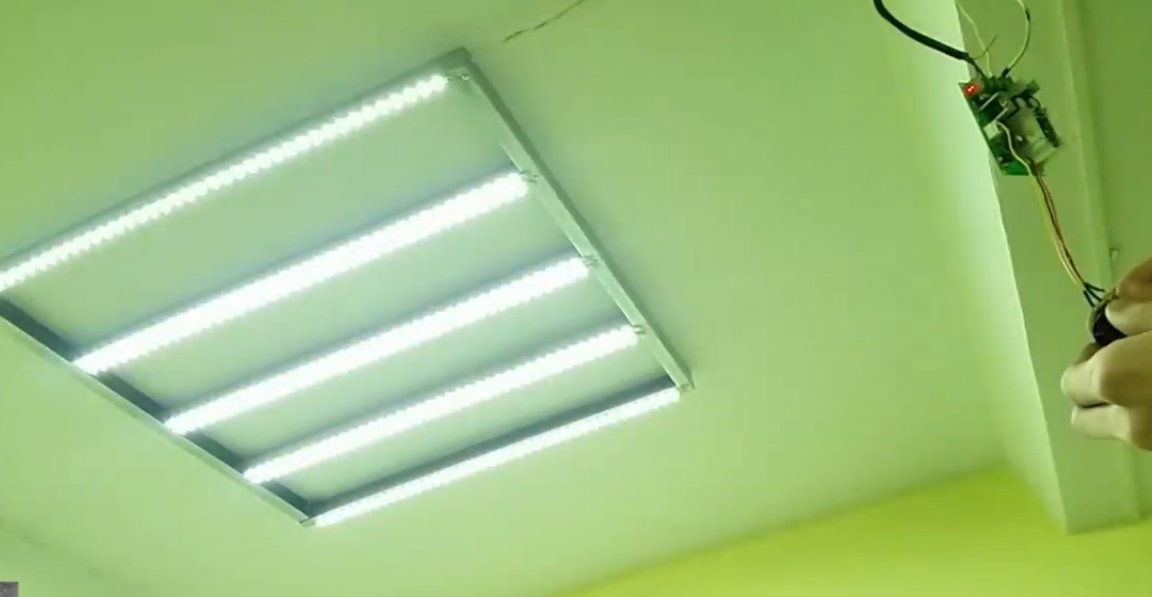
To avoid flickering, it is important to use a high frequency PWM controller. The brightness adjustment is very smooth and allows you to achieve the effect of moonlight. The camera does not transmit this, but live it looks very unusual.
Now let's touch on the subject of luminous flux and light. For measurements, install the phone at a distance of 1m from the lamp and run the application for measuring illumination.

As you can see, the illumination is about 1000-1100 Lx.According to information from Wikipedia, such lighting can be observed in a television studio. Also, this indicator is optimal for all kinds of locksmith work. By the way, the illumination of residential premises is usually 150-200Lx.
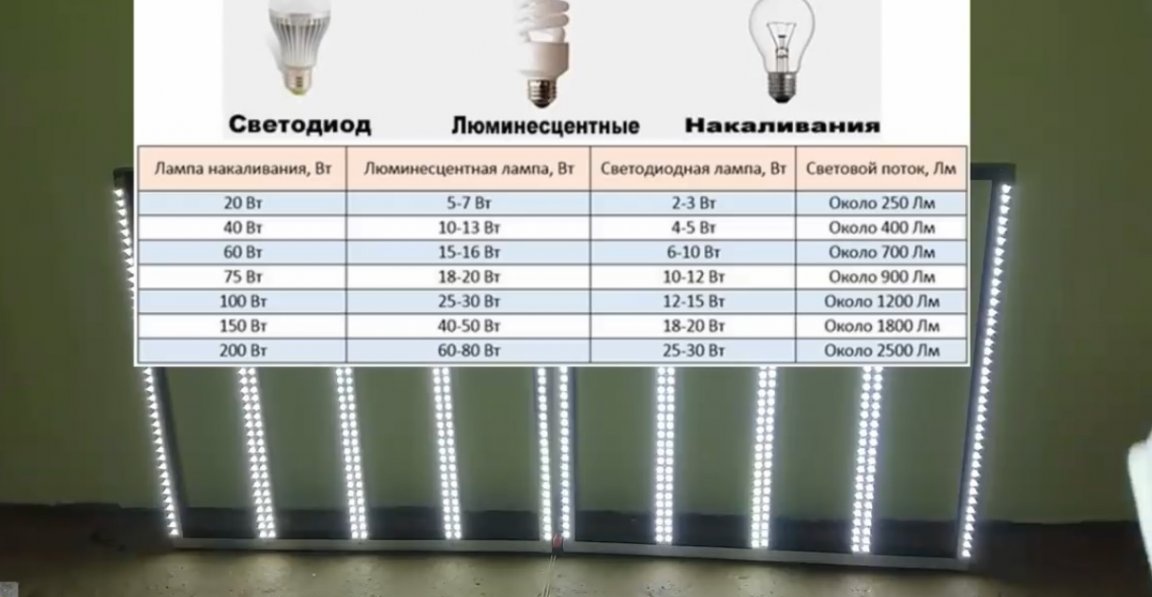
Now let's summarize some of the results. The advantages of such fixtures include the following: low cost and ease of manufacture. The cost of all materials for the manufacture of one such lamp is about 7-8 dollars. The next advantage is high energy efficiency. According to information from the Internet, LEDs are up to 10 times more efficient than incandescent lamps, while their service life is practically unlimited. Another benefit is safety. The lamp operates at an extra-low voltage of 12V, which allows the use of such lighting in wet and other hazardous areas. Also, if necessary, this voltage allows the lighting to work independently from the battery. And the last advantage is freedom of action. You can assemble a lamp of absolutely any shape and size to fit your needs. Stick on it with LED strip at least a meter, at least a kilometer, it all depends on your imagination.
Well, that’s all. Thank you for attention. See you soon!