

His gait is very similar to a real cockroach. When walking, it sways a little stepping confidently forward. The cockroach has a minimum of complex parts and is very easy to manufacture.
1.Video test
The video shows a mechanical cockroach from different angles during its operation and movement.
2. Characteristics and features.
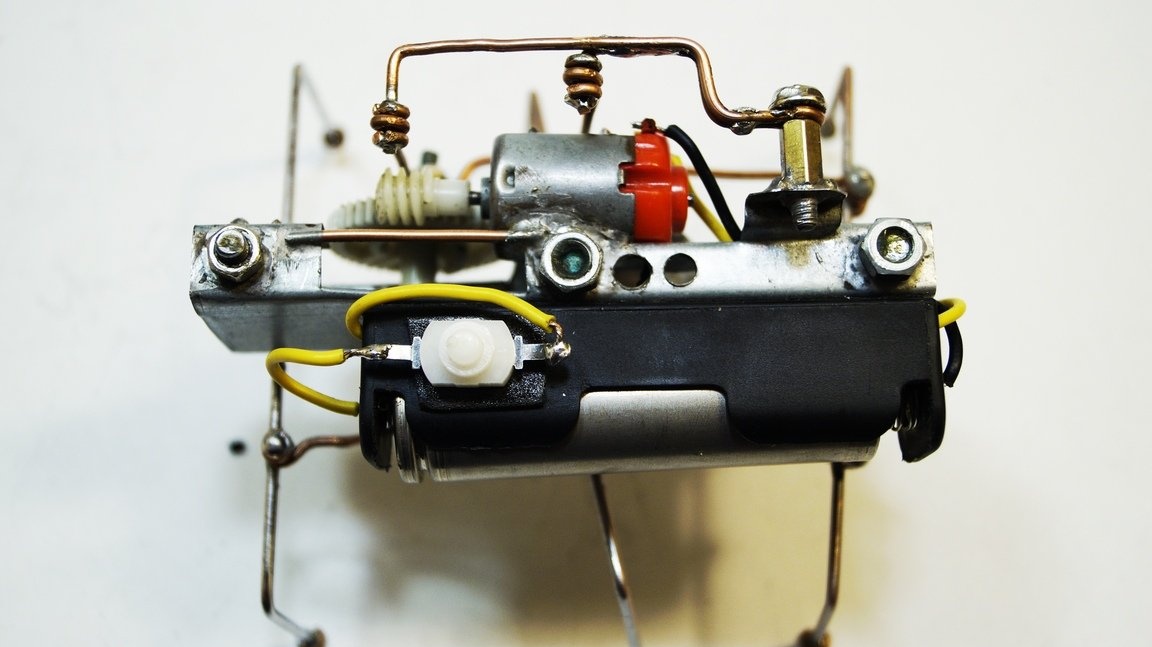
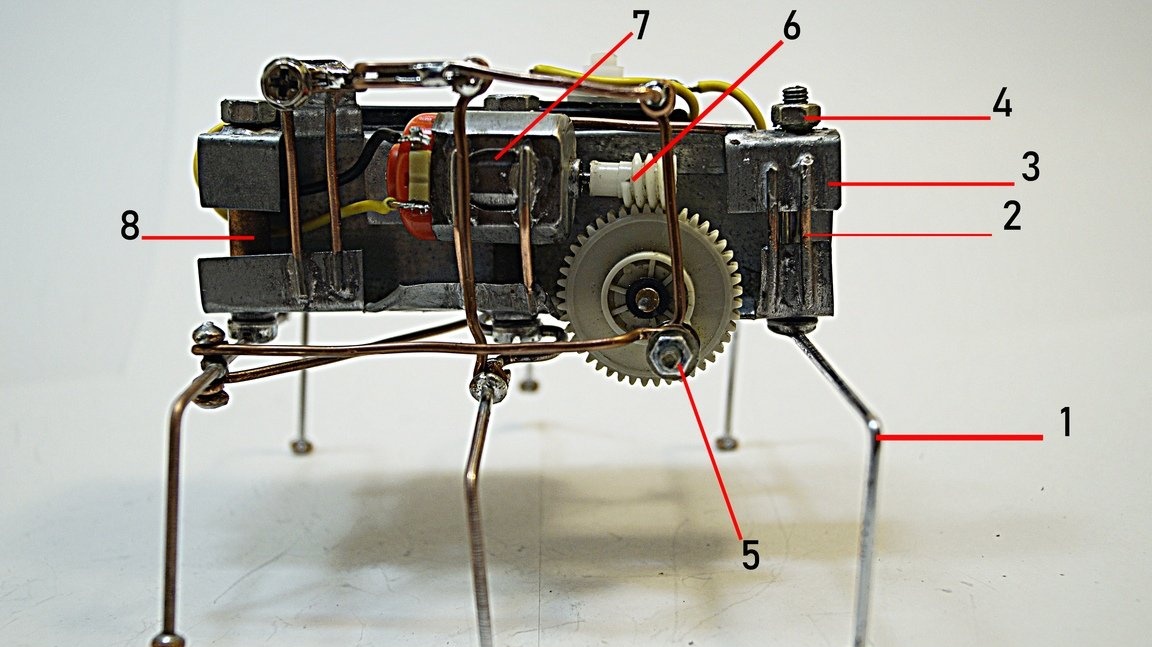
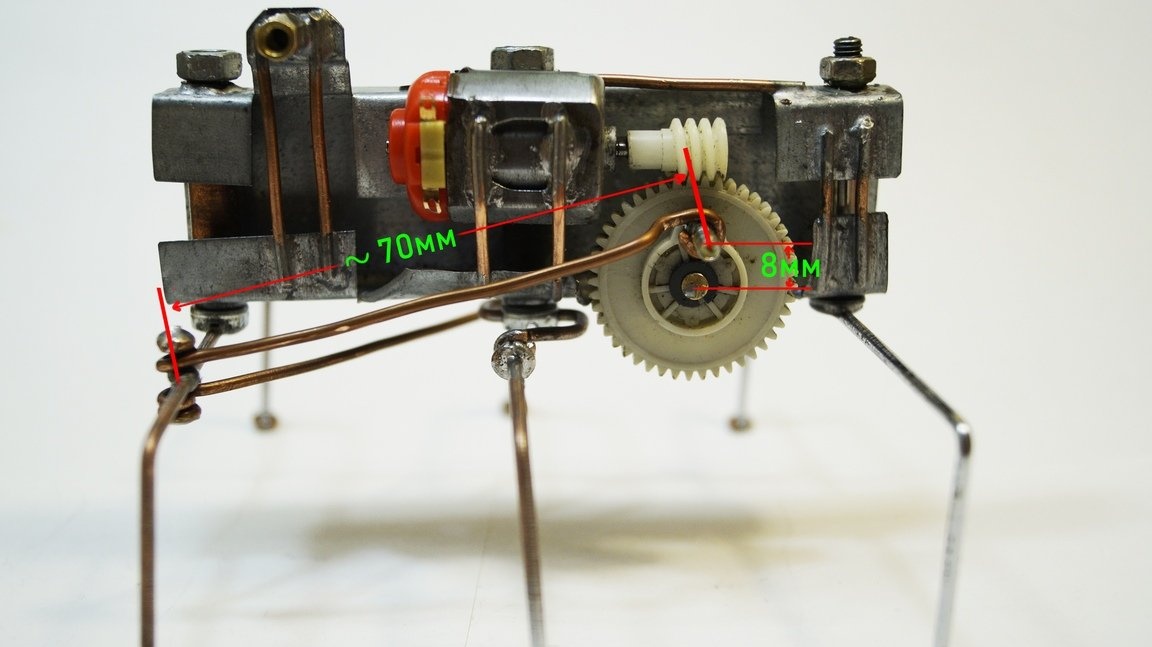
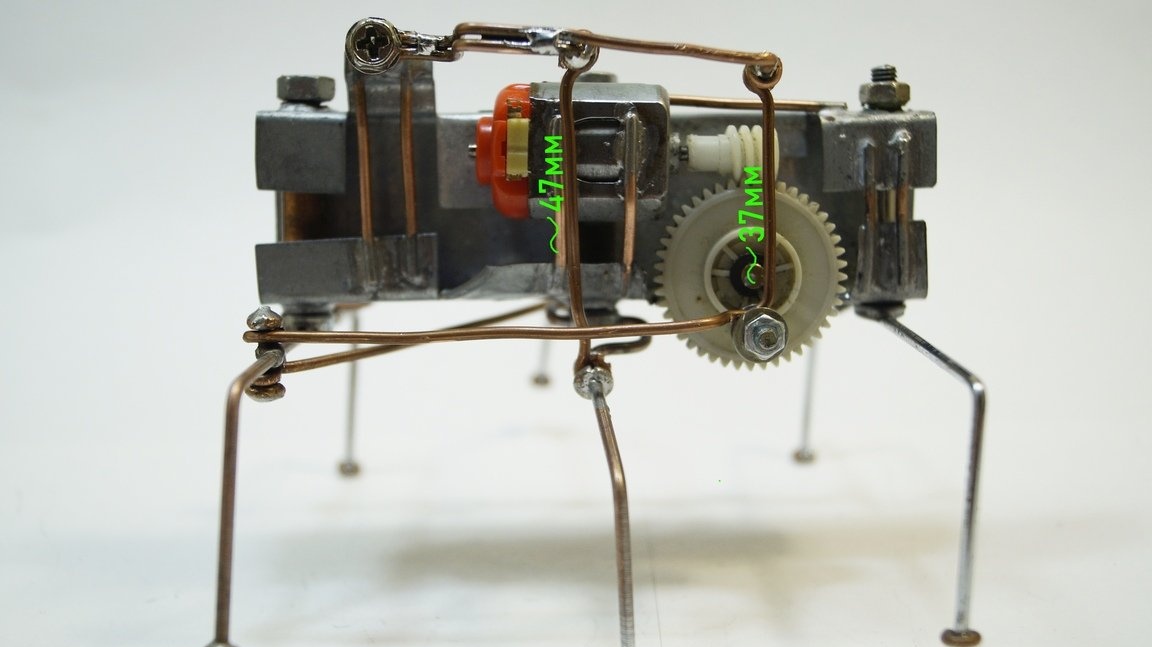
On a photo 1. The mechanical cockroach is shown, side view. On a photo 2. The top view is shown.
Photo 1.

Photo 2.
DESIGN. As a frame, the profile ppn-2 30X20 was used. The engine and other joints were mounted by soldering. Paws of a cockroach are fastened with M6 bolts. The power button and battery compartment are glued to double-sided tape. As a traction for driving the legs of a cockroach, a copper cable with a section of 2.5 mm was used.
MOTOR AND CRANKS. The motor and crank axis are soldered to the frame on POS-61, soldering acid ZnCl (Zinc chloride). To increase the torque and reduce the size, a worm gear was used.
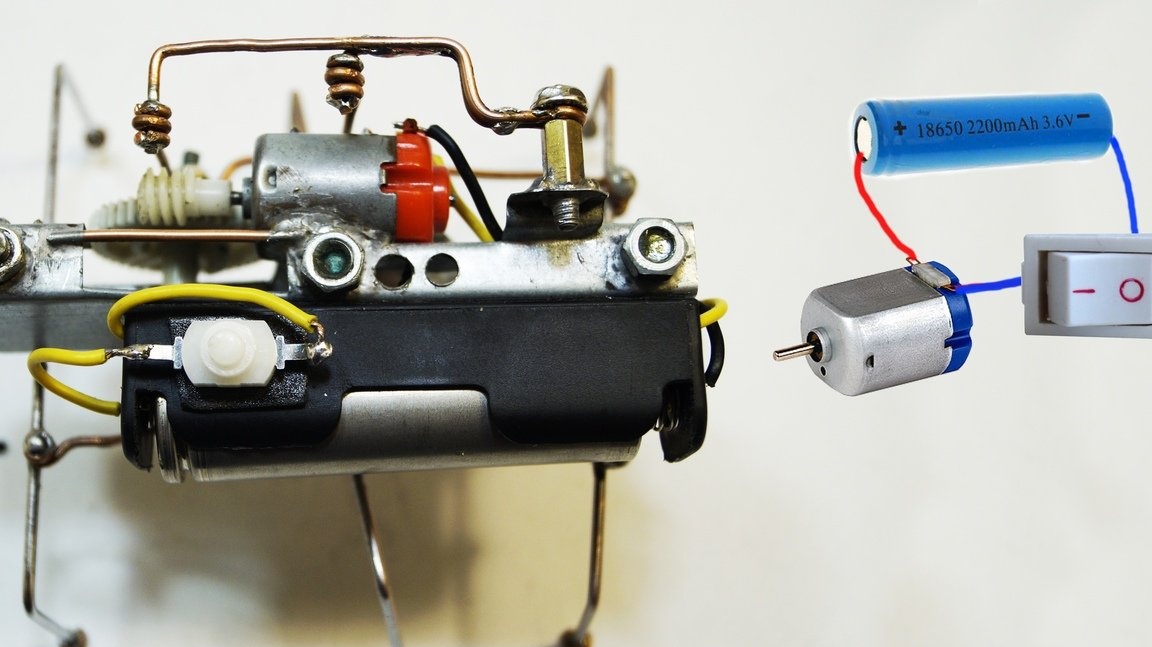
NUTRITION. A 18650 battery was used as the power of the robot. The power source is 3.7V.
ROBOT DESIGN DETAILS
1. Paws of a cockroach.
2. The stiffener.
3. The frame.
4. The axis of the paws of a cockroach.
5. Crank mechanism.
6. Worm drive.
7. Electric motor F130 5 V.
8. The sleeve axis of the cockroach paws.
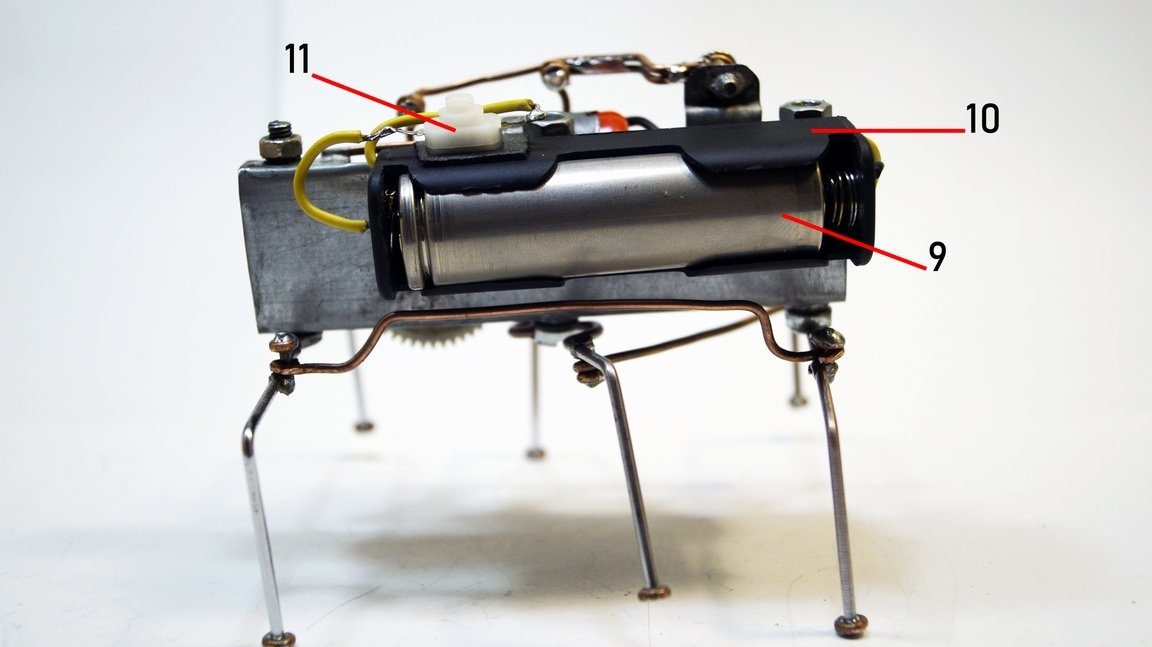
9. Battery type 18650, 3.7 V.
10. Battery compartment.
11. Power button.
3. The principle of work.
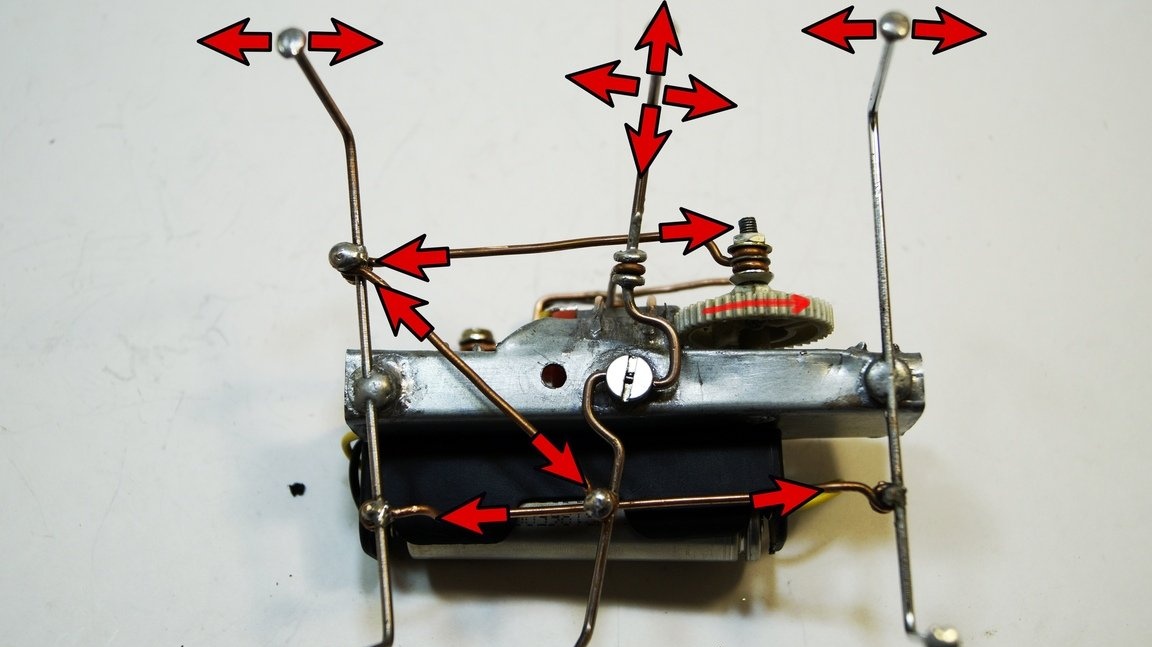
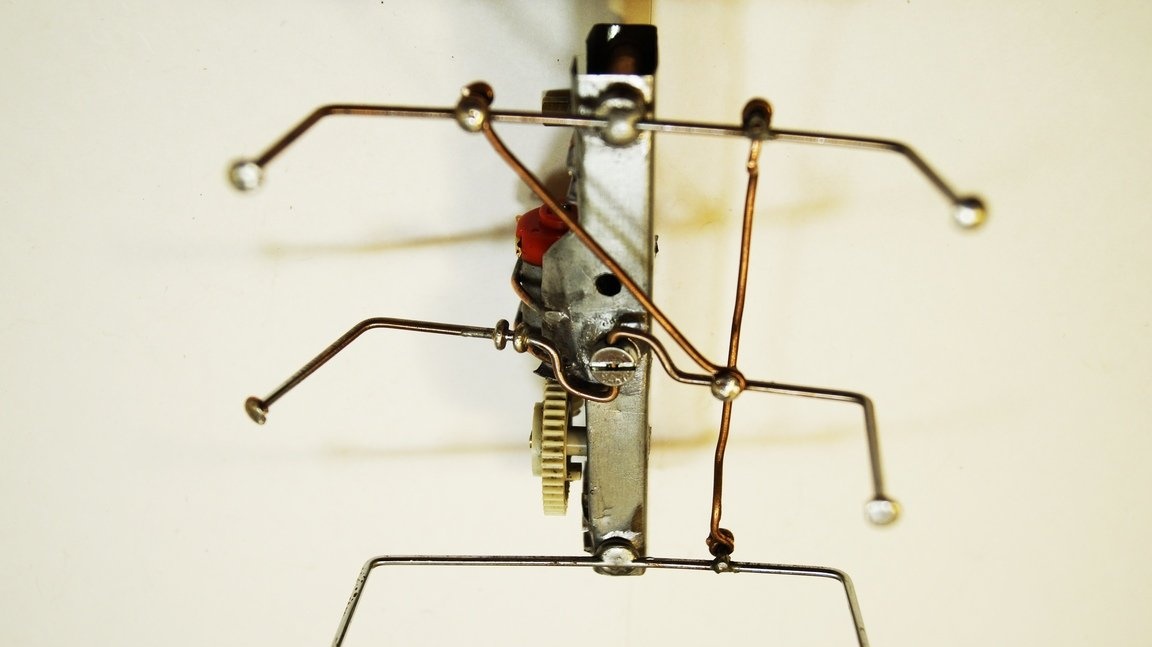
On a photo 3. 4. The principle of work of mechanical parts of a cockroach is shown. It is worth remembering that the front and rear legs of the robot are moving horizontally, and the middle legs are moving vertically and horizontally.
Power is supplied to the electric motor through the key, the motor rotates the crank mechanism. The crank drives the front paw through traction, respectively, from the front paw, the thrust pushes the back paw (they move synchronously). The middle pair of paws is connected to the first pair, crosswise (they move in antiphase).
To move the middle pair of paws vertically, a lever is mounted above the motor, which is set in motion from the crank mechanism.
Photo.3
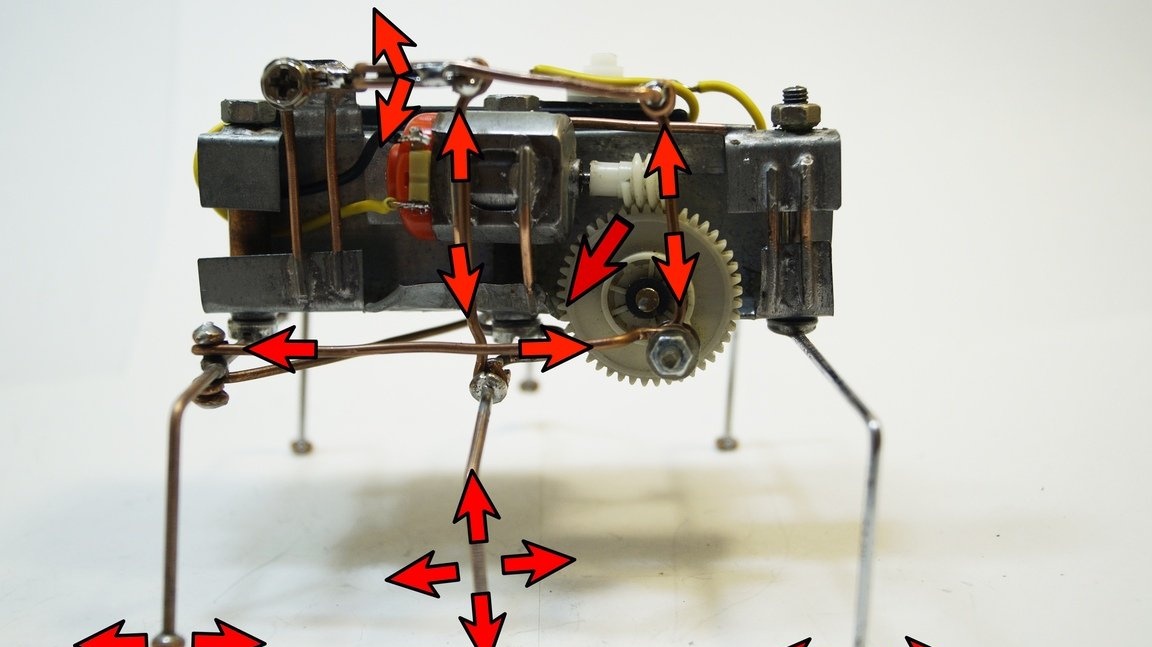
Photo.4
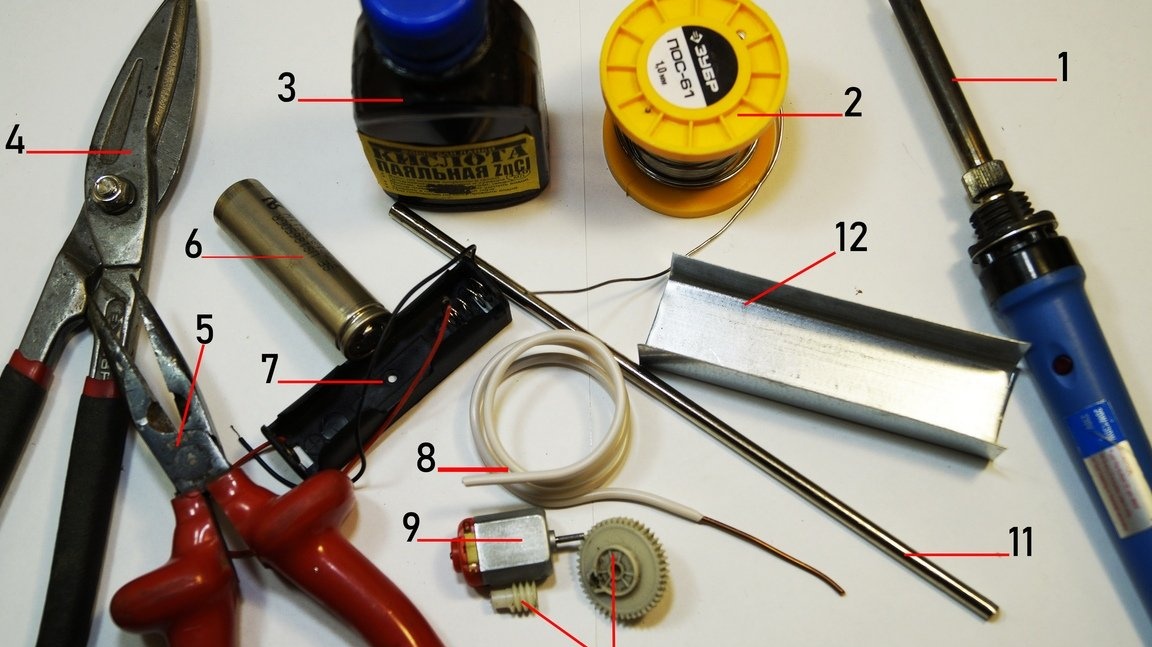
4. Materials and tools.
1.Soldering iron 50W.
2. Battery compartment.
3.Prysoy POS-61.
4. A copper wire with a section of 2.5 mm.
5. Soldering Acid ZnCl (Zinc Chloride)
6. Electric motor F130 5V.
7. Scissors for metal.
8. Worm drive.
9. Pliers.
10. Steel tube, diameter 80mm.
11. Rechargeable battery 18650.
12.Profile PPN-2 30X20.
And also: (power button, double-sided tape, mounting wire)
5. Assembly instructions.
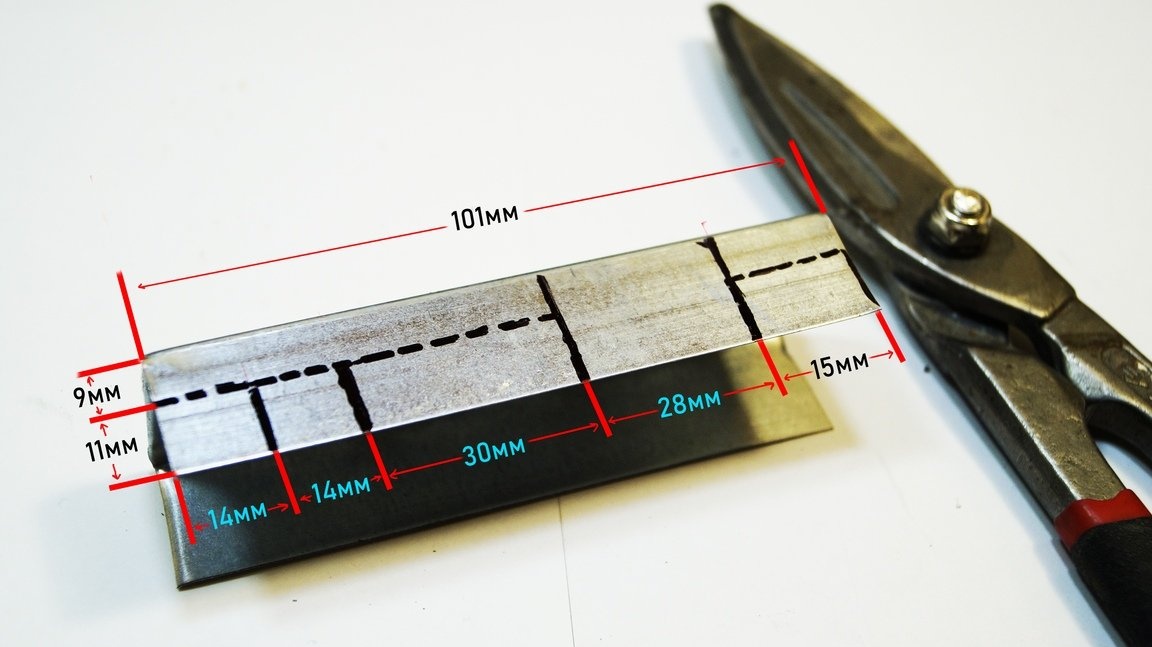
1.Making a cockroach frame.
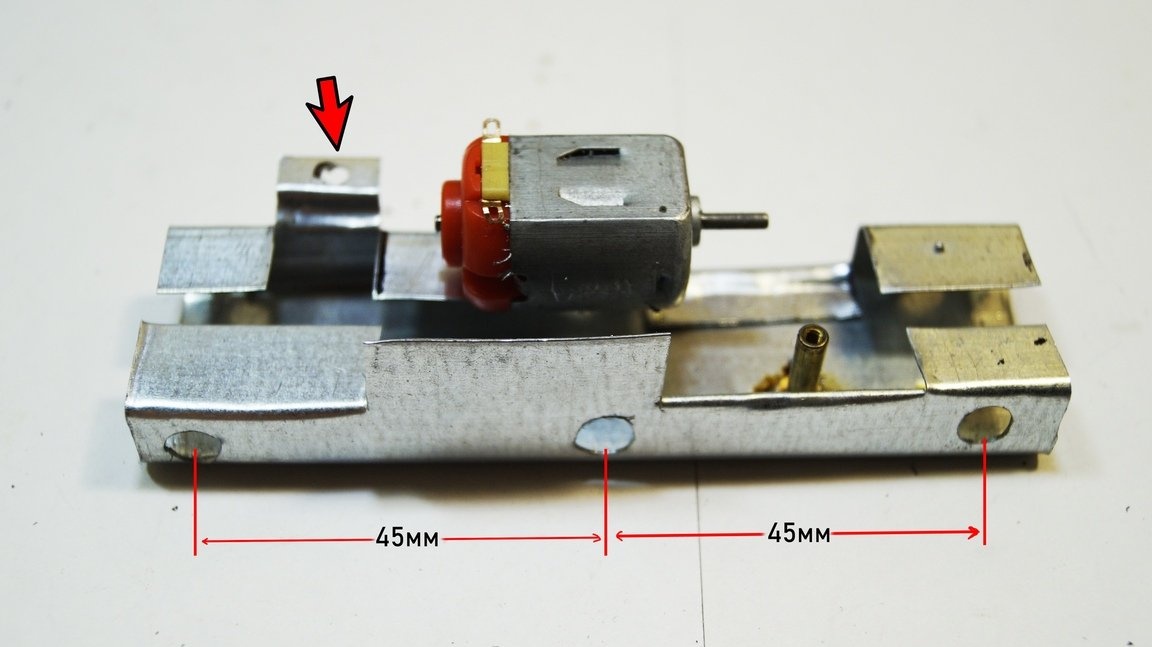
Draw the markup on the profile as indicated in Photo 5.
Photo 5.
Using scissors for metal, we cut and bend the workpiece with pliers as shown in photo 6. Mark the lower part as indicated in photo 6. Bend the profile with pliers as in photo 7.
Photo 6.
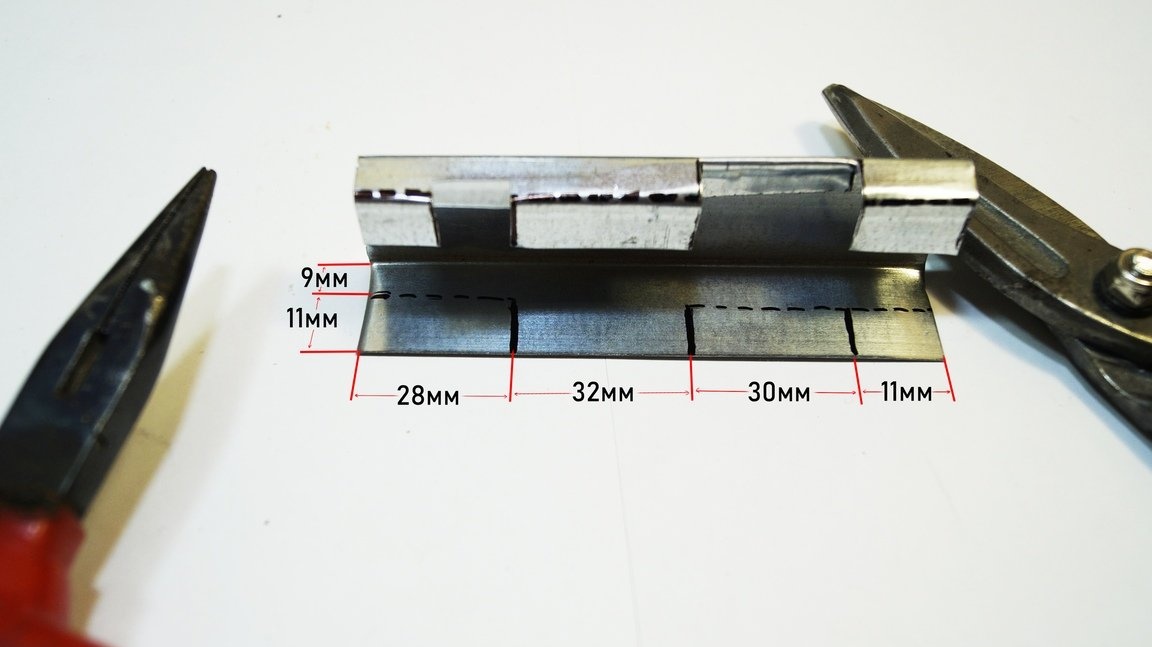
Photo 7.
2. Electric motor and crank axis.
The next step is to solder the electric motor to the frame. The motor before soldering will need to be disassembled. We flood the motor housing and the frame with a soldering iron Photo 8.
We solder the body of the electric motor and the frame together, warming the parts well with a soldering iron, pressing them to each other Photo 9. !!! BE CAREFUL, DETAILS HEAT MUCH HEATED !!!
Photo 9.
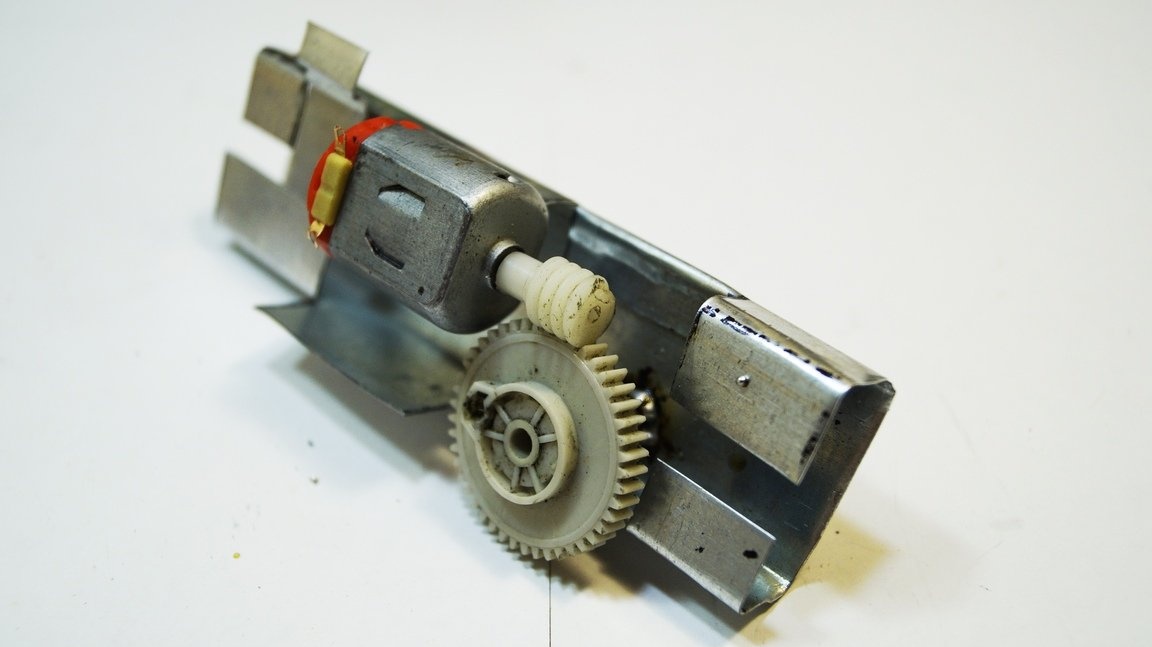
Putting the electric motor back. We solder the crank axis in place, this is done experimentally. The worm gear should be well fitted together, the gears should not be skewed. Photo 10.11.
3. Holes for the legs of a cockroach.
To attach the cockroach paws to the frame, you need to drill holes with an 8mm drill. We drill a hole in the ear behind the electric motor with a 3.2mm drill
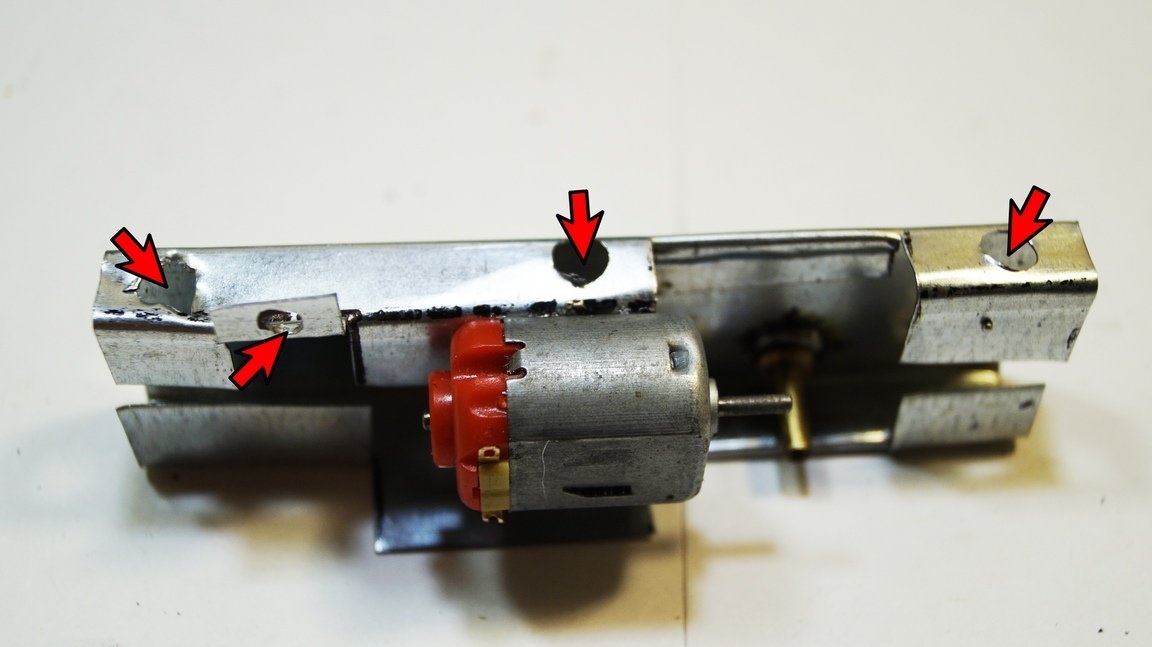
We also solder a nut in the ear behind the electric motor. The lever responsible for lifting the middle paws along the vertical axis will be attached to this nut
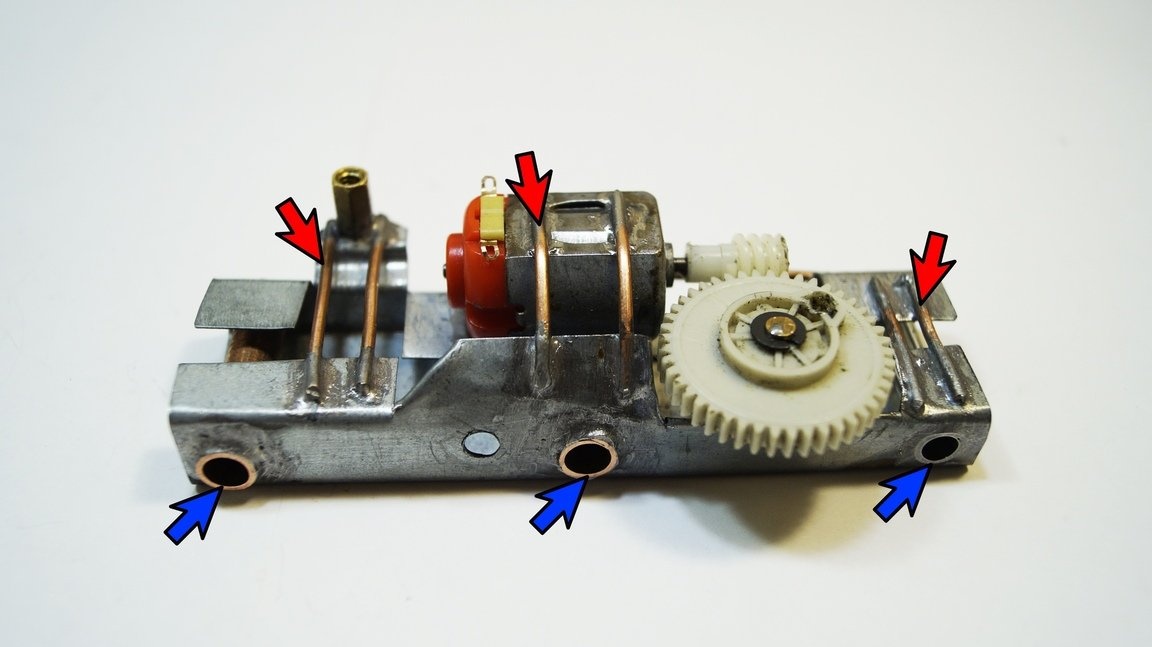
To strengthen the frame design, stiffeners were soldered with a 2.5 mm copper wire.
8mm bushings were also soldered to the attachment points of the cockroach paws Photo 15.
4. Paws of a cockroach.
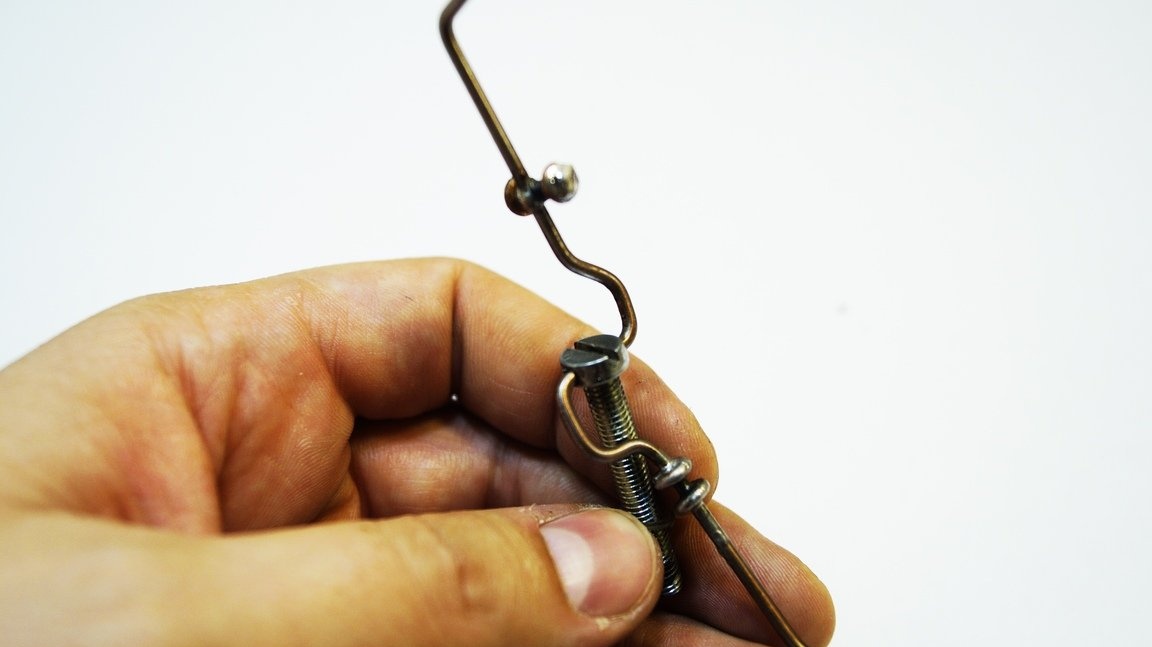
A metal wire with a diameter of 3 mm was used as cockroach paws, it is soldered to the head of the M6 bolt Photo 16. The middle pair of cockroach paws is made differently, a hole is drilled in the bolt head along the diameter of the wire. The wire is bent in the form of the letter “S”, this will enable the legs of the cockroach to move vertically. Photo 17.
Photo 16.
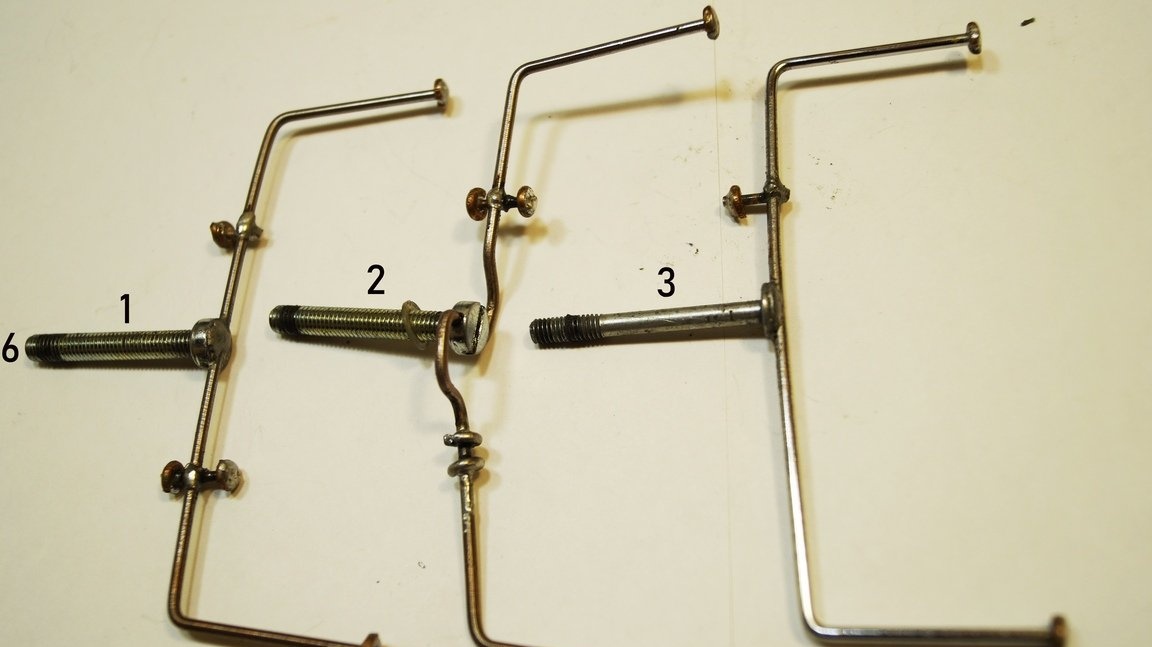
Photo 17.
For fastening the rods, a copper wire with a 2.5 mm long section 12 mm long is soldered to the cockroach's paws, copper rings are soldered to its ends. The rods are made of copper wire with a cross section of 2.5 mm, dimensions are approximate, it is advisable to bend the wire so that in the future there was the possibility of adjustment along the length of Photo 18.
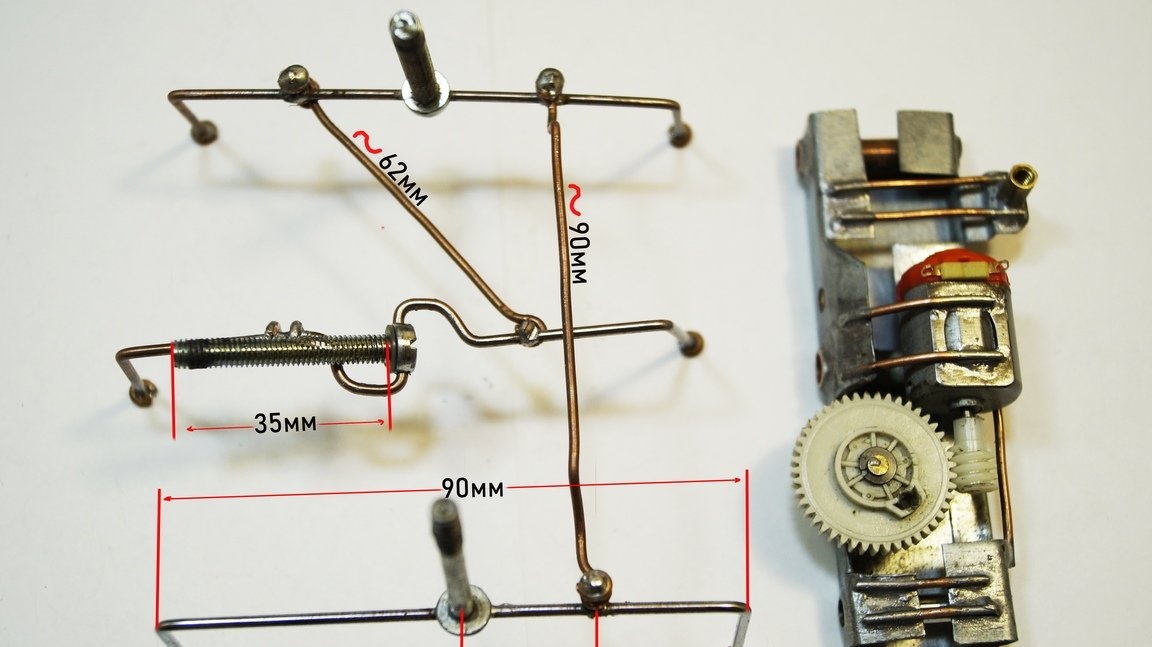
Photo 19 shows a bottom view, with paws mounted on the frame.
We establish traction from the crank mechanism to the front legs of the cockroach. We do a thrust with a hem for the ability to adjust it. Crank radius 8mm Photo 20.
We make a lever for moving the middle paws vertically from copper wire Photo 21.22.
This completes the mechanical part of the cockroach.
Photo 21.

Photo 22 shows the location of the paws at the lower position of the shaft of the crank mechanism.
Photo 22.
5. The electrical part.
Glue the battery compartment on a double-sided tape to the cockroach frame. Glue the power button on the battery compartment. We solder all the elements of Photo 23.
Robot - the cockroach is ready !!!
