
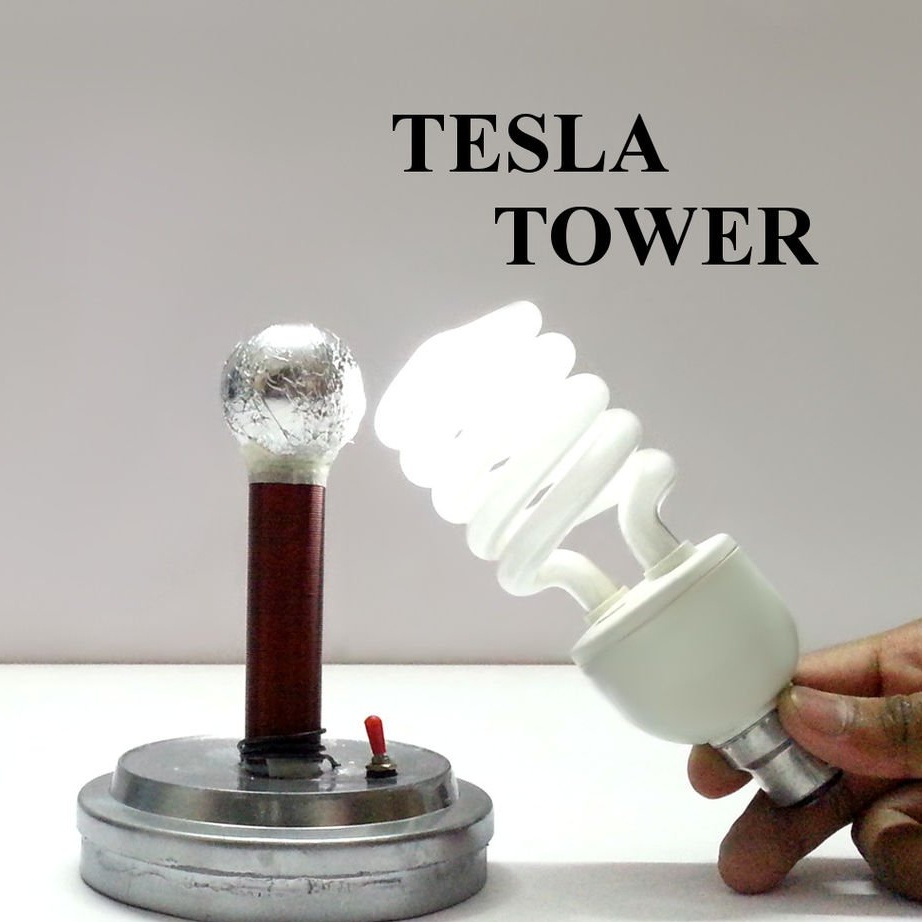
The concept of wireless electricity was introduced about 100 years ago, and even today it is one of the most fascinating and exciting topics for research and development. Nikola Tesla was a great scientist who actually demonstrated the transmission of electricity without wires.
On the example of this homemade, the author decided to create a Tesla mini-tower, which can include any fluorescent or neon lamps wirelessly. However, the concept of wireless electricity is completely different than the concept of transmitting electricity by wire. Wireless transmitting devices actually transmit electricity through electromagnetic induction.
This is a great project for fun, experiments, demonstrations at exhibitions, as well as for showing tricks.
Step 1: Watch the video
This video material gives a deep understanding of the whole process. Nevertheless, it is also recommended to read all the steps of this homemade product to obtain additional useful information and to view the necessary images.
Step 2: Required Parts and Tools
Transistor 2N2222A
27k resistor
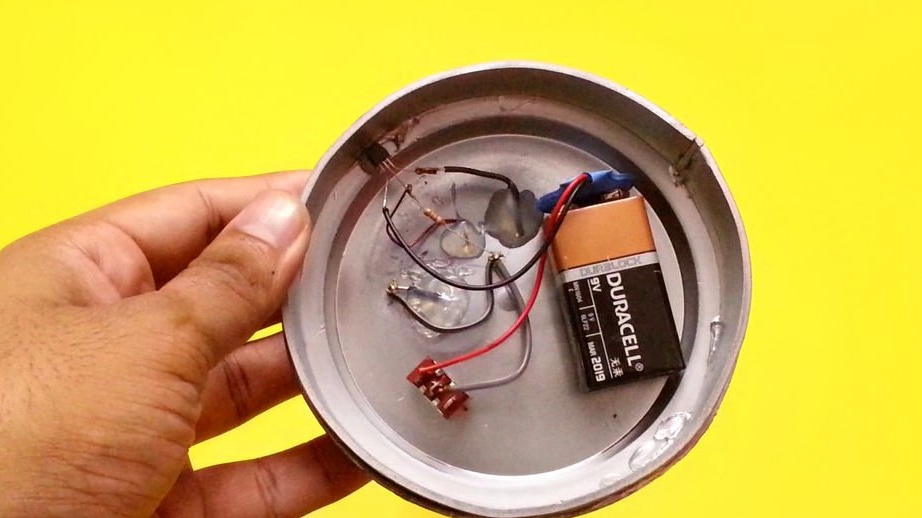
9V battery
Battery clamp
Switch
Plastic ball
Hot glue gun
Soldering iron
Copper wire 0.3 mm.
Hard insulated wire
PVC pipe
Tape
Sandpaper
Aluminium foil
Plastic base and connecting wires
Step 3: Basic Operation
It is based on the principle of electromagnetic induction. A high power switching transistor is used in a circuit that oscillates at a low DC voltage at very high frequencies. The air-core transformer combined with the primary coil increases the low DC voltage to a very high AC voltage. A strong electromagnetic field develops around the coil and hollow sphere. When some kind of fluorescent or neon lamp is approaching, the electrons inside the lamp are excited and hit the walls, because of which the fluorescent lamps glow.
Step 4: Making a tower coil


PVC pipe with a length of 20 cm and a diameter of about 2.1 cm.,
should be wrapped with 200 turns of varnished copper wire, 0.3 mm in diameter.
The coil on the pipe should be secured with tape.
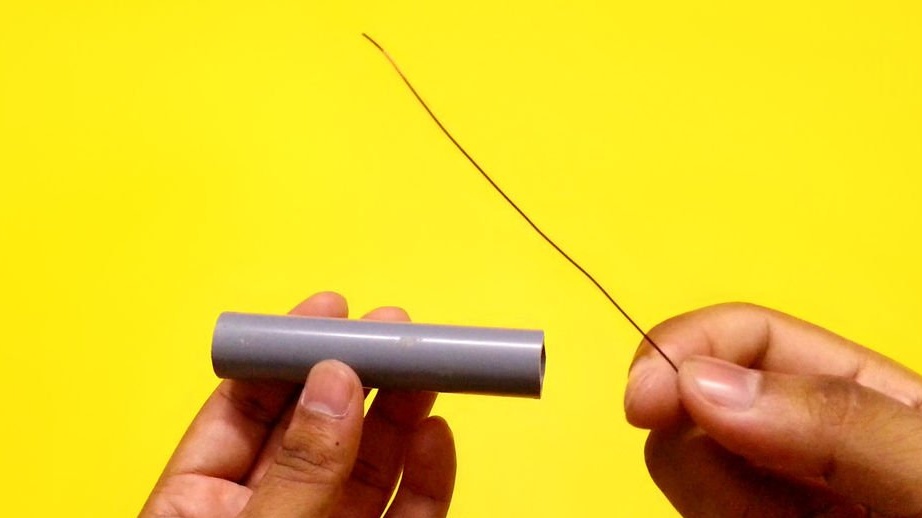
Varnish insulation must be removed from both ends of the wire using sandpaper.
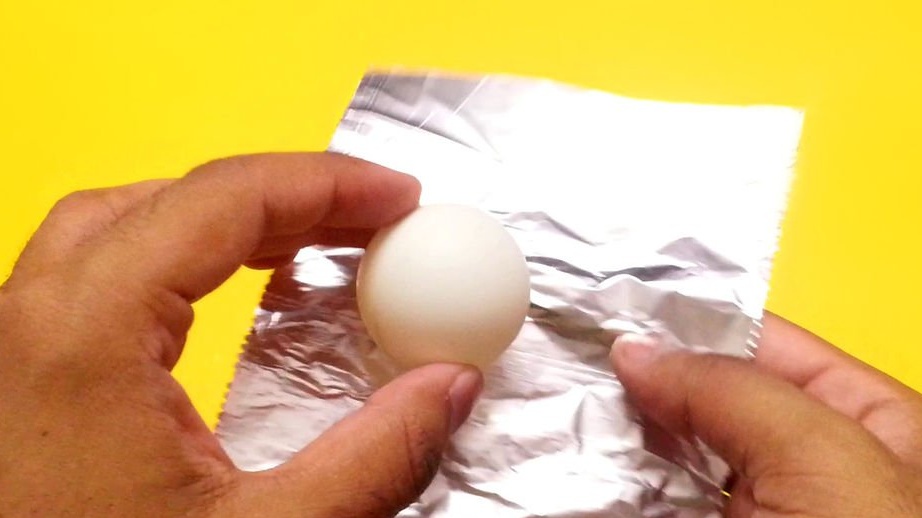
The ping-pong ball should be wrapped in a piece of aluminum foil to get a conductor from a hollow sphere.
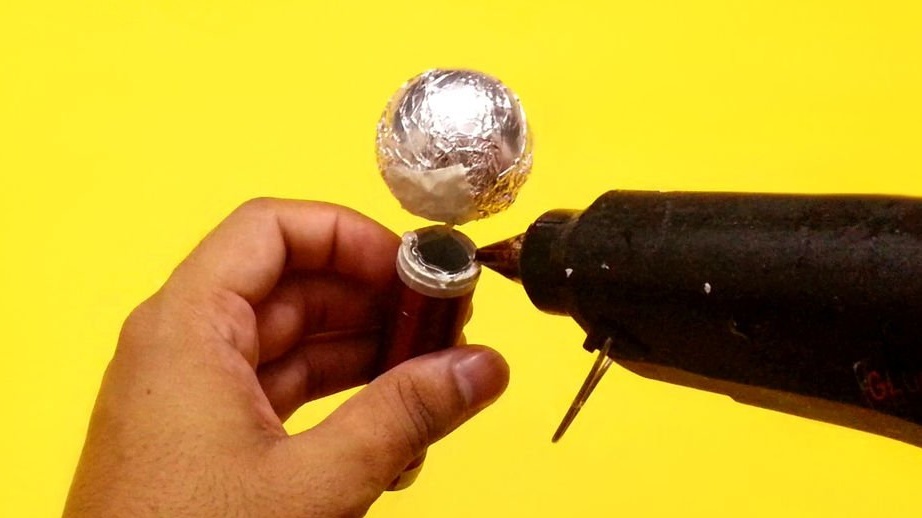
Then insert one end of the wire inside the aluminum foil into the spherical conductor and secure it with tape.
Using hot glue, glue the ball on top, in the center of the PVC pipe.
Note. Be sure to check out the images above or watch the video.
Step 5: Making the base of the tower
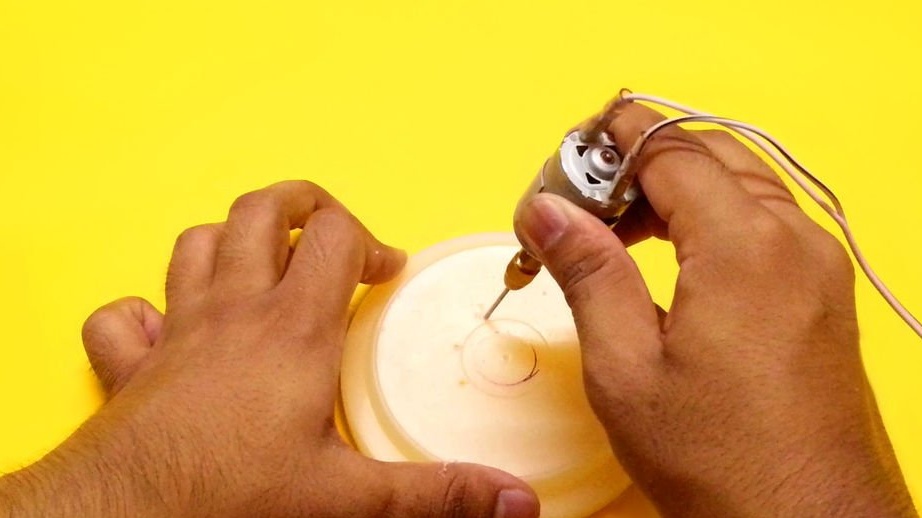
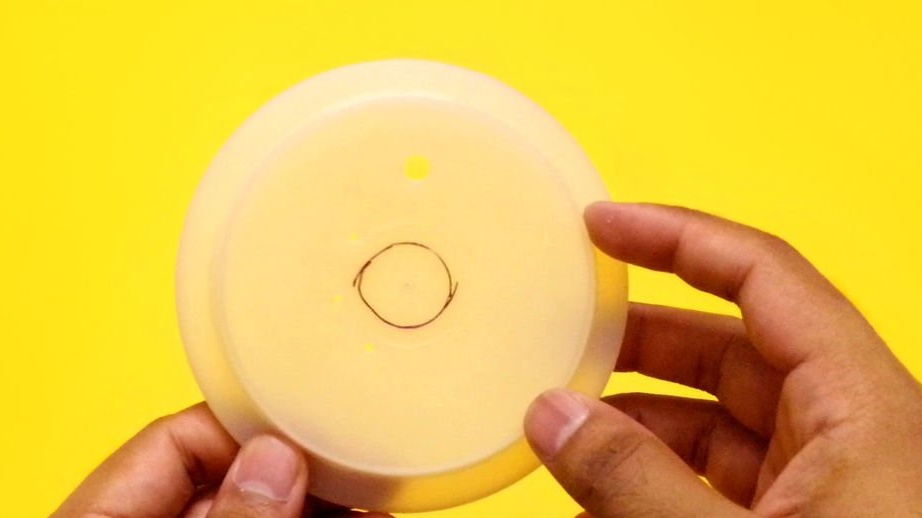

We place the tower in the center of the plastic cover.
Mark the position of the tower on the cover.
Mark three tiny holes around the tower and one large hole, a little further.
Tiny holes will be used to insert wires, and a larger hole will be used for the switch.
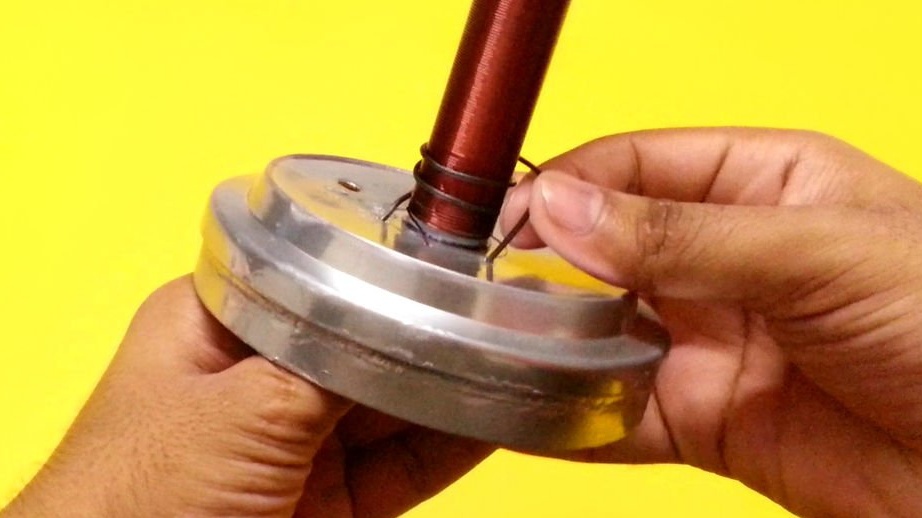
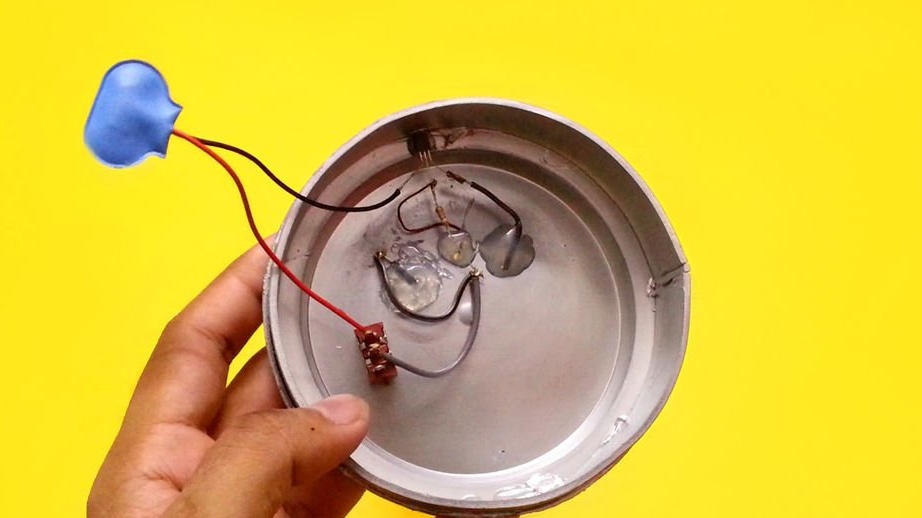
Insert the other end of the wire into the center hole of the base and secure it with hot glue.
Insert rigidly stranded wire into the first hole and use hot glue to keep it stationary.
Wrap two turns of rigid insulating wire around the tower.
Make sure that the direction of rotation should be opposite to the direction of the wire wound around the tower.
Insert the other end of the wire into the third hole.
Insert the switch into the larger hole to manually control the circuit power.
Step 6: Connecting Components
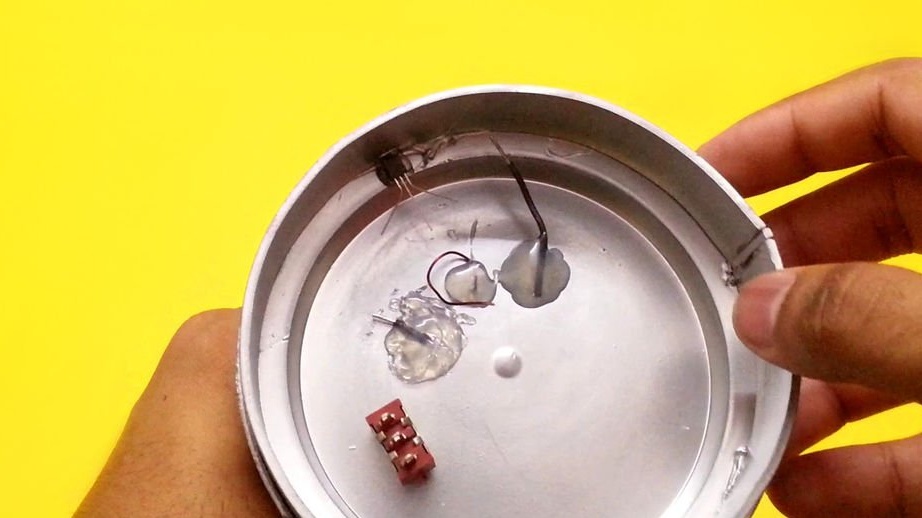
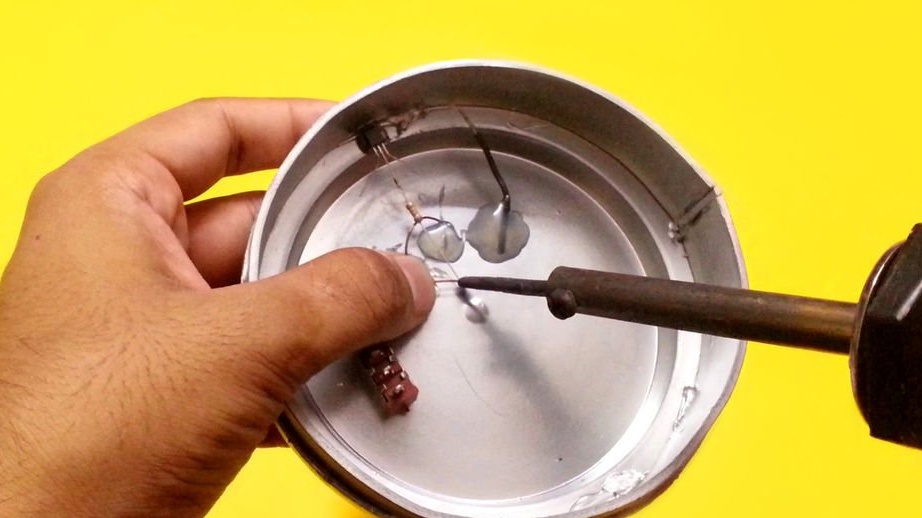
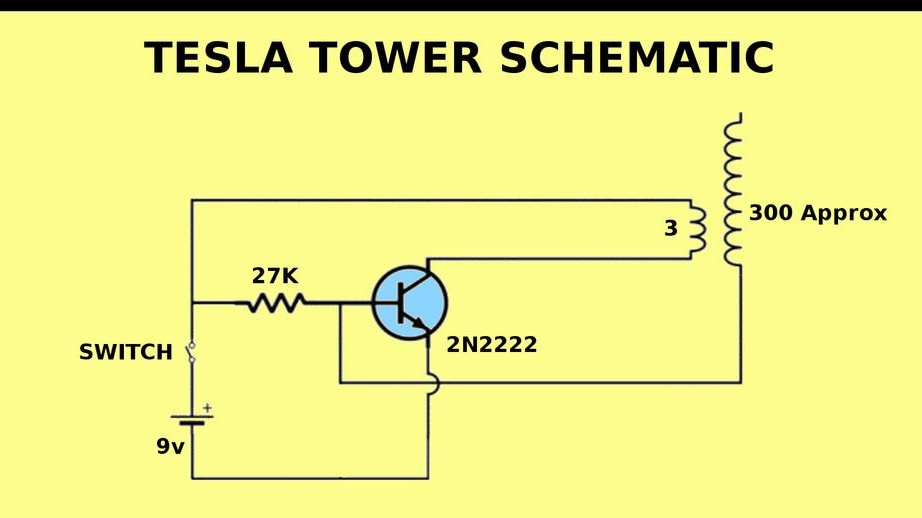
Using hot glue, attach the 2n2222a NPN transistor to the bottom of the tower base.
Solder a 27k resistor to the base terminal of the transistor.
Also solder the wire from the secondary coil to the base terminal of the transistor.
Connect one end of the primary coil to the resistor and the “+” battery terminal.
Connect the other end of the primary coil to the collector terminal of the transistor.
Connect the emitter terminal to the “-” terminal of the battery.
Note. Be sure to check out the diagram attached above.
Step 7: Testing and Debugging Home Improvement
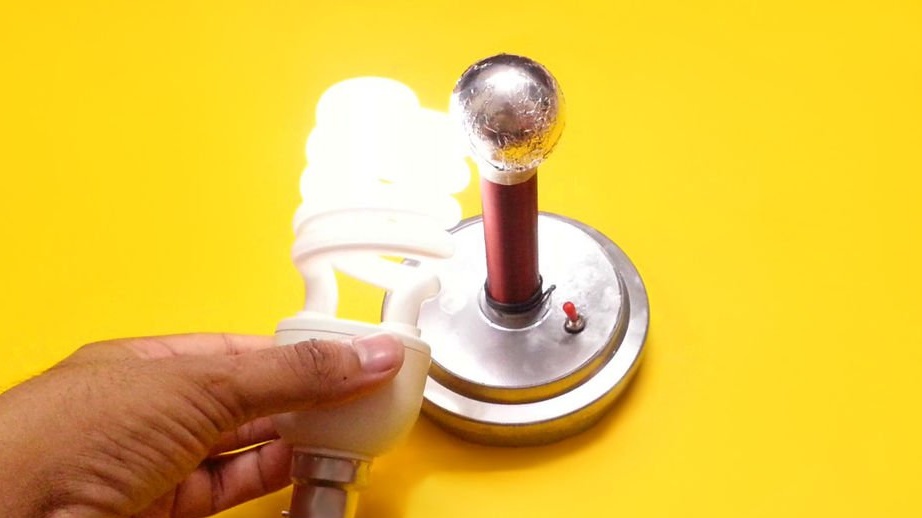
The project of a wireless power station is ready. Connect a 9V battery and turn on the circuit. When approaching the tower of any fluorescent or neon lamp, it will glow. The brightness will be directly proportional to the distance.
If the light is off, here are a few steps you can take to ensure that the circuit operates correctly and to fix problems:
Double check the circuit and make sure everything is connected correctly.
Make sure you use a powerful 9-volt battery, because a regular Chinese 9-volt battery will not work with this project.
If the transistor is overheated, the value of the secondary coils should be reduced or the supplied power should be reduced.
However, actual wireless power transmission to illuminate the lamp is not yet possible.