
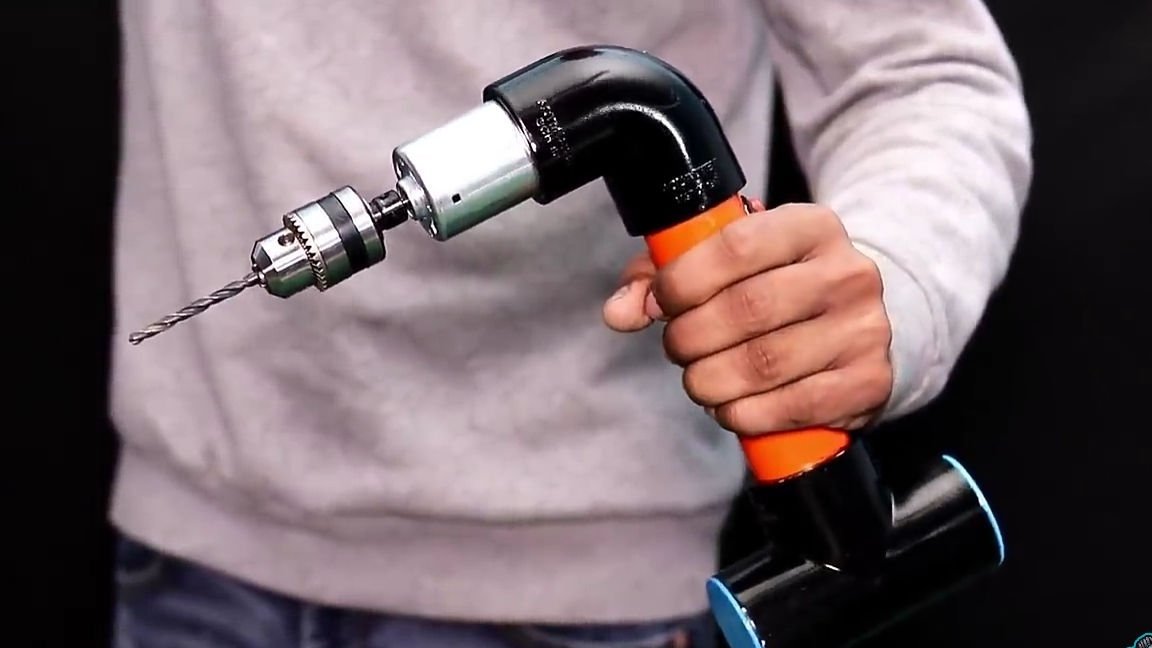
Hello friends the inhabitants of our site! In today's article, I would like to show you how to make homemade work that is very useful and necessary in the household. Namely, today we will consider how to make such a hand tool as a hand drill. The advantage of this homemade product is that it will not be inferior in power to factory analogues, and at the same time its cost will be much lower, and the main advantage is that it is “wireless”, that is, it will work not from the network, but from the battery . Anyone can repeat this homemade product, firstly, because the design itself is distinguished by its simplicity, and secondly, because it is affordable for everyone (since all components can be found both in local stores and our Chinese friends). In general, the homemade product is very interesting, so let's not pull with a long introduction, let's go!
Links to the main components are left at the end.
For this homemade product we need:
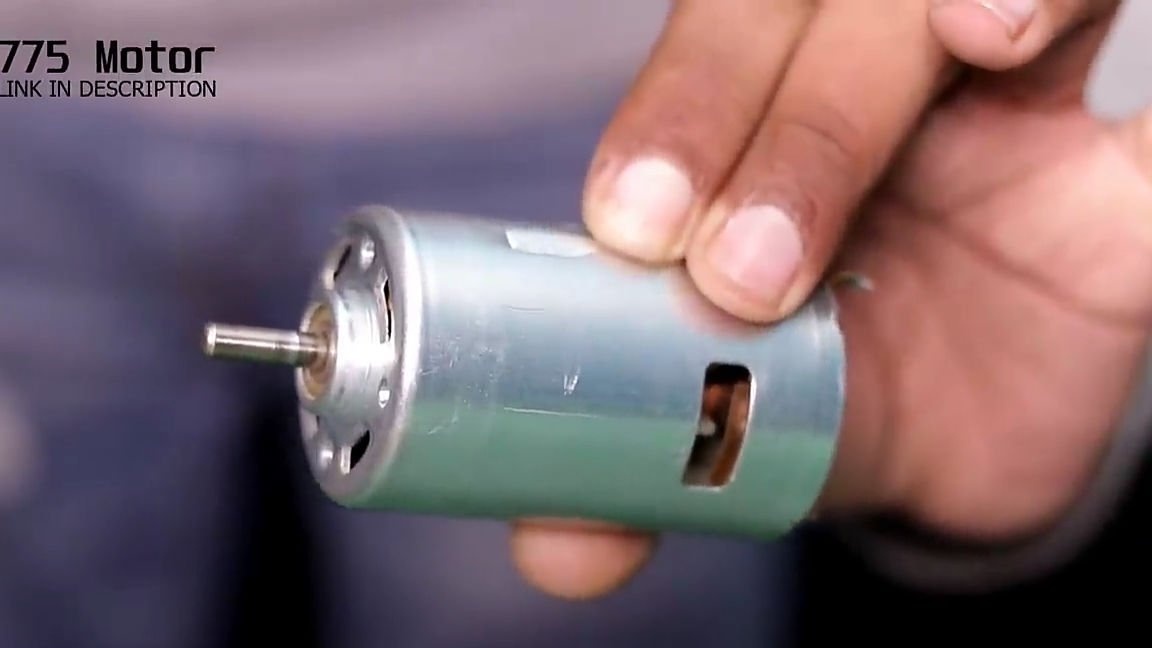
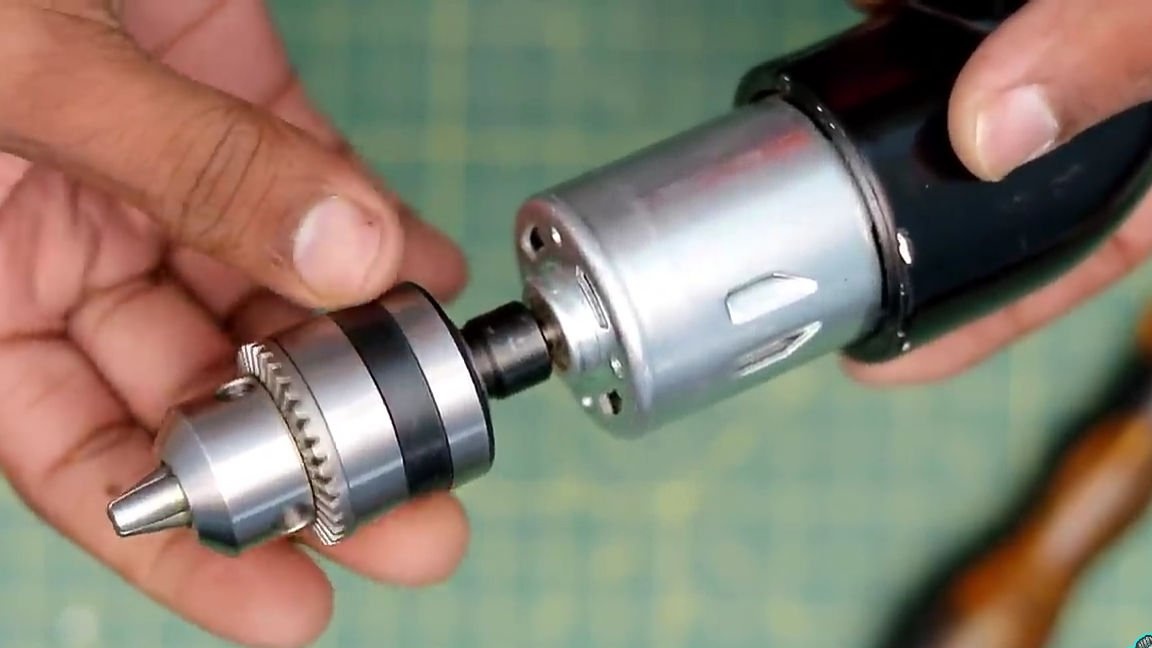
- Collector motor 775 class. (such usually put on professional RU models).
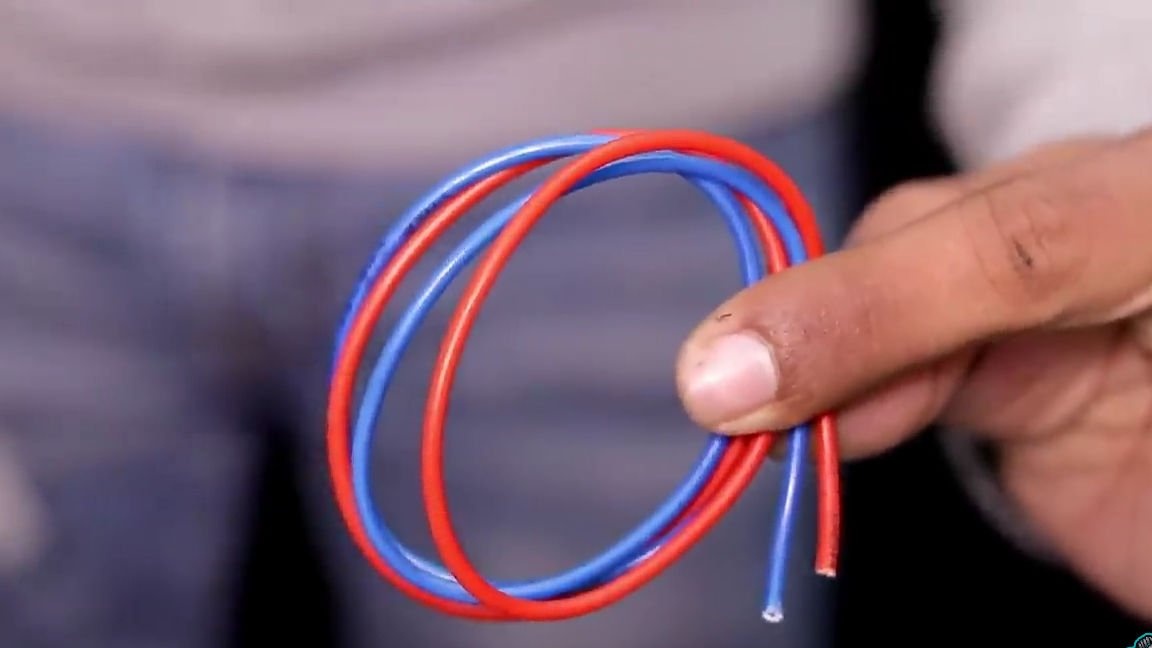
- wires
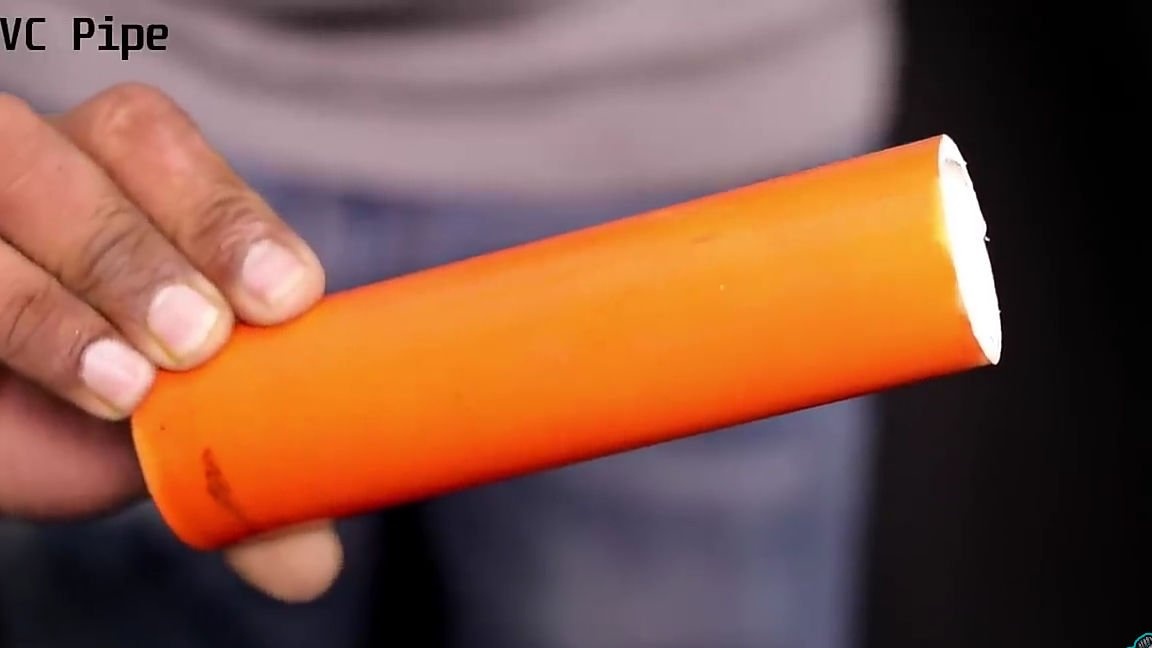
- PVC pipe with an inner diameter as close as possible to the outer diameter of the taken electric motor
- Corner for PVC pipe
- Button
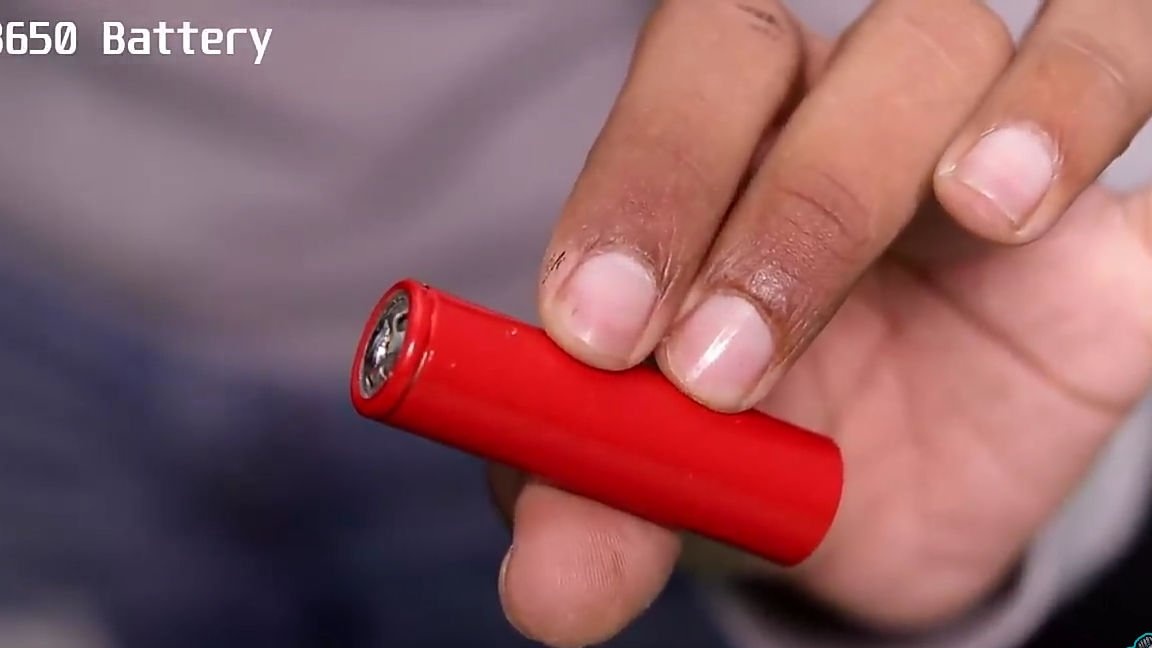
- Rechargeable batteries format 18650 3pcs.
- 3S BMS controller (charge / discharge controller board, for 3 lithium batteries)
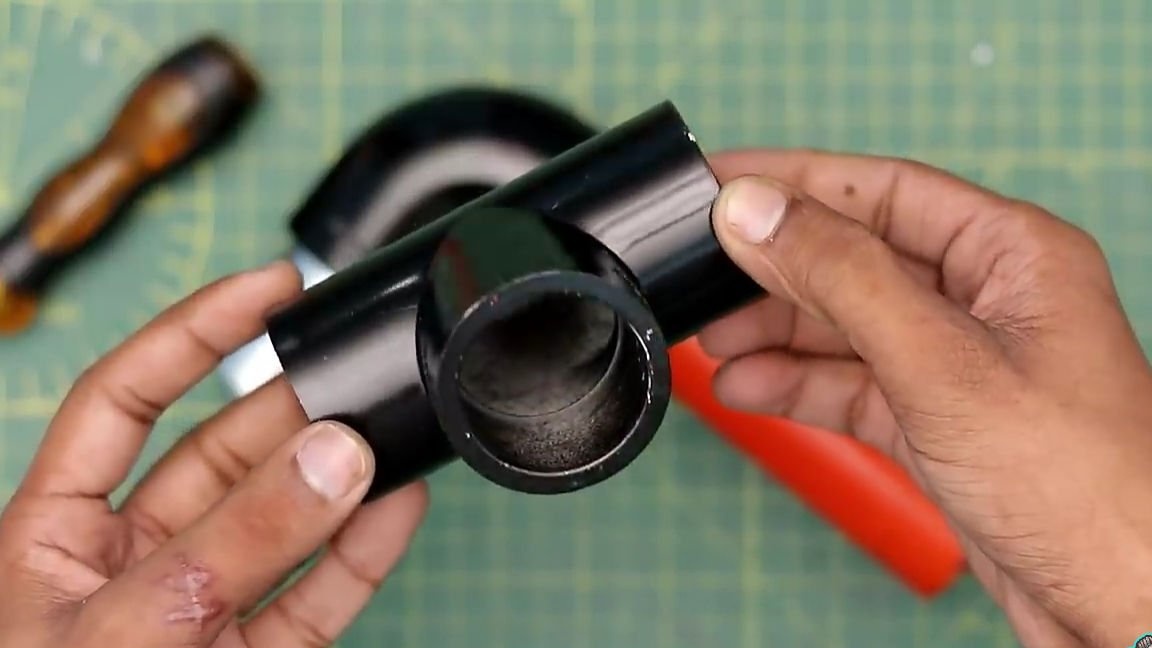
- "T" shaped adapter for PVC pipe
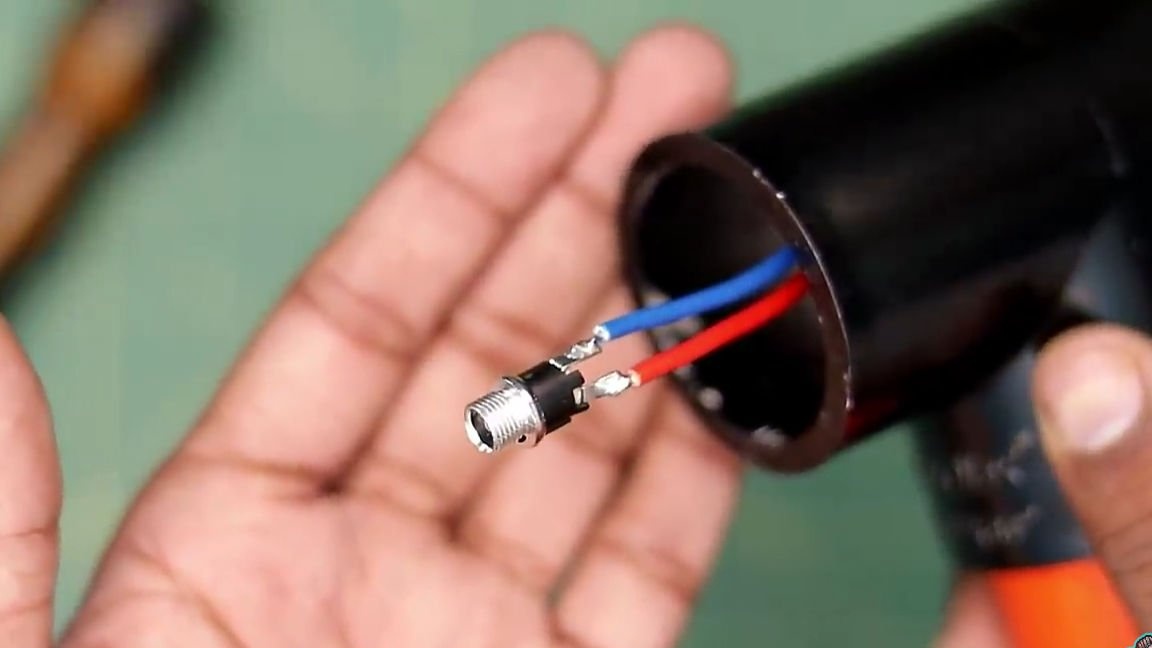
- Standard power connector
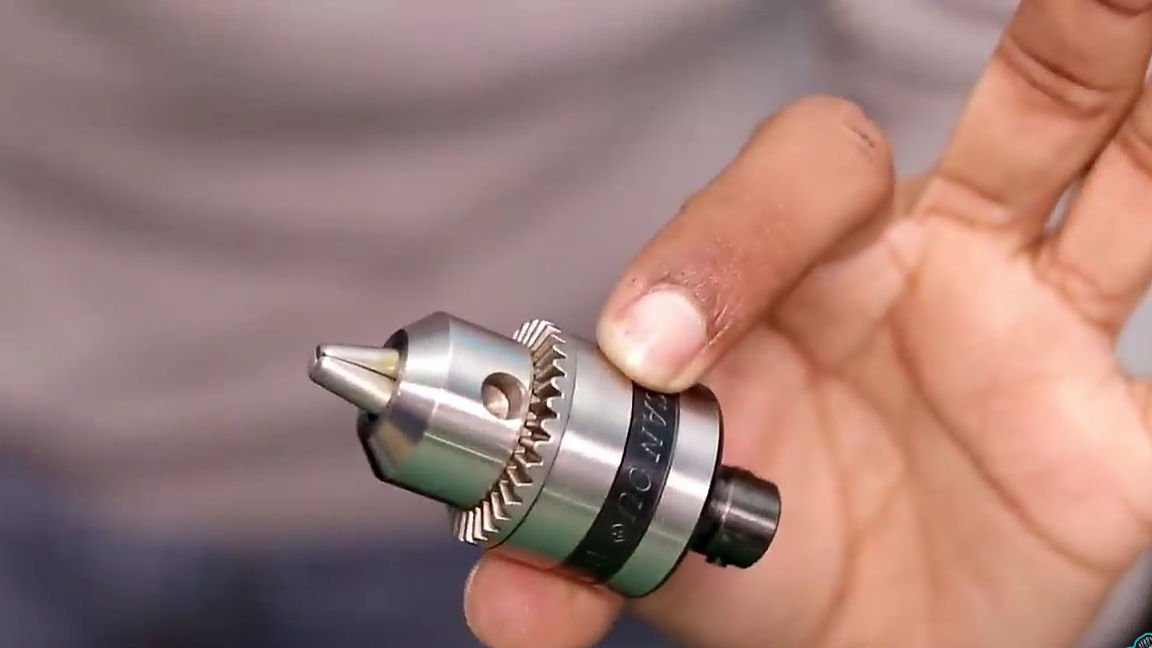
- Drill chuck
- Two plastic plugs for PVC pipe.
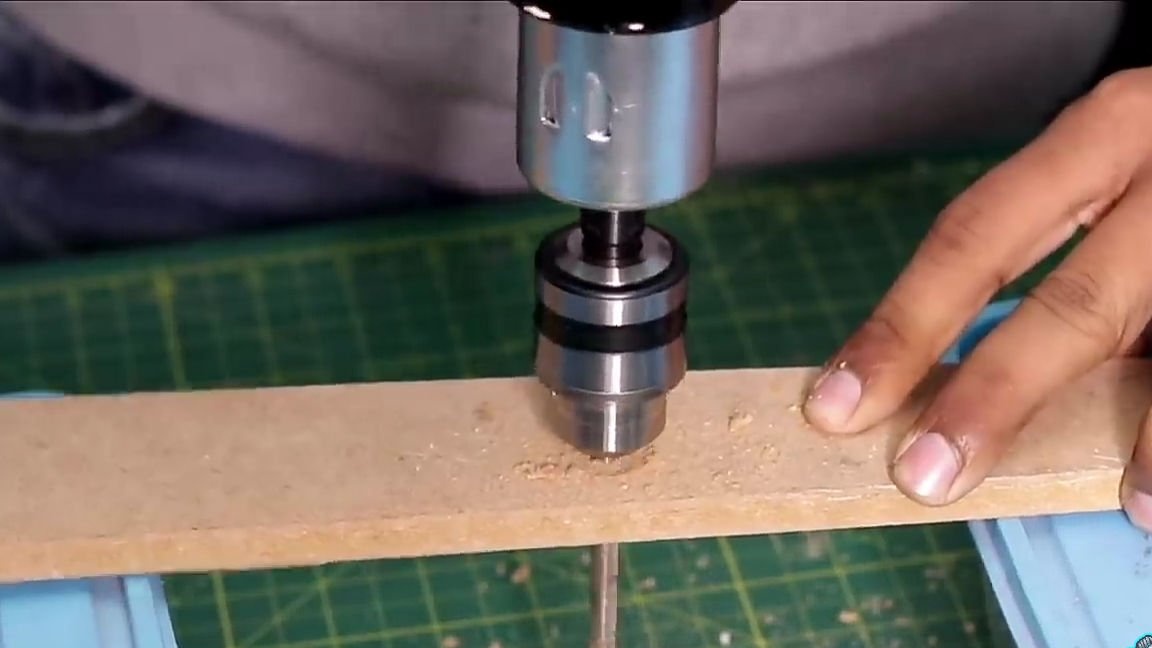
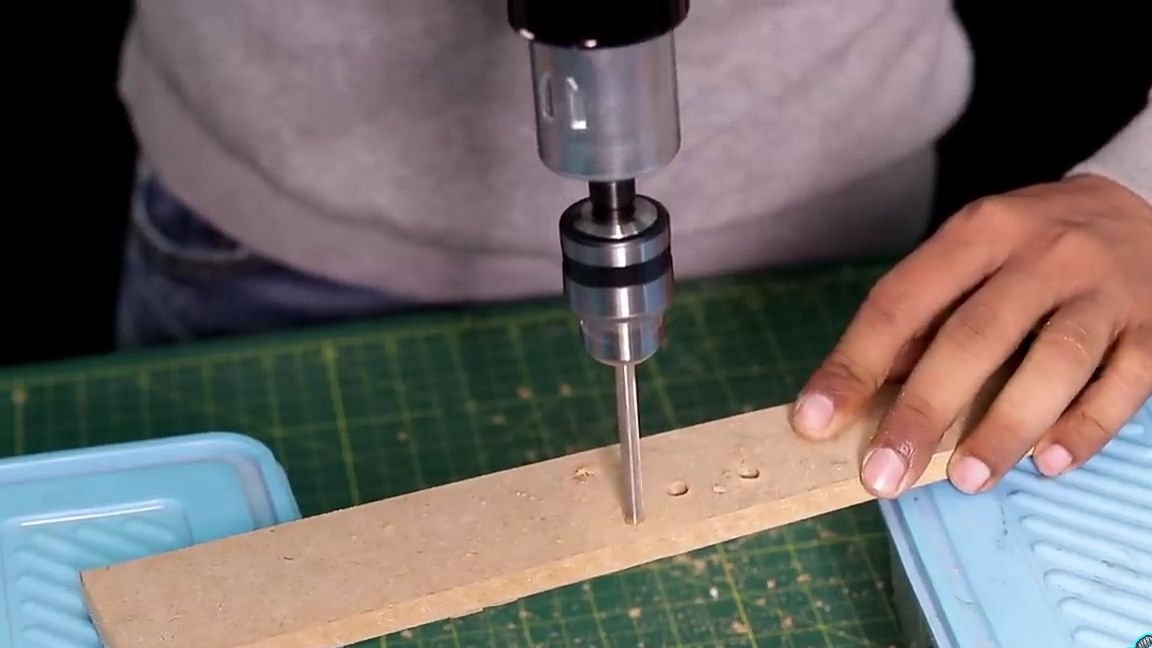
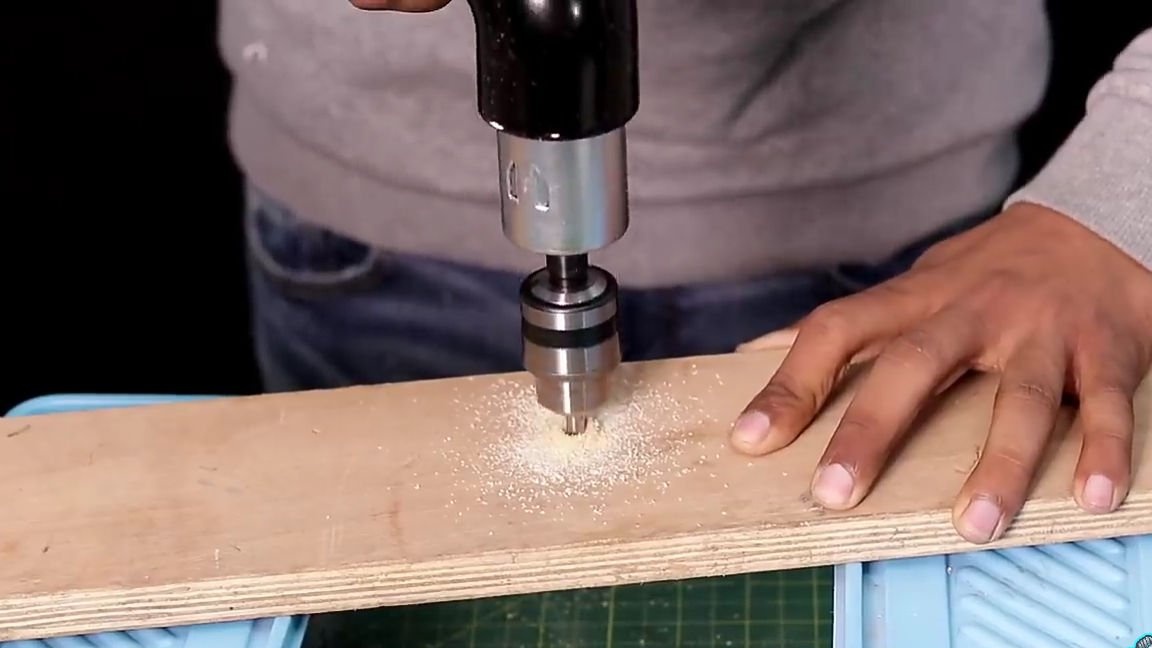
- Set of drills
Of the tools we will also need:
- soldering iron
- solder
- marker
- scissors
- Hot glue
- electrical tape
- hexagon
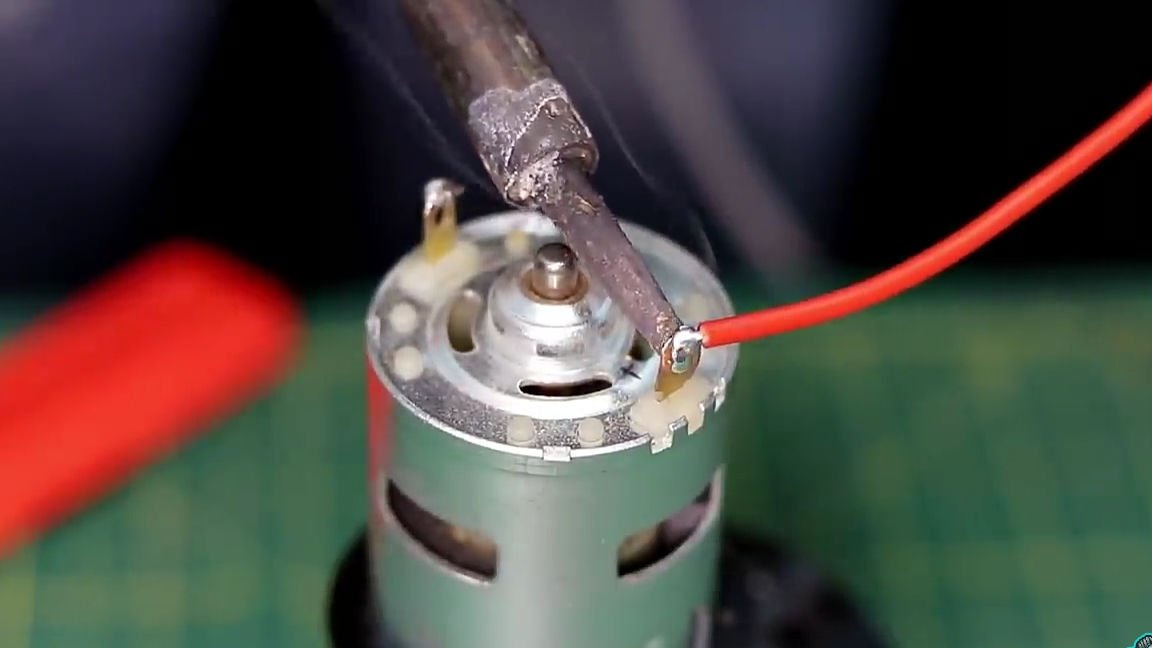
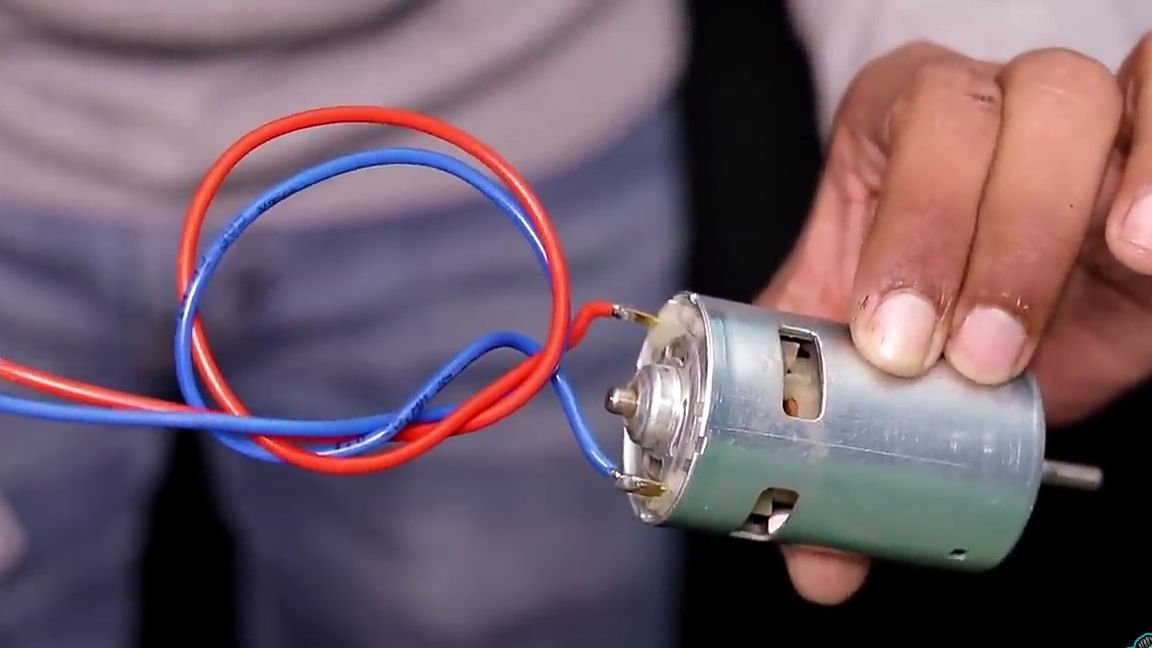
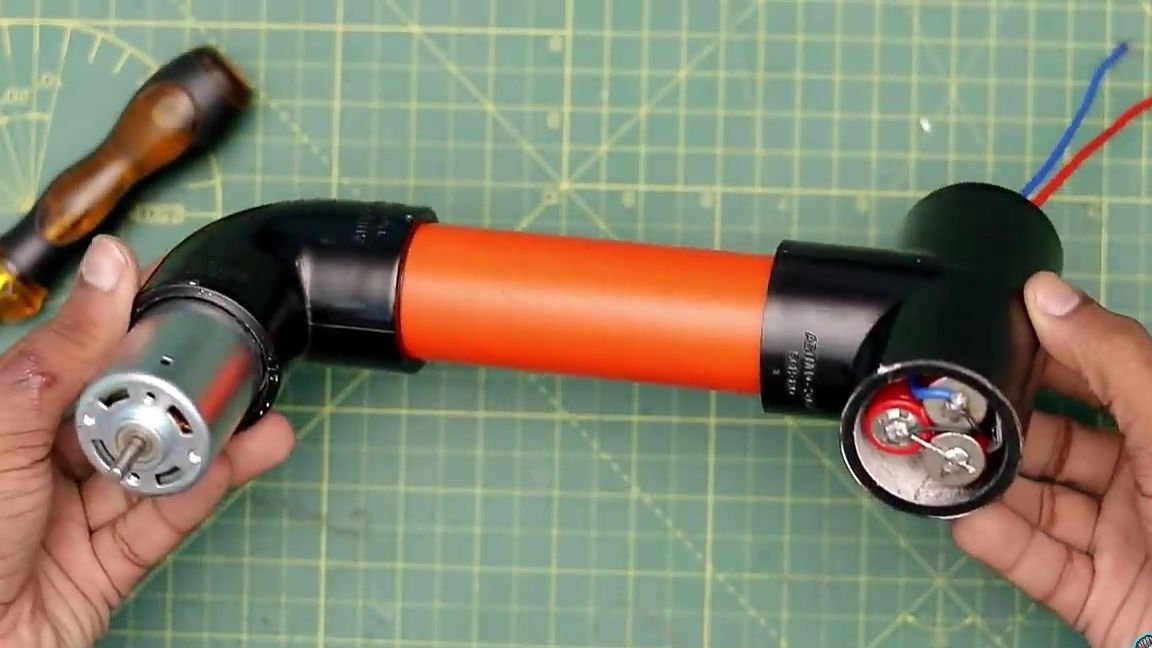
Well, let's proceed to the assembly of homemade products. To begin with, we should take a good and high-quality collector motor of class 775, the shaft of which should be on bearings. For more traction, you should take an electric motor "low-revving" that is, with a large number of turns. A link to a suitable motor is at the end of the article. Actually, to begin with, two power wires with a length of about 15-20 cm should be soldered to the electric motor itself.
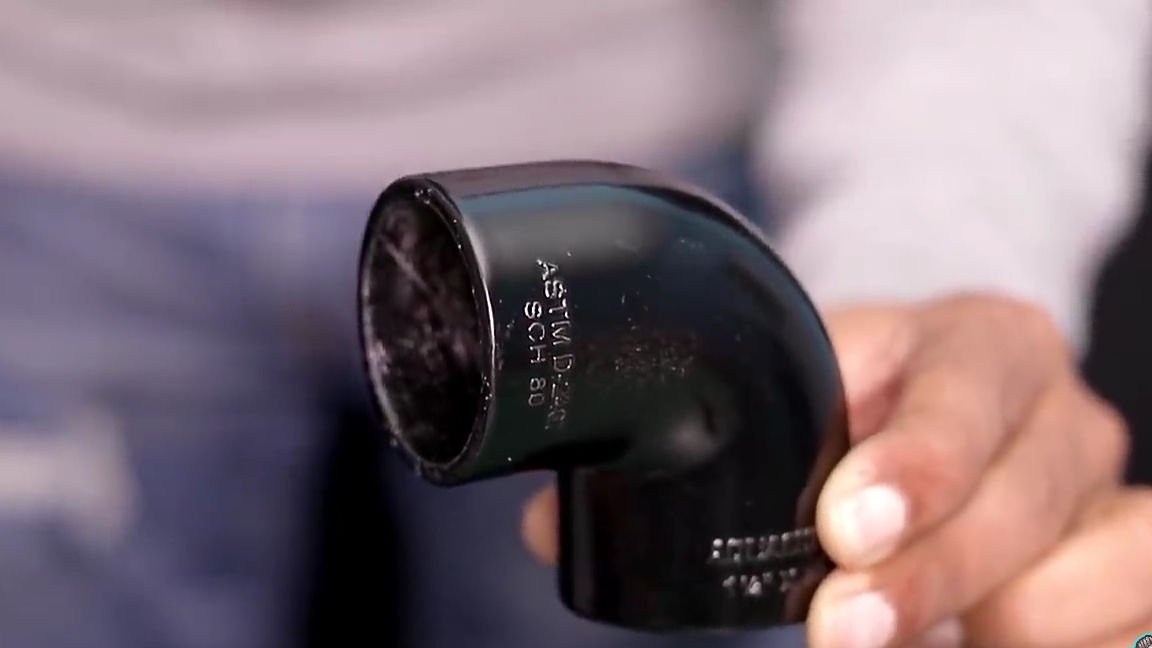
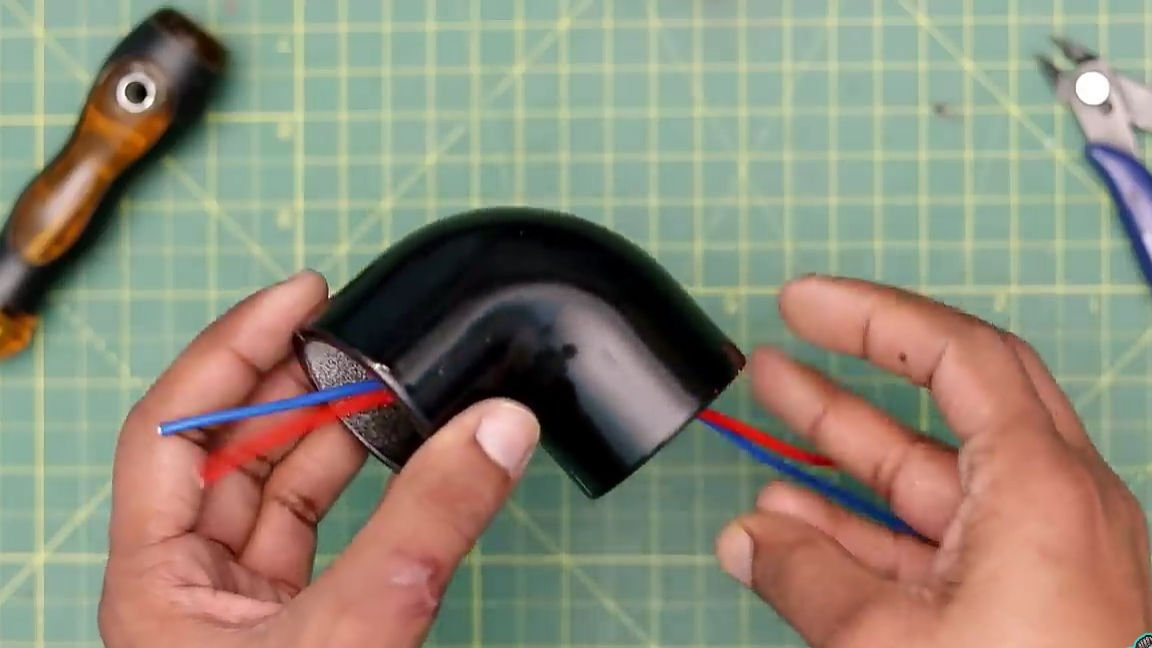
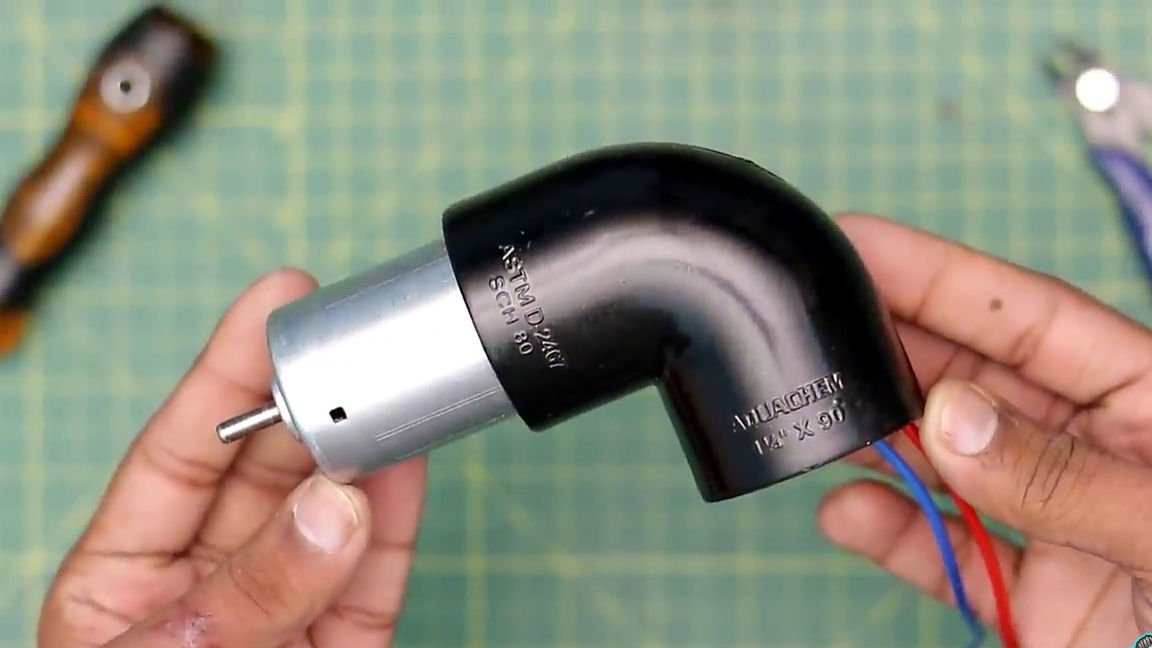
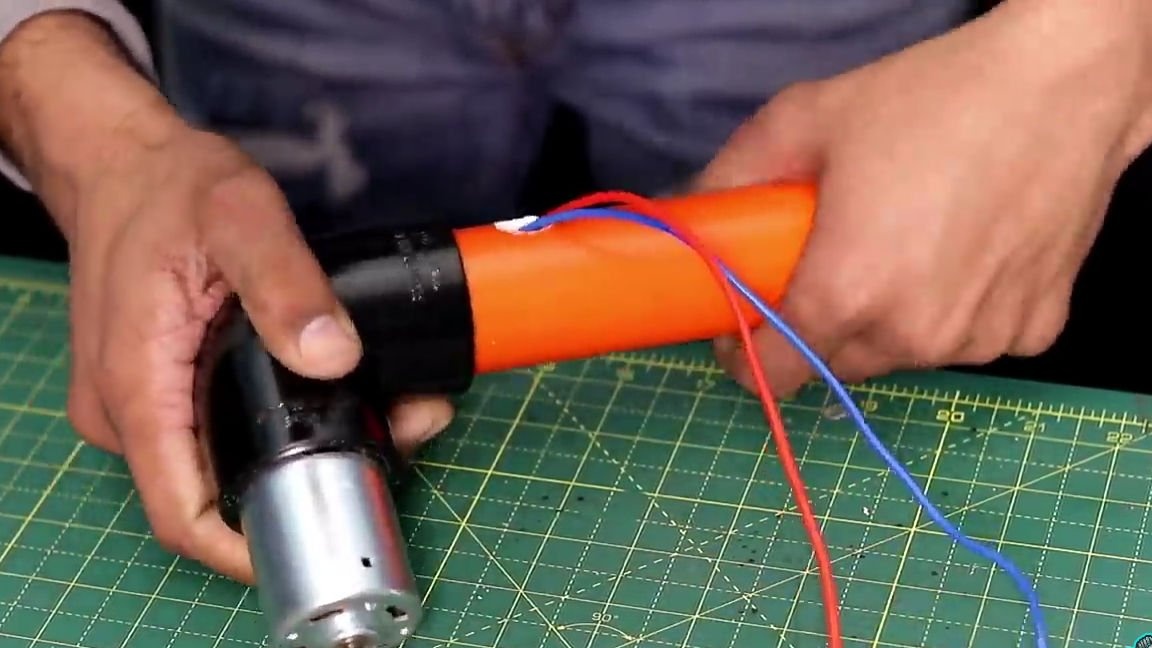
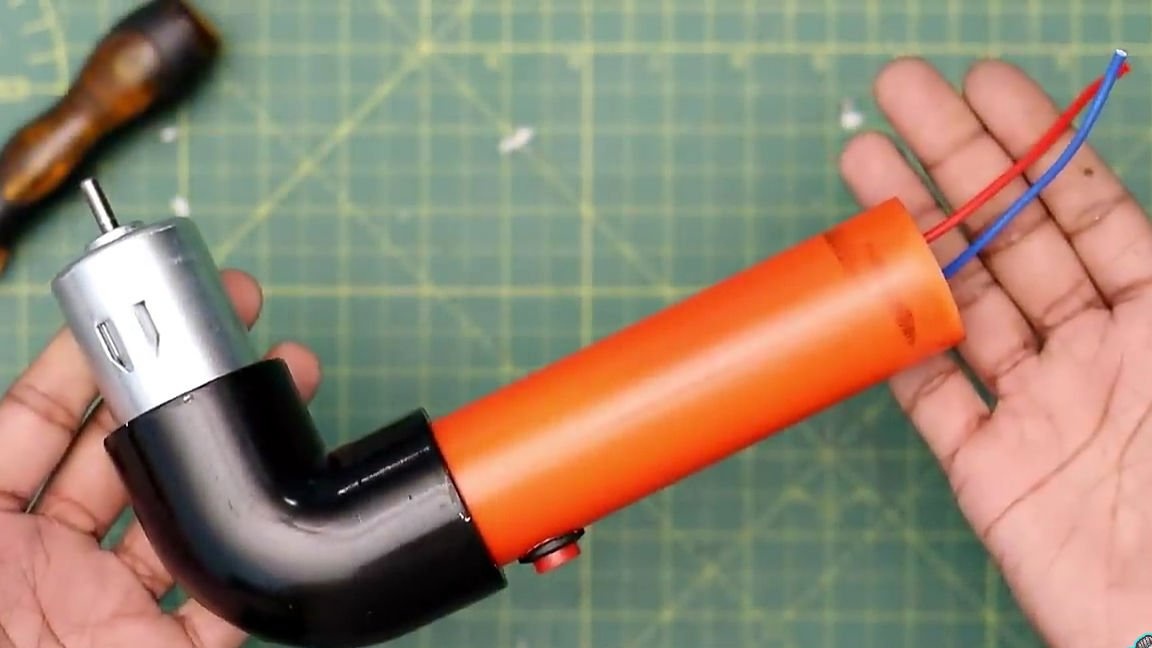
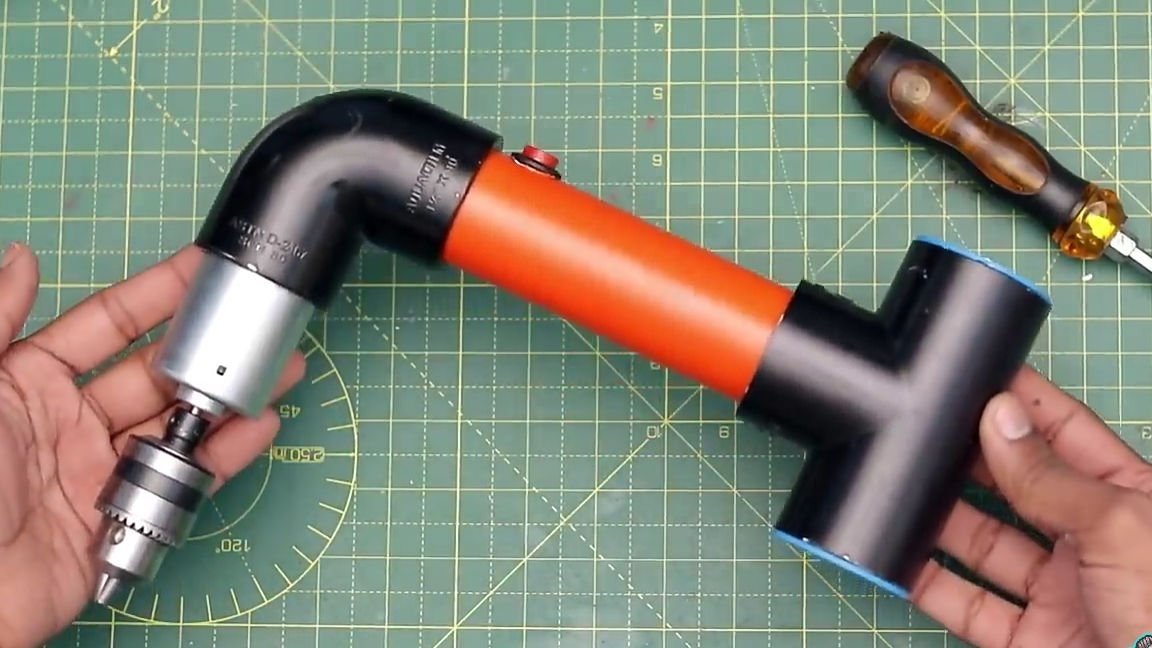
Then we need to take a corner suitable for the inner diameter of the PVC pipe. That is, the electric motor should sit tightly in it and not fall out. "Pressing" our electric motor into the corner, putting the wires in front of it.
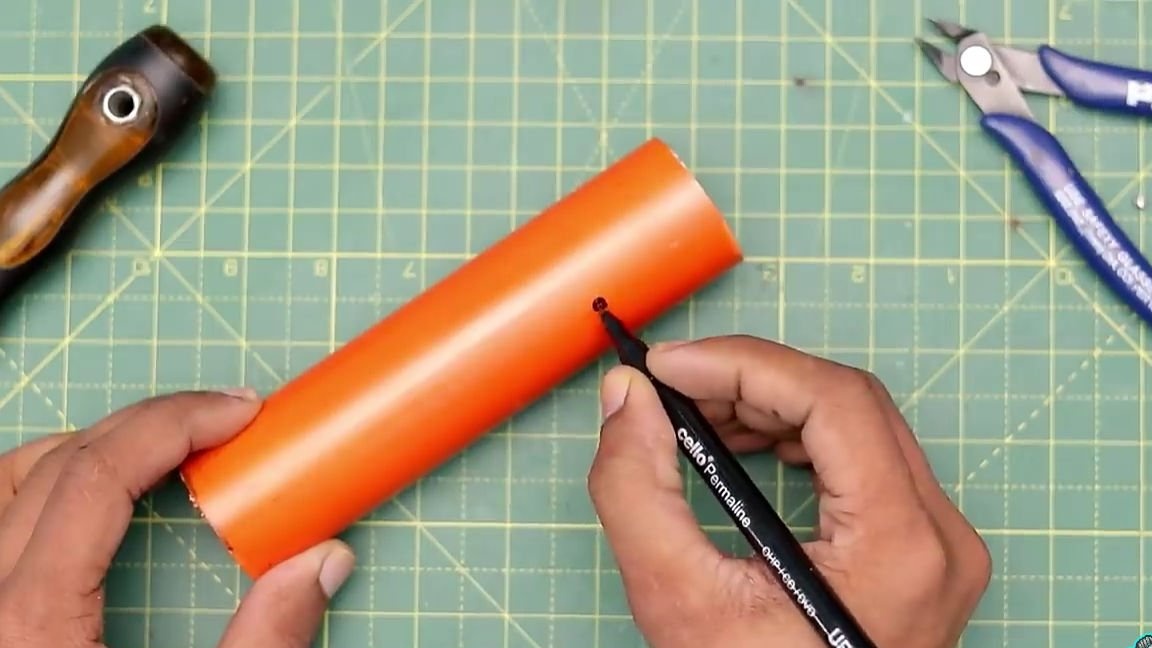
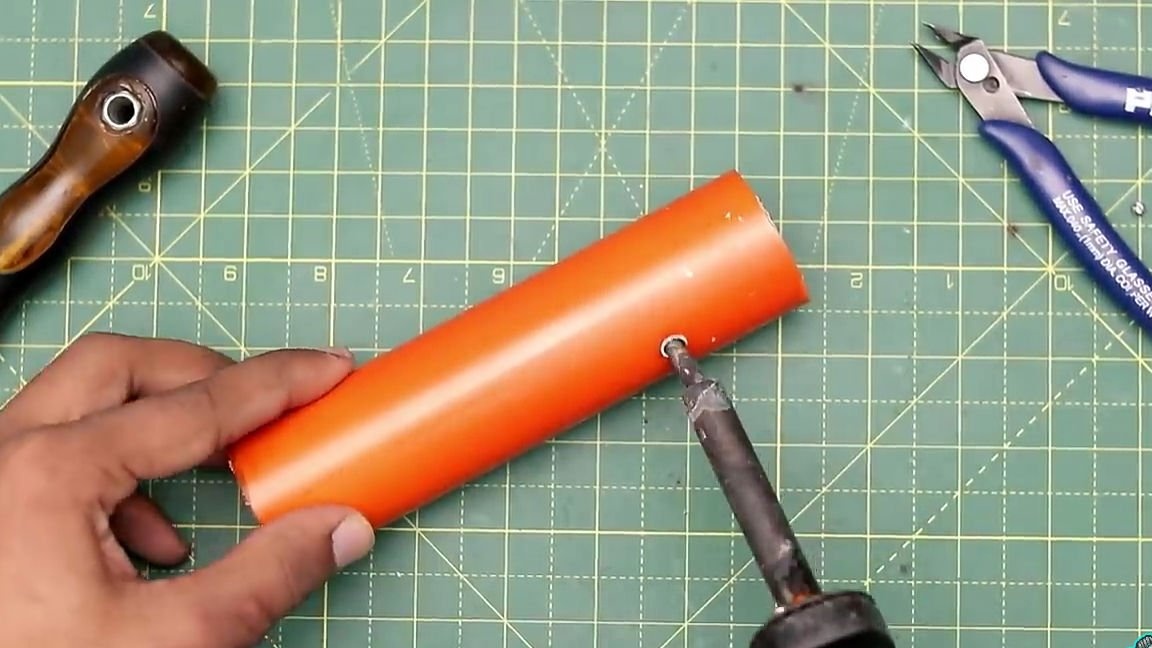
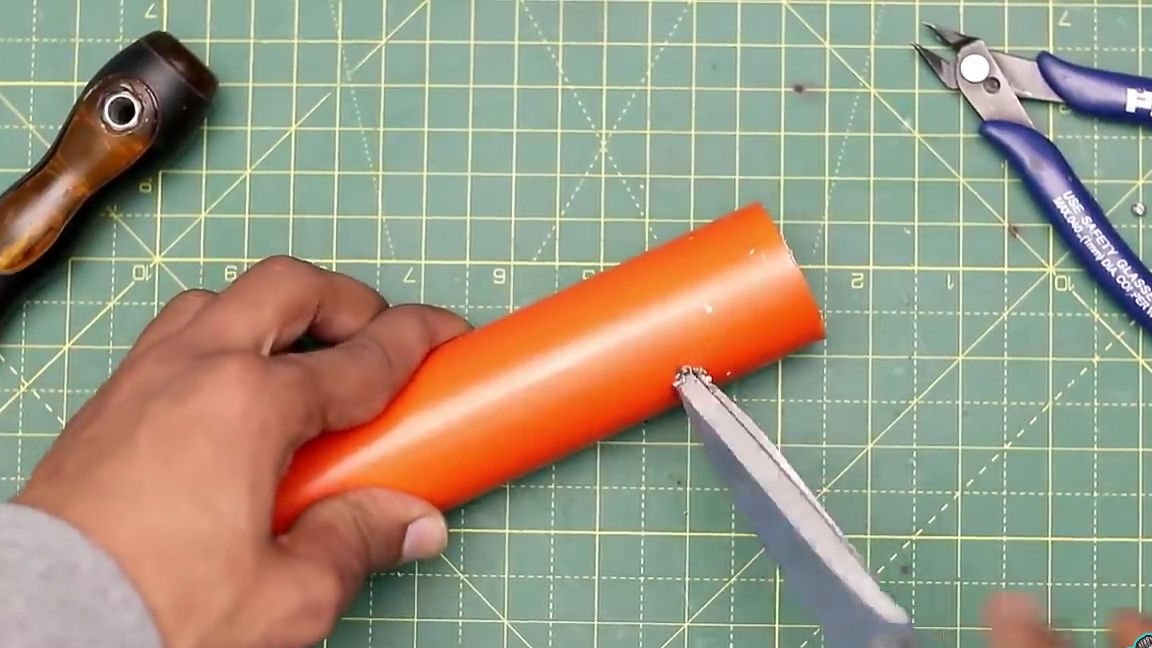
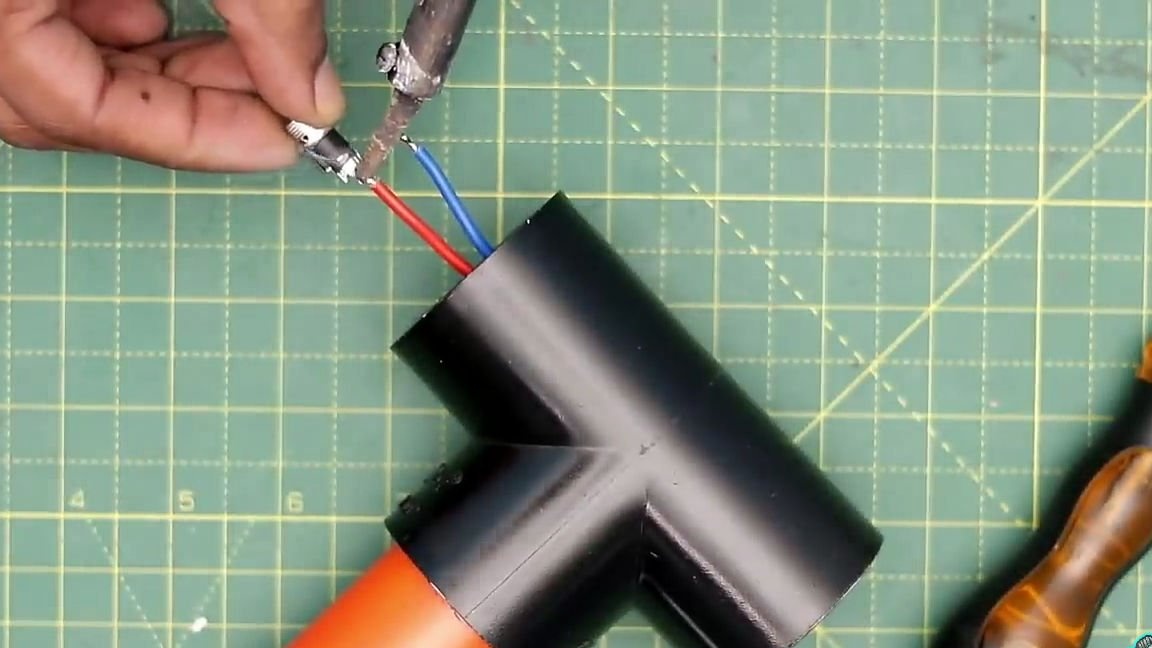
The next step is to get a PVC pipe of the same diameter as the corner. In this case, this PVC pipe will play the role of a handle for us, that is, you choose the pipe length yourself, the length should be such that it will be convenient for you to work later. On the pipe itself, we should make a through hole for the button, for this in a place convenient for you using a marker we leave a mark. Then, using a soldering iron, make a through hole, and then with the help of scissors or a knife, we expand the hole to the diameter we need (so that the button can fit tightly).

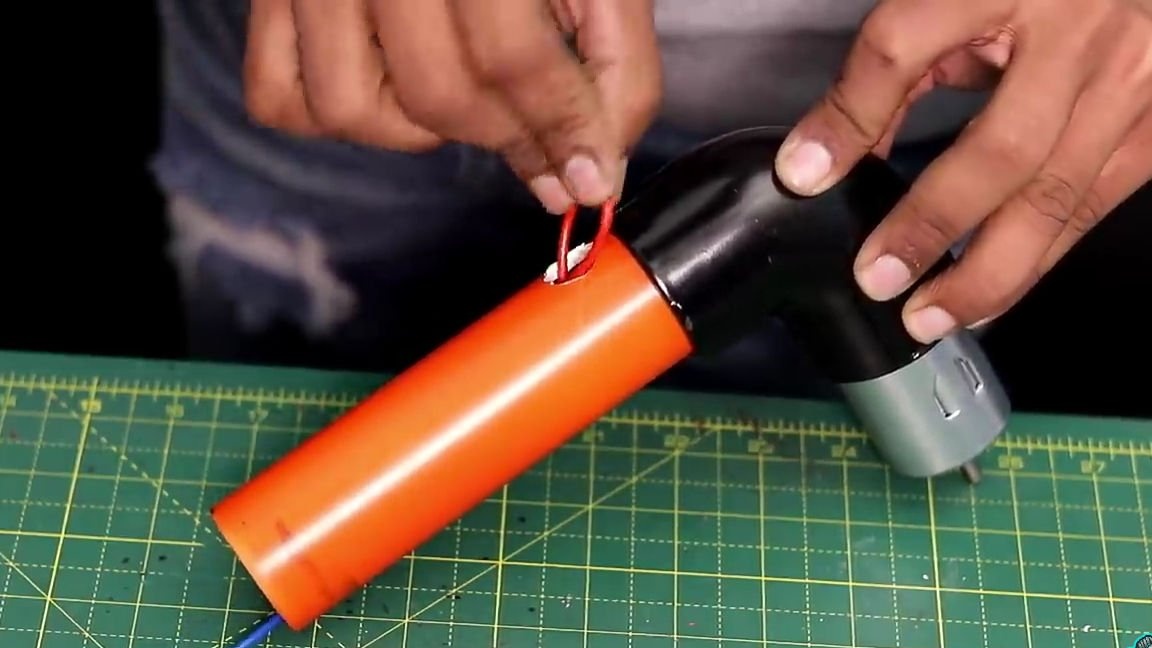
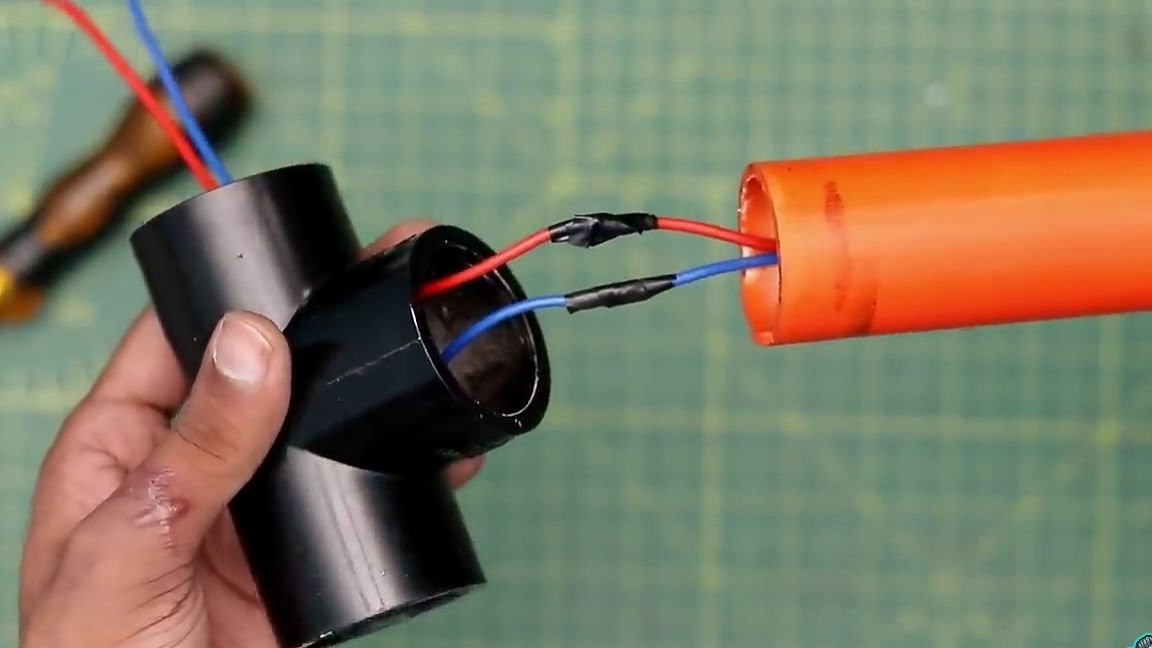
Next, we insert the wires from the electric motor through the PVC pipe and through the hole just made from the inside (see photo). And actually the pipes themselves are connected to the corner, in our case it is enough to simply insert the pipe into its place without using glue.
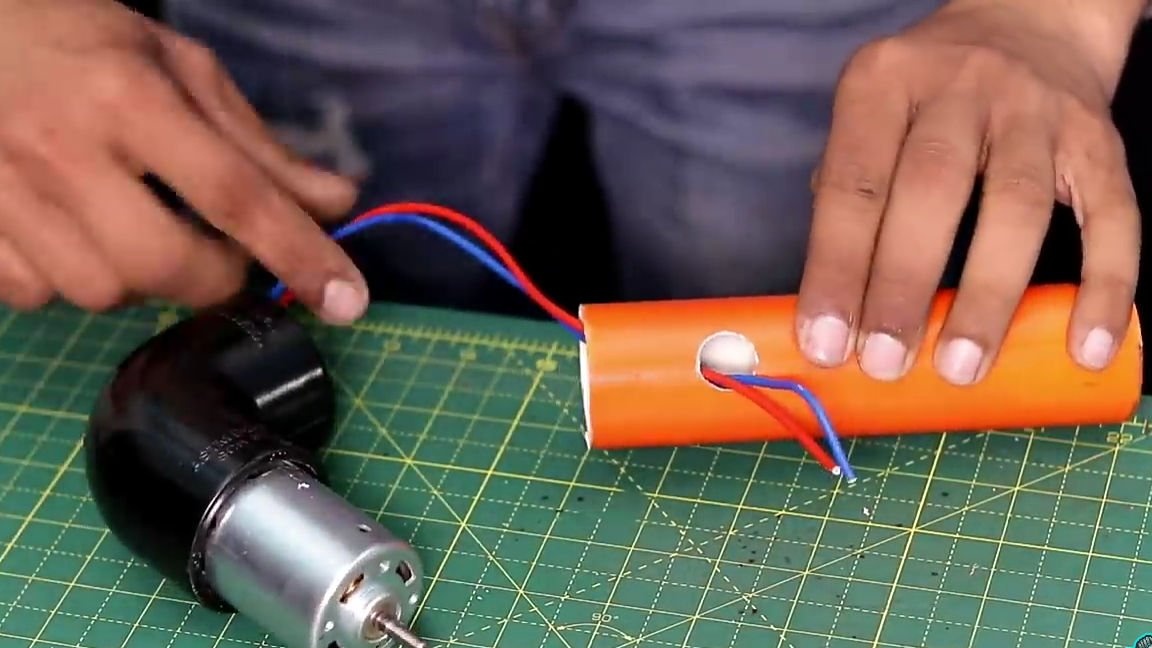
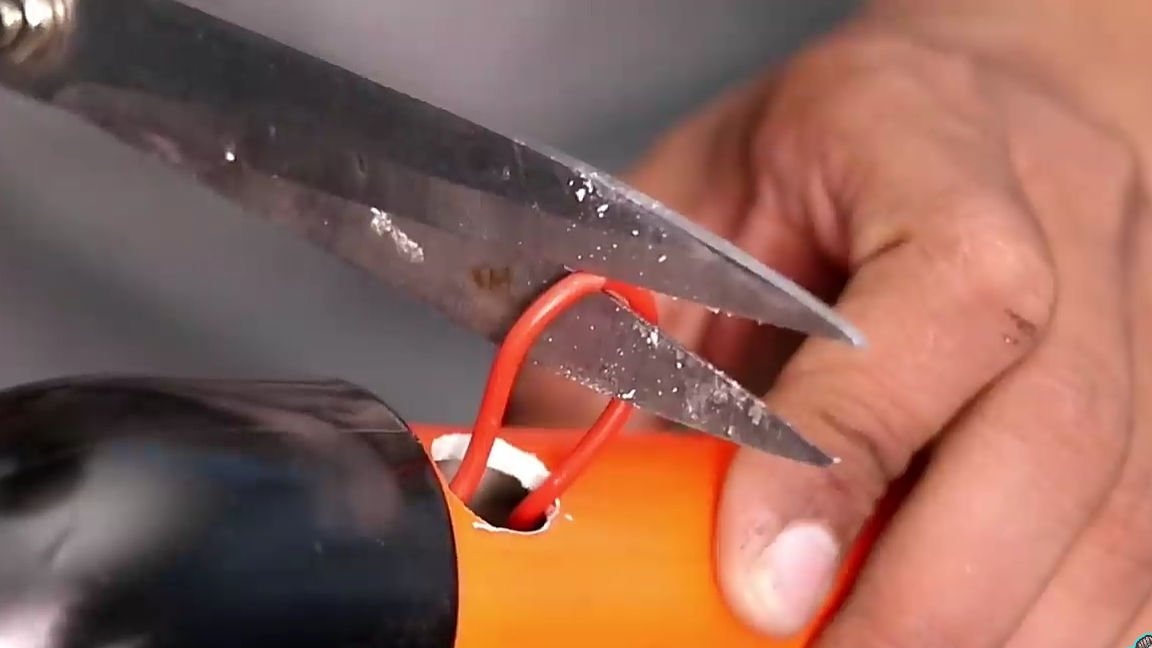
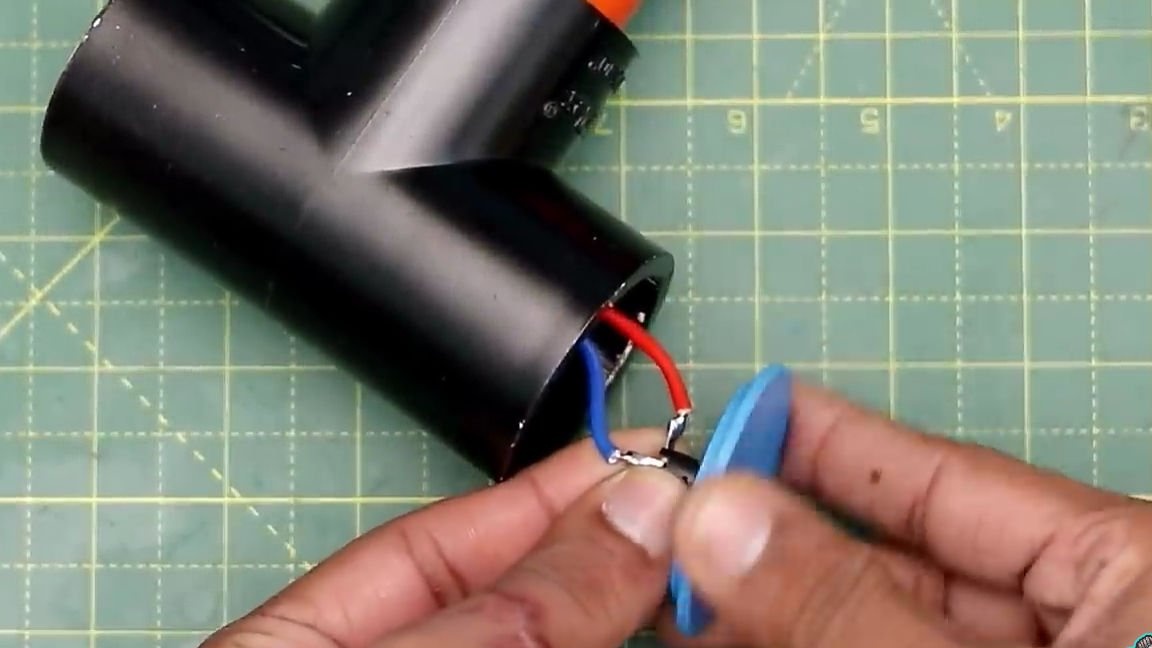
We put one of the wires inside, the second one is pushed in the same way as the first, but leaving a loop (see photo). We cut the loop with scissors and clean the insulation from the ends of the wire solder the button itself. Soldering the button to the above contacts, set it in its place.

After that, for the next step, we will need 3 lithium 18650 batteries. You can also find a link to quality batteries at the bottom of the article. But it should be added that this is the most common format of batteries and finding them in your city will not be difficult, for example, they are inside old laptop batteries, and they will give them to you in the repair center for “thank you”. But it’s also worth considering that used batteries will not be able to give you a lot of power and a large volume, and still I recommend that you buy new banks.
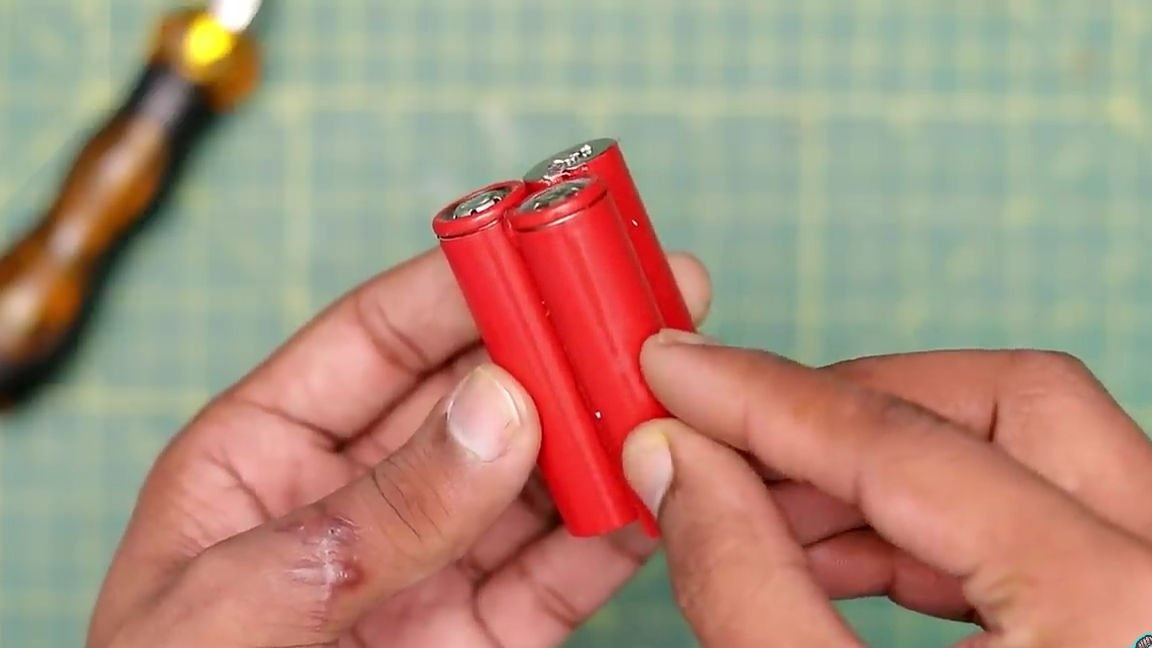
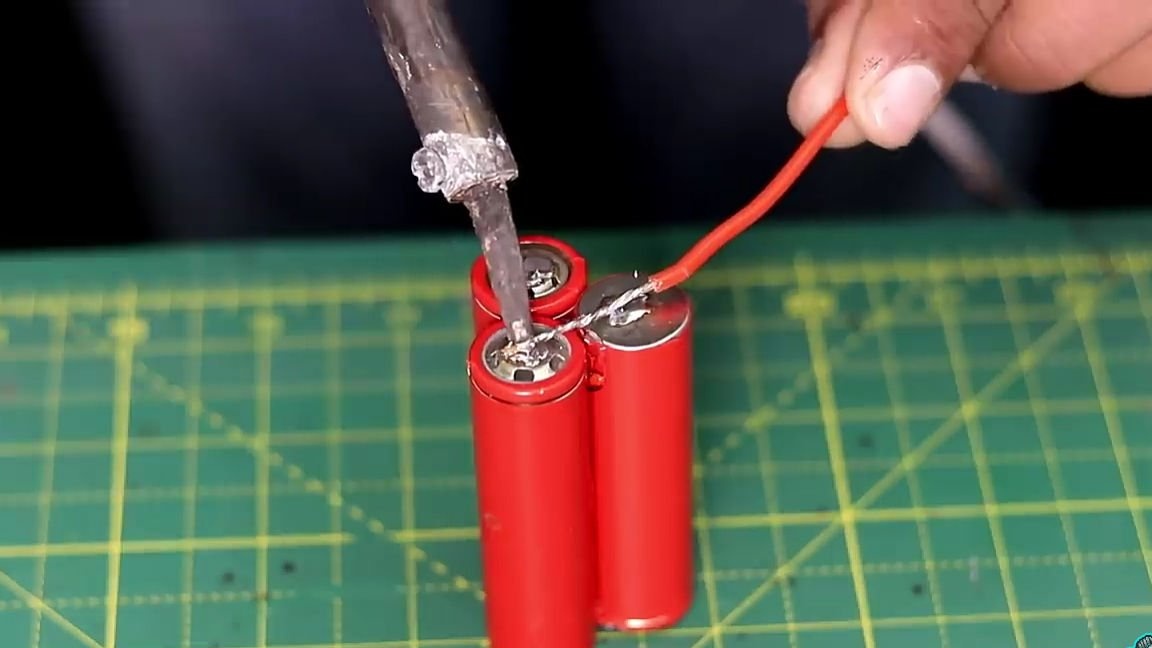
Having dealt with the batteries continue. Using hot-melt adhesive, we connect 3 batteries to each other in one battery so that they could then be easily connected in series, that is, for example, two batteries “+” up and the third “+” down (see photo). Then we deserve the wire, and solder it to the batteries, connecting them in series. It is important to note that it is not recommended to solder the batteries at all with an ordinary soldering iron, but this should be done using resistance welding, but if you don’t have one, then solder very carefully, and most importantly very quickly!

Then we need to take a BMS controller for three parallel-connected lithium batteries. A link to this controller is also available at the end of the article itself. This controller monitors the charge and discharge of each jar and balances them, it will not let you recharge and recharge your batteries. Well, in general, a useful thing. The controller itself will be connected to the battery and engine, as it is shown in the diagram below.

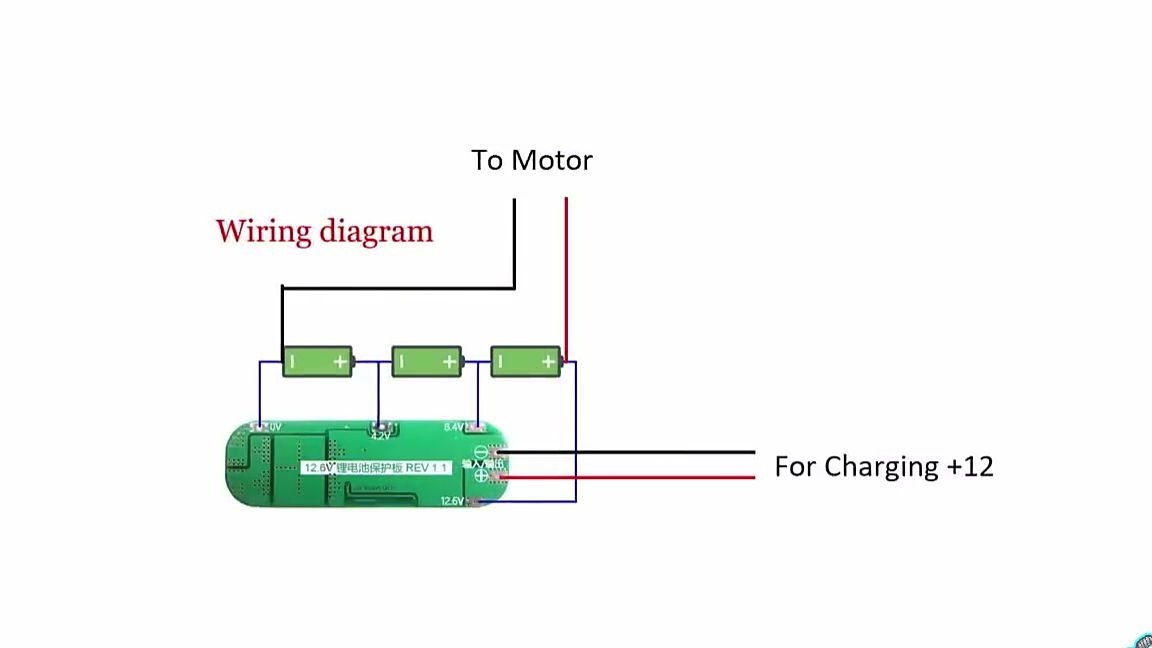
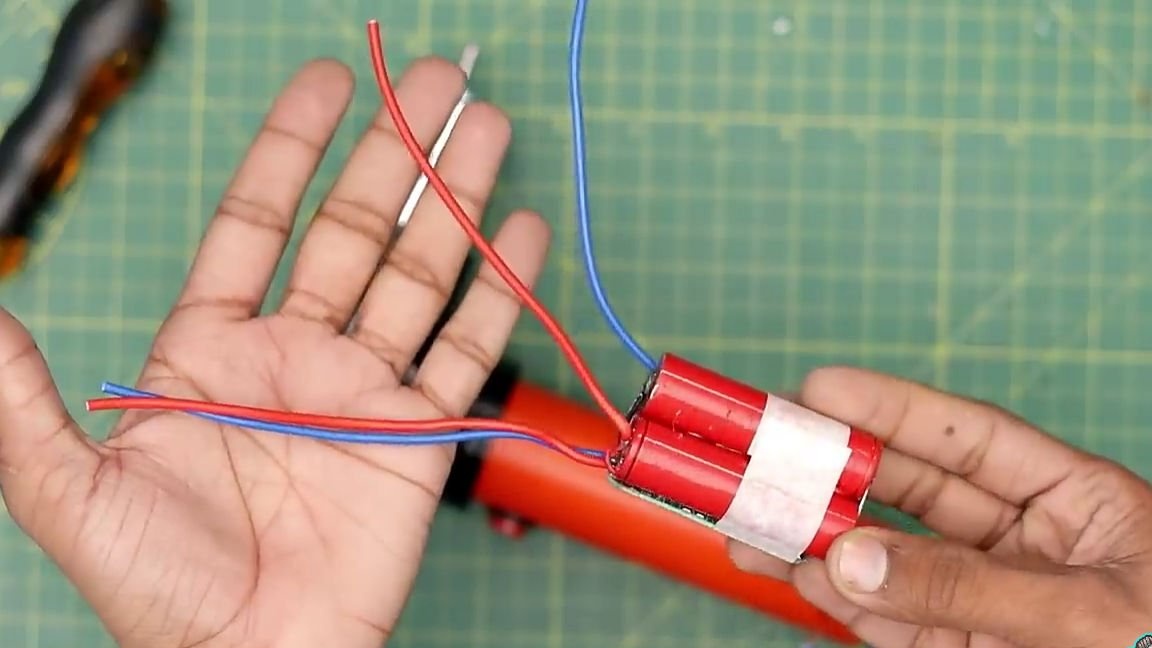
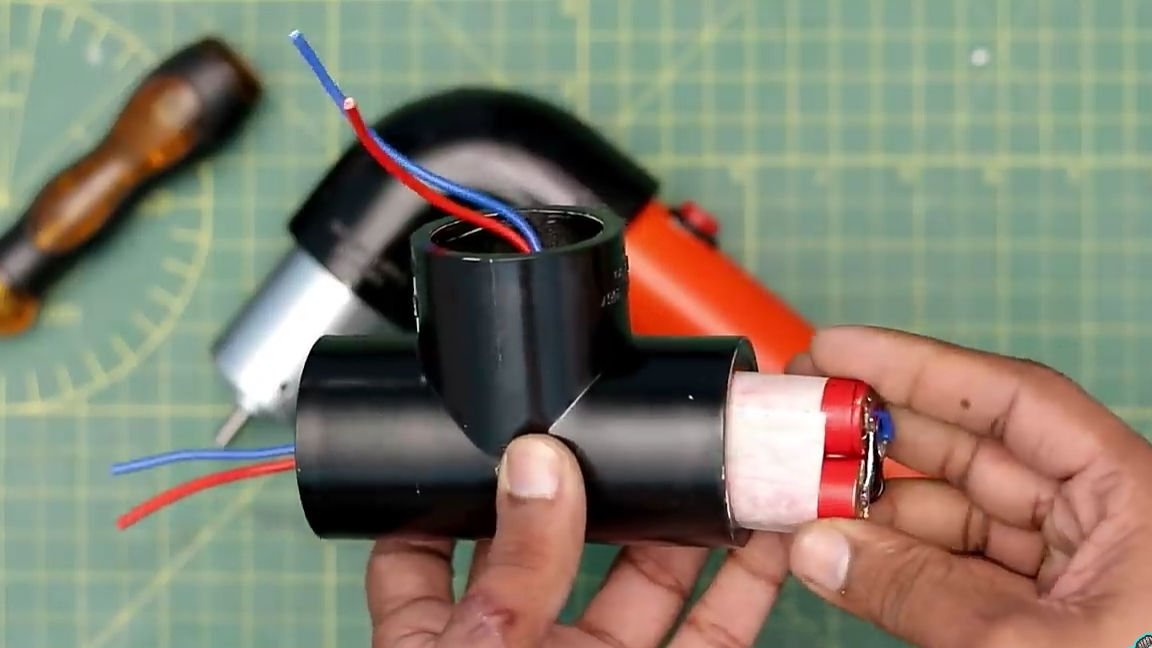
After which we will need to take a “T” adapter for the same PVC pipe. In the "T" shaped adapter we install the battery by inserting the wires from the battery for the electric motor through the central hole of the wire. We solder the wires from the battery (controller) to the wires from the electric motor so that then the electric motor rotates in the direction necessary for drilling.

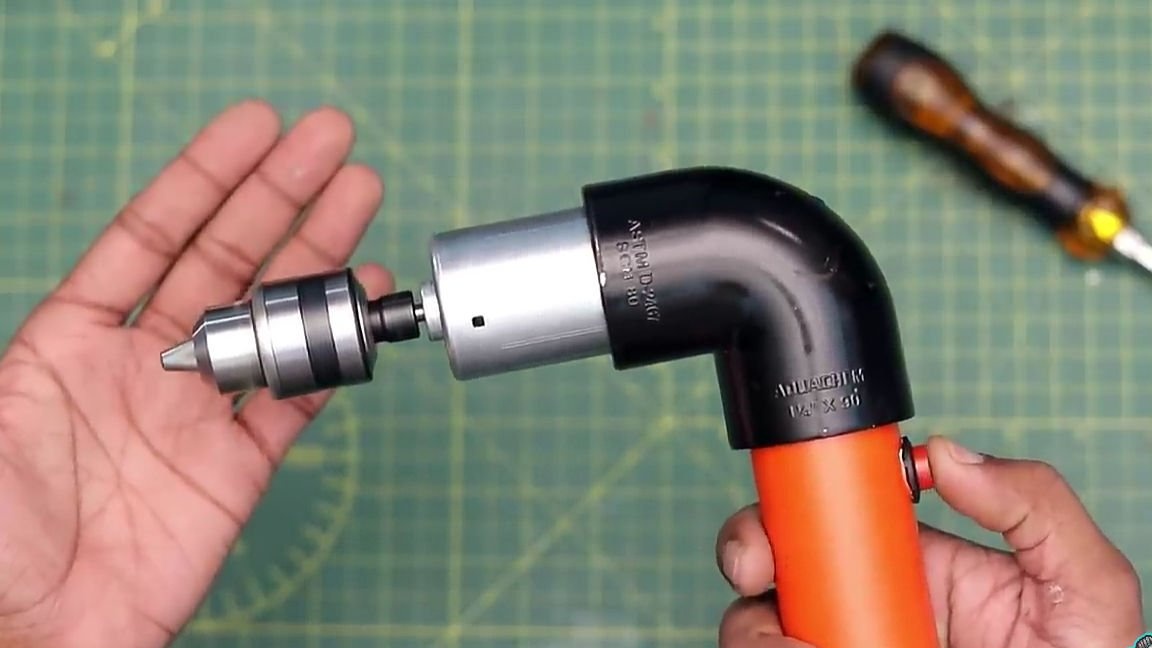
Next, take the power connector and solder it into the "input" of the power controller. The next step we need is a drill chuck. A link to the cartridge is also at the end of the article. If you will buy this cartridge in a local store, you should consider that they are different, and the main difference between them is the radius of the hole for the shaft on which they are actually installed. So be careful. We install the cartridge on the motor shaft and tighten the fixing hex screw using an ordinary hexagon, it should be noted that it is advisable to lubricate the fixing screw before installation with a thread lock.
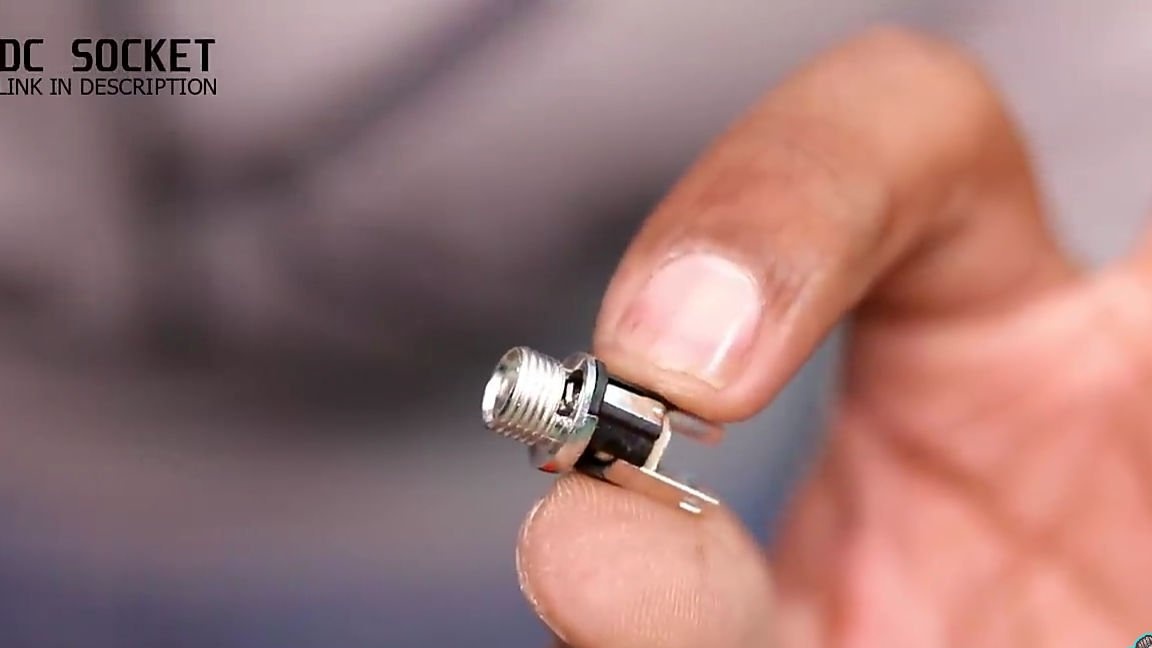

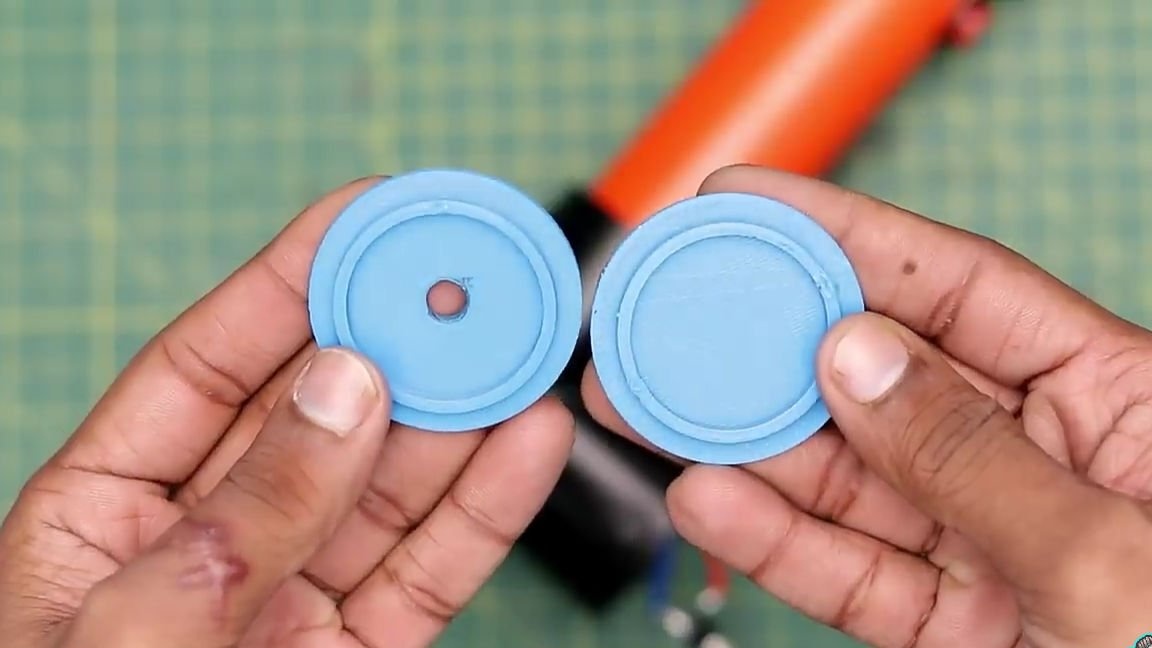
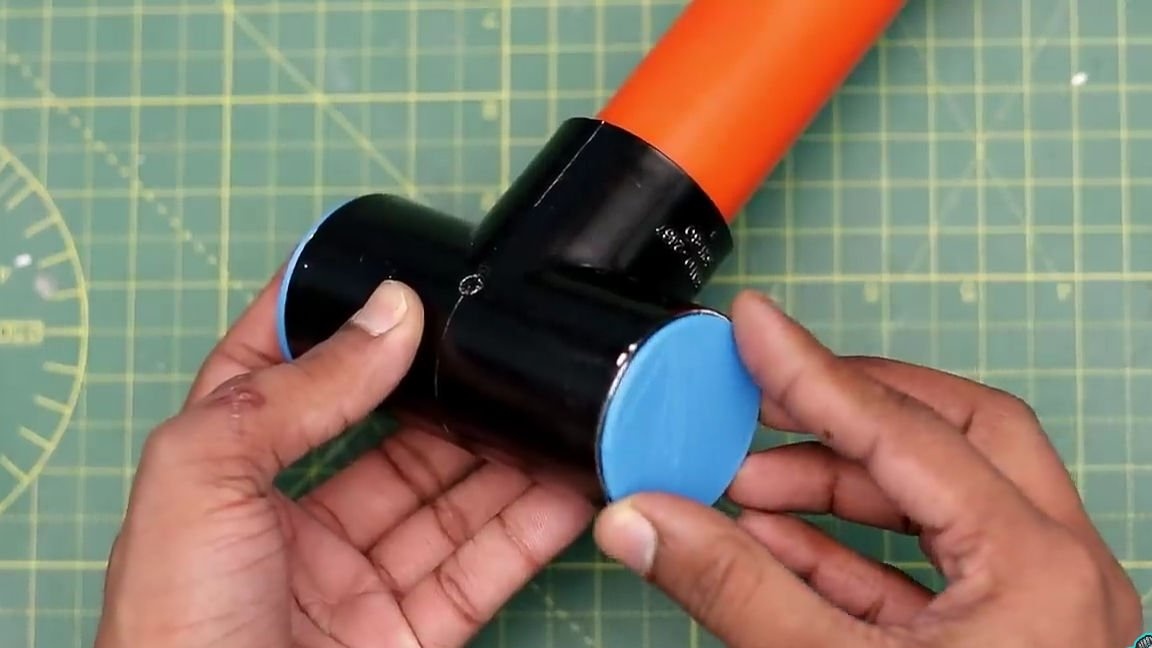
Well, in the end, we will need two plastic plugs for the “T” adapter, since the author of the homemade product did not have them, and he could not find them, he printed these plugs on a 3D printer. If you also couldn’t find such plugs, and you don’t have a 3D printer, then you can use some plastic from which you will cut the necessary circles and paste them. Having dealt with the plugs, in one of them you should make a through hole for installing the power connector. Well, we insert the plugs into place.
All is ready. It remains to charge homemade and test.As a result, we got a very cool homemade product that can definitely come in handy for you, and will not lie idle.

You can purchase accessories that can be useful for assembling this homemade product here:
.
Here is a video from the author with a detailed assembly and testing of this homemade product:
Well, thank you all for your attention and good luck in future projects, friends!