
Good day to all dear friends! In today's article, I would like to show and tell you a cool idea that is quite useful homemade. Almost everyone who has a powerful motor and a couple of boards can do this home-made. But in its significance, this homemade product may be one of the first among some people. Many will now go to write in the comments that this homemade product is too simple and will not be able to cope with normal workpieces and tasks, and will be right and wrong in part. Of course, homework is unlikely to be able to cope with the difficult tasks, because the author does not use the most powerful motor, and initially the author makes the "mini" version, but to increase the scale of the project, I think you yourself can.
In general, today consider how to make a mini lathe do it yourself. With this machine you can process small wooden blanks, but it is made very simply and from all available materials.
Well, well, I think that’s enough of the long introductions, they drove.
And so, for this mini-machine, we need:
-wooden slats
- large wooden board
-powerful electric motor
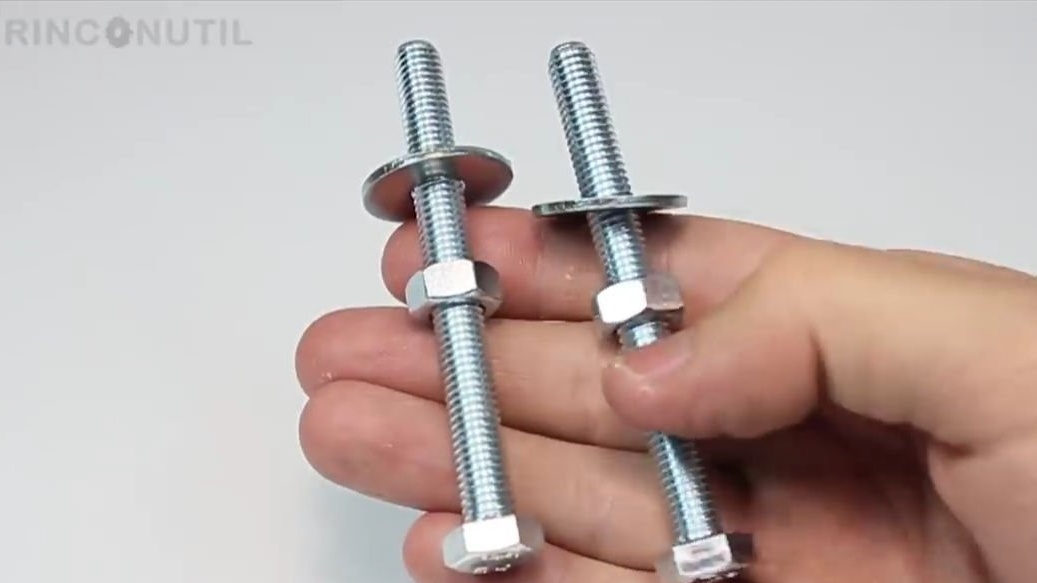
Large bolts and nuts to them (with washers of course)
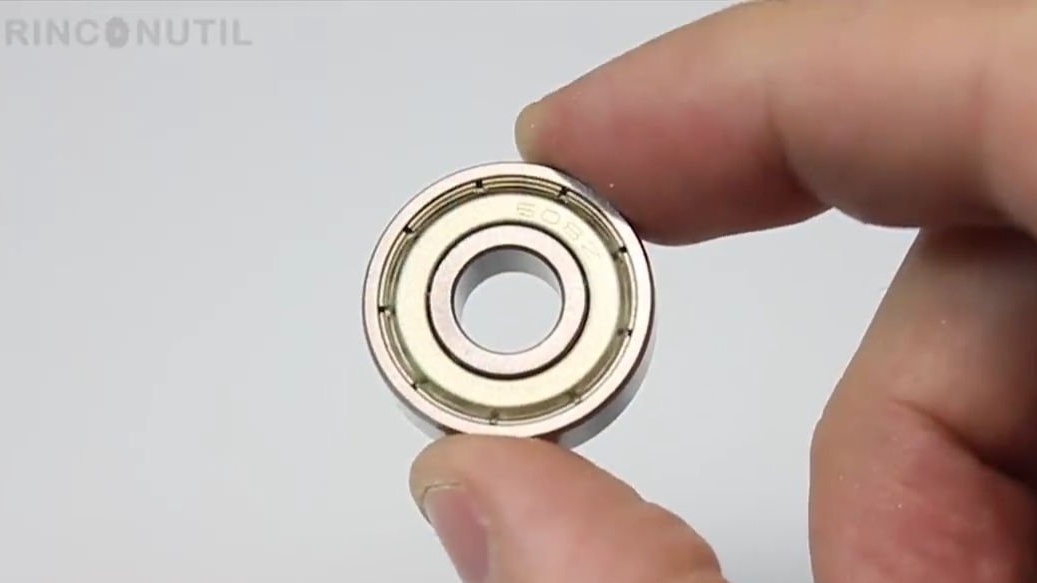
-one ball bearing
three nails
Of the tools we will also need:
paint glue
-mini drill
selection machine
screwdriver
-compass
line
pencil or marker
Let's get started.
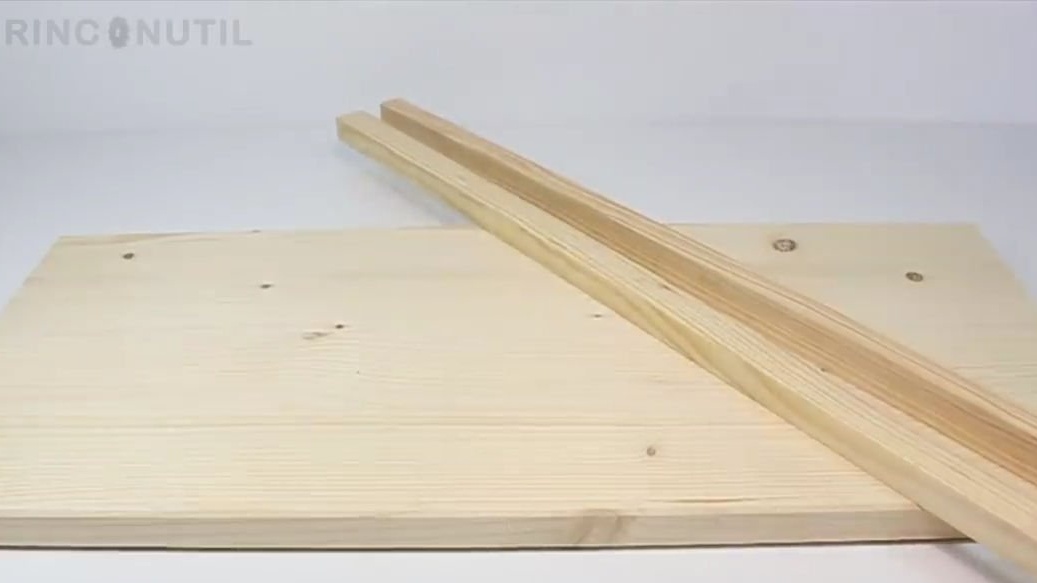
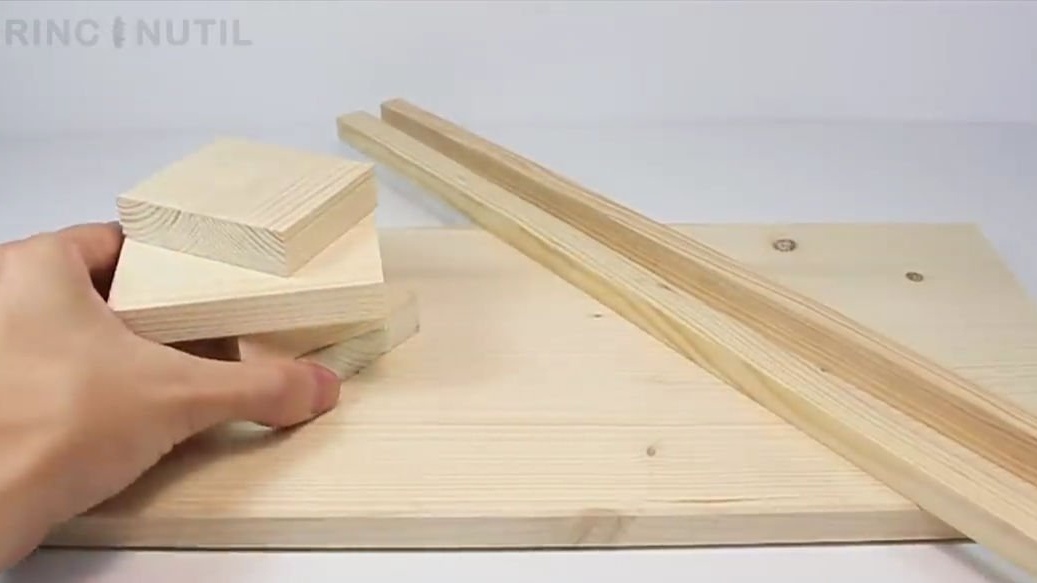
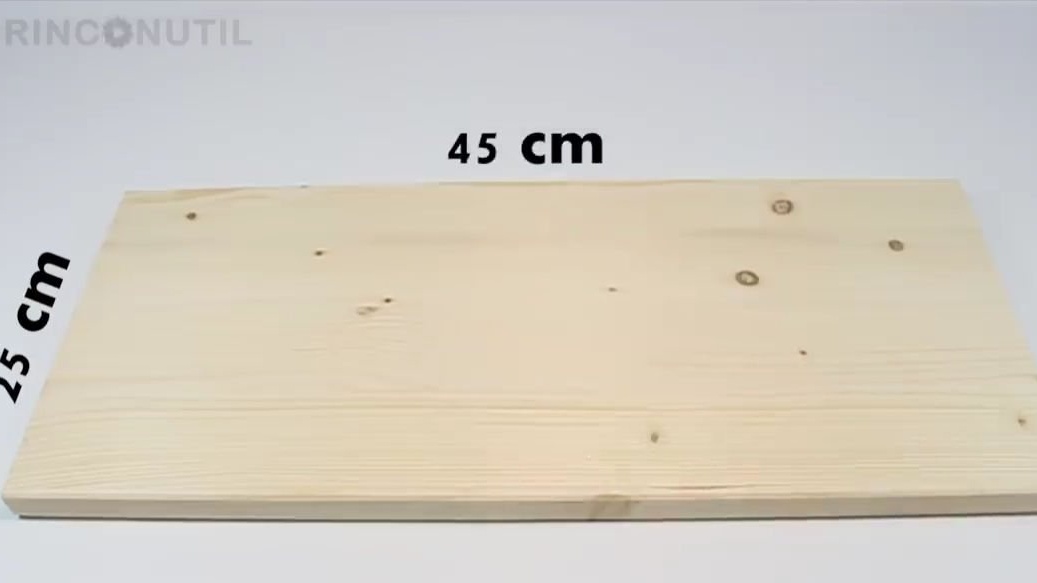
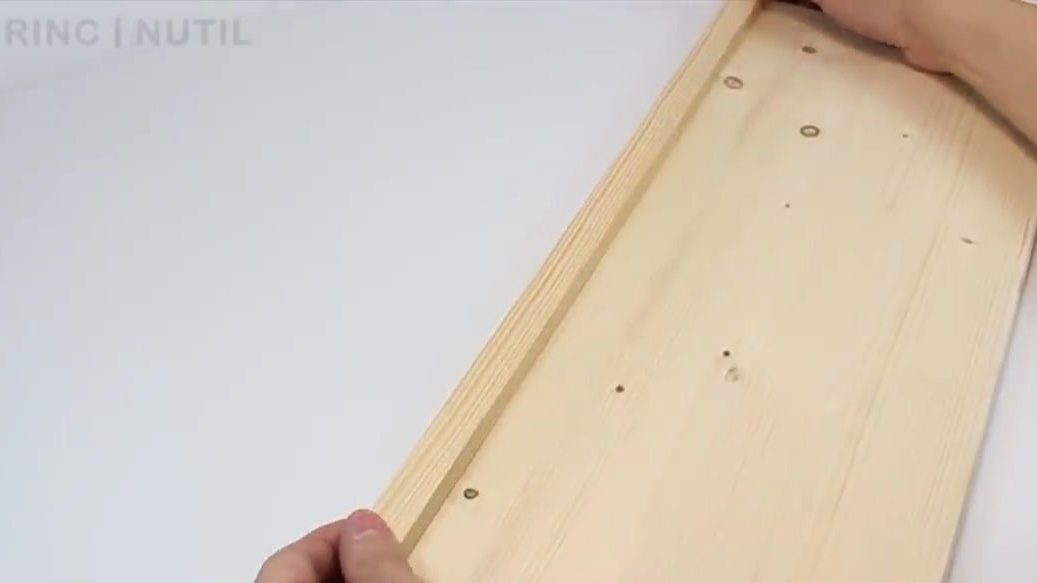
First of all, we need to take a large wooden board (the whole lathe will be located on it, so it’s better to take the size you need), two wooden slats and four squares, also made of wood.
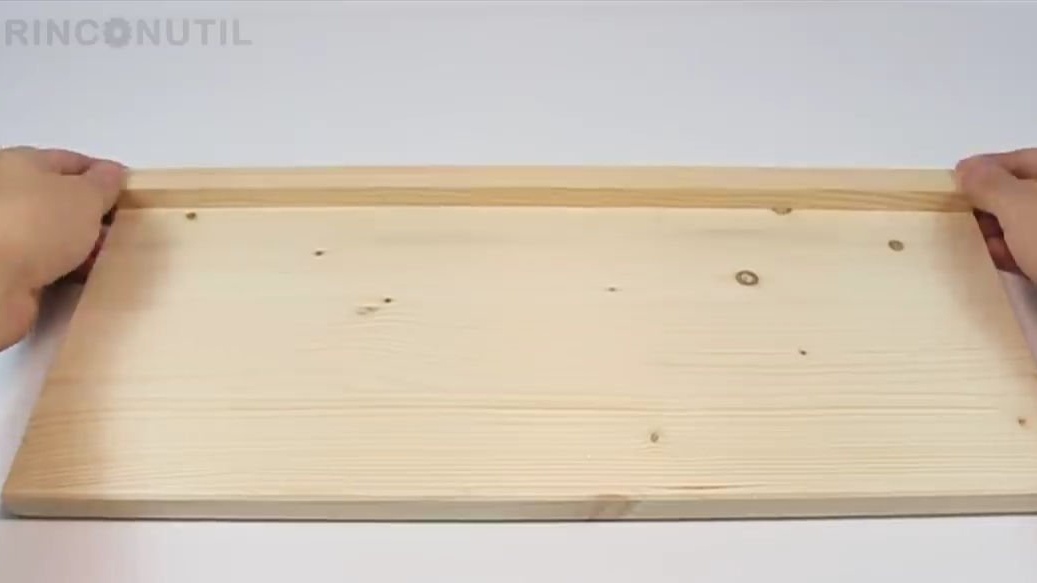
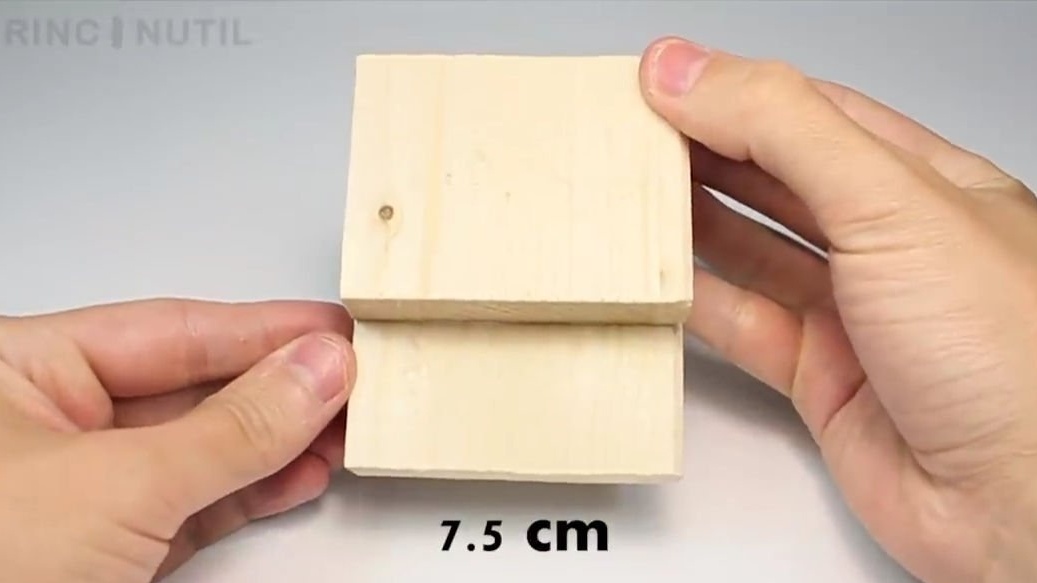
For the foundation of the structure, a blank with dimensions of 25 by 45 cm should be cut out of the board. On the big side of the board, one of the wooden slats must be glued, as you probably already understood, it should also be 45 cm in length. The author of the homemade glued using masking glue.
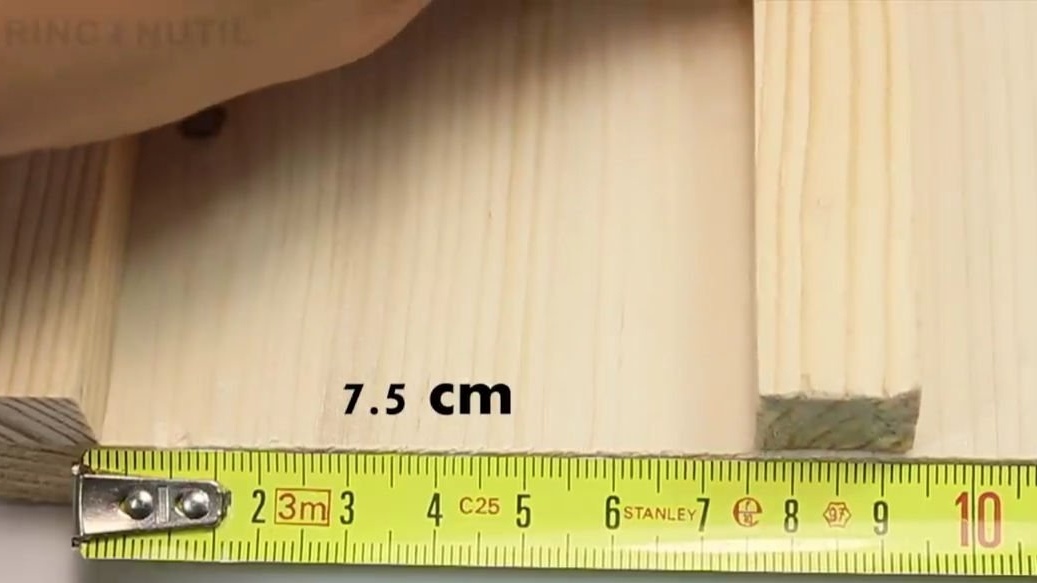
At a distance of exactly 7.5 cm, you need to glue the second the same lath, glue also with masking glue.
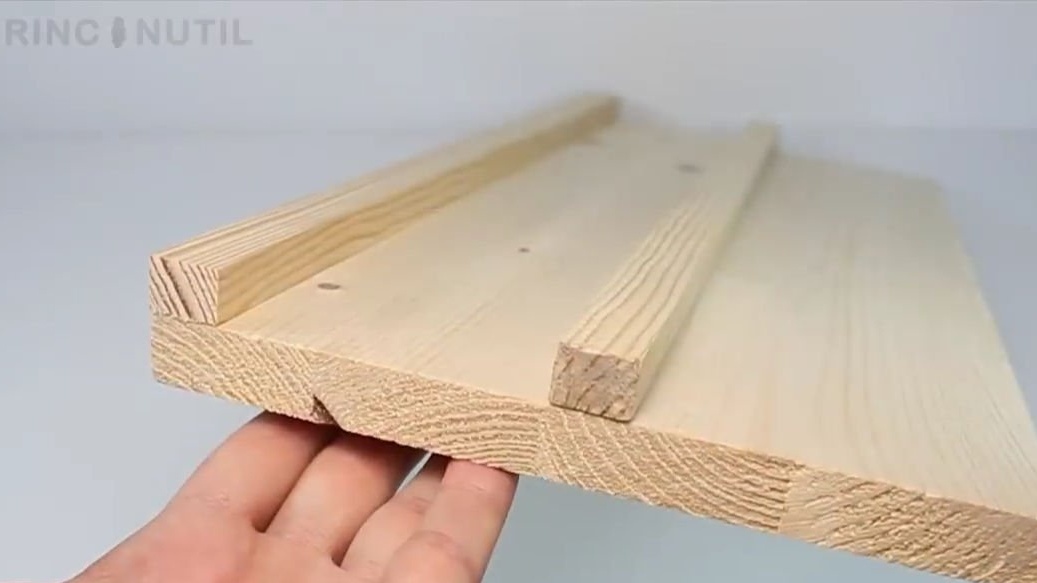
As a result, the design should be as shown in the photo below:
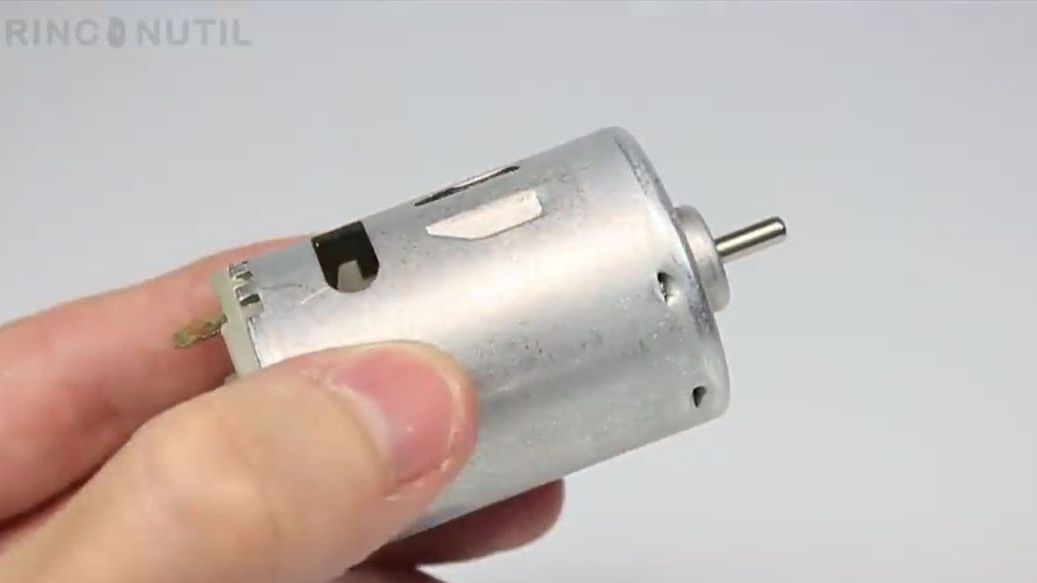
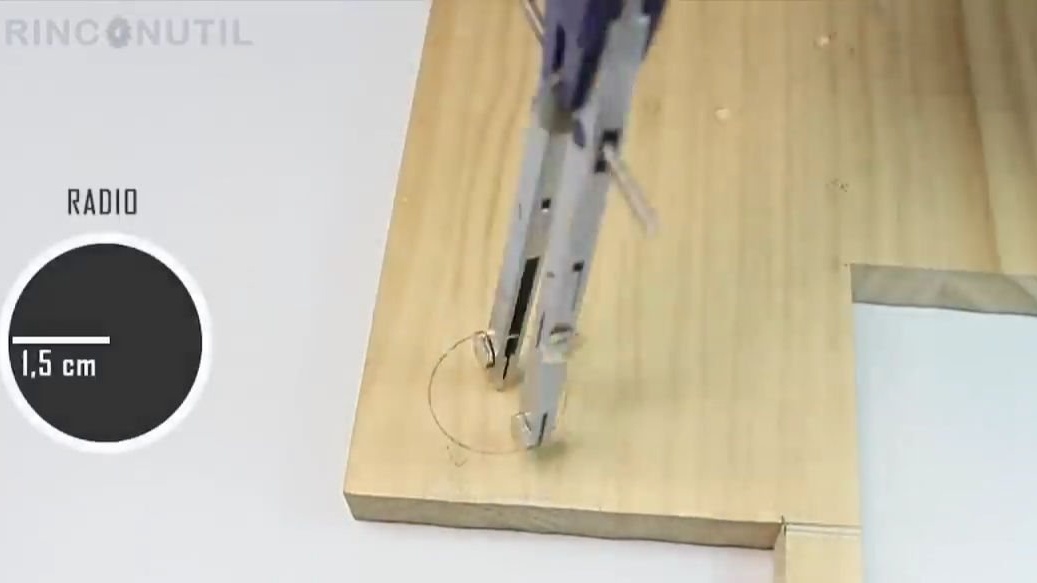
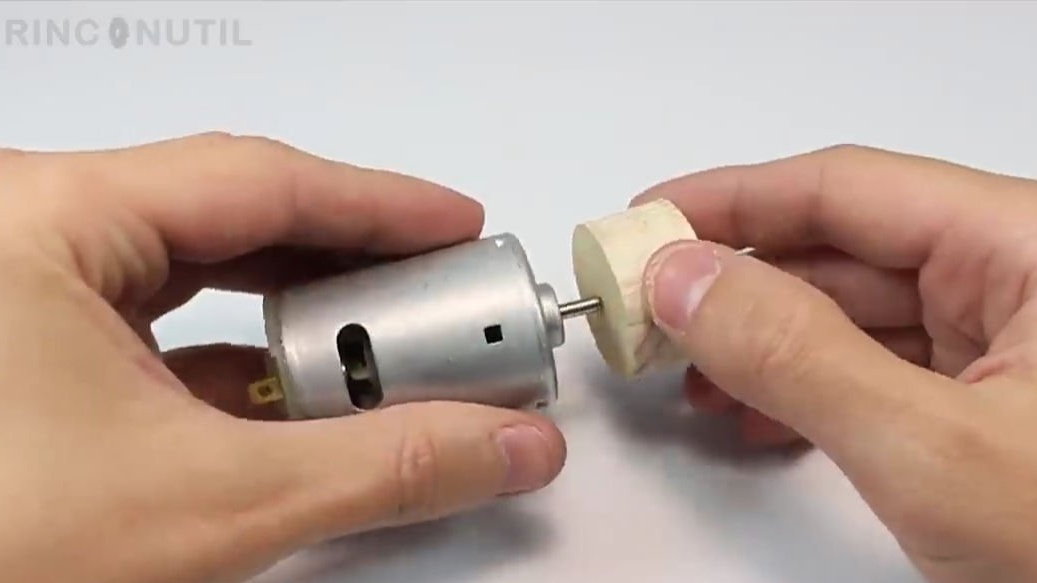
On the remains of the board, we draw a circle with a diameter of 15 mm with a pair of compasses. This circle will need to be put on the shaft of the electric motor, but before that we will do some manipulations with it.
First, drill a thin drill (the drill should be the same thickness as the motor shaft) the hole is exactly in the center of the circle, then we turn it over and drill three more through holes, of course as even as possible.
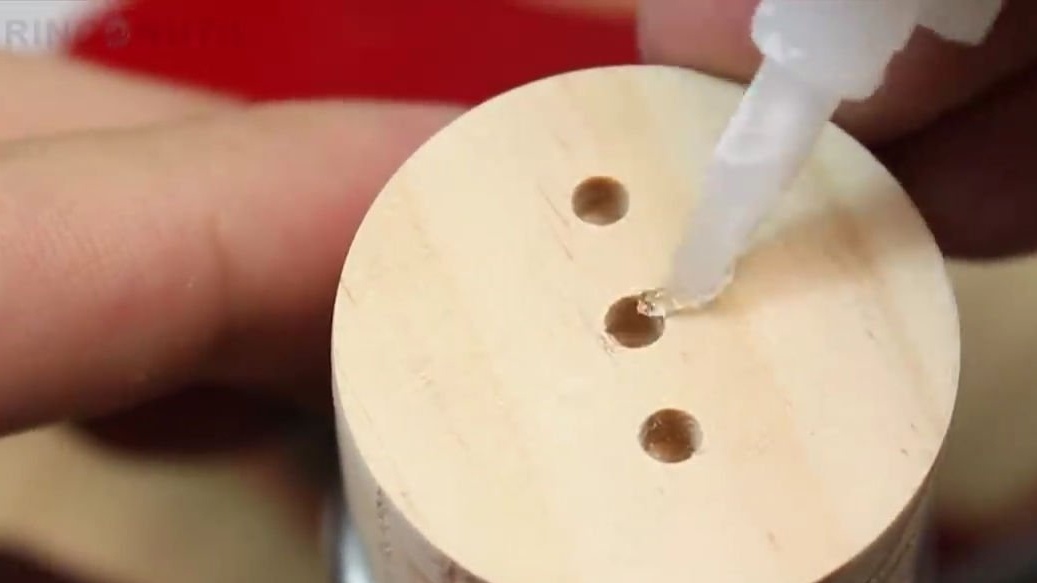
Done, now we drip a couple of drops of glue into the central hole and glue it on the motor shaft:

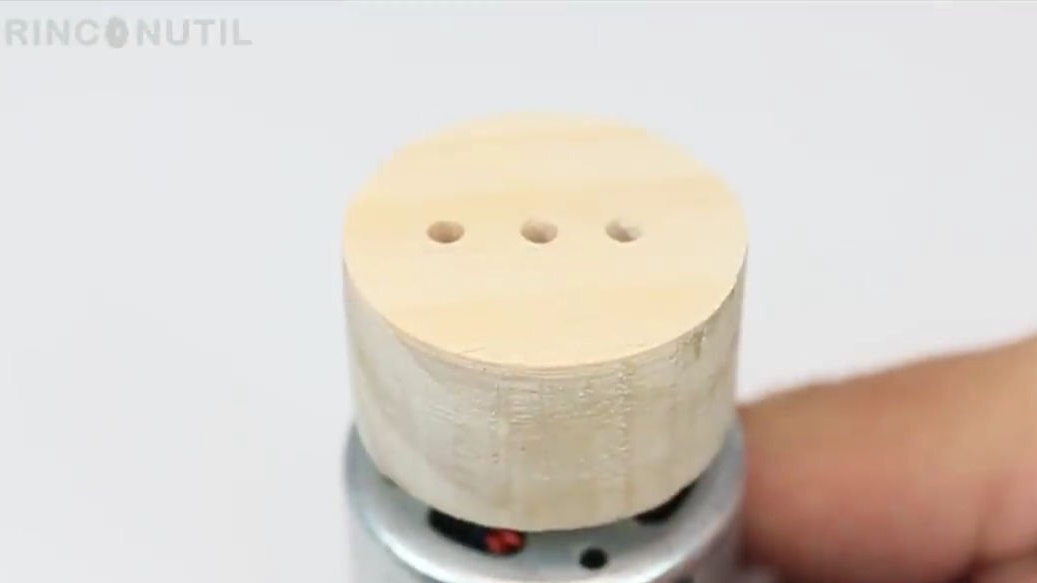
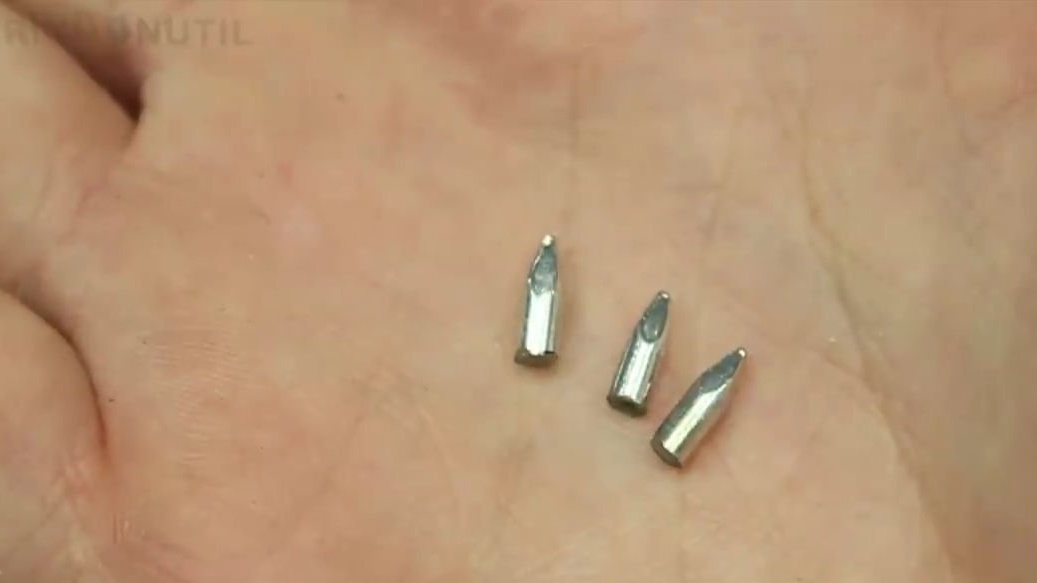
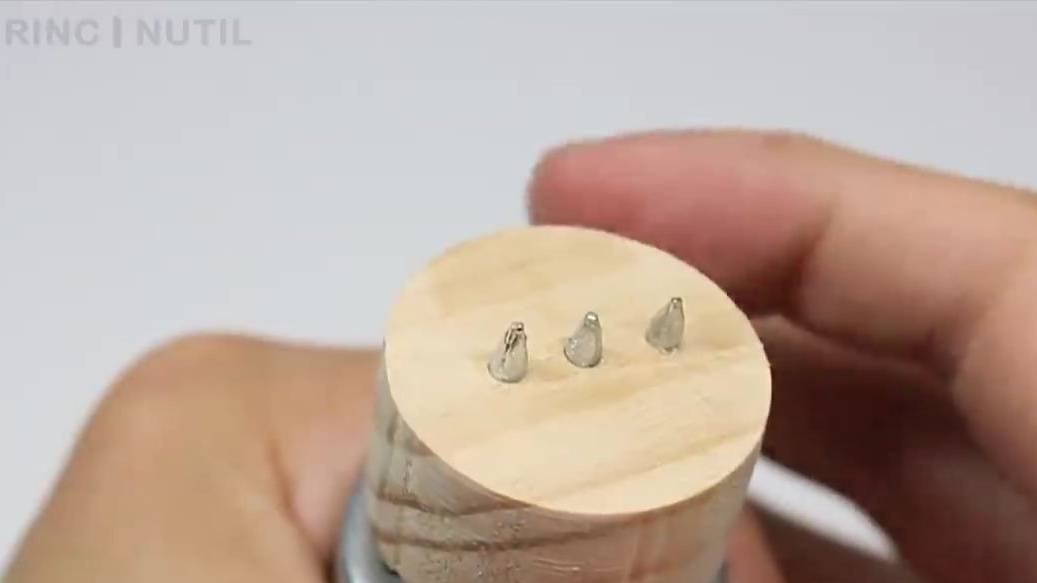
Now you need to take three nails and with the help of a boron machine cut off from them the sharp ends of the same size. Then again we put superglue into three holes on the circle, which made the action earlier, and insert the segments of nails there, the sharp part out. Everything should turn out like in the photo below:
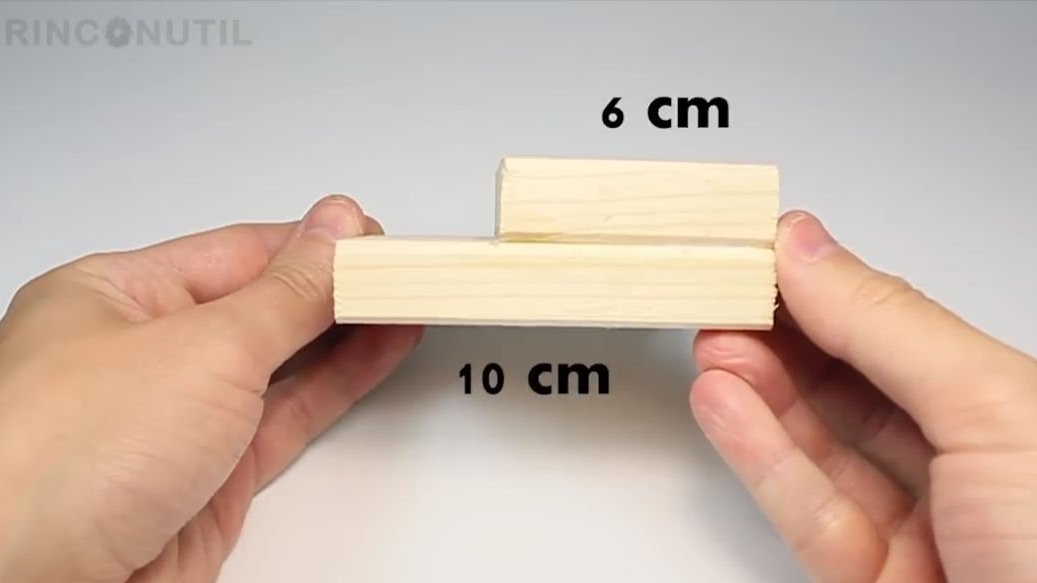
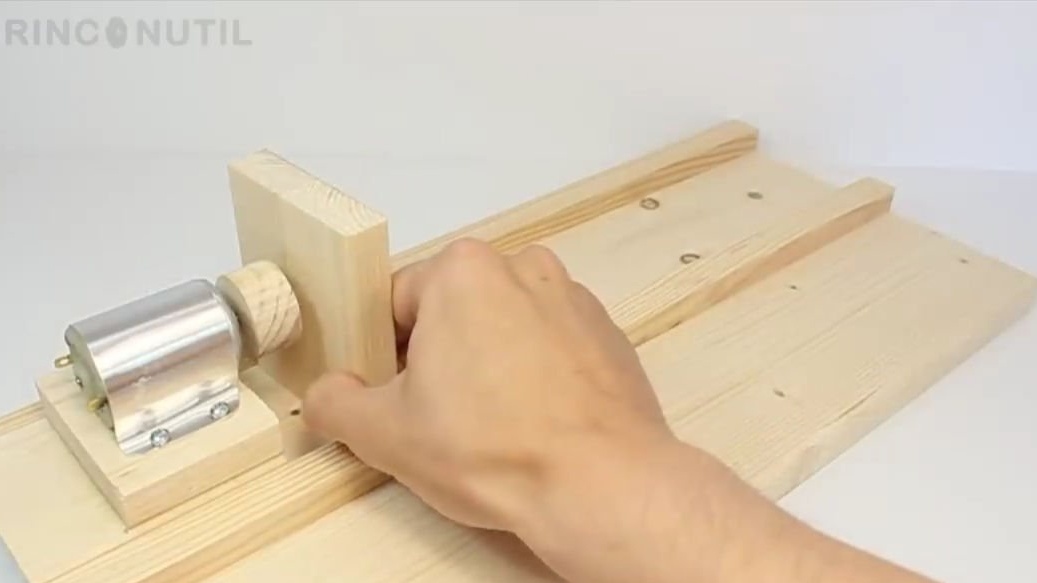
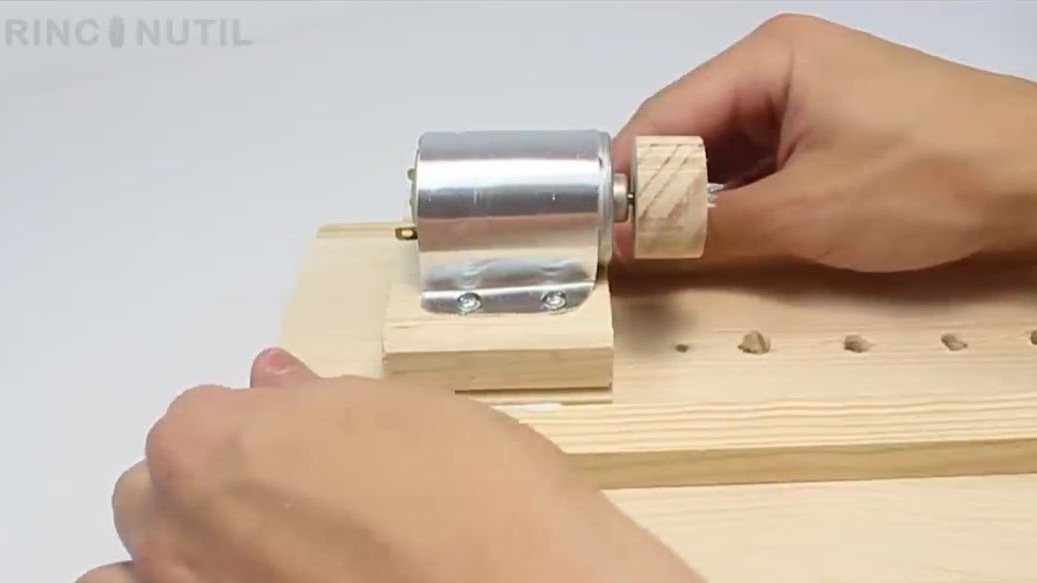
From two pieces of the board, equal in width but of different lengths, we make one part using masking glue. What the part should look like, you can look at the photo below, and if something is not clear stronger, then watch the video that will be at the end of this article. The width of both boards should be 7.5 cm, the length of the top - 6 cm, and the bottom - cm.
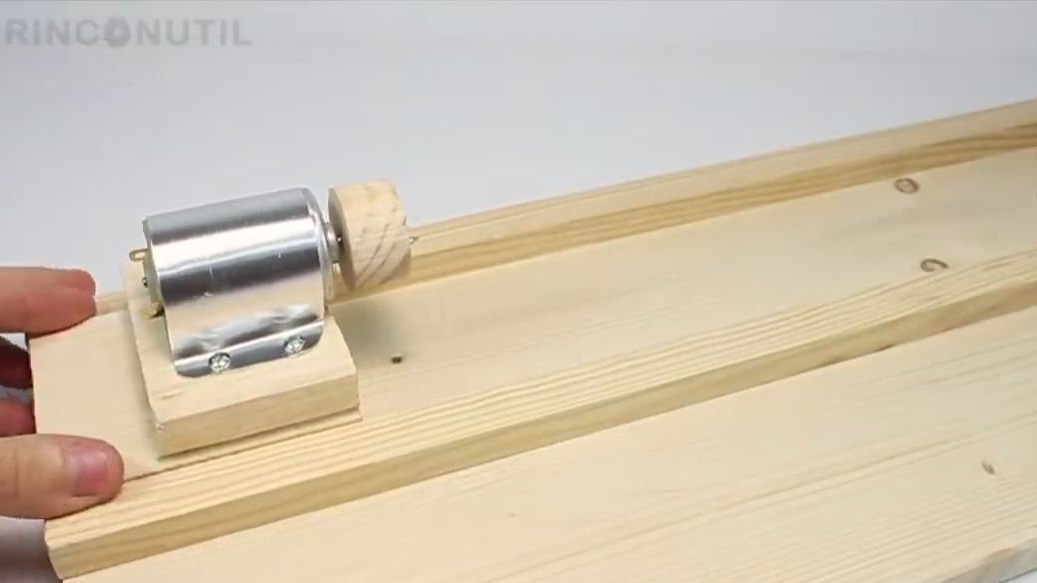
We install an electric motor on the top of this workpiece, pressing and fixing it with a metal brand.
This whole structure should fit between two slats on the main structure:

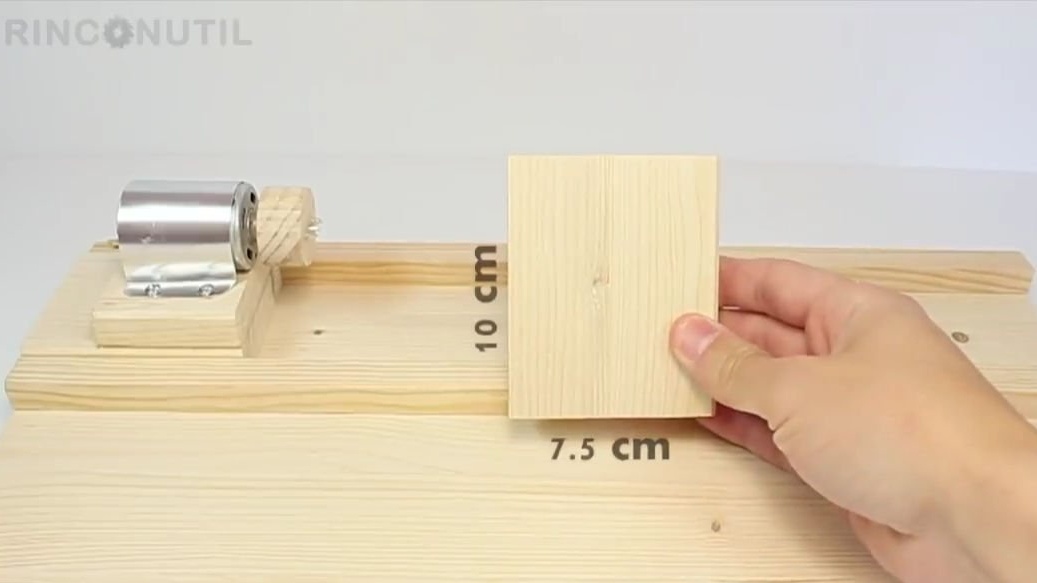
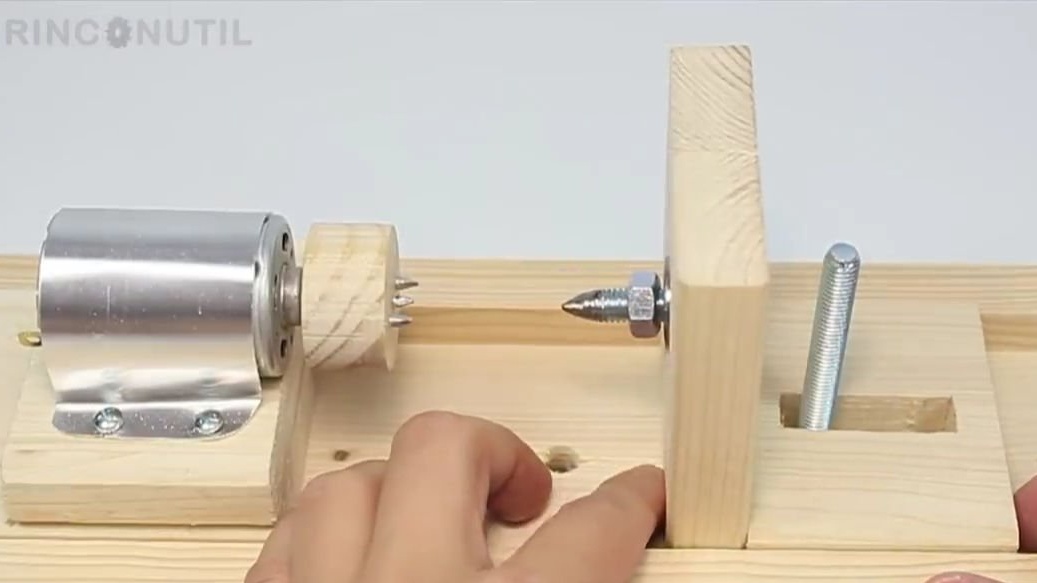
All from the same tree we make a part with sides 10 by 7.5 cm. It needs to be attached to the motor and mark the point where it intersects with the shaft of the electric motor.
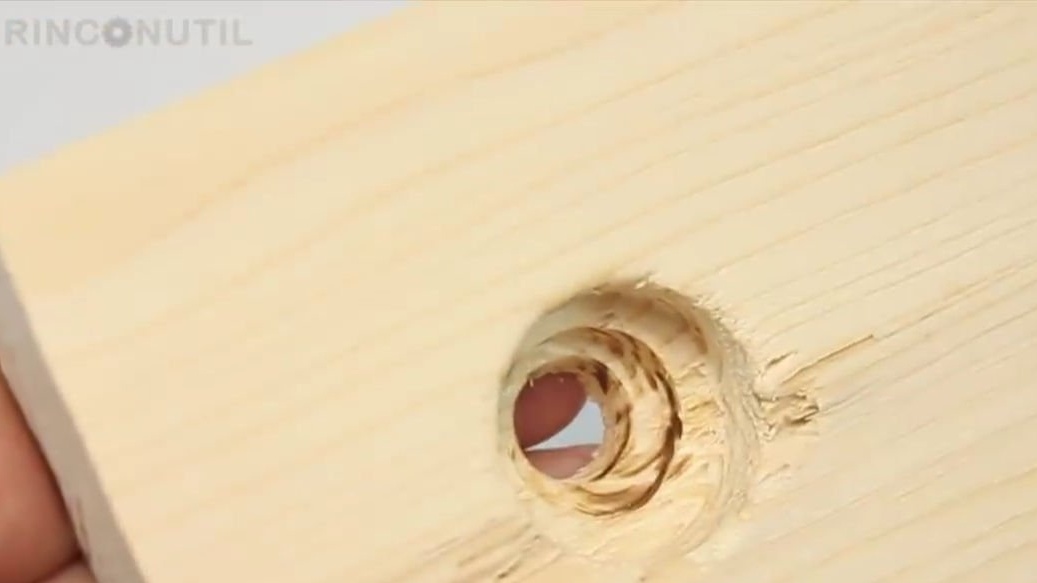
Now we take a special "chisel" (I constantly forget what is called), which should be with the same diameter as the ball bearing.
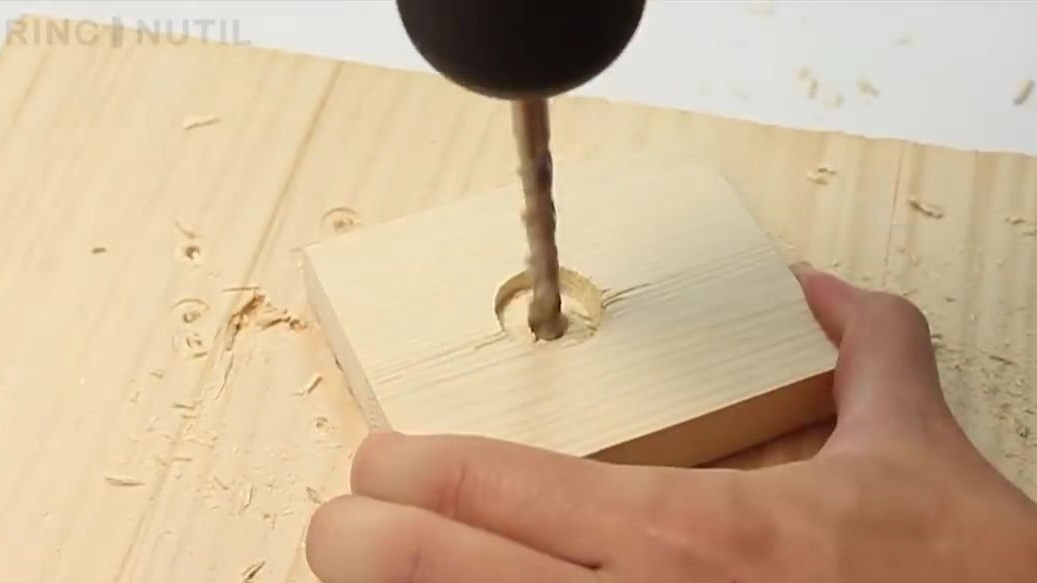
First, we drill them, and then a drill through several through holes, it should turn out something like this:
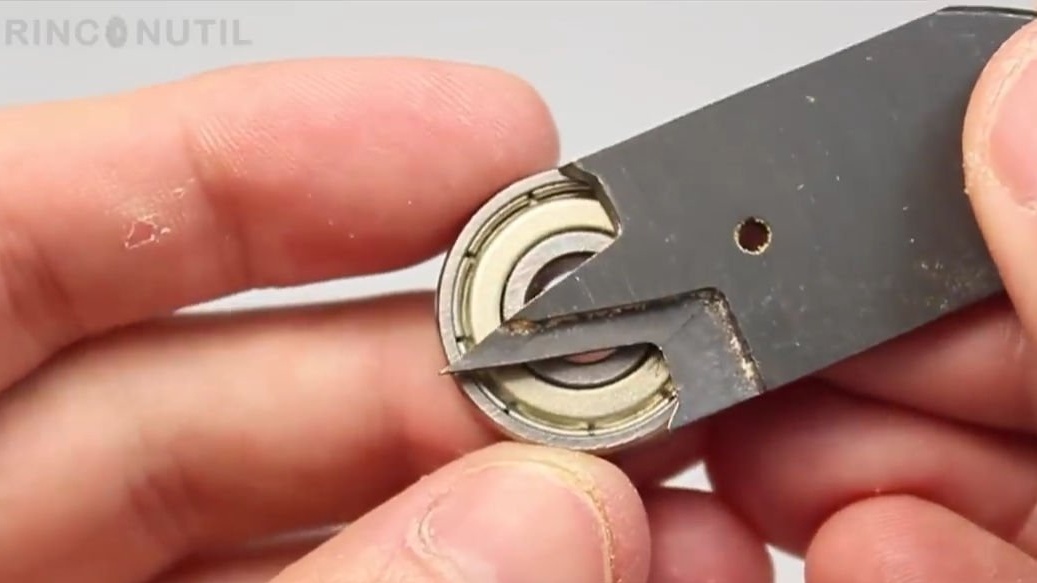
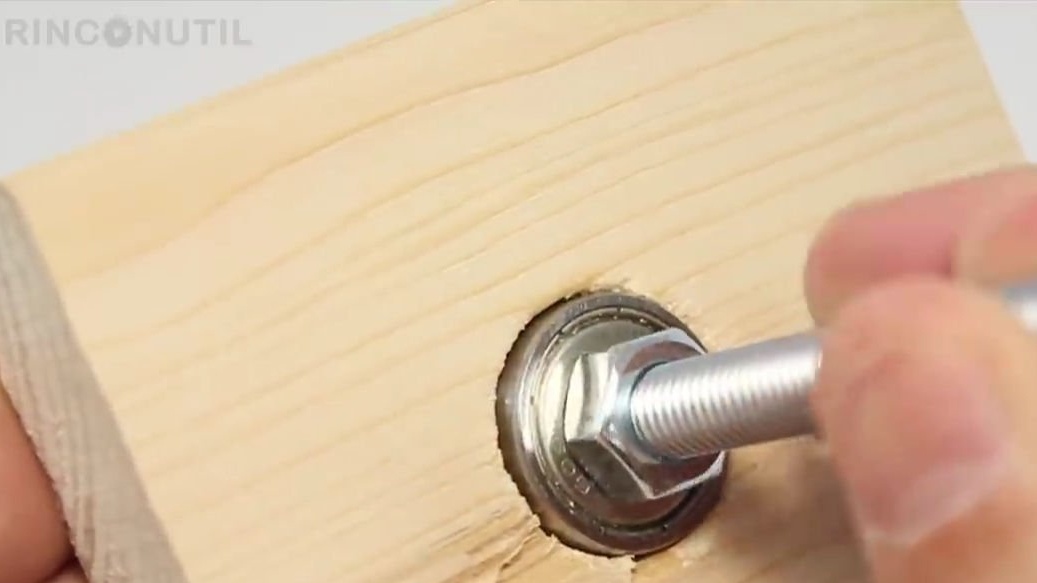
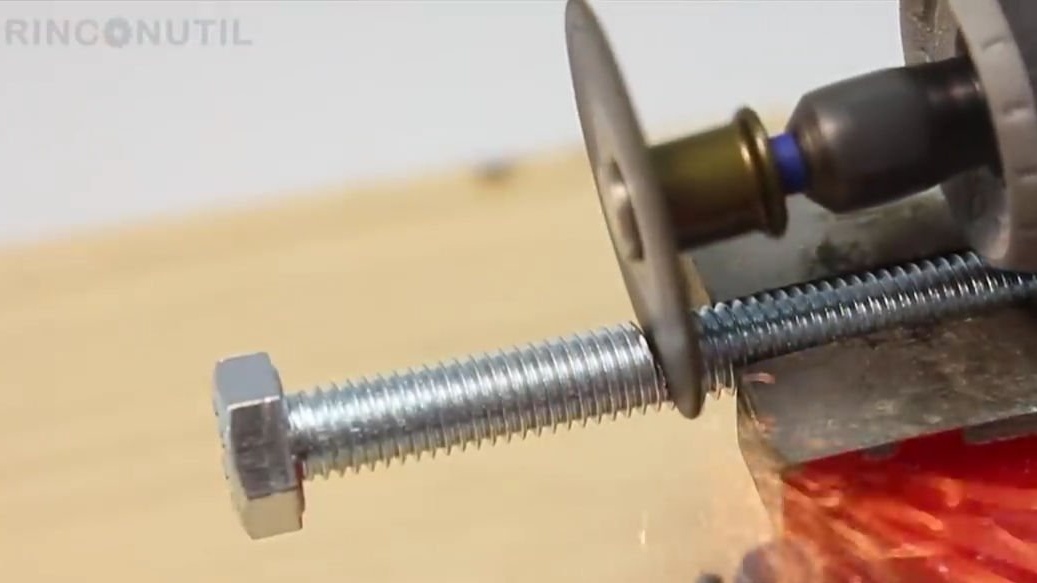
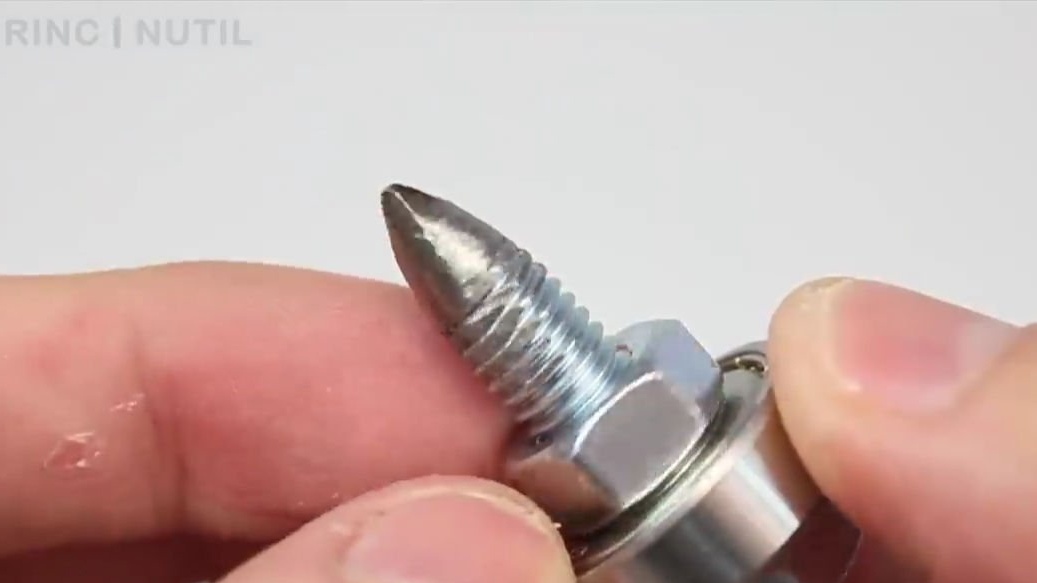
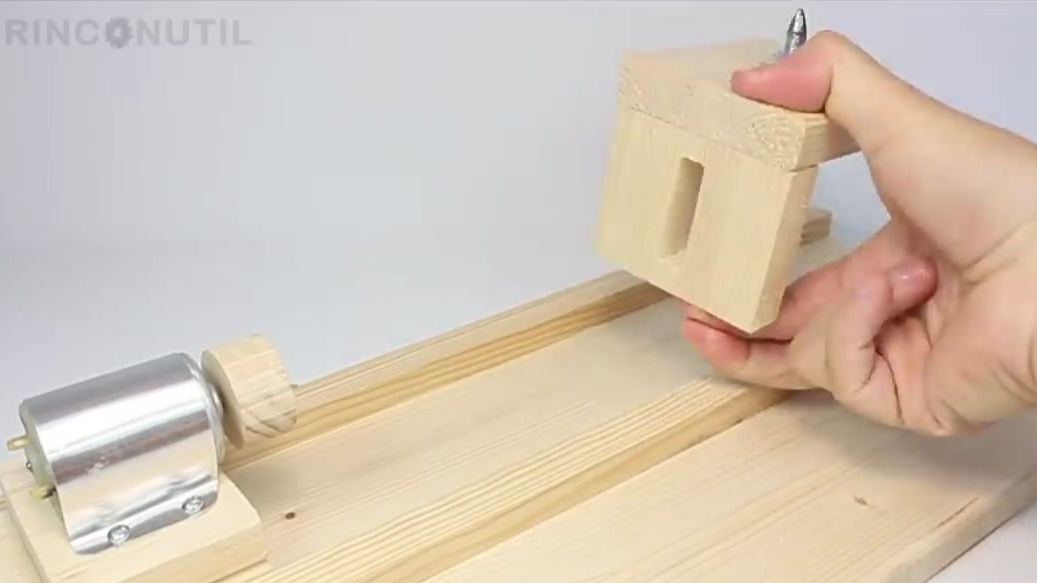
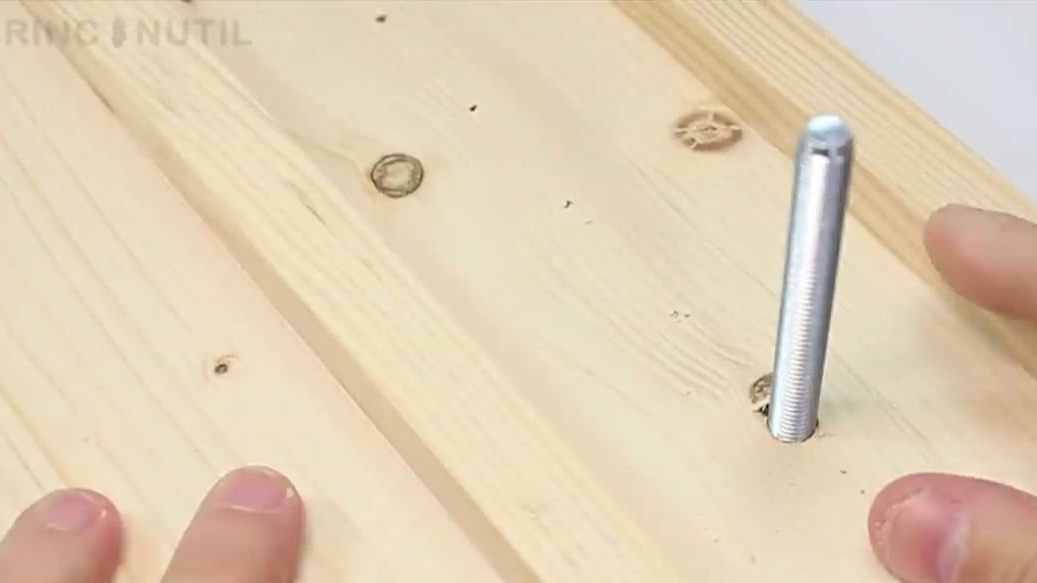
We insert the bolt into the ball bearing and fix it with a nut and washer, then measure a small distance and cut it off using a bur machine or grinder, then sharpen the end of the cut bolt. We insert this detail and naturally screw it into the wooden blank, which we did earlier:
We take another plank with dimensions of 7.5 by 5-6 cm and drill or cut a long hole in it in the center. Glue this blank to the board with ball bearing:
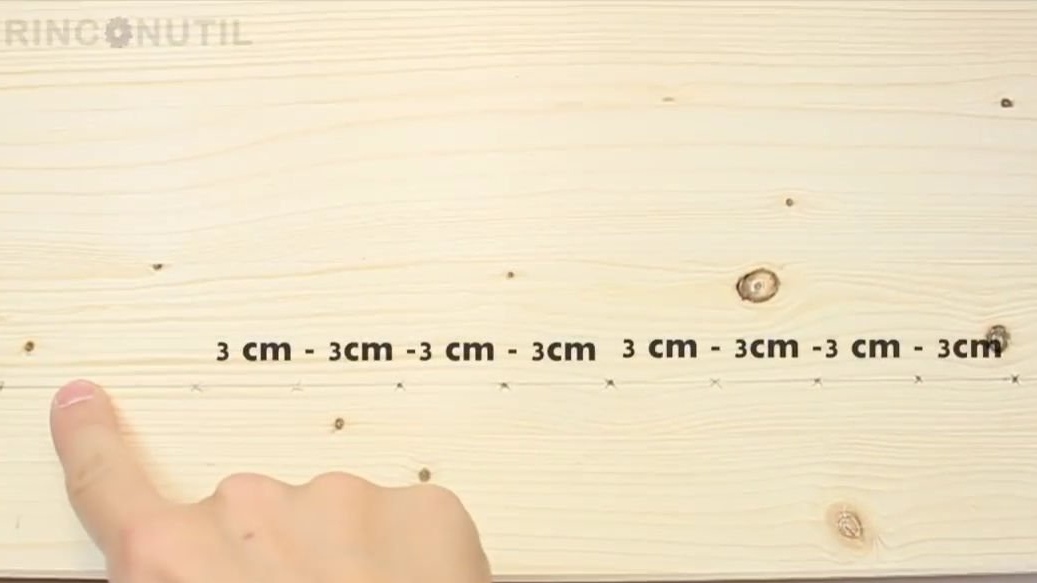
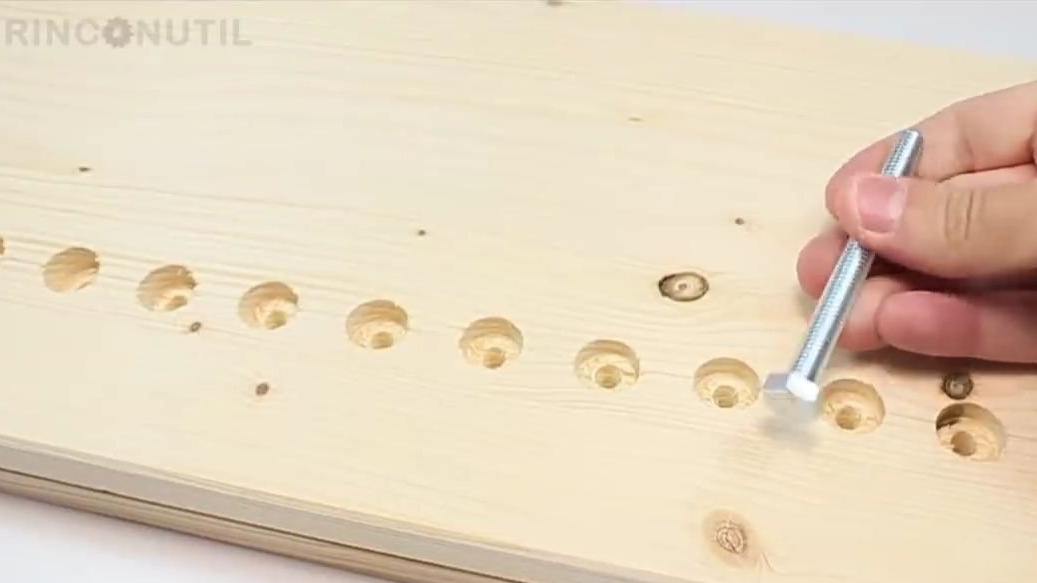
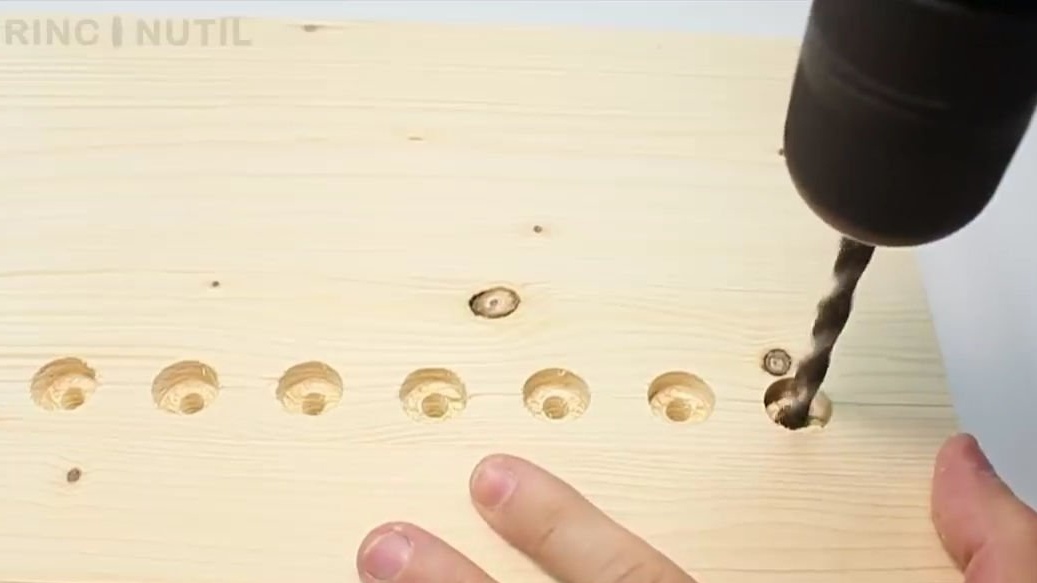
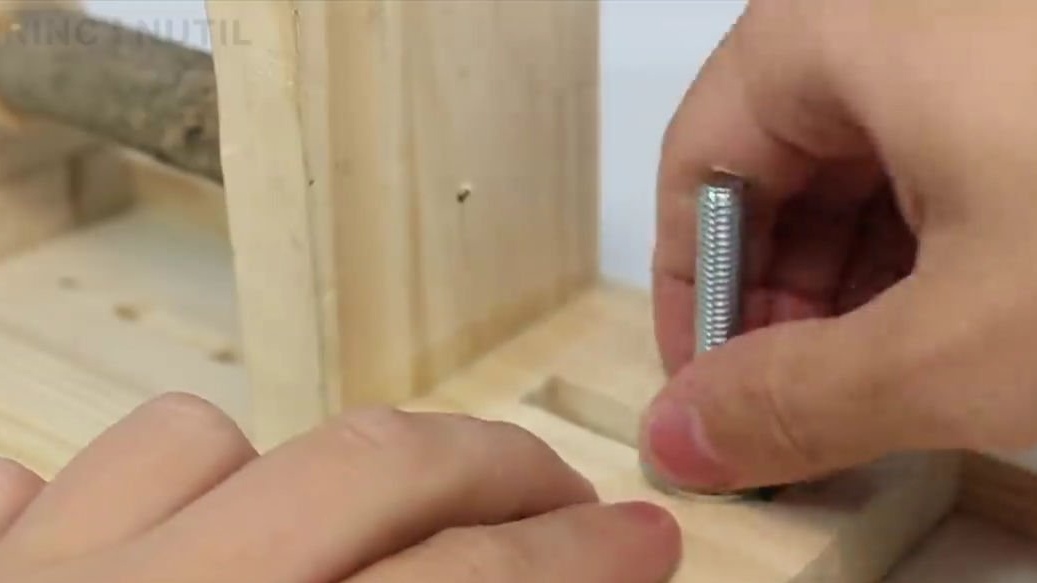
On the back of the main structure, mark a lot of marks at a distance of 3 cm from each other, after which we take a mini drill or screwdriver and drill holes in each mark, as shown in the photo below.
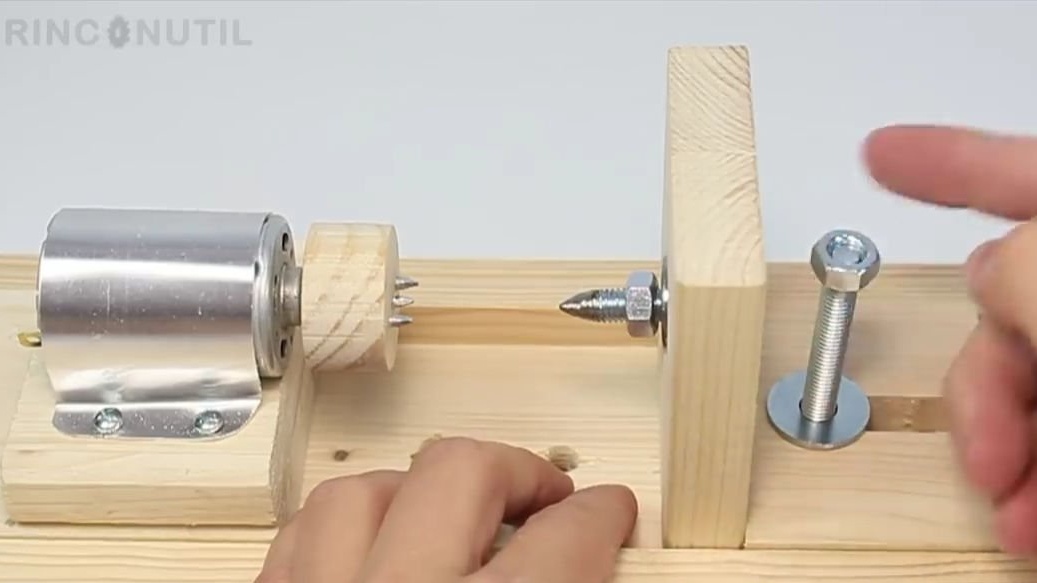
A bolt should be screwed into these holes, on which, in turn, a movable workpiece, which was made earlier, will be attached. Thanks to this method, it will be possible to adjust the machine to the desired dimensions of the product.
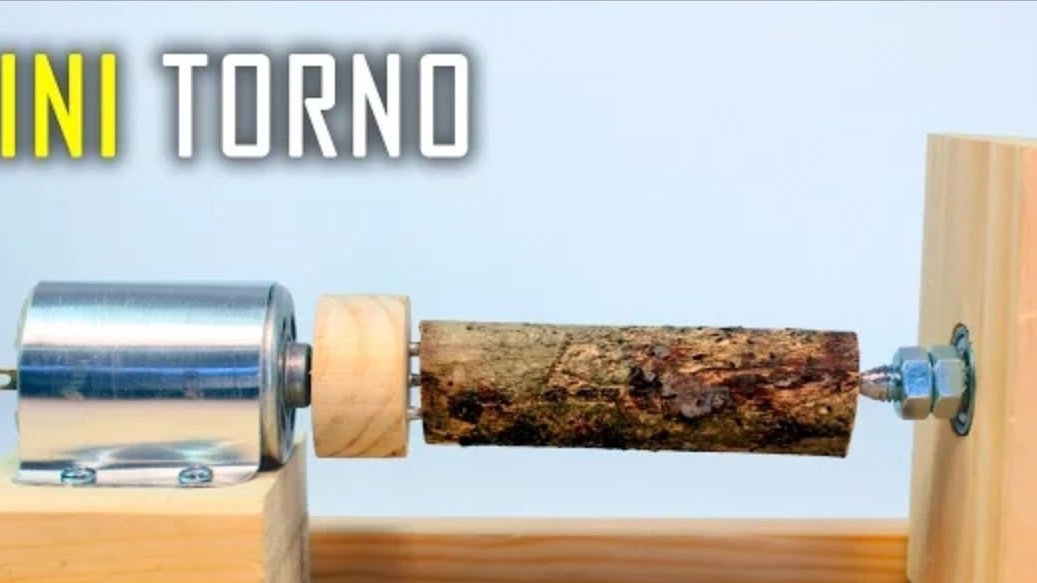
Well, we test what we got. Everything should look like this:
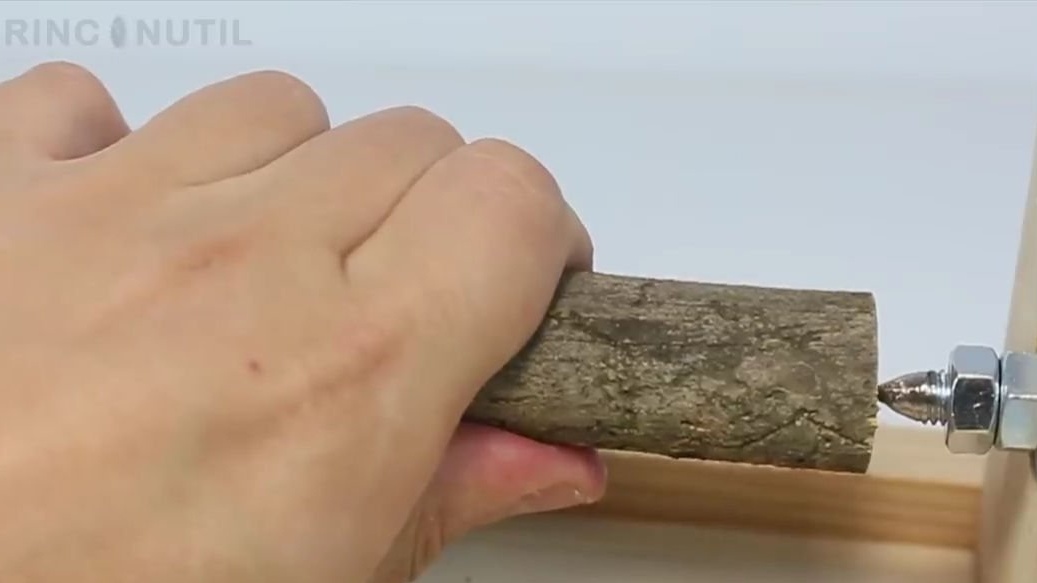
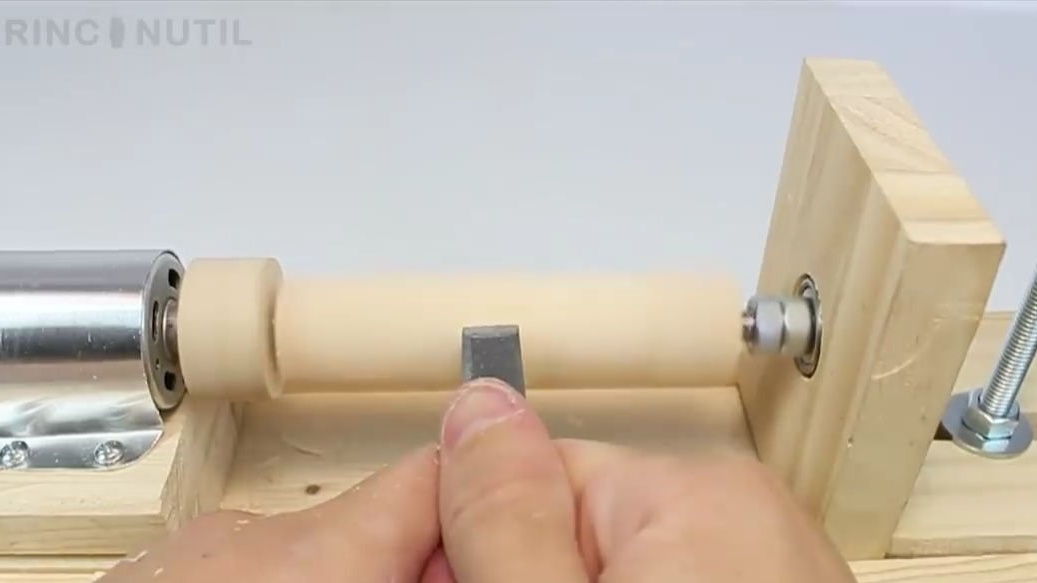
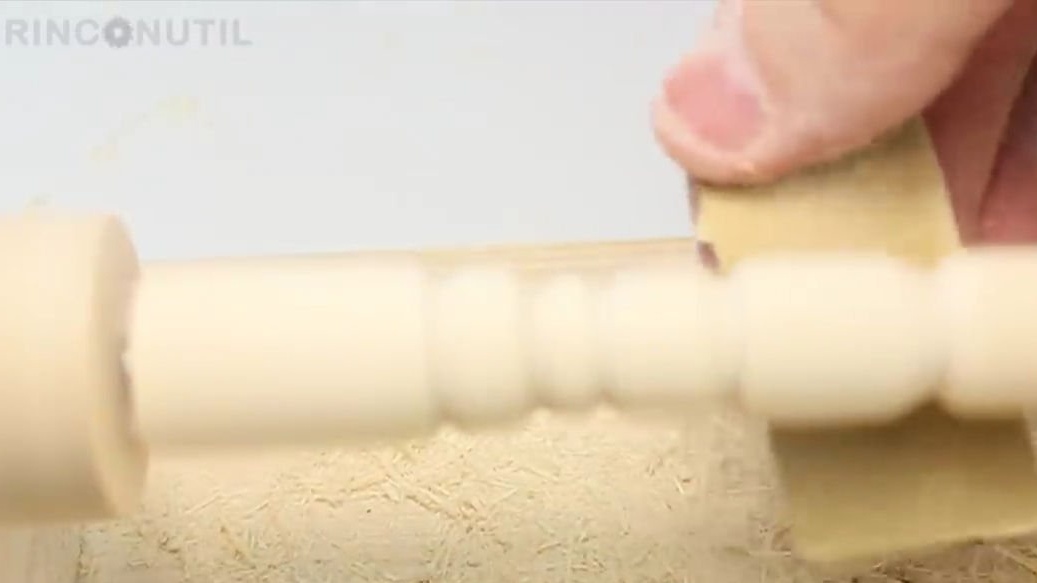
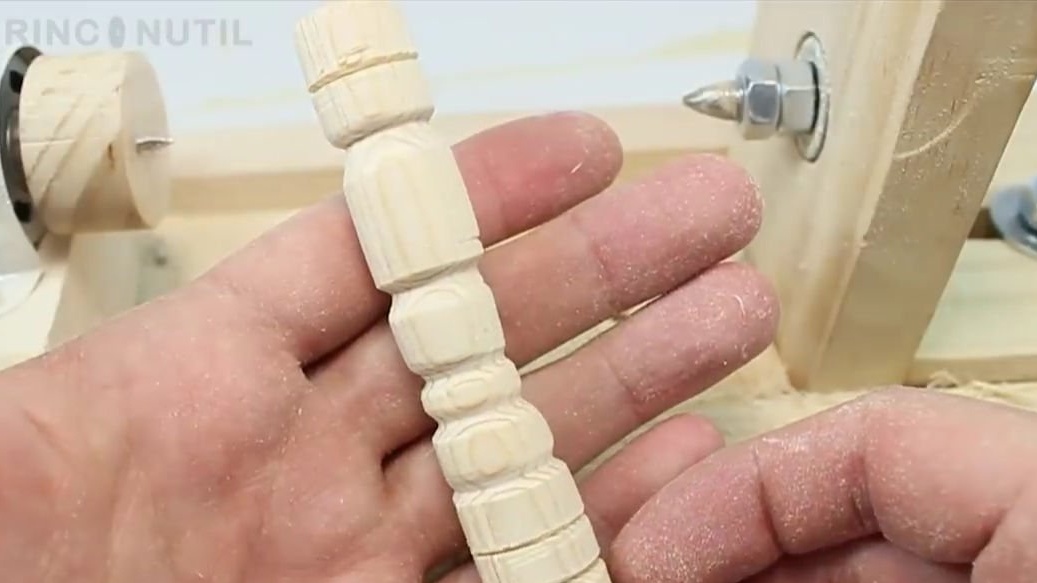
That's it! A simple mini lathe is ready and it remains only to test it. To do this, we need a not too thick branch, which we will process. We insert it on the nails (those that are located on a circle from the motor) and clamp on the reverse side with a pointed bolt, clamp the bottom bolt so that the structure does not move and that’s all, it remains only to supply the power your motor needs and enjoy the wood processing.
By the way, no protection is provided in this homemade product, therefore it is necessary to work with safety glasses and best of all in the manufacture of the machine, it is best to add a protective element, similar to those used in full-fledged lathes. In general, follow the safety rules!
By the way, this machine works just fine, and as I said at the very beginning of the article, if you increase the homemade scale, add a more powerful motor and put in good protection, you get an almost full-fledged lathe, which, moreover, will not take up much space and cost he certainly will not be a lot of money.
Here is a video from the author with a detailed assembly and testing of this homemade product:
Well, thank you all for your attention and good luck in future projects, friends!