
Skin treatment is much easier than you think, and the results can be very impressive. All you need is a few basic tools, a little tanned leather of natural origin and a sponge with a little water.
This practical example shows how to take your project out of leather - whether it's a wallet, belt or key chain - to a new level.
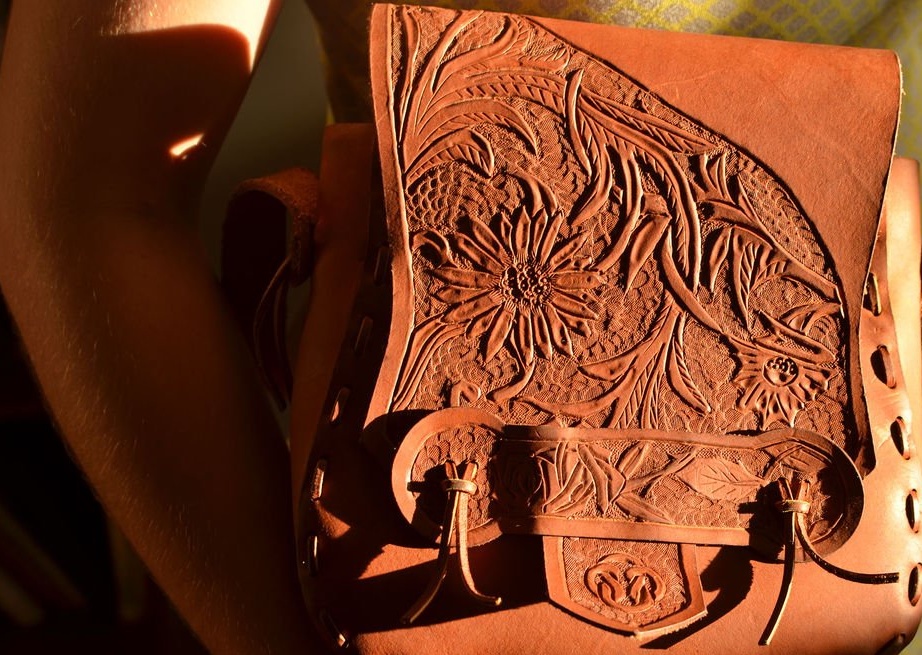
Skin Note:
Natural tanned leather is best for stamping. The whole chemistry of these processes is not very clear, but one thing is clear that skin cells are open. This means that if you pour water on your skin, it really absorbs it ... and then gives it a shape that you change it into while it is wet. Working with the skin is very pleasant and easy.
Tool Note:
At first, you will not need work tools for hundreds of dollars. Start small. According to the author, the real necessities are a rotary knife, a background tool and a hammer. Some shader will not be superfluous either, but in extreme cases you can use a spoon or something with a flat base.
Design Note:
Be creative. People always like to make leaves and flowers - this is what the author demonstrated - but there are other really good projects that you can implement. Look for inspiration in Google and Yandex images.
Step One: How to best transfer your design to the skin
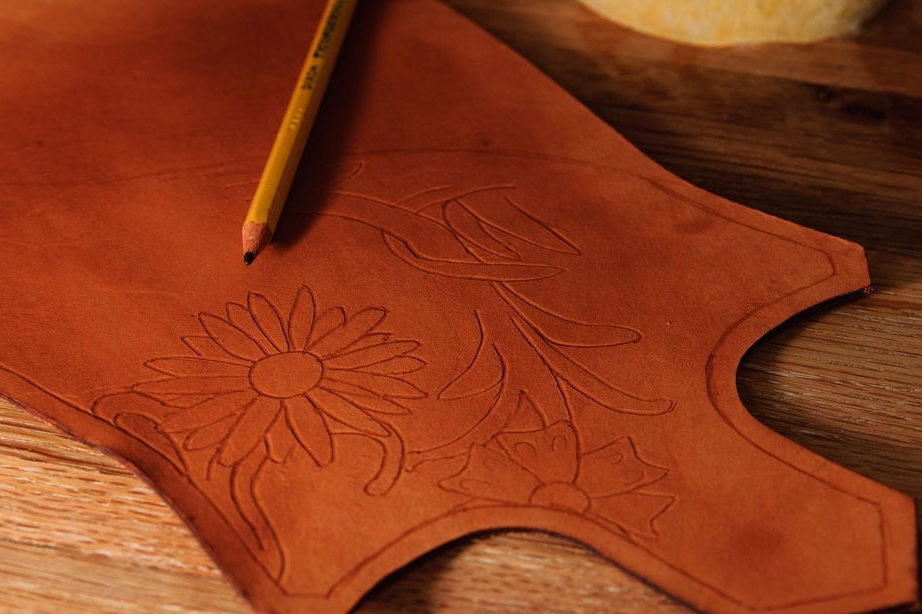

There are a couple of standard ways to transfer your design to a leather product.
Method 1: translation from the printout.
This is most likely the easiest and easiest way. This is pretty easy to do in fact.
Print the design.
Make your skin slightly moist *.
Put the pattern on the skin with the ink side up.
Track the design (you can use a special tool called a stylus, or a pencil, or something that will leave small dents on the skin).
* Moisten the skin with a sponge on both sides or quickly run it under the tap. Do not wet her so that she looks as if taken out of a puddle, because she will become too soft. It only takes a little wet. So that you do not need to squeeze.
Method 2: by hand.
The author prefers this method because he likes to come up with designs on the go. Usually he sketches a sketch, decides what he likes and dislikes about him, and then draws a modified version on his skin.
In this case, the skin was slightly dampened, because there was a dent where it was necessary to apply a drawing.
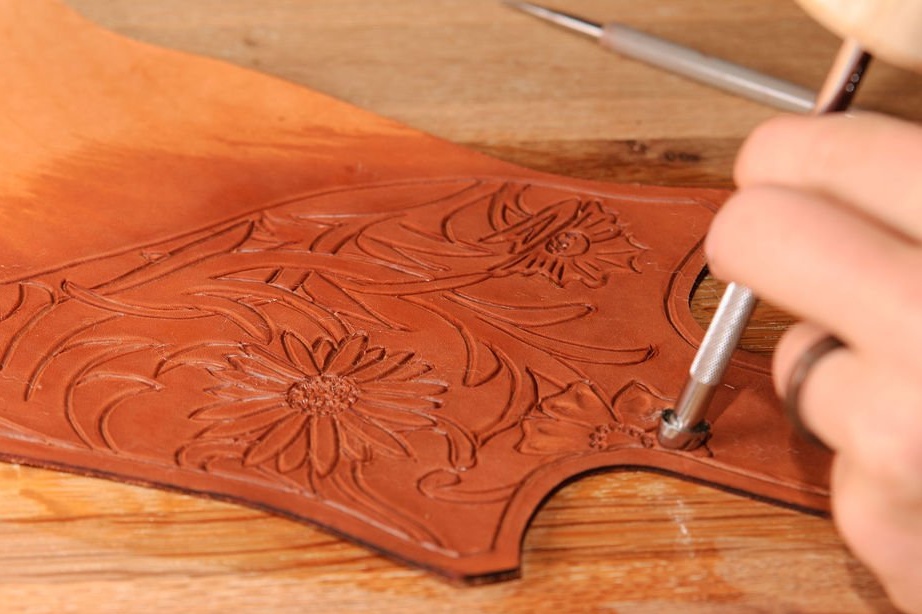
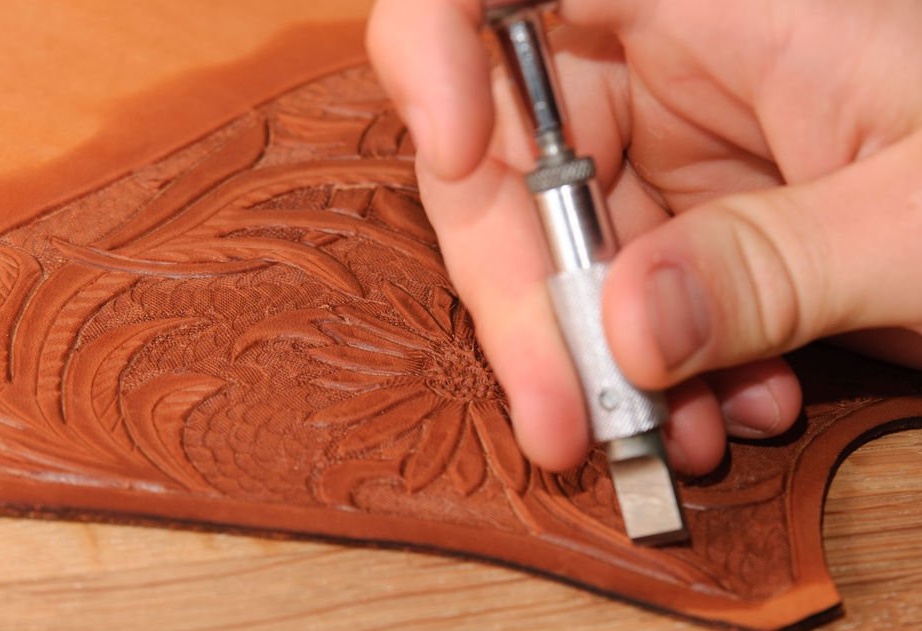
Step Two: Draw the lines with a rotary knife

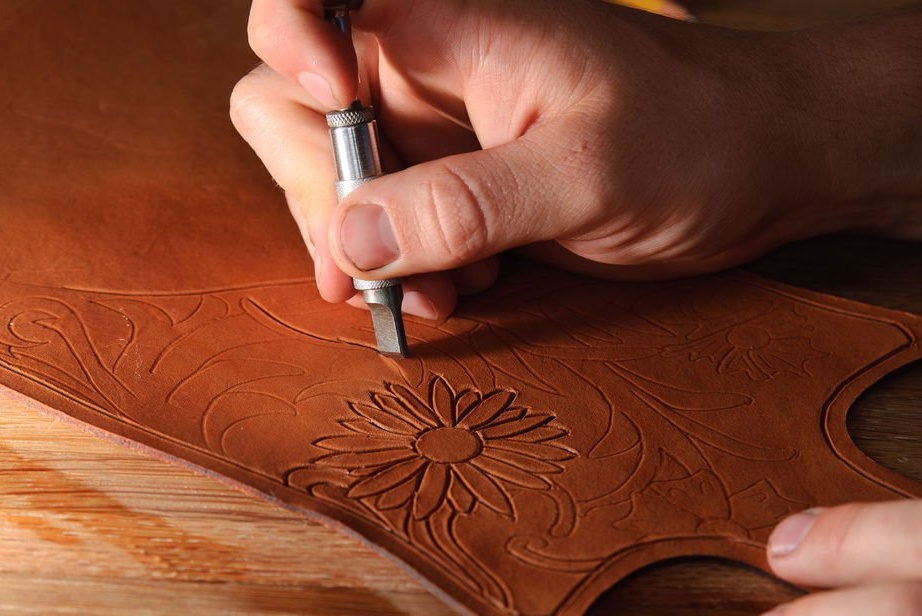
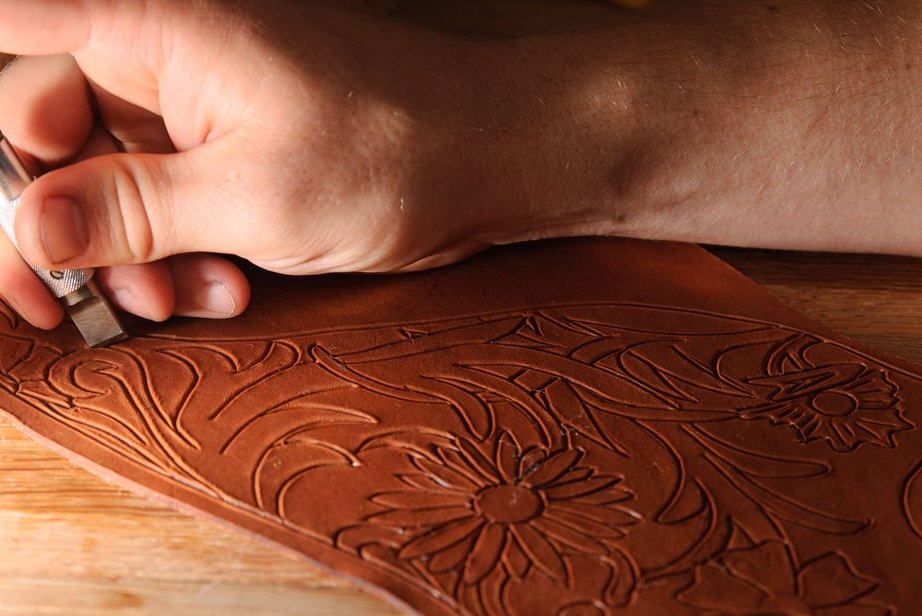
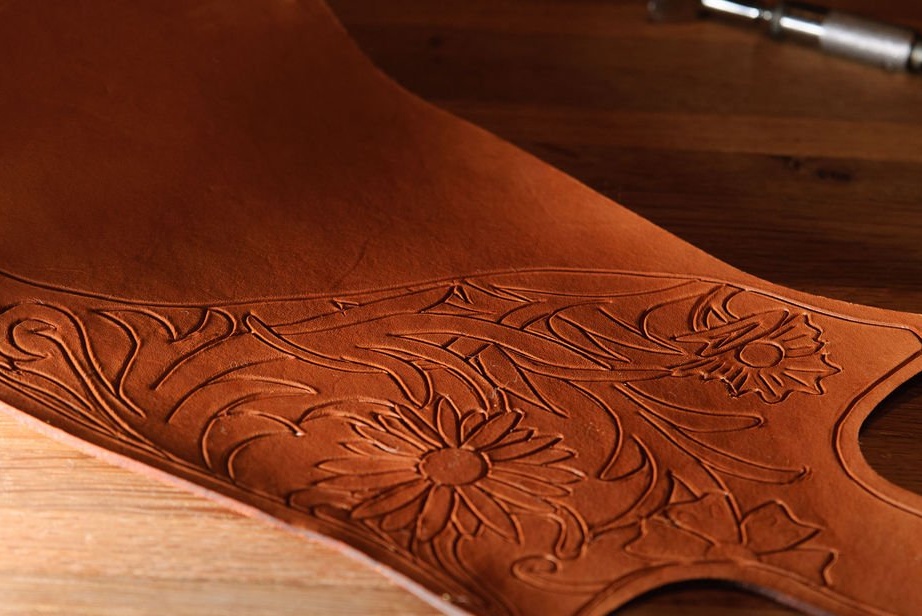
Use the swivel knife to cut through the lines.
Yes, the skin actually cuts through where a thick line or edge is needed. Do not cut to the end, but cut approximately halfway. The first time the author worked on the skin, he was afraid to spoil something and went through all the stages of failure ... The result was a rather boring and flat design. Be brave.
Warning: you may be tempted to stop after this step, because the design will already look pretty cool. Do not stop. All the main work is yet to come.
The photos show a good way to hold the rotary knife. It can rotate (because of this and its name), which makes it quite easy to cut really clean lines. Keep it sharp always.
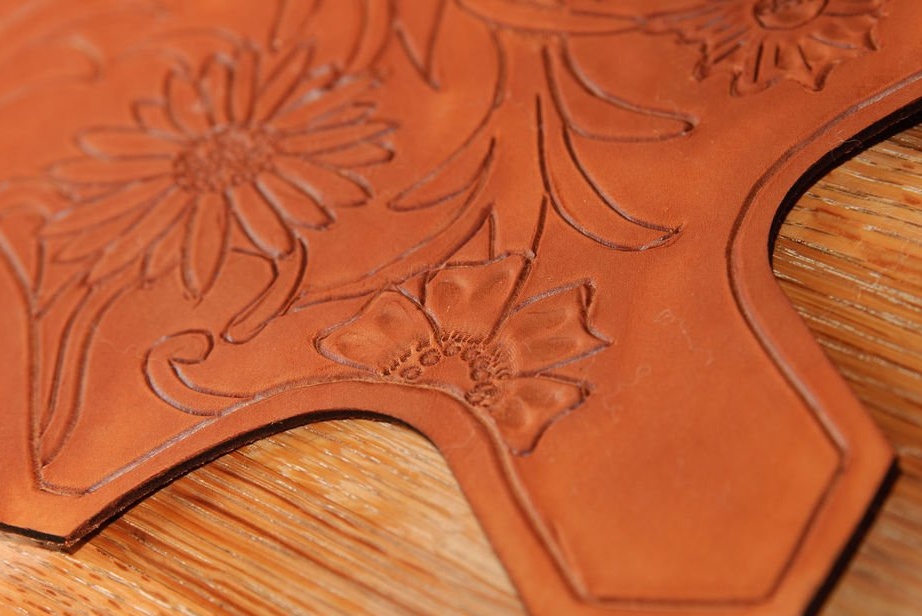
Step Three: Bevel Edge
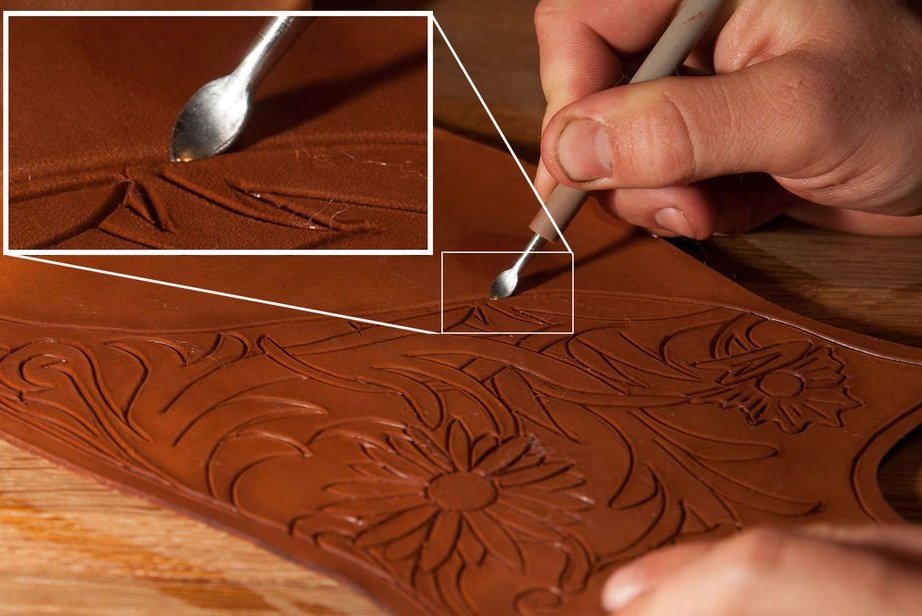

There is a special tool for chamfering. You can also use a spoon.
The idea is to mow the edges that you really want to highlight. Try to mow only one side of the cut, and do not touch the other. Or mow only the outside of the petals ... or any other that needs to be mowed.
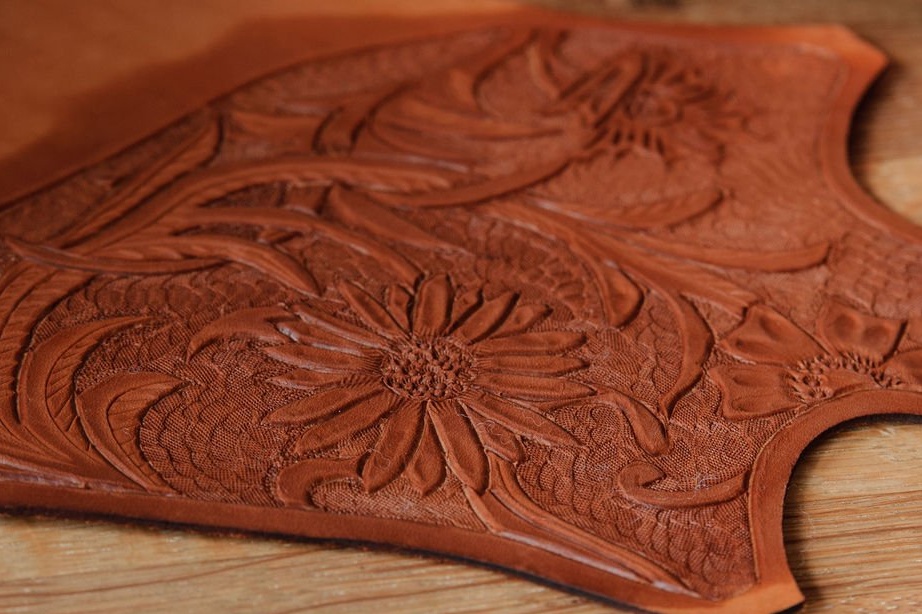
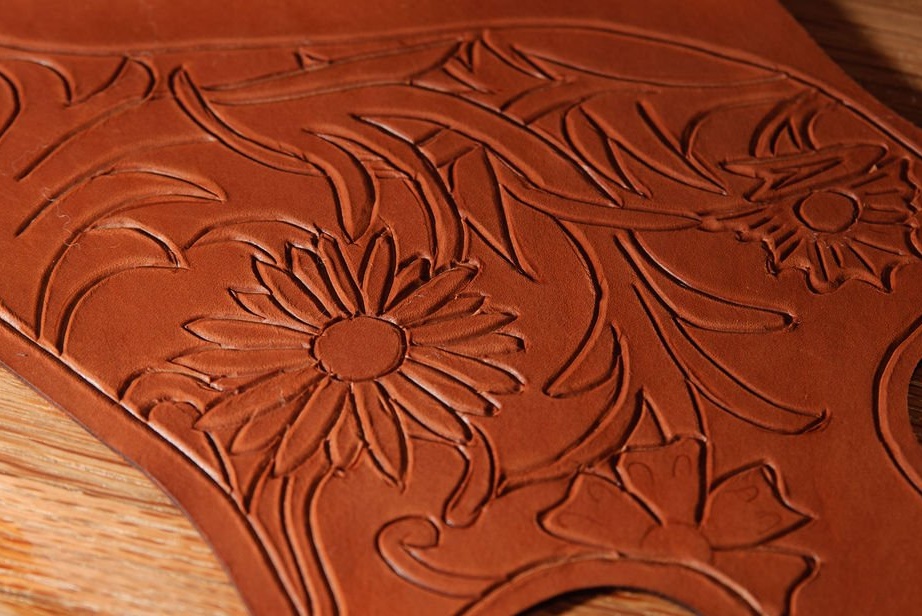
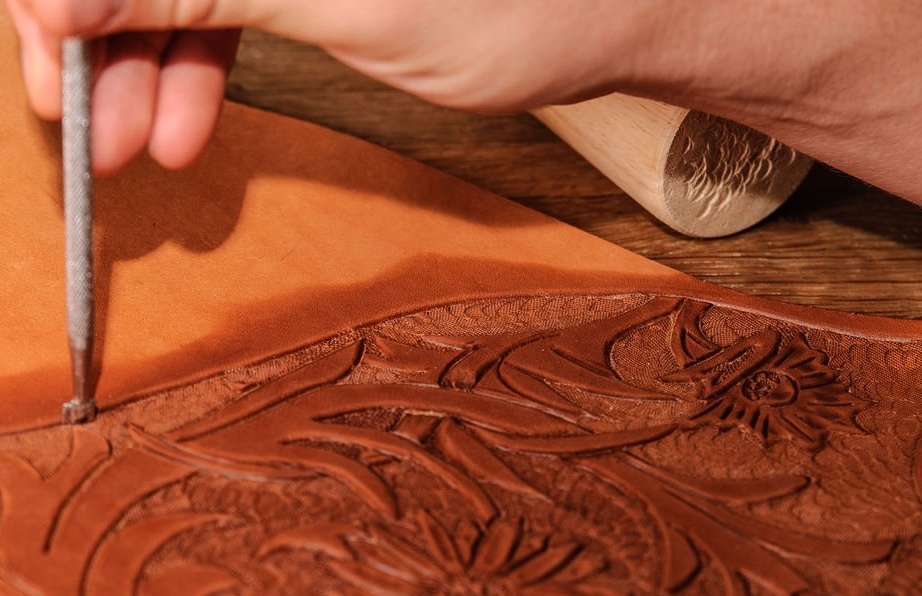
Step Four: Ennoble the Pattern on Leather Material
To be honest, the real work has already been done. It remains to refine the picture. This will require specific tools.
One of the good tools is the so-called “seeder” (the word is slang; the name of the tool is not really understood), which makes small circles that look like seeds on plants or flowers. Another is a “camouflage tool” (also jargon), with which you can make small holes in the leaves.
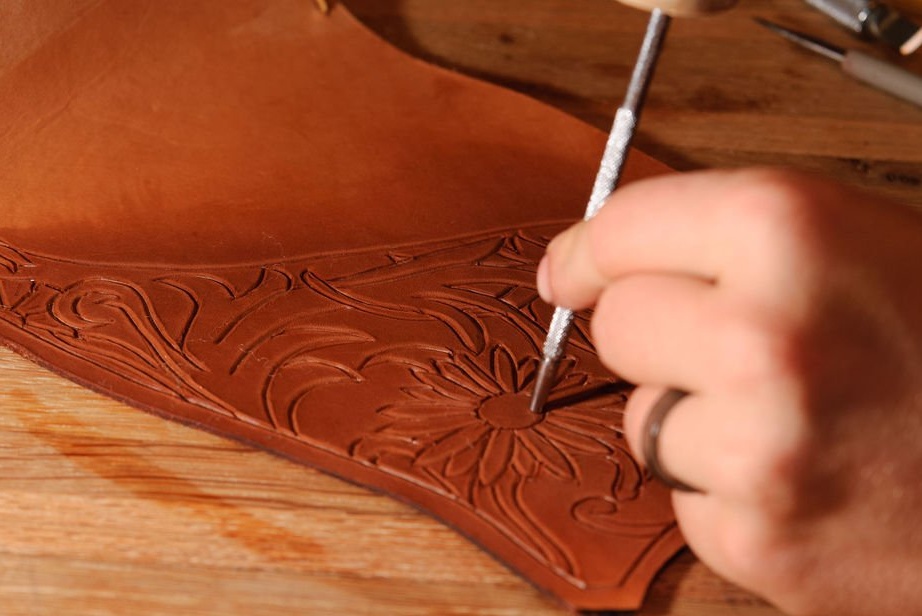
Step Five: Fill the Background
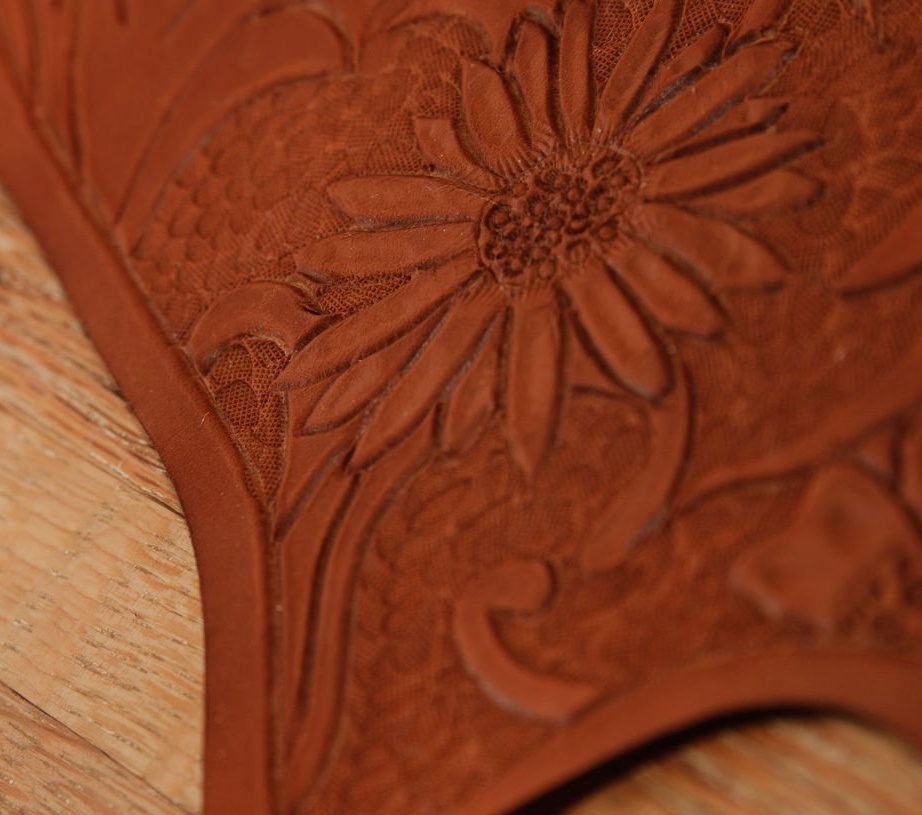
This is a laborious but important step. Although everything is much simpler than it seems. Take the tool to work with the background of the picture and mark the entire background. Again, one should be more decisive in one's actions. Stamping the background view will make your project stand out.
Step Six: Add Final Strokes / Edits
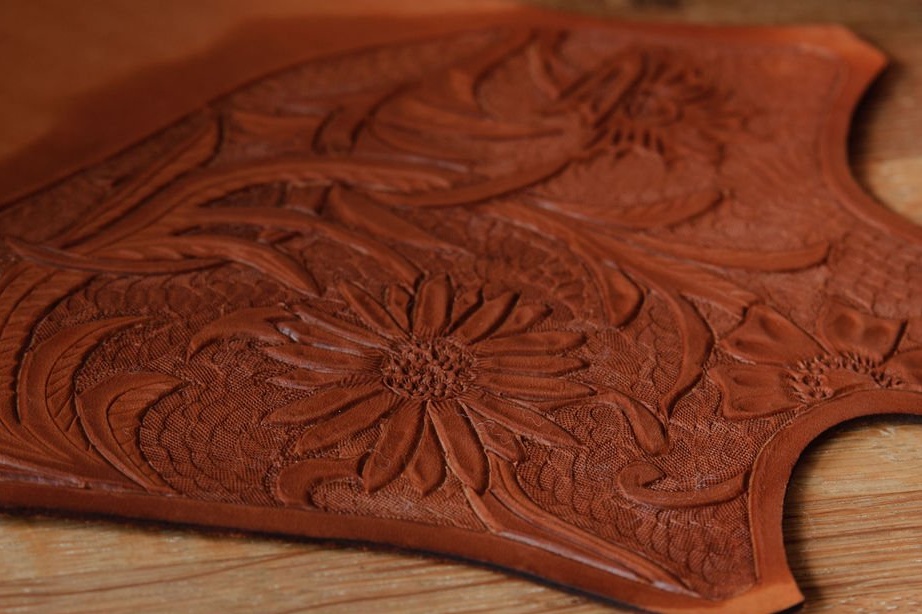
At this stage of the work, the author decided that several veins should be cut out on the leaves. Also, one of the stems was too thick, so it had to be cut and made thinner by bullying the background along the old lines. If you have similar mods, do them now.
The next (and last) step is to finish the skin.
Step Seven: Leather Finish
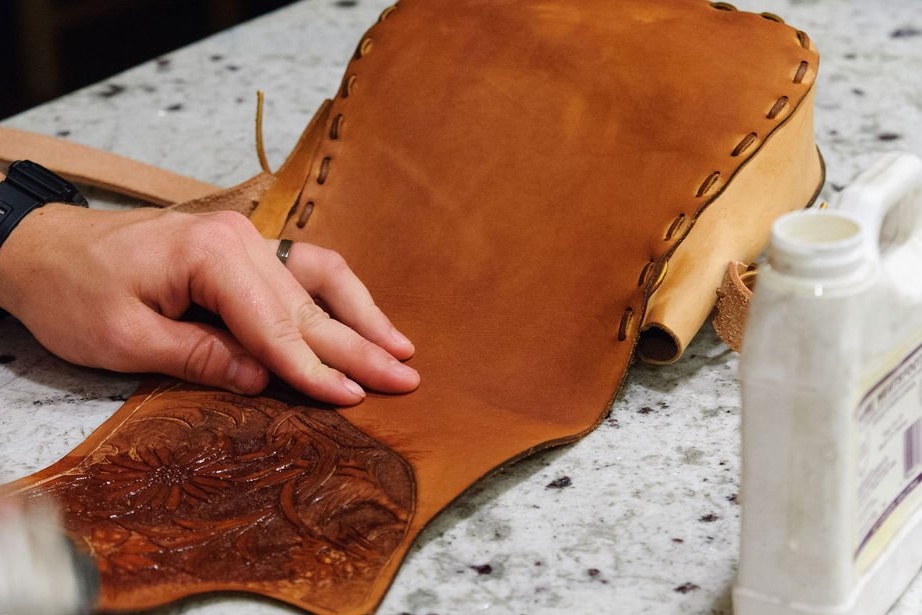
There are a dozen ways to do this. The author is not a huge expert in this field. Therefore, he cannot give much advice.
He experimented on pieces of skin with transparent layers and spots that came with the starter kit, but didn't like the results.
So it all ended by rubbing Neat's Foot oil with an old toe
 . This is not a valid finish, as such, but these actions soften the skin but do not seal the pattern.
 Step Eight: Enjoy Your Masterpiece
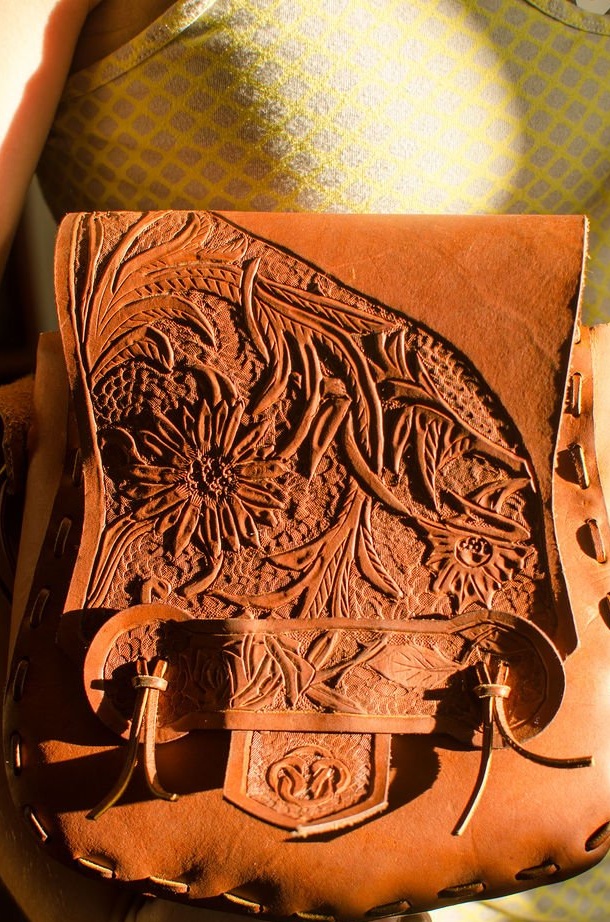
Your embossed skin will look good for years to come. The author still uses the wallet that he made in high school. After ten years of use and falling into the water, the product still looks just as good (or bad
 ), as before. Also used is a belt that was made around the same time, and it is still in good shape.