

I bet that in every kitchen (of course, if it’s not “for show”, but you only cook fried eggs or cooked dumplings there), there are many bags of spices. Topics that are bought for a particular dish, and then stored. Someone pours the contents (namely in them most often they are bought) in jars, and then takes away a whole cupboard under this madness. Someone starts a box, putting it on the very top shelf (of course, it is rarely needed, so it is), and then swears, each time taking it out.
All this I also went through. But with kitchen change, more precisely, when it was not just standing, but already used confidently, a simple question arose: what if we leave them in bags, but make a small separate shelf? Which is not only convenient to use, placing it at the level of the belt, and not "under the clouds", but also hidden from prying eyes. At the same time, I will immediately stop the critics who perceive each idea with hostility: it does not need to be foreseen, even at the design stage. On the contrary, you can do it, put it at any time, both in the kitchen, made on an individual project, and the usual serial. And to repeat this little workshop, you do not need to be an experienced furniture maker. It’s enough just to be a man whose hands are growing from the right place.
So, let's get started. Sawing will need quite a bit:
• 50x350 - 2 pcs.
• 50x448 - 2 pcs.
• 70x500 - 2 pcs.
• hardboard 345x475 - 1 pc.
And you definitely don’t need to buy a whole sheet. Where they cut it, for 50-100 rubles you can do all this without any problems and in just a few minutes.
But the accessories will have to be purchased:
• Skids 450 mm - 1 set.
• Confirmates - 7 pcs.
• Self-tapping screws 16 mm - 18 pcs.
• Self-tapping screws 30 mm - 4 pcs.
• White edge - 10 m (left).
• Confirmation stickers.
• Staples for staplers or nails.
• A pair of silicone dampers so that the external door does not knock heavily when closing.
I had a lot. But even if you get it all, the amount, too, will be ridiculous.
Of the tools you will need:
• Screwdriver or drill.
• Directly, a furniture stapler: if you use nails, then a hammer will perfectly replace it.
• The drill is confirmed: if it is not there, buy it in the same place where you will take the accessories.
• Hex, cross bit, and extension cable for them. As an option - a screwdriver and a wrench.
• Awl.
• Ruler and pencil.
• Knife.
• Iron, preferably old, heavy.
• Soft felt pad or just a rag.
• Little mallet.
That's all, so let's get started.
Pasting parts with hem. Of course, you can skip this step by ordering this procedure in the same place where you will make the cut. And so I, "the old fashioned way."
With a hot, heavy (just that simpler) iron, glue the edge to the part,
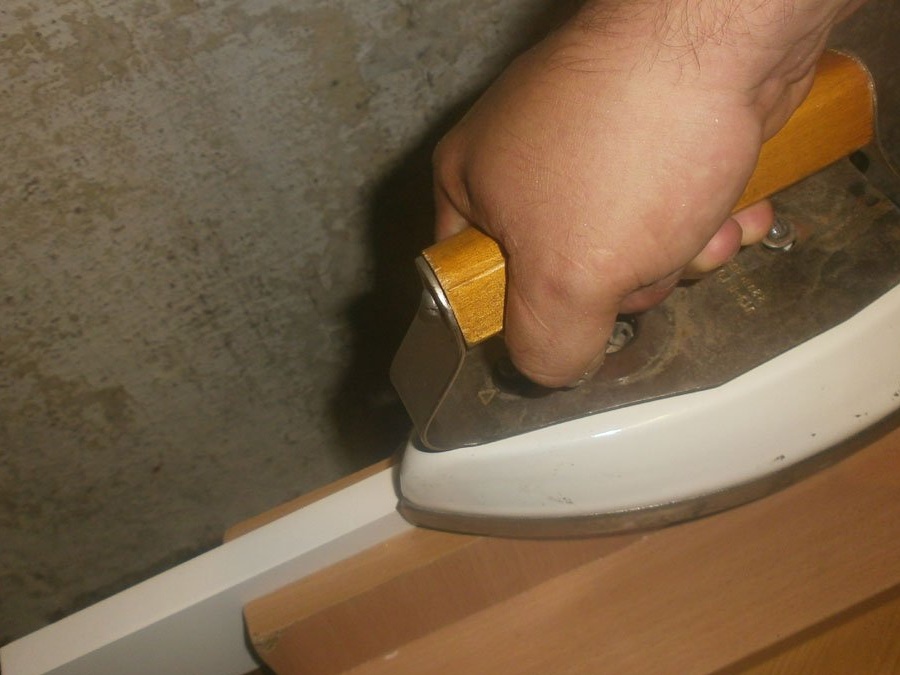
and while the glue is hot, rub it. Immediately I want to cool the ardor of critics who claim that with a special emphasis it is simple (I have one). The details are so small that you can do this almost by a canopy.
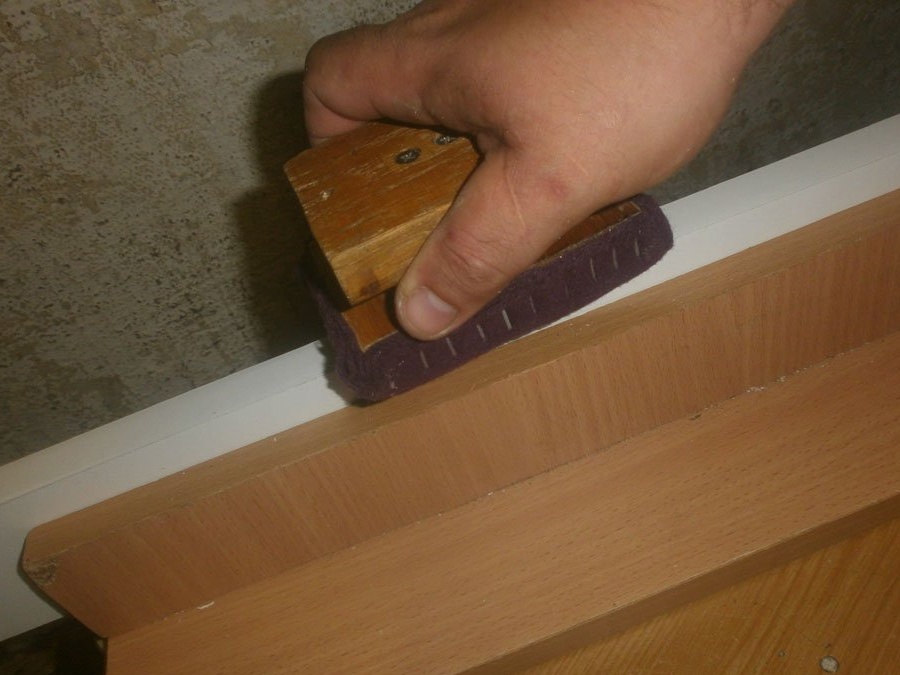
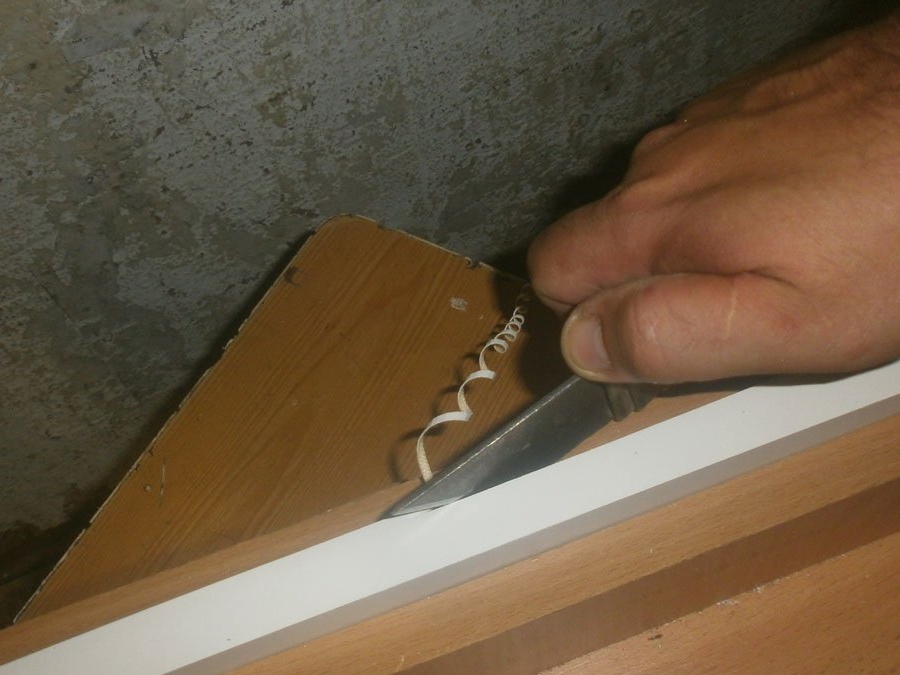
The excess edges are cut with a knife. Just do not take too sharp: damage the outer layer on the chipboard. And so, the edge of the paper, it is enough "for the eyes." One part is ready, we also do the rest.
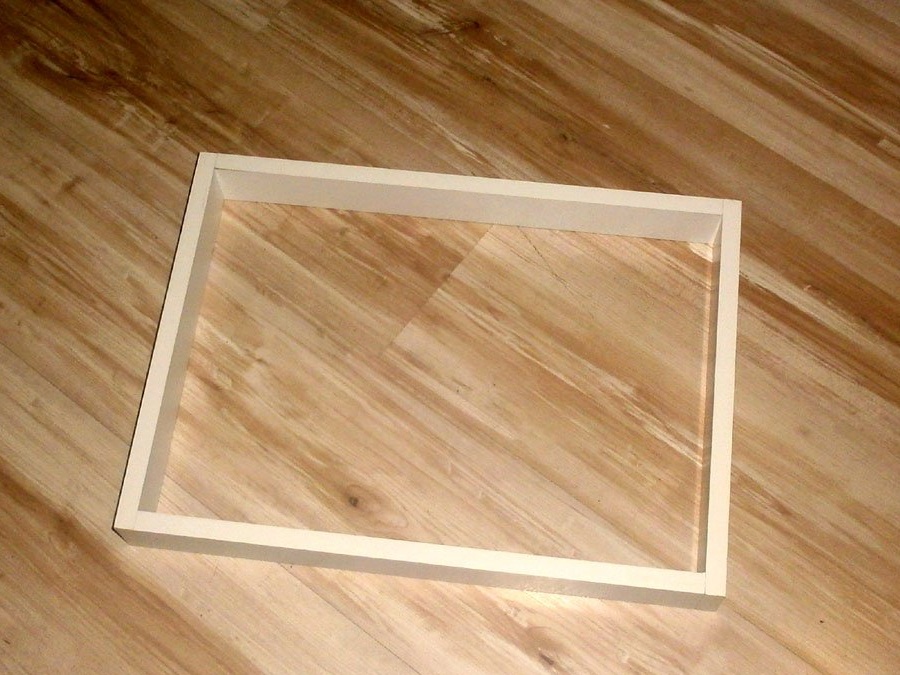
We collect the box of the box. We attach two parts, drill a hole, one on each side is enough,
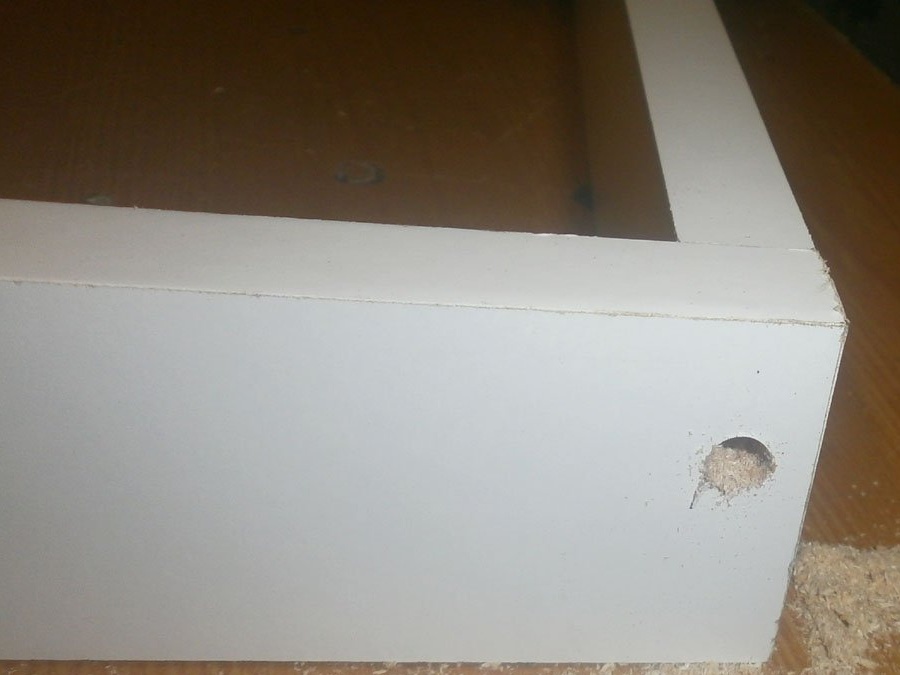
and wrap the confirm. If necessary, twist a little with a mallet.
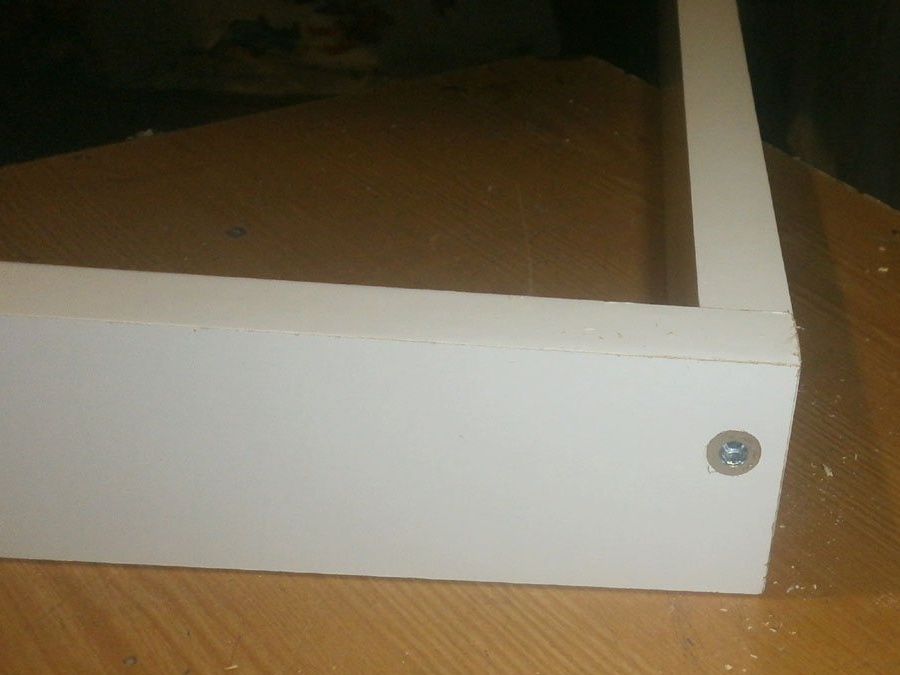
Also repeat three more times. Done.
Hardwood bottom. We nail it on only two sides,
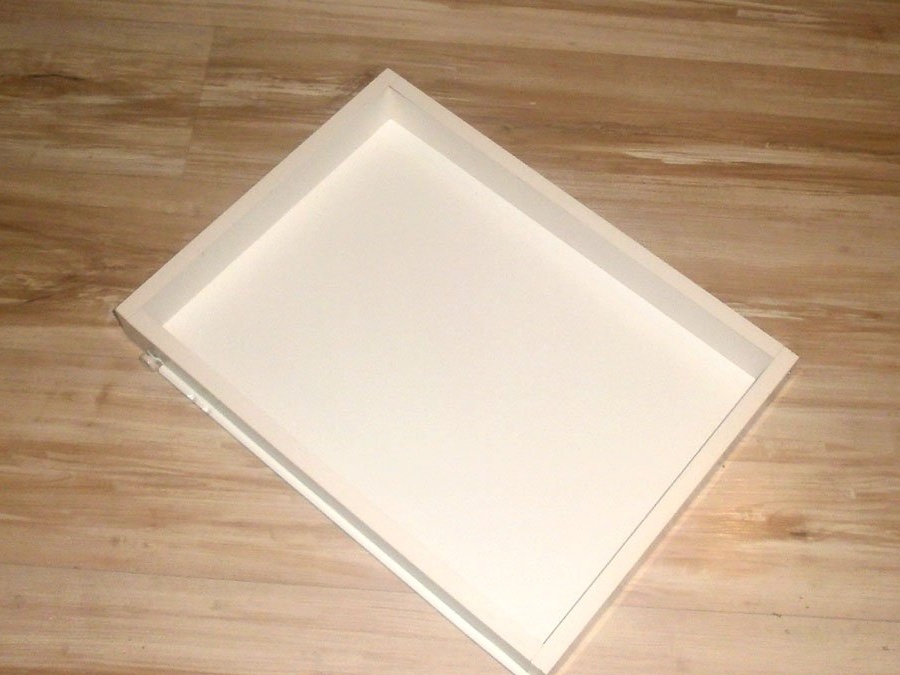
Since with the other two he will be pressed against the runners.
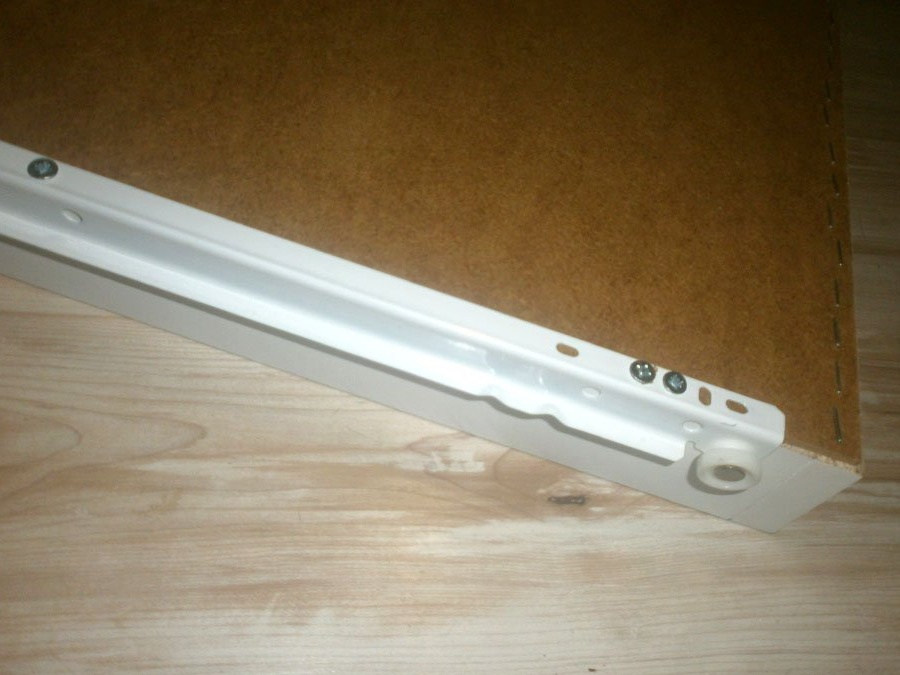
Reciprocal parts of runners. We screw them to the remaining parts (it turned out just with a slight slope), and in one we drill holes.
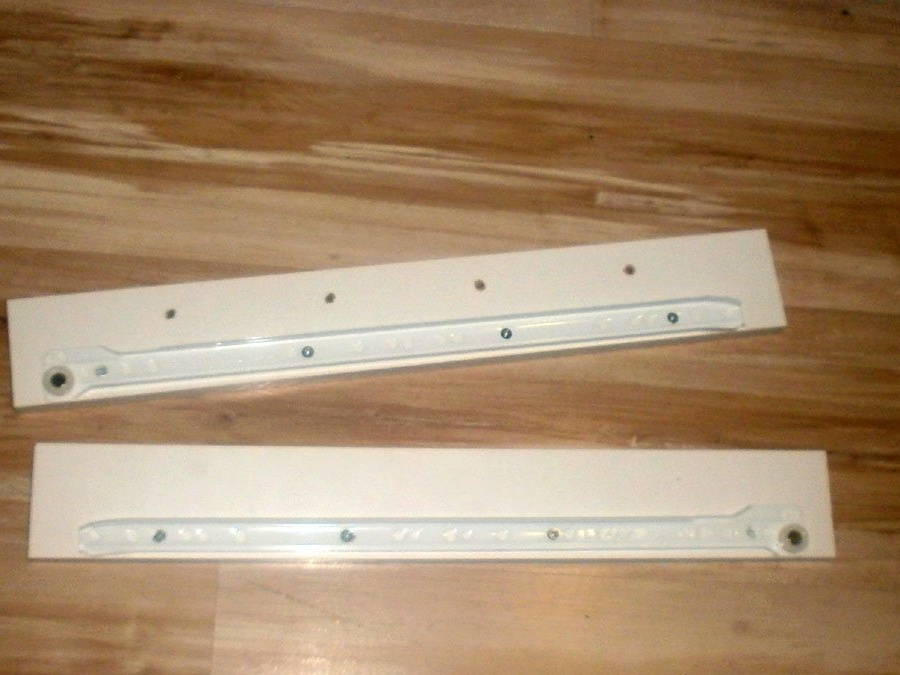
We screw it to the side of the cabinet. Without it, the box will not be pulled out: an open door interferes. The width of the part itself is the same as the cabinet itself: it’s easier to screw it on, it’s not even necessary to mark out.
Countertop. It will have to be removed: to do without this will not work. Therefore, we unscrew the fastenings with which it is pulled to the cabinets. But this screws, self-tapping screws or something else, does not make any difference. The main thing is that during assembly you get back into the same holes: you don’t even have to level the cabinets by level, twisting or unscrewing the legs.
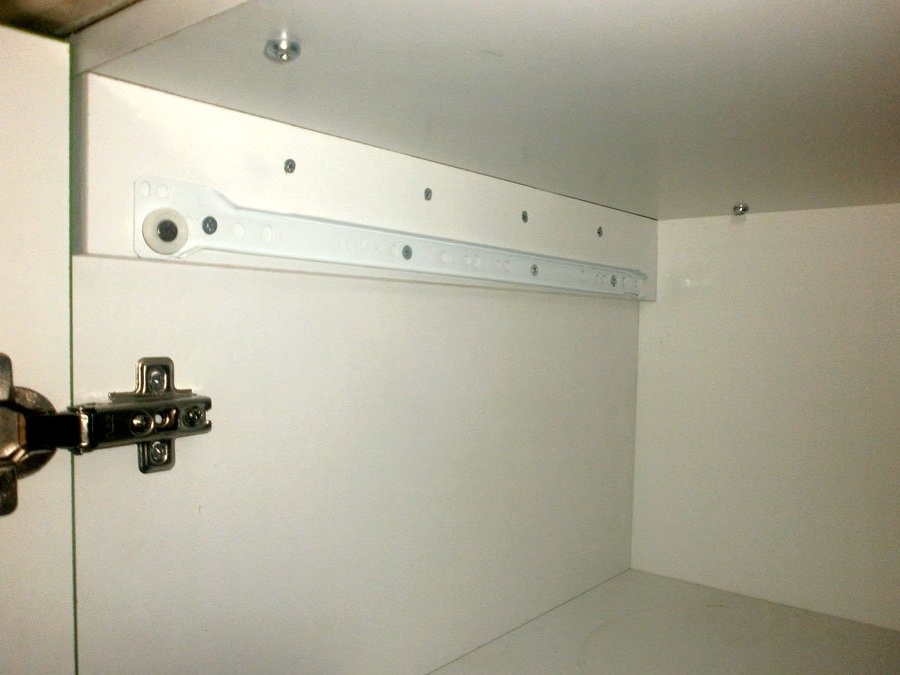
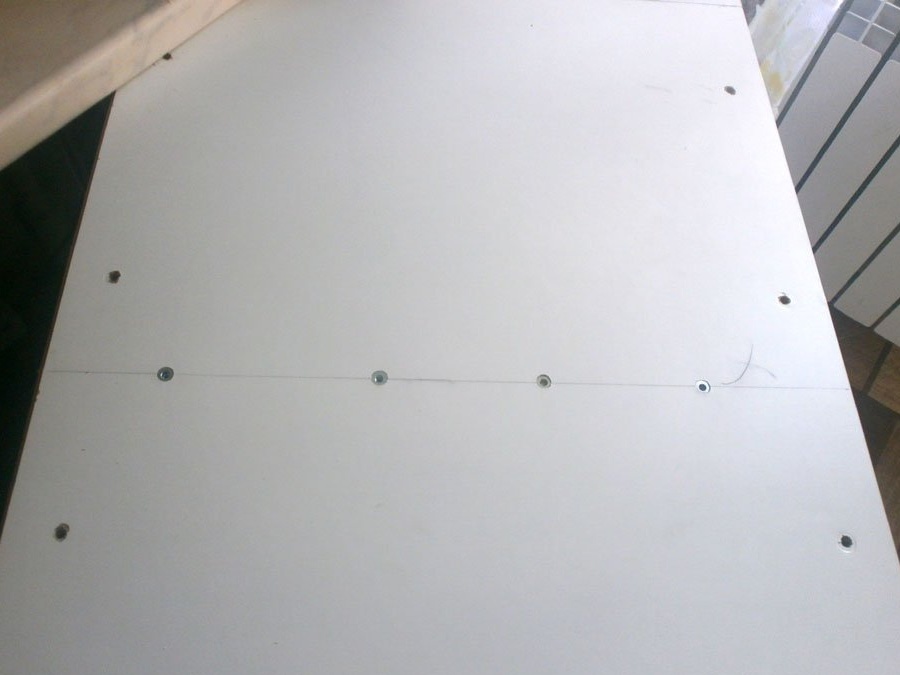
Reply part. It's harder with her. Firstly, you still have to pull out the cabinet cupboard - you need access to its upper and rear parts, and secondly, you still have to precisely mark it out. Otherwise, the box will not roll out, slide in completely or will jam.
But nothing complicated, for the given dimensions it is 408 mm from the left edge, a straight line, and there are 4 confirmations on it.
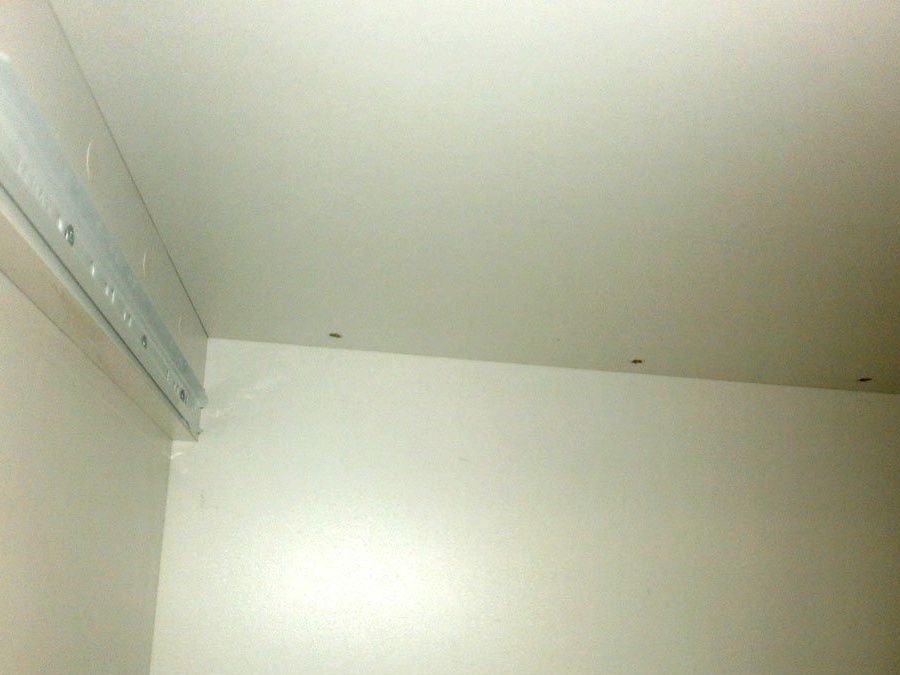
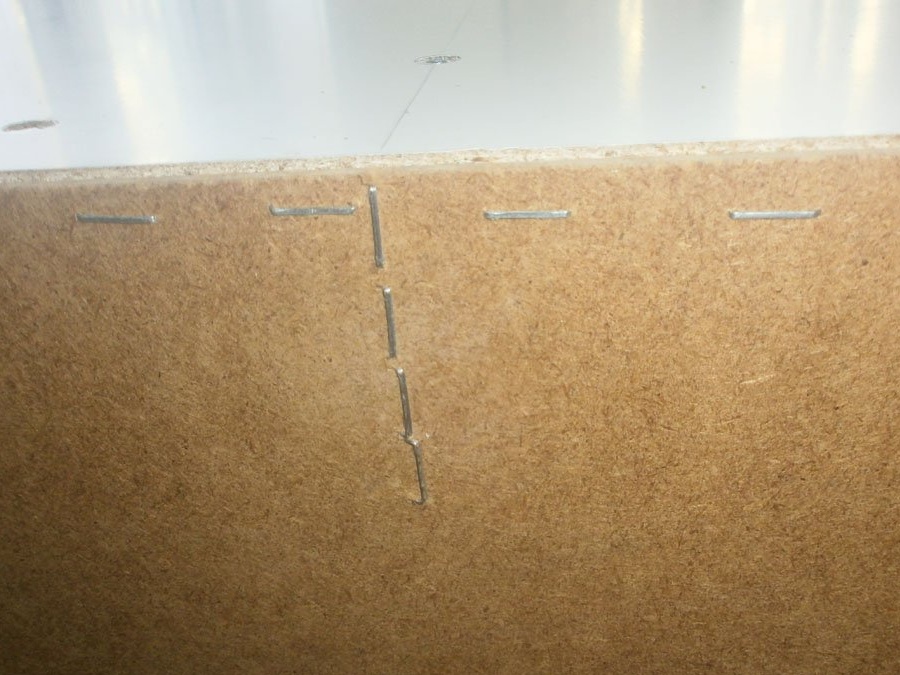
And so that the design is even more even, we shoot with brackets, or nail the rear hardboard with furniture nails. Where there is a guide for runners.
We check: the shelf rolls up, leaves as it should, does not jam anything and does not catch.
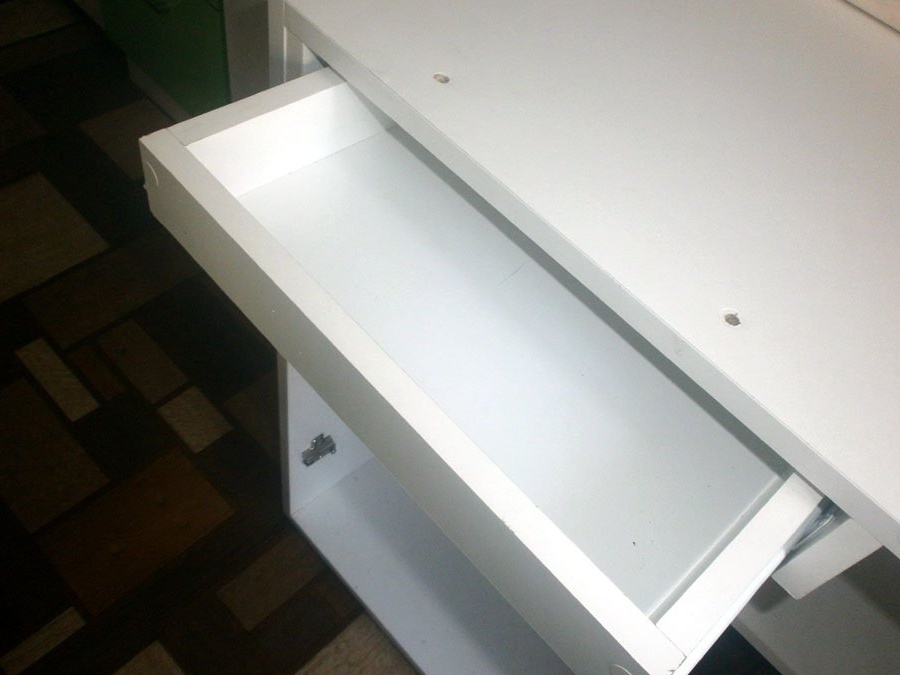
At the same time, the upper distance is minimal: the shelf itself, when inserted into the skids, entered end-to-end in height. This is what rational use of the cabinet’s interior space means.
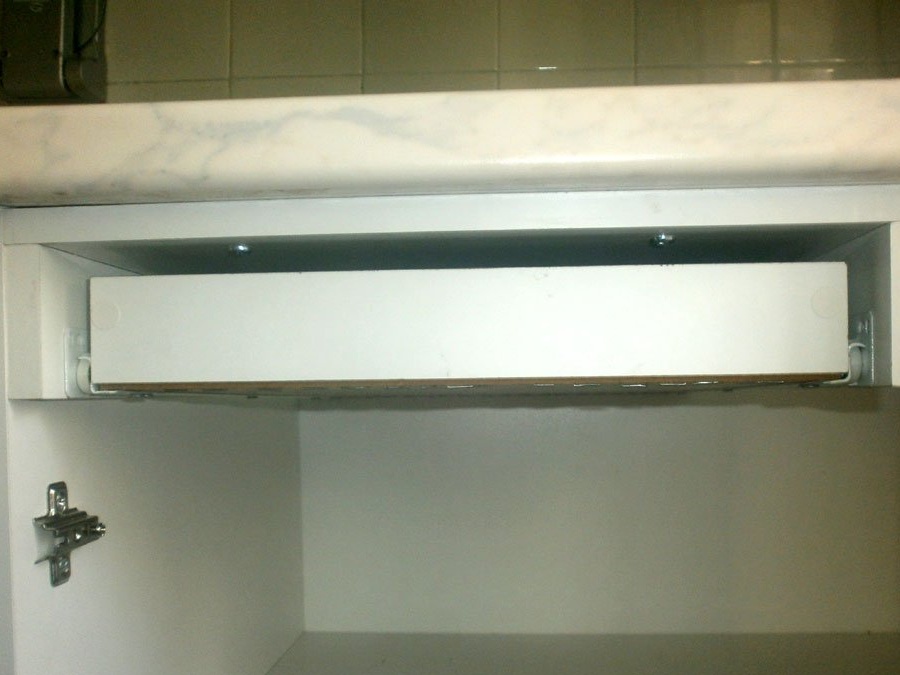
At the same time, there were abundant bags of spices in it: in my case, everything.

Whereas the outer doors close as they were, as if the inner shelf had not appeared.
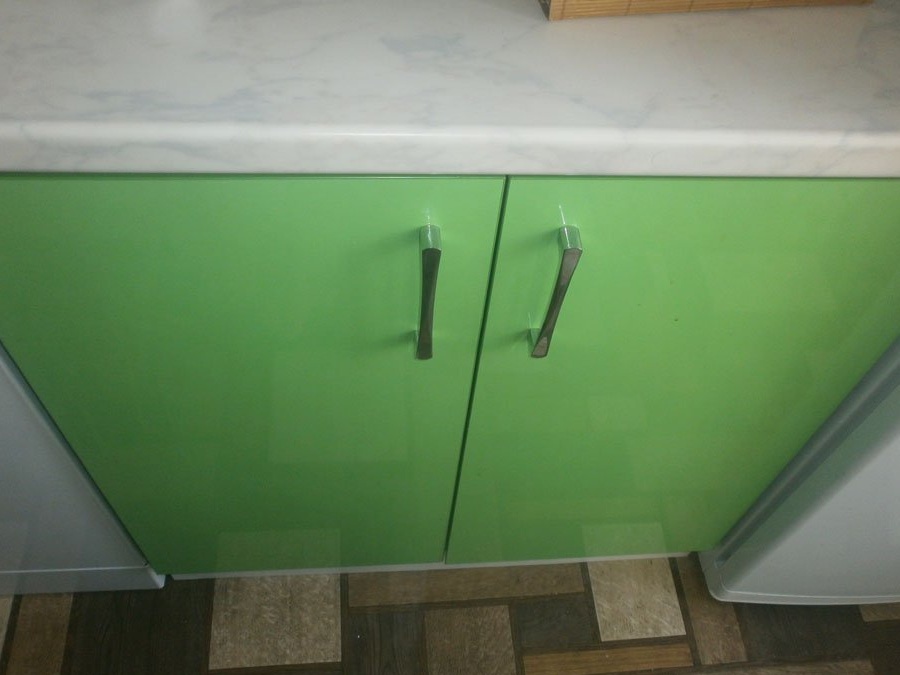
I poked a little with the width of the shelf, literally one and a half centimeters. When it rolls out, you need to open both doors. You can fix this, as well as make two roll-out shelves, on the right and left of the cabinet.
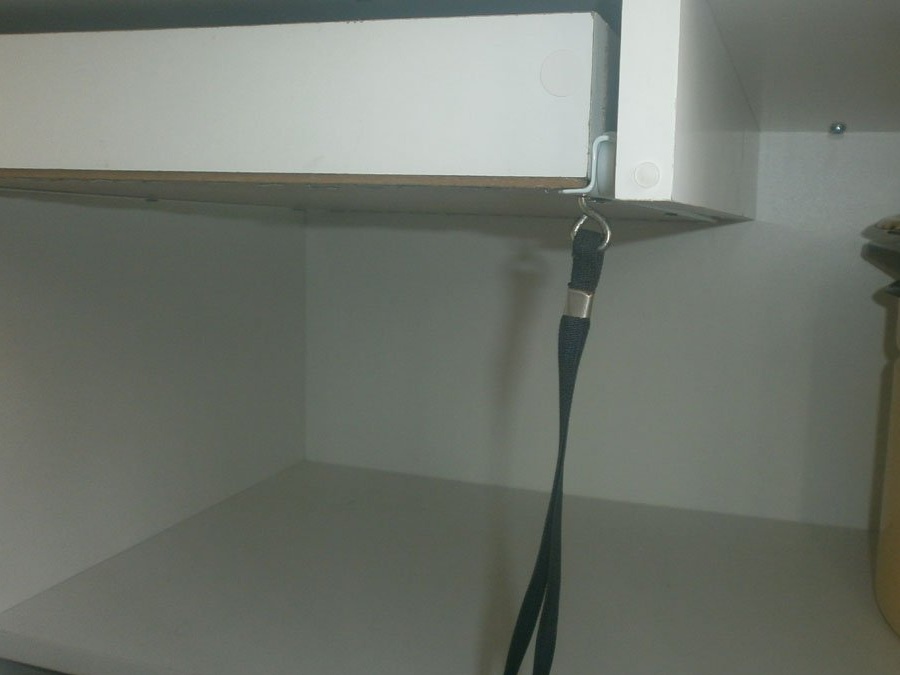
But when I used it a little, I revealed one flaw: there is nothing to roll out the shelf for. She has no external handle. Therefore, from something, like an umbrella, put the strap on a self-tapping screw with a little ring at the end and clamped it.
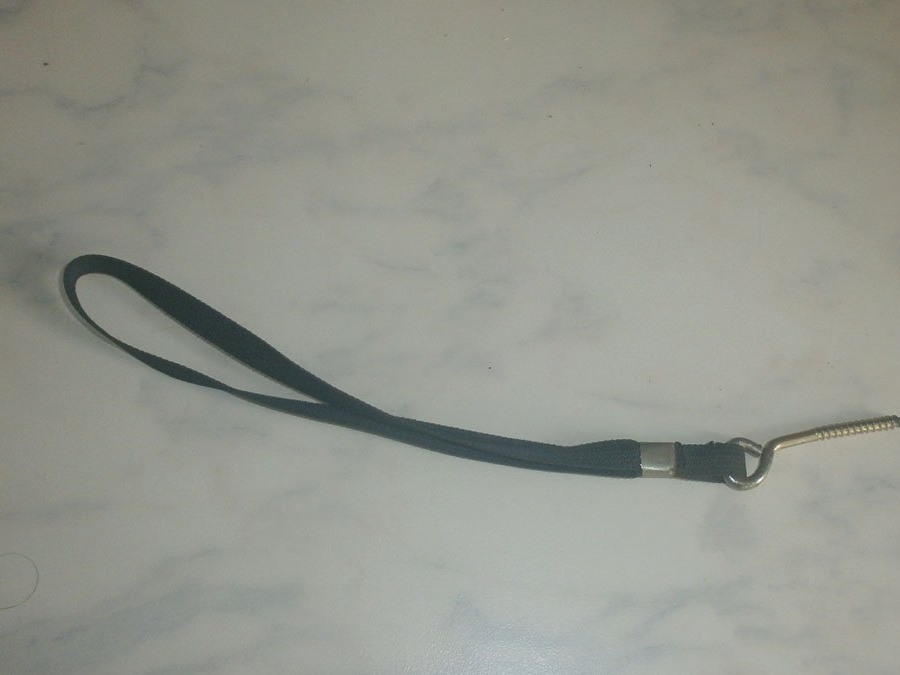
And then from the bottom I screwed into one of the sidewalls of the shelf.
It turned out nice and convenient.
So for those who have nowhere to put bags of spices in the kitchen, I definitely recommend repeating this small workshop.