

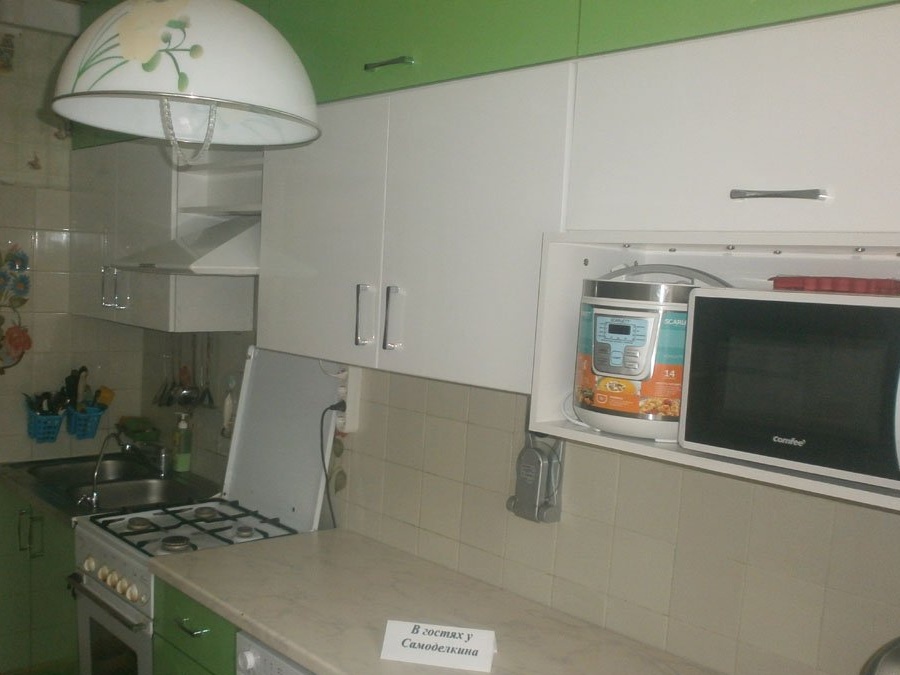
It seems to me that many times I did a cabinet furniture: folding and hinged tables, chest of drawers and even every little thing. But such a large-scale product for the first time. And since the beginning of a new kitchen already laidthen there’s nowhere to retreat.
From the source data:
• Use the available area to the maximum. So - cabinets in the ceiling. And so that they do not look too bulky, the hinged need to be made in two levels and different colors.
• The length of the kitchen is 4 meters. But you need to leave a niche for an ironing board with a width of about 200 mm at one wall.
• Wash only consignment note. And so that it adjoins the stove. I just didn’t find a new one: “the day before yesterday” is the most frequent comment of sellers. Therefore, I did not come up with anything better than using the old one.
• Water supply and drain pipe - in the lower left corner. Since the base is also concreted at the drain, the depth of the cabinet itself should be less.
• A 20-liter boiler and osmosis for cleaning with a 5-liter water tank should fit in the sink. And if possible - also a bin.
• Width of cooker hood 500 mm. In addition, there should be a full-size, not narrow dishwasher and refrigerator.
• The microwave oven must not stand on the refrigerator - high. So, you need to come up with a niche for her.
But most importantly, two risers: gas and heating. Which naturally also branch to the side. Plus - made ventilation duct. So it’s impossible to use ready-made wardrobes and choose the necessary kit: you have to do it yourself. Or order: but then the price tag turns out to be just "horse".
Taking into account all these requirements, restrictions, the sketch was as follows:
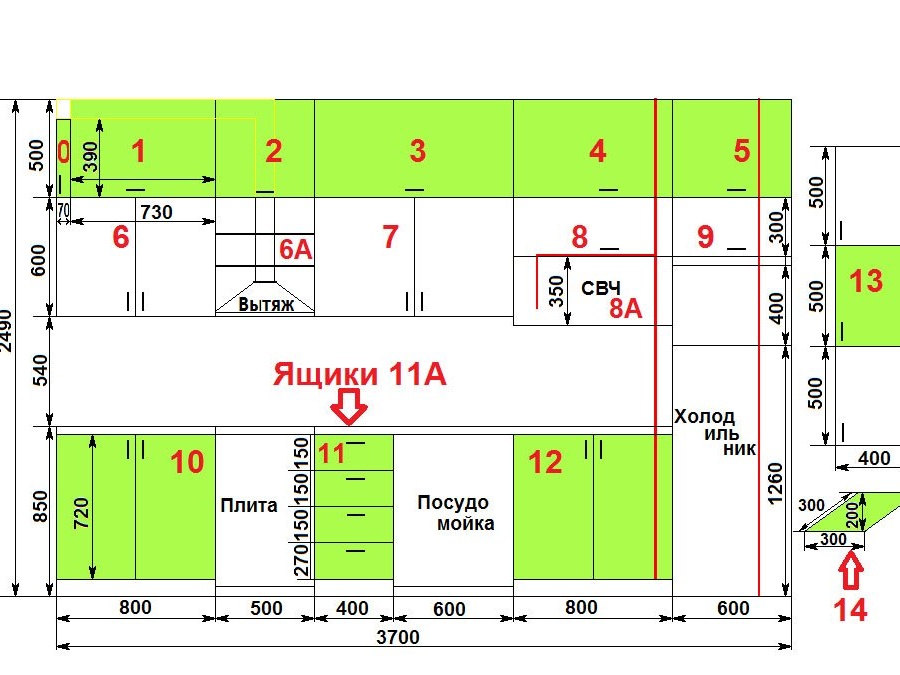
I also decided to make a flat cabinet with a depth of 120 mm, but a large area (0.4 by 1.5 meters), a first-aid kit for every little thing, plus a shelf-bread box.
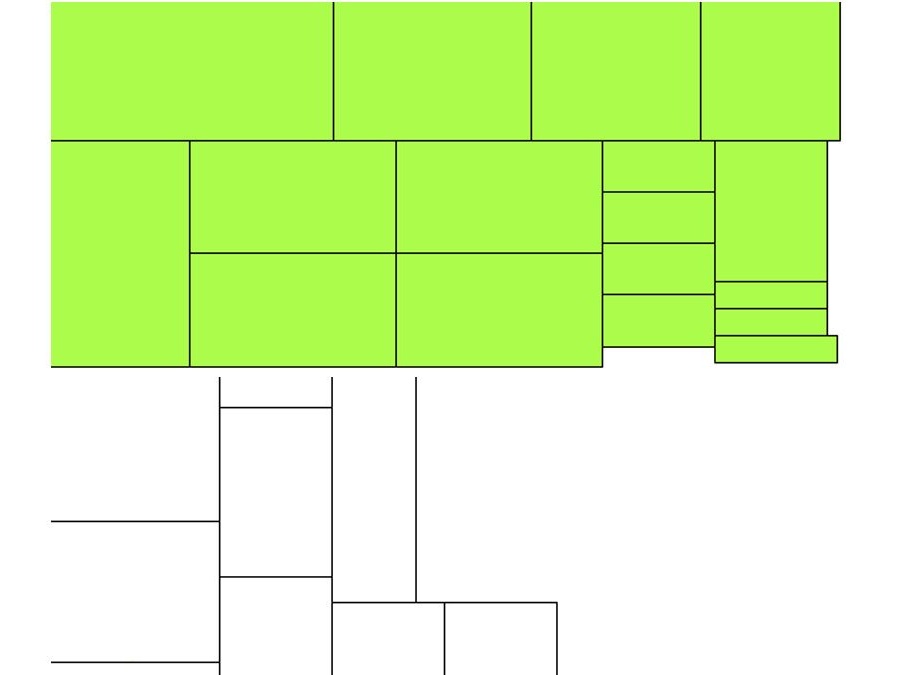
I didn’t want to cut it and where to glue the edge: anyway, everything is individual. That's just a friend who saw the finished kitchen and wanted the same (the kitchens themselves are the same, only mirrored), reassured me. Therefore, I will give:
• 60x300 - 2 pcs. edge with 2 long sides and 1 short - shelf 0
• 60x350 - 2 pcs. edge on 2 long sides - shelf 0
• 85x400 - 1 pc. edge on all sides - threshold
• 85x800 - 2 pcs. edge on all sides - threshold
• 100x200 - 1 pc. edge on 1 long side - shelf 14
• 100x310 - 6 pcs. edge on 1 side, long - withdrawable shelves 11A
• 100x480 - 6 pcs.edge on 2 sides, long and short - withdrawable shelves 11A
• 100x500 - 2 pcs. edge on 1 side, long - shelves 6A
• 100x768 - 2 pcs. edge on 1 side, long - cabinet 8A
• 100x768 - 2 pcs. cut under the T-profile from 2 sides, long - cabinet 6
• 100x768 - 2 pcs. edge on 2 sides, long - cabinet 10
• 110x368 - 6 pcs. edge on 2 long sides - cabinet 13
• 120x1500 - 2 pcs. edge on 3 sides, 2 short and 1 long - cabinet 13
• 120x368 - 4 pcs. edge on 1 long side - cabinet 13
• 150x468 - 1 pc. edge on 2 sides, long - cabinet 2
• 150x568 - 1 pc. edge on 2 sides, long - cabinet 5
• 150x698 - 1 pc. edge on 2 sides, long - cabinet 1
• 150x768 - 1 pc. edge on 2 sides, long - cabinet 4
• 180x310 - 2 pcs. edge on 1 side, long - withdrawable shelves 11A
• 180x480 - 2 pcs. edge on 2 sides, long and short - withdrawable shelves 11A
• 190x268 - 2 pcs. edge on 1 side, long - cabinet 8, cabinet 9
• 200x350 - 2 pcs. edge on 3 sides, 2 short and 1 long - shelf 14
• 200x468 - 2 pcs. edge on 1 side, long - cabinet 2
• 200x500 - 3 pcs. edge on 3 sides, 2 short and 1 long - cabinet 1, cabinet 2
• 200x568 - 4 pcs. edge on 1 side, long - cabinet 5, cabinet 9
• 200x698 - 2 pcs. edge on 1 side, long - cabinet 1
• 200x768 - 4 pcs. edge on 1 side, long - cabinet 4, cabinet 8
• 230x968 - 2 pcs. edge on 2 sides, long - cabinet 3
• 240x500 - 1 pc. edge on 2 sides, long - shelves 6A
• 270x968 - 2 pcs. edge on 2 sides, long - cabinet 7
• 280x300 - 4 pcs. edge on 3 sides, 2 short and 1 long - cabinet 8, cabinet 9
• 280x500 - 7 pcs. edge on 3 sides, 2 short and 1 long - cabinet 2, cabinet 3, cabinet 4, cabinet 5
• 280x600 - 4 pcs. edge on 3 sides, 2 short and 1 long - cabinet 6, cabinet 7
• 280x768 - 1 pc. edge on 1 side, long - cabinet 6
• 280x968 - 4 pcs. edge on 1 side, long - cabinet 3, cabinet 7
• 300x350 - 2 pcs. edge on 3 sides, 2 short and 1 long - cabinet 8A
• 300x768 - 2 pcs. edge on 1 side, long - cabinet 8A
• 368x500 - 2 pcs. edge on 1 side, short - cabinet 11
• 370x768 - 1 pc. edge on 2 sides, long - cabinet 12
• 450x720 - 2 pcs. edge on 3 sides, 1 short and 2 long - cabinet 10
• 450x768 - 1 pc. edge on 2 sides, long - cabinet 10
• 500x720 - 2 pcs. edge on 3 sides, 1 short and 2 long - cabinet 12
• 500x720 - 2 pcs. edge on 2 sides, short and long - cabinet 11
• 500x768 - 2 pcs. edge on 1 side, long - cabinet 12
In addition, you need a piece of the 1.8 meter countertop and pieces of hardboard: 295x596, 295x795, 340x475 - 4 pcs., 395x715, 395x1495, 495x495, 495x595, 495x725, 495x795, 495x995, 595x795, 595x995, 715x95
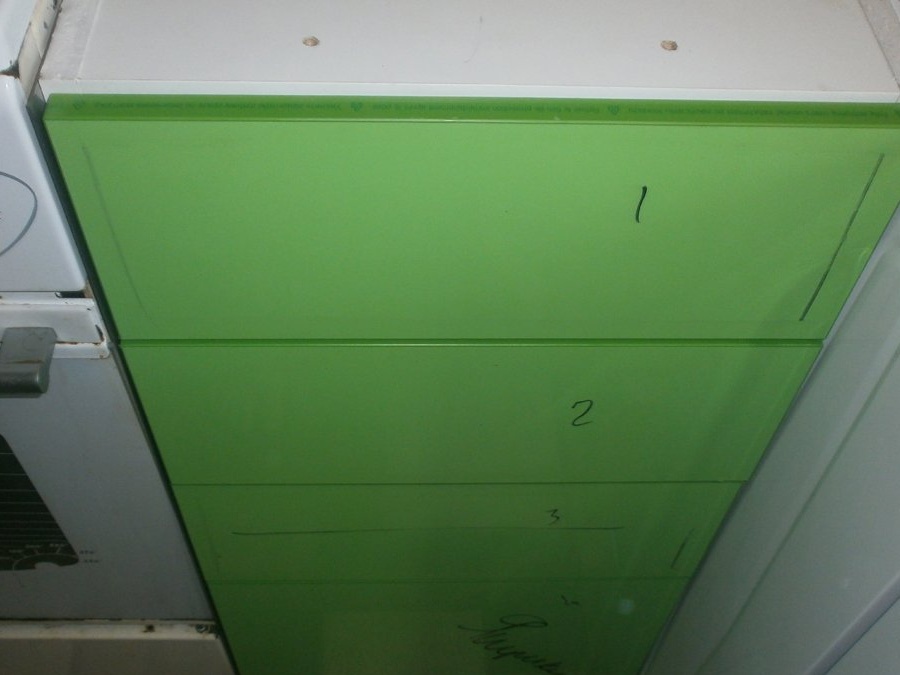
Facades - plastic in the edge (gross dimensions, the sawmills themselves know very well how much they need to be taken away):
Green:
• 70x390
• 150x400 - 3 pcs.
• 270x400
• 400x720 - 4 pcs.
• 400x500
• 500x500
• 500x600
• 500x730
• 500x800
• 500x1000
• Rhombus 300x300 with a height of 200
White:
• 300x600
• 300x800
• 400x500 - 2 pcs.
• 400x600 - 2 pcs.
• 500x600 - 2 pcs.
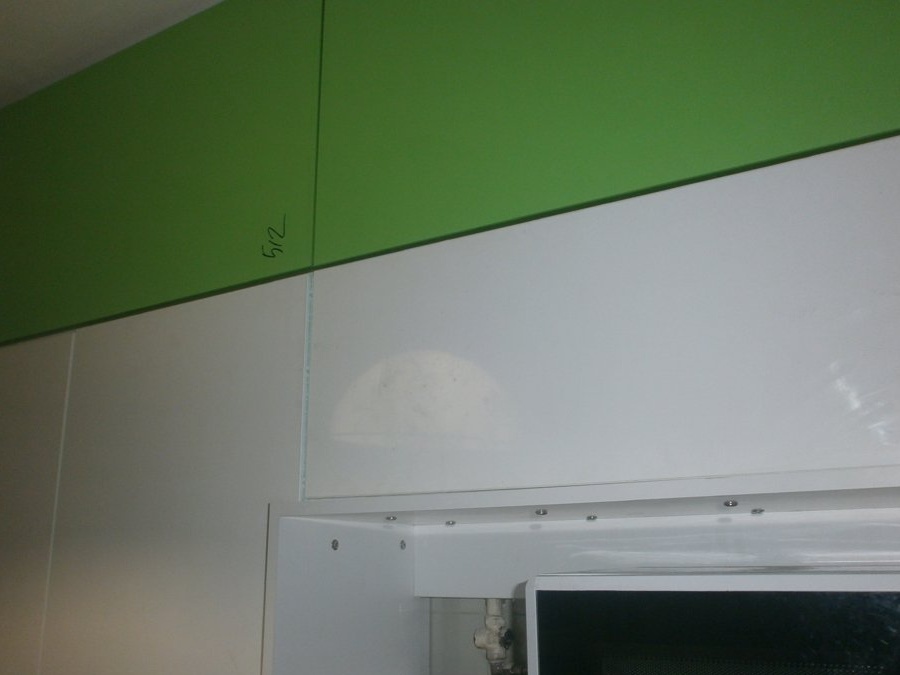
Green is just on the sheet, and white is halfway in.
In addition, we need hardware:
• Confirmates - 250 pcs.
• Coupling bolts 4 mm - 20 pcs.
• Coupling bolts 8 mm - 30 pcs.
• An emphasis under removable regiments - 80 pieces.
• Hinges - 38 pcs.
• Self-tapping screws 16 mm. - 250 pcs.
• Self-tapping screws 25 mm - 50 pcs.
• Gas stops: 60N - 10 pcs.
• 90N - 4 pcs.
• Pens - 22 pcs.
• Latches for thresholds - 6 pcs.
• Side caps for countertops - 1 set
• Decorative legs: - 12 pcs. adjustable in height, not less than 100 mm
• Silicone dampers - 2 sheets.
• Stickers on the heads of confirmations white mat - 2 sheets
• L-shaped steel awnings - 4 pcs.
• Adjustable awnings - 17 pcs.
• The tire for canopies of 2 meters - 4 pieces. and self-tapping dowels for their fastening
• Wide white plastic corners - 5 pcs.
• T-shaped profile white opaque - 4 m.
• Shelves for dryers - 1 set.
• Skids 450 mm - 4 sets.
• U-shaped stops - 50 pcs.
I took many hardware with a margin, so I stayed.
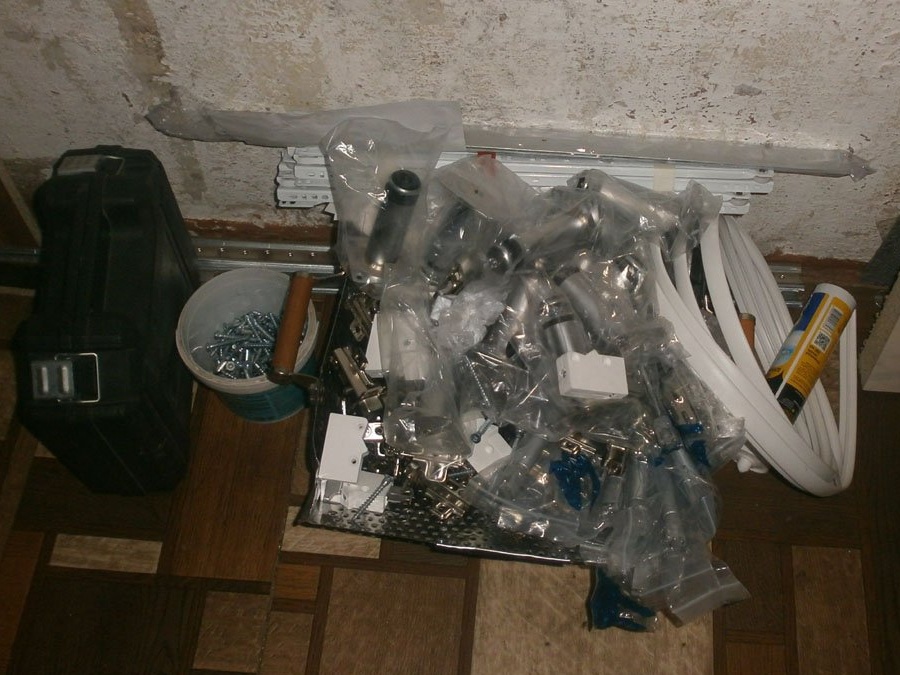
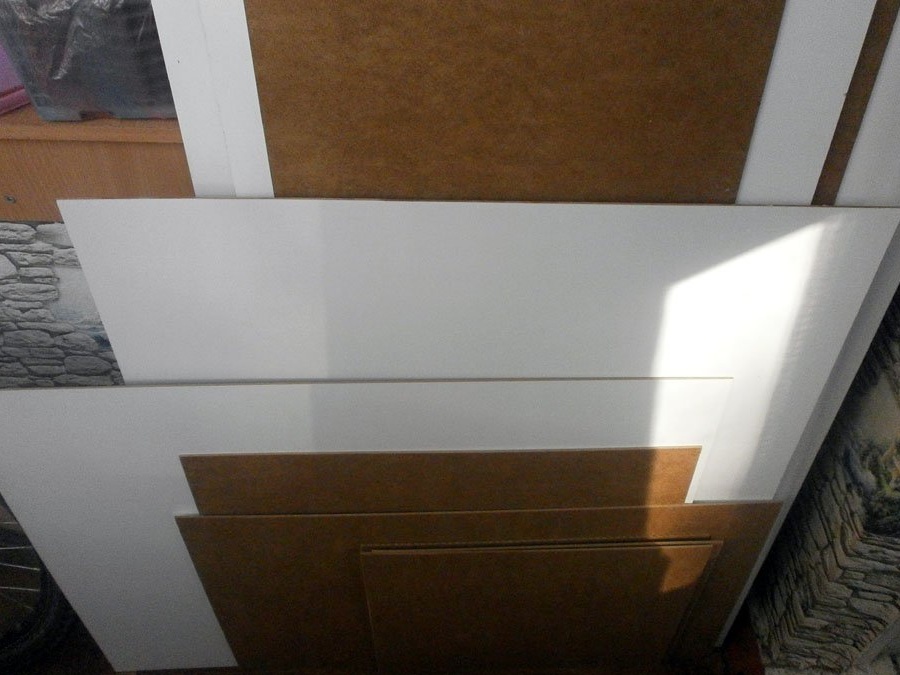
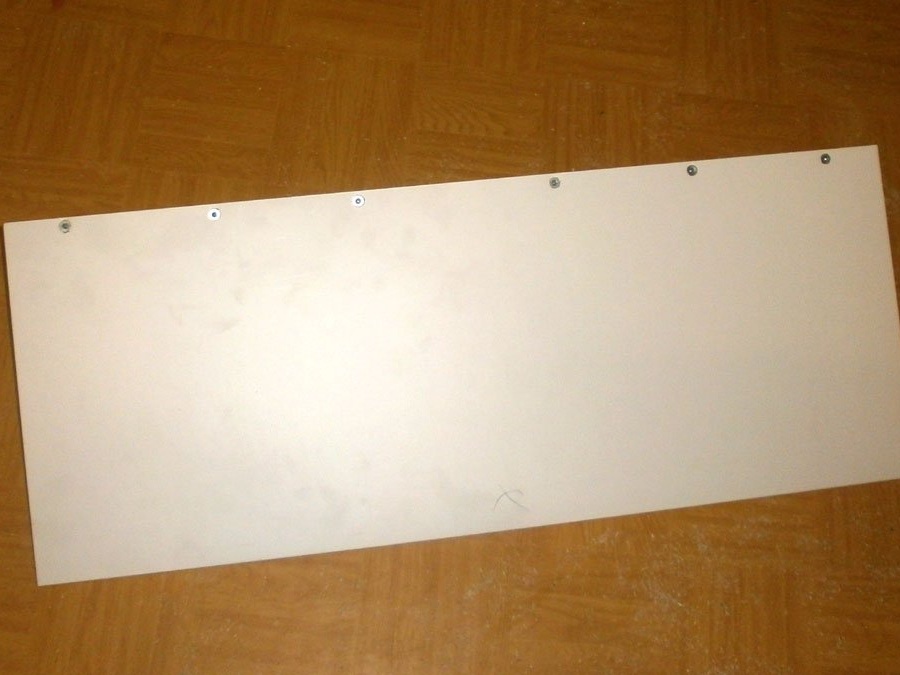
First, they brought the cut to the cabinet-drawers (I ordered it immediately with gluing)
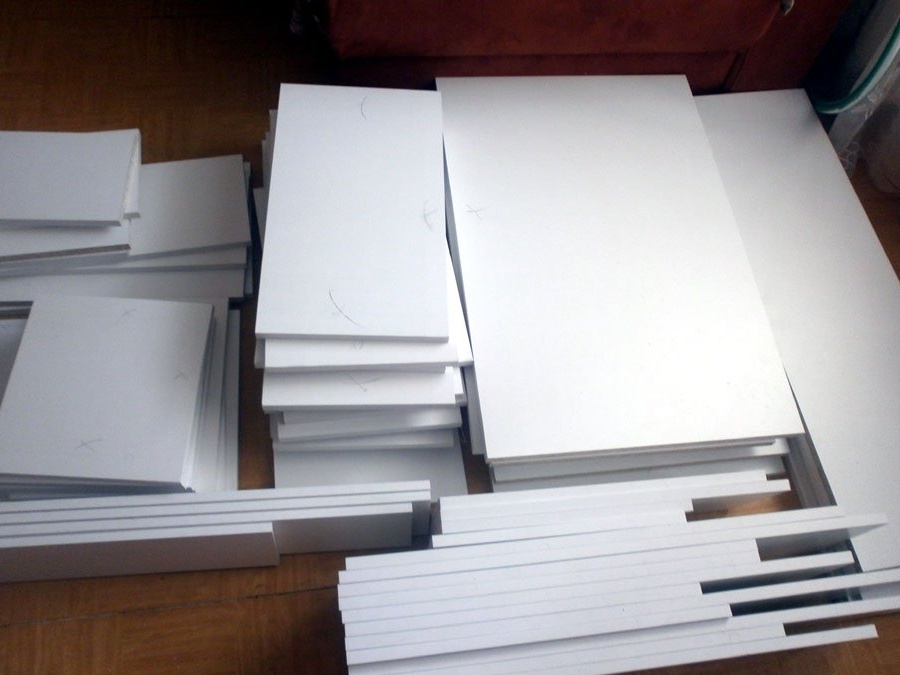
and hardboard.
Again a little stopper: where so much have I ordered? And were the delivery men right when they brought me another, not mine, order? But as they say, eyes are afraid, and hands do. Therefore, he began to collect boxes.
Yes, I completely forgot: tools. You will certainly need:
• Screwdriver: used two so as not to rearrange the drill head.
• Directly confirmed, conventional drills 4, 4.5, 7 mm and 10-bit.
• Hex and cross head.
• Milling cut holes for the hinge.
• Awl.
• Ruler, tape measure, marker, pencil.
• Rubber mallet - always white, so that no traces remain on the cabinets.
• Impact drill or hammer drill to hang tires.
• Sealant (preferably white, not transparent), masking tape.
• Level.
• Teflon tape for plumbing.
• Gas hose and hoses for the mixer.
• Furniture stapler: although you can do with a hammer and nails.
• Sharp furniture knife or scissors for metal: to cut holes in the hardboard under awnings.
Look like that's it.
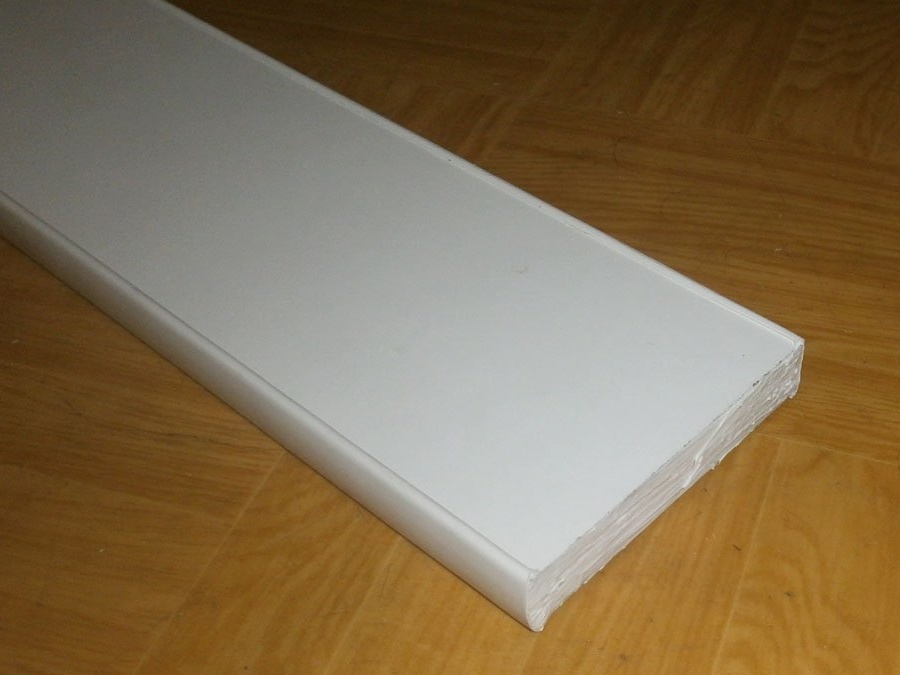
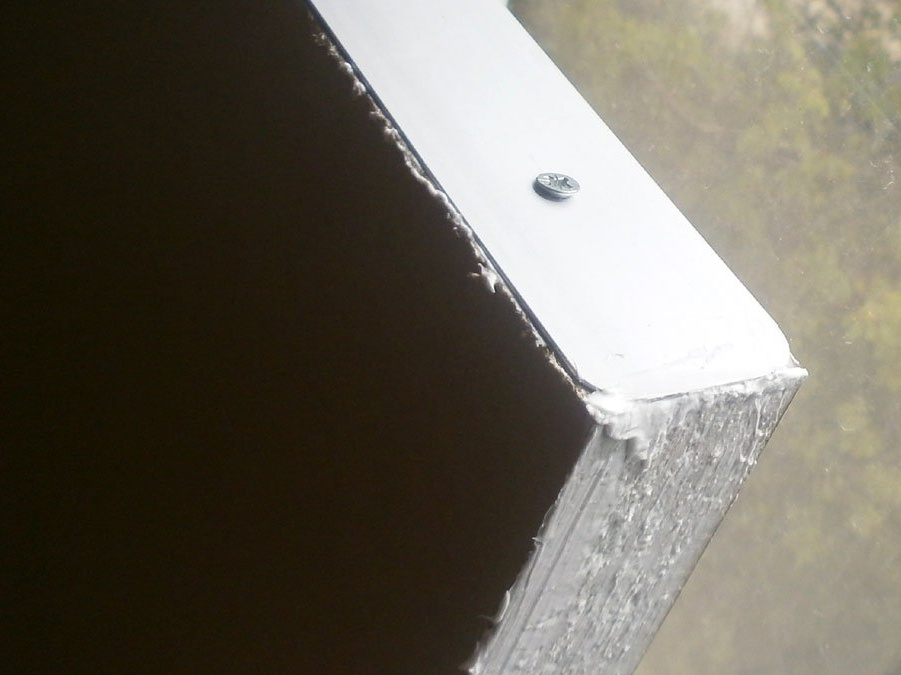
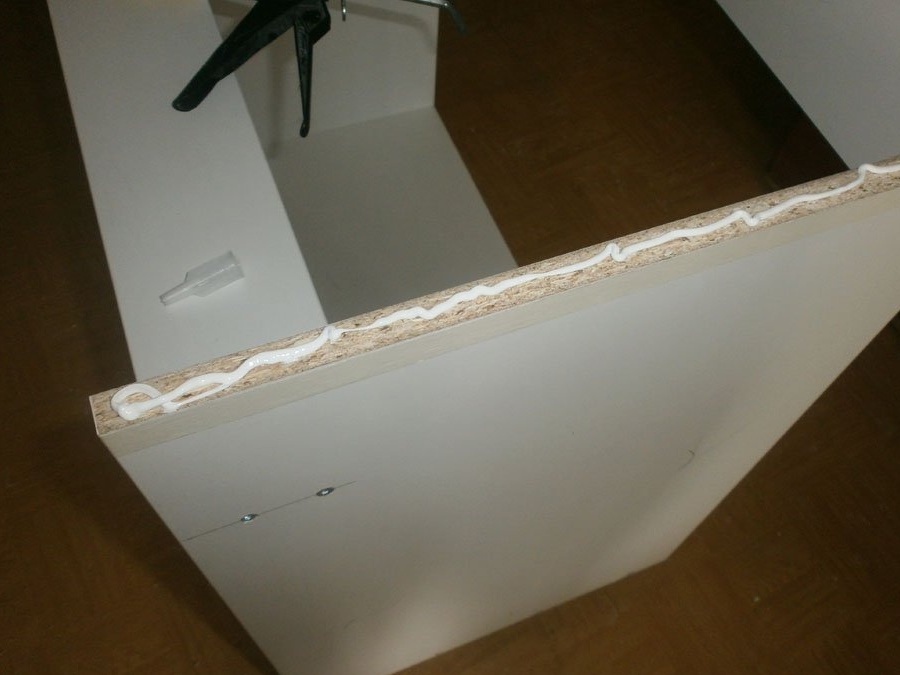
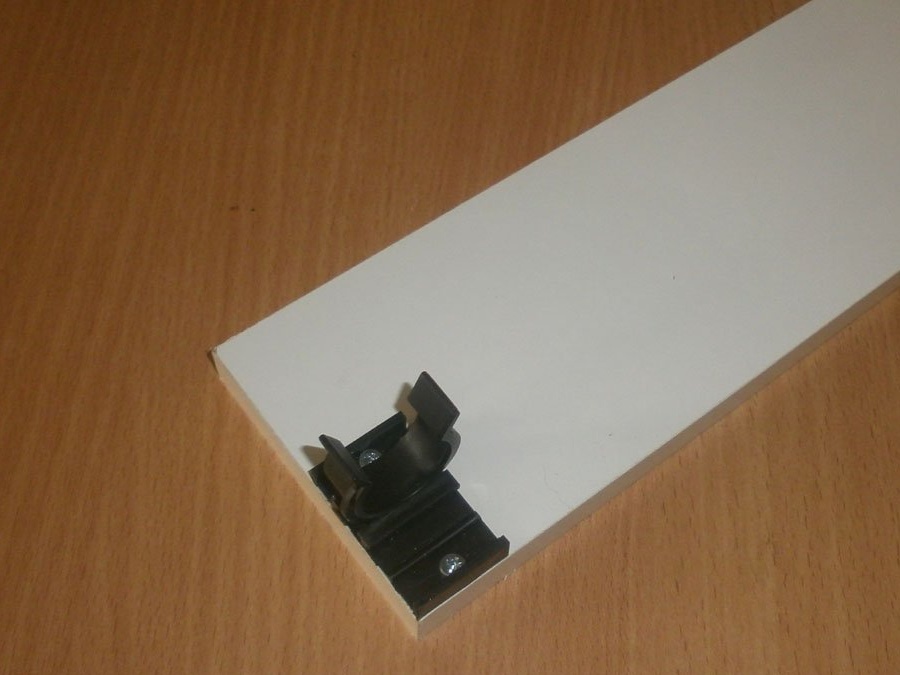
But even before assembling the “boxes”, one important thing needs to be done: seal the two slats in the dryer and the countertop at the ends and the rear edge. To do this, glue with paper tape everything that should not be stained,
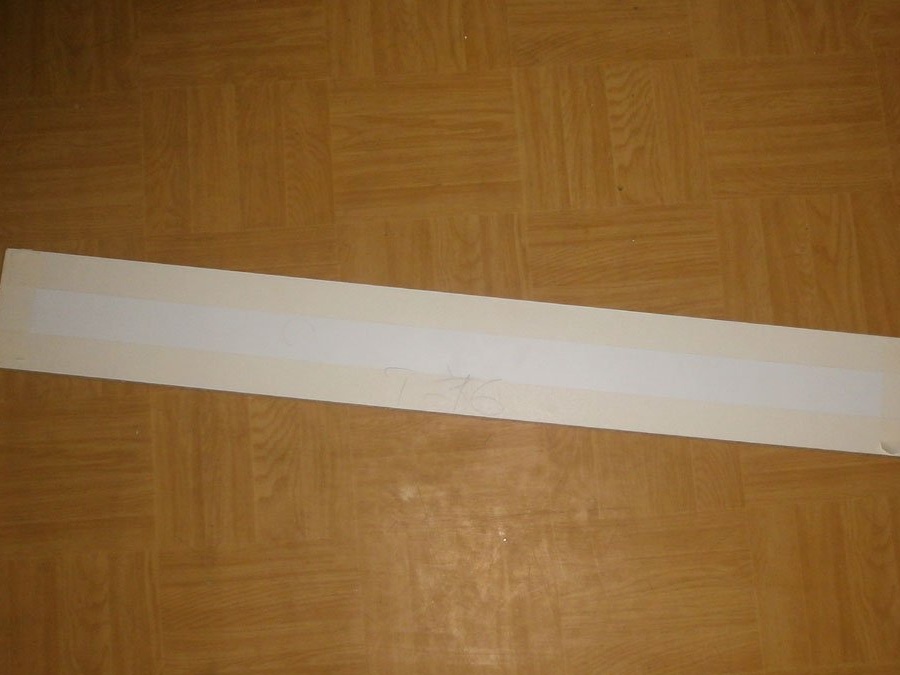
and coat, rubbing lightly (you have to twist the finger), hemetic. We hammer in a T-shaped profile and only now remove the paper tape.
We also do with the countertop: and until the sealant has frozen, we screw the side plugs to the countertop,
and planks - to almost assembled drying.
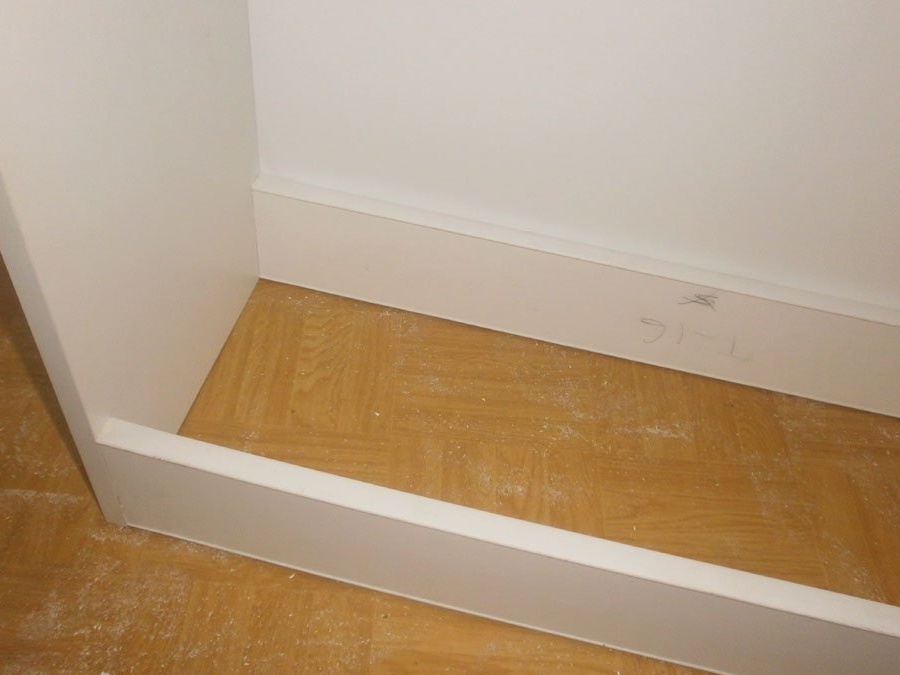
Now the sealant will be as it should. And spilled tea on the countertop, and the wet plates, cups that you put in the dryer, the chipboard is not terrible: it will not get wet and will not swell.
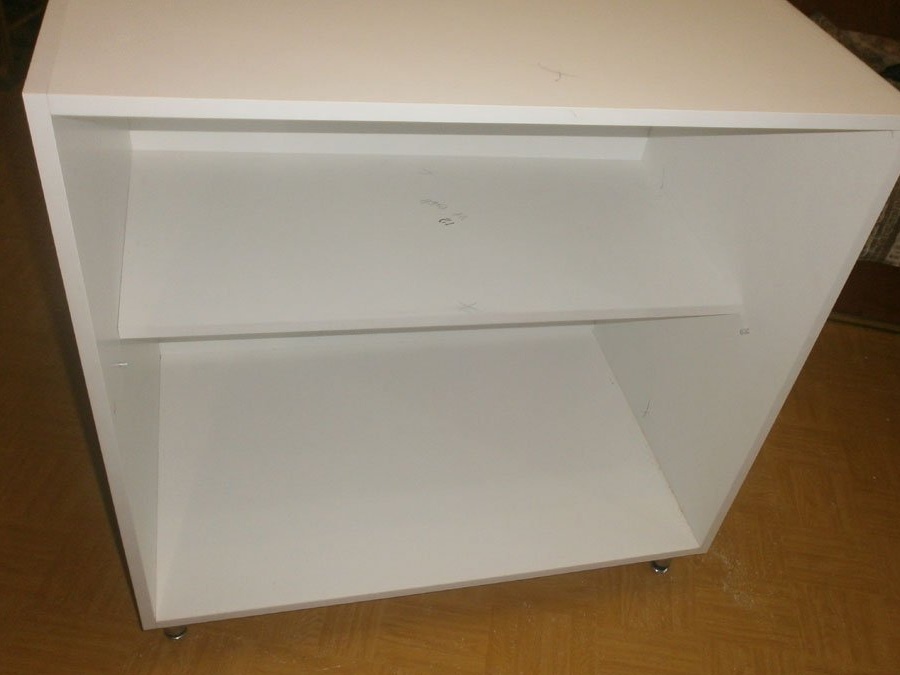
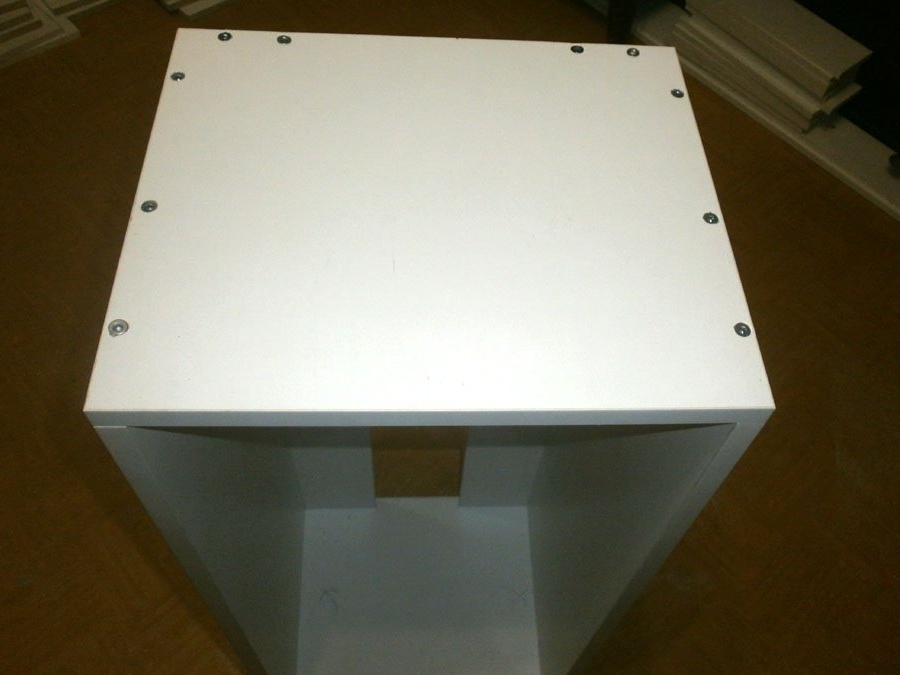
There is nothing complicated in assembling the boxes themselves: they put in two parts - they drilled,
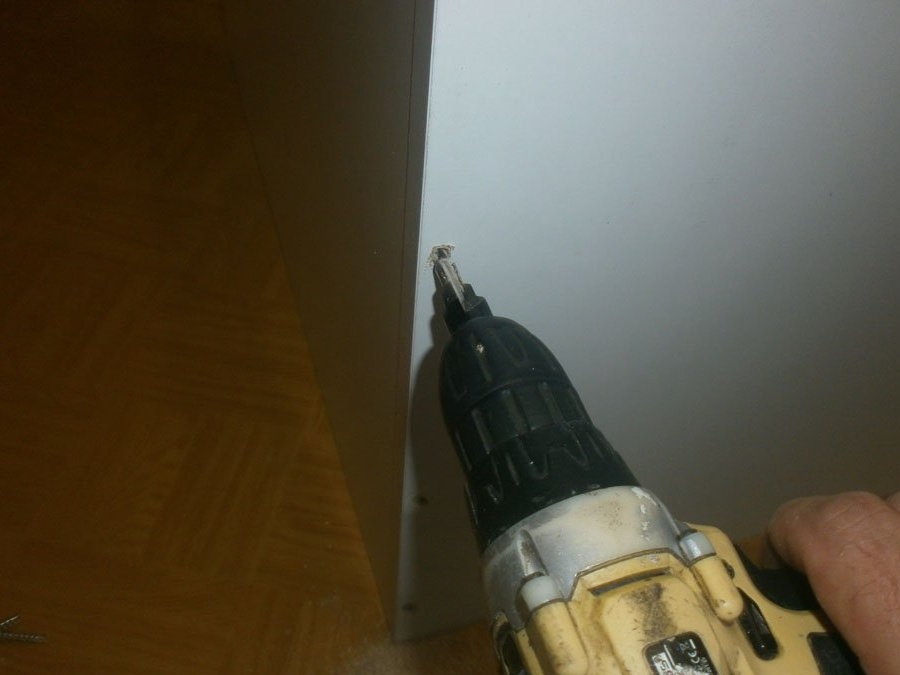
screwed confirm. If necessary - a little tweaked, pounded with a mallet.
And so - many times.
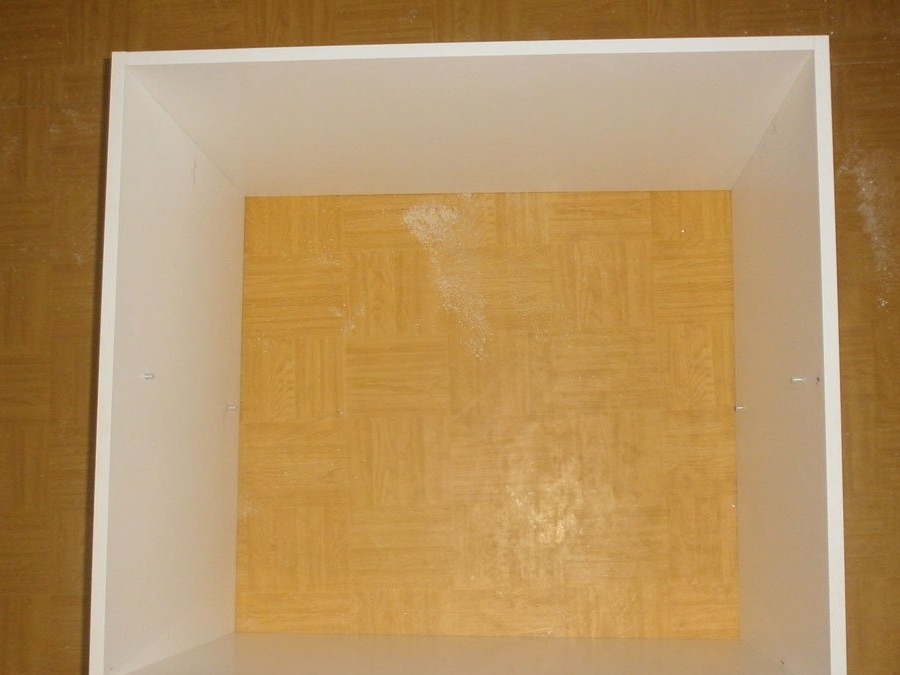
While the back wall of hardboard can also trim the resulting box. Therefore, first nail the staples (or nails, which option you choose) crosswise, and then all the others.

The legs of the lower cabinets. I chose simple ones, because I did not know whether I would close them with thresholds or not, but I provided for such an opportunity. Therefore, I took cylindrical.
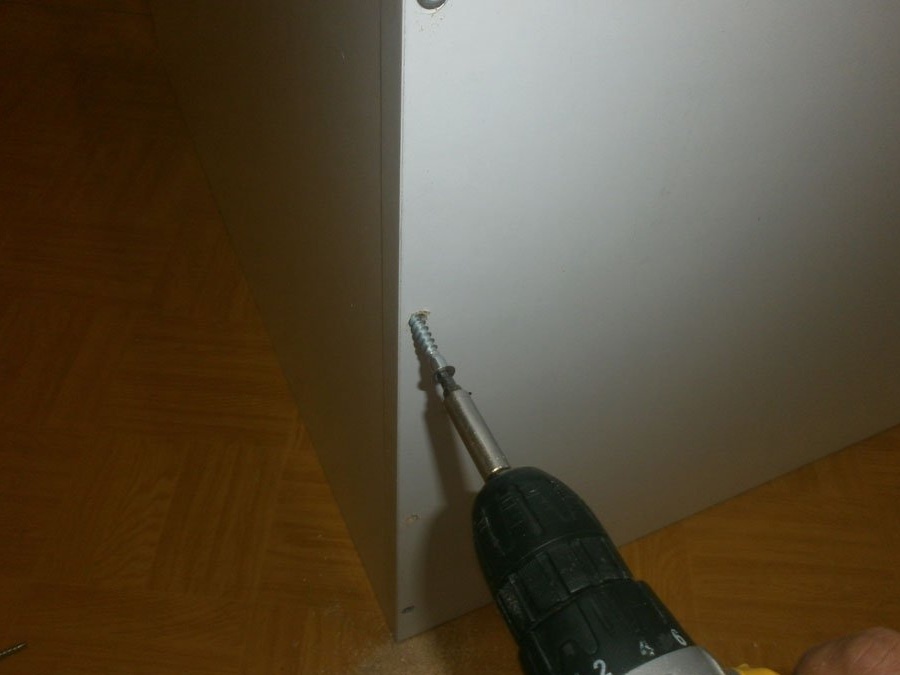
The mount is also crosswise, first two screws,

then two others. Moreover, those in the wall can be taken more authentically: it will be more reliable.
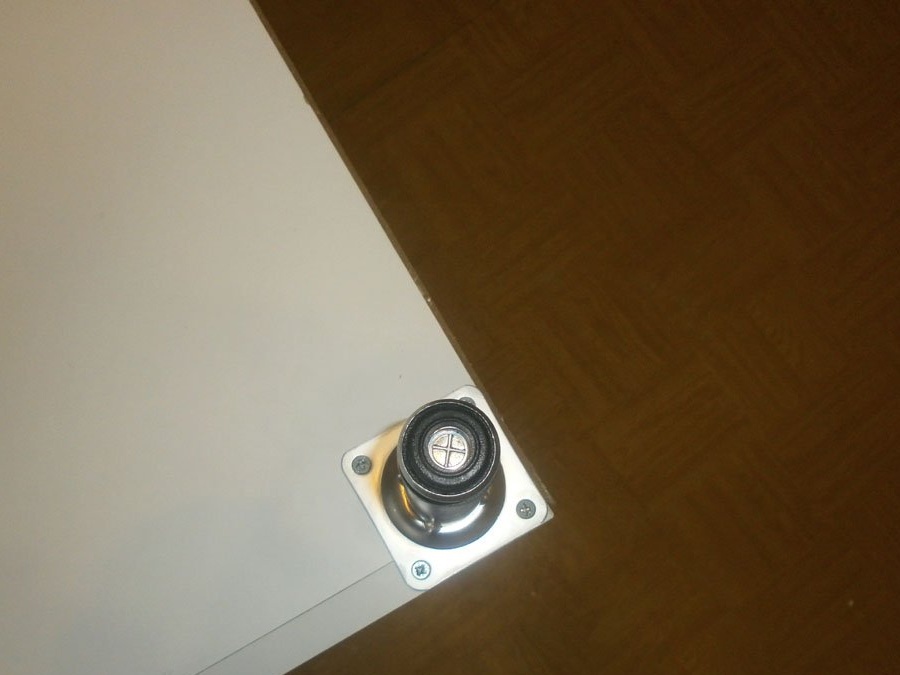
At the same time, the front legs were slightly sunk, a couple of centimeters, while the distant legs were screwed under the cut: so the cabinet will be as stable as possible.
One is ready, and we are doing the rest. By the way, my facades were a little late, so I screwed them later, and you can do everything right away.
The cabinet under the sink is different: it does not have a back wall. And to compensate for the reduced stiffness due to its absence, as well as the fact that there is no top cover, two 100 mm wide strips will replace it.
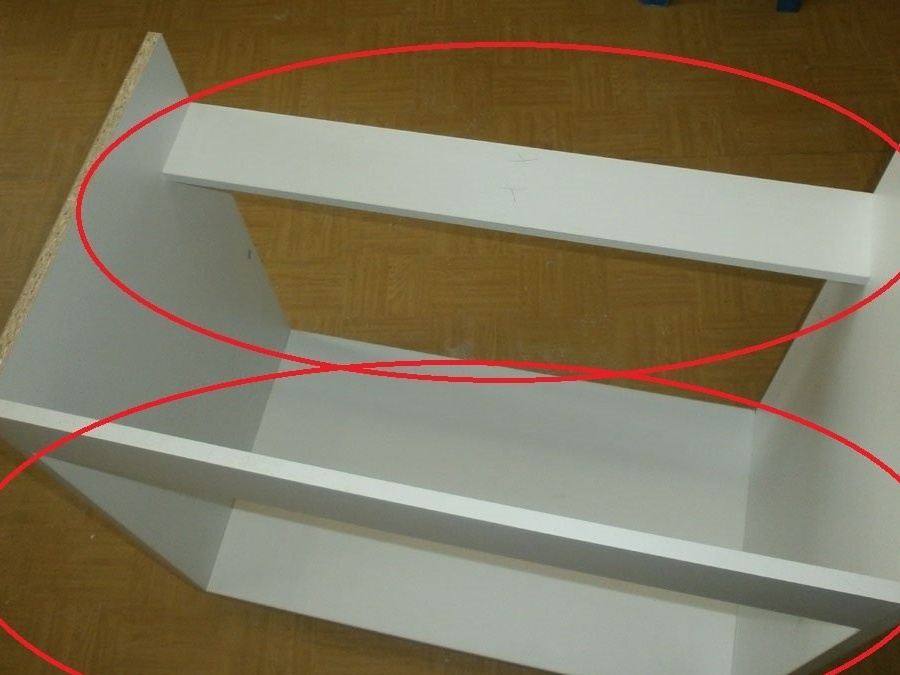
And do not forget to grease the ends with sealant: it certainly will not be superfluous, given the increased humidity. We glue the contour with paper tape, apply it,
and smear well, rubbing it. Just like at the ends of a countertop and a drying cabinet.
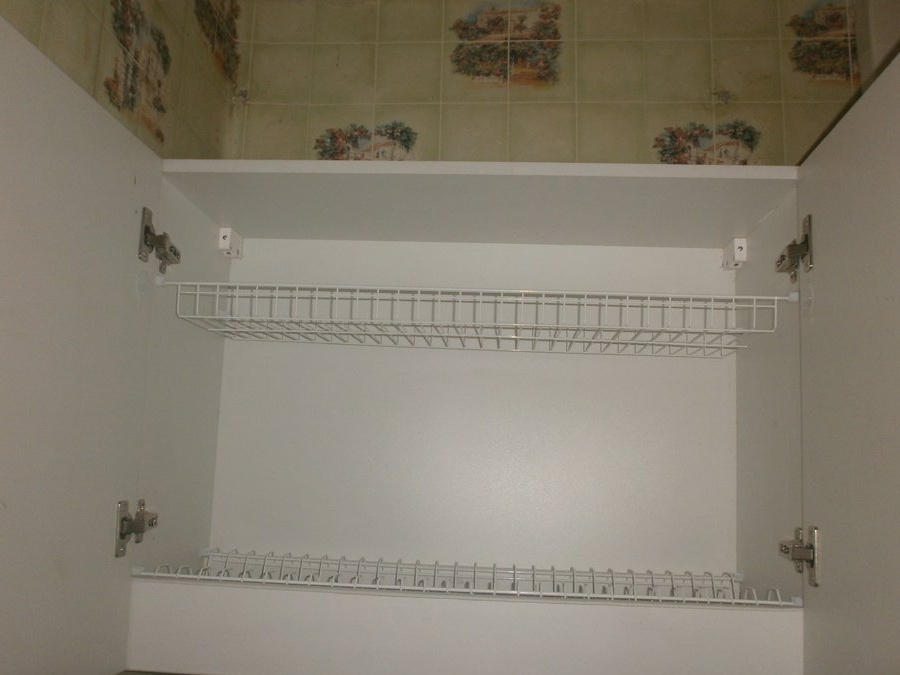
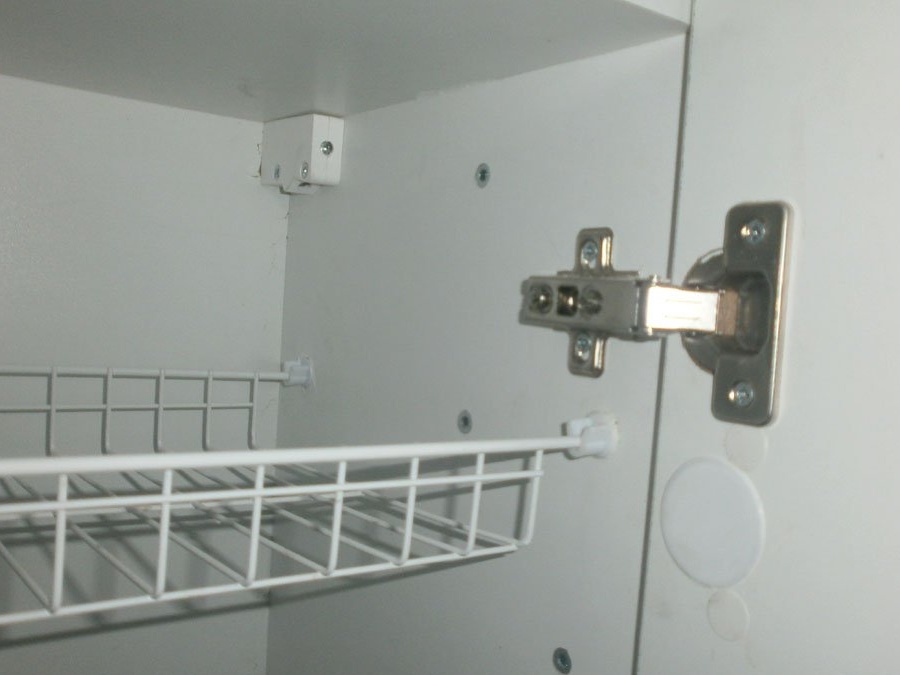
Wall cabinets differ from the lower ones only in that they are smaller, they do not have legs but there are, accordingly, canopies. For the kitchen, I took adjustable in two planes: for a long time I wanted to try them. Although you can take ordinary ones.
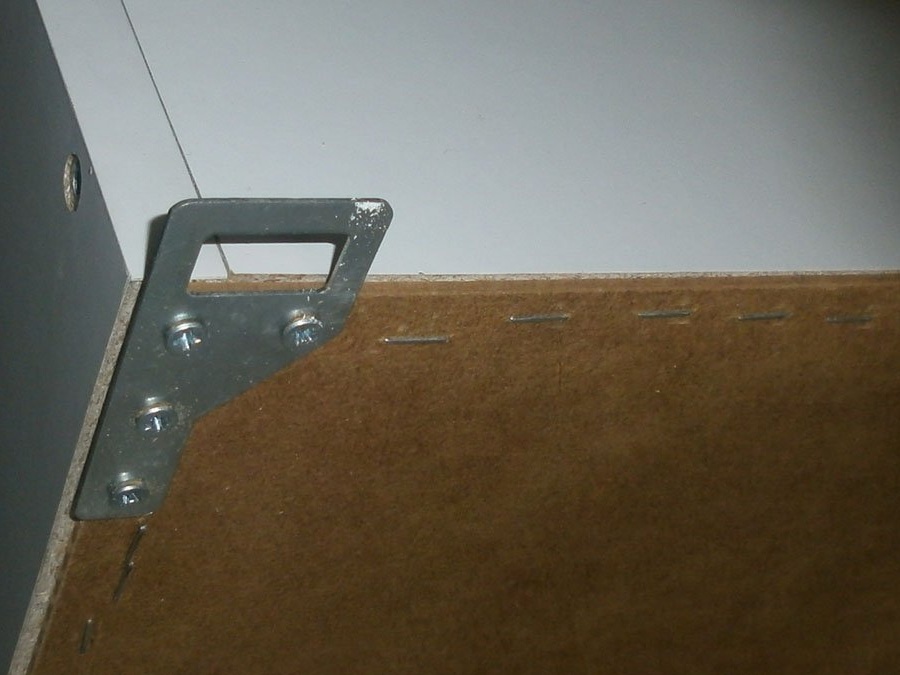
They are screwed into a corner and into the edge,
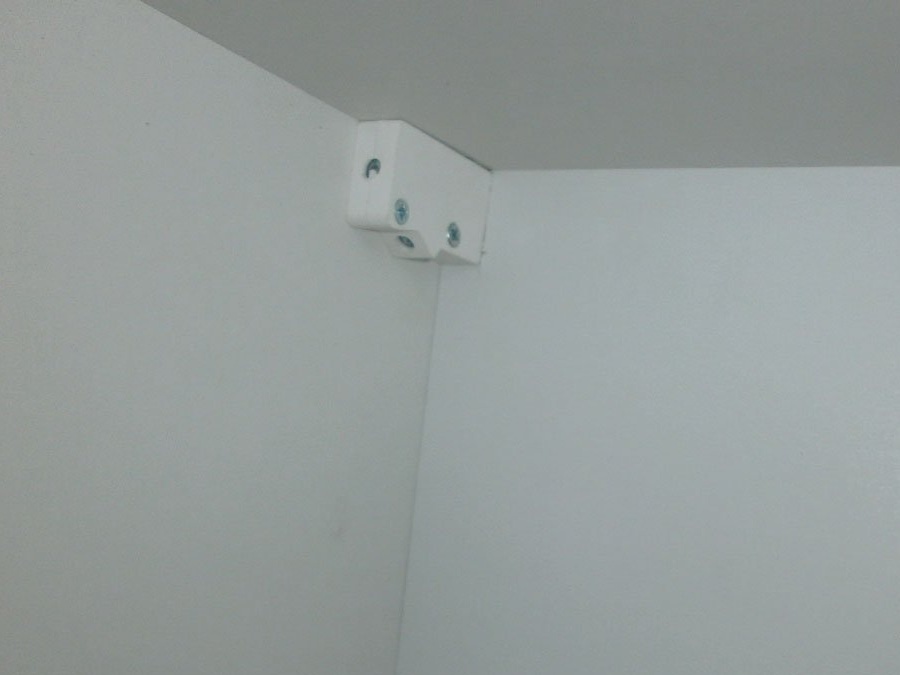
in hardboard, a rectangle of 30 by 45 mm is cut out and everything is ready: you can nail it. He does not block the adjustment, and closes the rear wall of the cabinet.

But these are ordinary cabinets-boxes, which will be closely adjacent to the back wall. Whereas in my case, out of 9 wall-mounted cabinets, 6 fall on the ventilation duct and pipe risers. And where it is possible - cabinets 4, 5, 8, 9 will only adjoin the wall with vertical walls. Number 2 - only one, and number 1 in general, hang only on the coupling bolts on adjacent cabinets.
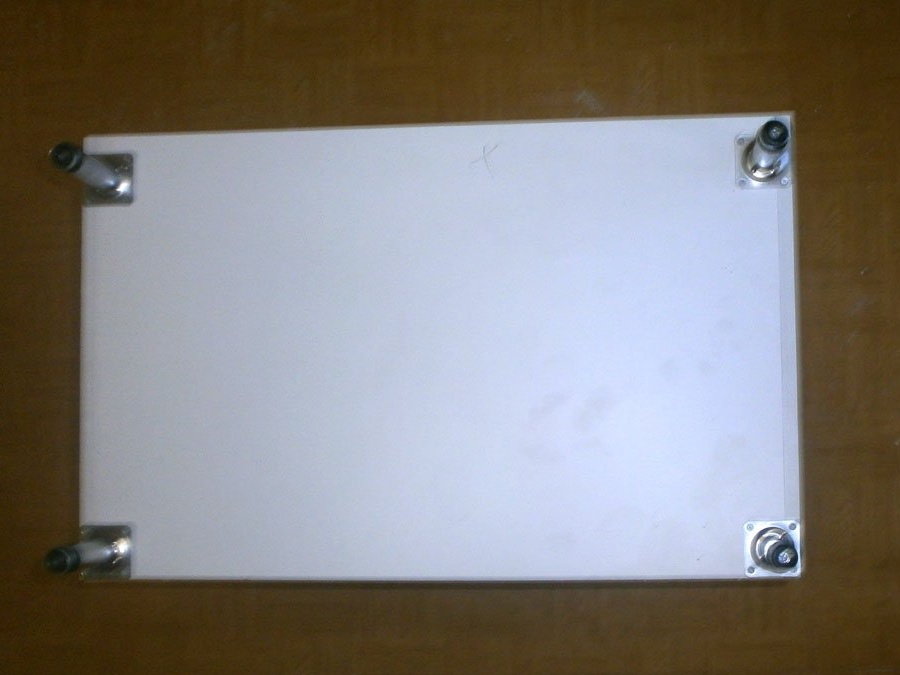
At first, everything is simple: we mark and drill holes for confirmations and stops for removable shelves.
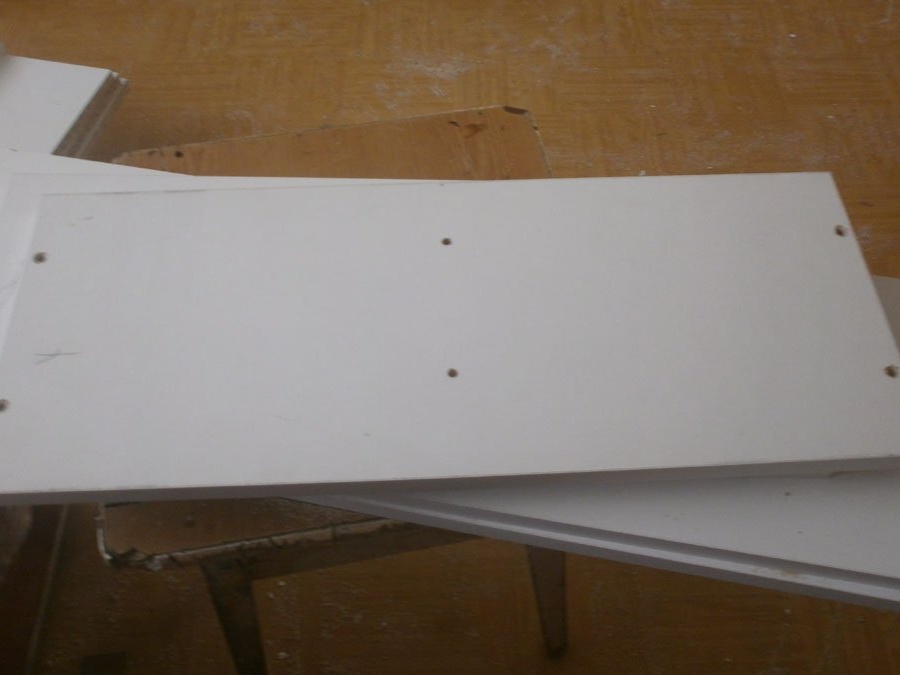
We assemble the box, draw a line on the side parts connecting the smaller parts, and use a drill bit of 8 (although it may differ for you), drill 5 holes on each side.

We drive in U-shaped guides.
Try on a sheet of hardboard. If necessary, turn them a little. We also act on the other side.
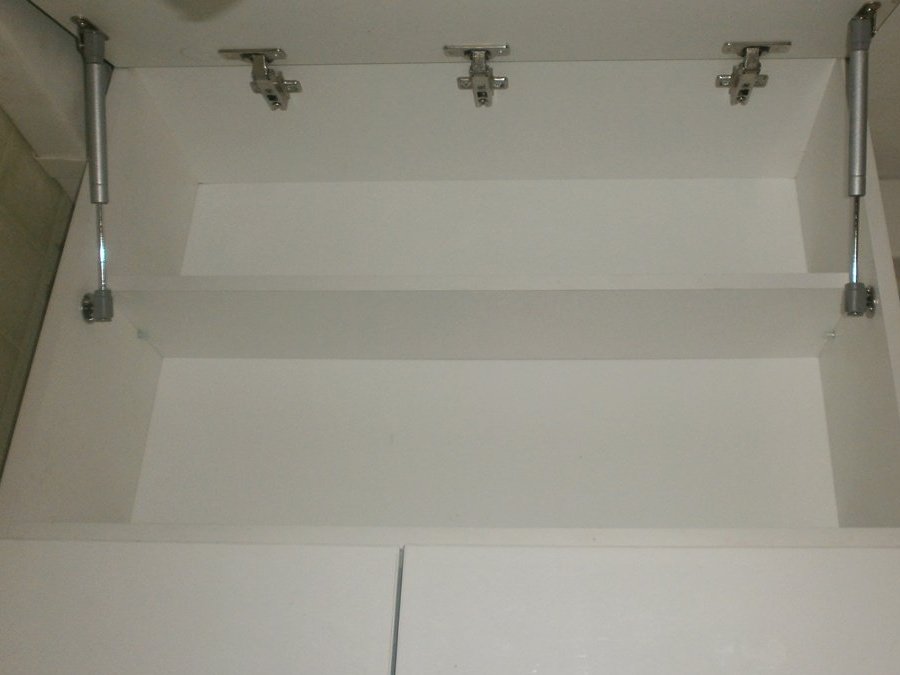
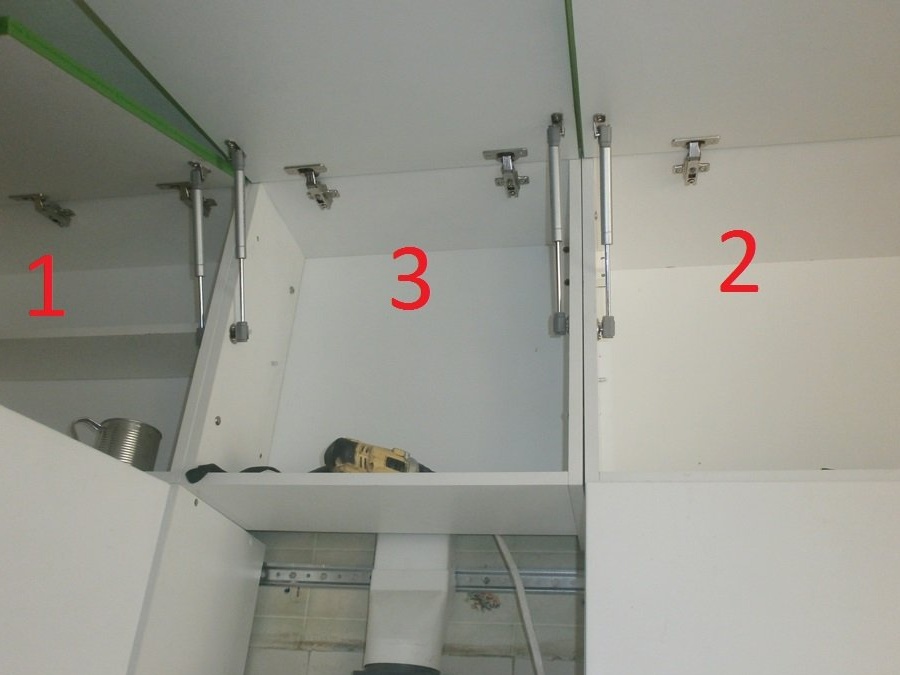
Awnings. We retreat 16 mm so that they are all in a row, drill holes with a five of the drill two holes in the chipboard, drill holes in the canopies themselves, and on the "mother" of the coupling bolt, we fasten them.
And on the reverse side we attract with M4 screws with countersunk heads 16 mm long. Repeat in mirror.
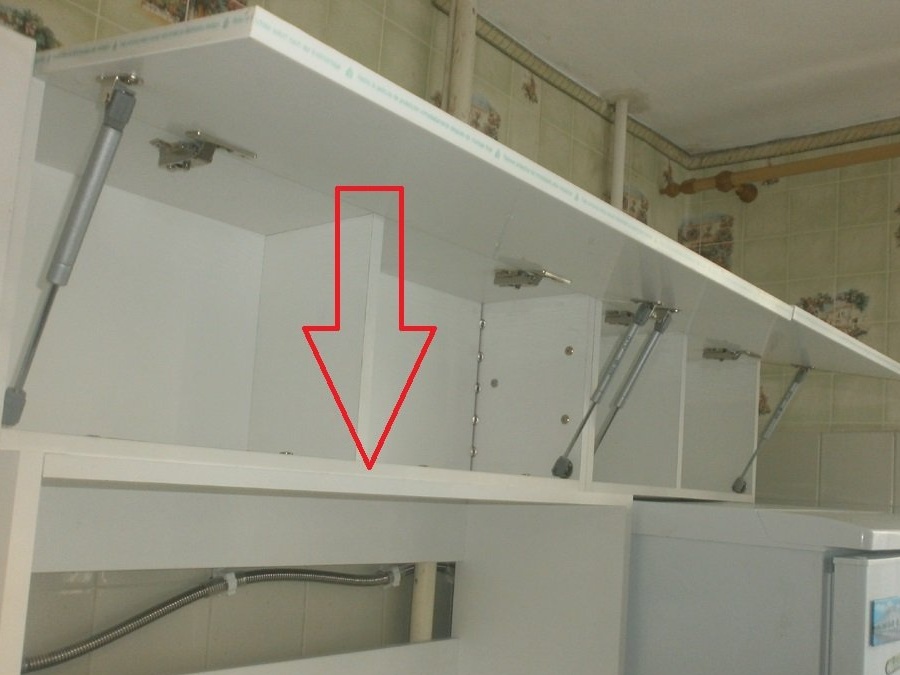
But just do not rush to nail the back wall of the cabinets.It is easier to adjust the gas stops of the facades opening upwards without it.
Niche cabinet for a microwave. I understand that it would be more aesthetic to assemble it on dowels, but given its weight, the reliability of the design comes to the fore. Therefore, the rear half-wall strut on 6 confirmations,
whereas the side walls - by 10.
It turned out reliably.
Shallow pencil case No. 13, hanging separately, was made not on adjustable, but ordinary canopies: I was afraid that he would move to the side, and there was no place left to make a stopper. Therefore so.
Roll-out shelves. A box is nothing wise: two confirmations per side (although one would be enough)
from below, the hardboard is pressed by runners (they need to be screwed in three or four places with screws), and the rest is shot by brackets.
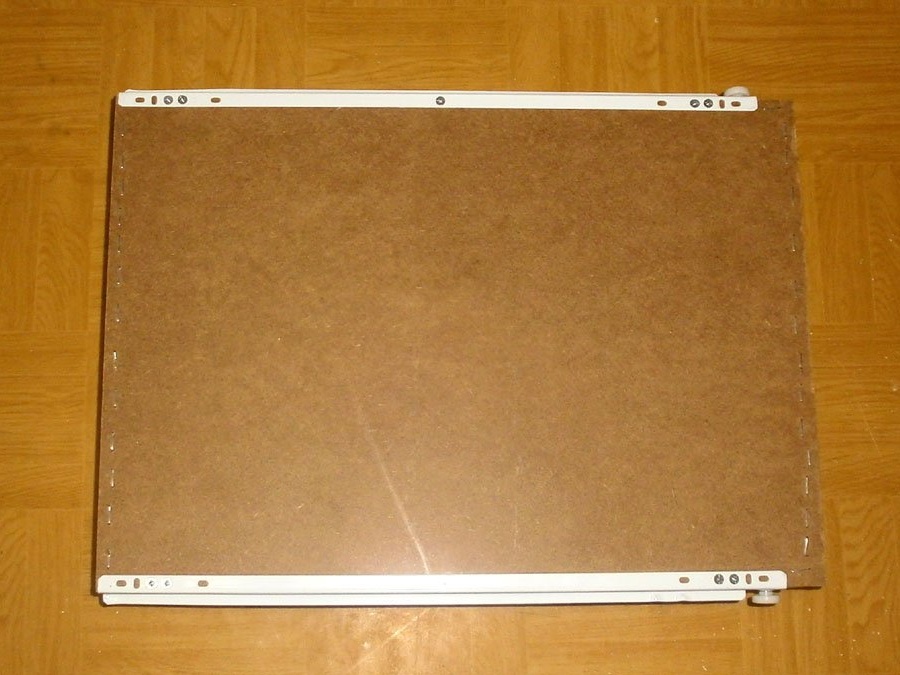
But I do not fasten the runners to the drawer on the sides: although there are holes there.
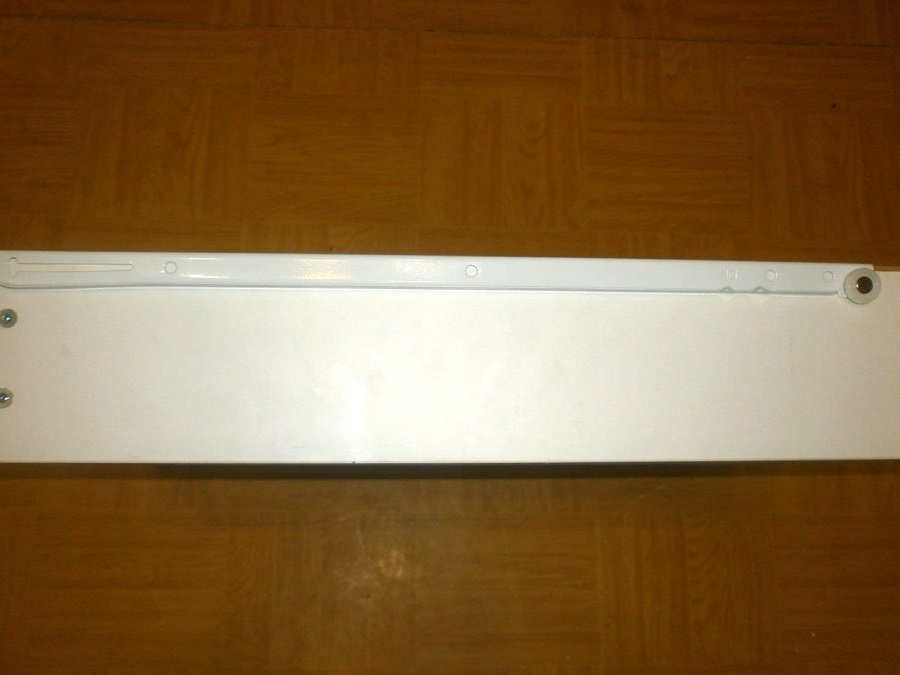
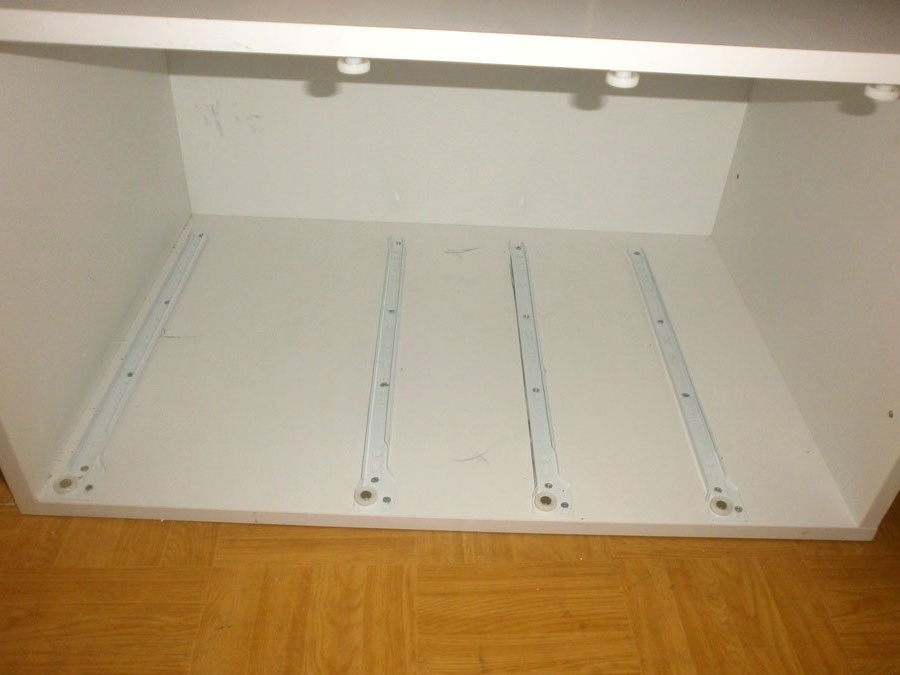
Now the response runners in the box itself. Just do not repeat my mistake: first fasten the runners, and only then - nail the back wall to the cabinet. I did the opposite, and I had to suffer a lot.
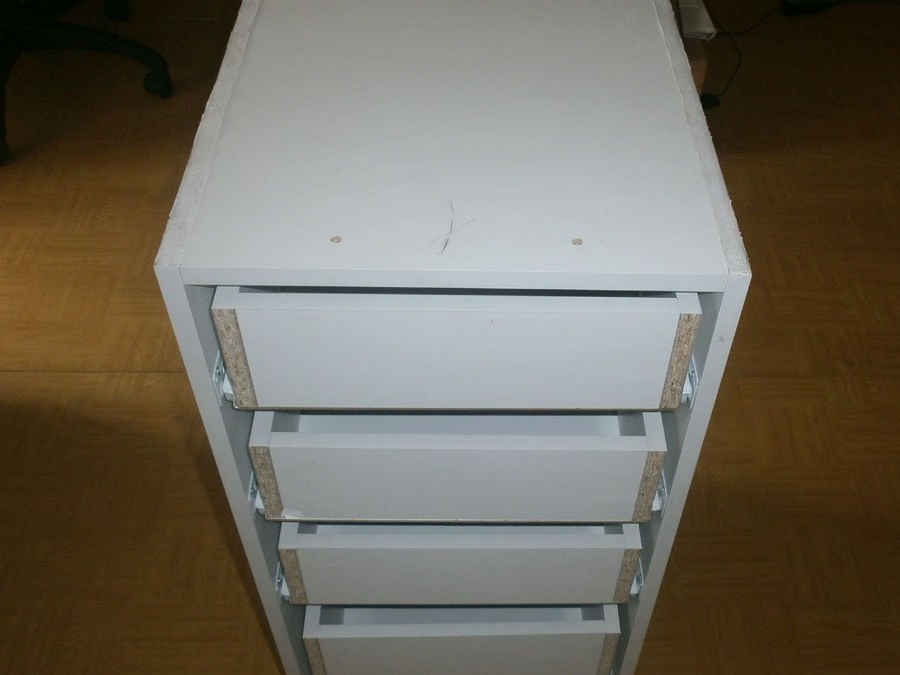
The cabinet is ready, it remains only to wait for the facades.
But since the facades were still late (holidays were superimposed), I decided to do what I could. And first of all, it’s a wash-stand. By the way, while I set it, I said thanks more than once that the facades did not reach: it would be less convenient to put it in and out, with doors.
It was simple for me: I cut, set instead of the old curbstone, so I did not have to adjust anything. It’s only necessary, when changing flexible hoses, buy new ones: I decided to save money and then removed and installed everything again.
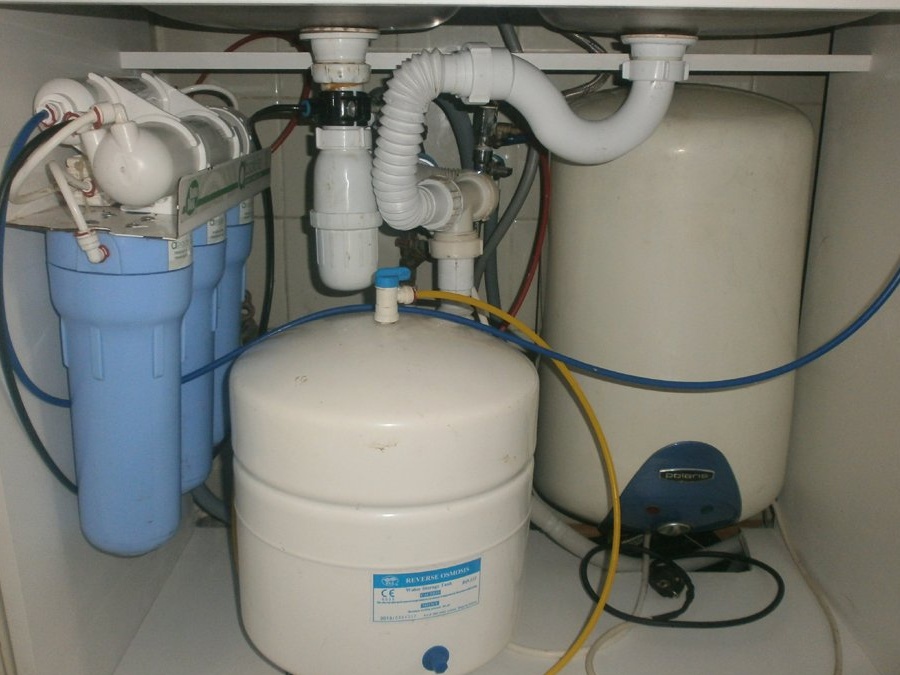
When I install the sink, I coat it with sealant directly where it adjoins the wall from two sides. And also another, between the sink and stove. It turned out very well: the practice of such a solution in the old kitchen proved to be just great.
Hooray, the facades arrived. And the first thing I did was a small shelf above the kitchen table for bread, lazybones from the TV receiver and other things. The practice of the former kitchen has shown that this is a very, very convenient subject.
Hinges. In the facades

having retreated 22 mm from the edge, I make a hole with a special drill-mill with a diameter of 35 mm,
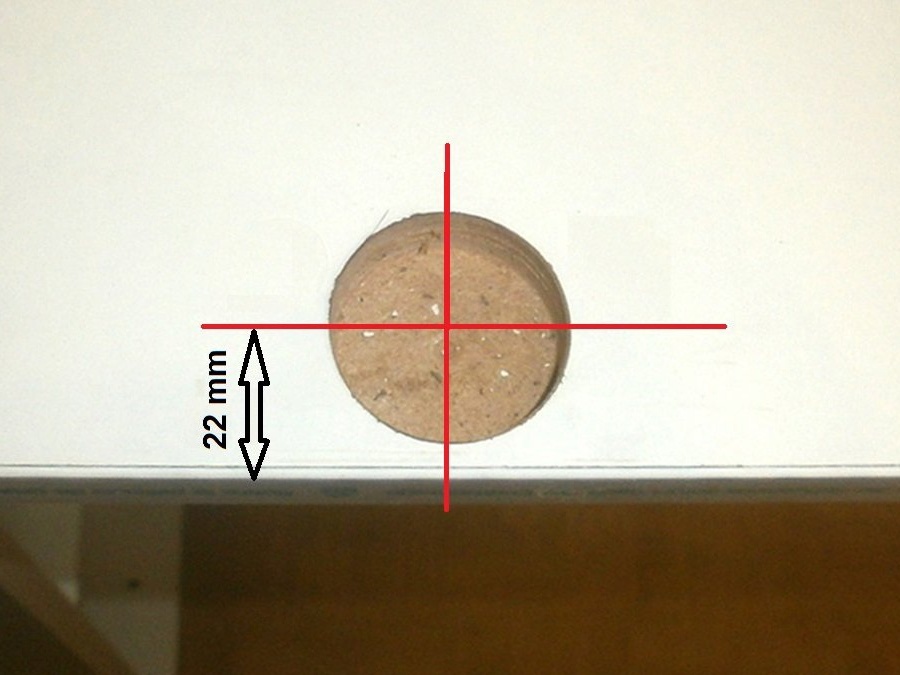
and with two screws 16 mm long I fix the loop.

Now putting the facade close to the cabinet box, I attract. It’s better to twist the screws in the middle of the holes in the loop,
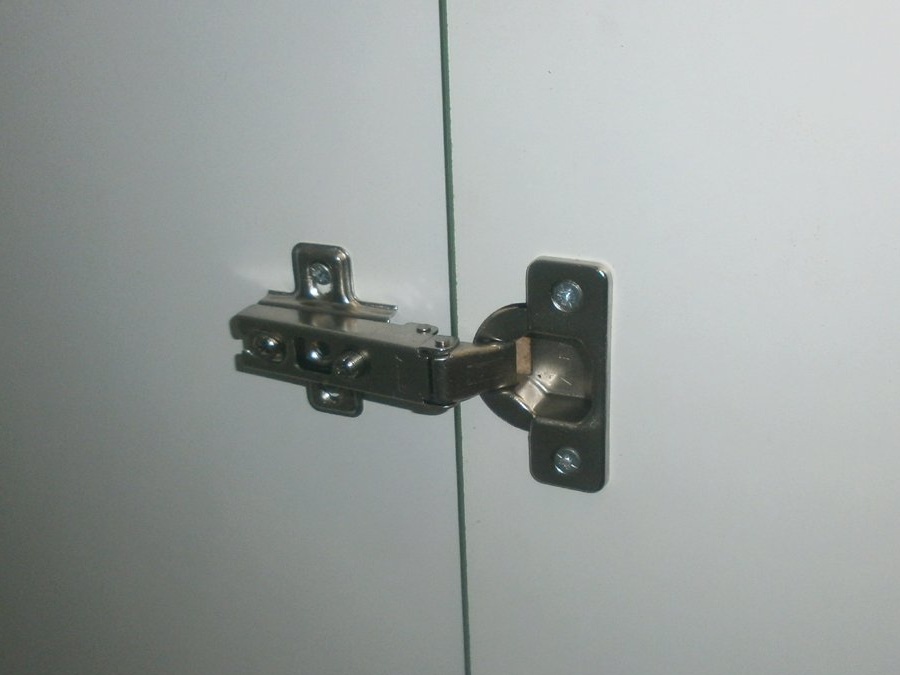
since then they, as well as directly the screws on the hinge, need to adjust the doors.
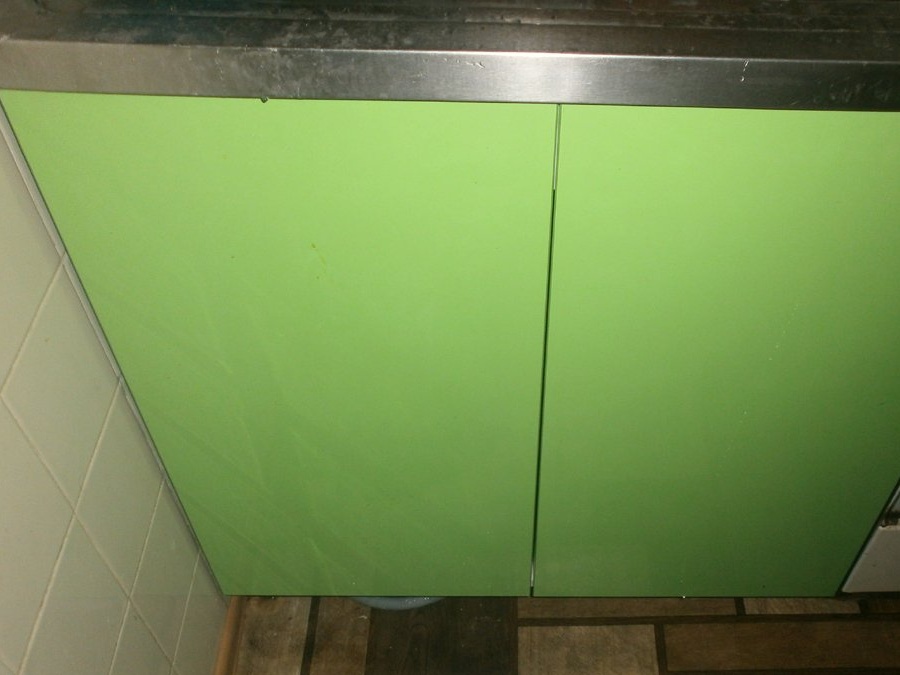
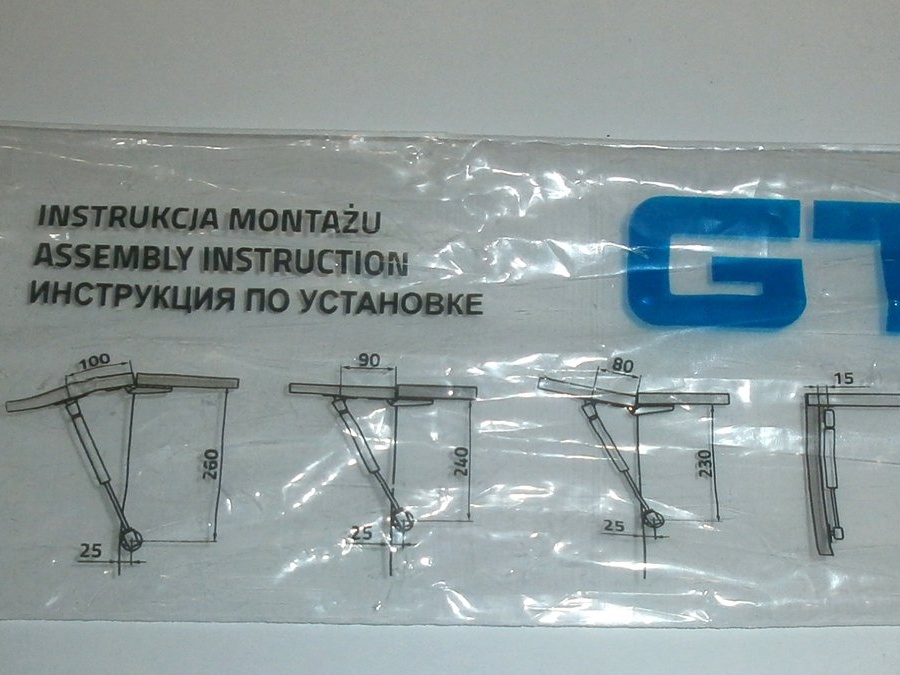
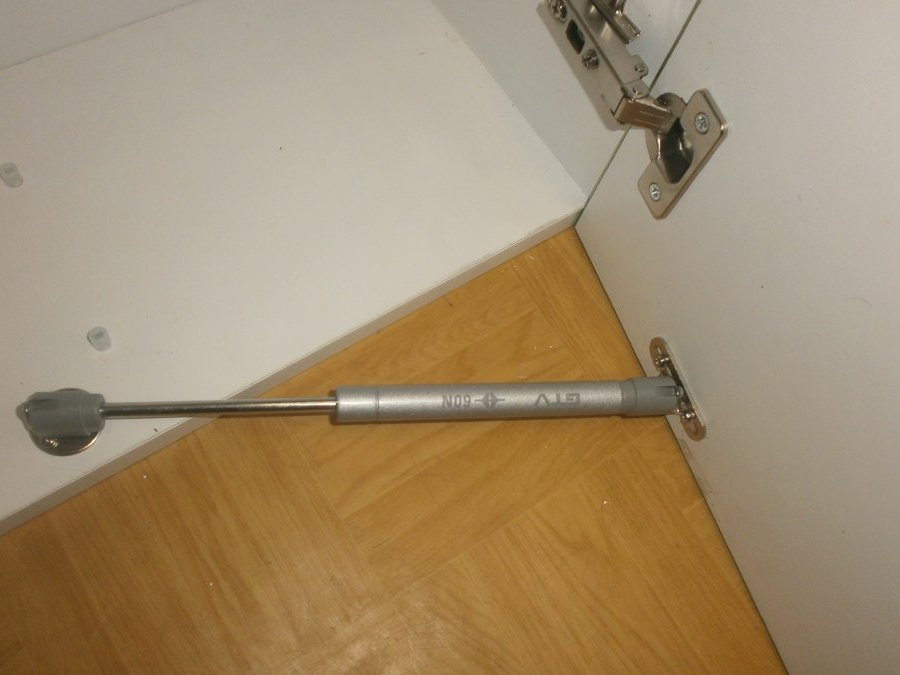
Gas stops for doors that open up. I will not advertise the manufacturer, but the installation instructions are drawn on the packaging of each of them, understandable even to the "teapot", which I consider myself to be.
Therefore, 2 screws from the stop set in the door,
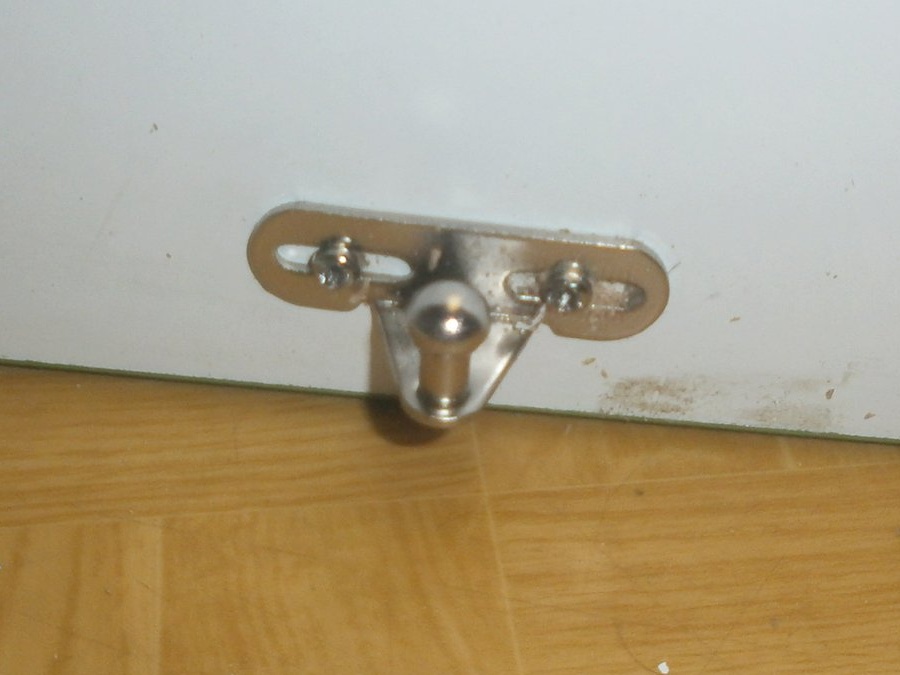
3 - in the cabinet box,
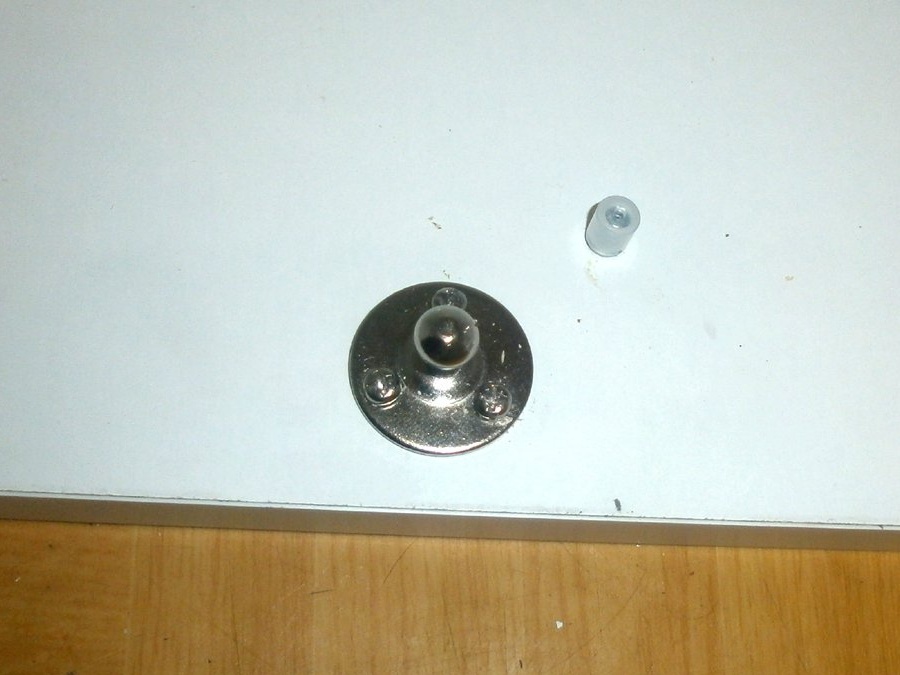
two clicks and voila, the emphasis is. You can do one on the cabinet, but I prefer to put two on each side. So the door does not warp, and if one suddenly fails, then it will not hammer on the head when you look for something inside. Only pick up less rigid if you also put in two.
Repeat the same operation for fastening the doors and installing gas stops many times until all the cabinets are ready.
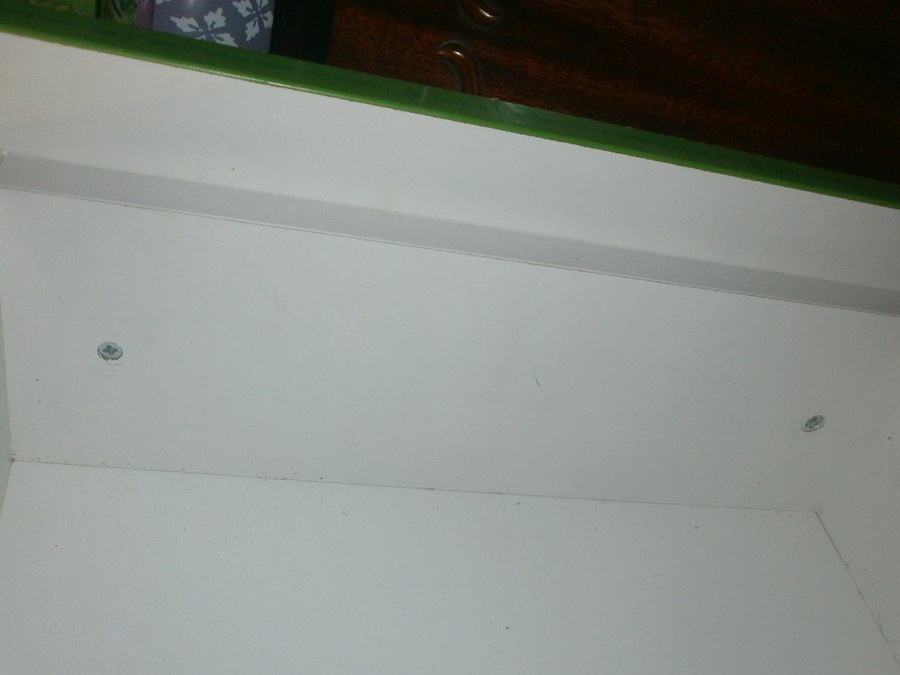
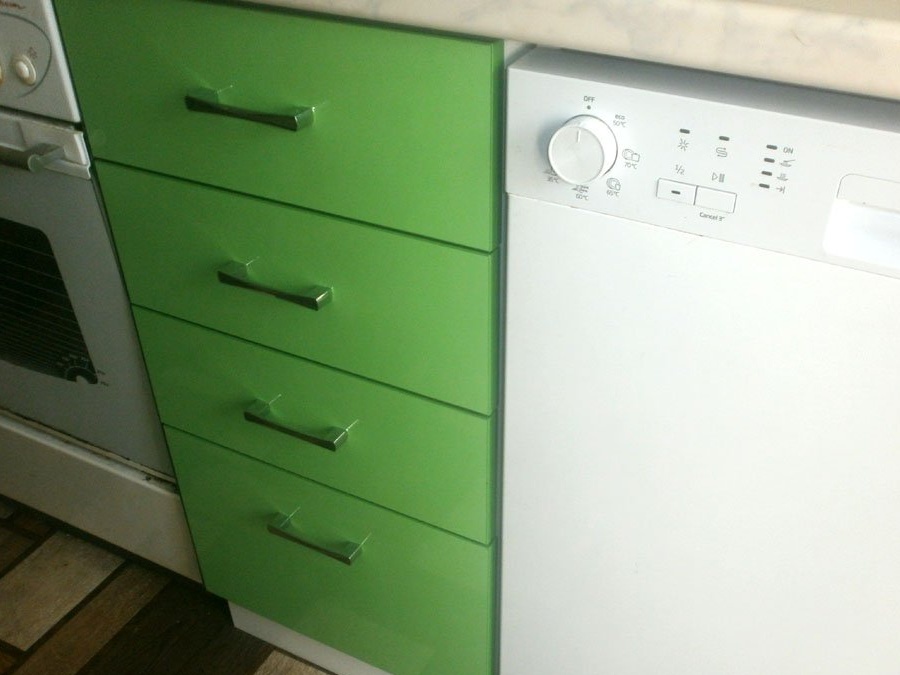
Facades of drawers. Several times already collected something similar and always use a little trick. I glue a strip of double-sided foam tape on the facades and carefully lay them out. So they will be as even as possible, with equal distances, and you won’t have to twist anything.
I fasten each of them with two self-tapping screws from the inside: then when I put the handles in, they will also attract her.
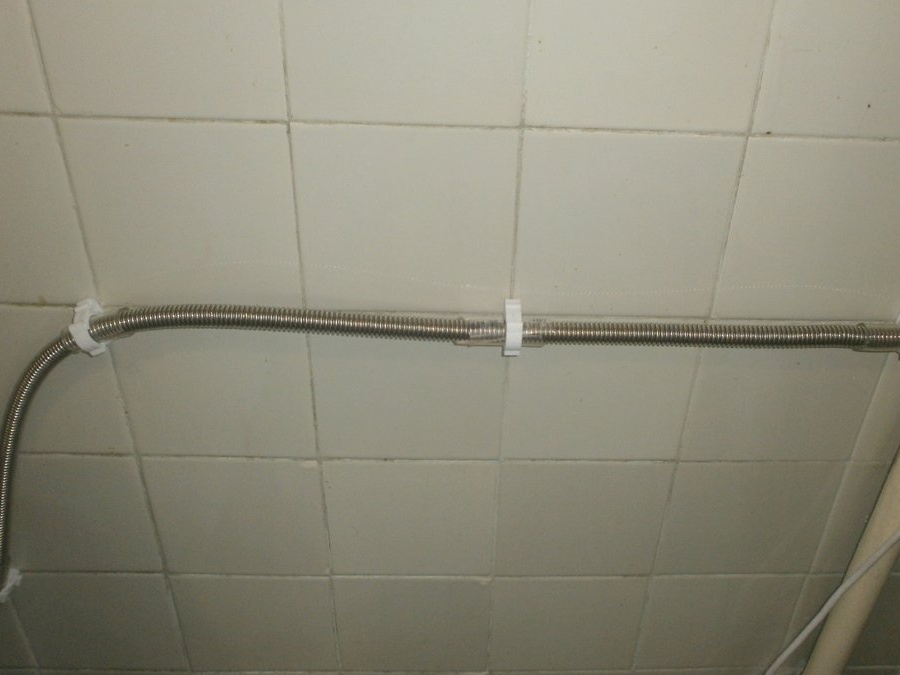
Everything, the cabinets are assembled, it remains to install them. But first you need to lay a new flexible gas hose. And for its fastening I used half-inch clips for water pipes.
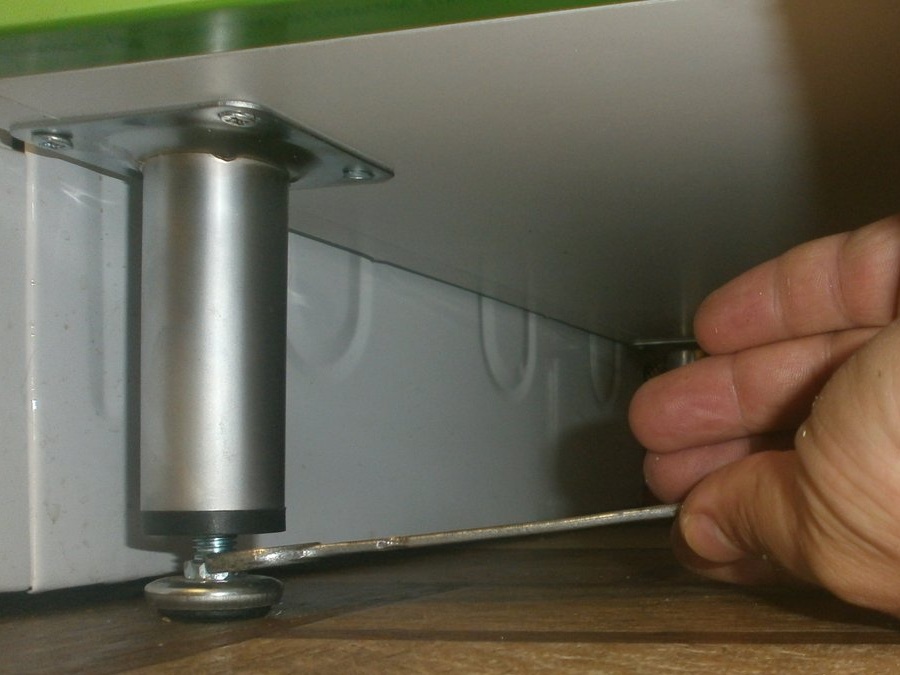
It’s easy next. Put one stand,
dishwasher and a second. Aligned to the wall,

and then adjusted the height of the legs. Here is the wrench and level to help you.
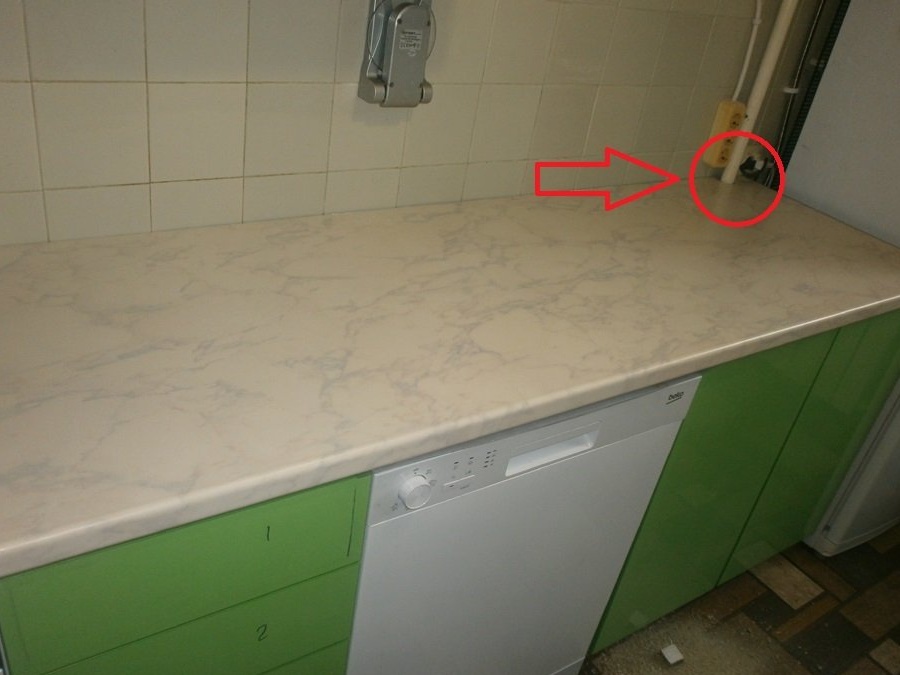
He laid the countertop (still had to cut a hole in it under the gas riser), and pulled it from the bottom with screws. The bottom row of the kitchen is ready.
Now the top one. I never used such adjustable canopies, so the debut.The bar was fastened with ordinary thick self-tapping screws with dowels with a diameter of 10 mm. In this case, you do not need to screw them into each hole in the bar. As I was told in the store where I purchased all the accessories, two screws for each cabinet are enough. And place them as close as possible to the canopies of the cabinets themselves: you definitely won’t be mistaken.
At the same time, in order to adjust the height of the cabinets to a minimum, be sure to use the level. Along the entire length: the bar strives to deviate slightly up and down.
Drying is hanging. The cabinet, which above it, just the opposite, does not hang in any way. Because I pull it with two rows of coupling bolts,
for reliability. Done.
Further hood, so the length of the strap for another cabinet is not enough. I fasten the second. Naturally, it must already be trimmed.
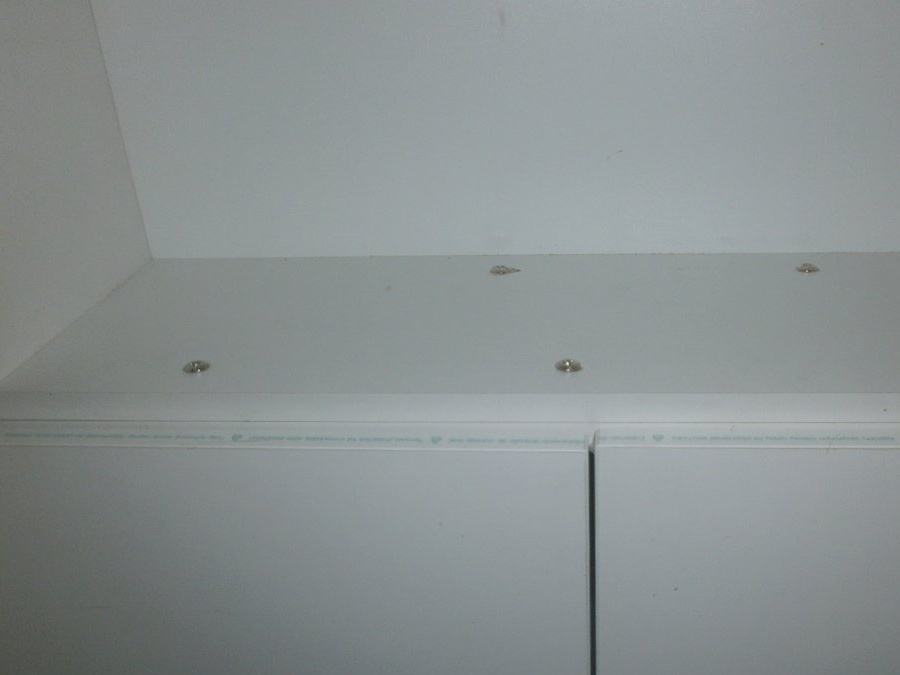
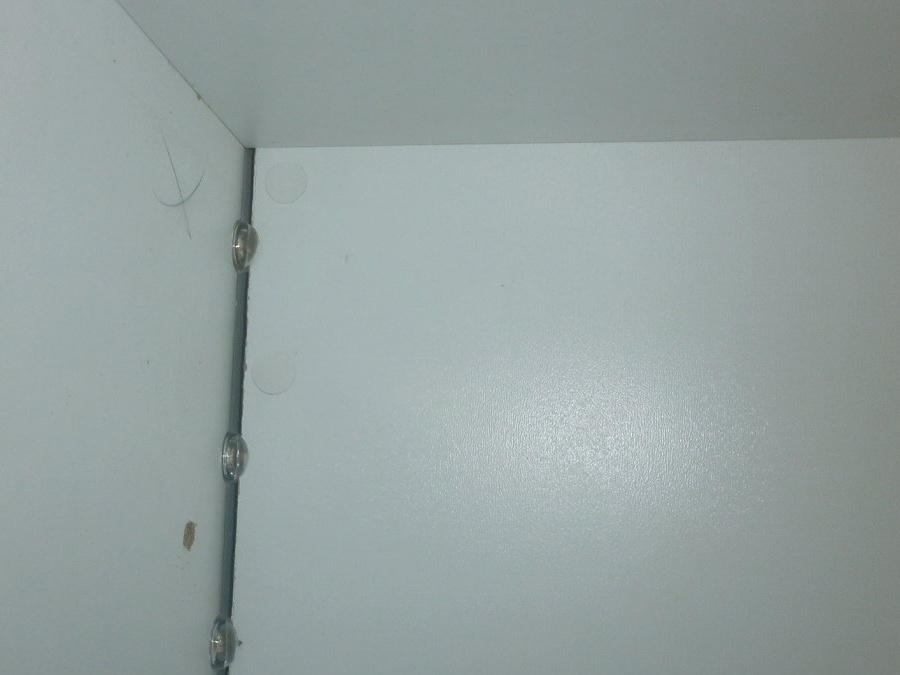
The cabinets, where the back wall adjoins close to the kitchen wall, do not cause problems: hung, leveled, tilted out, level, took up the next. But those cabinets behind which pipes run and are less deep are more difficult to regulate. When assembling, do not forget to drill two holes on each side with a diameter of 8 mm for the adjustment screws and store a long, thin screwdriver.
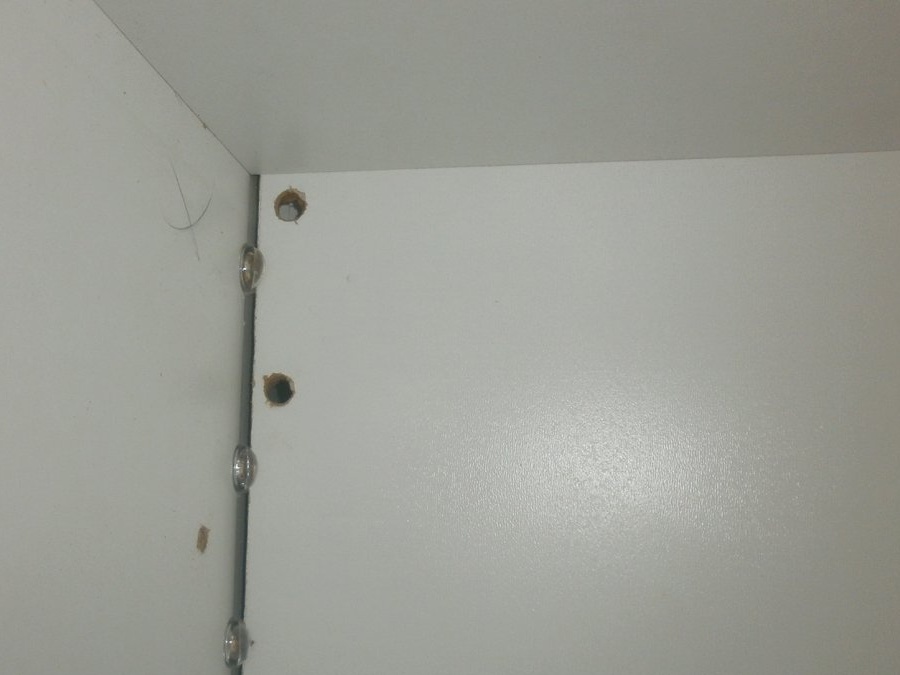
And so that after adjustment these "black holes" do not gap, just glue them with circles for confirmations.
The cabinets themselves are tightened together with tie bolts: so the whole structure will be almost monolithic,
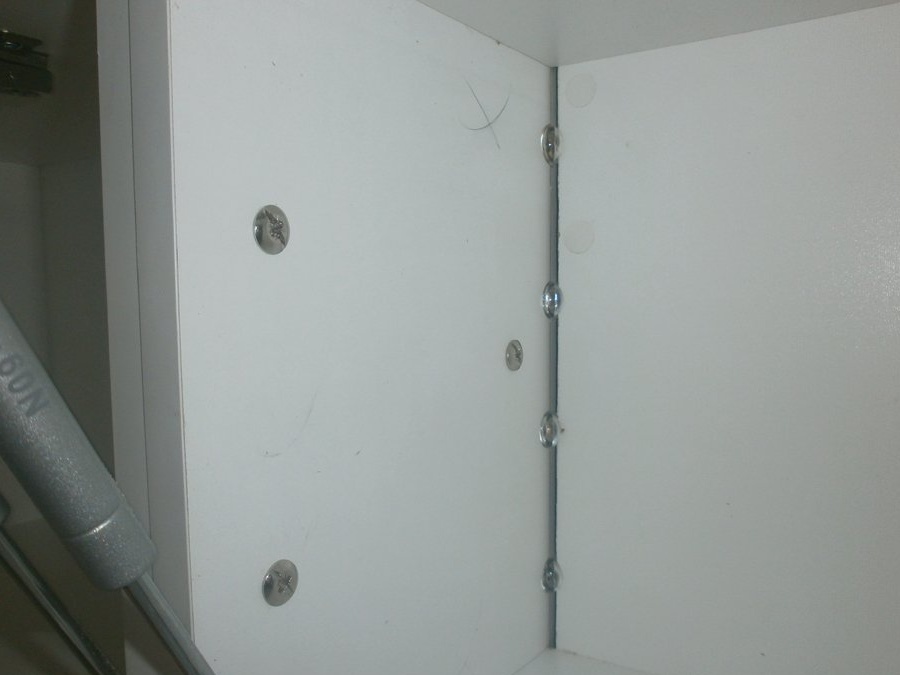
and will hang securely. Even the only open cabinet, the one where there will be a crock-pot and a very difficult microwave oven, and not hanging on suspensions in any way, will also be a single whole.
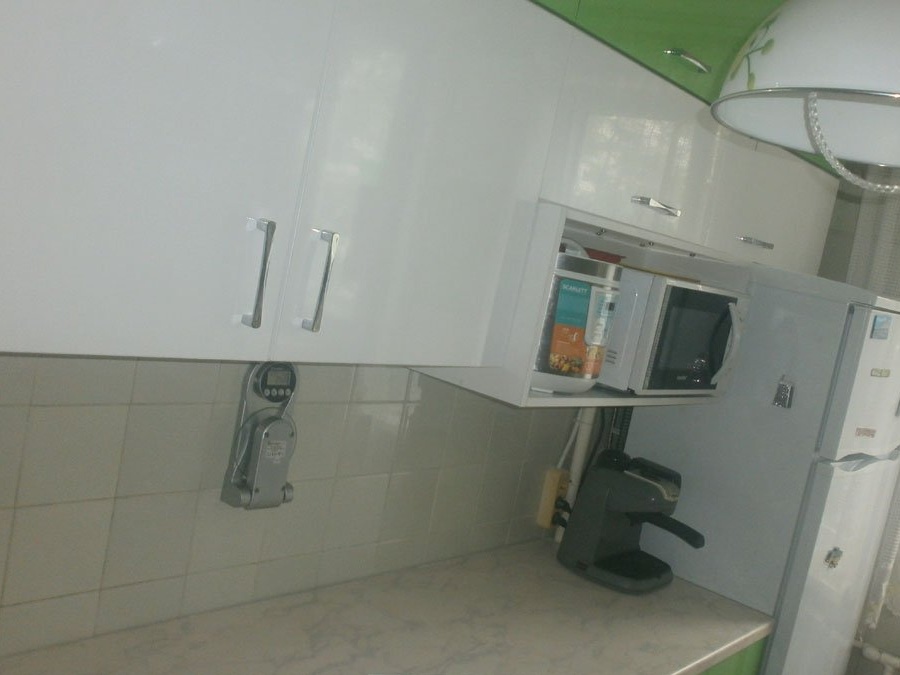
The topmost row of cabinets. Again, the bar, or rather one and a half from the exhaust pipe to the end of the wall, we first hang a large cabinet, and then the one above the hood.
We hang the whole row of cabinets, align them, tighten not only between each other, but also with the row below.
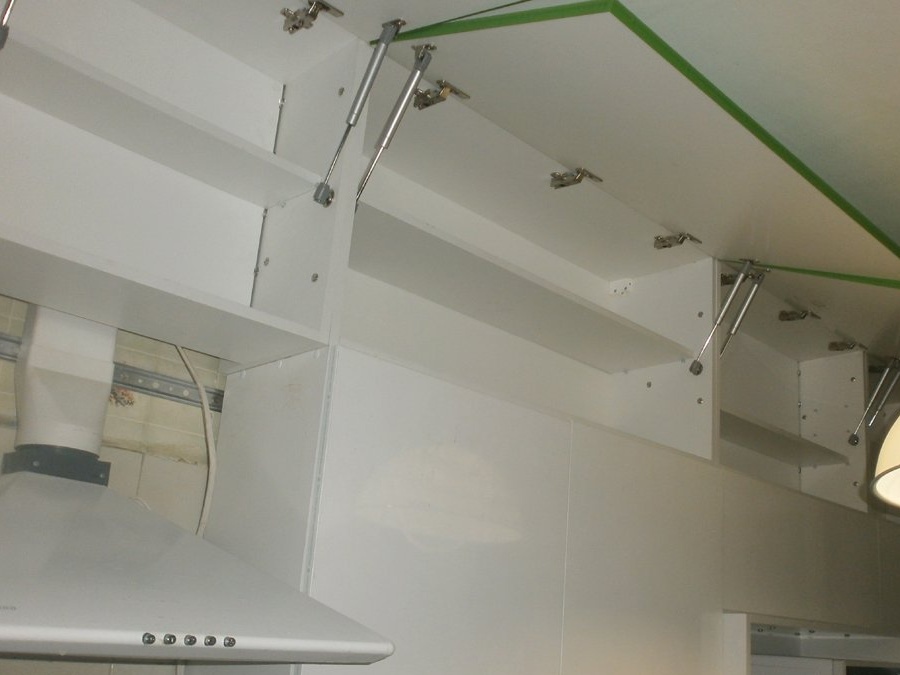
The kitchen is hanging.
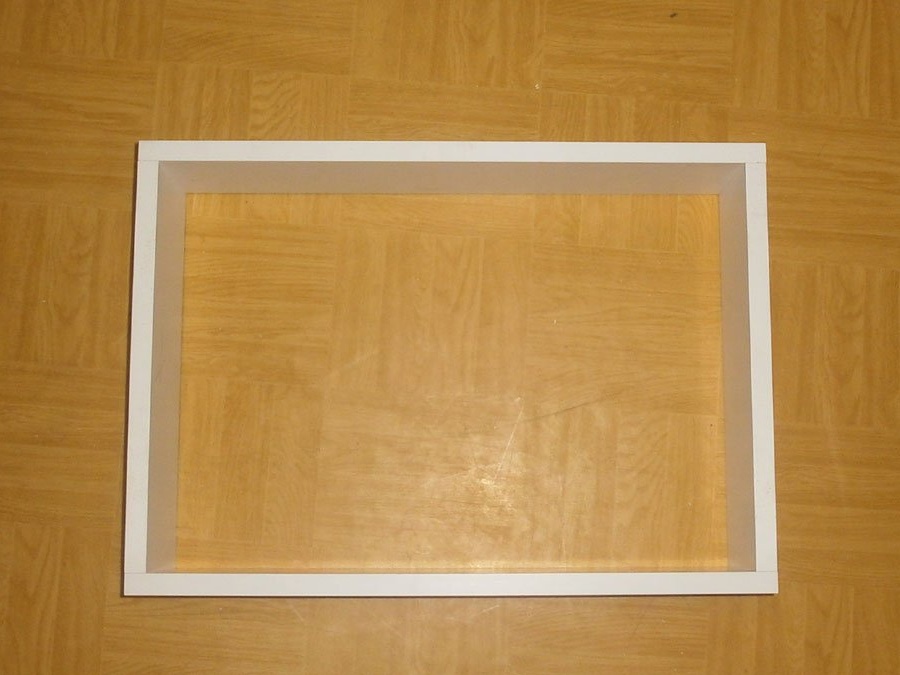
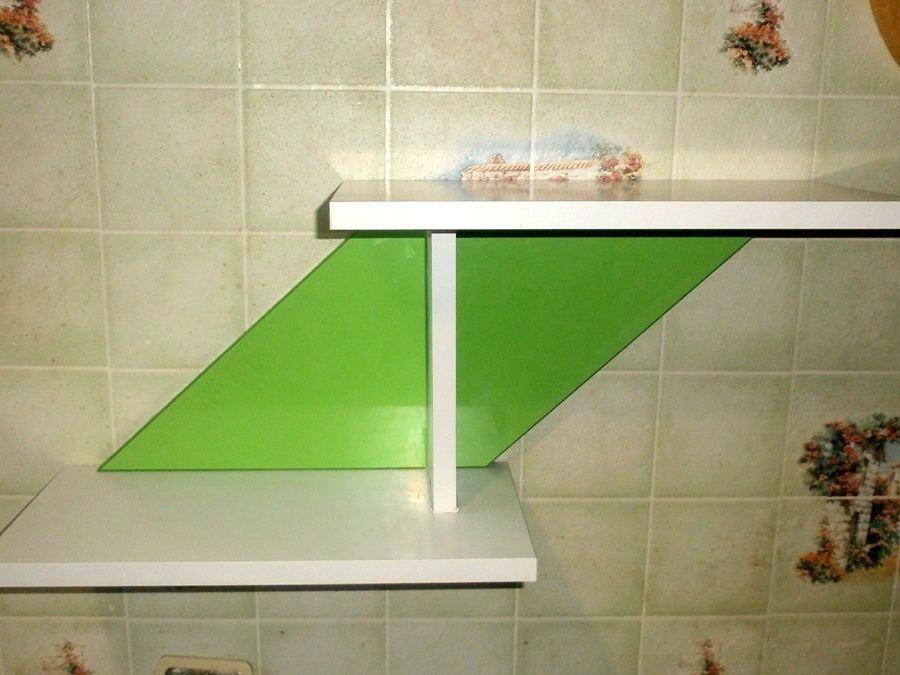
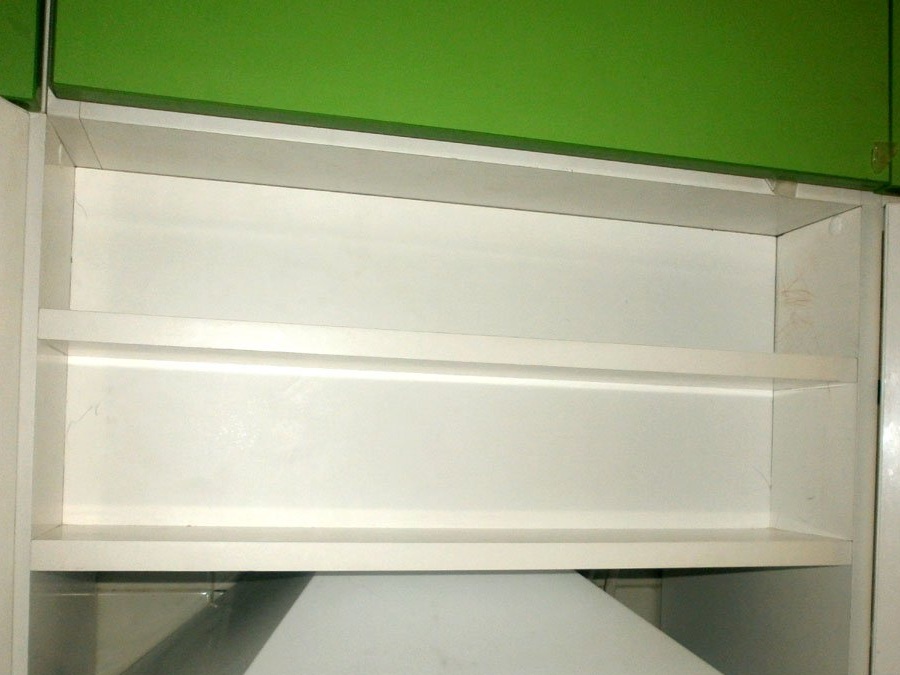
An open shelf to close the hood as much as possible. While designing, I was thinking of just getting along with two horizontal shelves, but then changed my mind. Therefore, I made this simple design:

and set it down.
Just pulled confirmations three on each side.
Narrow cupboard under the exhaust duct. I ordered the facade in advance, but I didn’t think how to make it. Therefore, he acted simply: a small square that will simply stand on a drying shelf.
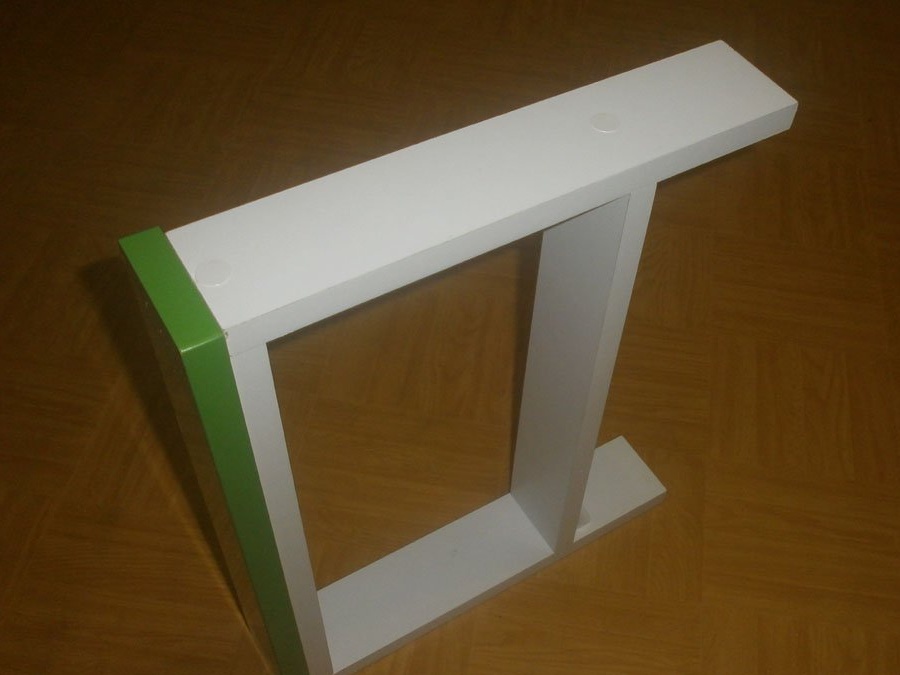
And in order not to override it, he made it long: so it will rest against the wall.

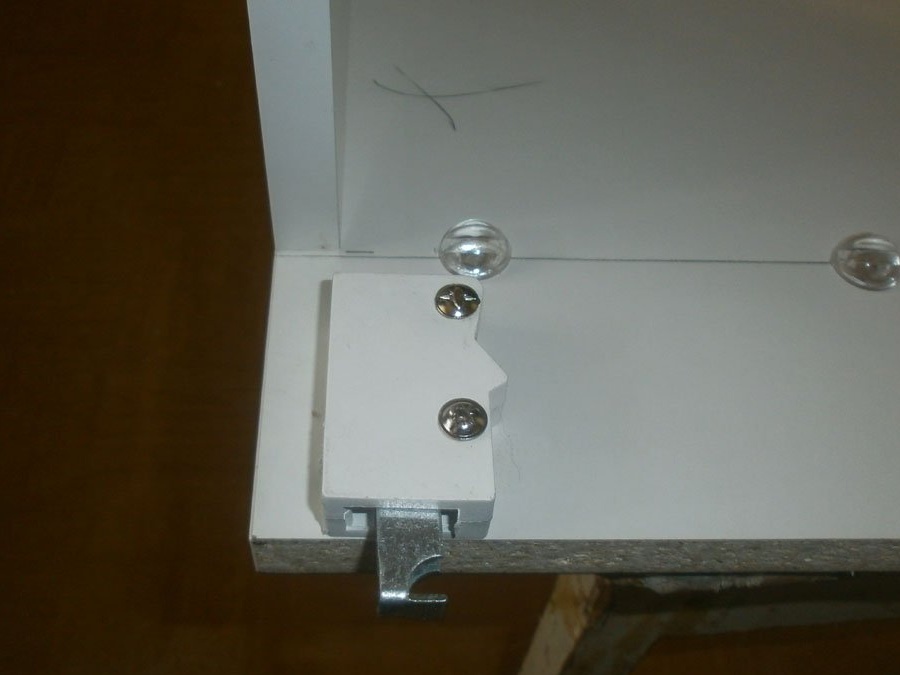
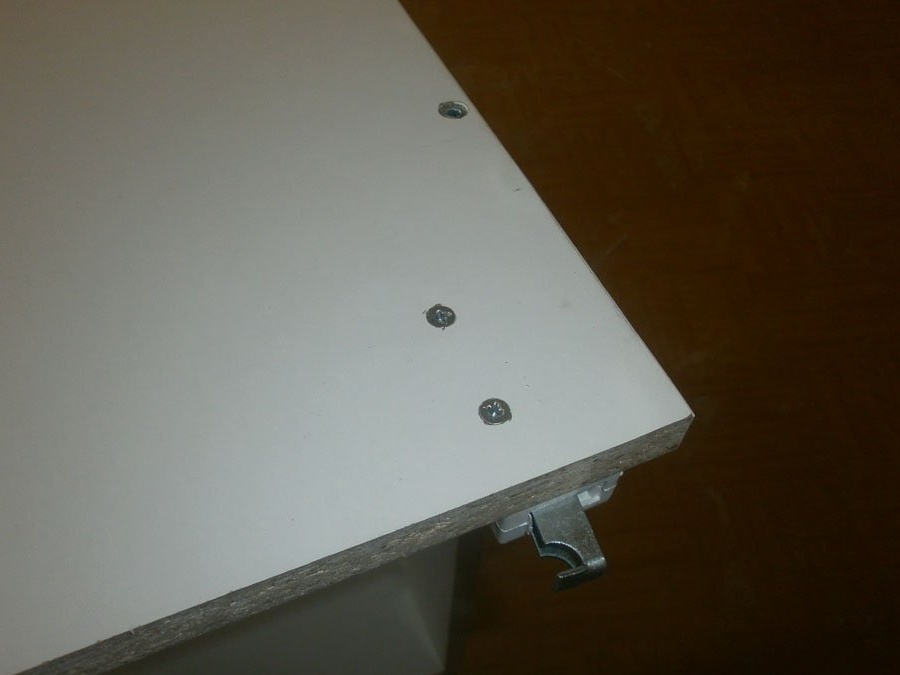
Thresholds Just screw the latches around the edges and put the thresholds on the legs of furniture.
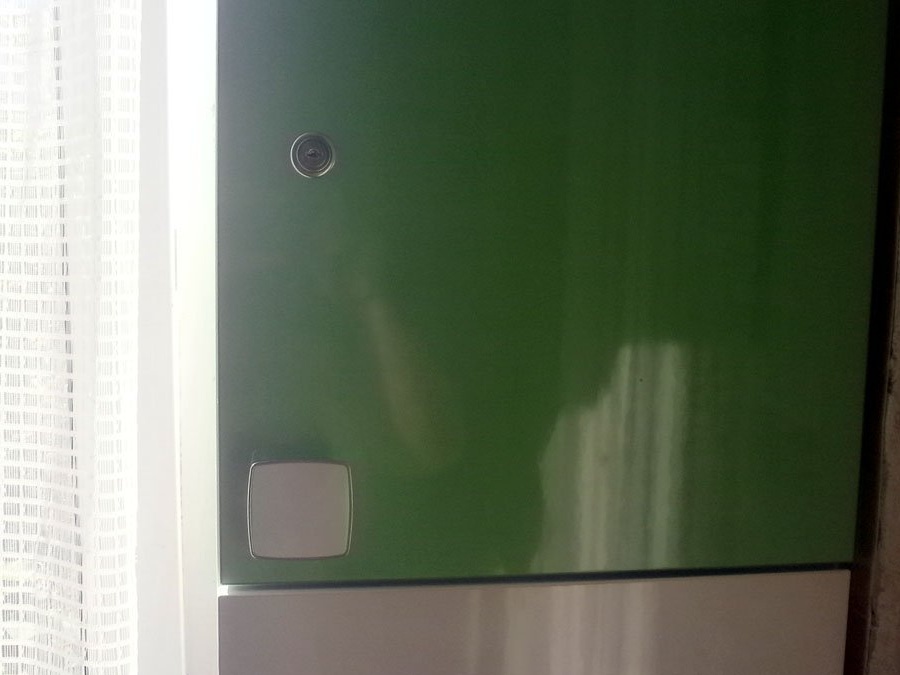
Now we fasten the handles. No tricks, two holes with a diameter of 4 mm in each door and you're done.
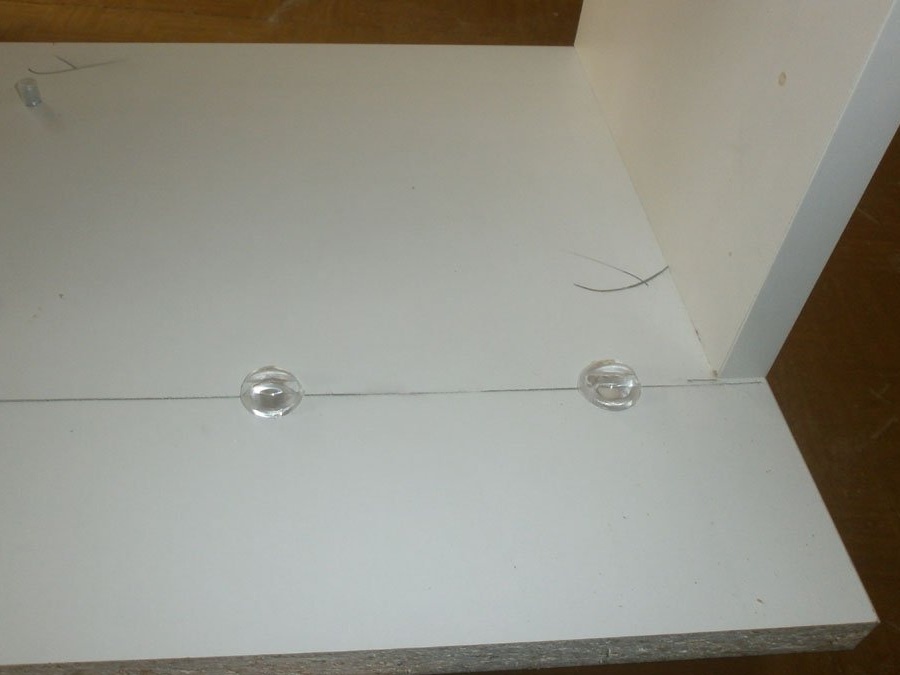
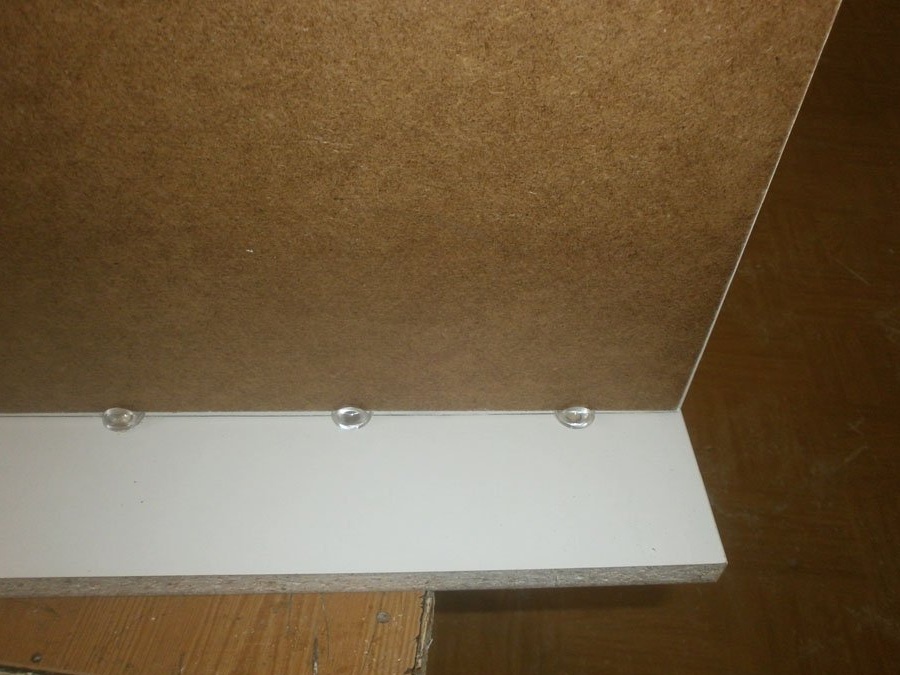
For the first-aid kit, they bought not staples, but mushrooms-blabs: they are less bulky. But they are also fastened with two screws, only the distance between them is minimal.
As for me, it turned out pretty well. And given the amount that I saved (absolutely all sellers indicated the corresponding price tag for an exclusive order, although for me - box-by-box), it turned out quite inexpensively.
That's all. It remains to remove the protective film from the facades (the son did this), stick on silicone dampers, circles so that when the doors are closed they do not plow too much, adjust them again and you can call your spouse to accept the work done.