


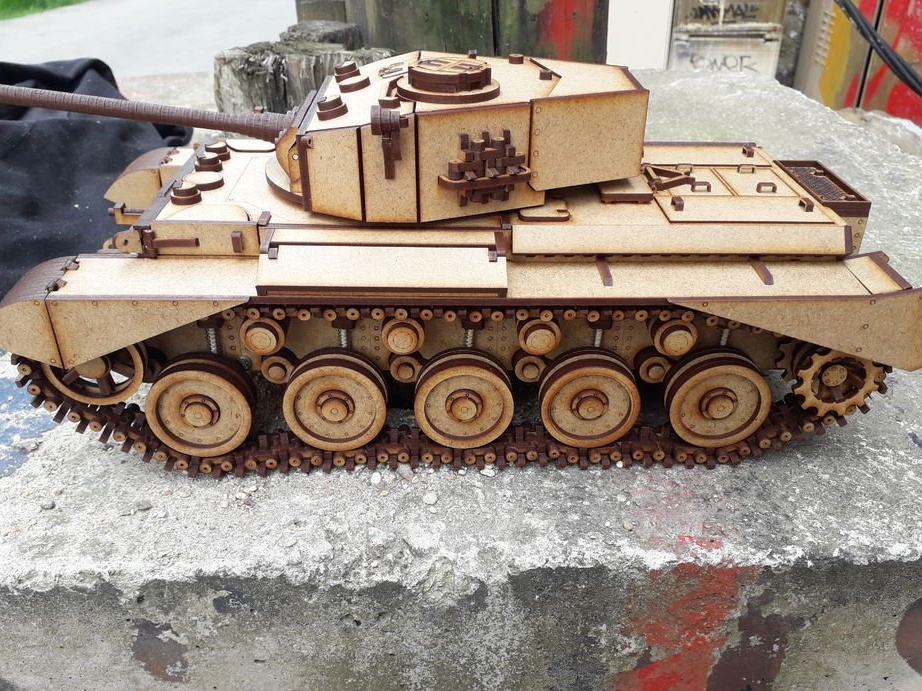

This tank is not the first assembly of the master. A distinctive feature of this particular model is a spring suspension, equipping the model with an engine, maintainability.
Let's watch a demo.
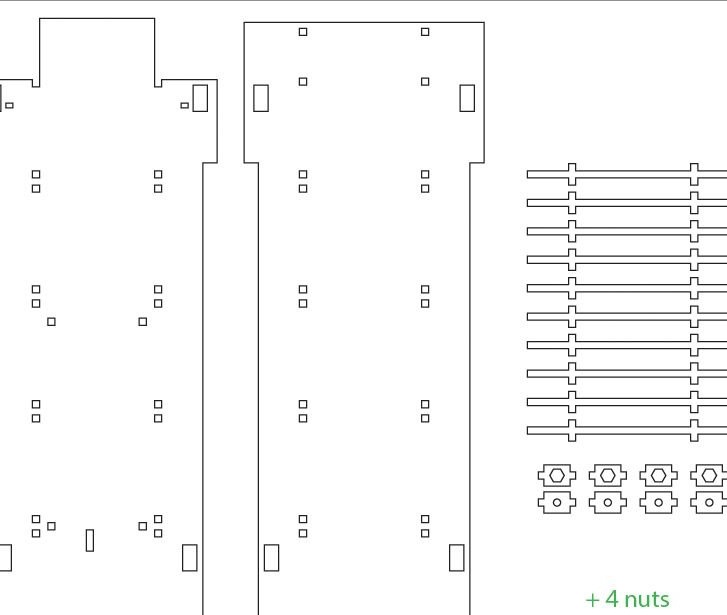
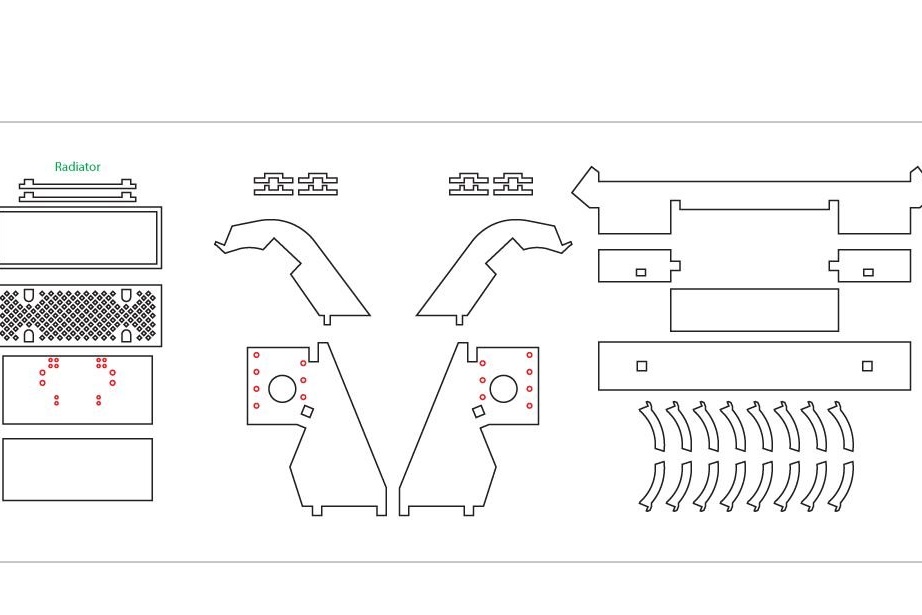
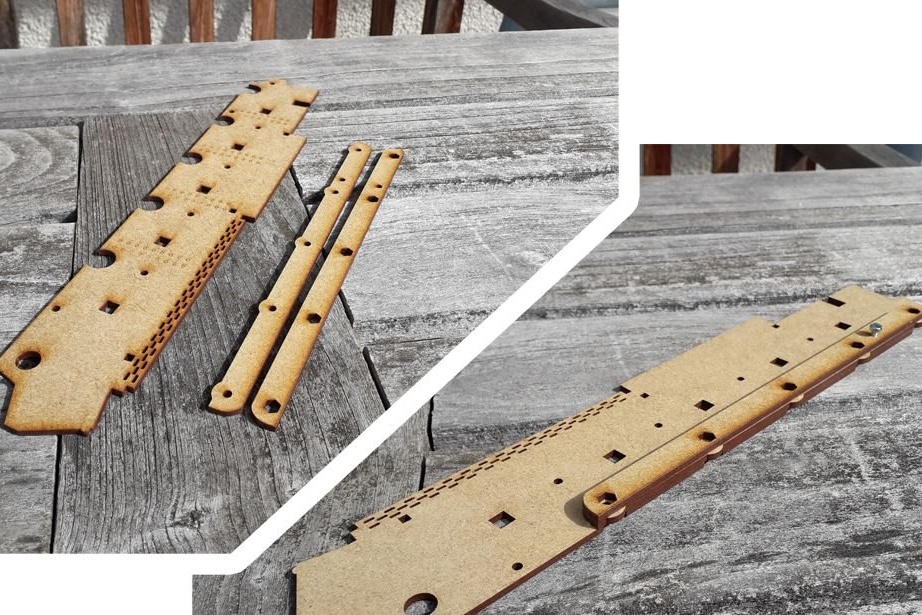
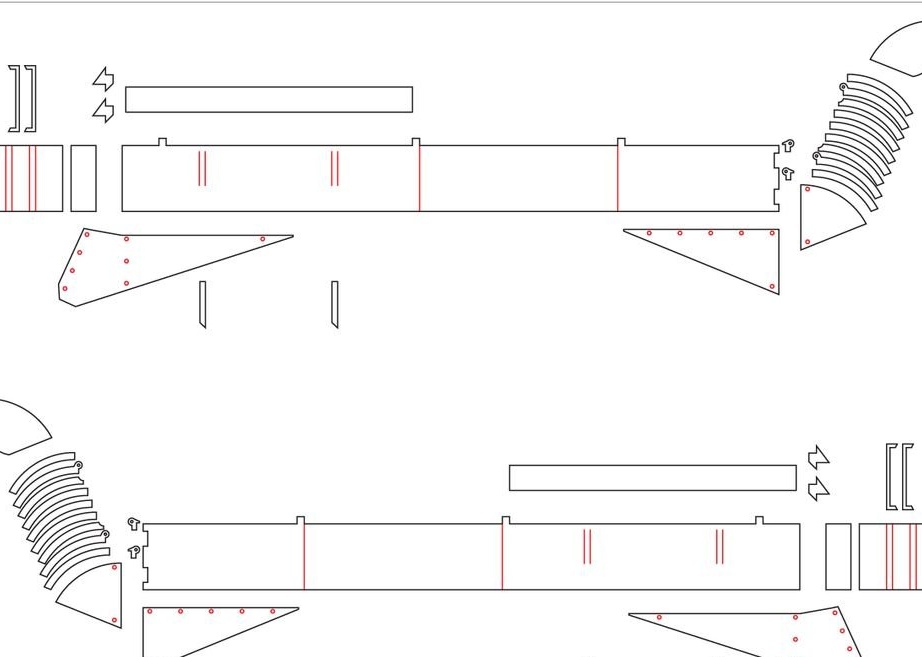
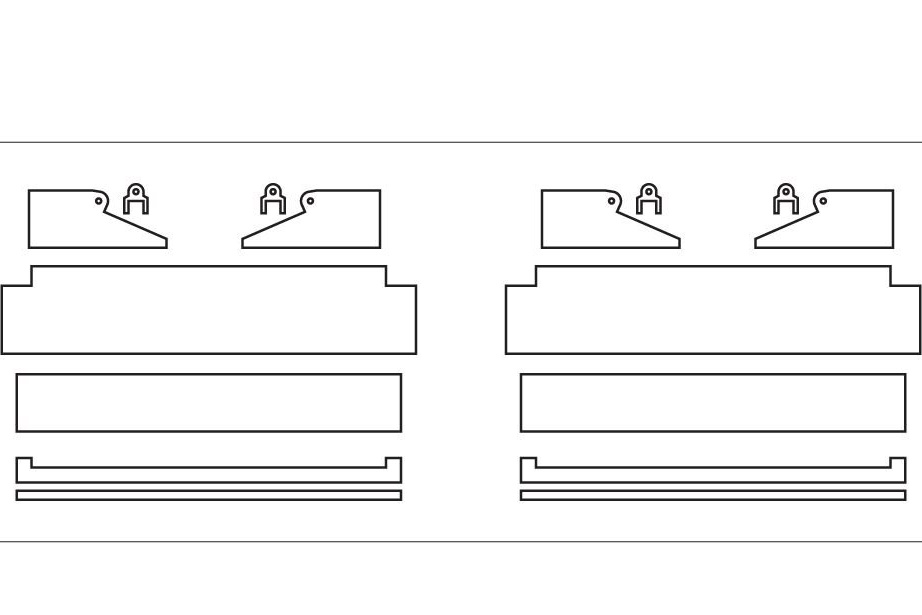
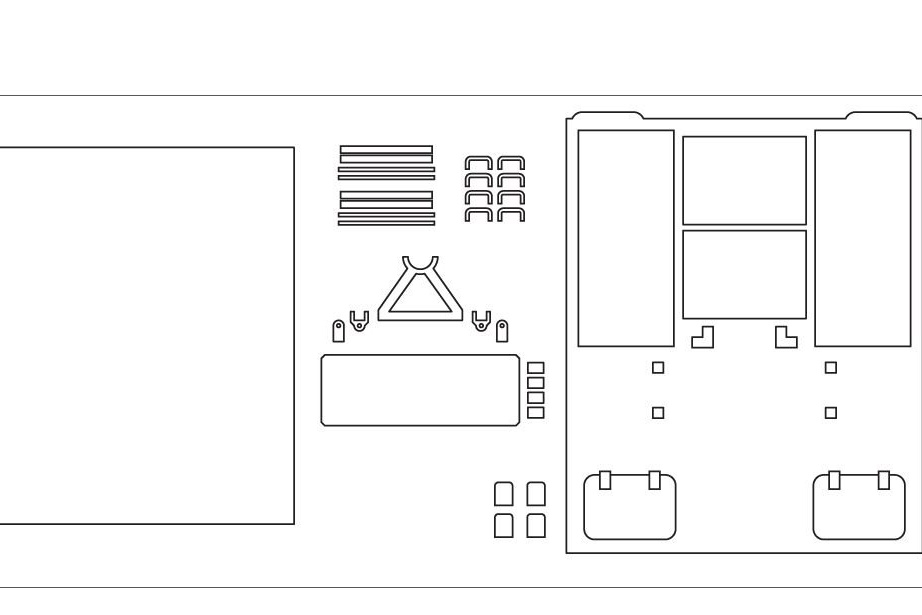
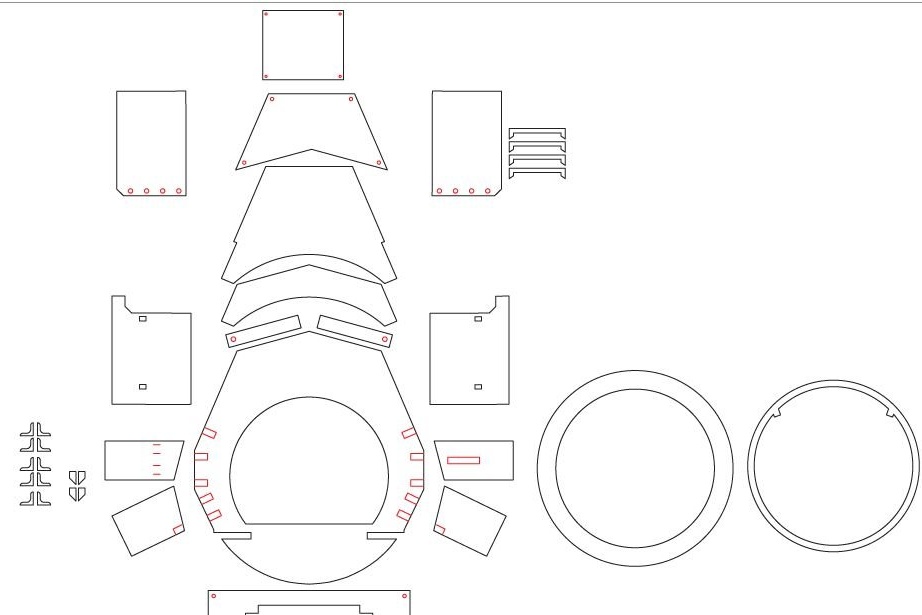
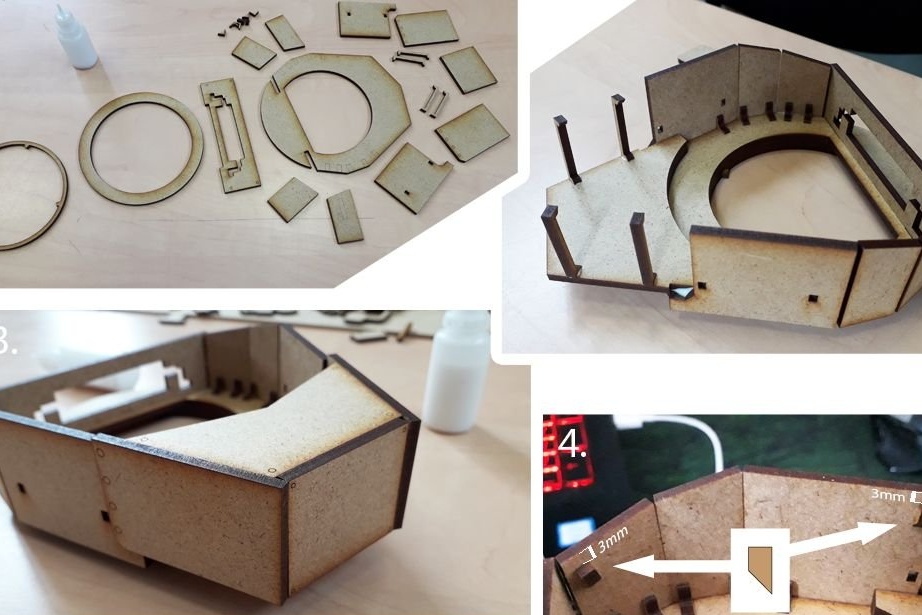
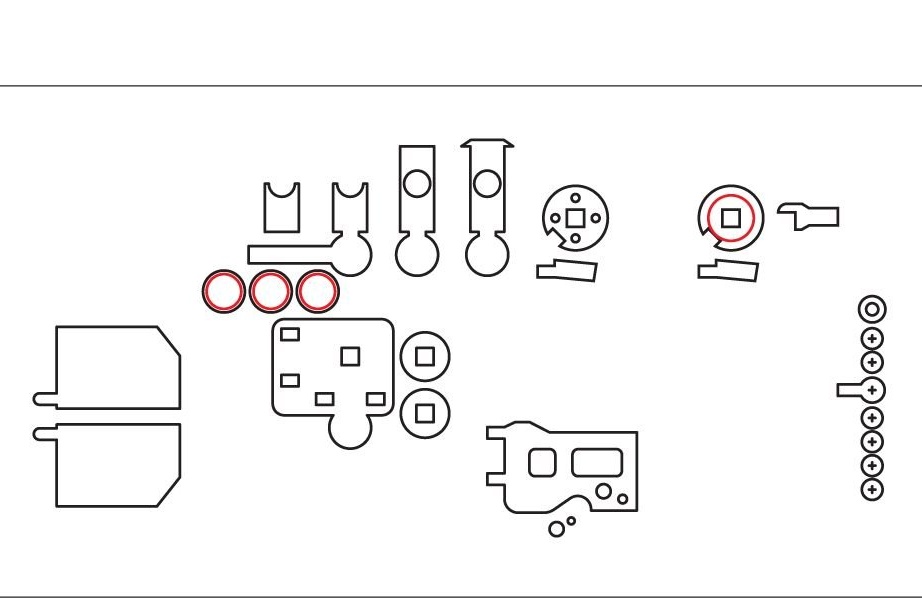
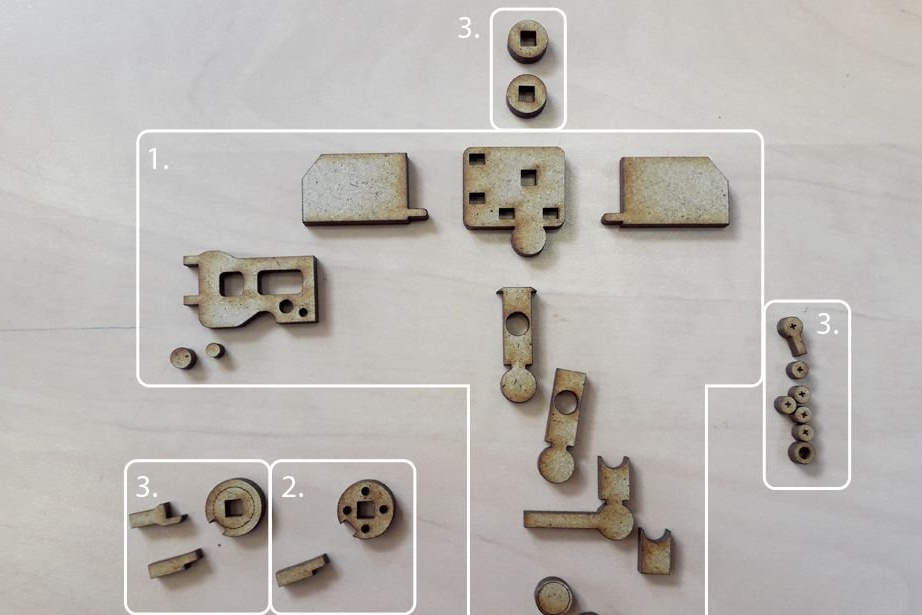
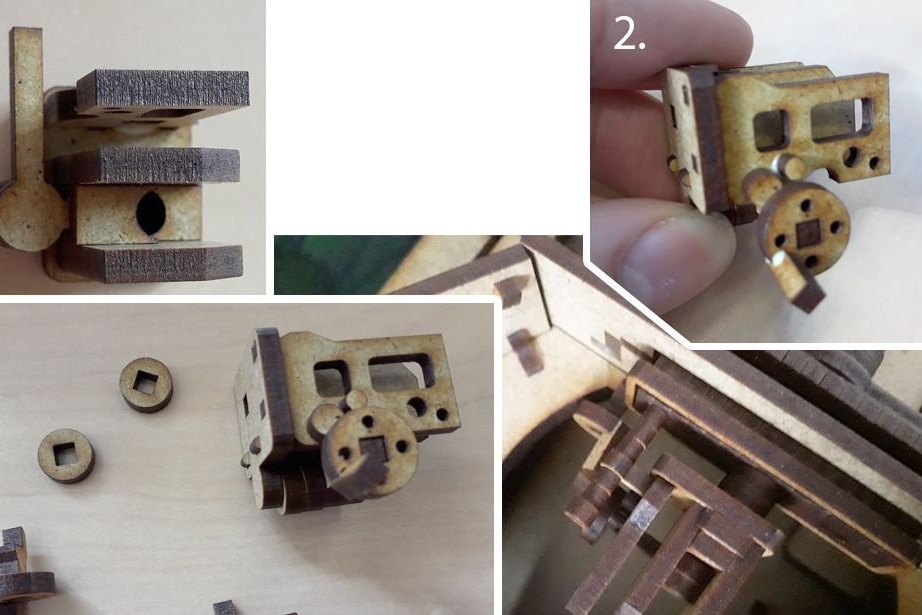
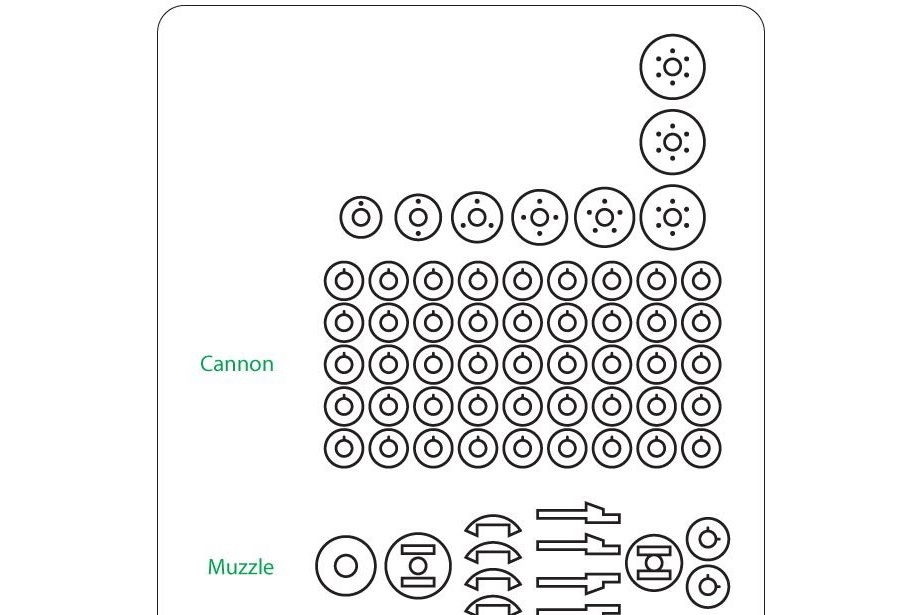
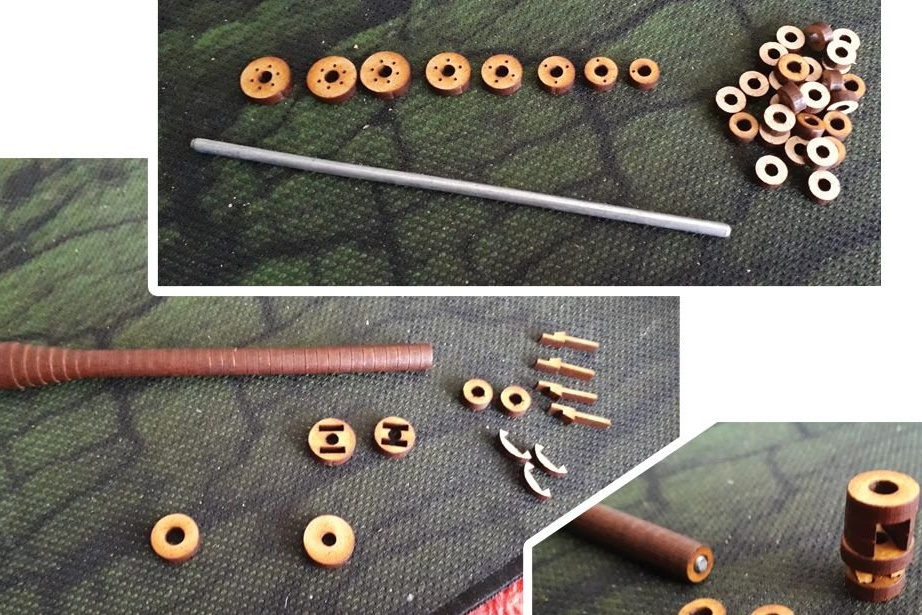
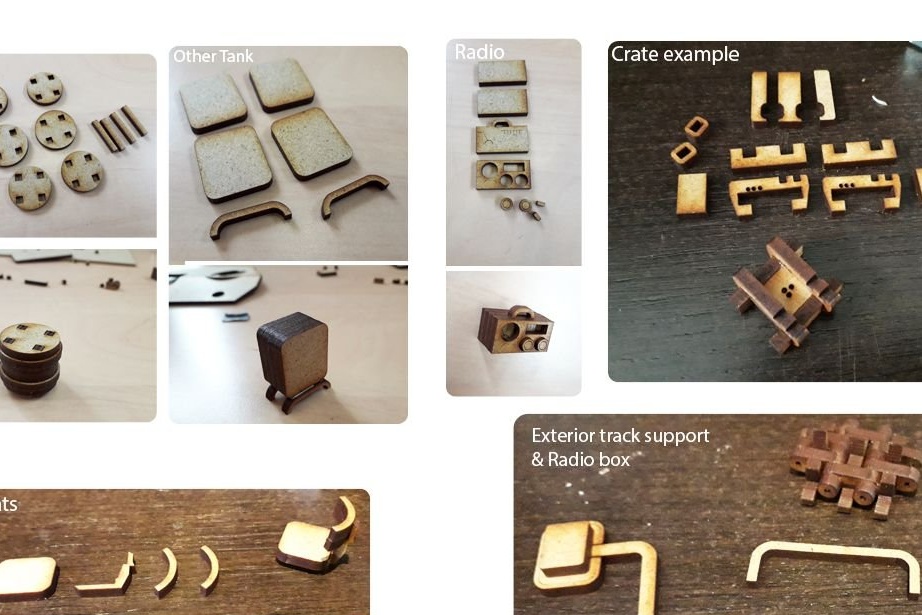
Case details are cut out on a laser cutter, and files are available at this link.
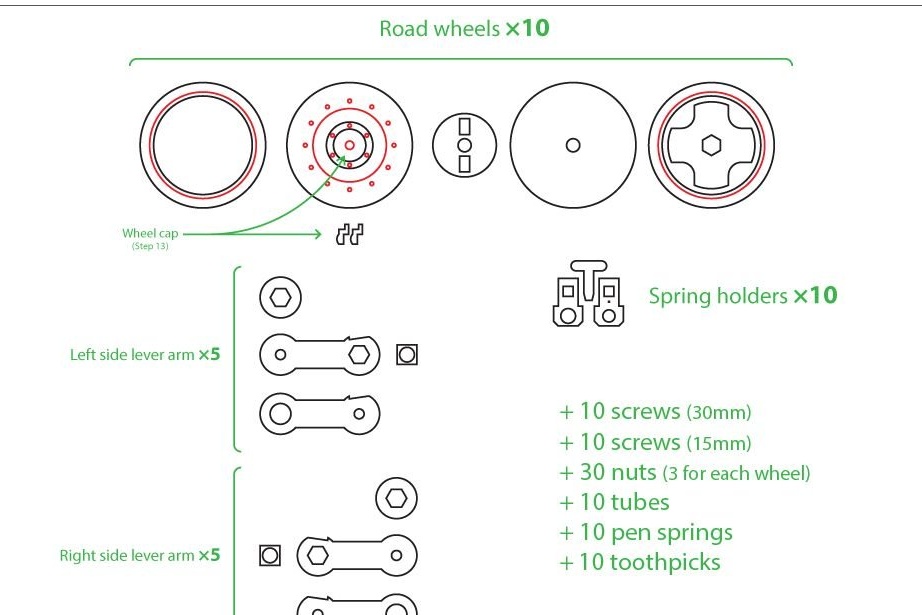
In addition to body parts, the following will be needed
Tools and materials:
- Screws Ø 3 mm:
-14 pcs 15 mm long,
-10 pcs 25 mm long,
-10 pcs 30 mm long.
-Tubes x20 Ø4 mm (Ø3 mm inner diameter);
-Metal wire Ø 1 mm;
-Ø3 mm threaded rod;
-Springs for pendants Ø 4.5 mm and a length of 30 mm -10 pcs;
- Screws M4 2 pcs;
Toothpicks
-Bread board;
Microcontroller ESP8266;
-Connecting wires;
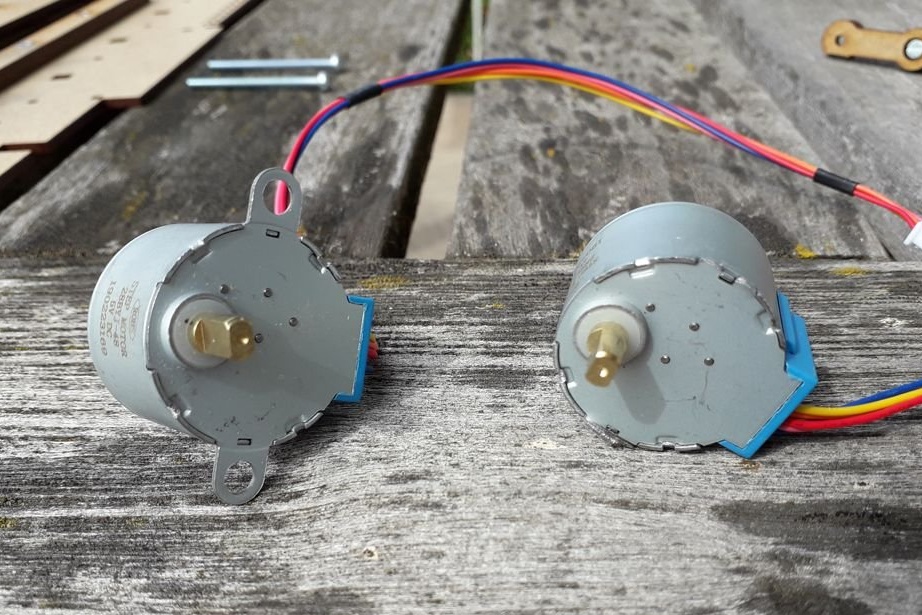
- 28BYJ-48 engine with a control board - 2 pcs;
-Battery 5V;
Step One: Review
In this step, the master exposes his model tank and also indicates the link to the site where you can see the tank in a disassembled form.

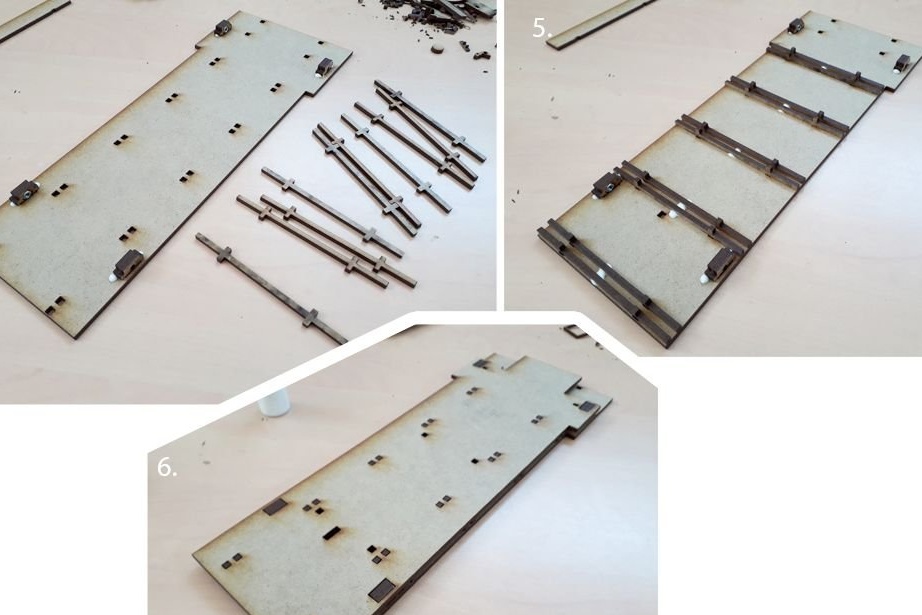
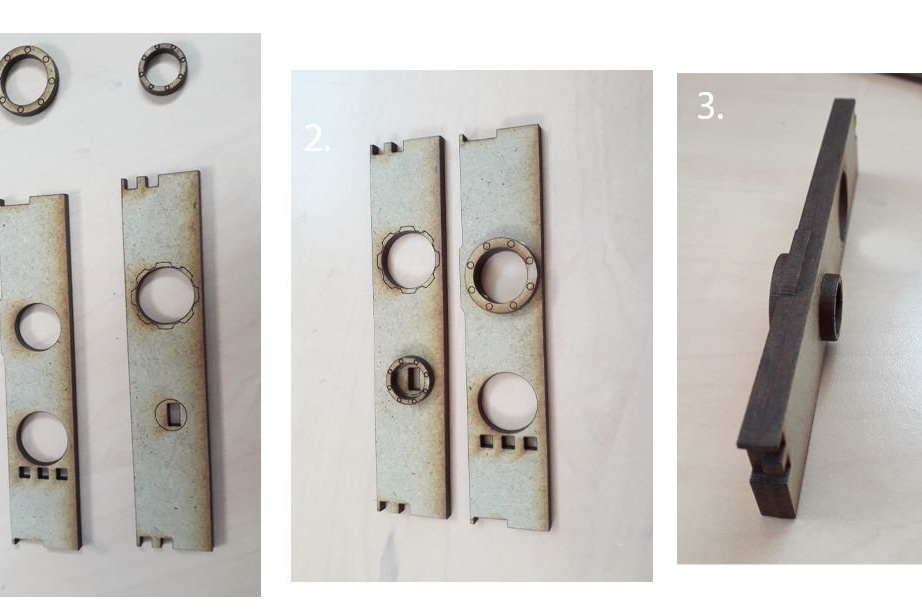
Step Two: Bottom
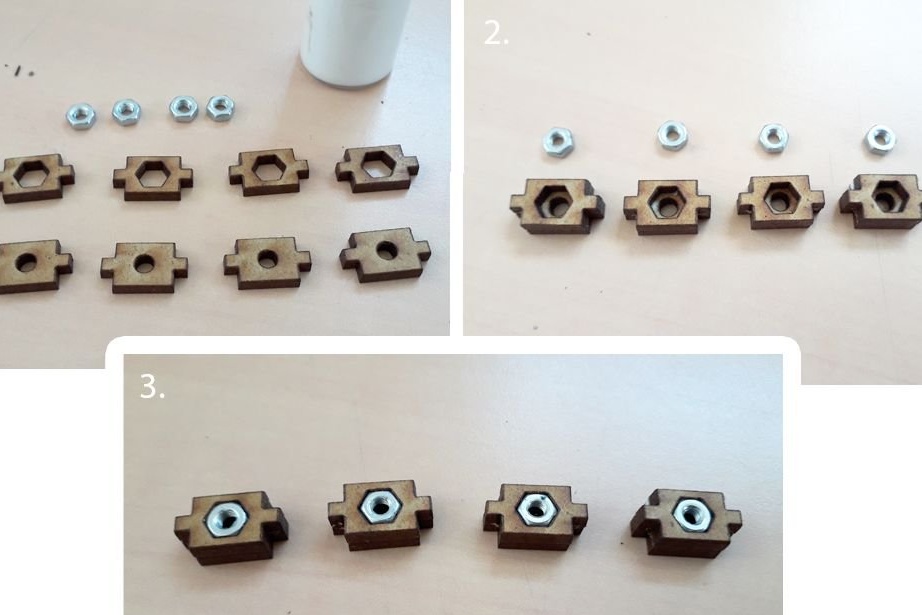
The master begins assembling from the bottom of the tank. Installs nuts in mounts. Mounts on the sides of the bottom. Establishes supports. Sets the second layer.
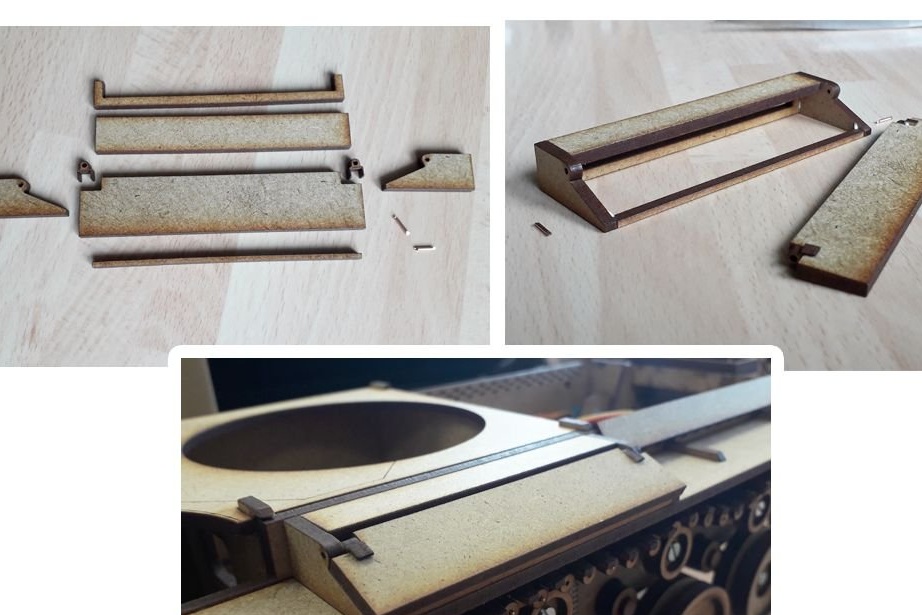
Step Three: Case
Begins body assembly. Assembles a radiator and a back.
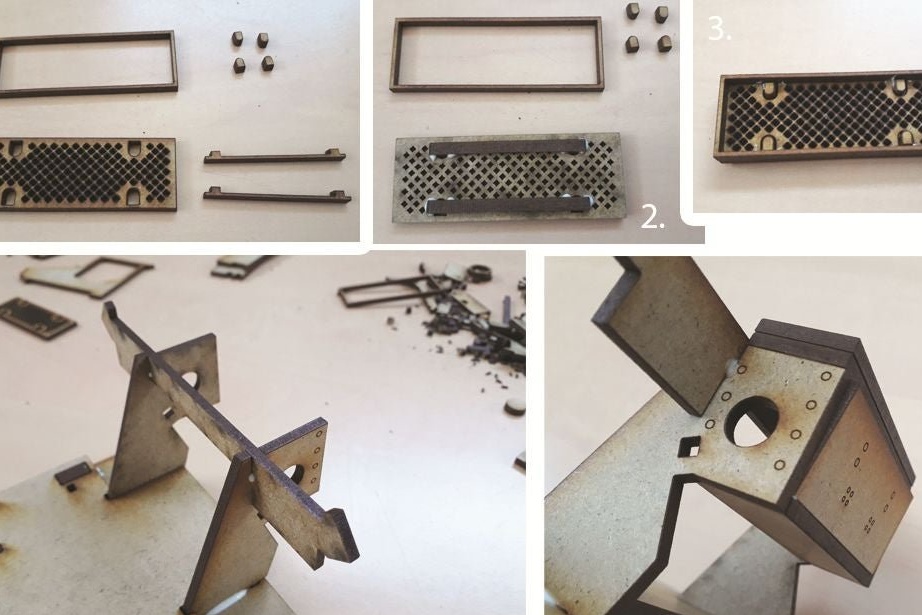
Gathers the front.
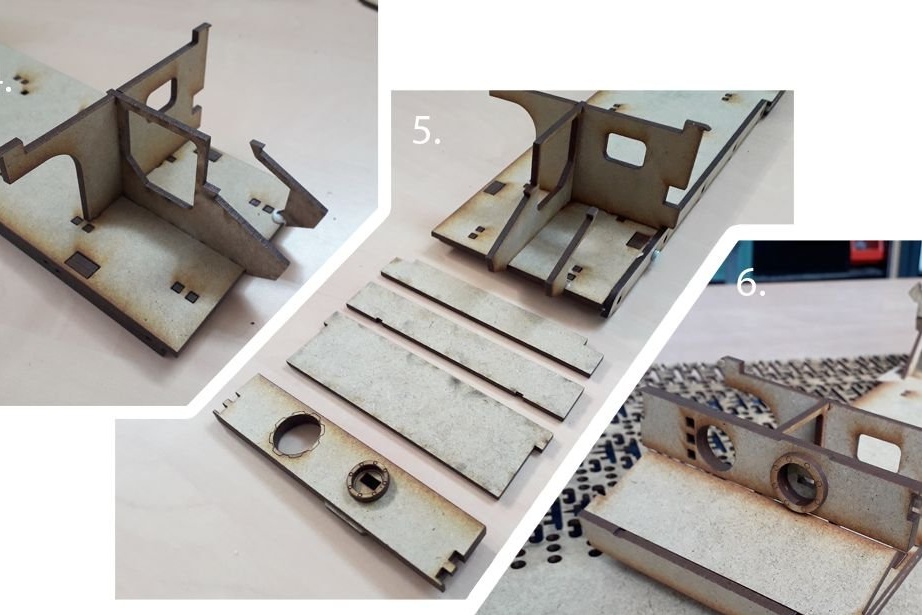
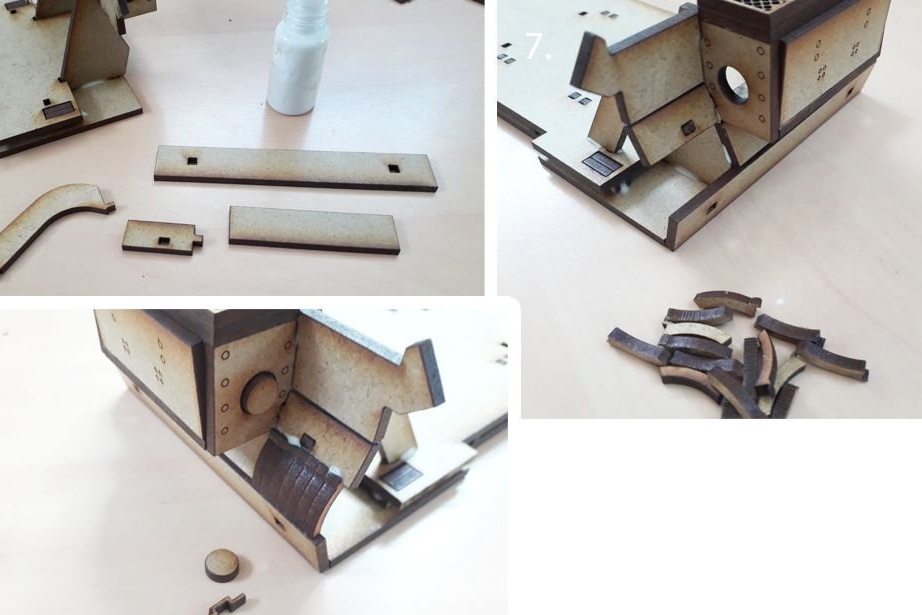
After placing the front armor, the hull is finished. Other parts will be screwed on or glued to it without gluing
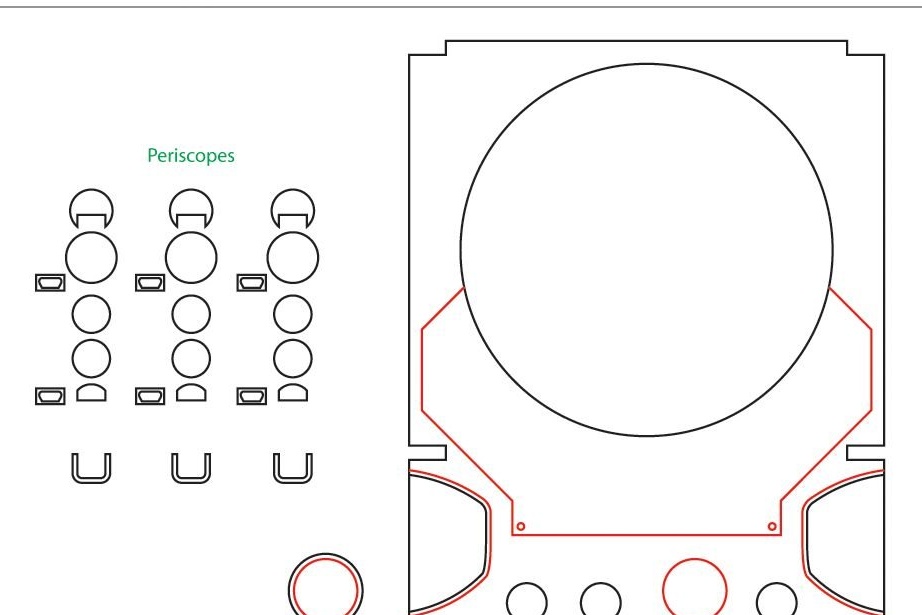
Step Four: Roof and Periscope
This part is a removable part. This is done in order to have access to the inside. The periscope lever is installed at the end of the roof. The periscope is placed on the roof, but does not stick to it.

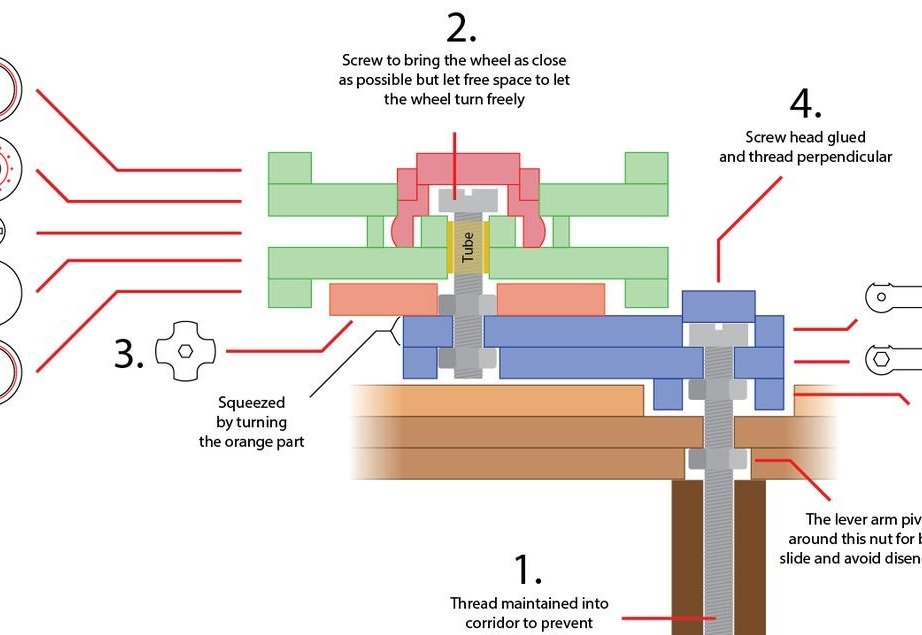
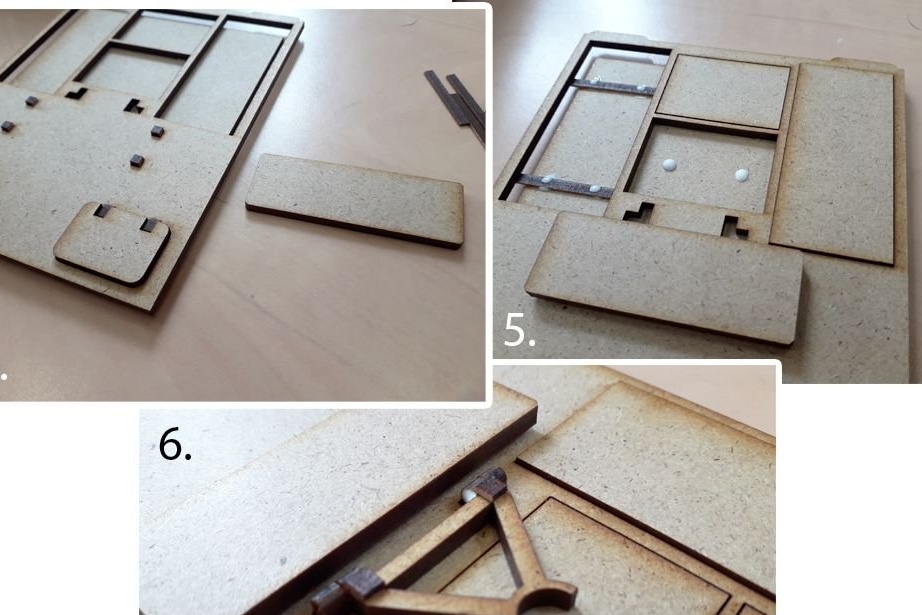
Step Five: Side
Suspension arms are mounted on the sidewall. It is screwed to the double bottom with 15 mm screws using 4 nuts that were fastened in the first step.


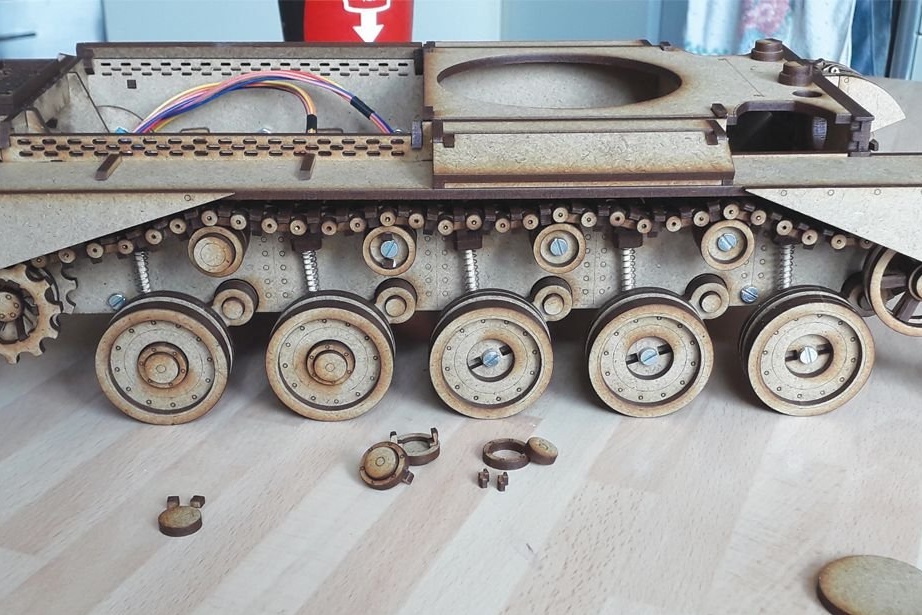
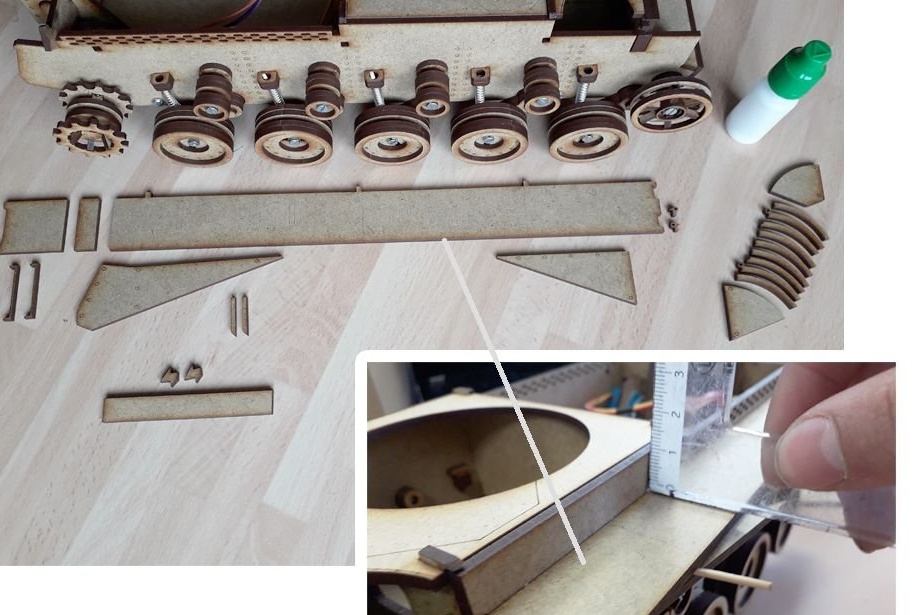
Step Six: Suspension
Assembles and installs suspension components. All steps are reflected in detail in the photographs. Apply a little glue to the ends of the springs for fixing. Inside the springs sets pieces of toothpicks. This will prevent the springs from popping out.
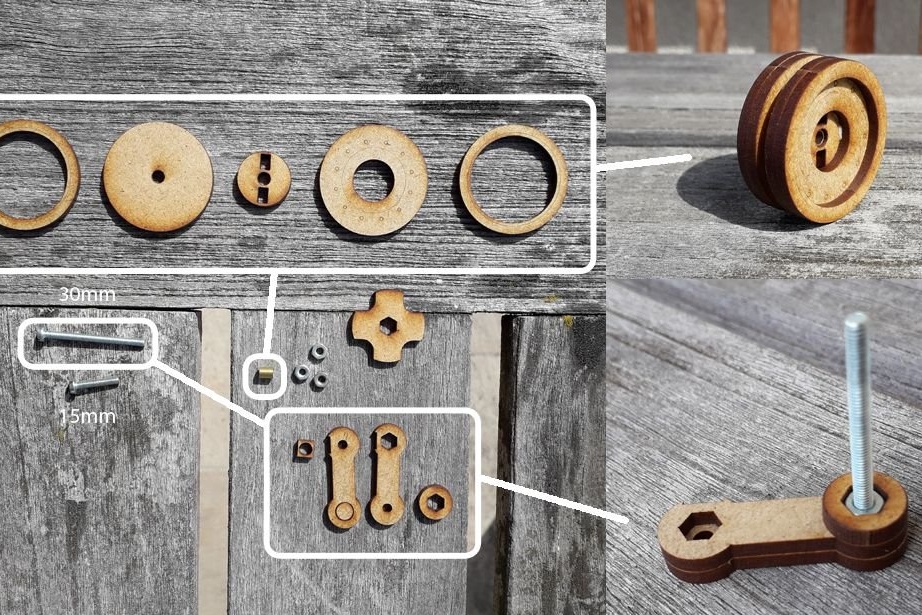
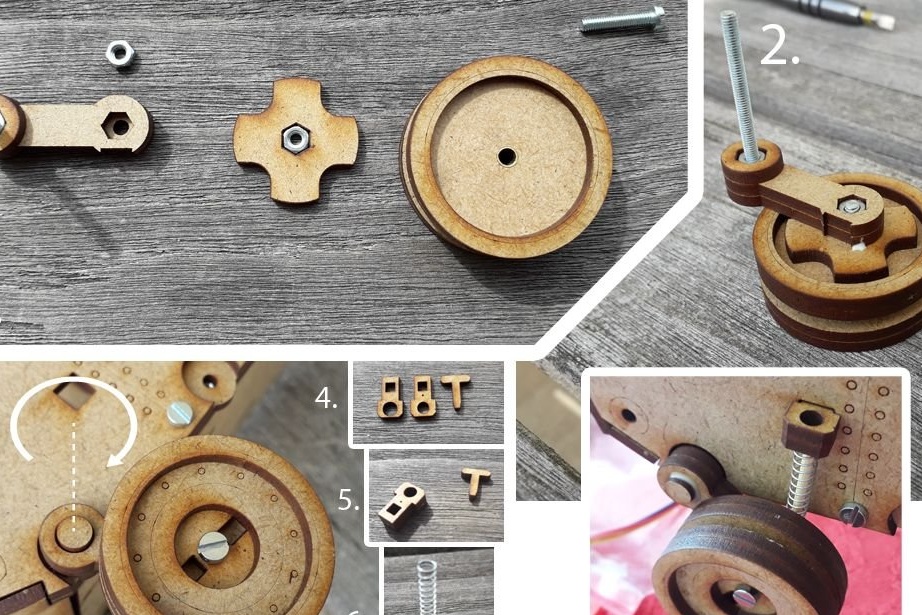
Assembles and installs the front lower wheel. A brass tube and a 20 mm screw are installed inside the wheel hub. Then the hub is closed with a plug.
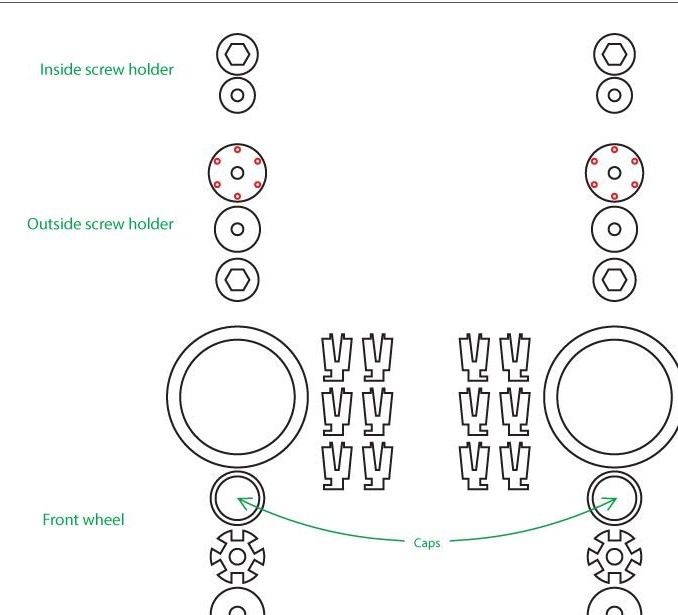
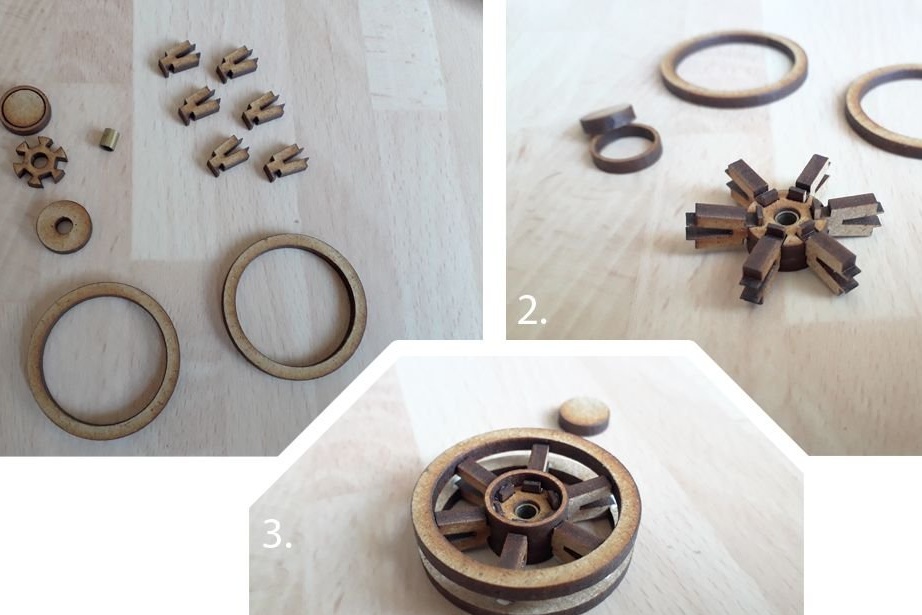
Assembles and installs rather a wheel.


Assembles and installs drive wheels. These wheels will be connected to the engines installed in the tank of the tank.
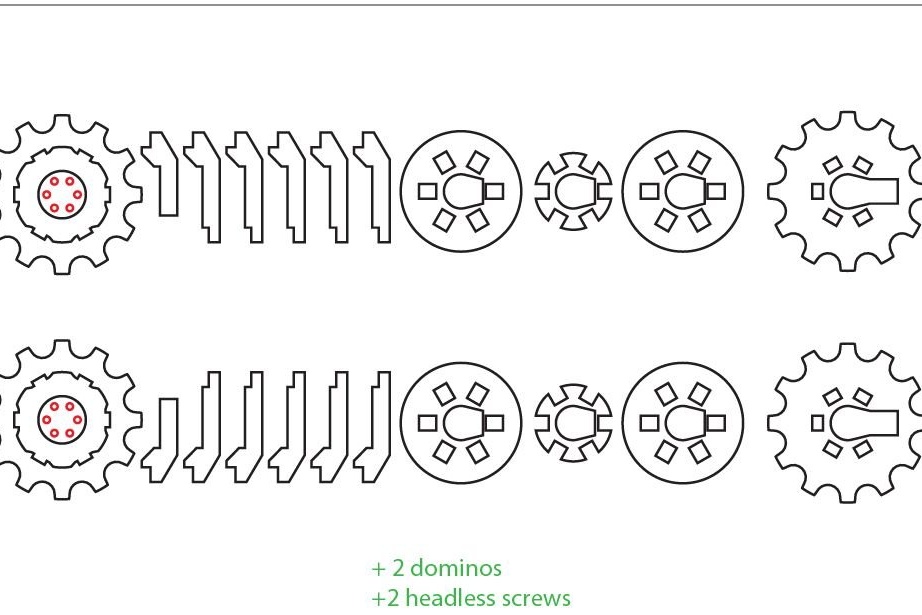
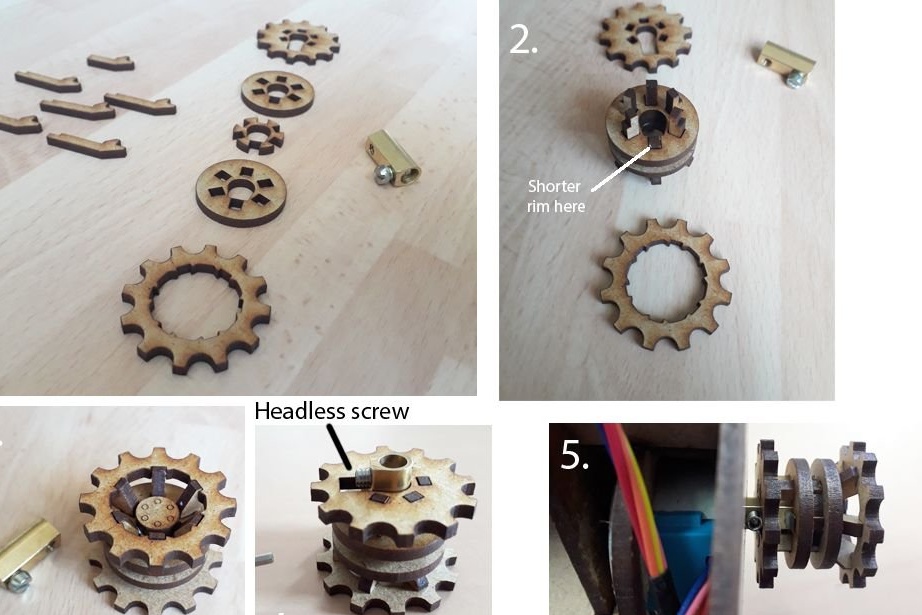
Installs plugs on wheels.
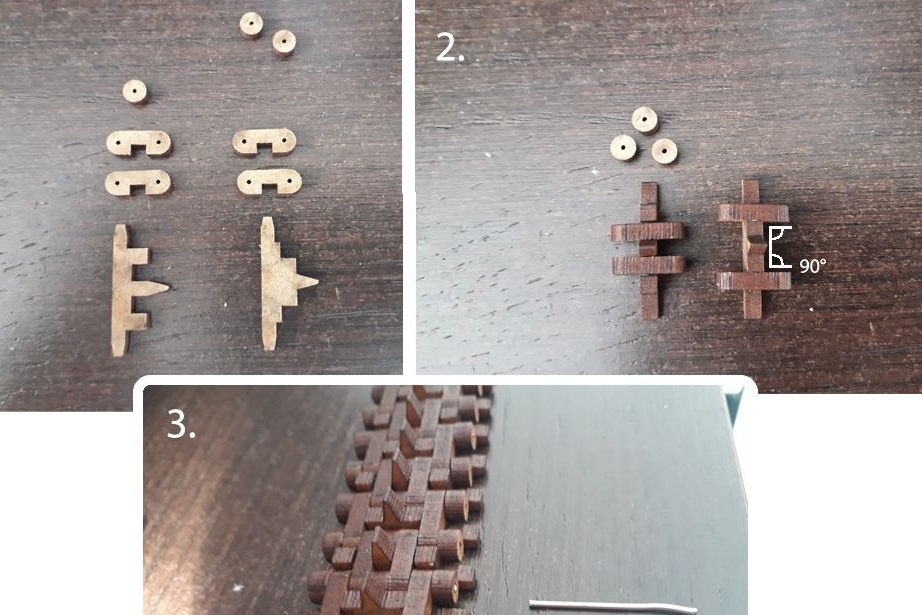
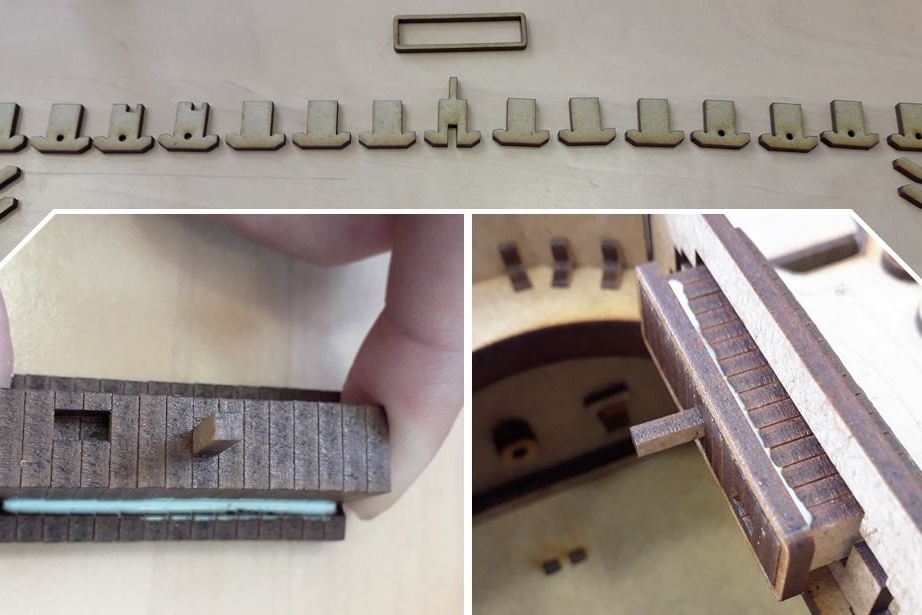
Step Seven: Track
Collects caterpillar tracks. The tracks are fastened together with a thin wire. On the sides of the wire is fixed with caps.
Step Eight: Dirt Protection and Drawer
Installs shields. The front of the flaps is movable and can be raised.

Sets the drawer. As loops, pieces of wire are installed.
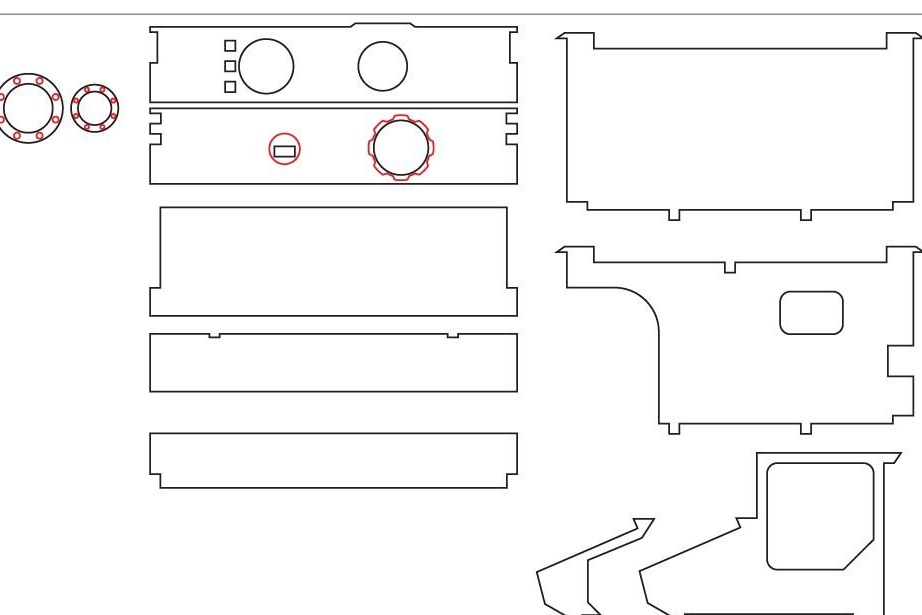
Step Nine: The Back
This part is located behind the tower and it will cover the whole electronics.

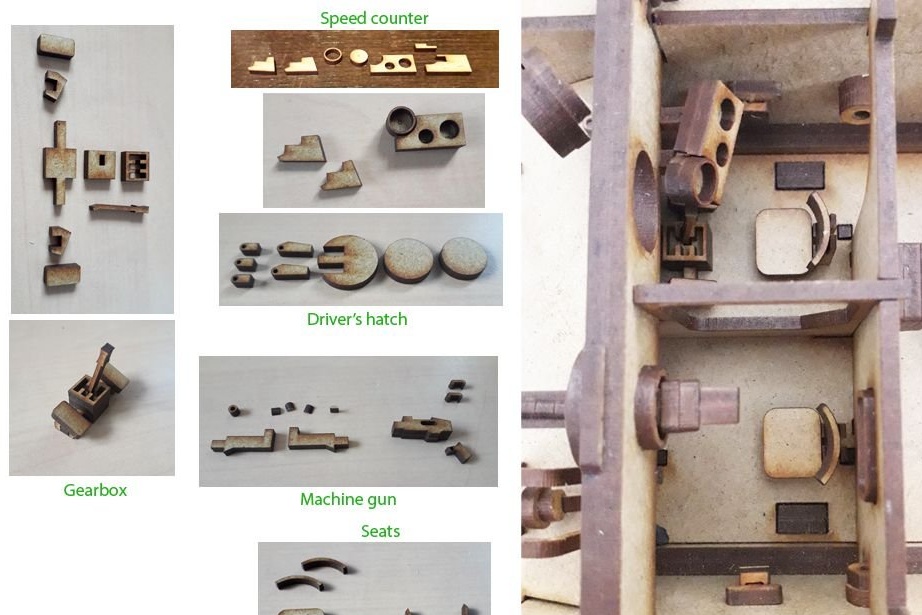
Step Ten: The Tower
Gathers the top of the tower and side walls.
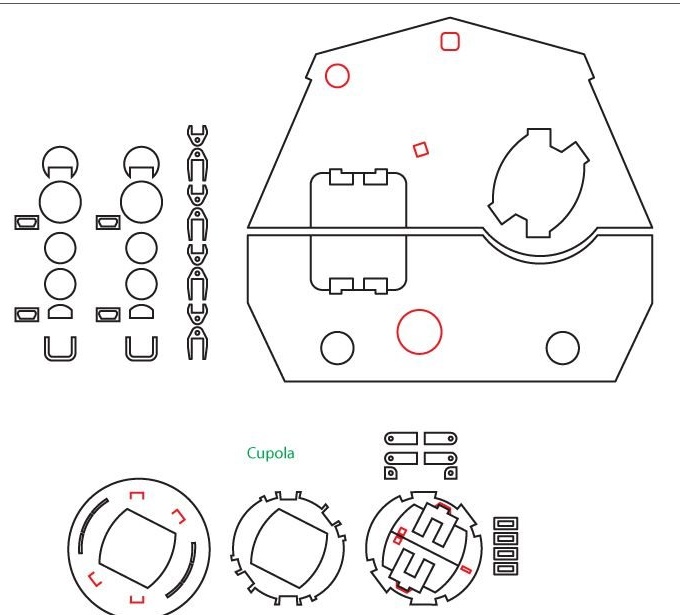
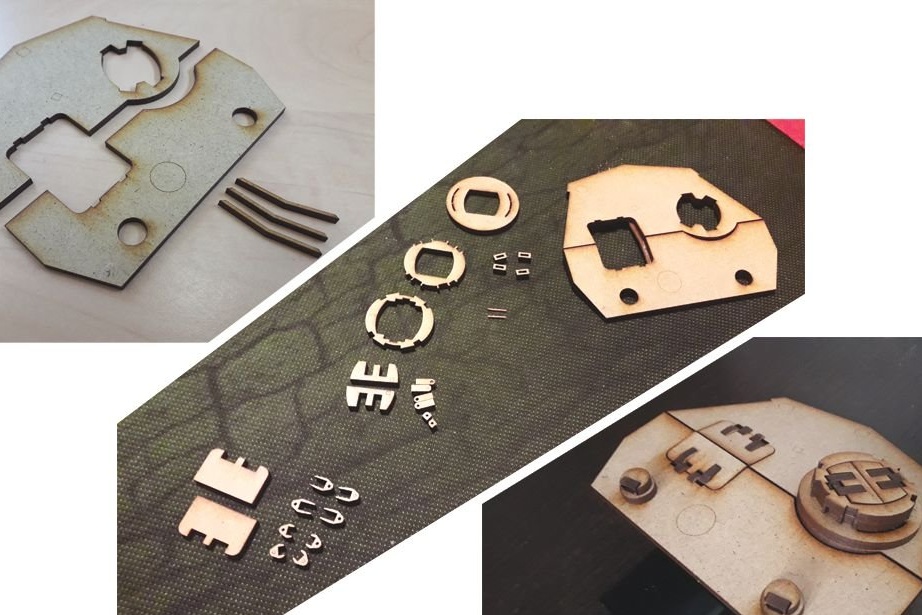
Glues the gun mount.
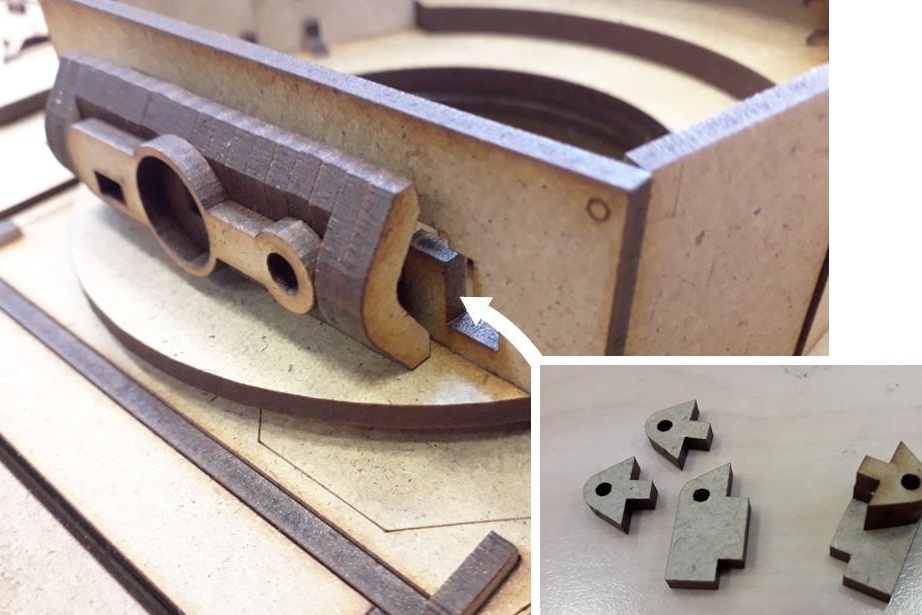
Sets the internal mount and gun control mechanism.
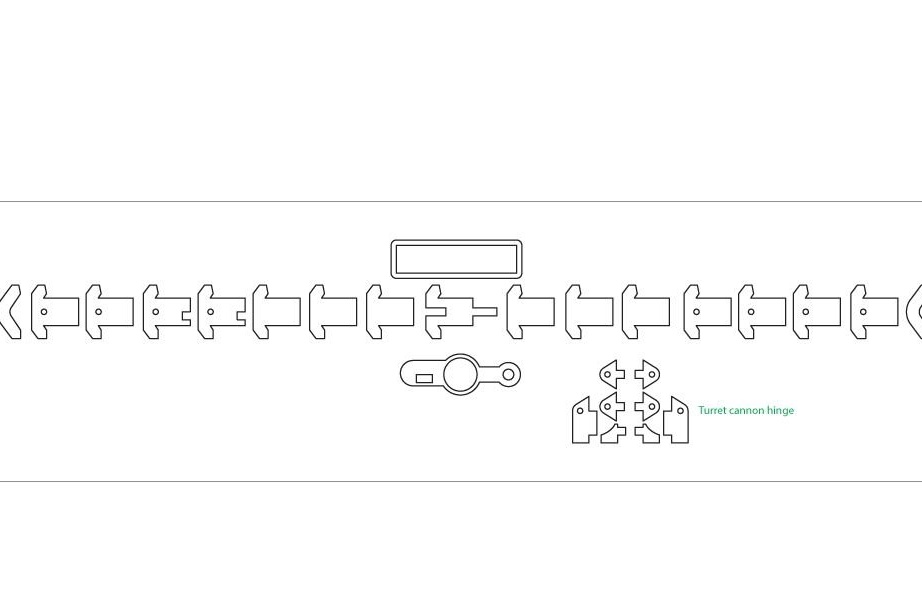
Step eleven: gun
Collects a gun. The main gun is a metal rod. The remaining details are strung on it.
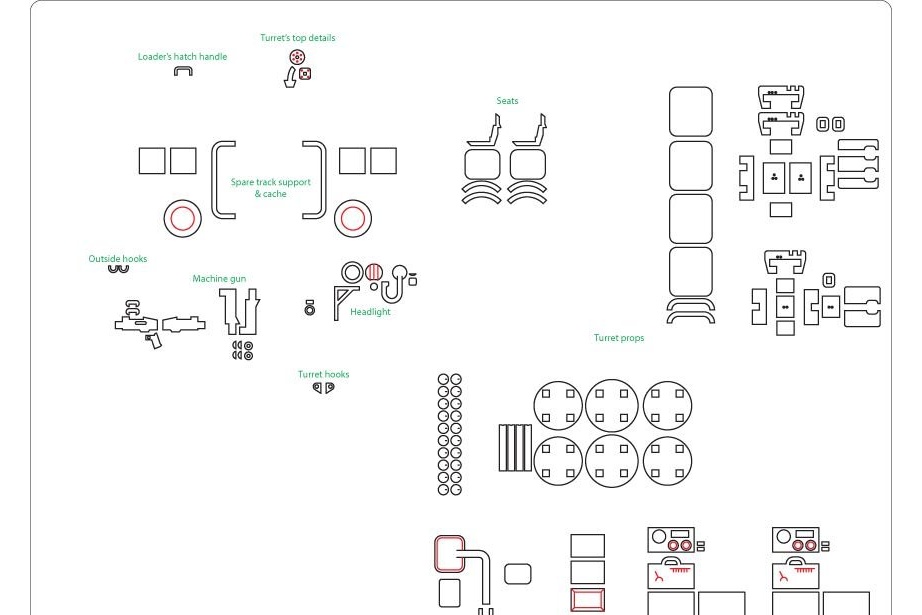
Step Twelve: Small Details
Secures small parts of the tank.
Inside, on the left side there is a seat and a machine gun, outside the barrel of a machine gun.
Right on the driver's seat: seat, control levers and pedals, sunroof.
Outside: hooks, headlights, boxes, ammunition, wire rope, etc.
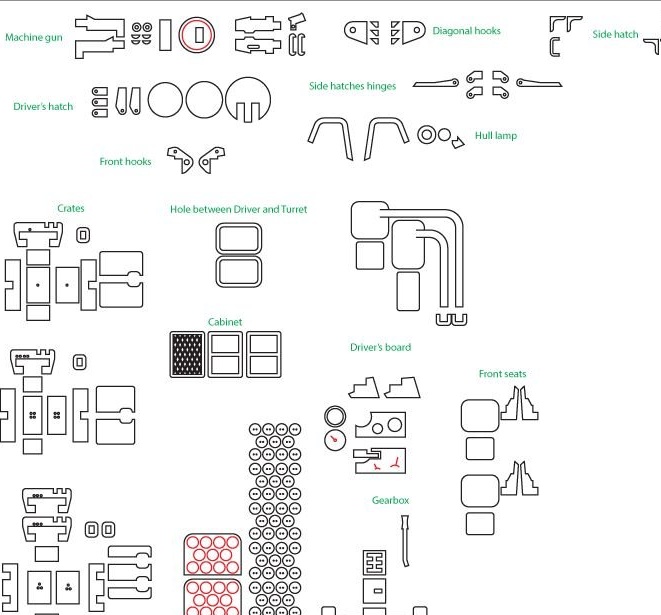
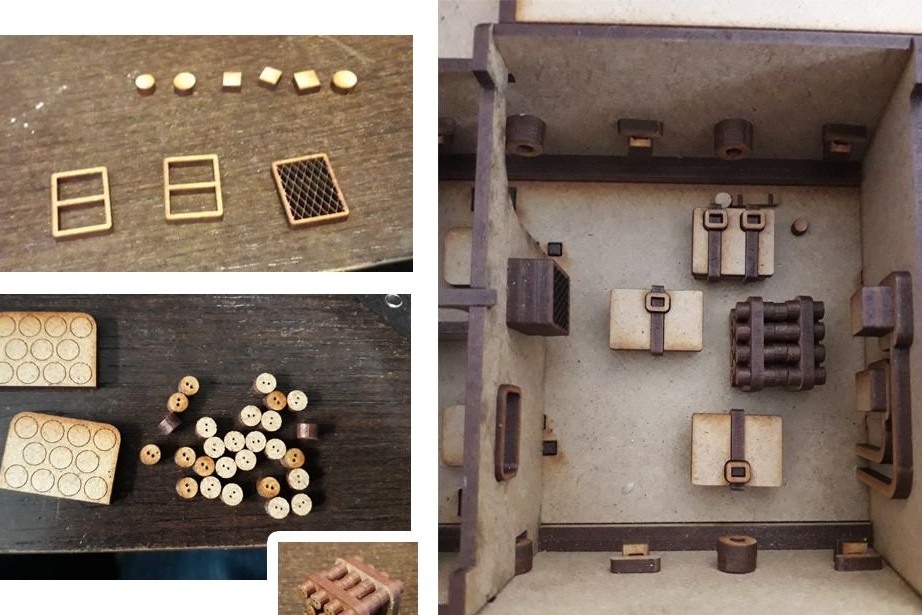
A tank under water is fixed to the tower, a walkie-talkie inside the tower.

Step Thirteen: Electronics
Installs engines. Performs installation of the electronic part according to the diagram.
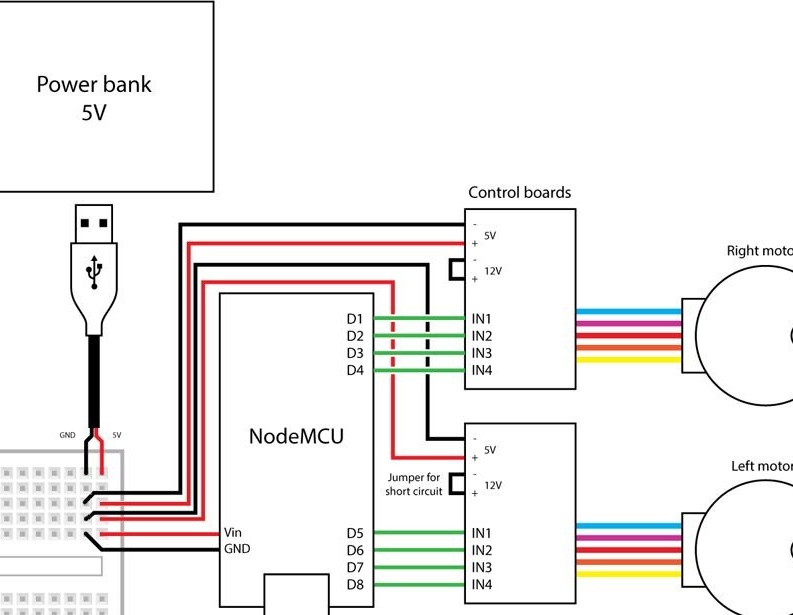

For wireless control, I chose the NodeMCU controller. The model is controlled through NodeMCU and the Blynk application (available on Android / iOS). This app provides a fully customizable HUD to control from any Arduino or iOS phone via WiFi.
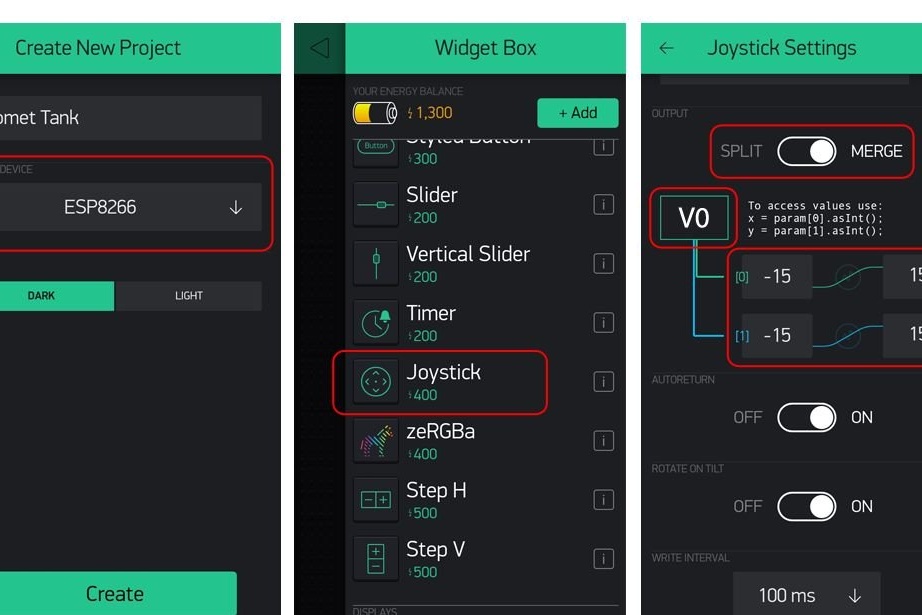
So, after installing the application, the first thing to do is create an account.
Create a new project and assign the ESP8266 (NodeMCU chip) as the microcontroller and set the WiFi mode.
As soon as you first see your HUD, create a joystick. Send the joystick information to the virtual pin V0 of the node.
Once you have created a joystick, click on it to open its settings. At positions X and Y, set the range from -15 to 15.
Install libraries.
First, download the Stepper2 library here: https://github.com/udivankin/Stepper2
This library is a good option for cheap stepper motors, such as the one that the master used. It better manages engine phases and provides better torque. After downloading the .zip file, install it from the Arduino software: Sketch> Include Library> Add .ZIP Library ... and select it.
Then, if you have never previously flashed NodeMCU, you need a computer to recognize it. The Arduino IDE has a board manager on which the correct drivers are installed.
Copy the following line:
https://arduino.esp8266.com/stable/package_esp8266com_index.jsonOpen the settings and paste them into the URLs. Save the settings and go to the controller manager in Tools> Board> Boards Manager. The ESP8266 card must be present at the end of the list. The wizard chose version 2.5.0 with the IDE in 1.8.9.
You also need the Blynk library, which can be found in Sketch> Include Library> Manage libraries ... and then find Blynk in the search field.
Go to the project settings and send a token to your address, which is a large string that allows your phone to recognize NodeMCU when it is turned on. Copy the token from your recently received mail and paste it into the auth array.
Now you can install the firmware.
Comet.ino
Everything is ready, now you can enjoy your work.