
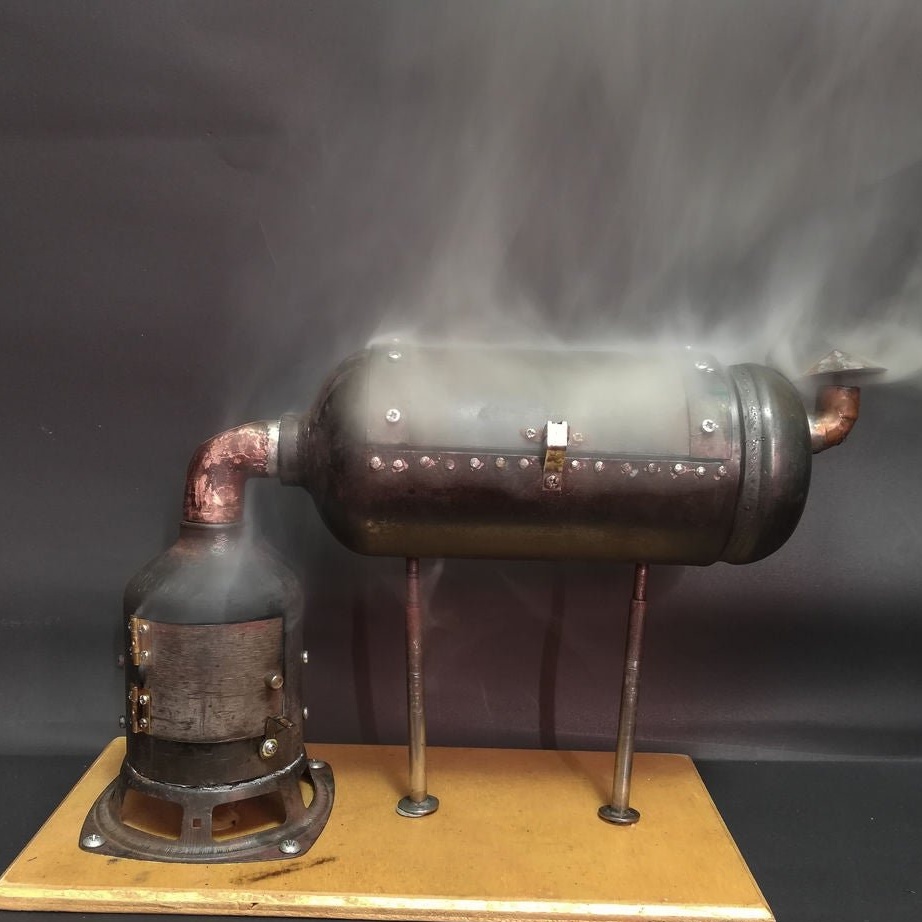
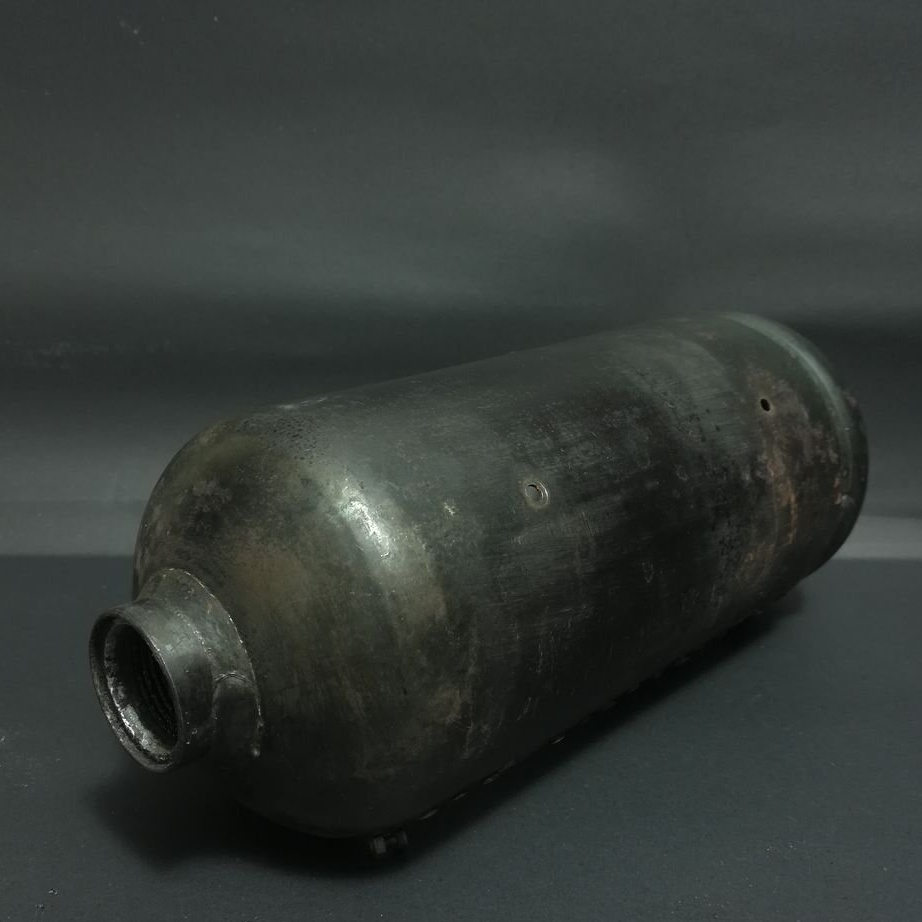
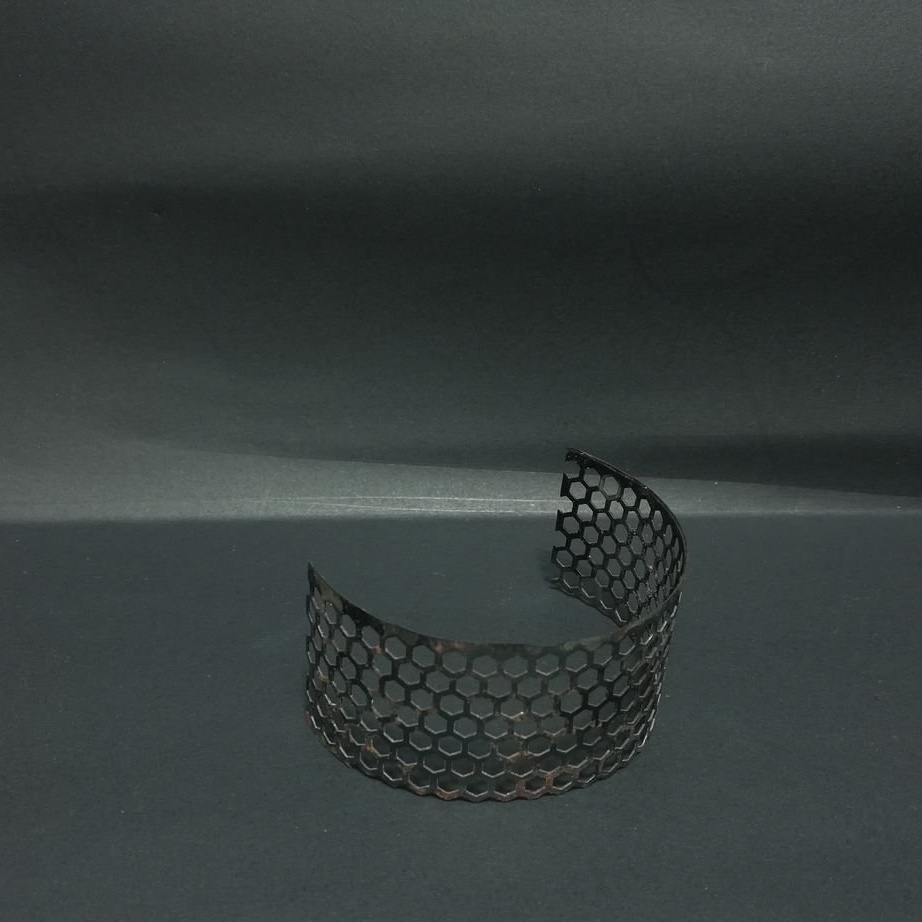
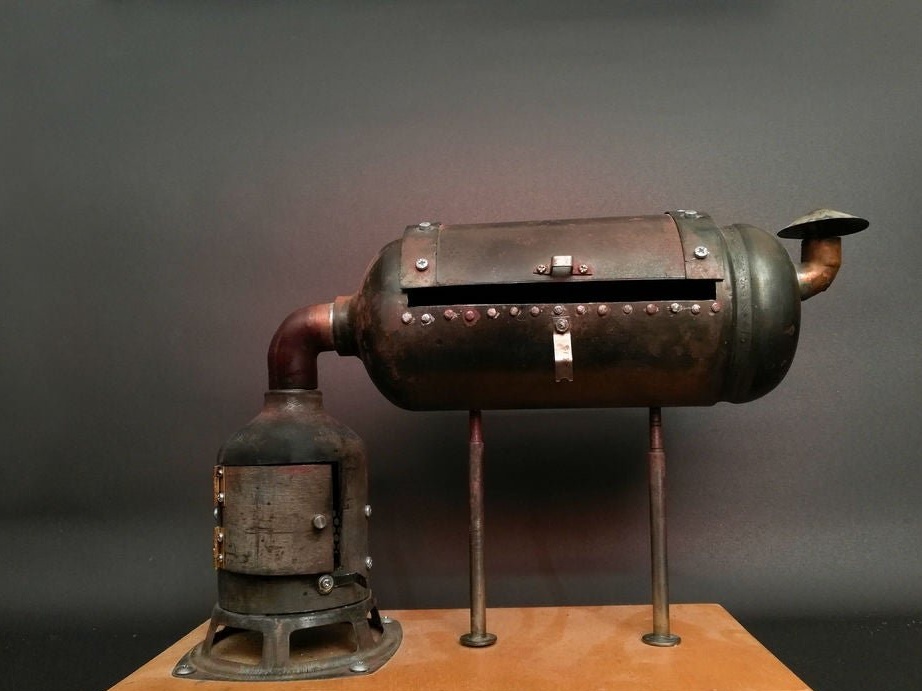
If you think it’s just modelthen you are mistaken. In this mini-smokehouse it is quite possible to smoke a couple of sausages. Of course, it is a pity that the master, for clarity, did not place, for example, a matchbox near the smokehouse, but we can judge its size by the dynamics and the grid from the computer's power supply.
So, for the manufacture of such a smokehouse, the master used the following
Tools and material:
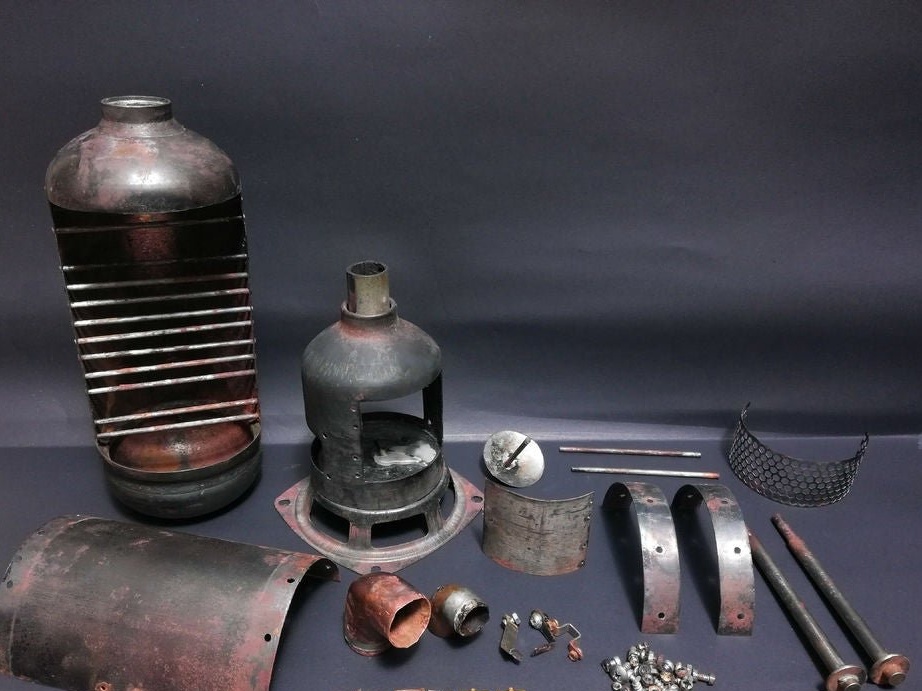
- Fire extinguisher 2 pcs;
- Copper knees - 2 pcs;
- Loops - 4 pcs;
-Case speaker;
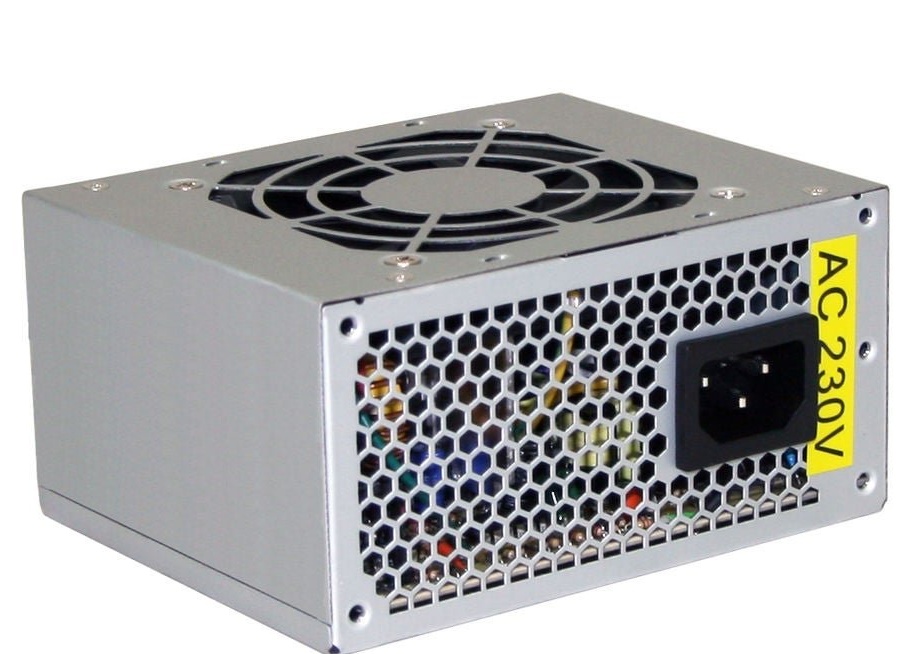
- Mesh power supply;
-Metal rods;
-Bolts;
-Hammer;
-Drill;
-Soldering accessories;
-Fasteners;
-USHM;
-Scissors for metal;
-Screwdriver;
-Plywood;
-Hacksaw;
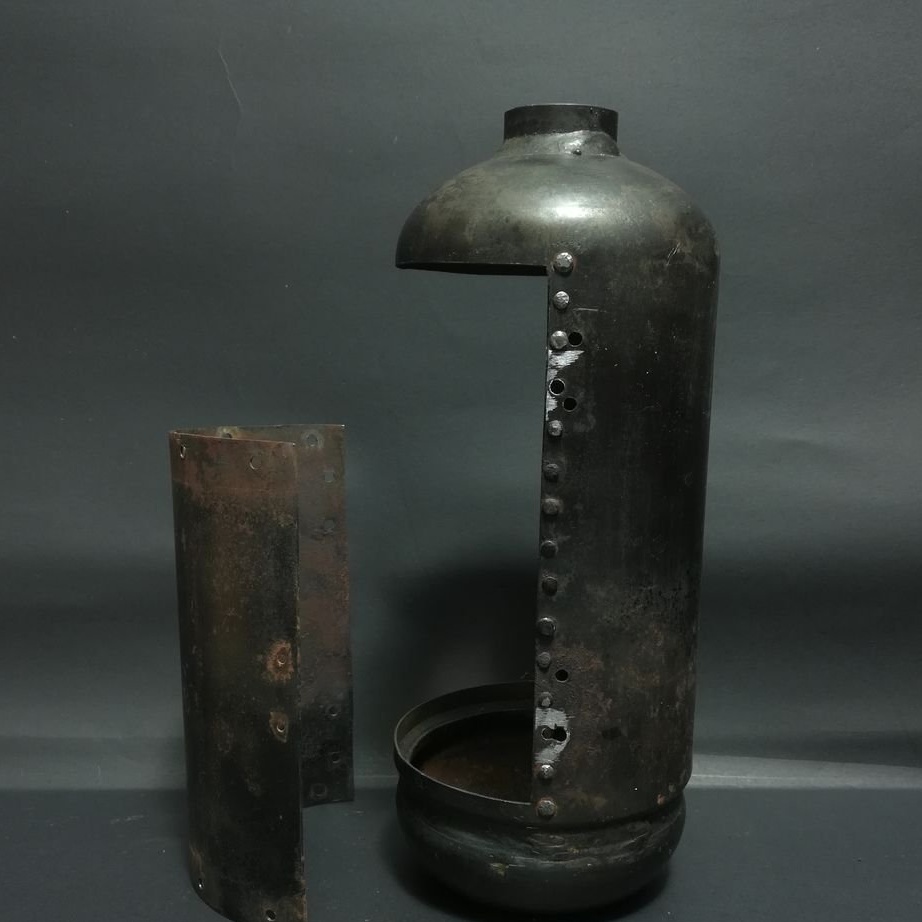
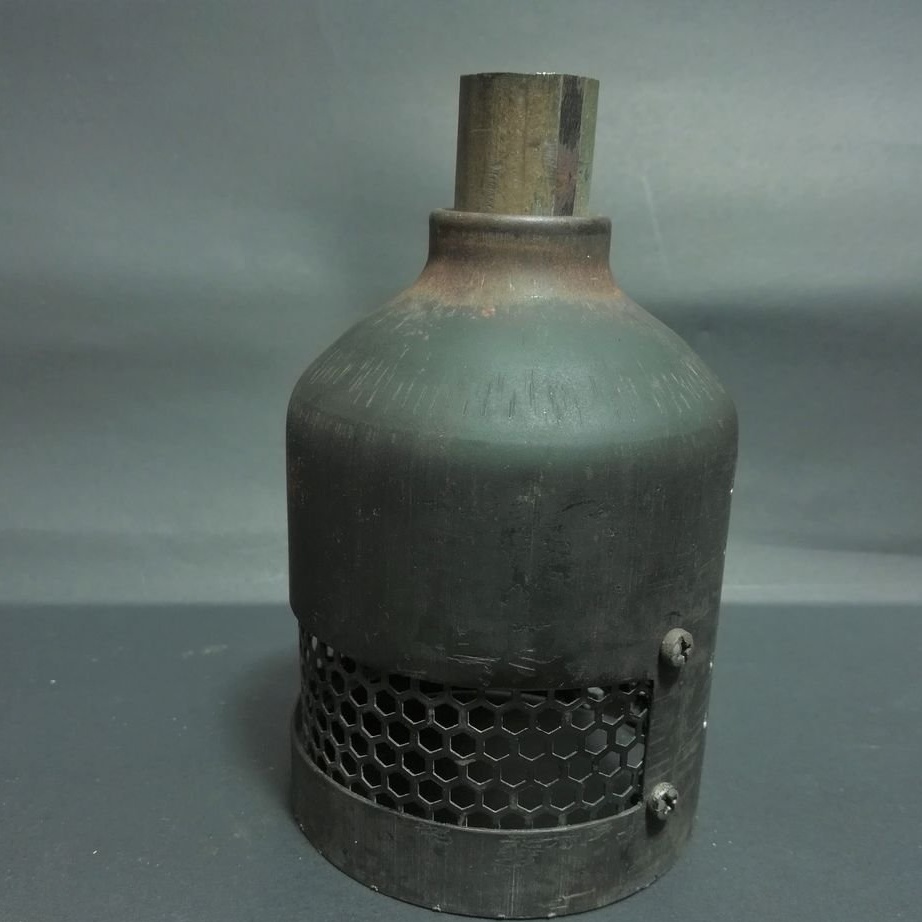
Step One: Cover
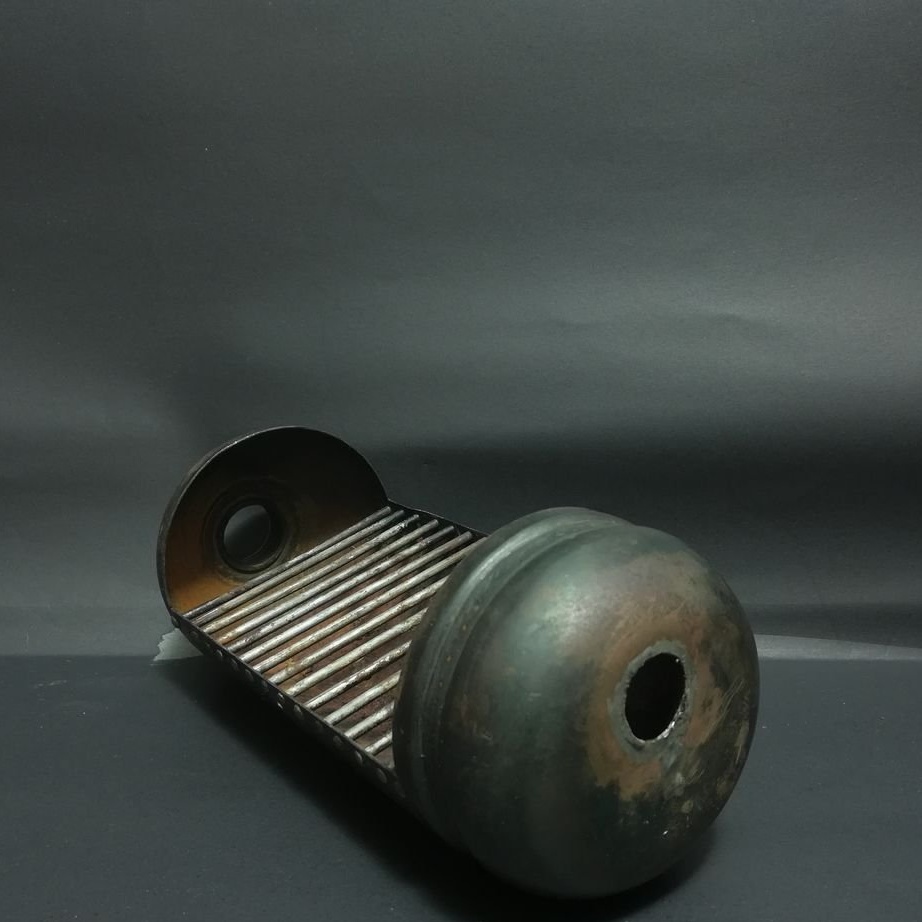
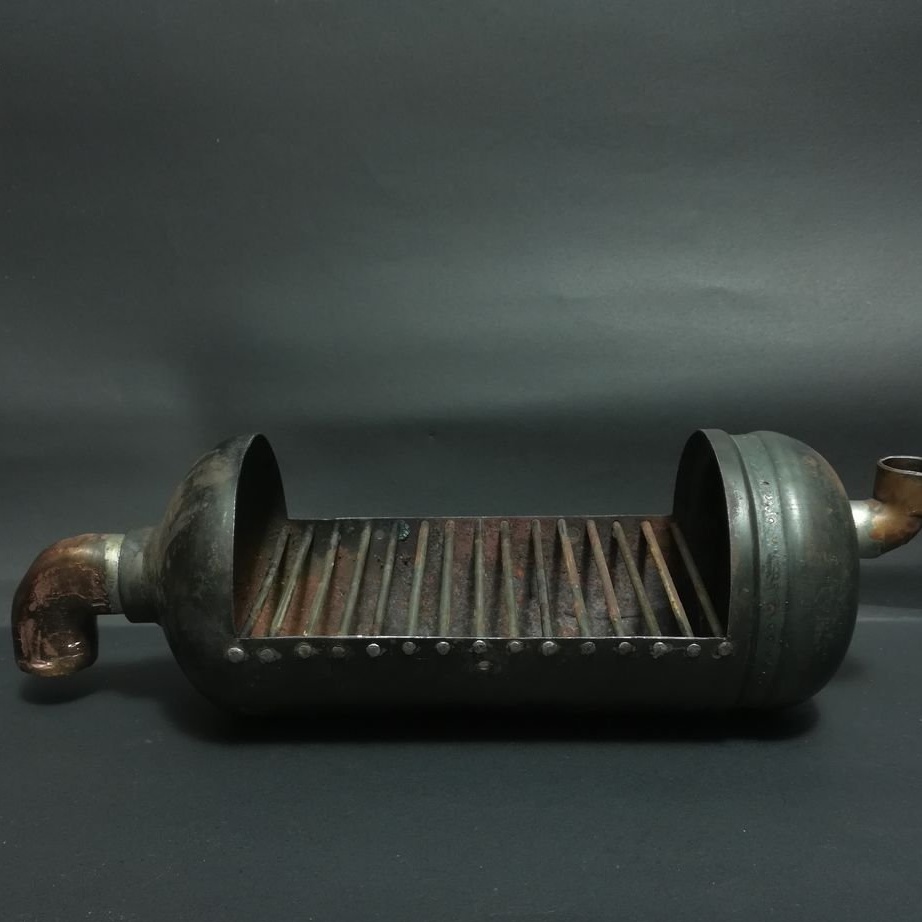
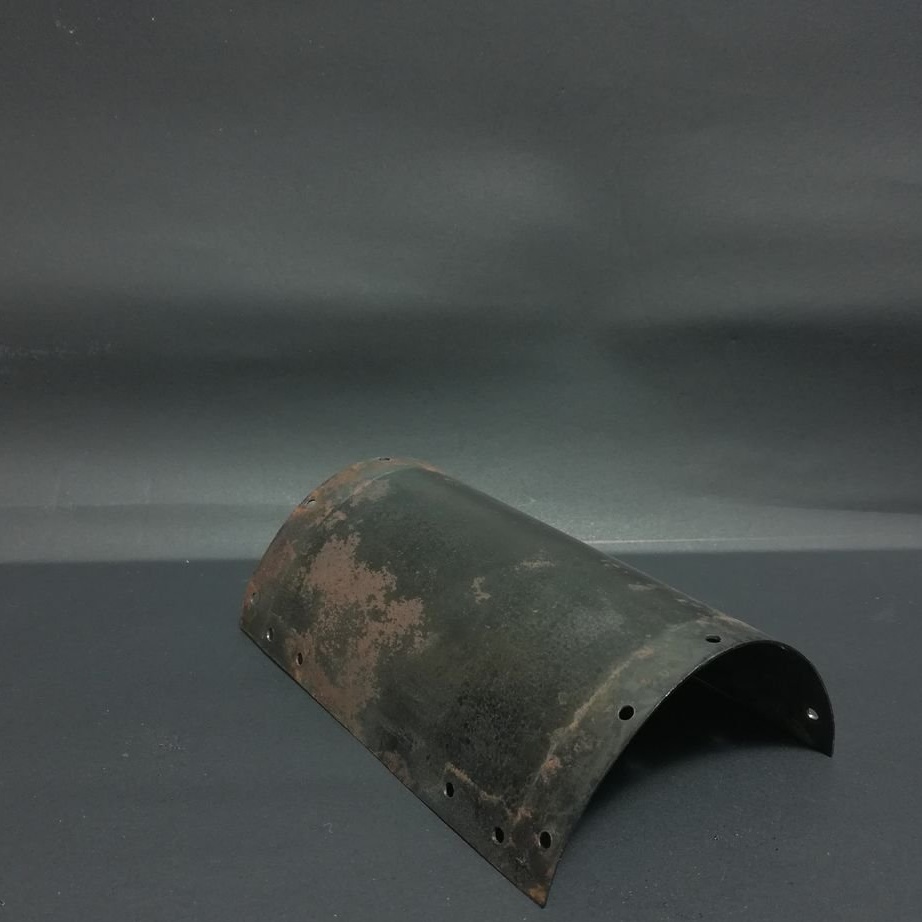
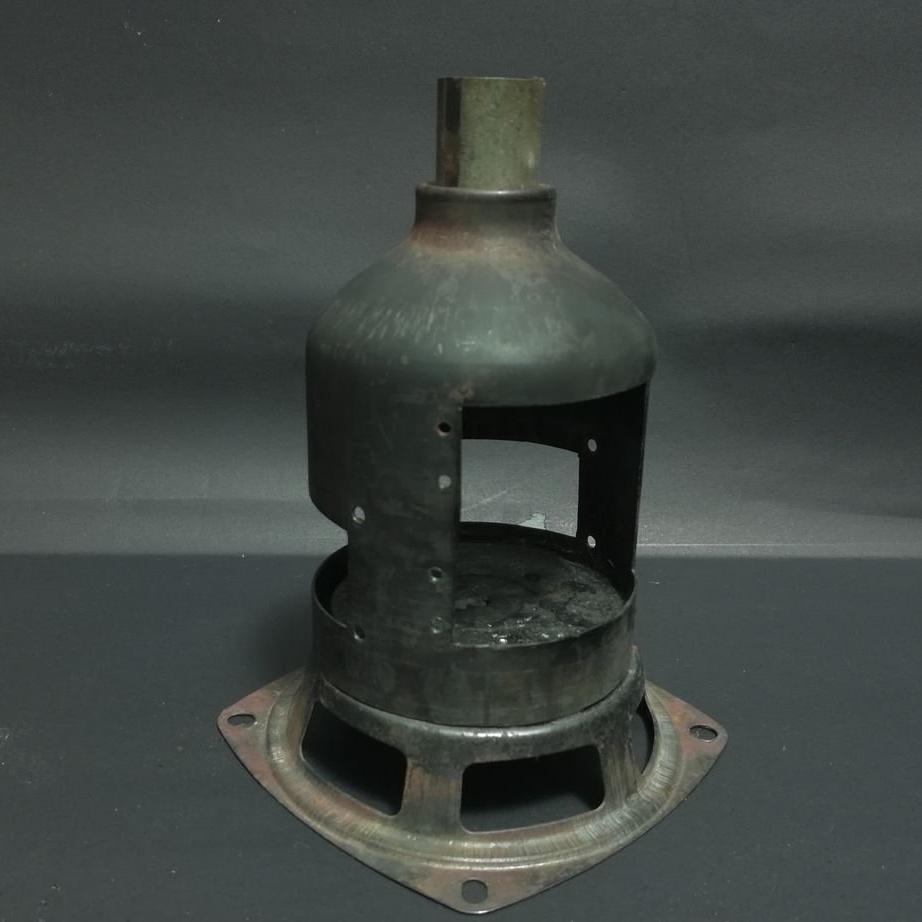
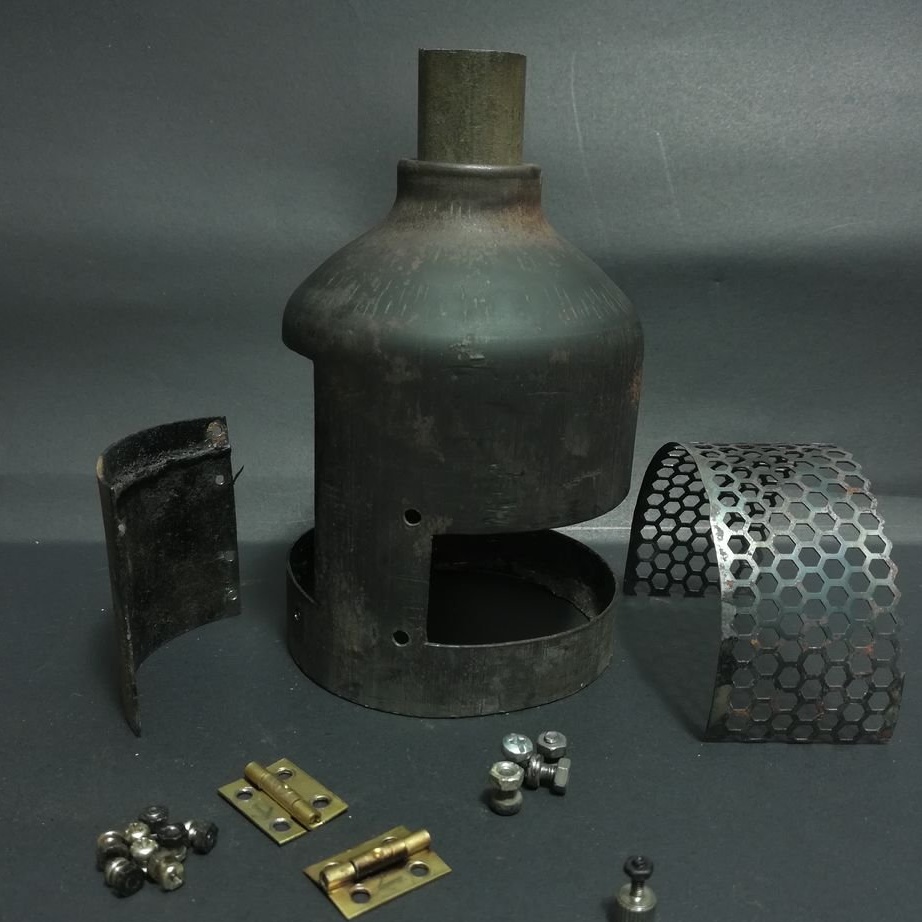
The smokehouse is made of the body of a small fire extinguisher. The top of the fire extinguisher is removed. Then the three sides of the lid are marked and cut. Hole holes are marked. The fourth side of the cover is cut off.

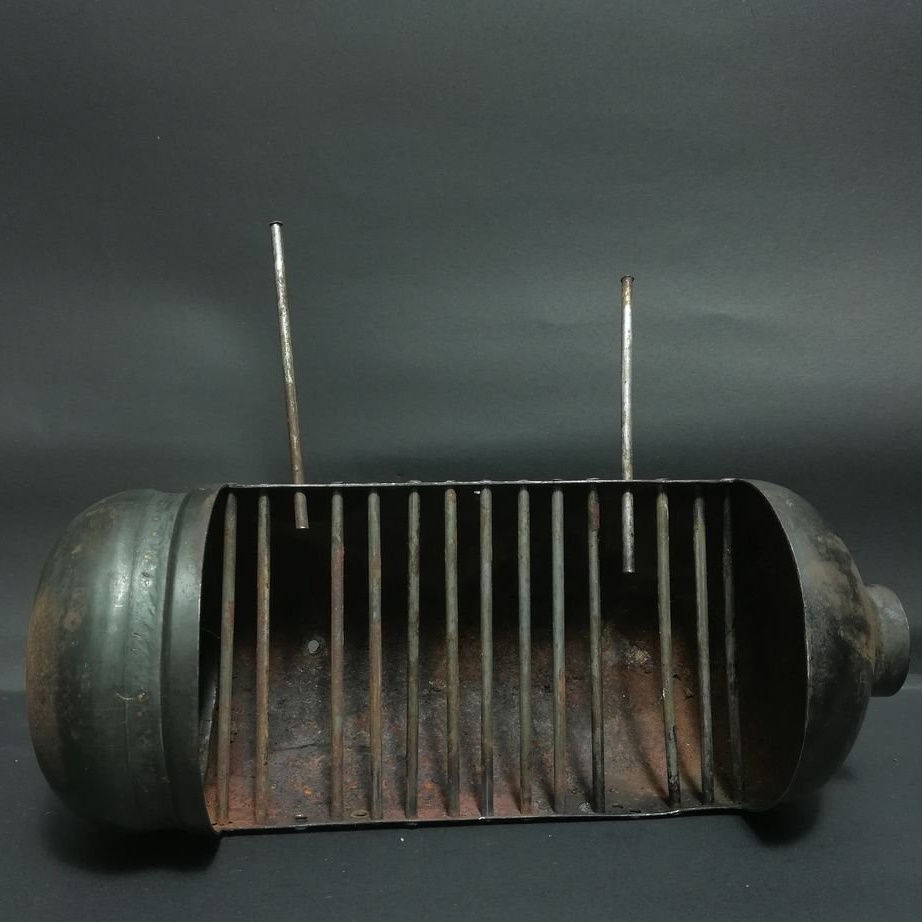
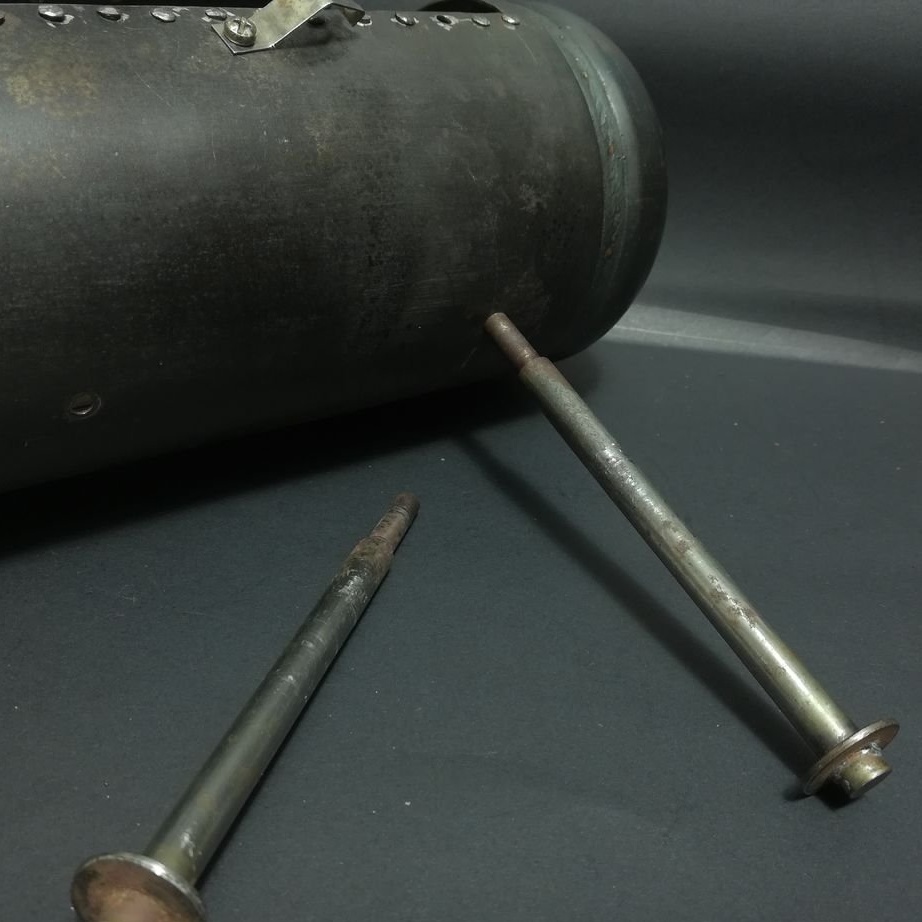
Step Two: Lattice
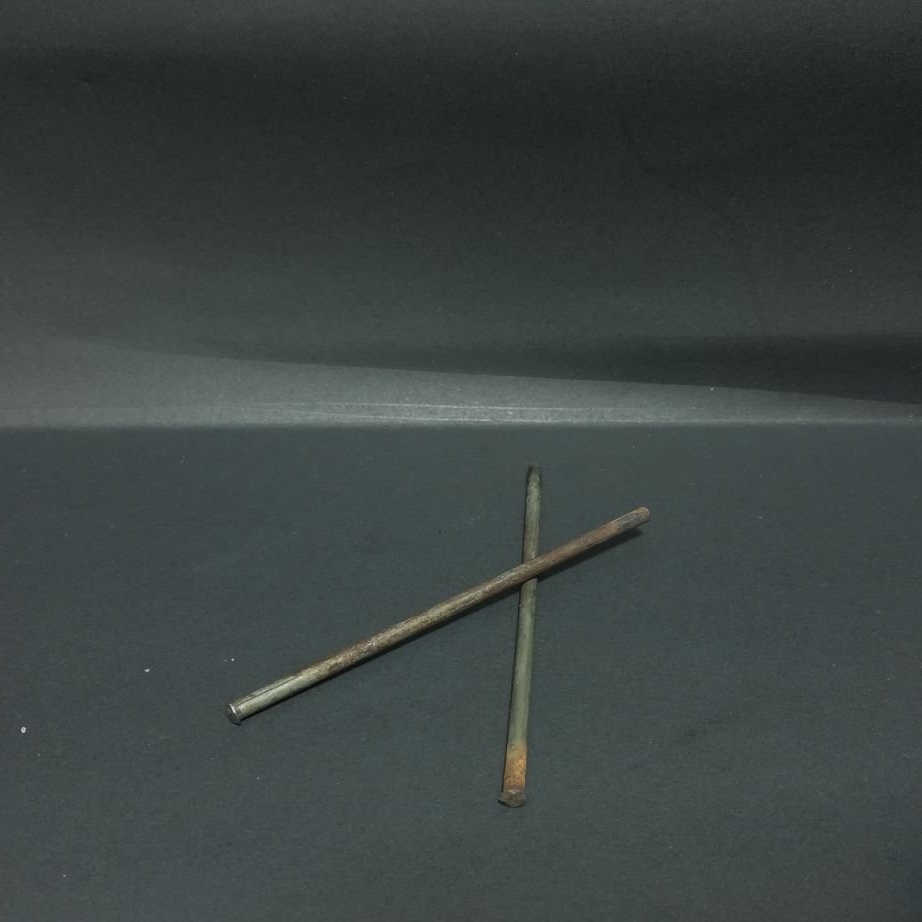
Below the cut, on both sides, a series of holes for the grating are drilled coaxially. Metal rods are installed in the holes. The edges of the rods are riveted with a hammer.
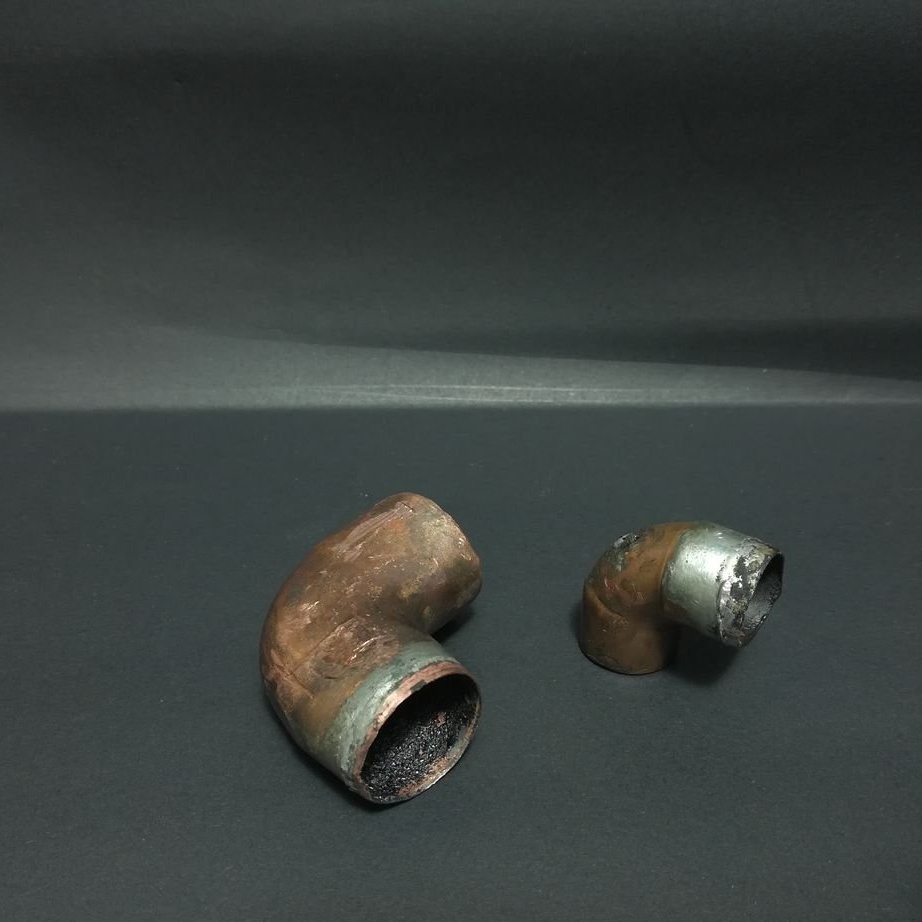
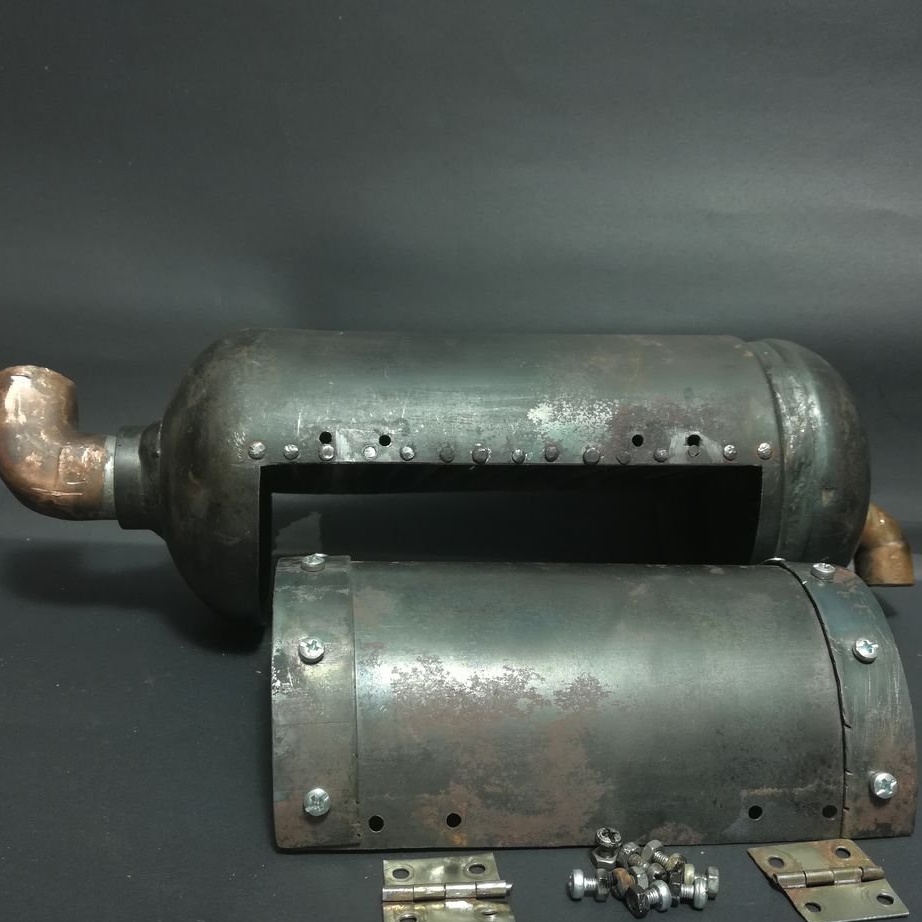
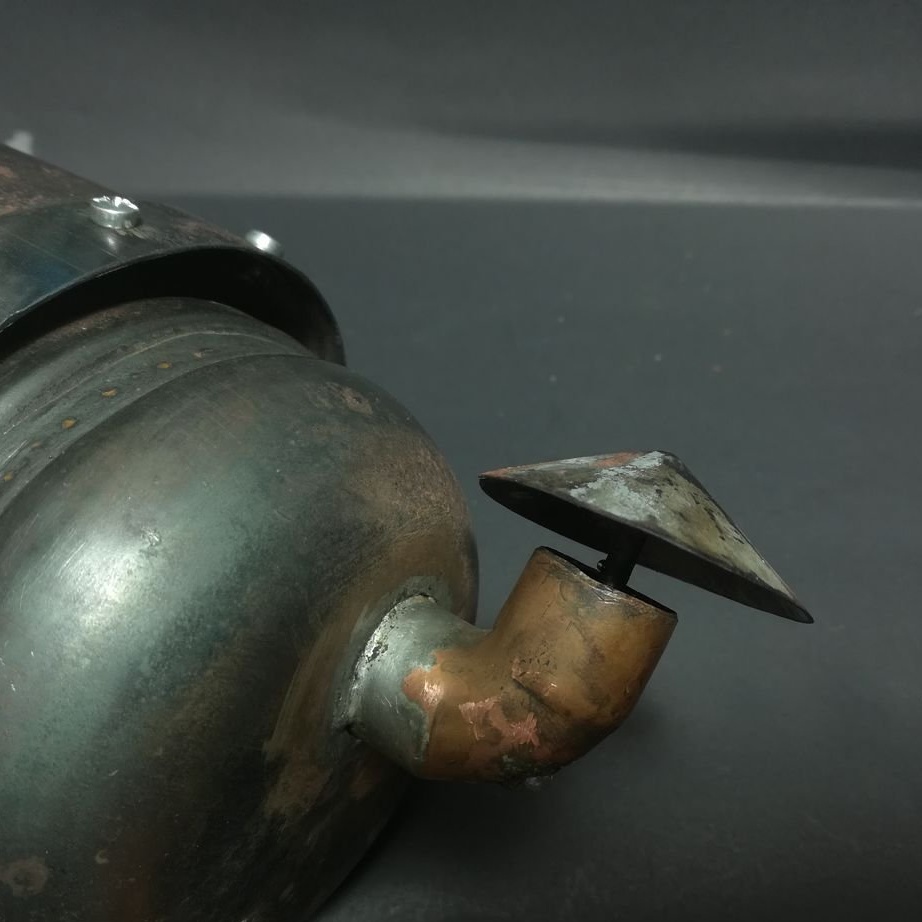
Step Three: Knee
The knee is copper. One knee will serve as a chimney, the second will connect the smokehouse with the furnace. The master drills holes at the ends of the smokehouse and solders the knee.
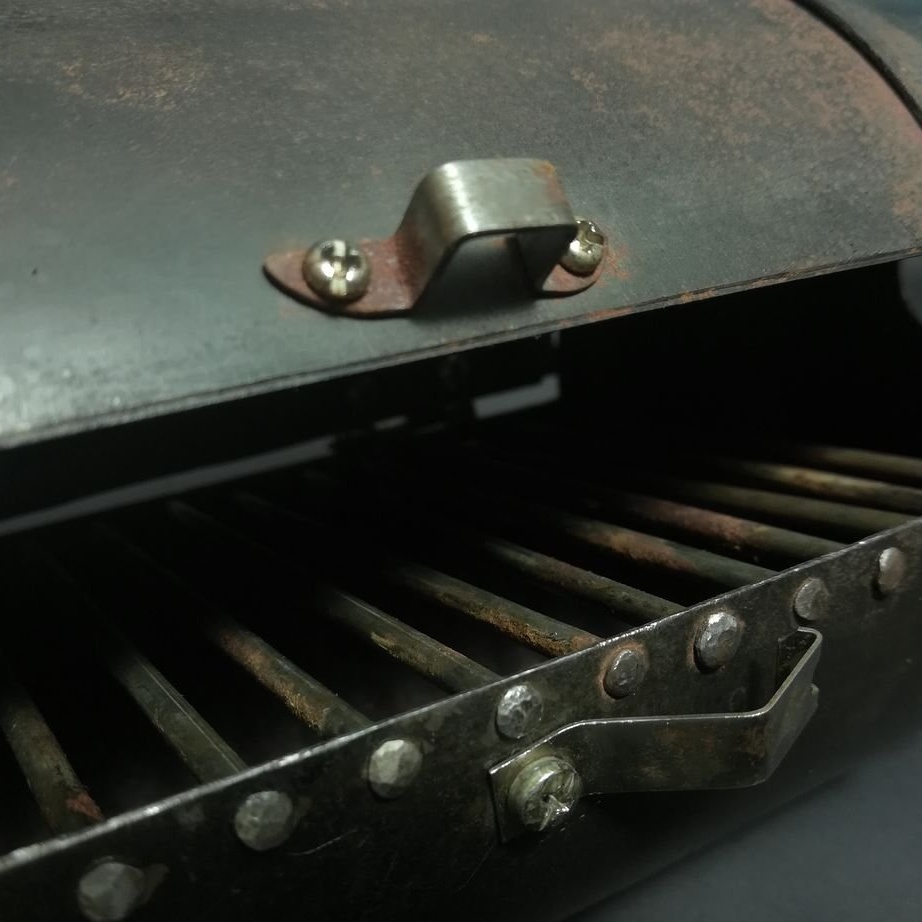
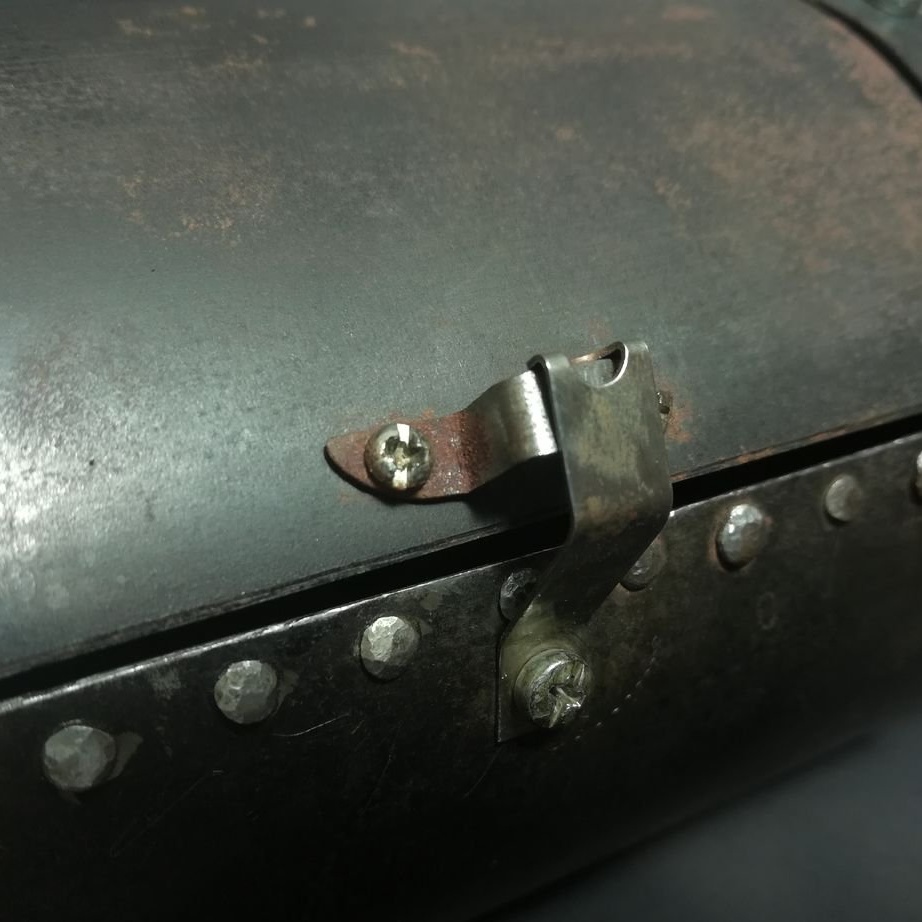
Step Four: Cover Installation
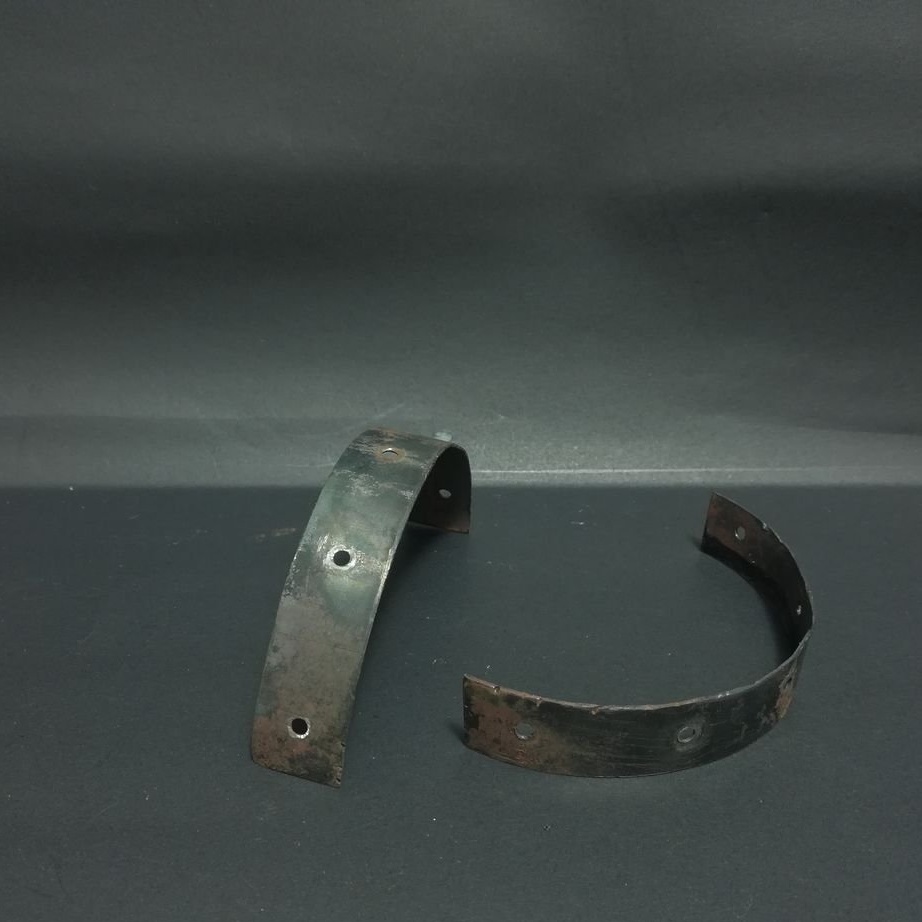
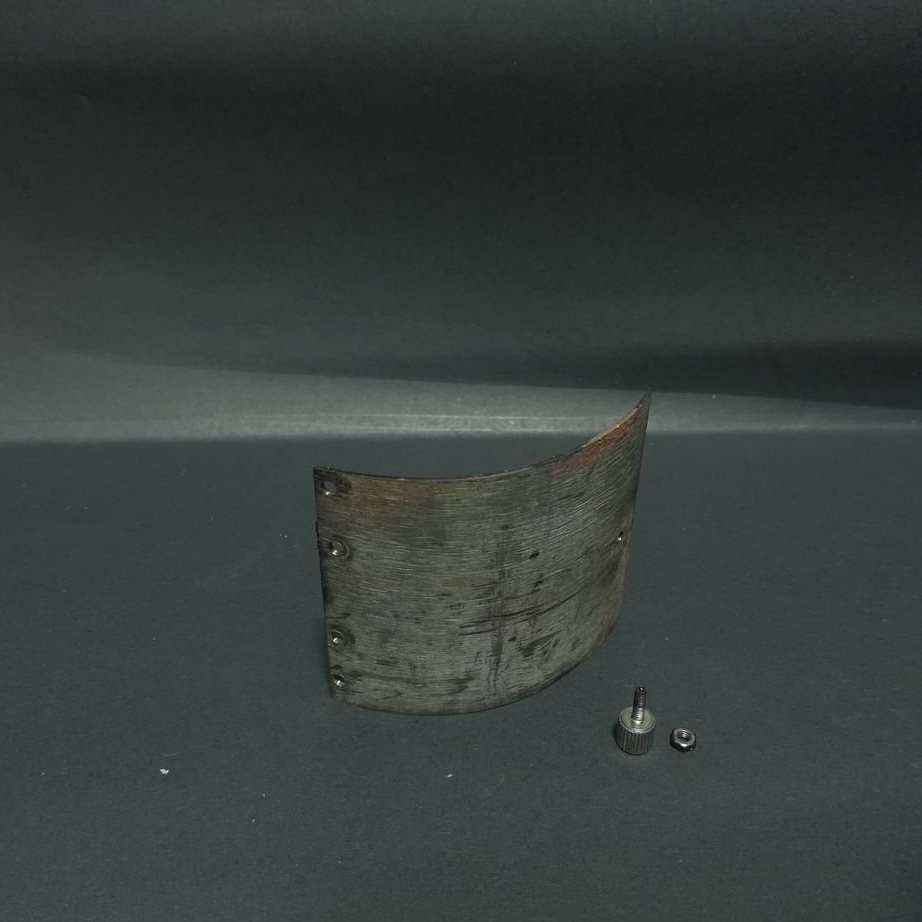
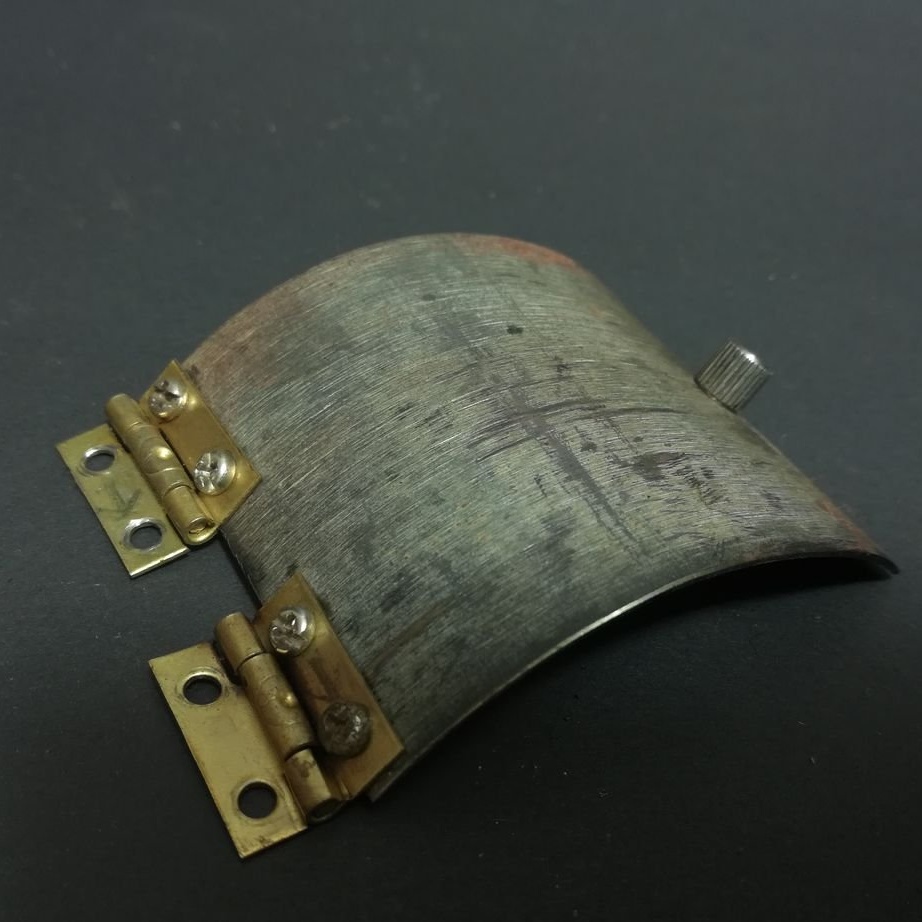
From the second fire extinguisher, the master cut off two semicircular strips. I drilled holes in the lid and strips. Screwed the strips to the lid.
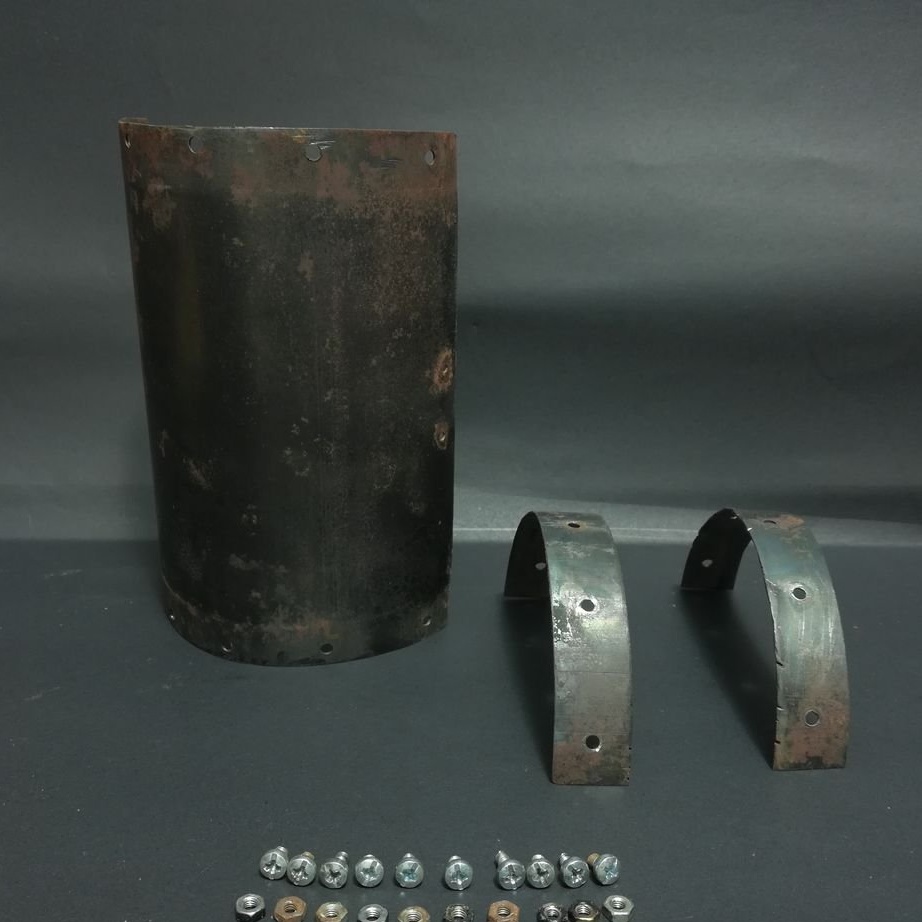

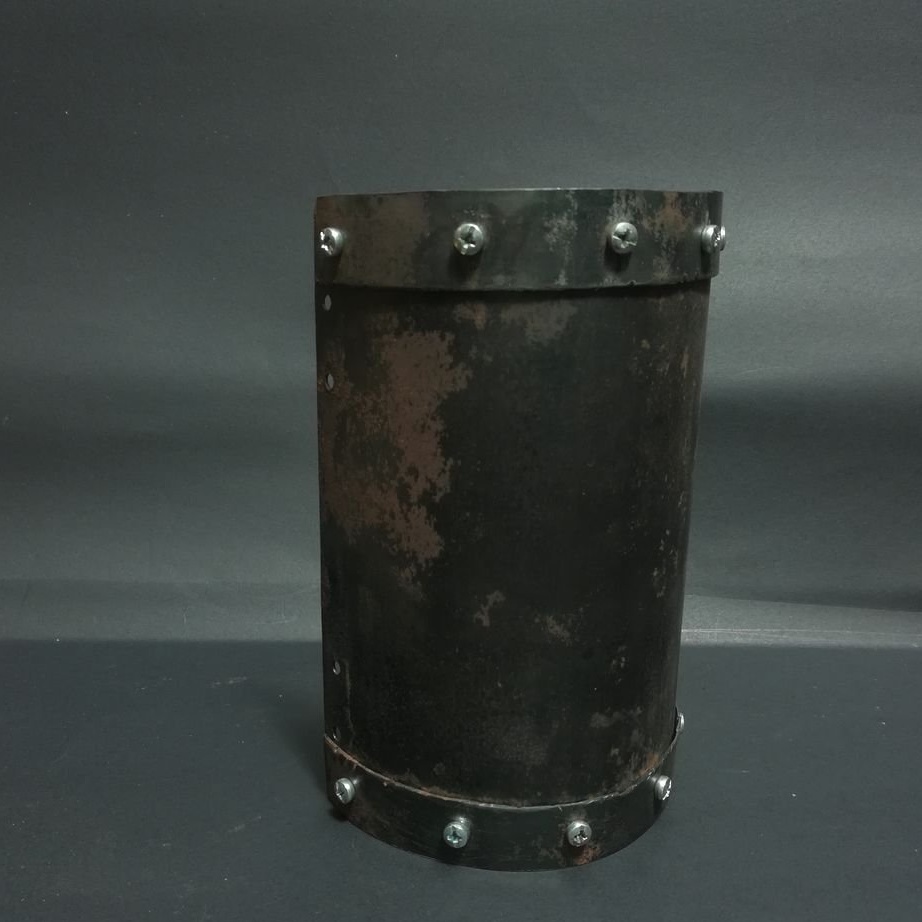
I screwed the hinges and set the lid on the smokehouse.

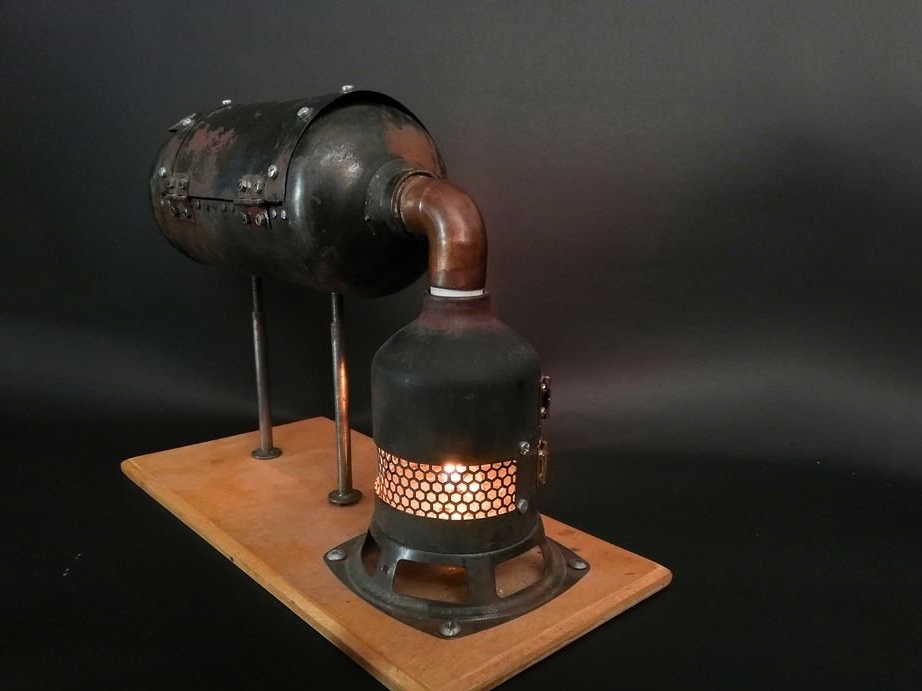
Step Five: Firebox
Now you can start making the firebox.
Here the process is almost the same, this time the master fire extinguisher cut into about a third, then made another cut to make the door. On the reverse side, I cut a rectangular piece of the case, it will be forced ventilation.
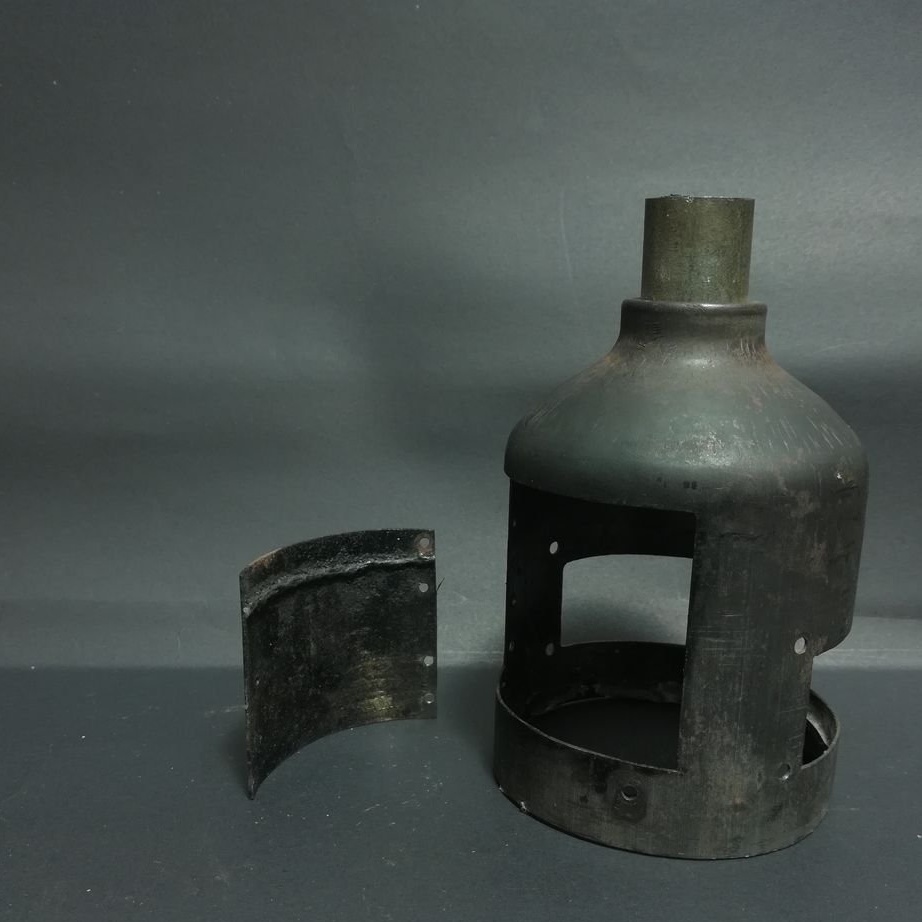
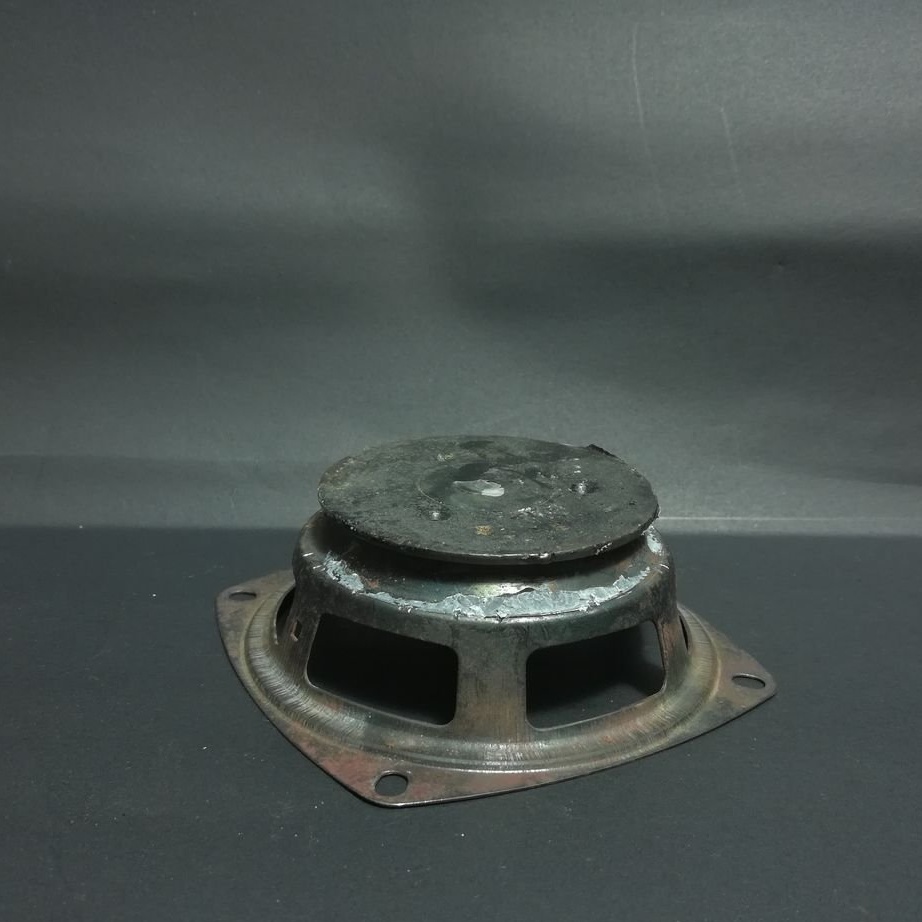
As a support, the master used the metal part of the speaker along with a magnet.
To close the ventilation hole, the master cut out the grid from the computer power supply housing, and secured it to the furnace body.
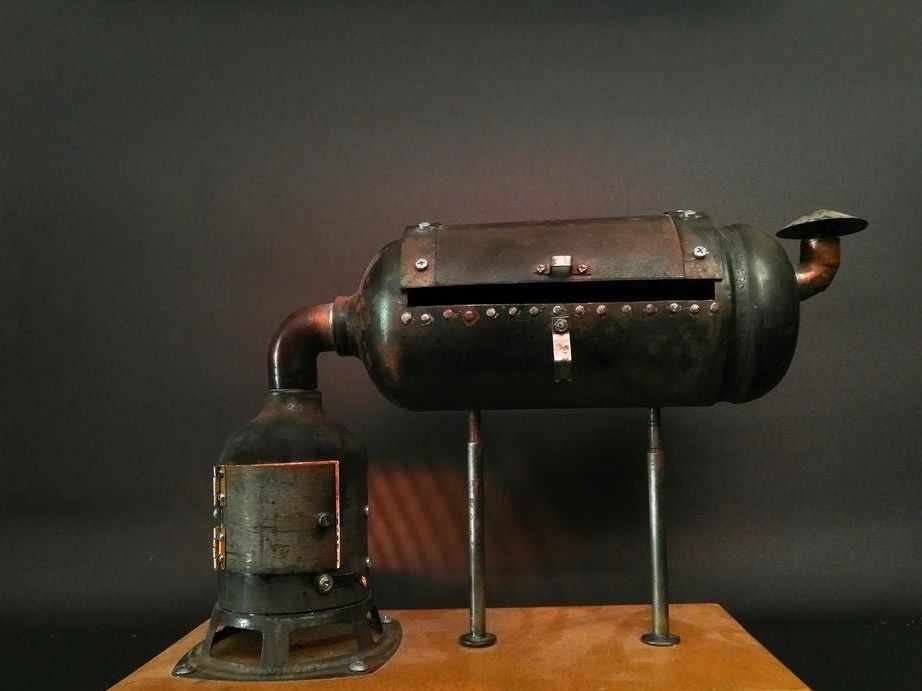
Now you can put everything together.

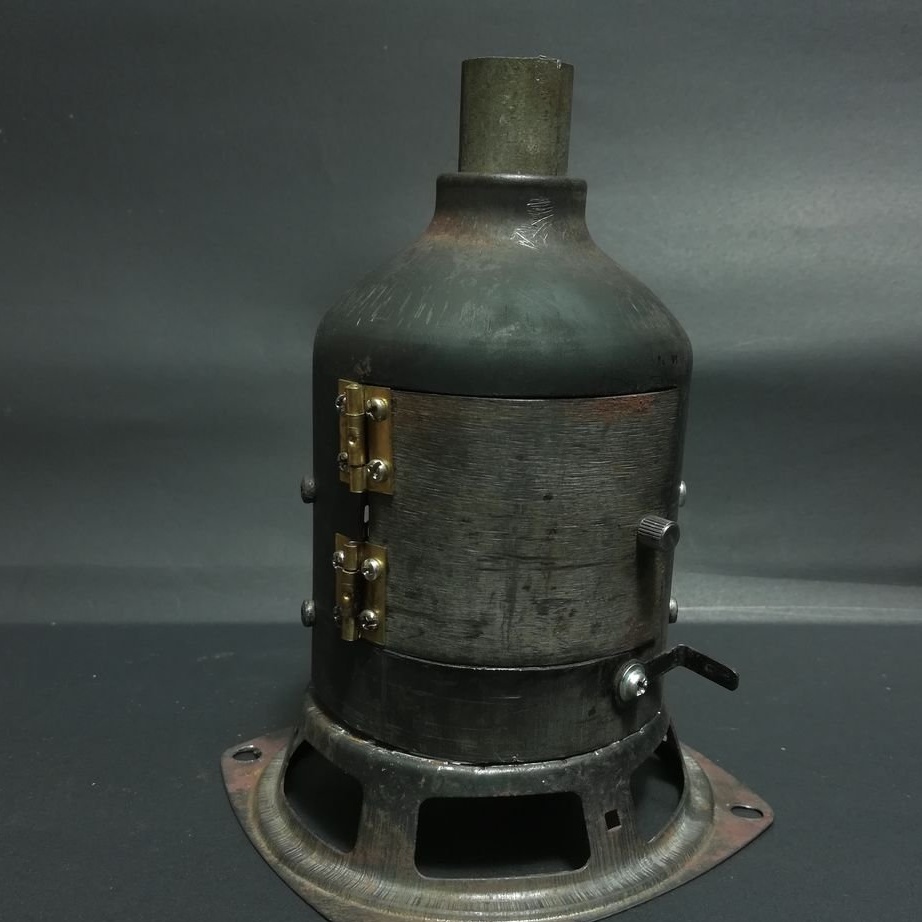
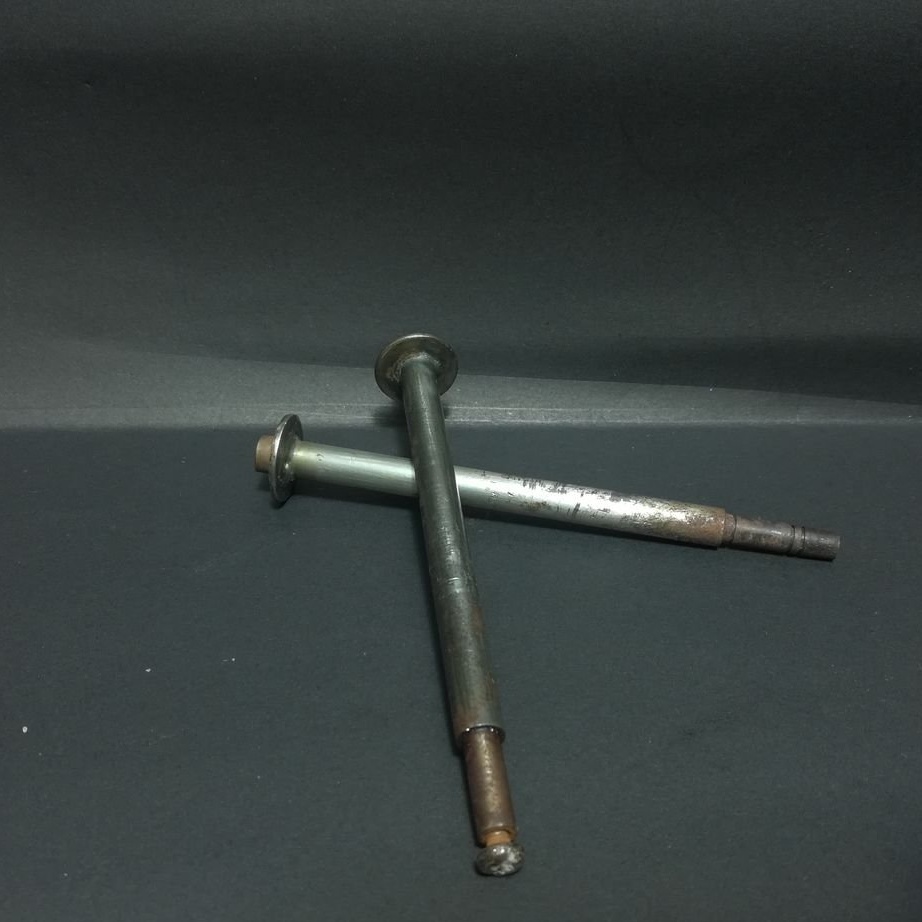
Step Six: Feet
The master used bolts as legs.Bolts have a thread only at the end and this is ideal for fixing the legs. In the smokehouse, the master drilled two holes and secured the legs.
Seventh step: small details
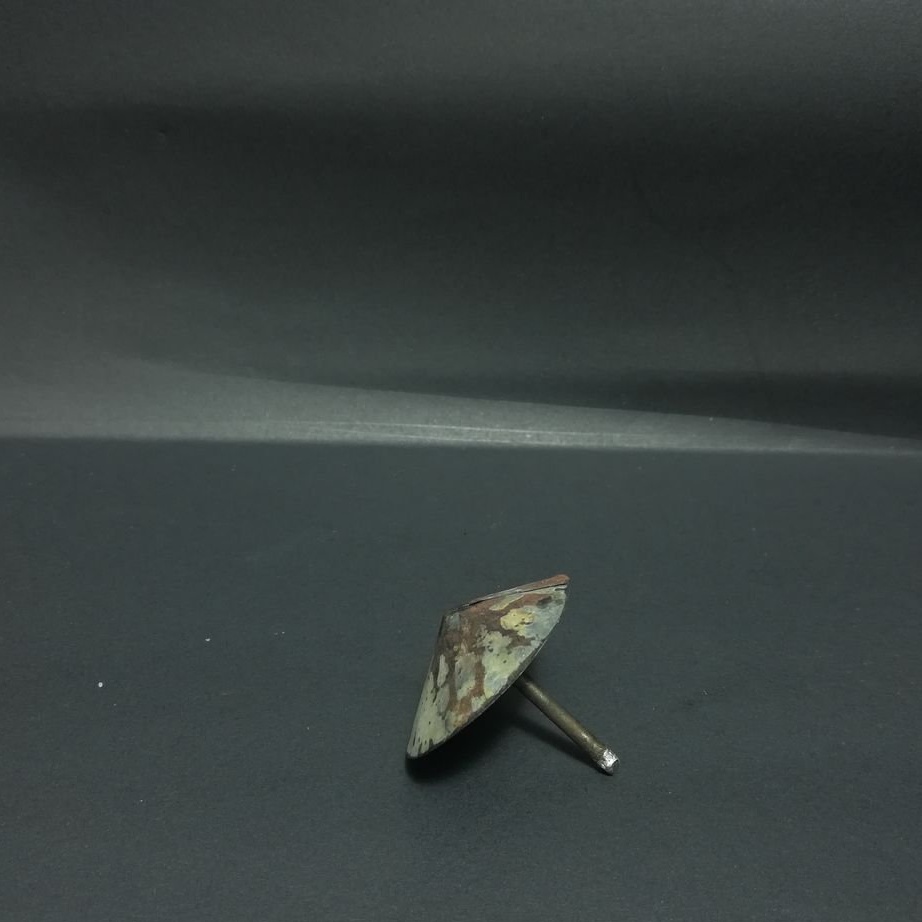
The master fixed a metal umbrella on the chimney, and a lock on the lid.
Step Eight: Build
To assemble the entire structure, the master uses a plywood base. Secures the firebox, connects the smokehouse to the firebox and also secures it.

Everything is ready and you can experience the smokehouse at work.