» Fixtures » Apparatus »Wood burning device

Wood burning device


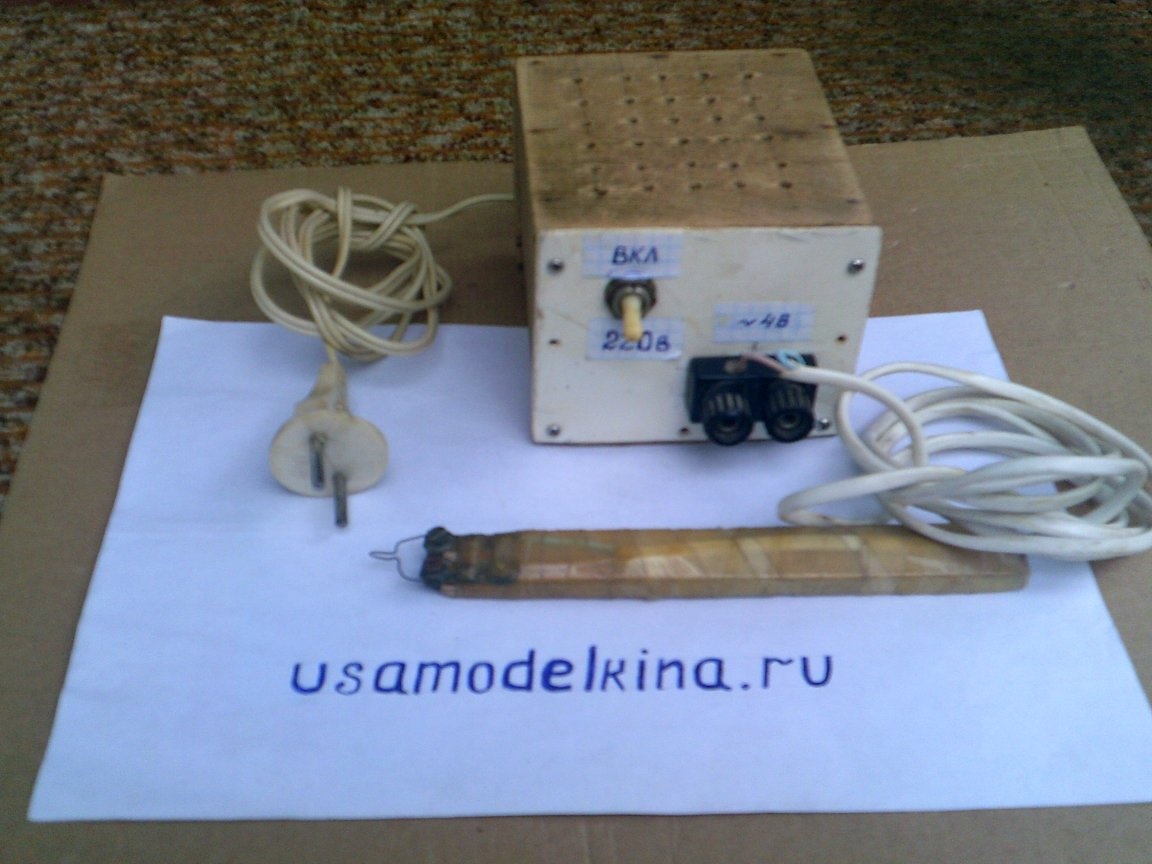
good afternoon friends the inhabitants of our site! I want to share with you how easy it is to make a wood burning device do it yourself. For this homemade work we will need the following materials and tools.

It: step-down transformer, with a voltage on the secondary winding of 4V, and a current of at least 2–3 amperes, a power cable with a plug - 1 m long, and a power cable with a cross-section of at least 0.75 mm, two meters long; to connect to the handle of the burner; a small wooden lath measuring 1 * 2 * 15cm, you can use plywood; wiring terminals - 2pcs; electrical military clamps for connecting the terminals of the secondary winding of the transformer -2pcs; any nichrome wire from any heating element; electrical tape, toggle switch.

Of the tools you will need: wood hacksaw; soldering iron, solder, tweezers, wire cutters, pliers, screwdrivers, small screws and cloves.

We assemble as follows:
The connection diagram is shown in the photo.


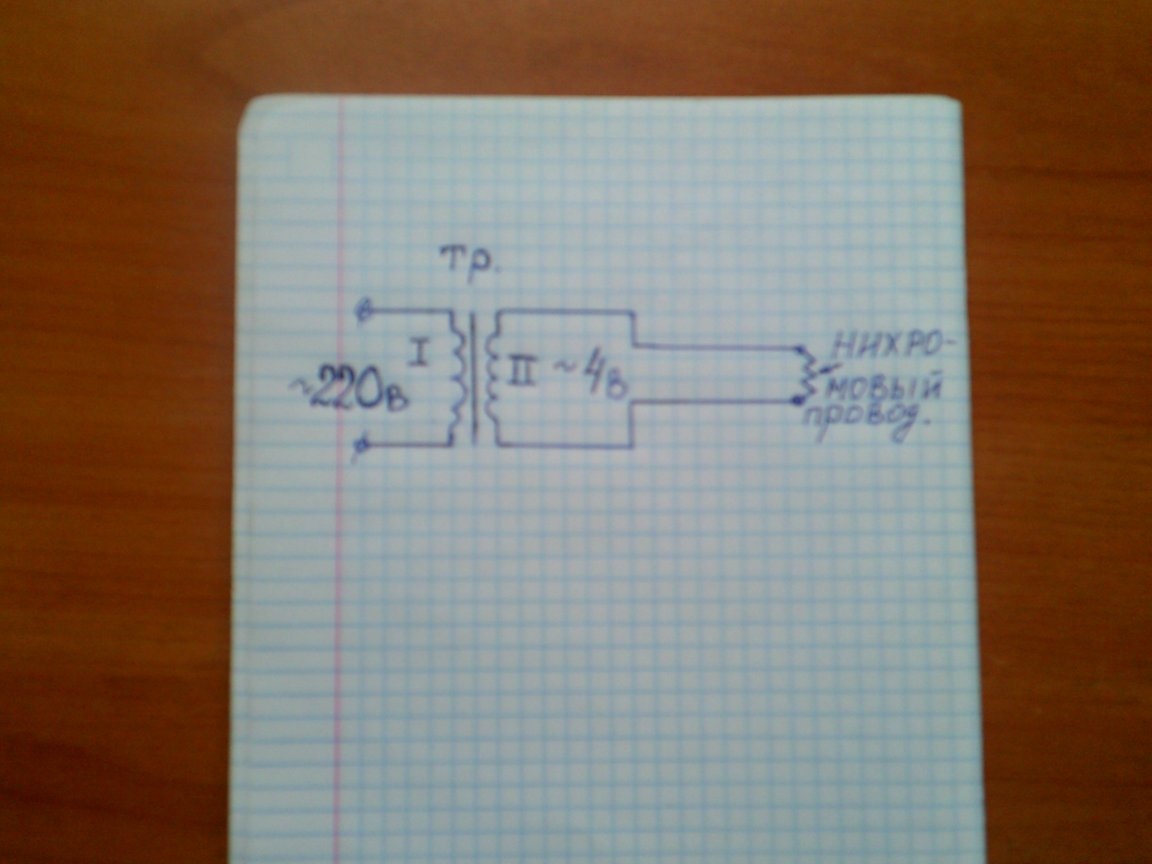
Step 1. We check the transformer for operability, for which we find the network winding, connect it to a 220v network, and measure the voltage on the secondary winding - it should be about 4-5v.

Step 2. From a scrap of plywood or a board we cut the rail of the above sizes. We process its edges, make them semicircular.

Step 3. We attach two mounting terminals to one end of the obtained handle using self-tapping screws, as shown in the photo.

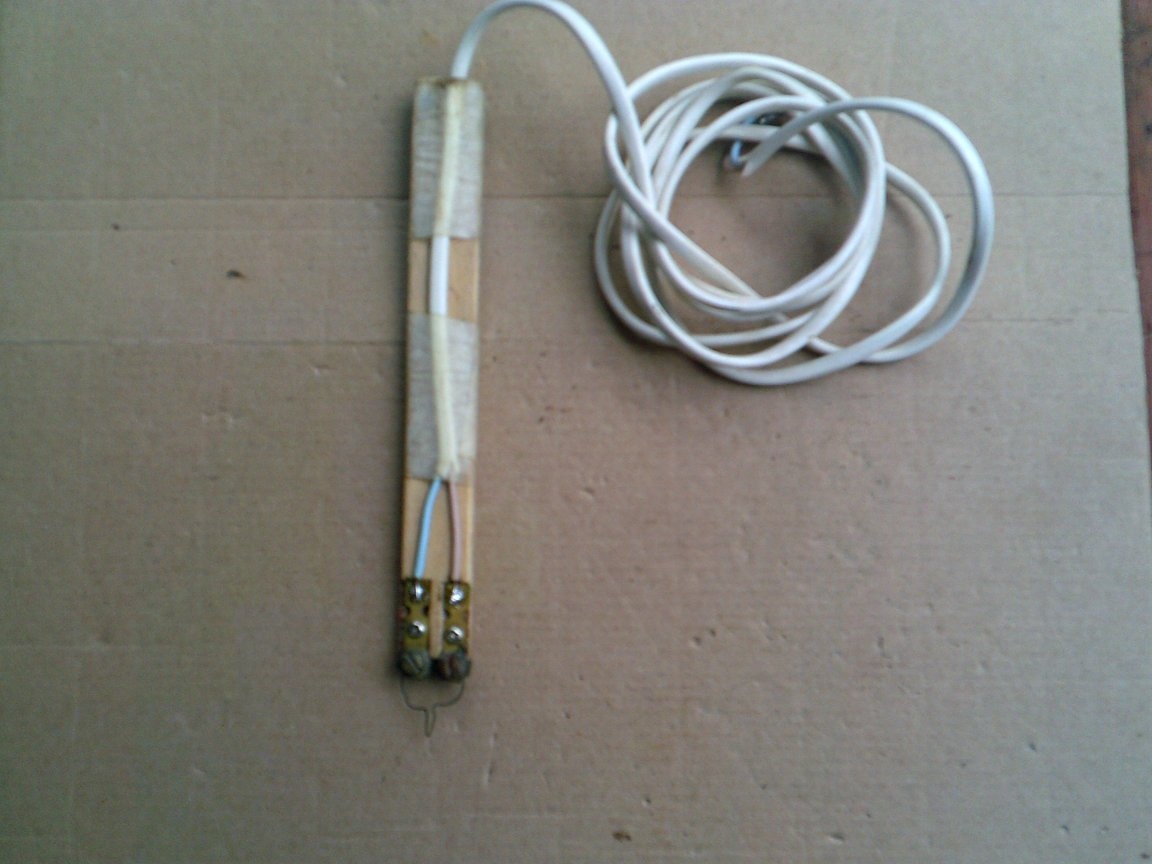
We attach to the outer ends of the terminals a piece of nichrome wire, 2.5-3 cm in size, we select empirically (we make sure that the wire is heated to a bright cherry color, and does not burn out). To the opposite ends we connect 2 meters of a network stranded wire. The second ends of the wires are connected through mounting clamps to the secondary winding of the transformer.

Pressing the wire to the wooden handle, wrap it with electrical tape, as shown in the photo.

We connect the mains cable with the plug to the primary winding of the power transformer through the toggle switch.
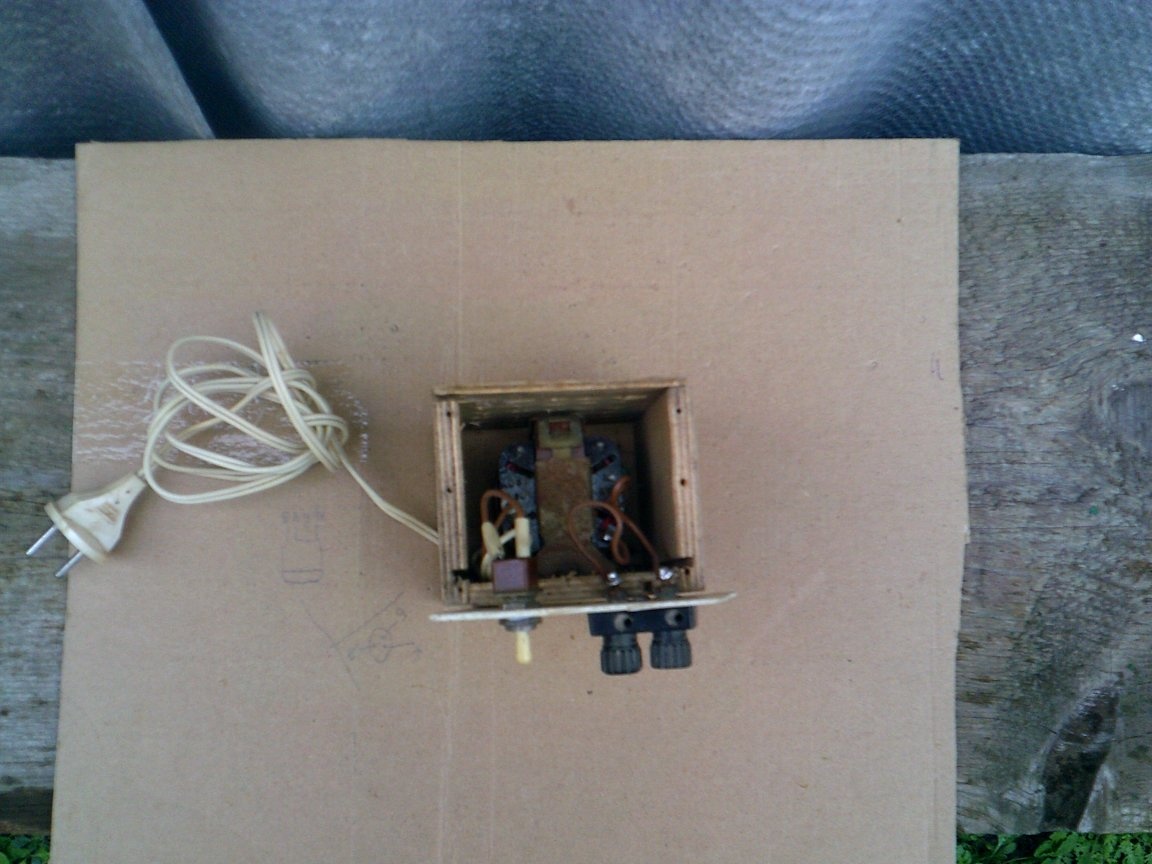
Step 4. From plywood or any other material we make a suitable housing size. We place the assembled homemade product in this case.

Next, we check the operation of the burner by connecting the power cord to a 220v network. With this homemade product you can do good crafts, and even the paintings, having previously applied the drawing we need on the processed plywood sheet.

That's all, the homemade product is ready. I wish you all success in your work. See you again.
9
8.8
7.5

Add a comment

    • smilesmilesxaxaokdontknowyahoonea
      bossscratchfoolyesyes-yesaggressivesecret
      sorrydancedance2dance3pardonhelpdrinks
      stopfriendsgoodgoodgoodwhistleswoontongue
      smokeclappingcraydeclarederisivedon-t_mentiondownload
      heatirefullaugh1mdameetingmoskingnegative
      not_ipopcornpunishreadscarescaressearch
      tauntthank_youthisto_clueumnikacuteagree
      badbeeeblack_eyeblum3blushboastboredom
      censoredpleasantrysecret2threatenvictoryyusun_bespectacled
      shokrespektlolprevedwelcomekrutoyya_za
      ya_dobryihelperne_huliganne_othodifludbanclose
18 comments
Here is the answer ... When burning out, the degree of controllability of fine motor skills also plays the most important role. You also "draw".)))
I also draw badly, very much) More precisely, I don’t blond at all from virginity. And the handwriting is worse than that of doctors ...
I won’t even try to draw portraits, I can only if I do mine, so as not to offend other people.
Someone from the famous said (I don’t remember who): the child will draw a more even line along the line than an experienced artist by hand. In general, I’ve been using “rulers” all my life when I need to do something even.
The button is not in all Soviet burners. There is no "Silhouette", but it is very common.
Excuse me, but do you draw well with a pencil? Can you, for example, let’s not draw (this is artistic talent needed), but draw someone’s portrait? (there is enough equipment). So that with shadows and, as a result, it seems that it was ???
I just showed my version of the burner.

Which is quite functional!
Well, yes, a rectifier for the regulator. Add transistor and potentiometer. Maybe of course I had curves at that time (and even now it’s wrong not much better), but there were cases when I burned too deeply (not when you burn out with dots, but when you try to draw a line). I twisted the knob periodically, I won’t say that often, but I twisted it.
Author
I don’t know why I should burn the apartment? I have already burned out 5 average pictures with this device. It turned out really not bad. I'm quite happy. And who does not like, I do not impose. I just showed my version of the burner.
I don’t know what came up !! Yes, and so categorically - "made it", "you can’t work with this," "Necessarily need adjustment" ....
I had a Dwarf burner in my childhood. In terms of functionality - about the same! There were no adjustments there. The toggle switch was in three positions (0-1-2). But I used only "to the full." Because it is possible (and necessary) to regulate the degree of burning through the force of pressure and the time of touch. The rest is useless bells and whistles.
Something tells me that some writers themselves did not burn anything ...
I would add a rectifier to your design
Why? ... Constantly if you burn, the color is different? scratch ... Or, purely for the regulator?

The only thing I would add is the “skirt” at the bottom of the “pencil”. So, if you just throw it, the sting always lifts up.
There is not a weak current, the button needs a powerful one.
Adjustment is an indispensable element, any is a rheostat on the primary, output, taps or magnetic gap. The output wire is thicker. And the voltage, if you look closely, is 1.3 V.
Do you disassemble and show the transformer from the factory burner?
Author
I did not indicate that nichrome should be used from old electric stoves, and certainly not from soldering irons.
Author
I think for safe use of this device, you can put a button on the handle of the burner, which will turn on and off the power supplied to the nichrome thread.
The idea of ​​making a burner is cool.But it’s not finished, it’s just done so that it’s impossible to work with it.
Most likely you will burn the apartment when you try to work them seriously.
Author
The diameter of the nichrome wire is 0.8 mm.
I remember at school at labor lessons all sorts of pictures were burned out on plywood. The factory Soviet burners had a “shutter” button to turn on the glow only at the right moments. There was also a power regulator, also a useful thing, especially when the pieces of wood differ in density.

I would add a rectifier, current regulator and the shutter button to your design. The characteristics of the nichrome wire would also be nice to indicate. The resistance depends on its length and diameter, which in turn affects the current and, as a consequence, the degree of heating.
Made to be? How to use it? If only I read a little about burners.
any nichrome wire from any heating element;
It seems that far from any! scratch

We advise you to read:

Hand it for the smartphone ...