

When the Sega Dreamcast game console just came out, the translator soon saw it in one store connected to a VGA monitor, then still a tube. Then I thought that they used an external TV tuner, then still expensive. And only today I learned from the author of Instructables under the nickname mothflavour2 that there was originally provided for a simpler way to connect.
It turns out that an input for connecting a switch is provided on the console’s multi-pin AV connector, when it is closed, the console’s video controller switches to the VGA mode and starts outputting signals to the connector’s contacts that can be passed through the board with one passive components to the VGA connector. The Sega company itself produced an appropriate adapter that could be easily repeated - but only after getting a separate mate to the device’s proprietary AV connector. Therefore, the master decided to install a switch, a board with capacitors and resistors, as well as a VGA connector directly into the console and connect it to the pads on the motherboard. Small spoiler: it worked.
The master begins the alteration by disconnecting all cables from the console, especially the power cable, since the PSU in Dreamcast is built-in. Then he opens the console box:
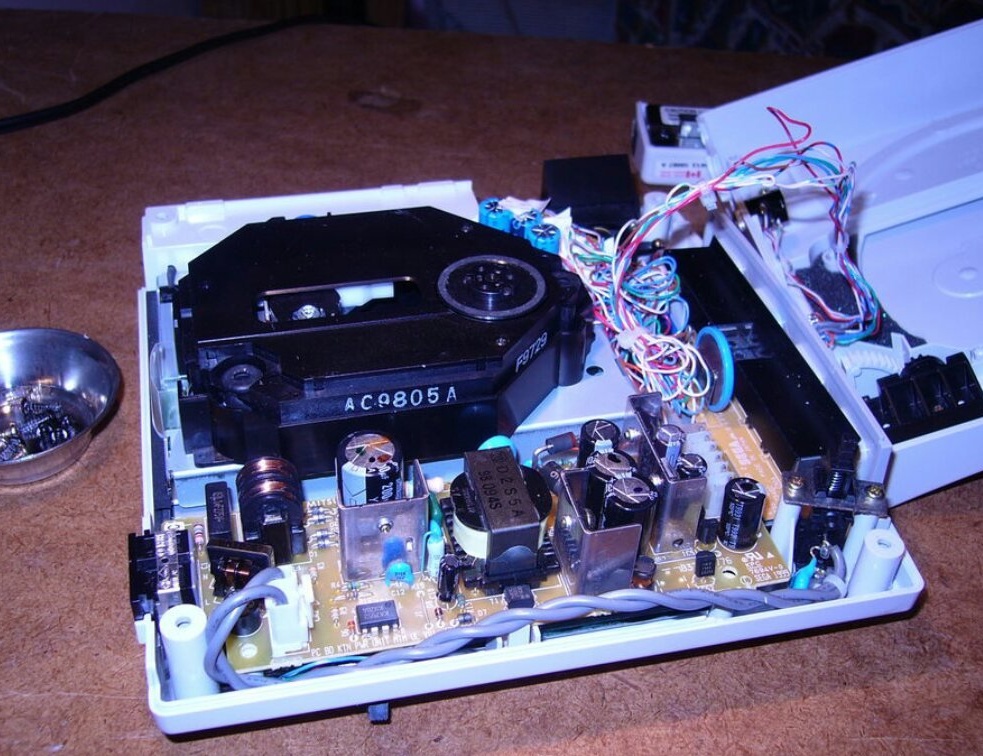
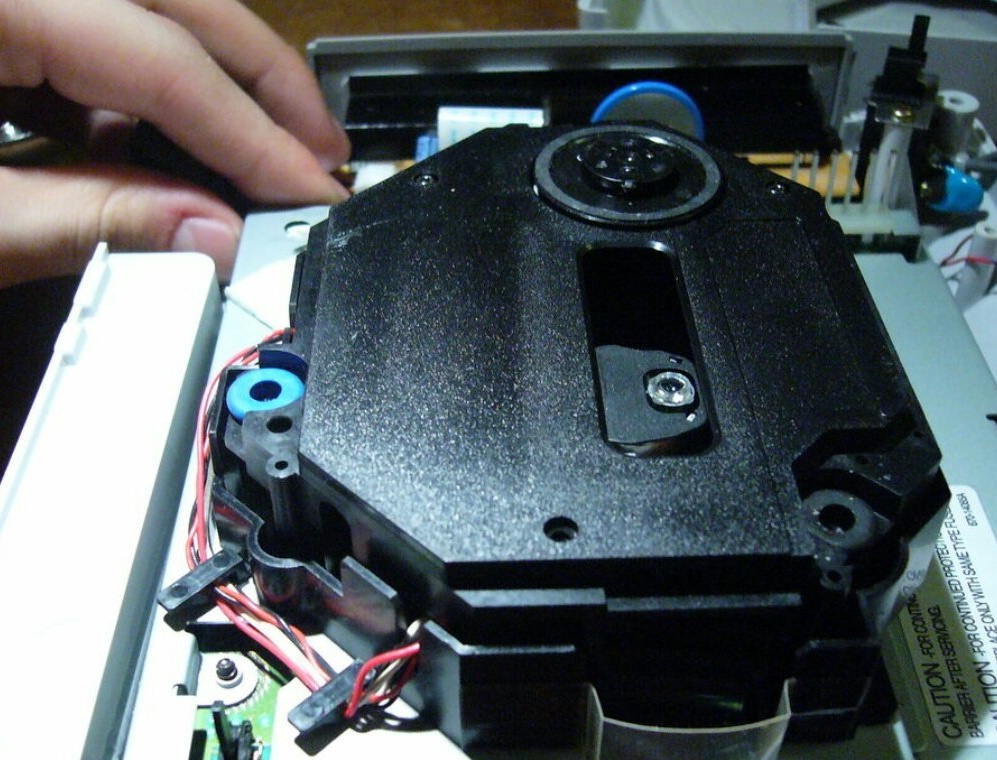
Then he unscrews the screws holding the metal base of the optical drive. This is a proprietary GD-ROM drive, where G stands for gigabyte. By capacity, such discs occupy an intermediate position between CD and DVD. The master lifts the drive not for plastic, but for metal - only in this way will it be possible to remove it entirely, and it will not fall apart in the hands.
Removes the screws holding the pulse power supply board, disconnects the connector that connects this board to the switch. Removes the board from the six thick conductors on which it is held. She puts it aside without touching the terminals of the filter electrolytic capacitor on the primary side.
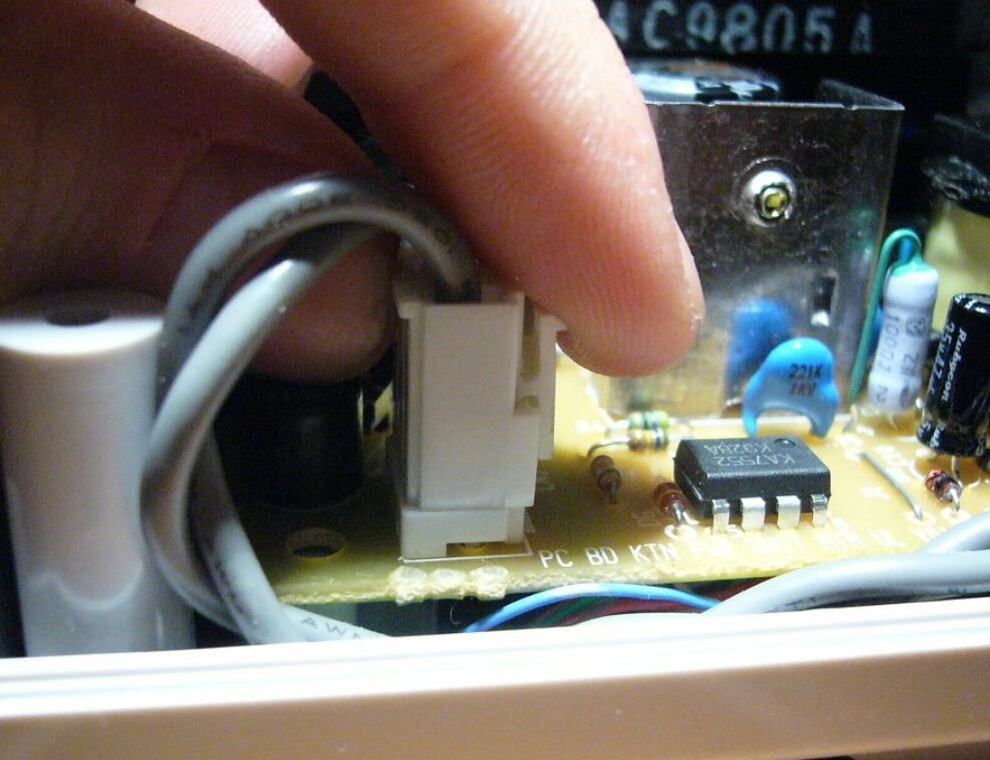

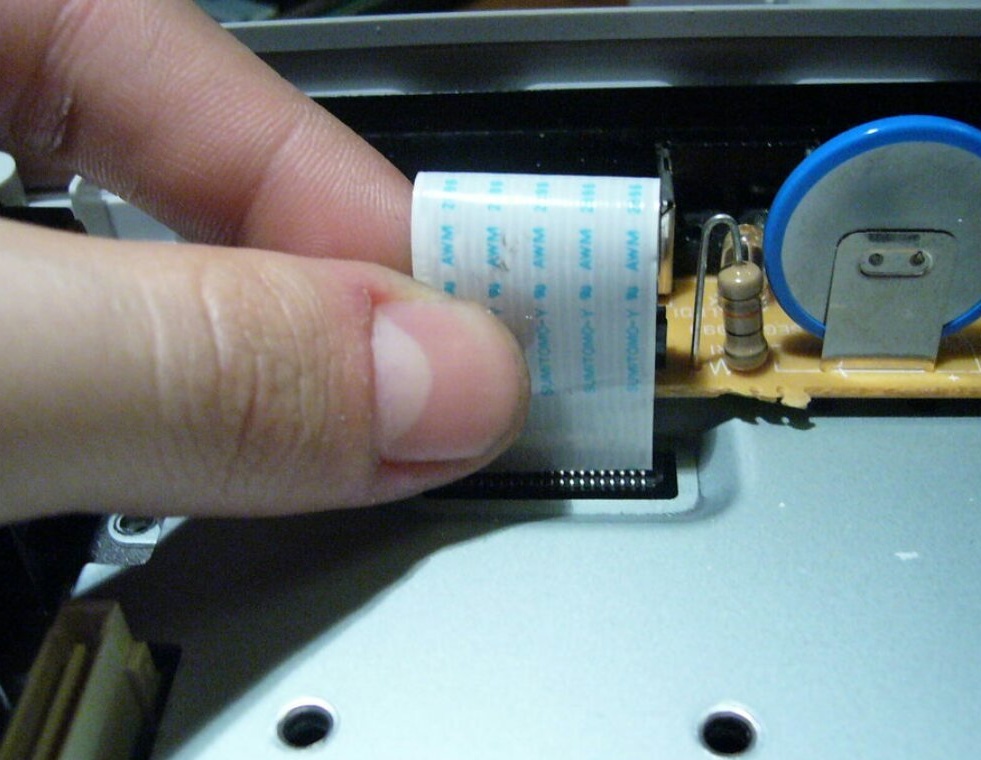
Disables the cable going from the motherboard to the gamepad connector board, and then the fan power connector (closed with a finger in the photo):
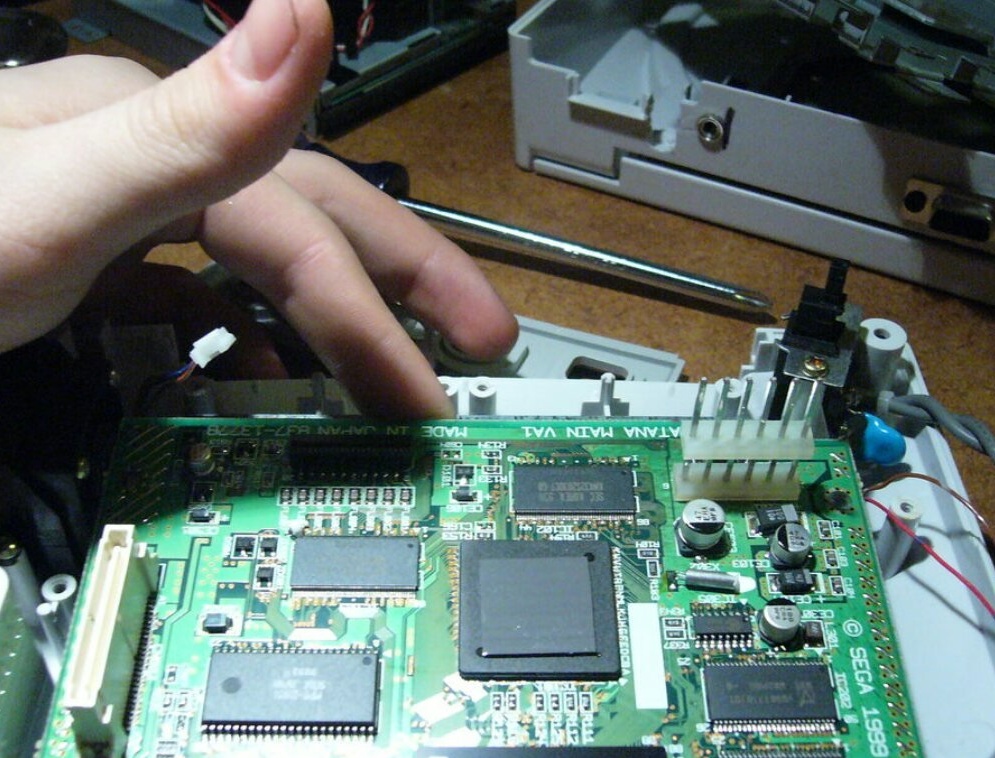
Removes a metal screen and a plastic overlay, after which access to the board of connectors for gamepads is opened. Takes it off and gets access to the motherboard. Removes the screws holding it and removes this board.
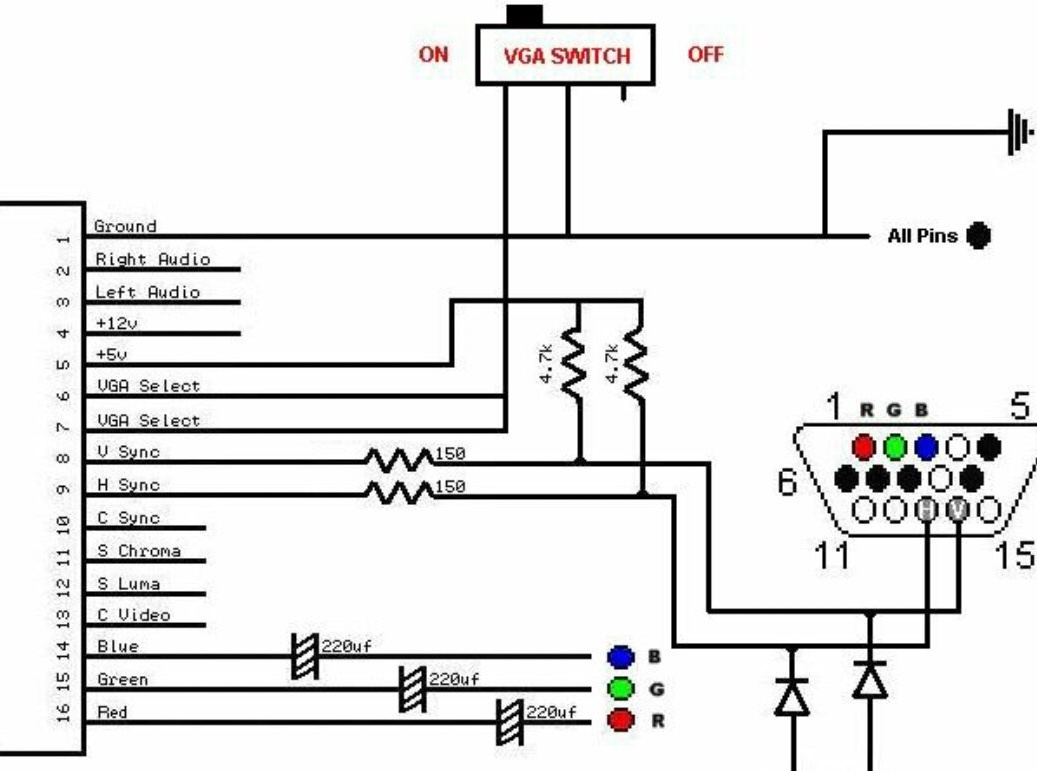
Draws up a wiring diagram for a VGA connector, switch, and passive components. In order not to clutter her, some of the conductors do not show. Everything that is indicated by circles of the same color is interconnected.
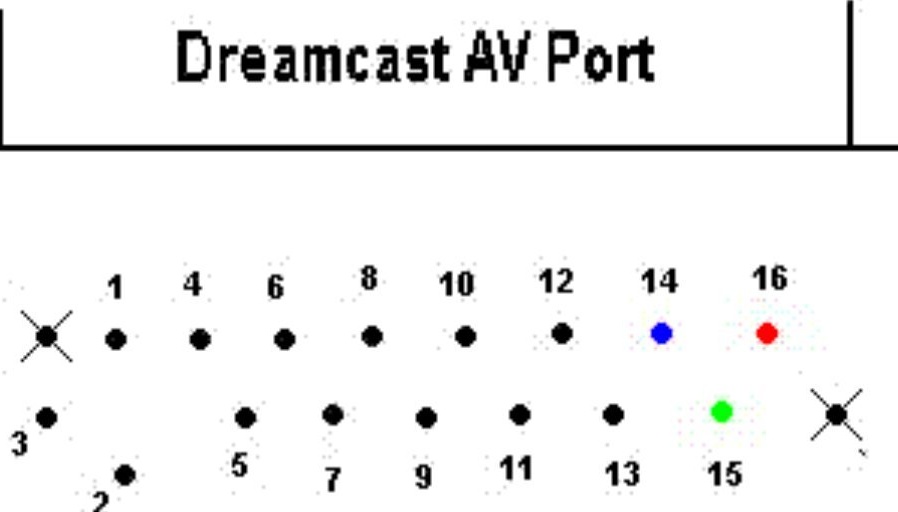
The following diagram shows the location of the pads of the AV connector on the back of the board:
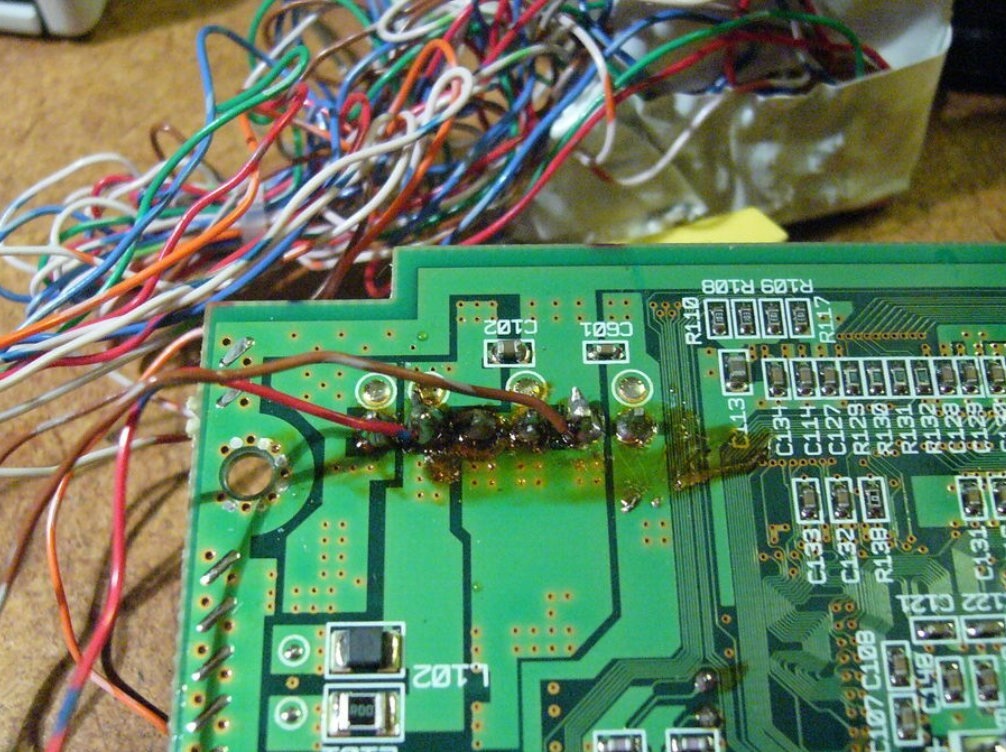
The master solders the wires there (here the board is turned relative to the circuit):
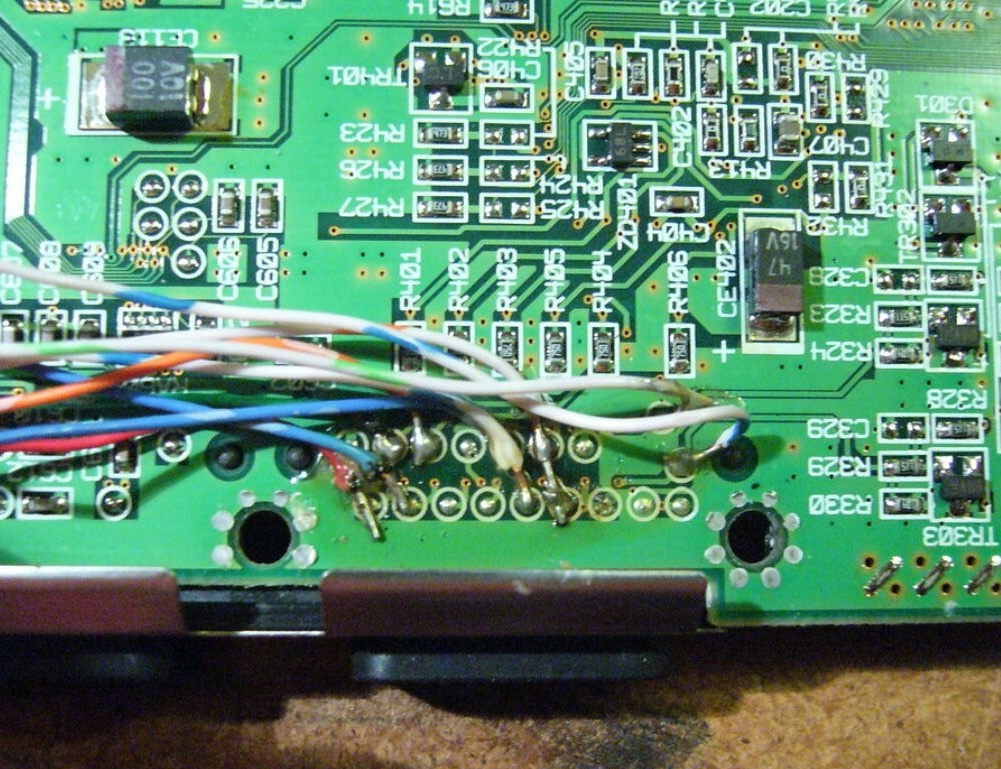
Here is the same from a different angle:
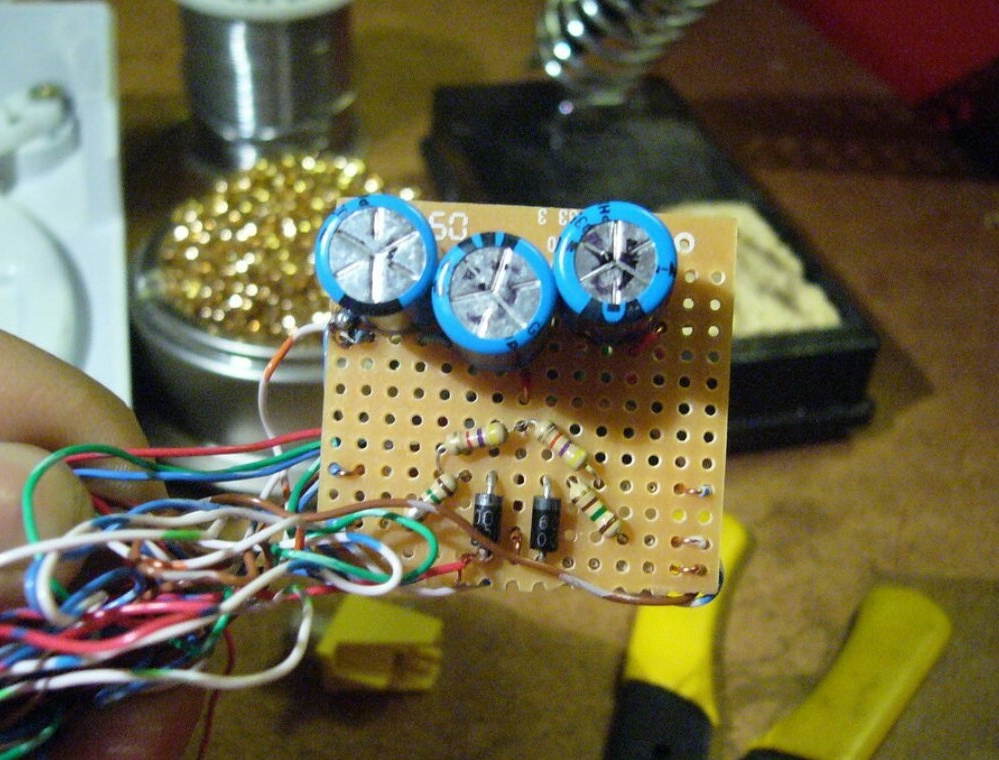
If desired, you can connect an audio jack for computer speakers to pins 2 and 3 of the connector. Meanwhile, the master assembles a board with passive components according to the scheme and connects it:

It connects the switch and both connectors (VGA and jack), installs them on the back wall. Assembles the console in the reverse order, making sure that the new board and connectors do not short-circuit anything and themselves are not shorted anywhere. When returning to its place, the PSU again avoids touching the terminals of the filter electrolytic capacitor on the primary side.
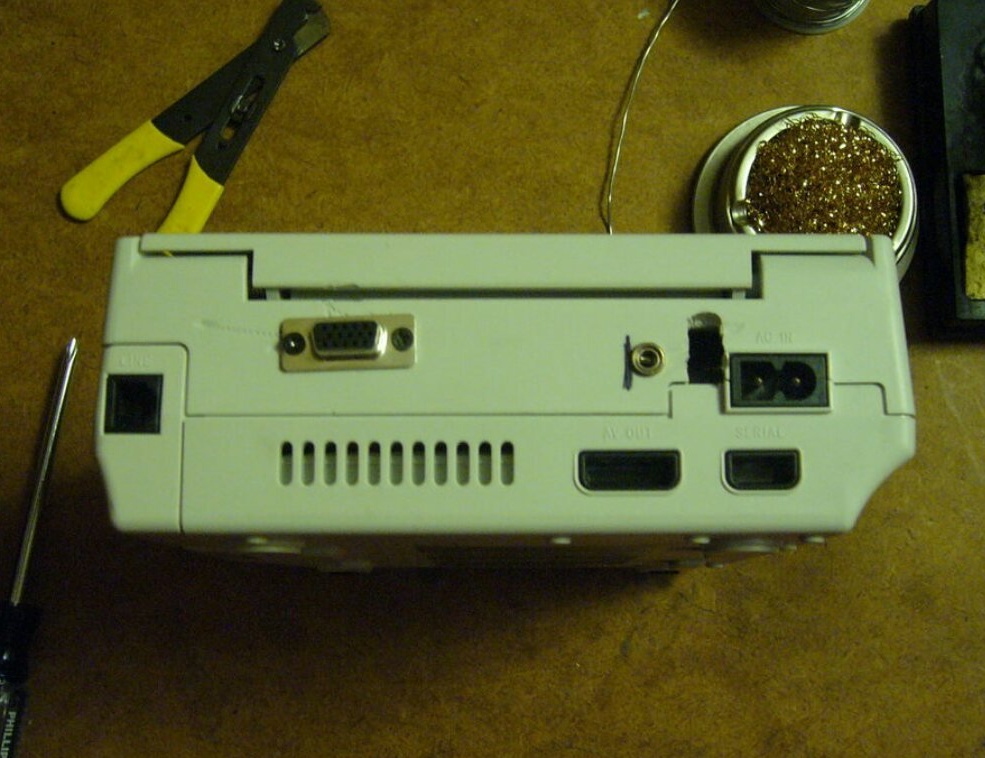
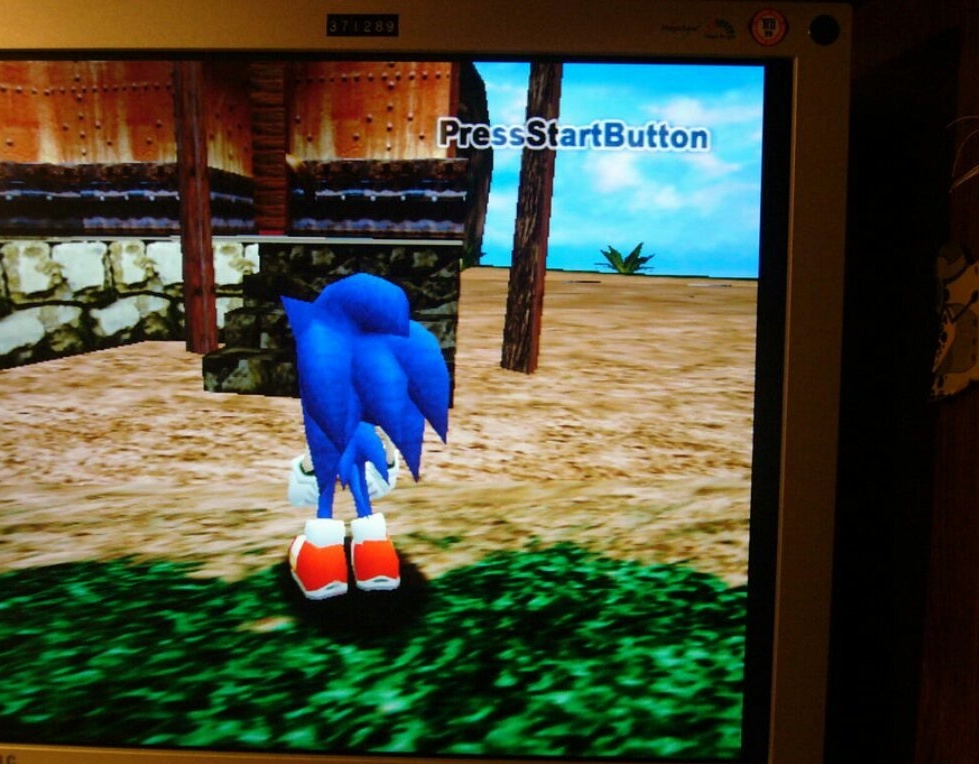
It connects to the console all the cables that it disconnected before disassembling, as well as the signal cable of the VGA monitor. If desired, you can connect speakers. Moves the newly added mode switch to the closed position. It supplies power to the console and monitor, and then turns them on. Everything works:
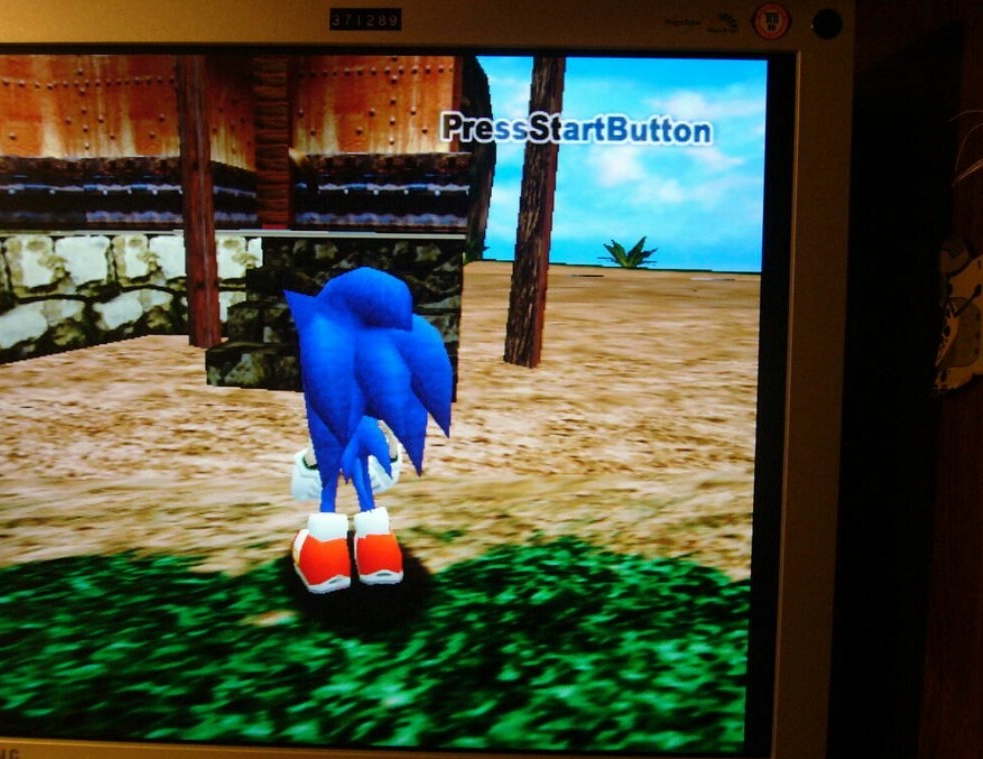
The image quality is not bad. Close shot (modern monitor, LCD):

Looks like it's Sonic. In unusual for mega drivers 3D. Sega and on the next generation of consoles remained by itself. And a little about the sound. In the finished Sega adapter, both audio signals are passed through the op-amp, but as the experience of the master showed, the sound is quite loud without them.