
The author of Instructables under the nickname nemo13 offers his own version of the experience of transferring an image to a board. From modern high-tech equipment for this simple experiment, you only need a laser printer or a copy machine (an inkjet printer is not suitable here). Even if you don’t have one, you can use it in the nearest copy center. Just do not ask his employees to mirror the image - they can guess why you need it and offer their services of transferring it to a board (for example, a laser), which are much more expensive. Mirror the image in advance yourself, today using the simplest programs, and sometimes a regular photo editor, you can even do this right in the smartphone with which you took the picture. In many copy centers, they accept images for printing not only from flash drives. Here the printout from the master is ready:
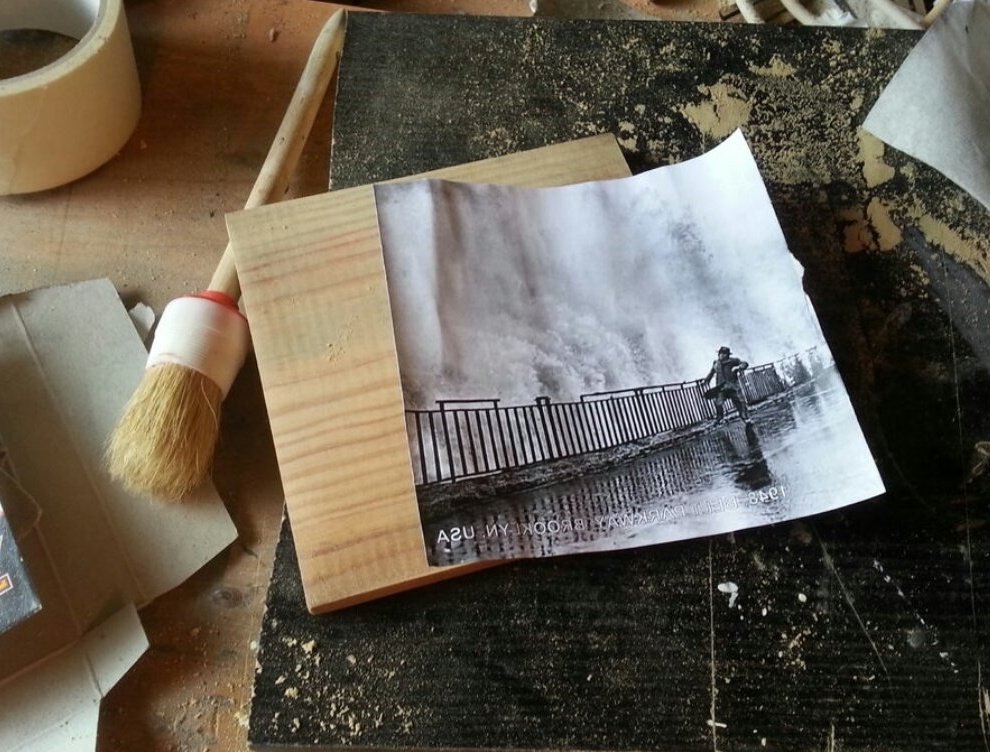
The remaining items necessary for the experience have existed in an almost unchanged form for many decades, almost everybody will find them - this is the board itself (even if it has been sanded, it is nice to sand it again just before the transfer):
PVA glue:
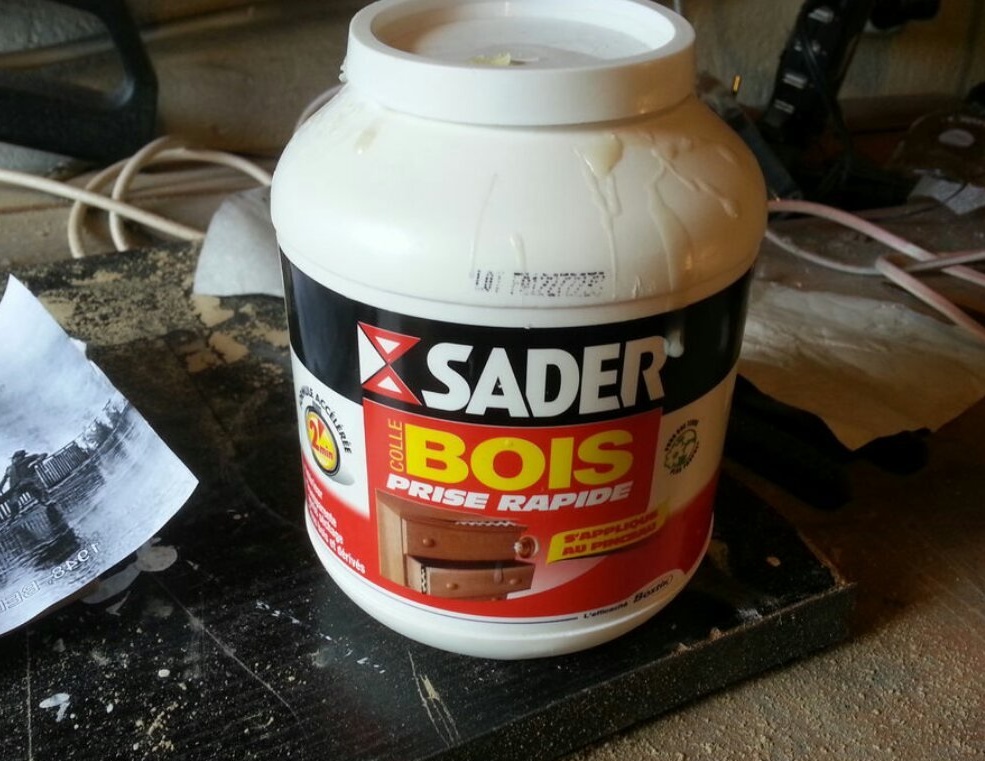
A brush, sponge, sandpaper and some non-combustible clearcoat. No iron needed. Wood is not textolite. And the sheet for printing, by the way, does not have to be glossy. The master dilutes the PVA glue with water in a ratio of 1: 1.
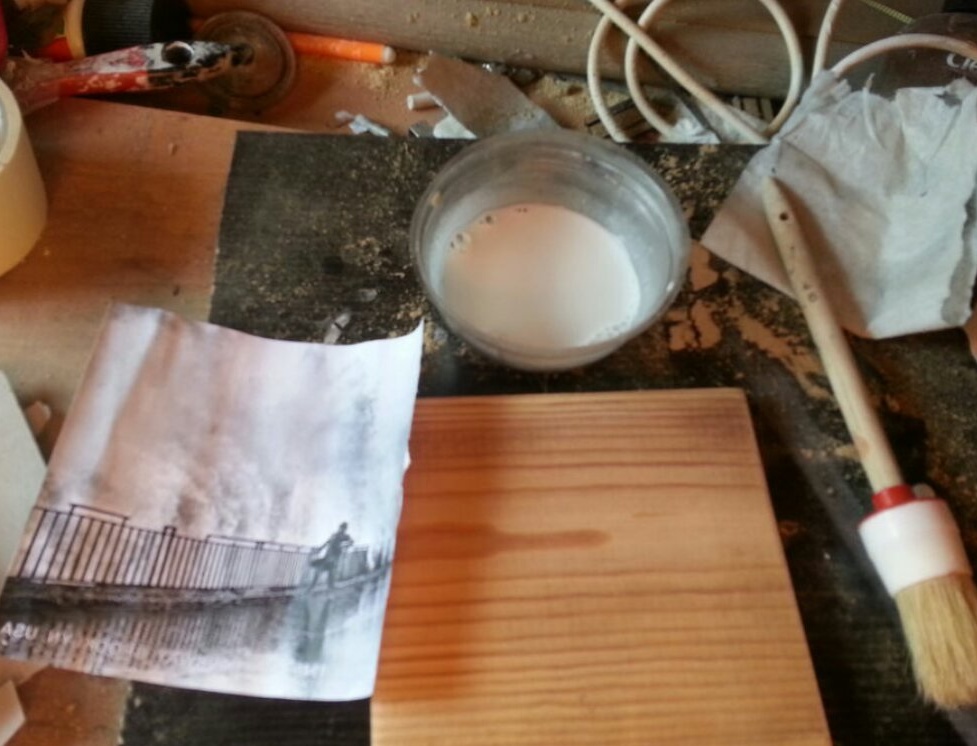
Evenly applies glue solution to the board with a brush, imposes a sheet with an image on the board, squeezes out all the air bubbles:
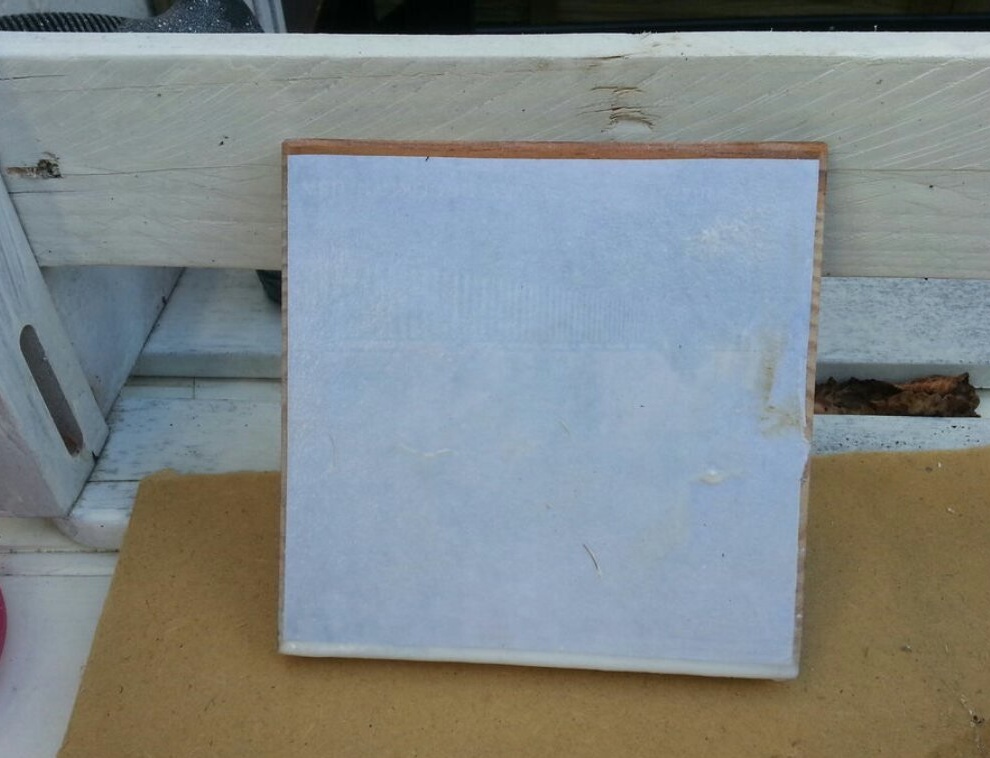
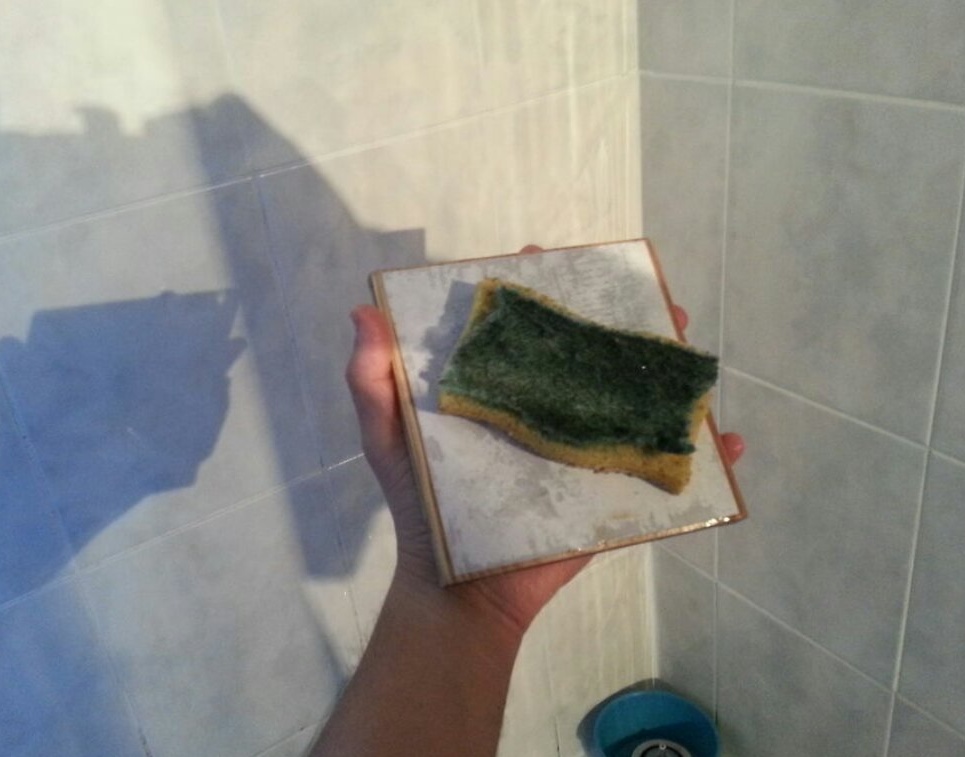
Leaves to dry. Water begins to slowly evaporate through the pores in the paper, leaving glue that hardens. After waiting for complete drying, the master begins to remove the paper with a slightly dampened sponge:
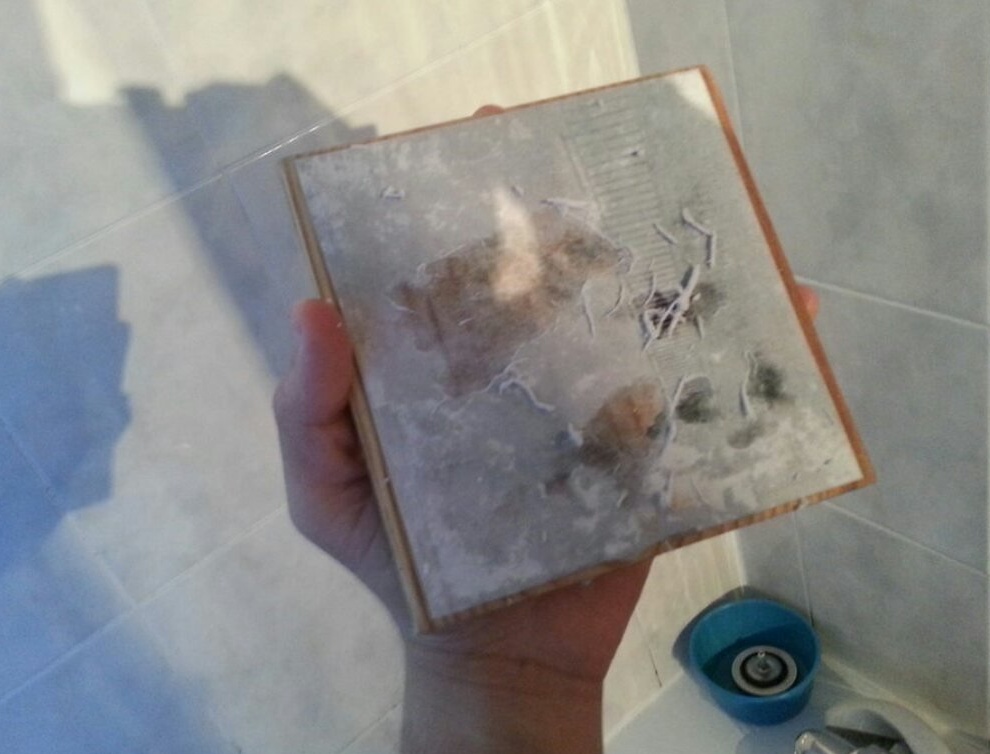
This is what remains:

The master again allows this thin paper layer to dry completely, and then removes it without wetting it with sandpaper. But very carefully so as not to erase the image below it. And here it is "manifested":
The master covers it with a non-combustible transparent varnish and again leaves to dry:
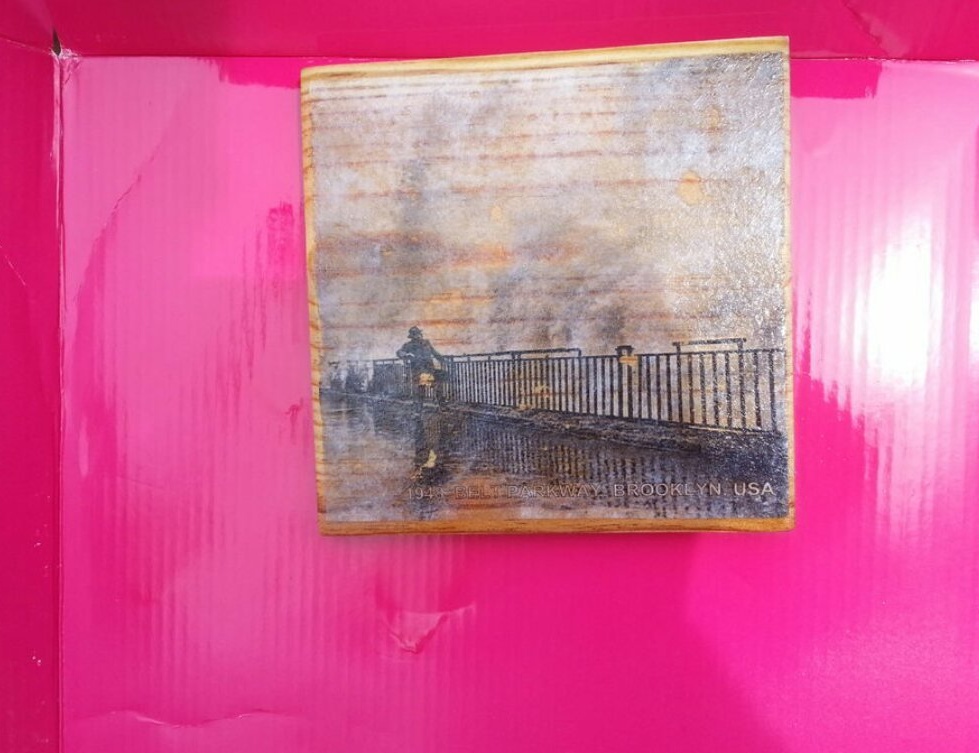
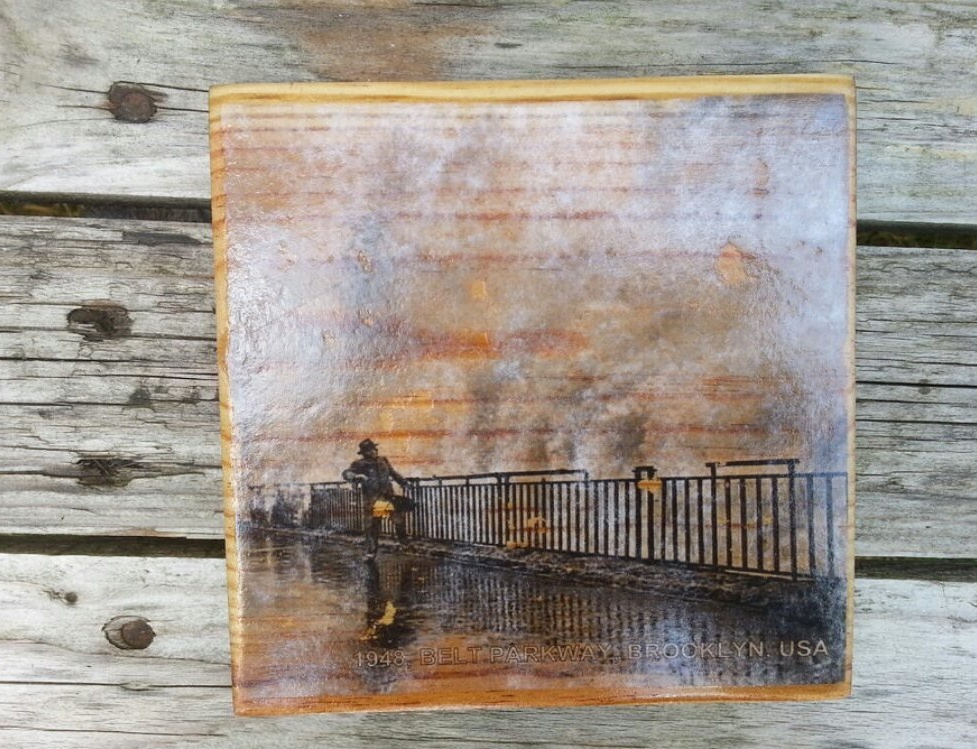
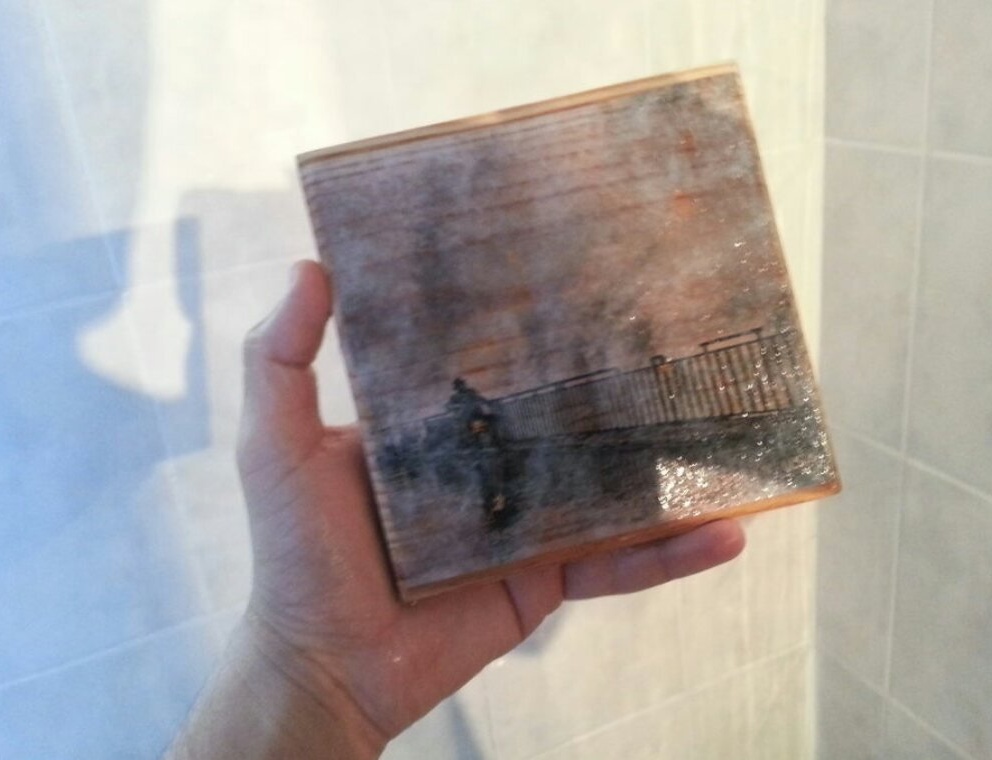
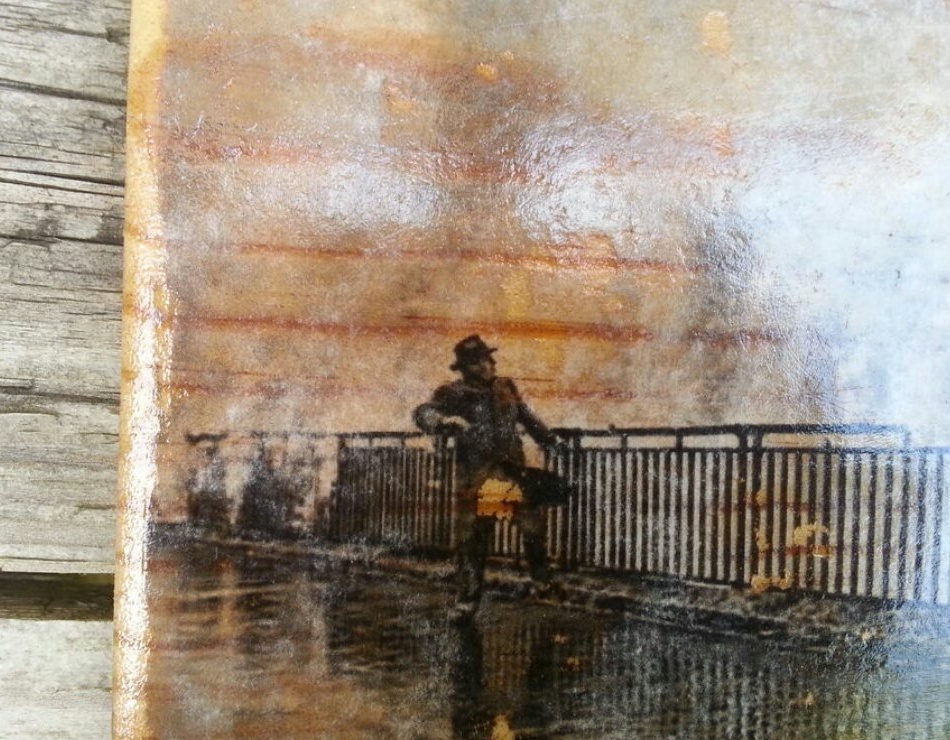
Done, and almost indistinguishable from the factory:
It is curious that in the comments on the original on Instructables ads immediately went like: "I tried it, I didn’t like it, I ordered it in this office - they did it well." Do not get fooled. Yes, the first time it may not work out very well, but practice and learn. It may not work at all due to underexposure, even if it seems that everything is dry, you still need to wait at least a day. You can train on office drafts and very small pieces of wood, the consumption of PVA glue will be scanty.
The result of this experiment can be not only a beautiful decorative object on the wall. If you make, say, audio equipment in wooden and plywood cases, you can get drawings and inscriptions on the front panels in the same way.
And I completely forgot: images do not have to be dashed. Dmitrij was translating an article on transposing a halftone in a similar way, and there, too, everything worked out. Look at a half-tone laser print through a magnifying glass and see why.