
Good day, colleagues are friends!
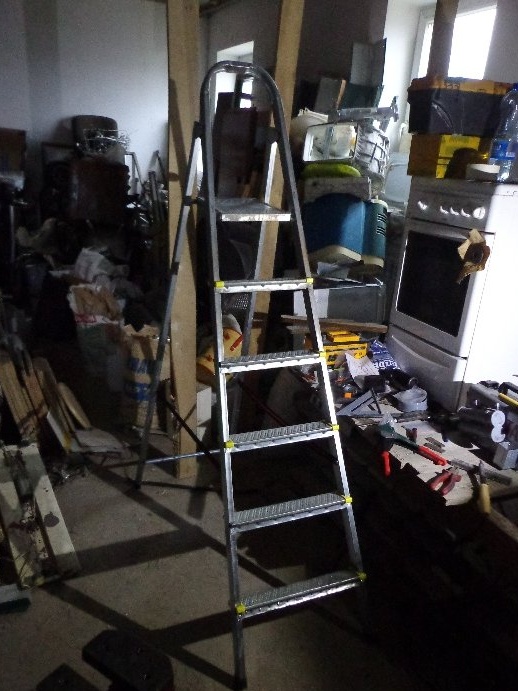
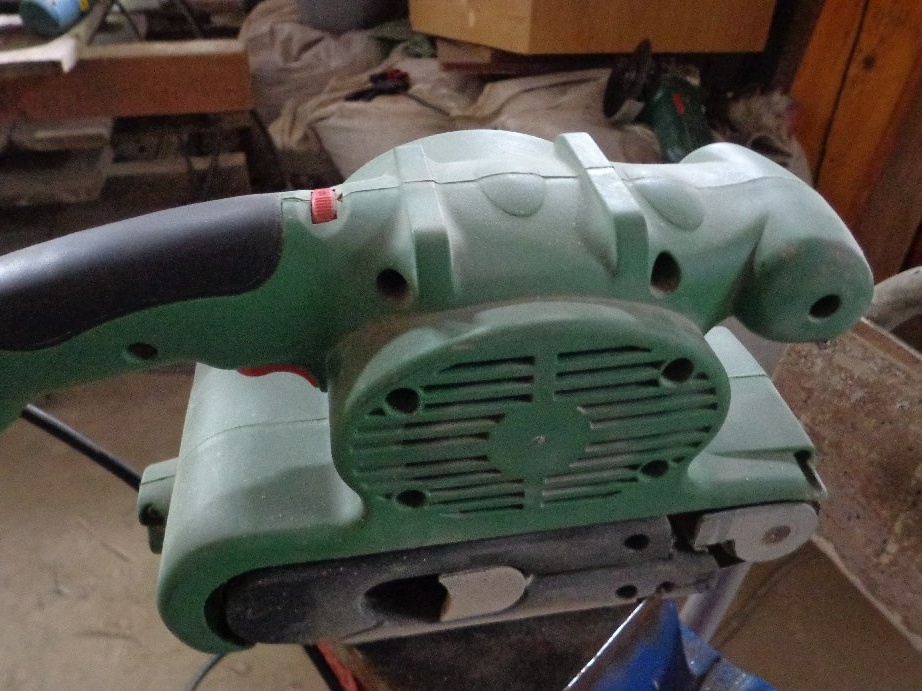
In this article I want to share the experience of repairing a stepladder that I was already thinking of handing over in scrap metal, but changed my mind. The reason for this was that, on my farm, there are already two stepladders, but one small other is tall, which does not always allow me to conveniently perform the work. The stepladder, which I will repair, in height between those that are. When I brought myself to the construction site, it turned out that for some types of work it was just right.
This stepladder:
- the first threshold is bent
- the tube on the support legs was missing
- the tube under the upper platform dangled and there was a risk that it would finally pop out
- there were no restriction belts on the sides (so that the ladder and support legs did not run apart in different directions)
At first glance, a "penny" work seemed, I thought I could handle it in a couple of hours, but the repair process was much longer and more difficult.
Tools and materials:
- drill or screwdriver
- drill bits for metal 3.5; 4; 5; 16 mm
- Angle grinder (grinder)
- belt sander
- cutting wheels
- professional pipe 30x30x2
- degreaser and spray paint
- aluminum rivets 3.2x6; 4x8; 4x12;
- riveter
- pencil or marker
- tin corner from the roofing element
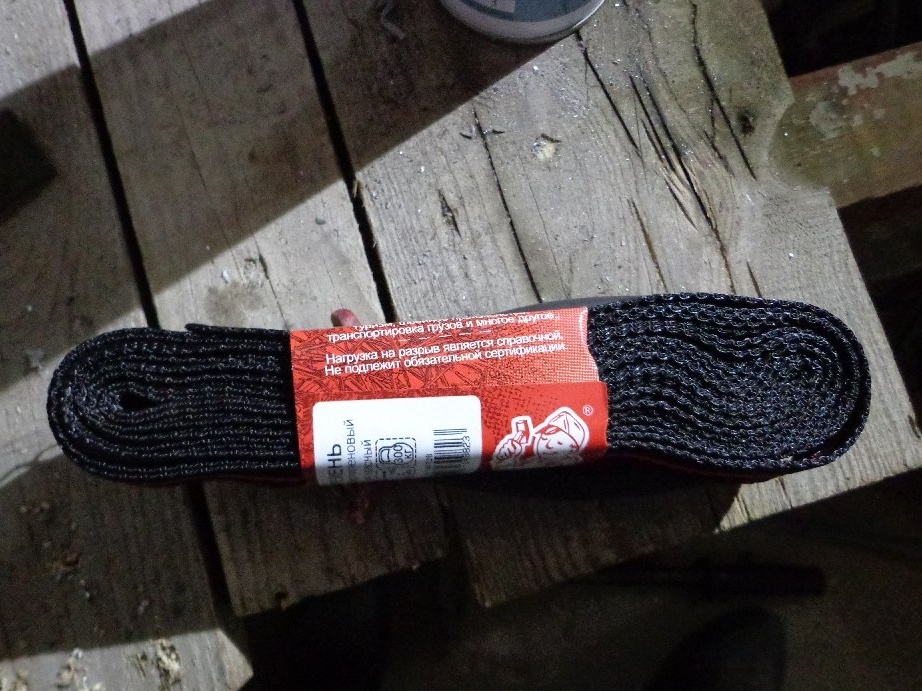
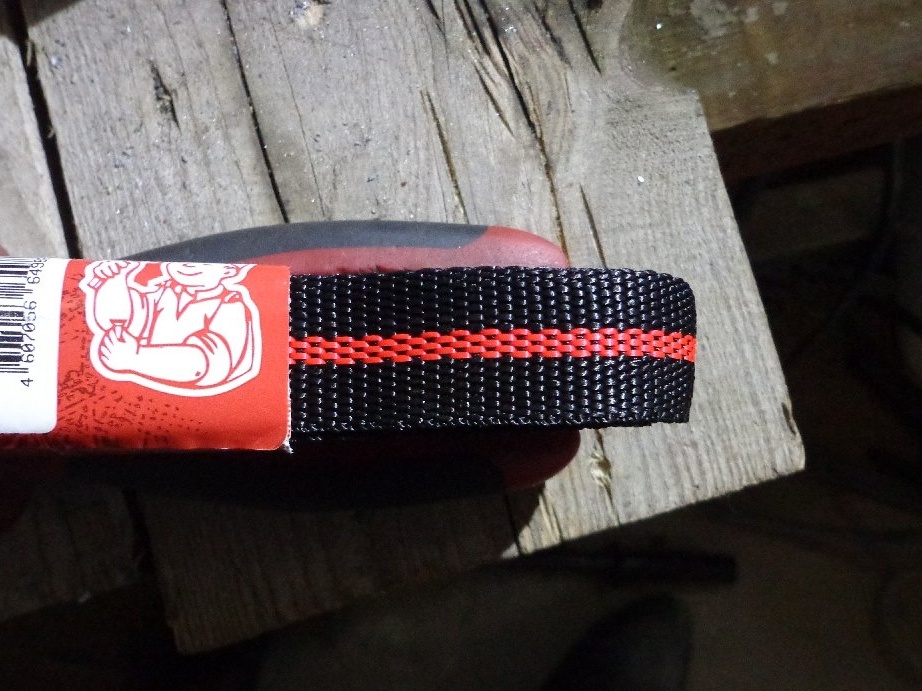
- strap 25 mm
- hammer
- soldering iron
- 4 mm galvanized reinforced washers
- tube 16 mm
- metal scissors
- gas key
- scrap, nail puller, mount
- quick clamping / expanding clamp (universal)
As already written above, I decided to restore, because making sure that it is suitable for some work, and it will not be superfluous in the household.
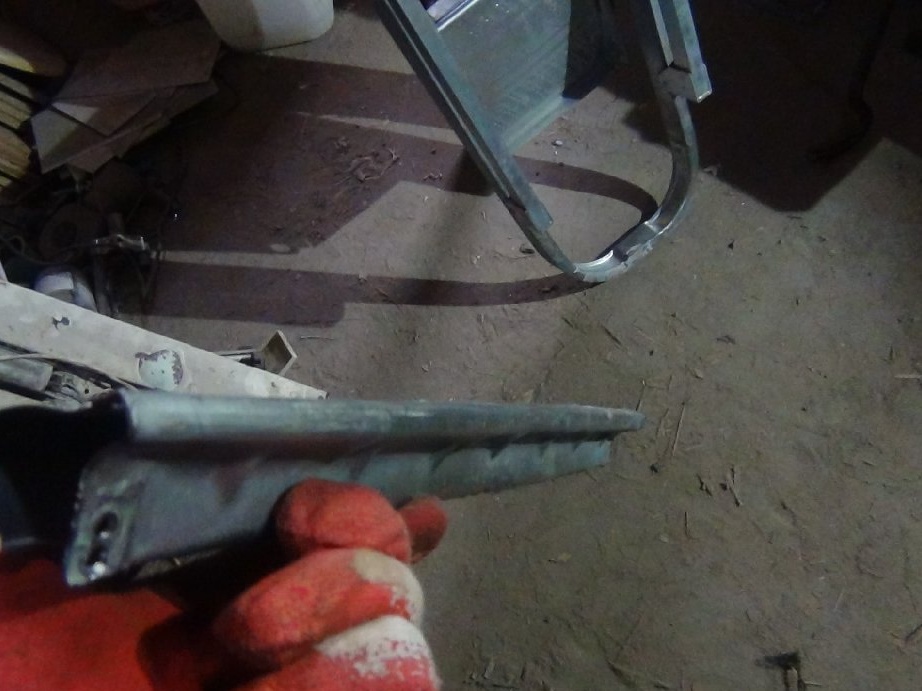
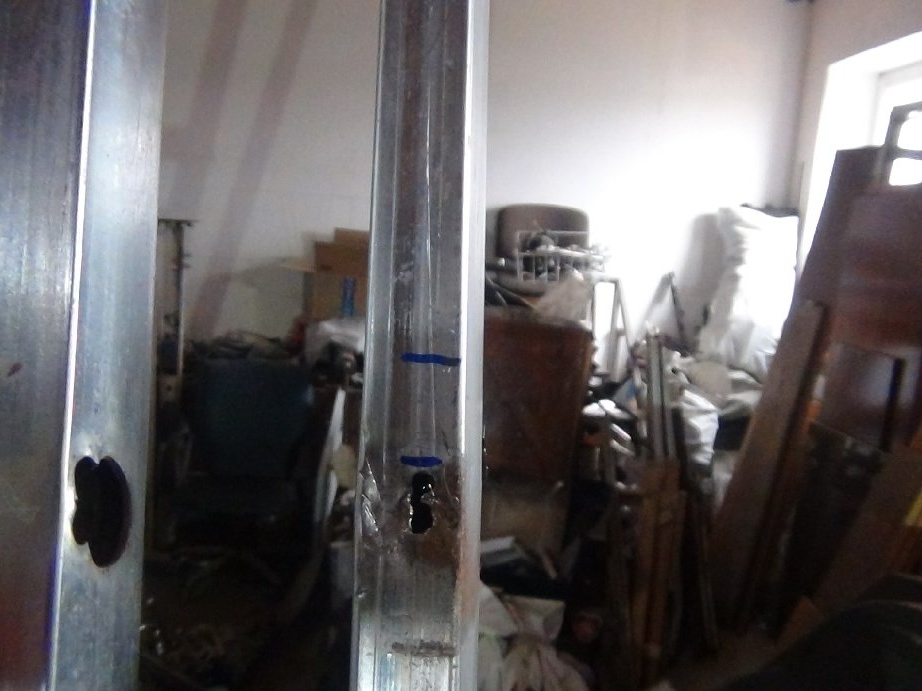
Step 1: Removing the bent threshold and straightening with subsequent installation back
To level the threshold, it must be removed, was spot-welded to the base of the entire ladder.

When trying to drill with a drill for metal, both 4 and 5 mm did not succeed, the weld spot itself was larger in diameter. In order to tear it, he started picking with an old broken screwdriver, he only made it worse in one place, he broke through the profile itself, and in another it wasn’t possible to rip it off and decided to cut it off with a grinder, and did not notice that it cut more than was required while damaging the very stand of the ladder, the professional pipe. In two places, it was possible to disrupt the spot welding, which pleased.

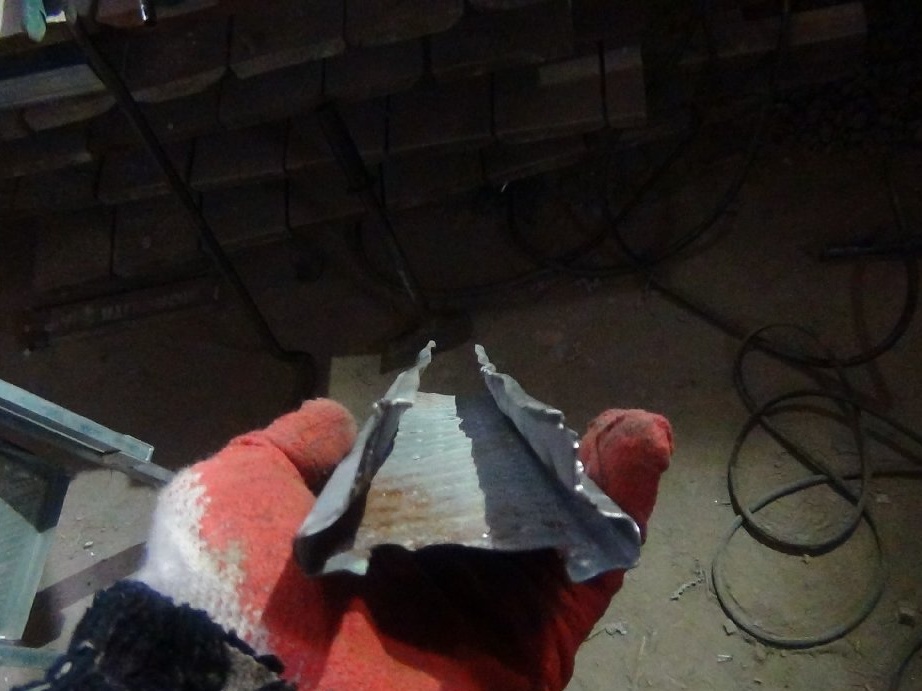
As he removed the threshold, he began to straighten it. The process of straightening did not begin to fix, because the threshold had a complex shape and the process itself looked like a jolly curvature of a circus clown.I just didn’t try to clamp the curve threshold with my foot, or with a clamp, or with a steel beam to start pulling, I tried many fixation options and each option was useful in its own way.
Still managed to pull it into approximately its original shape.

Now I had to figure out how to strengthen the bent threshold. This procedure is necessary due to the fact that the metal has already undergone mechanical deformation and if it is returned to its place without an amplifier, it will inevitably bend back, all the straightening work will be in vain.
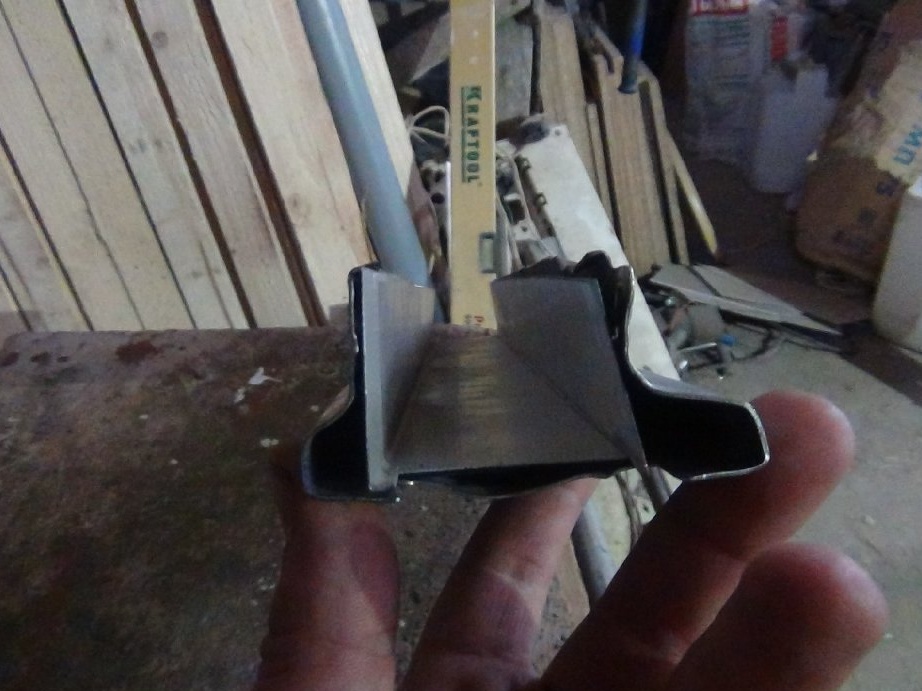
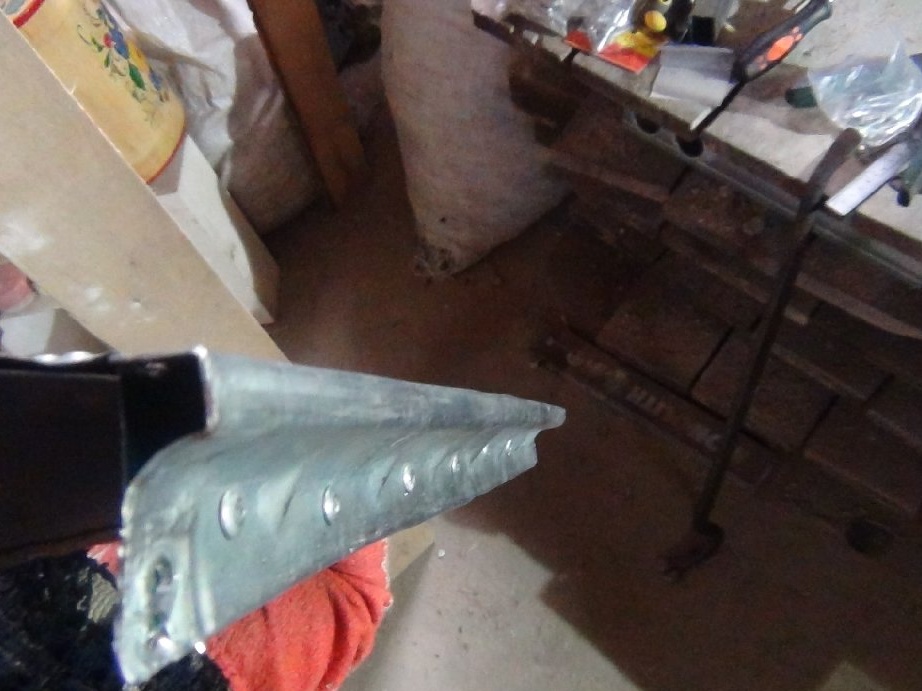
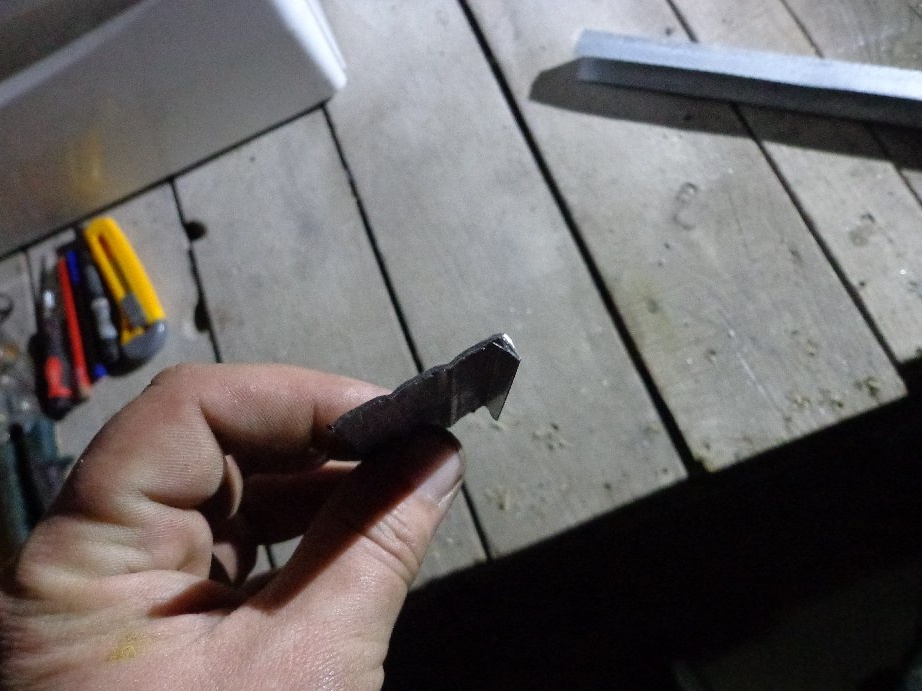
For amplification, at first I wanted to choose a profile for drywall either ceiling or partition, but I abandoned these two ideas. After the construction of the roof, I still have trimmed corners of the finishing, they are also called "overhangs", if I'm not mistaken.
The gypsum board profile did not fit in size, I needed a 33mm x 40mm profile, none of which fit the dimensions. But trimming corners is no longer needed, cutting them for a useful idea is not a pity.
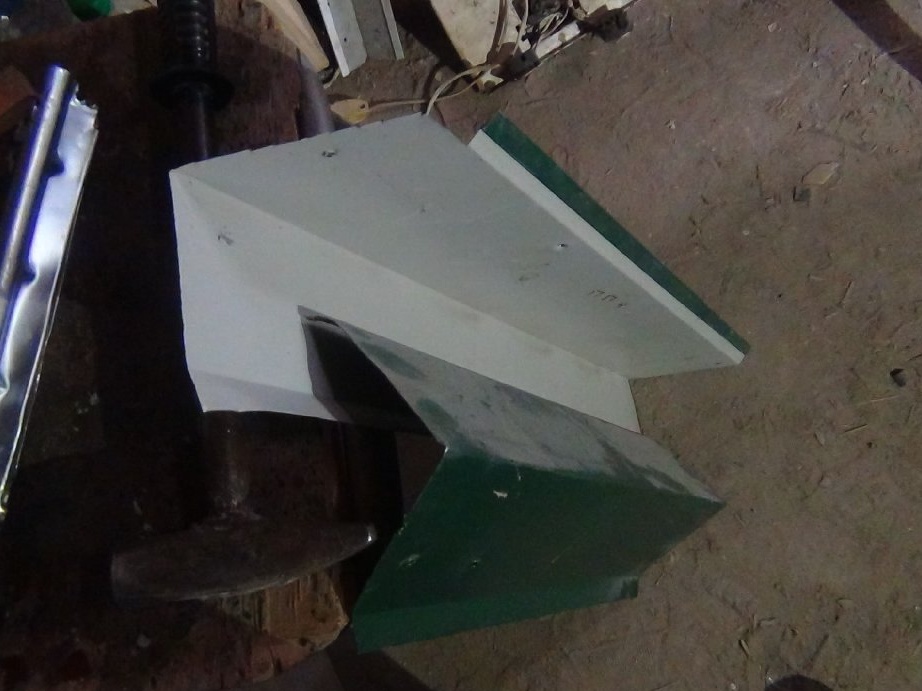
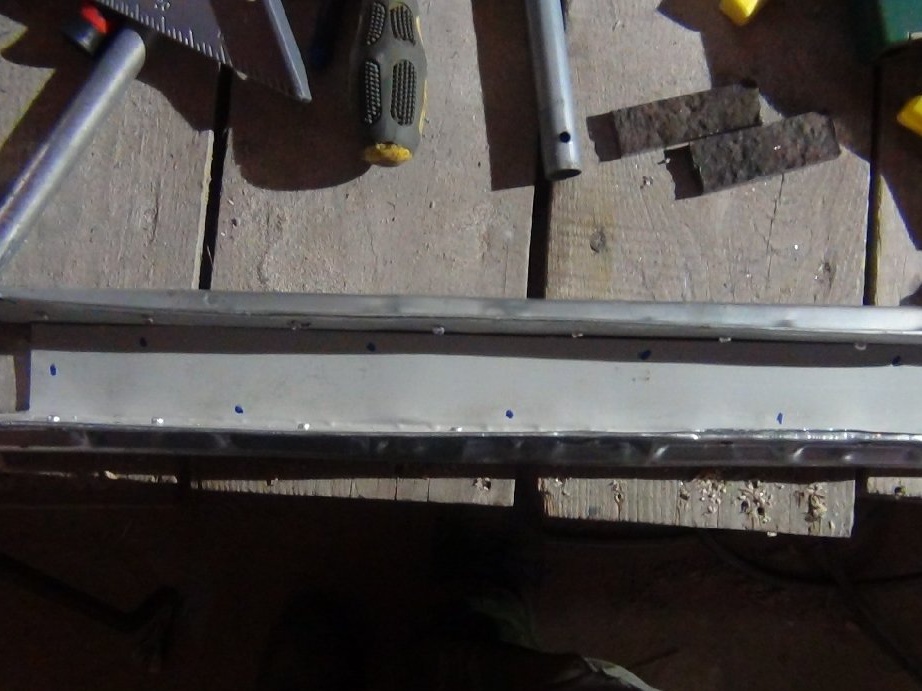
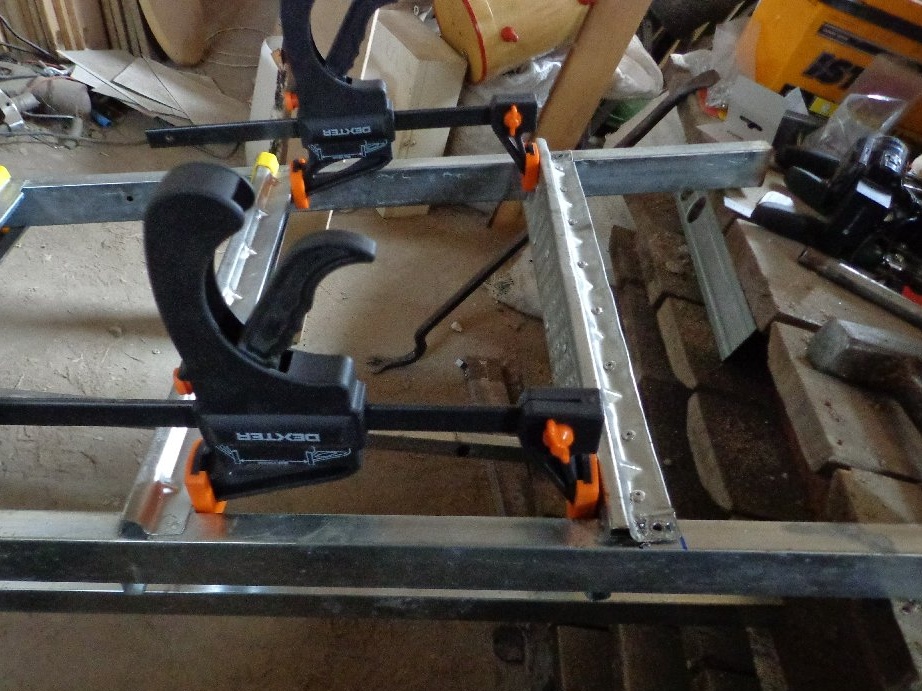
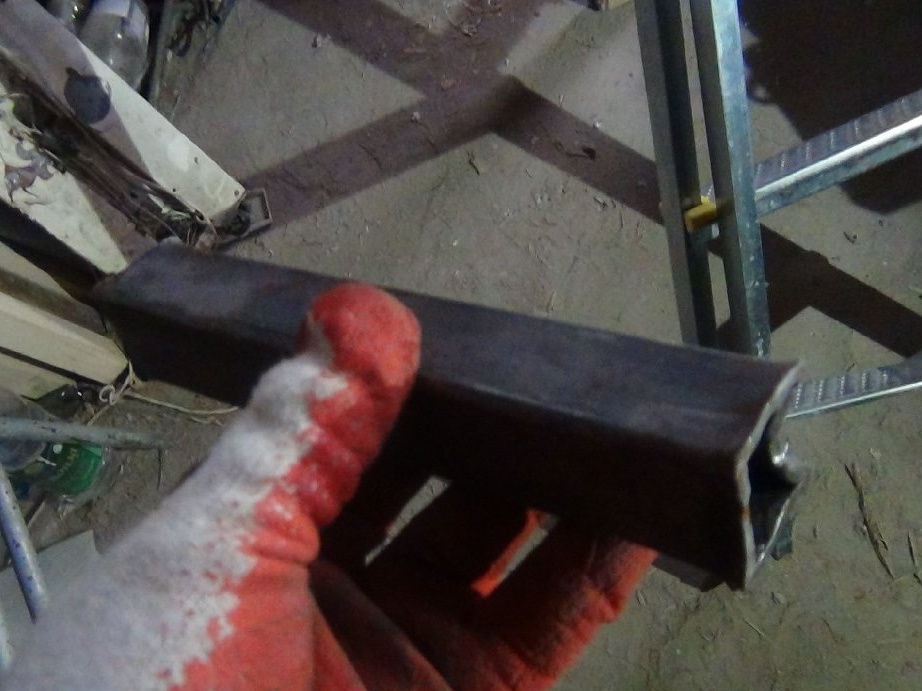
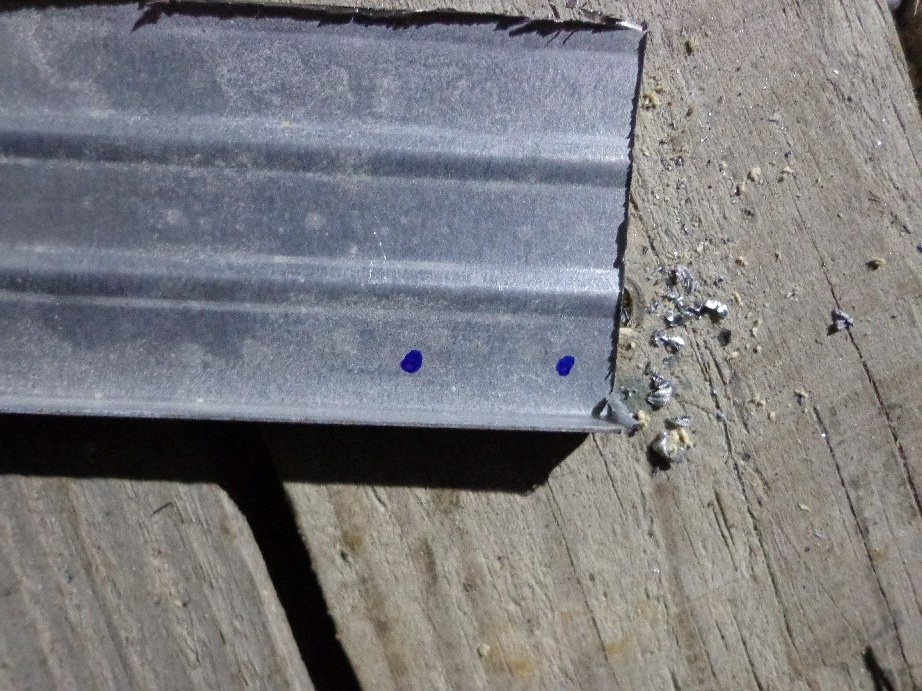
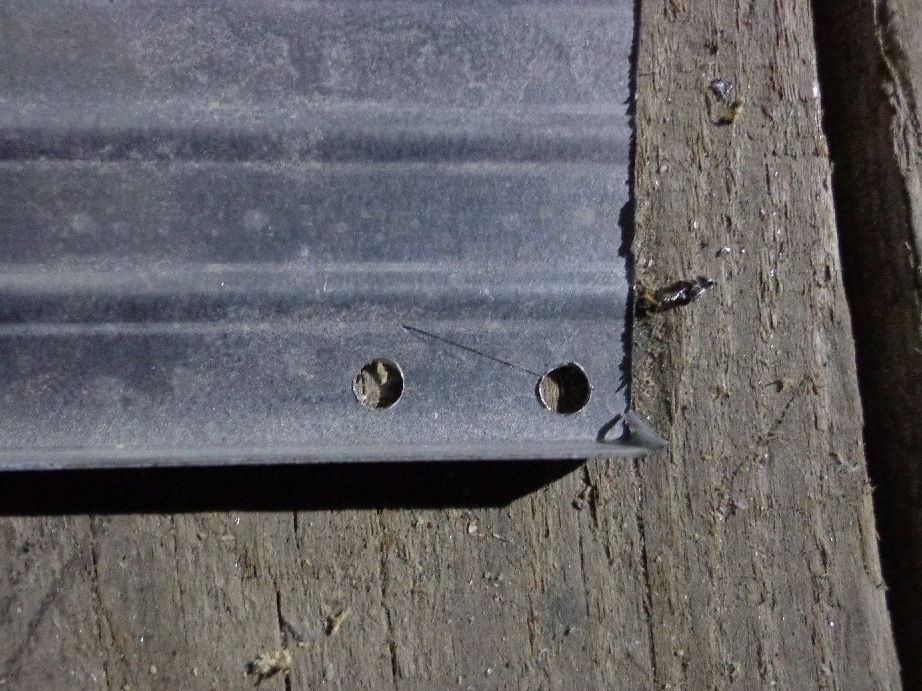
Having marked on the sides the necessary sizes of 33 and 40 mm, I cut it off. I cut off not the length of the threshold, part of which is between the racks, but the length of the entire threshold, I decided that these amplifiers should also participate in fixing on the racks, especially since after dismantling the threshold, the spots where the spot welding was also weakened.
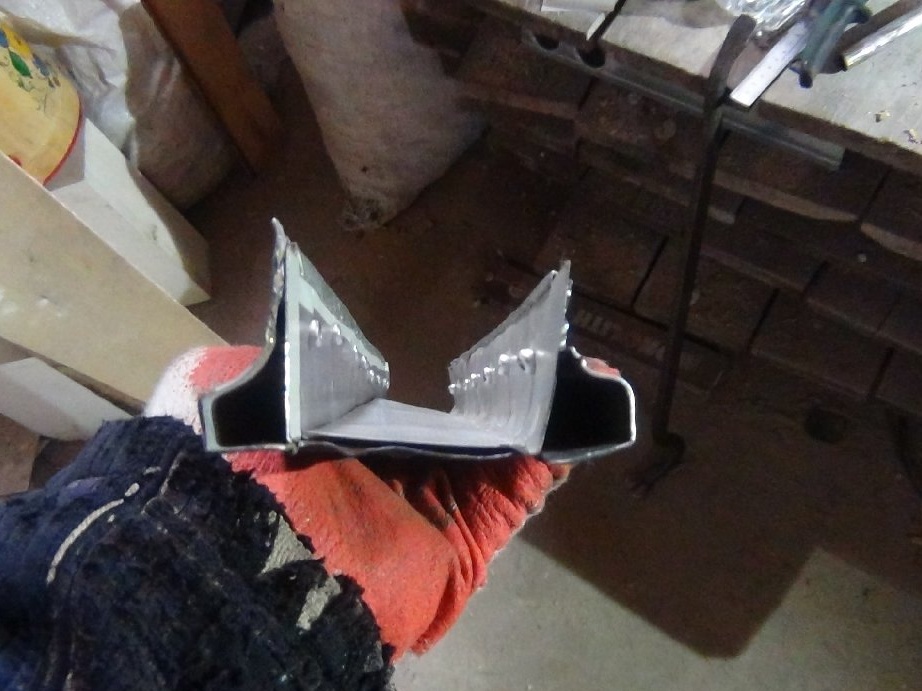
The result was the same U-shaped profile only with the right dimensions. I cut out excess metal that can interfere with the installation of the threshold in place (see the photo above).

He put it inside the threshold.
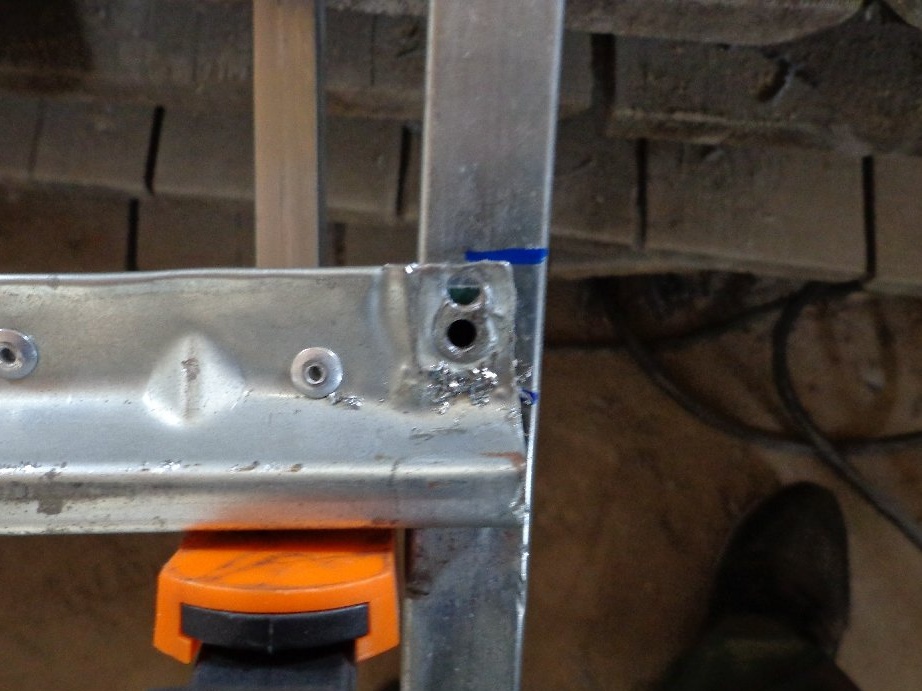
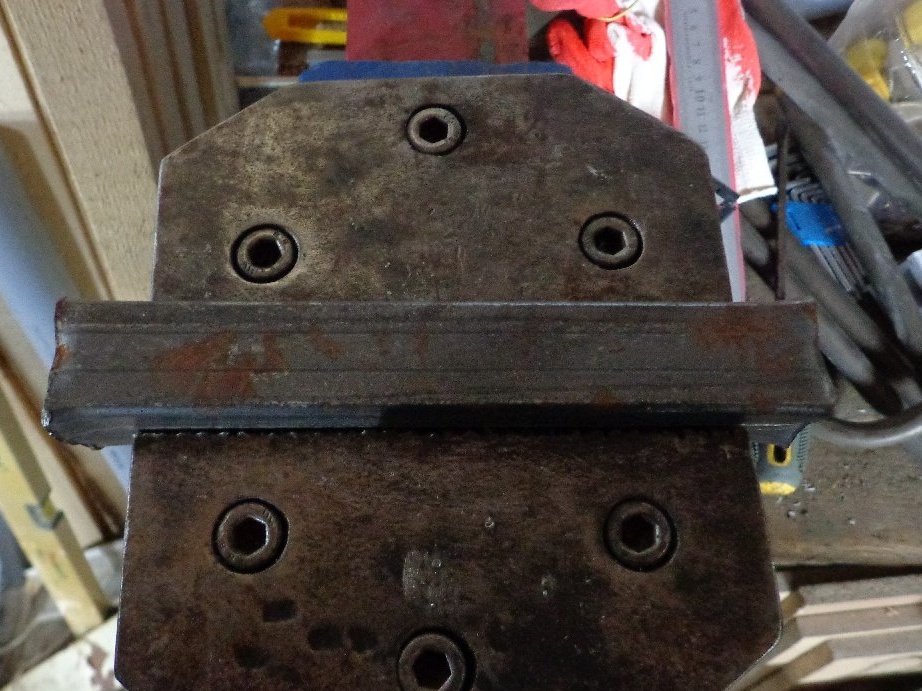
In order for the amplifier to work, it riveted 4x8 rivets along the entire length between the factory amplifiers, which should support the deflection threshold, but the idea did not justify itself.
So that the corners do not move immediately when drilling holes for rivets, I first drilled one in the middle and put a rivet, and then without fear that something would move, I drilled all the holes and riveted the rest of the holes on both sides at once


Additional strength will give installation of rivets on the surface of the threshold, where the foot is placed when climbing the ladder.
Riveted in a checkerboard pattern.

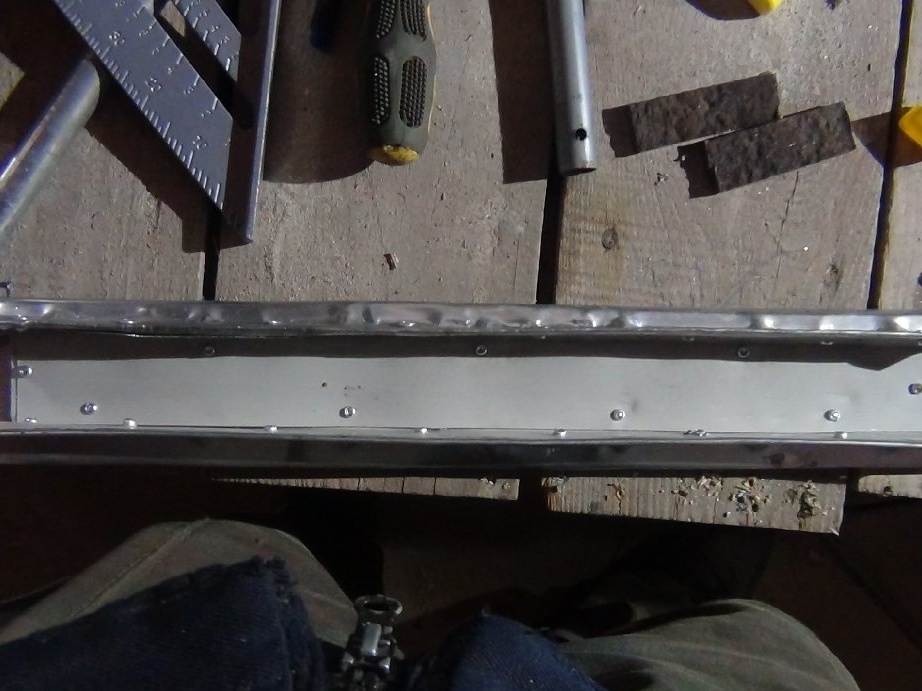

The threshold is ready. The video shows how I rely on him with all my weight and everything is in order, but in me about 100-110 kg, I’m not very large, but heavy.
Setting the threshold did not take much time, but other difficulties appeared.
While the straightening process was going on, stiffening ribs (were not at 90 degrees relative to the threshold surface) were straightened at 90 degrees, but should be at an angle (did not measure which angle was originally, and it wasn’t before). With the help of a gas key pulled at an angle what should be. In fact, such a wrench can be used as pliers, for the same thing. The hammer did not remain indifferent, still I had to tap in some places.
The problem with drilled holes and a hole with a screwdriver pressed through was solved immediately. He moved the sills a couple of centimeters lower, thereby killing two birds with one stone, and closed the holes, and the rivets will be installed in a fresh place.
He made marks starting from the bottom of the “leg” so that the threshold was not skewed.
Riveting on one side, it was not difficult, proceeded to the other.
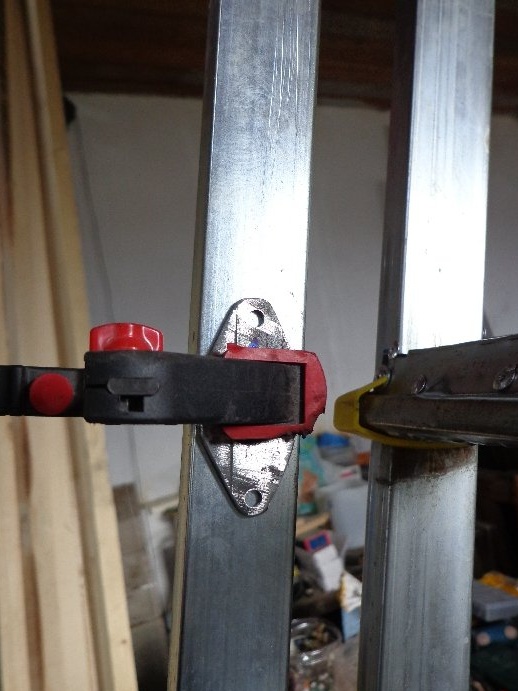
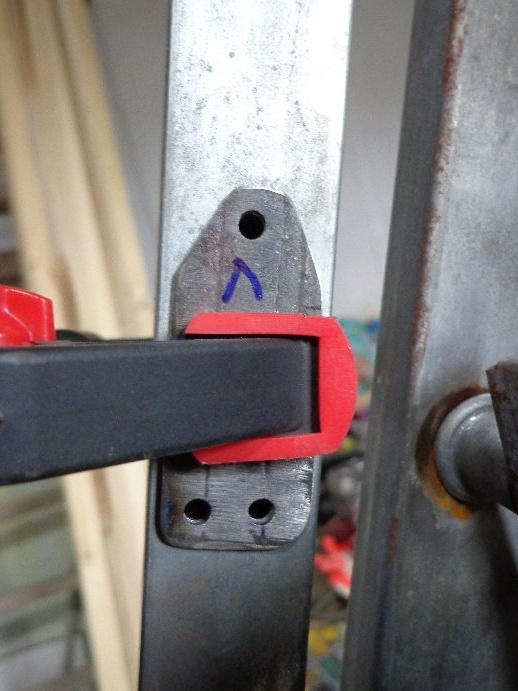
There are problems on the second side. Although he bent with a key, the bend did not return to the same position. Since the 4x8 rivets are quite strong installed, then on the last side it was possible to use quickly clamping-expanding clamps. Resting on the whole threshold, slowly pulling (like a jack) to the risks identified by the marker.
Rivets installed with a slight offset. It turned out two points of support instead of one located on one straight line.

The threshold returned to its place.
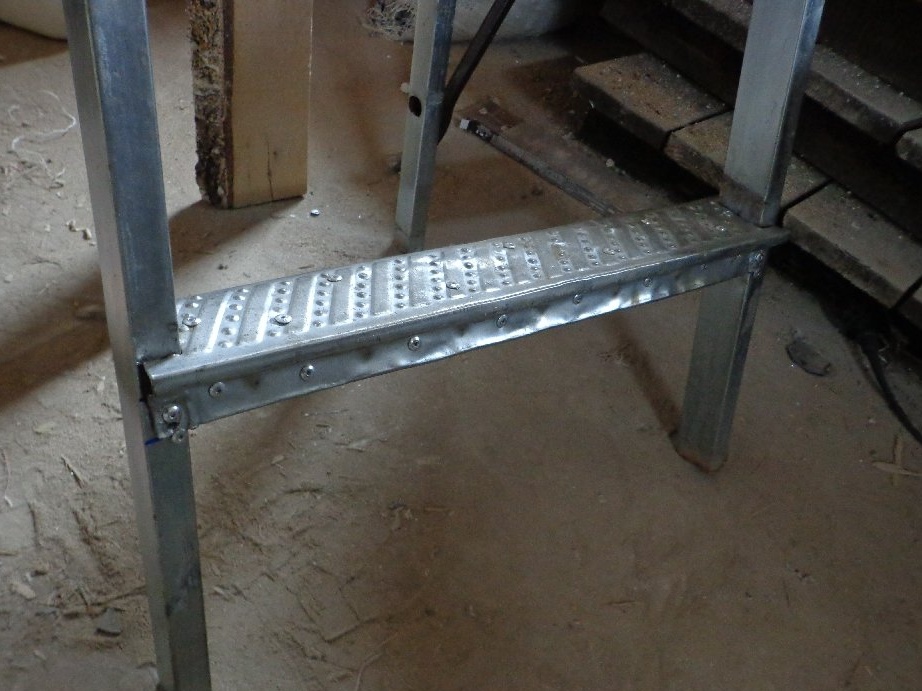

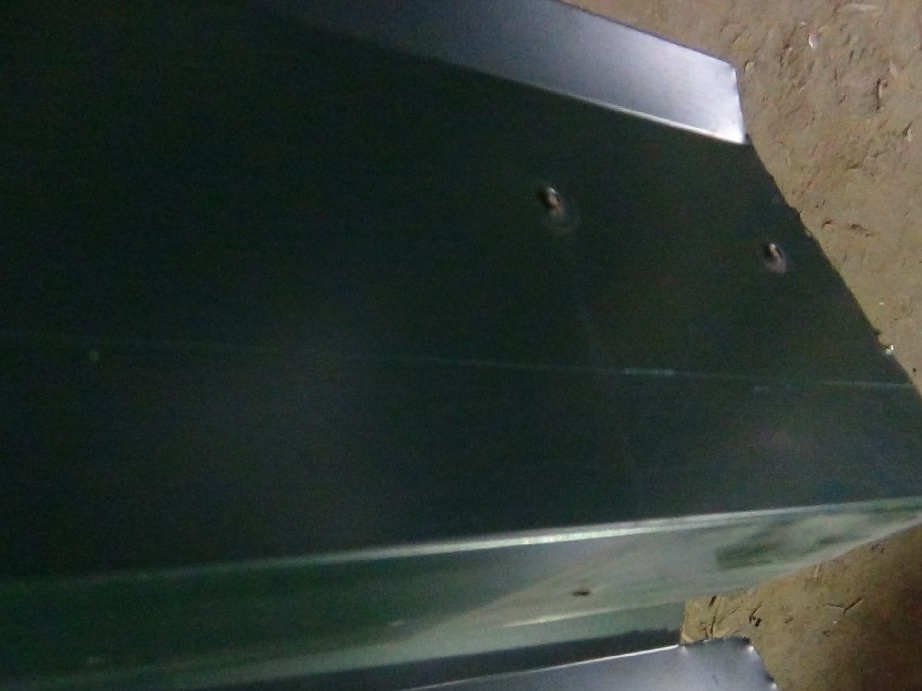
Well, he returned the plastic pad in place.
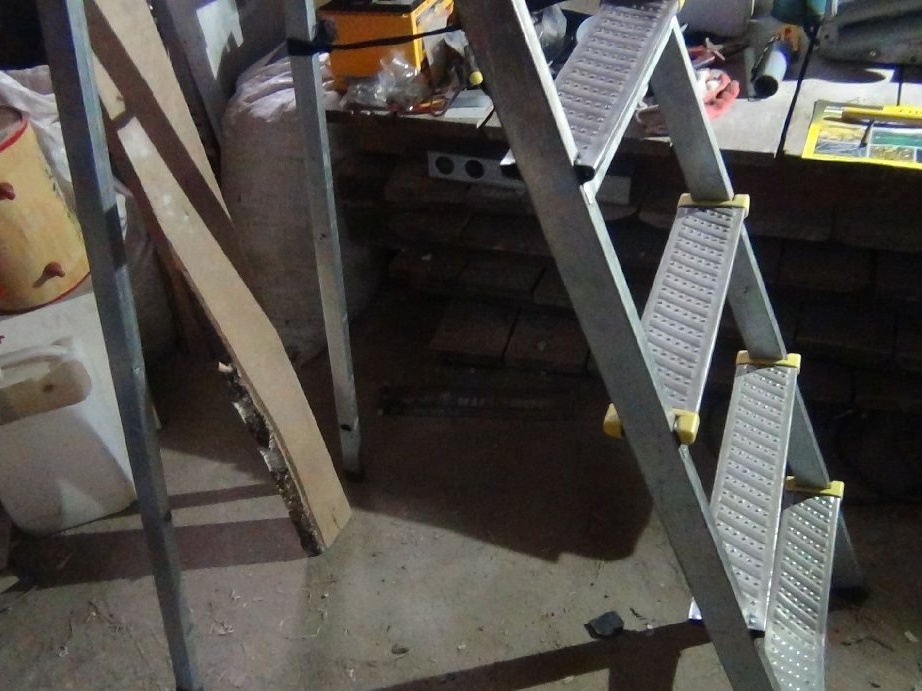
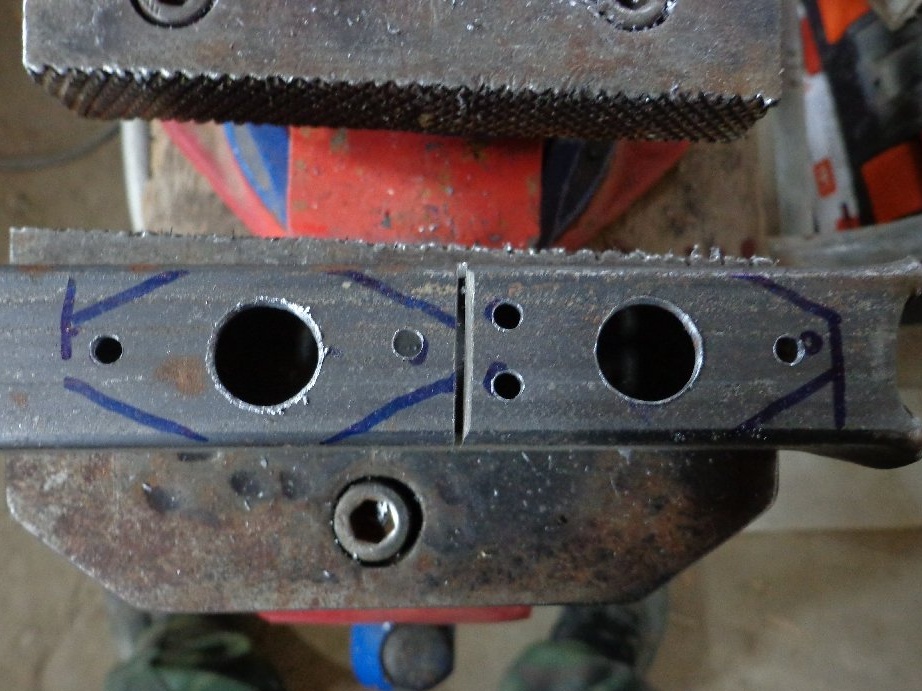
Step 2: Work with the lower tube and upper threshold
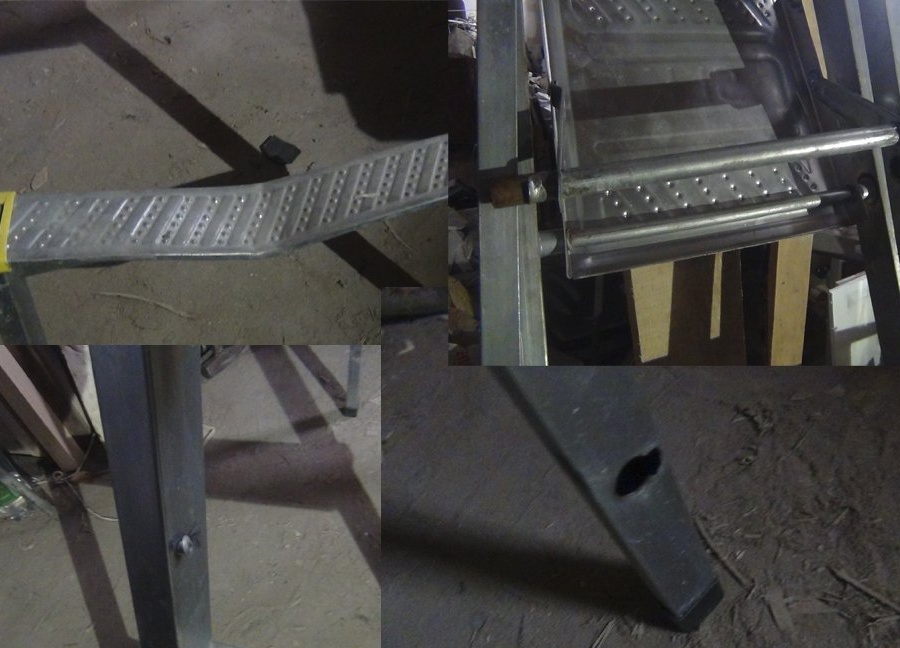
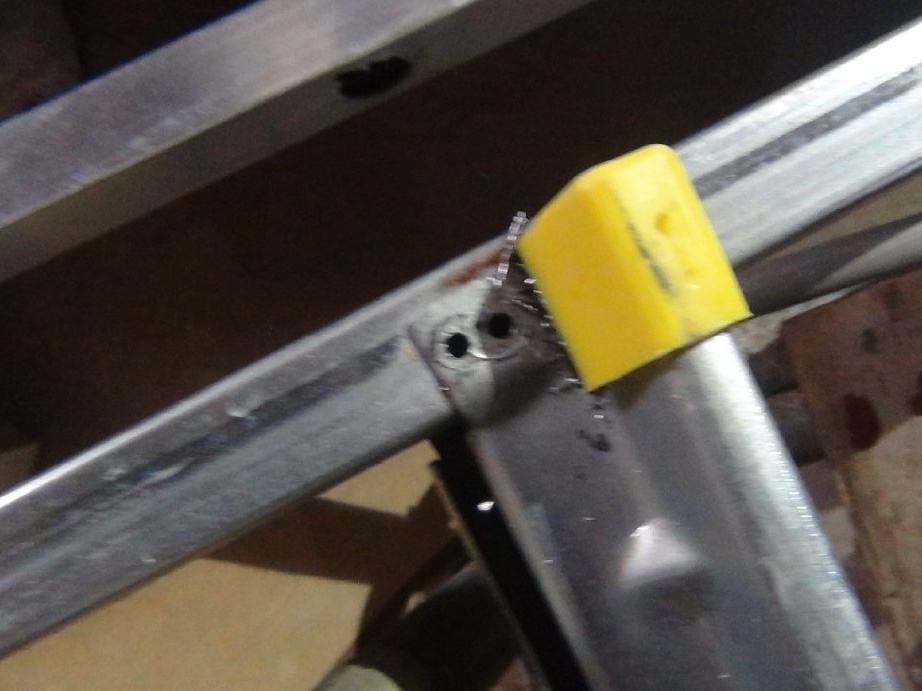
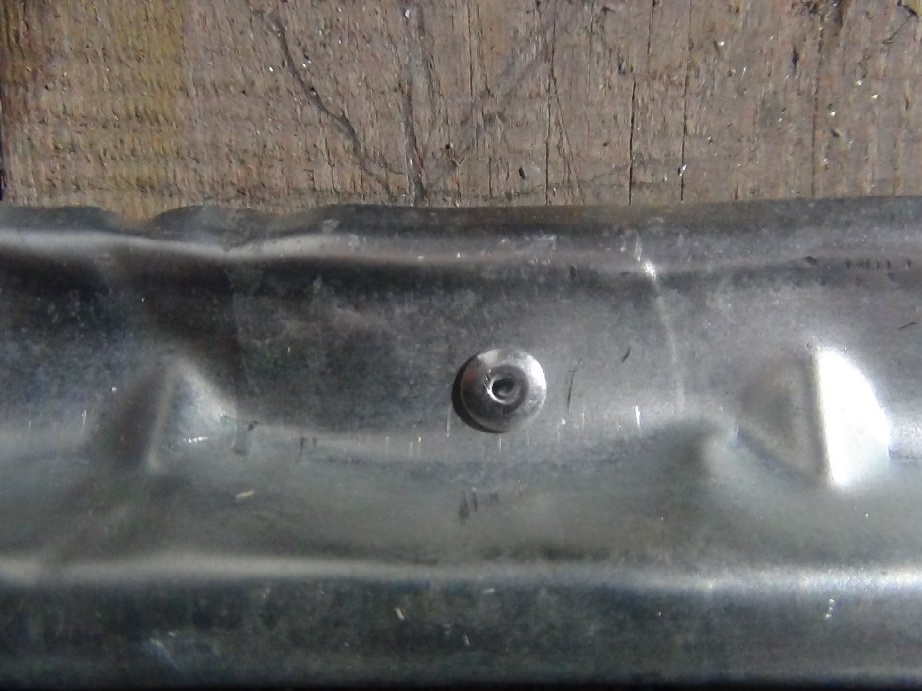
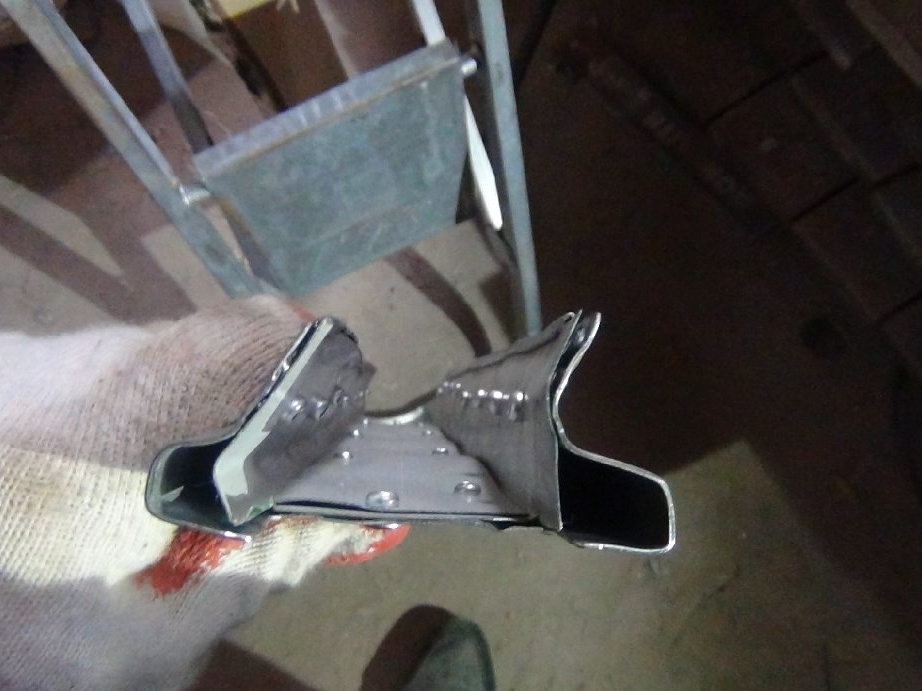
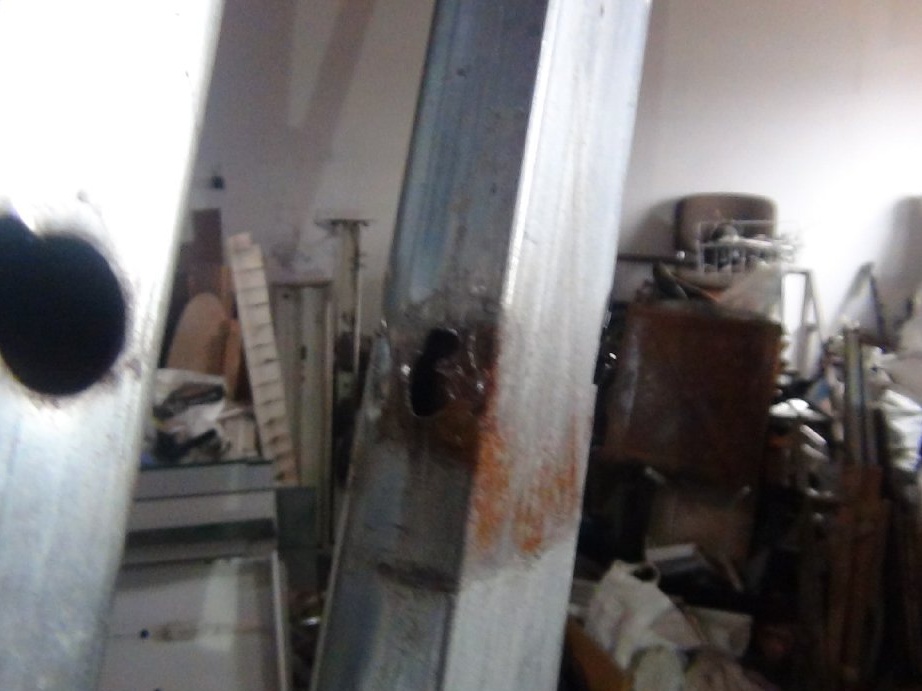
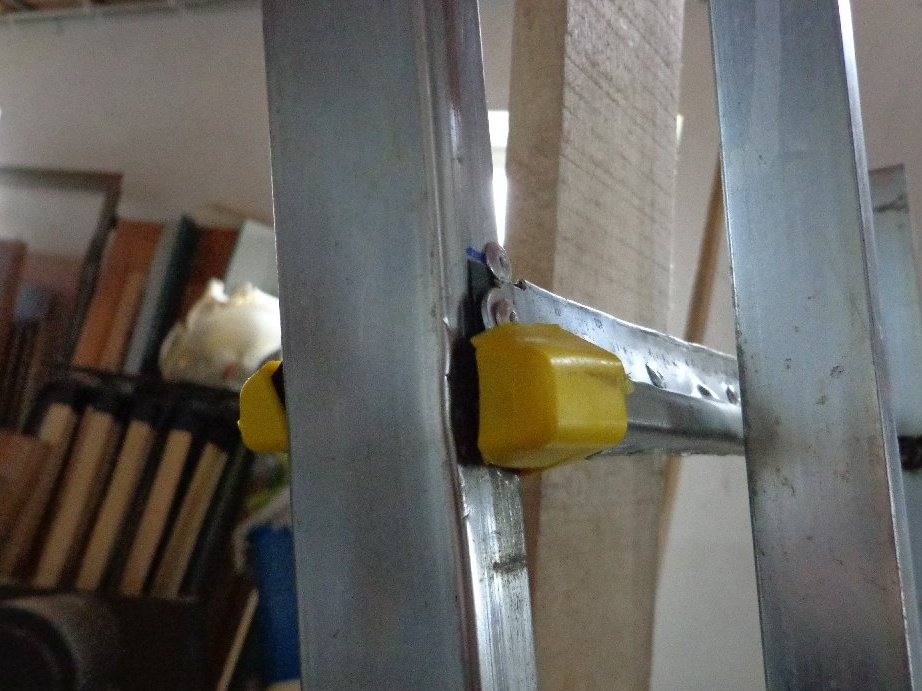
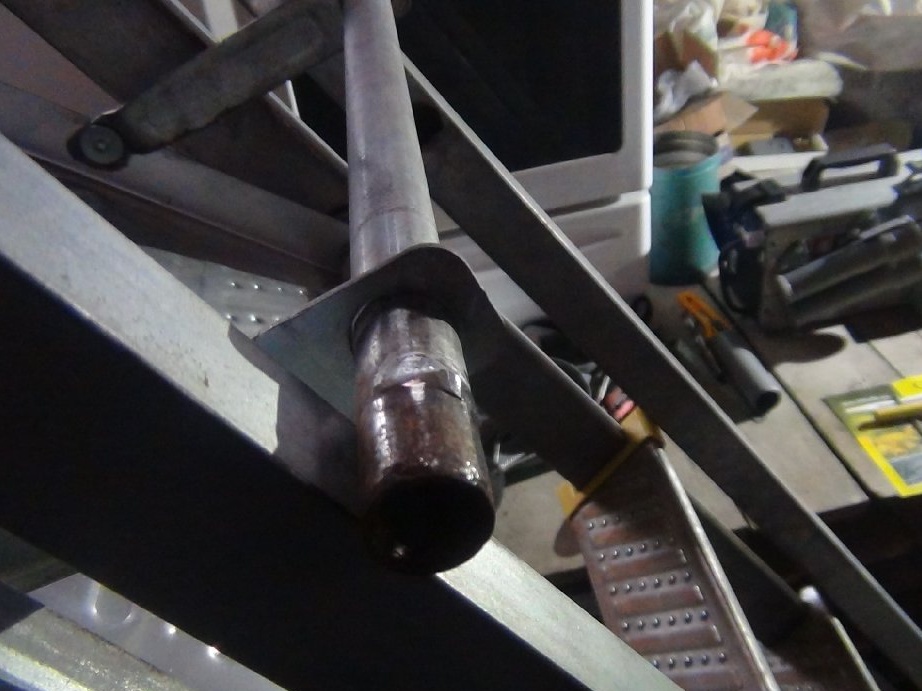
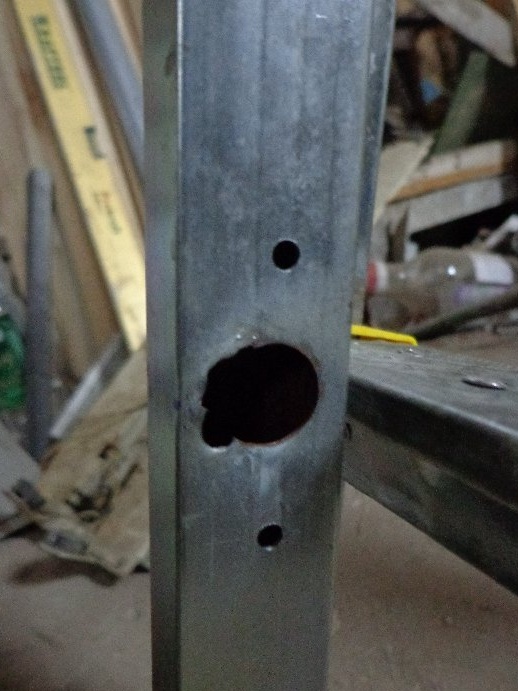
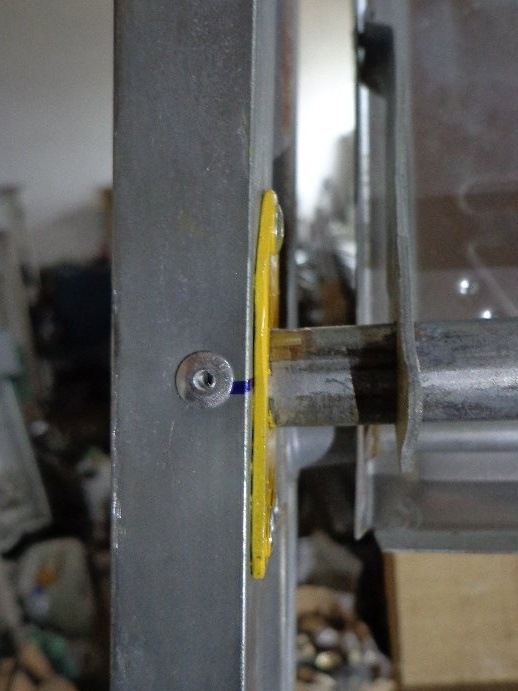
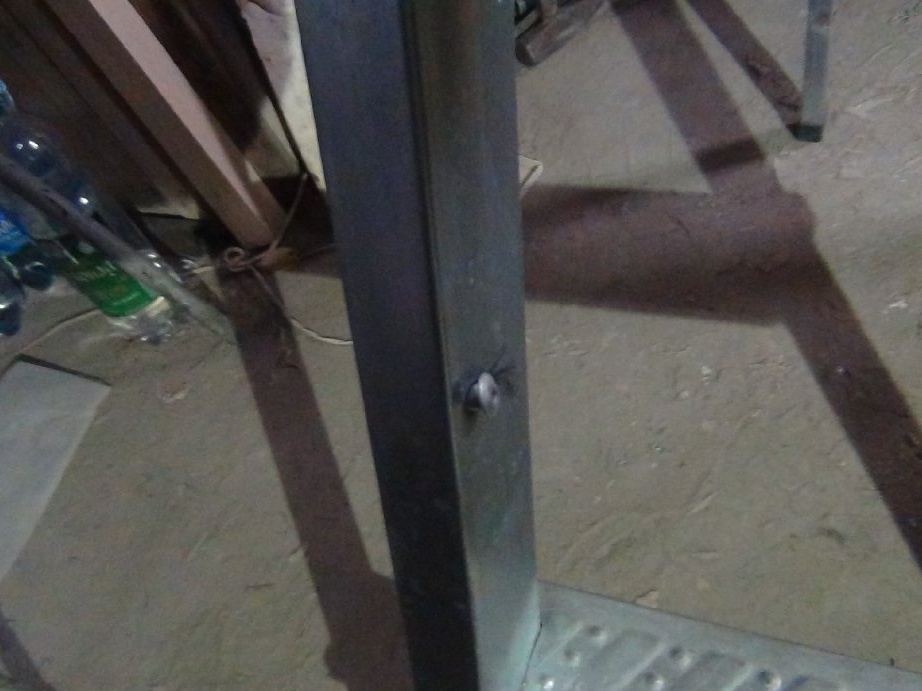
The hind legs "lived their own life." The tube that held them was missing, and it was dangerous to use a stepladder. During operation, the tube dangling in its place broke, not much, but enough that the new tube also dangled. The same thing happened on the top tube. They broke off only due to the fact that they were seized with one drop of welding, and not scald around the circumference.
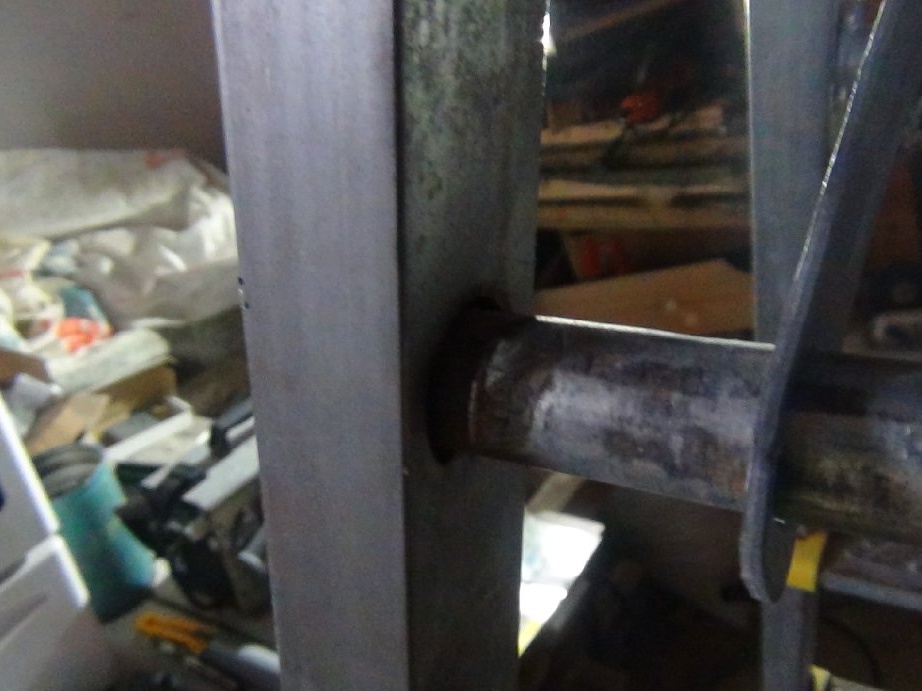
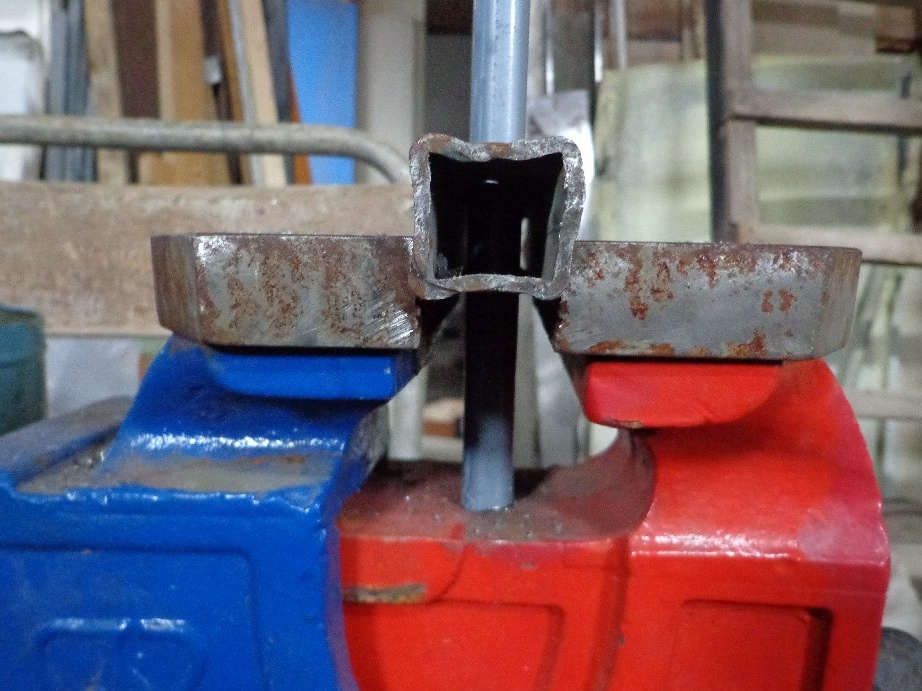
The farm was littered with tubes of a suitable diameter of 16 mm.The tube that I used was once a baby carriage cane, but it fell apart and saved material from it.
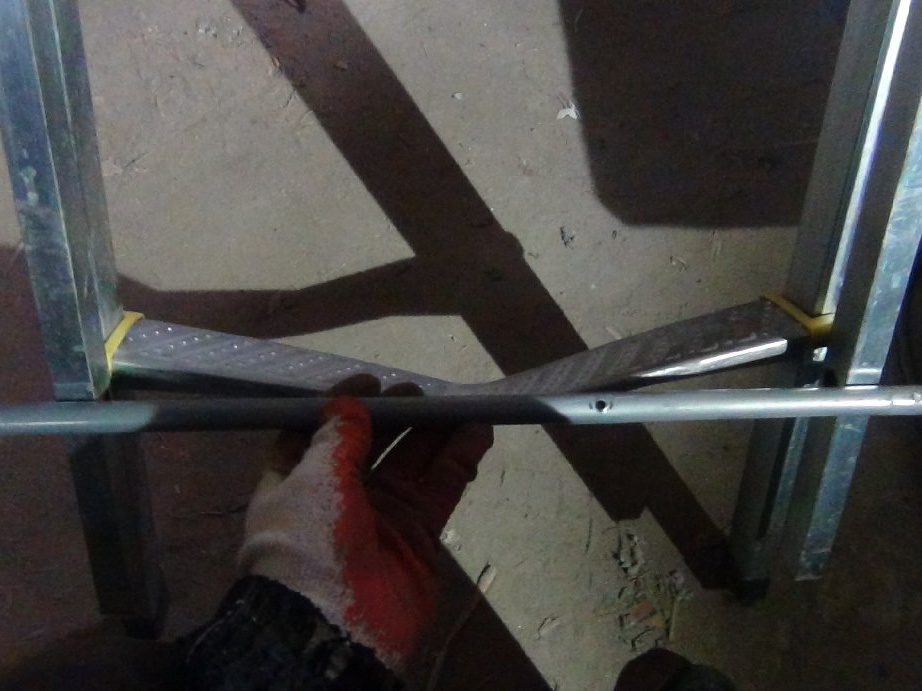
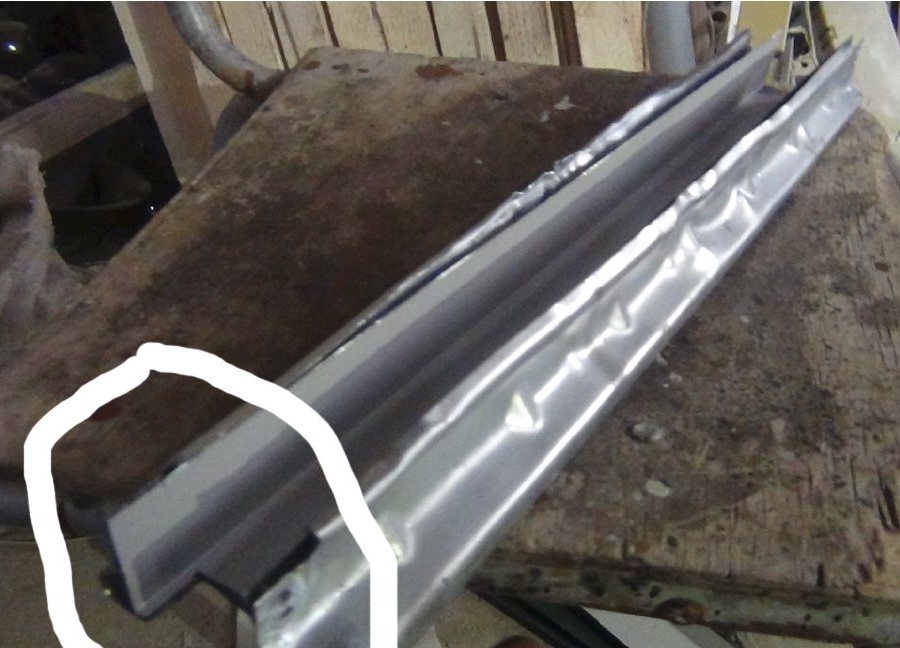
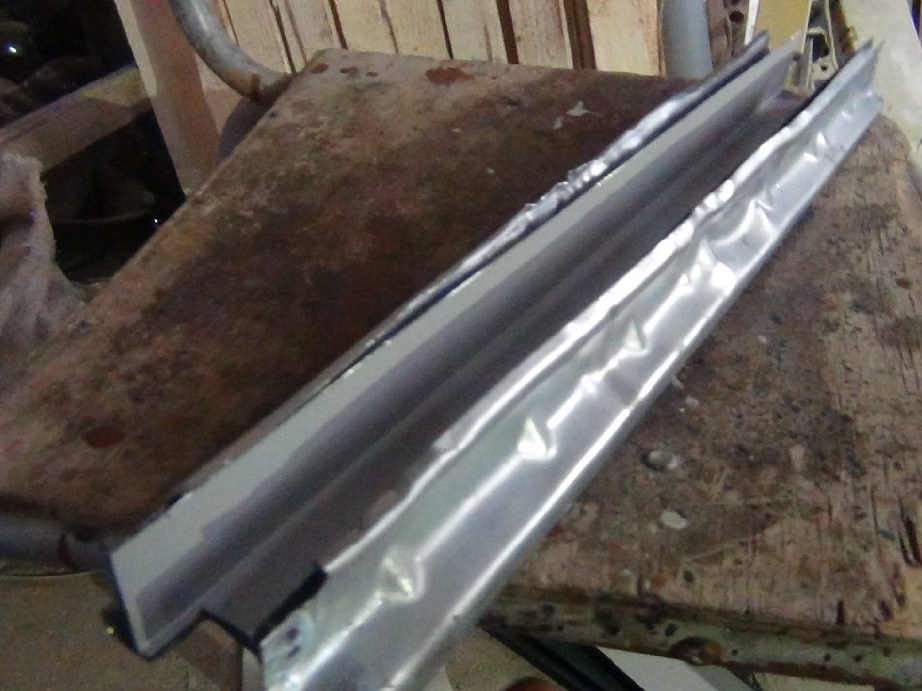
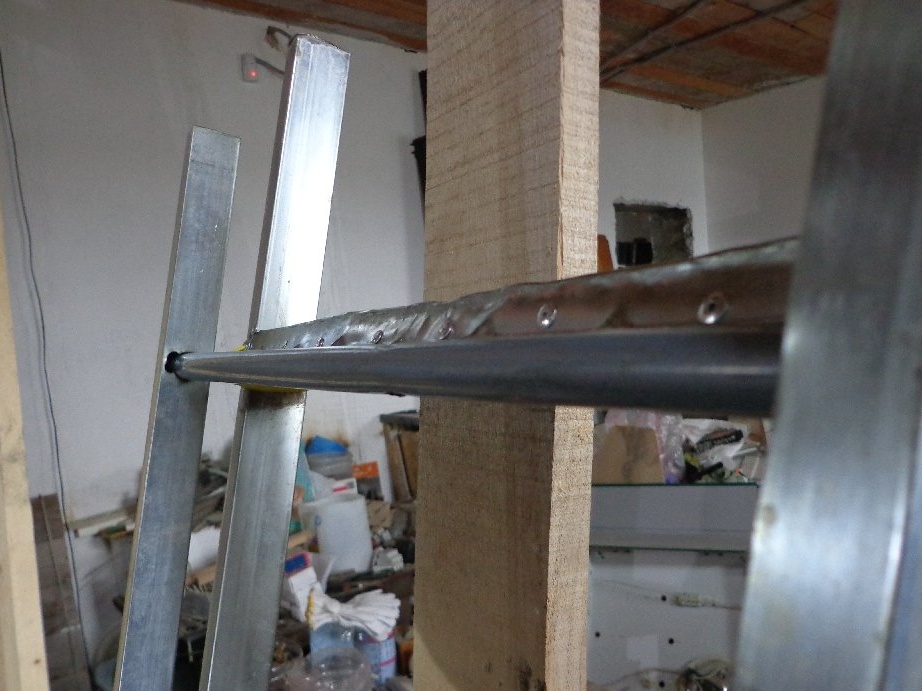
I moved the hind legs on one level with the supports of the ladder, and marked the edges of the future slice along the tube. I cut it off from that calculation so that the ends of the tube abut against the walls of the professional pipe from the inside, then I will explain why.
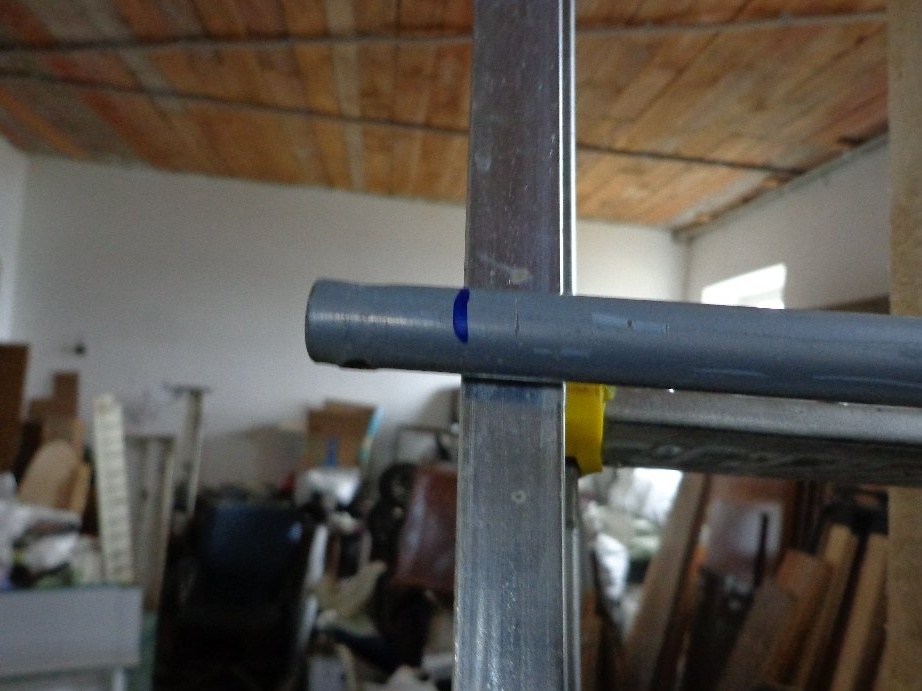
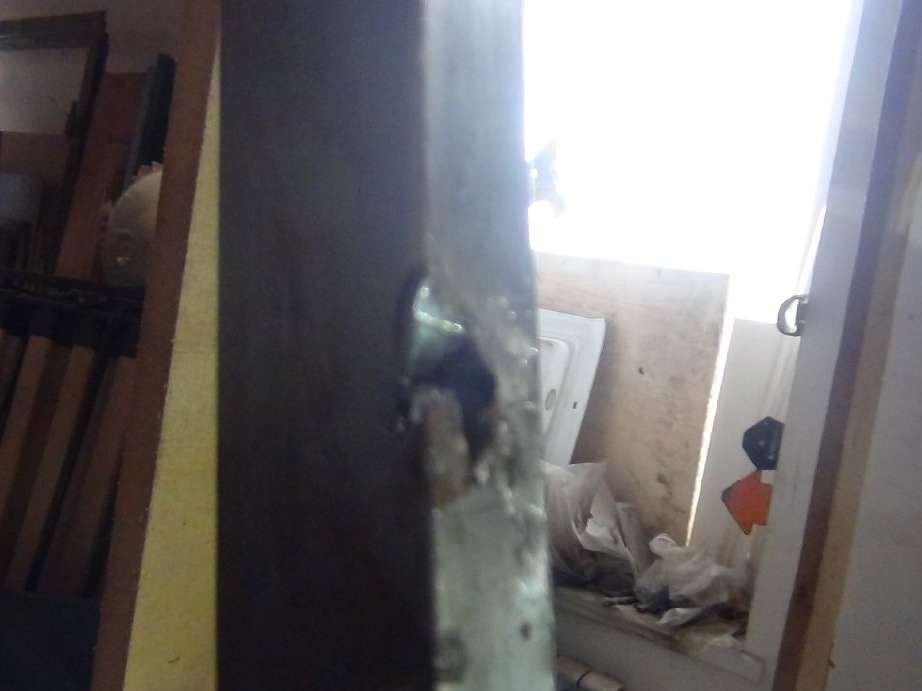
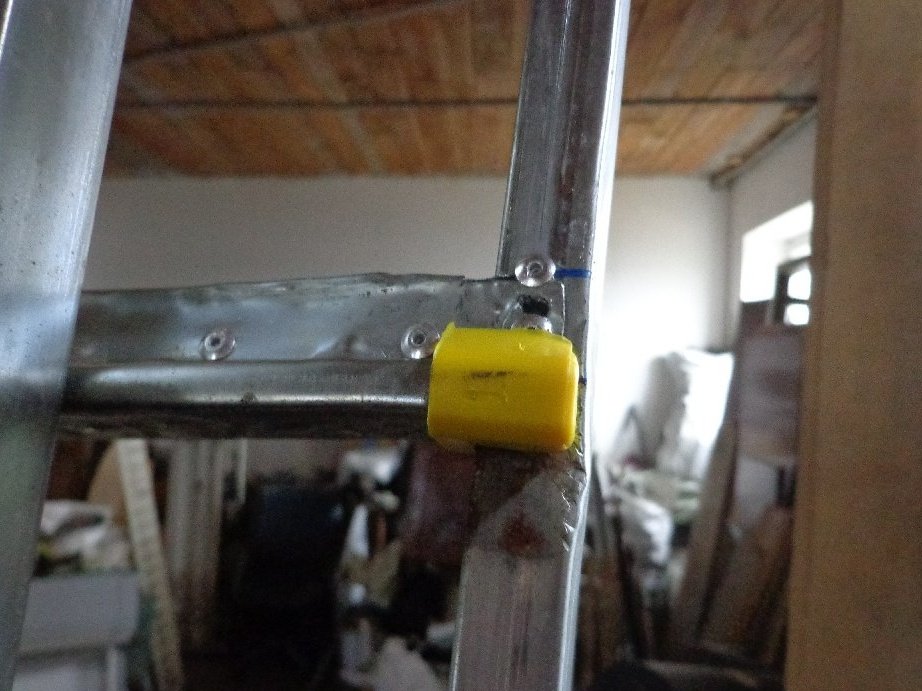
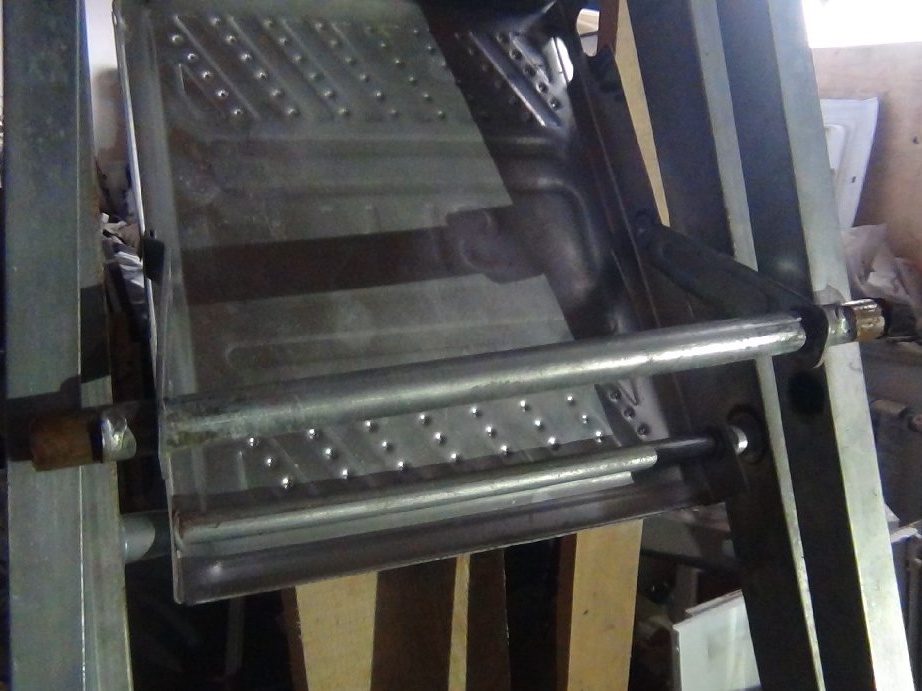
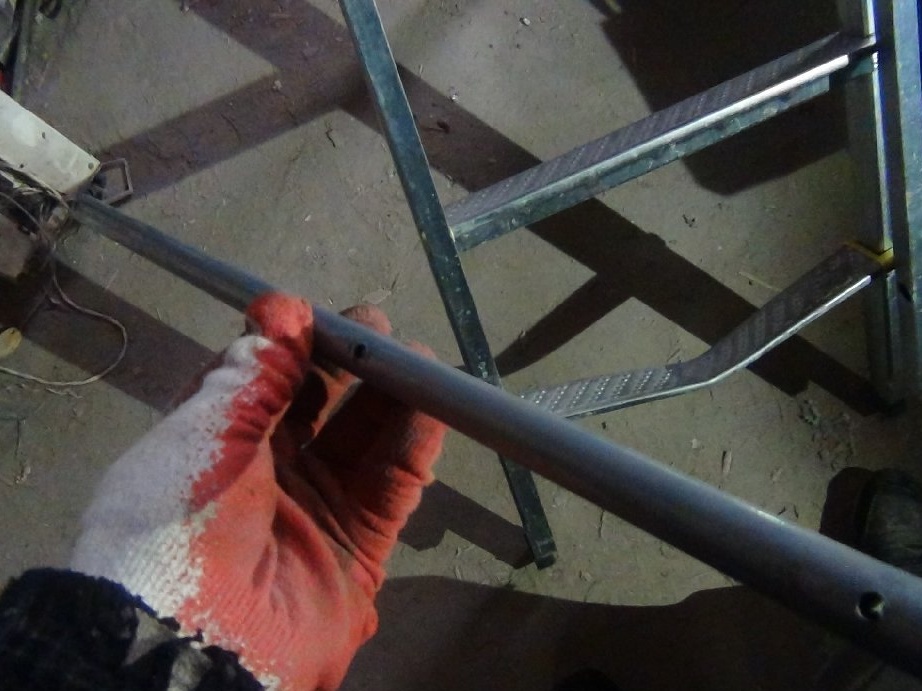
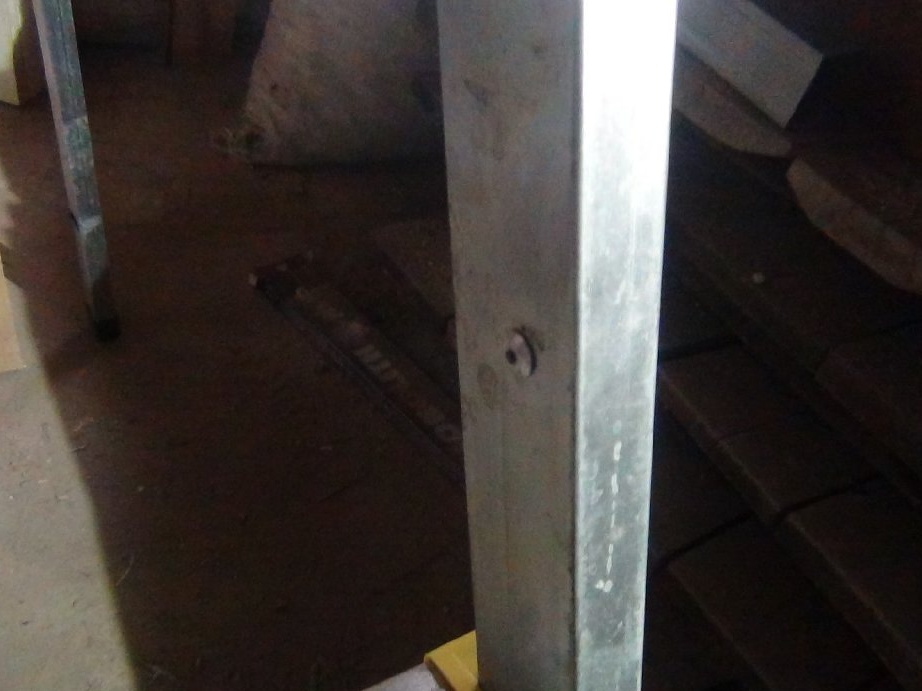
The tube under the upper threshold is well preserved, and I did not see a reason for replacing it. I polished the welded drops and set aside until it was installed back.
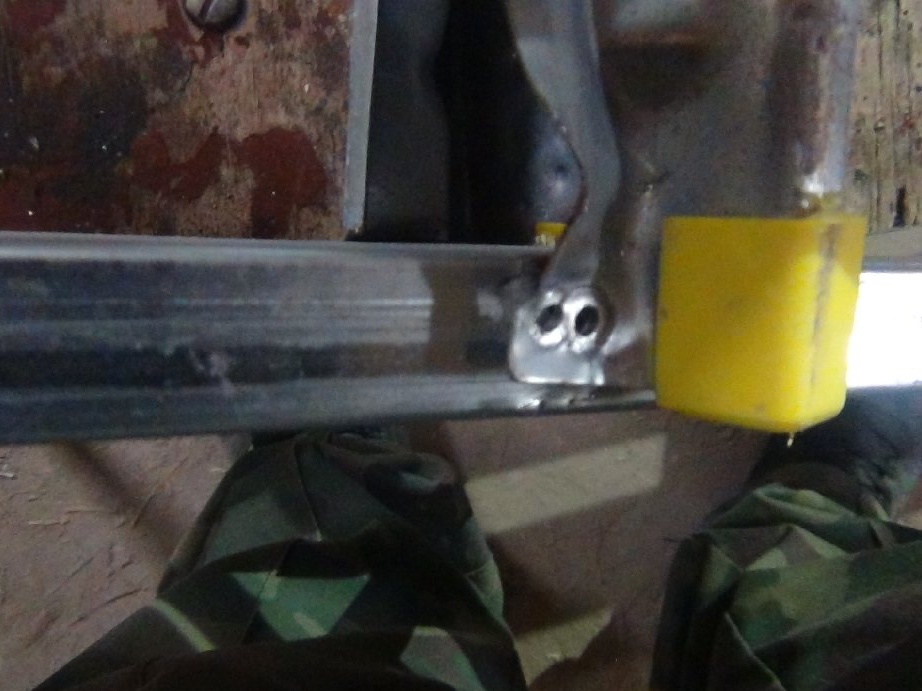
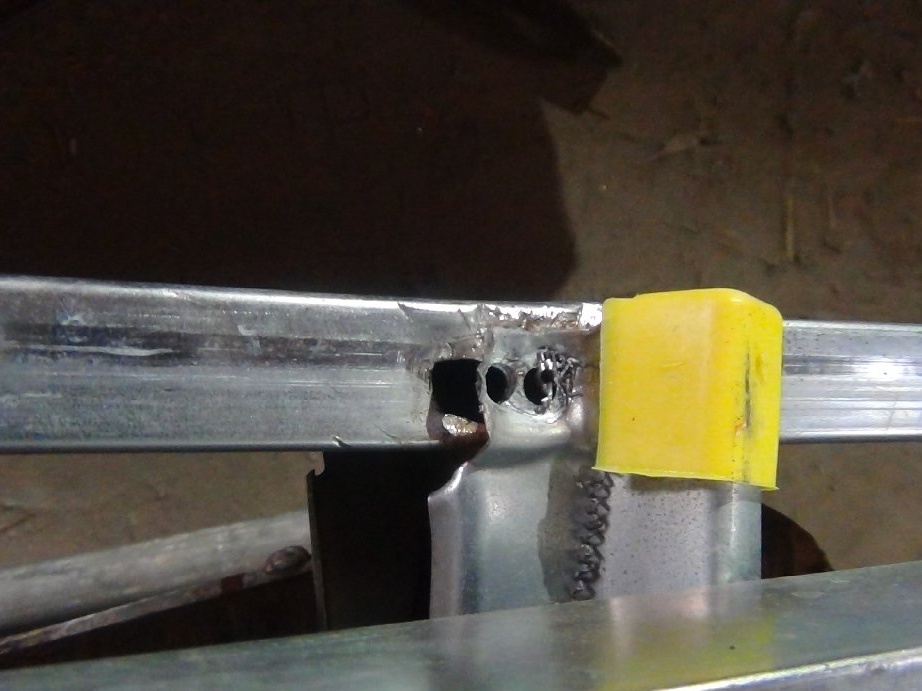
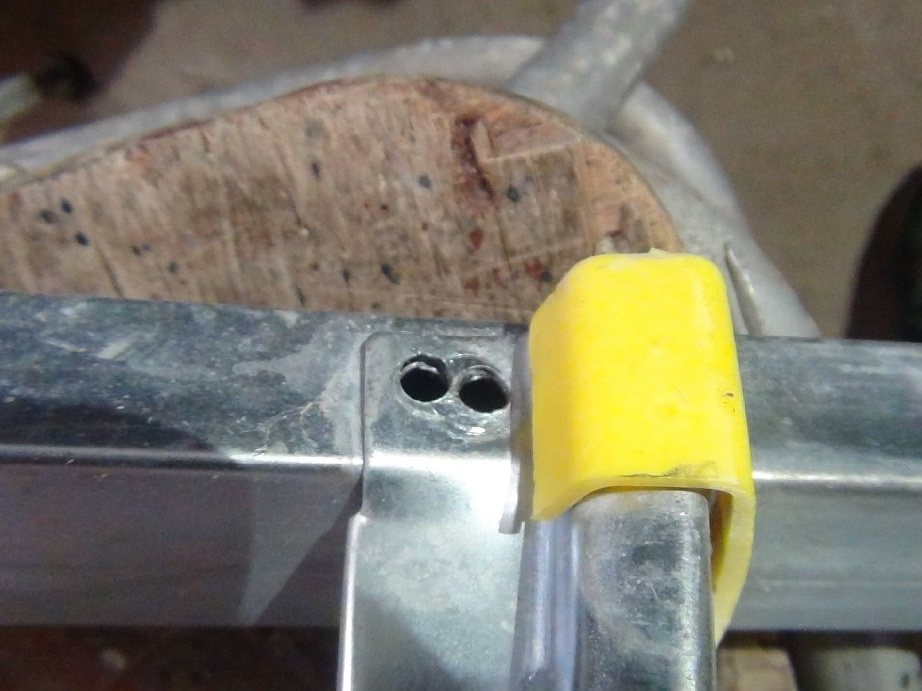
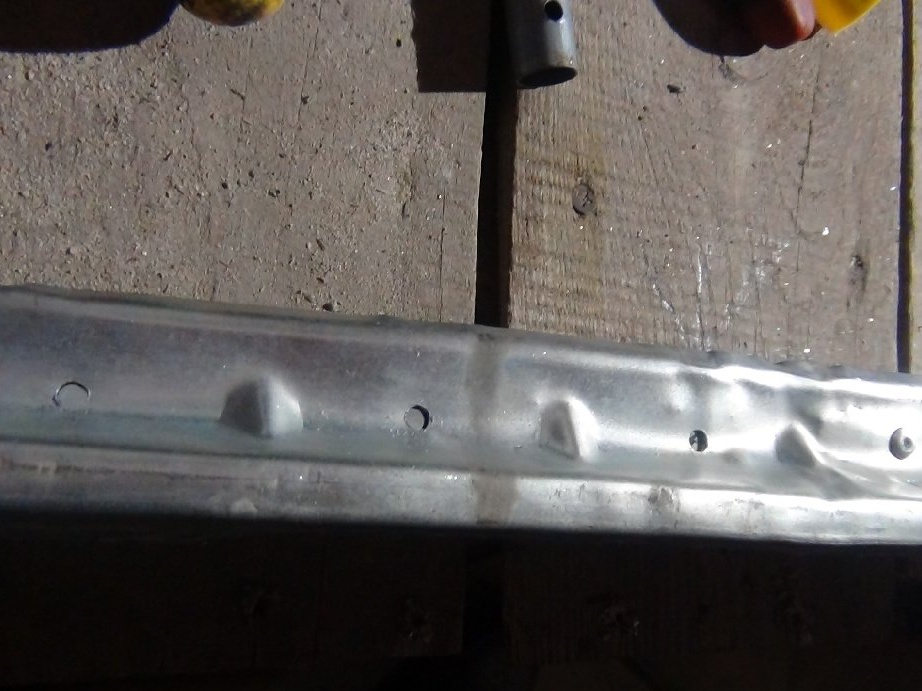
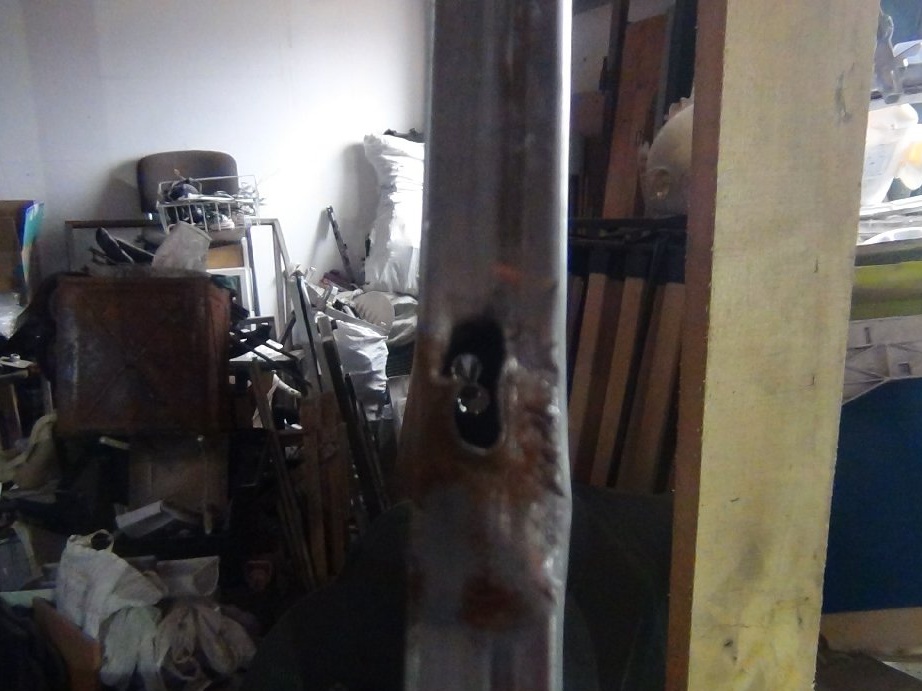
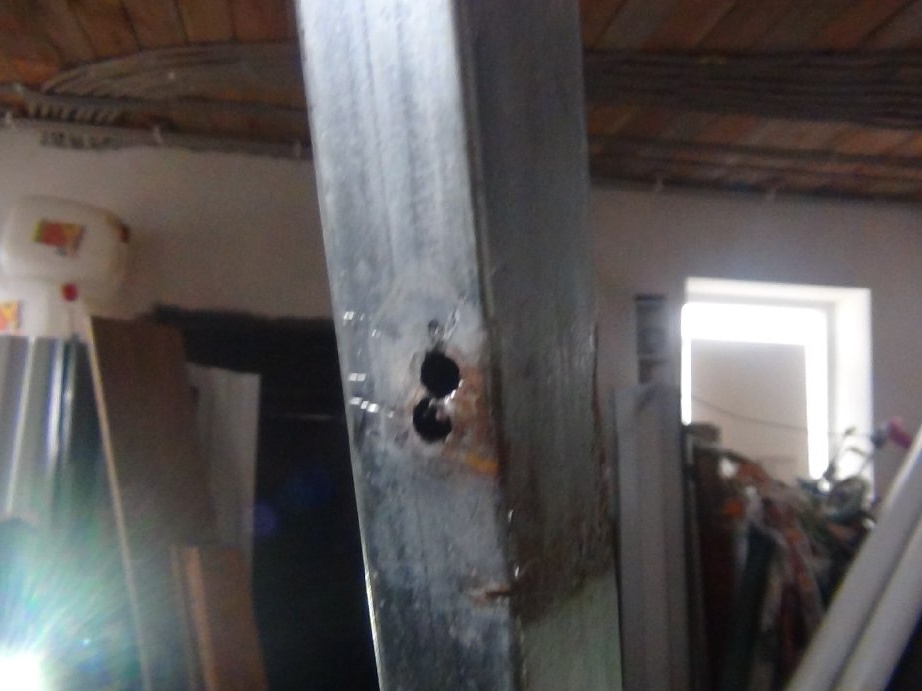
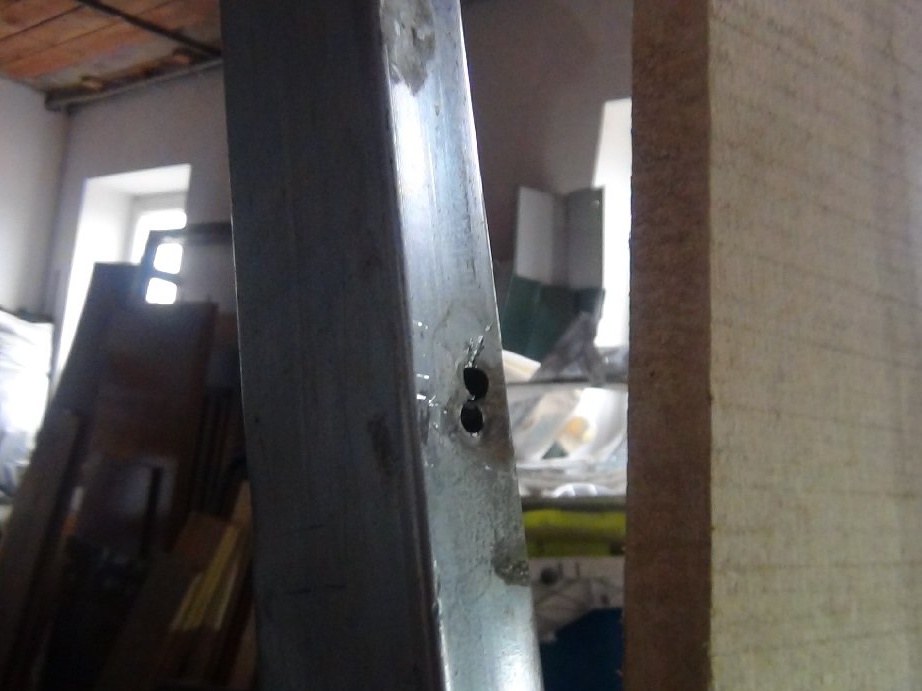
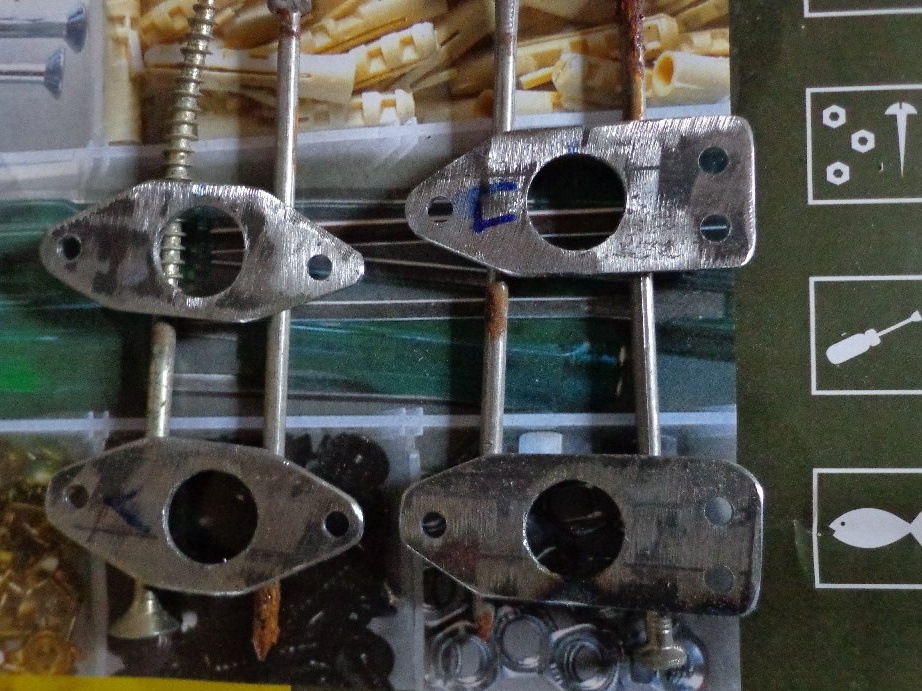
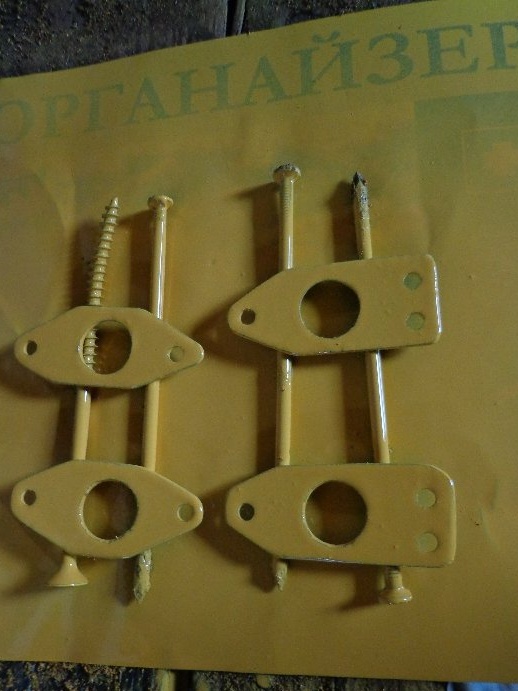
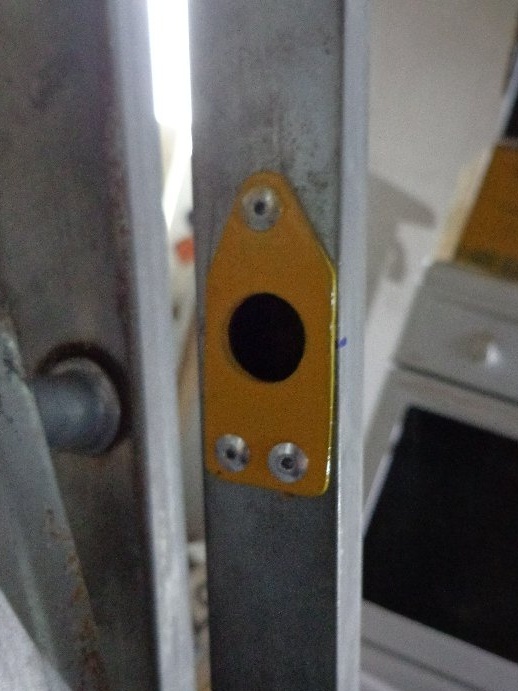
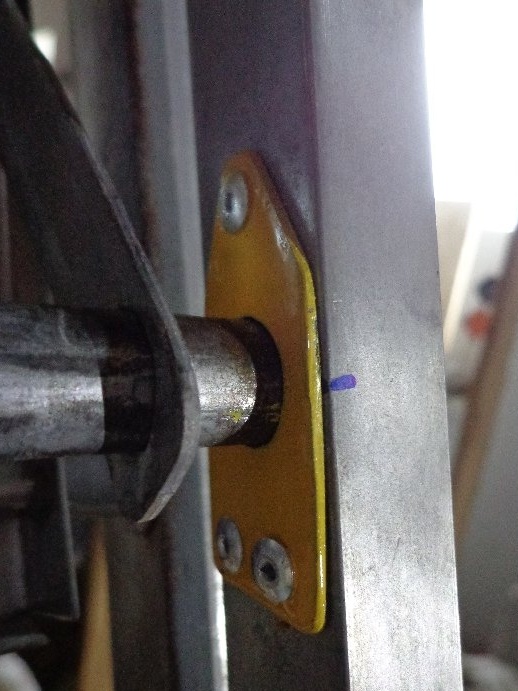
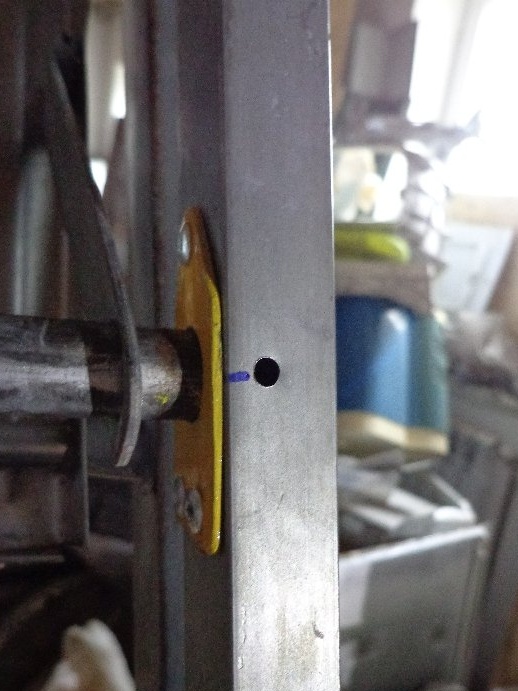
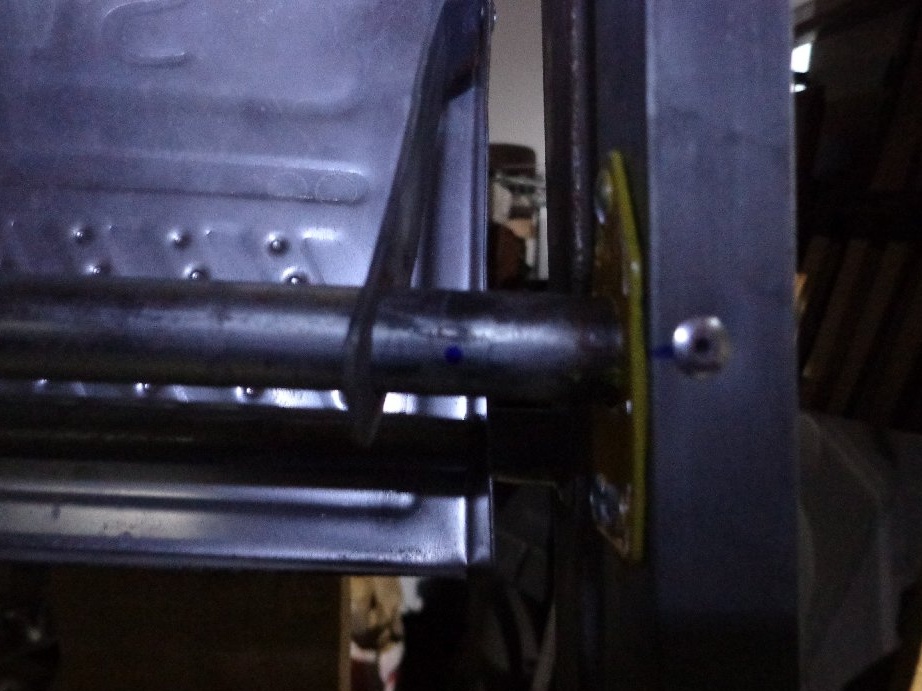
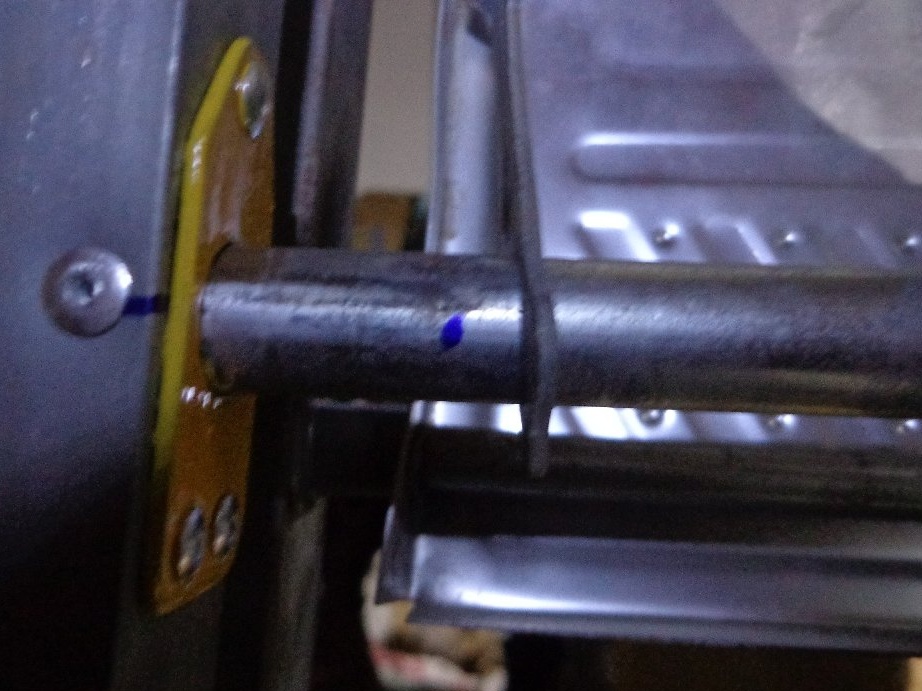
Since the standard holes for these tubes were broken, I decided to strengthen them with 2 mm thick plates. They will not hold for how long, they will not allow the pipes to break holes when moving. It was possible to weld, of course, but it was not a desire to unwind the welding hoses.
He took a piece of pipe 30x30x2, remained after welding scaffolding, the length just suited for future plates.
The plates themselves will be made 6 cm long and the width of the professional pipe. I marked on a piece of pipe how the holes for rivets and the pipes themselves will be drilled. I decided to drill first, and only then cut out the grinder. it’s easier than cutting out first and then trying to drill holes in the plates, it’s not convenient, but drilling with the 16th drill, that’s the problem.

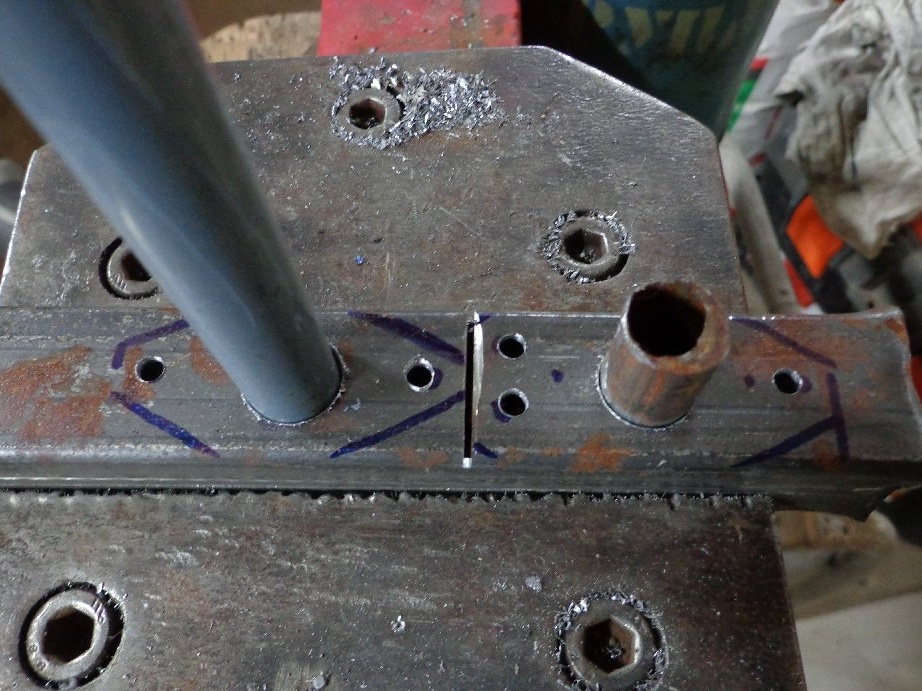
I got 4 plates with holes already prepared.
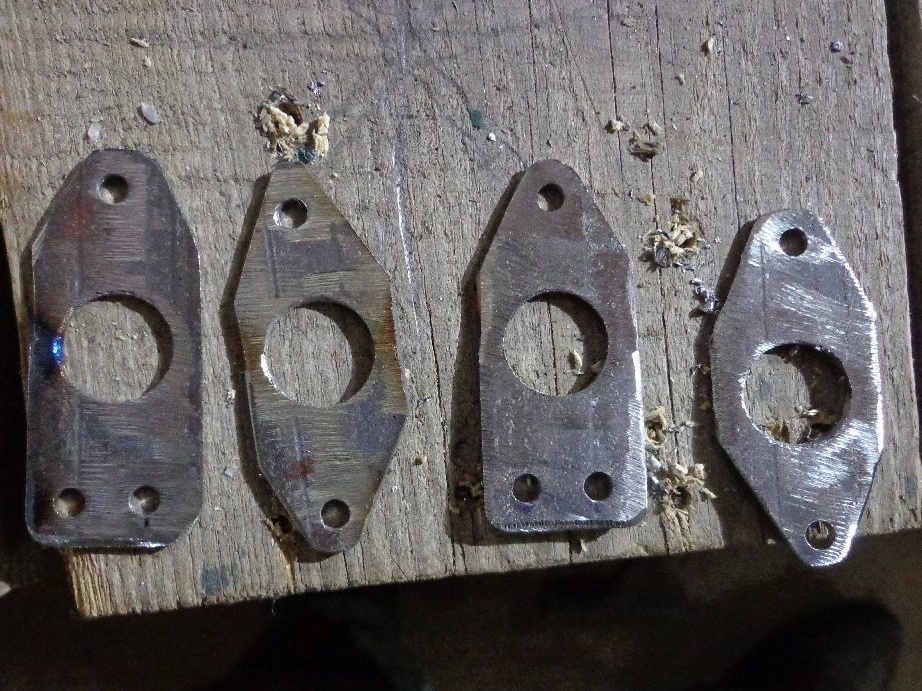
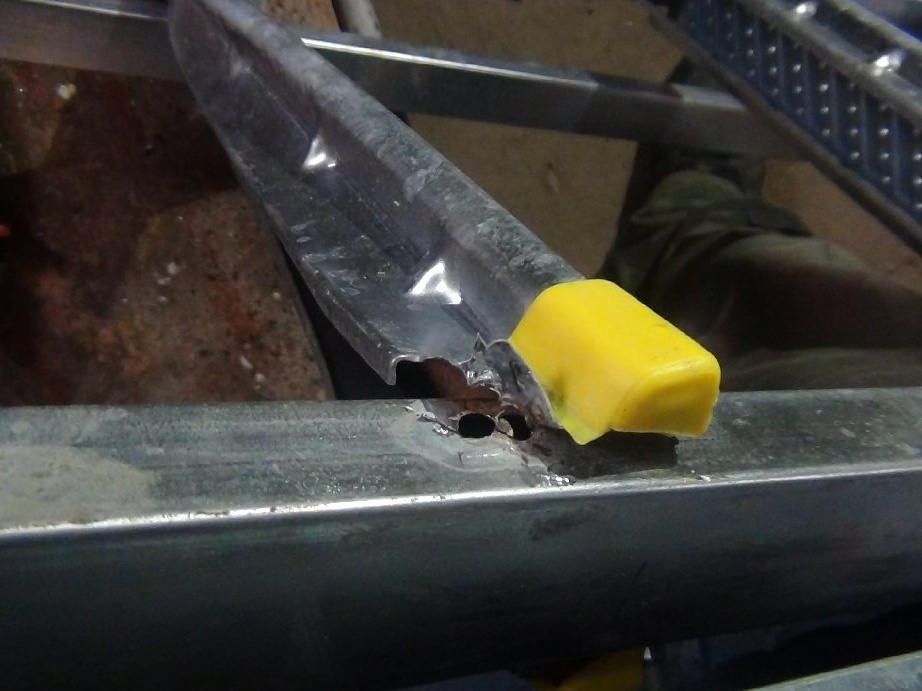
The sharp edges after cutting were sanded with a belt sander.
Until I painted them, I used it as a template for drilling on a rivet step ladder.


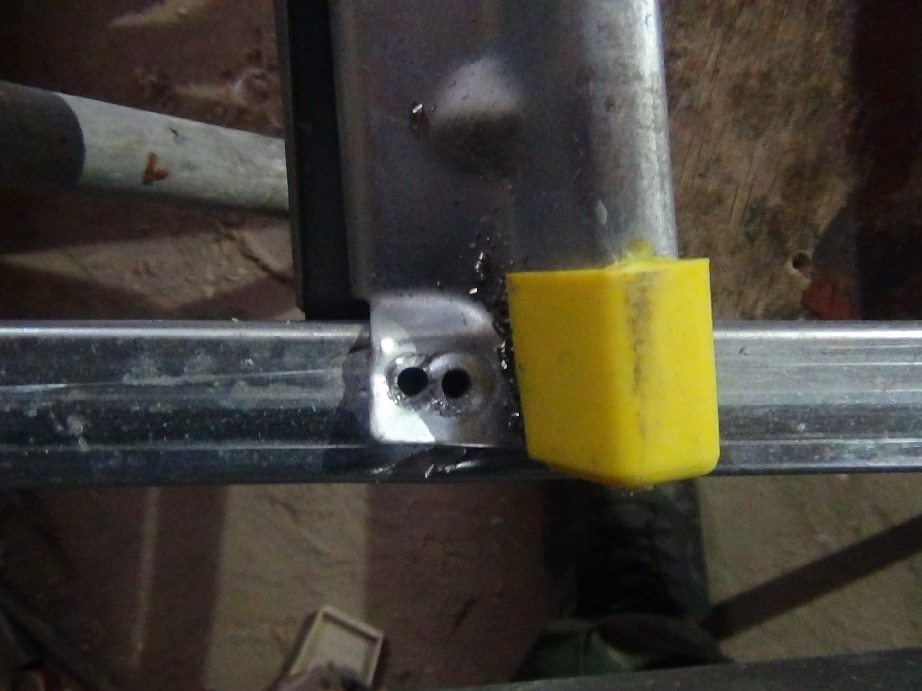
Degrease them and paint them yellow.

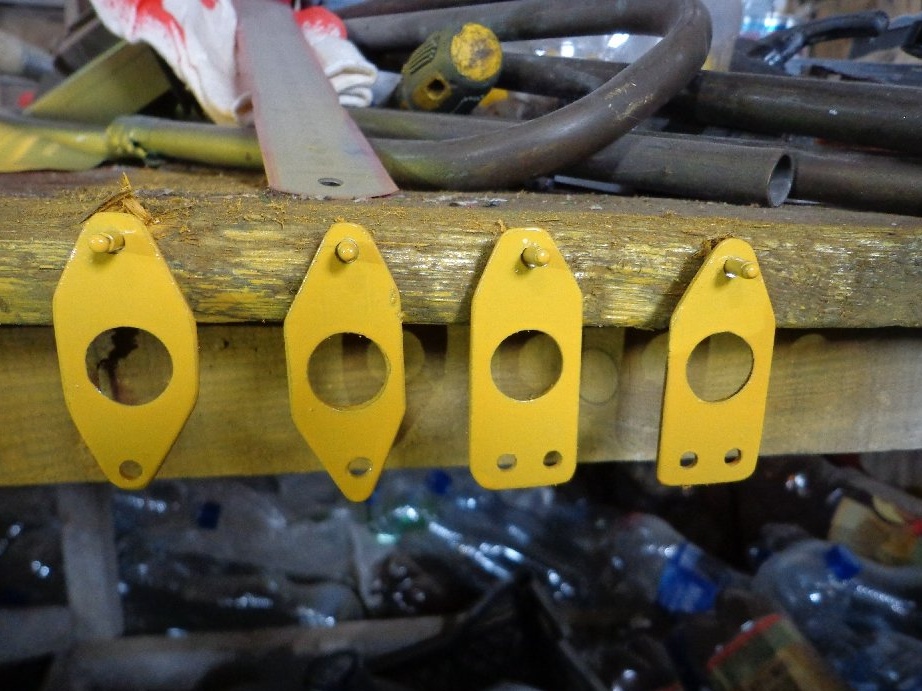
I decided not to wait a day until the paint dries. I immediately riveted these plates to the legs, using 4x8 rivets and a drill of the corresponding diameter.
Further, the work does not come into contact with painted parts, and if fresh paint is a bit out of control, then there is nothing to worry about.
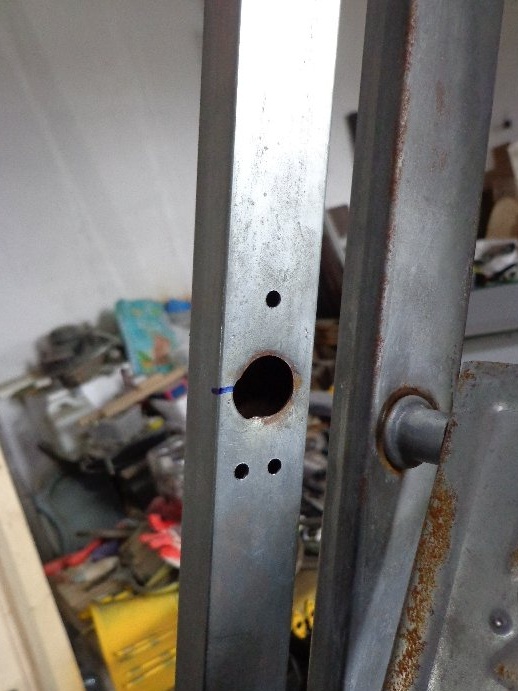

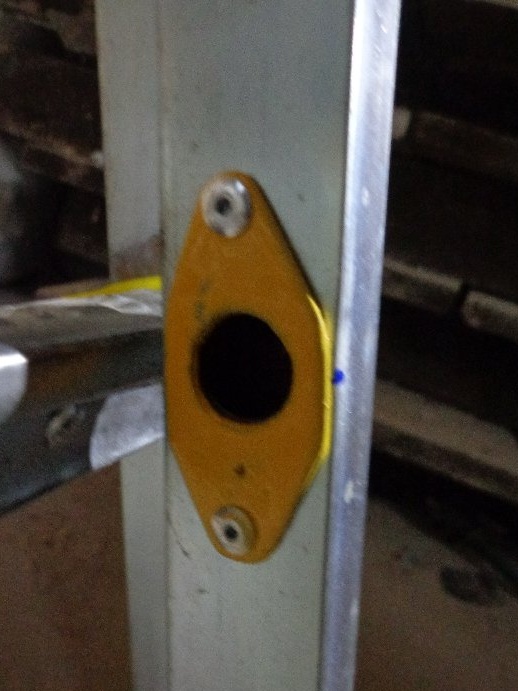
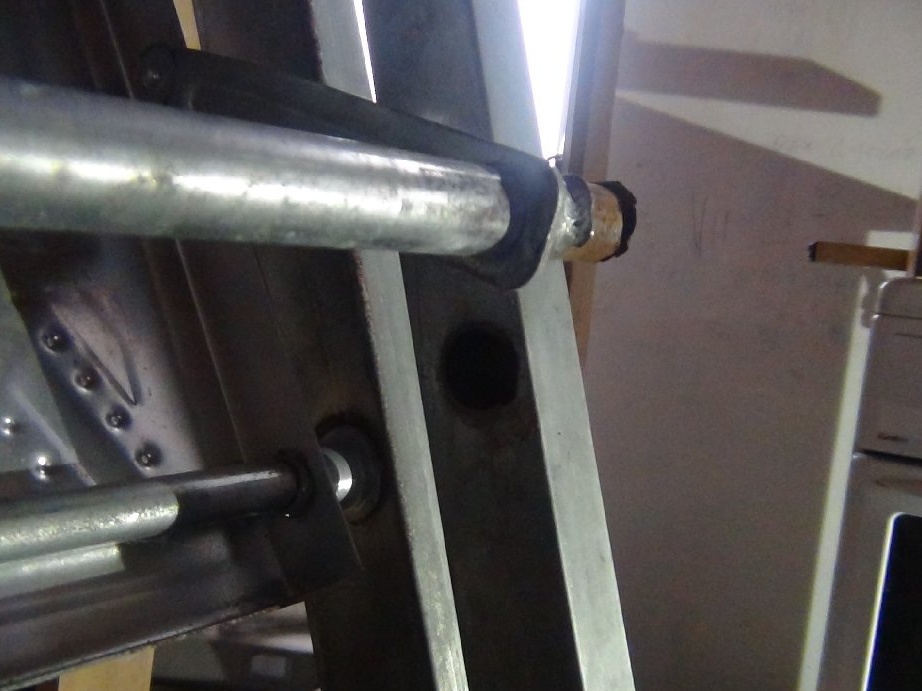
Now inserted the tubes into the drilled holes with a diameter of 16 mm.

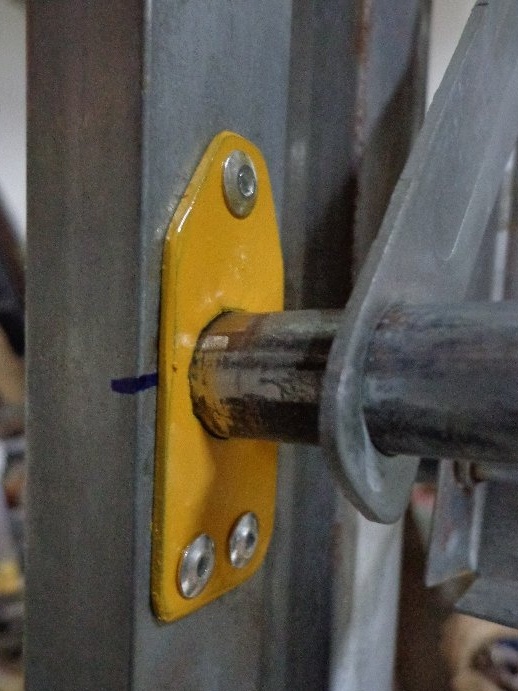

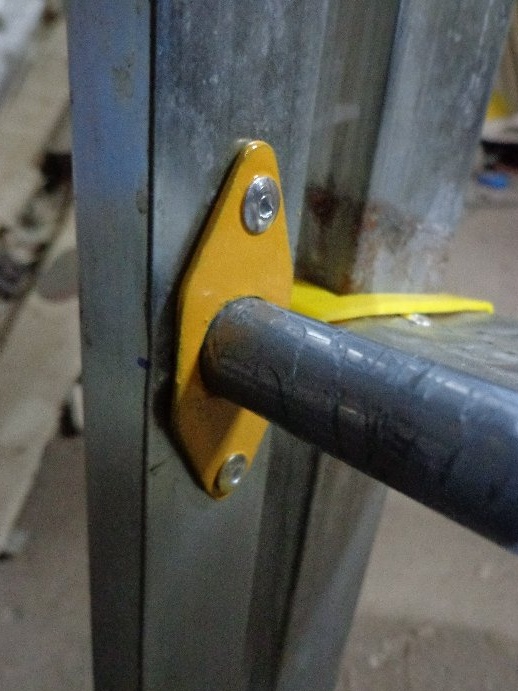
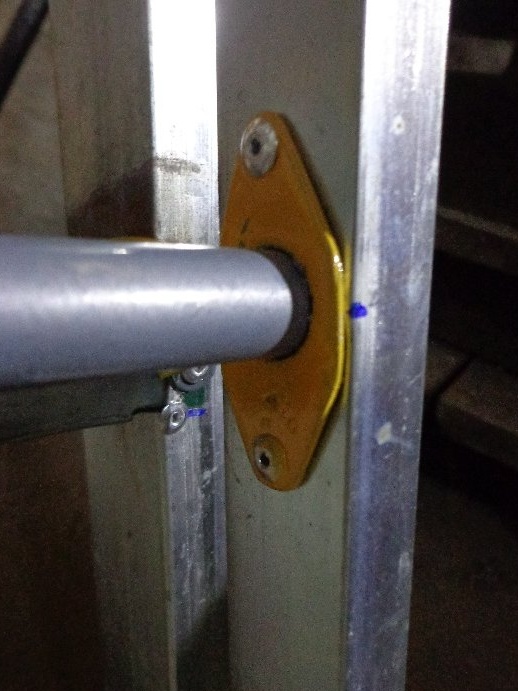
Now that the tubes in place, they need to be fixed so that they do not fall out of their holes.
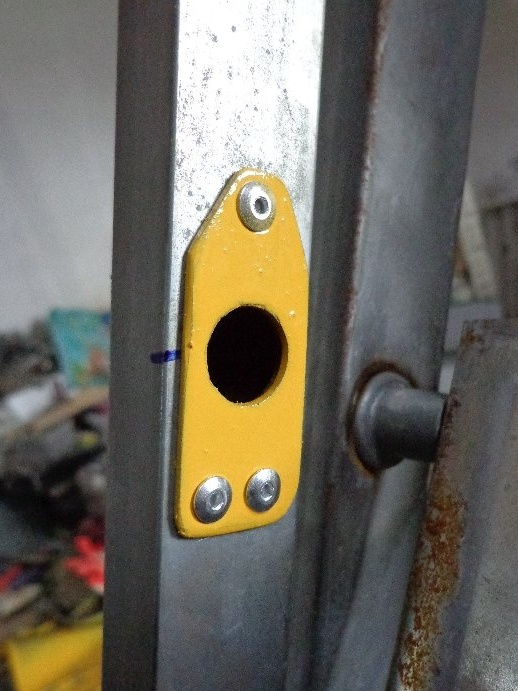
I used 4 × 12 long rivets, the length was just enough to drill a hole in the profile to fix the tubes.
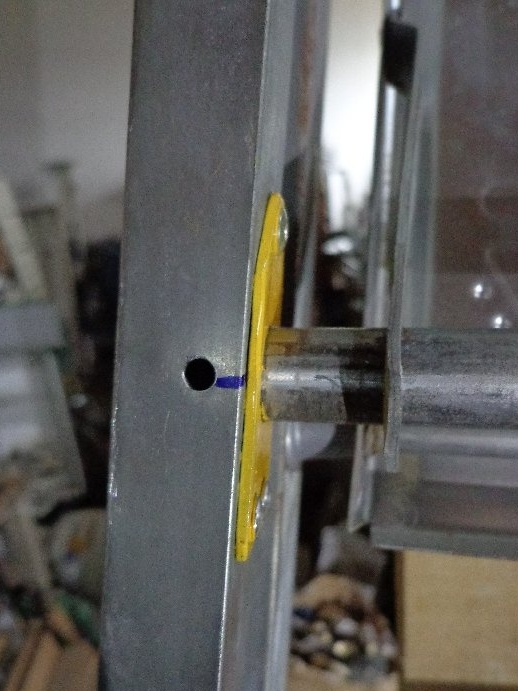
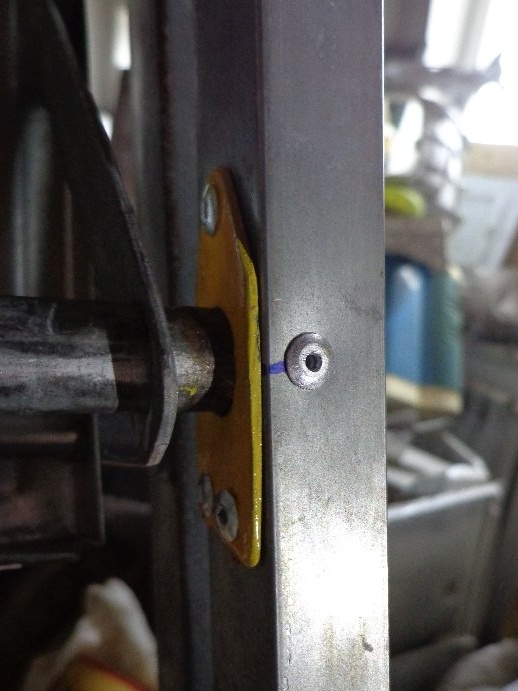
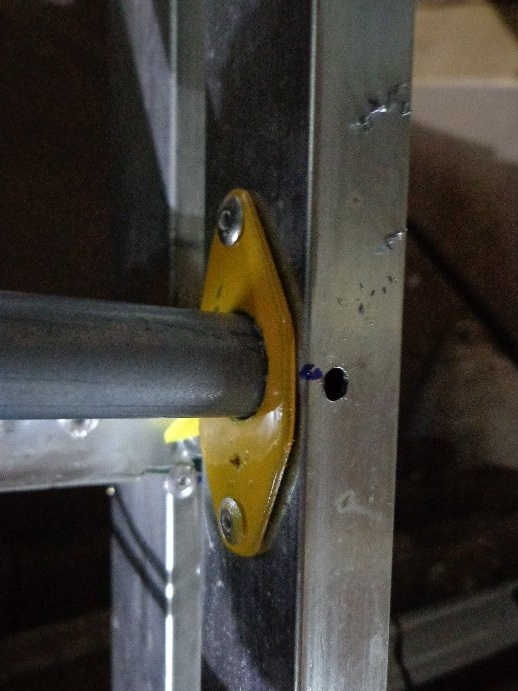
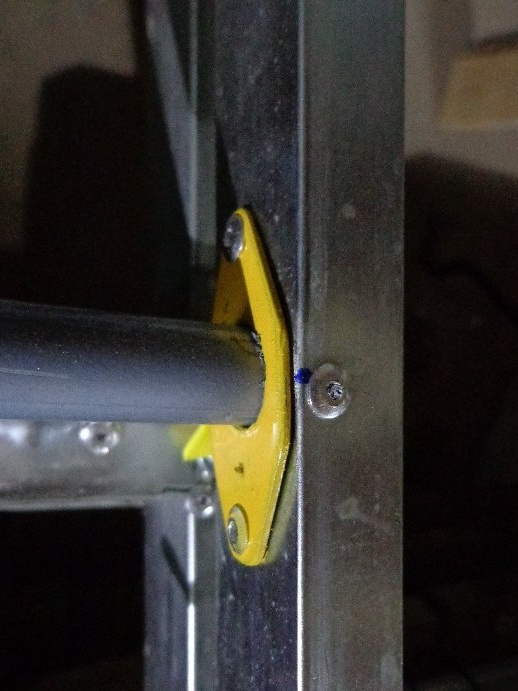
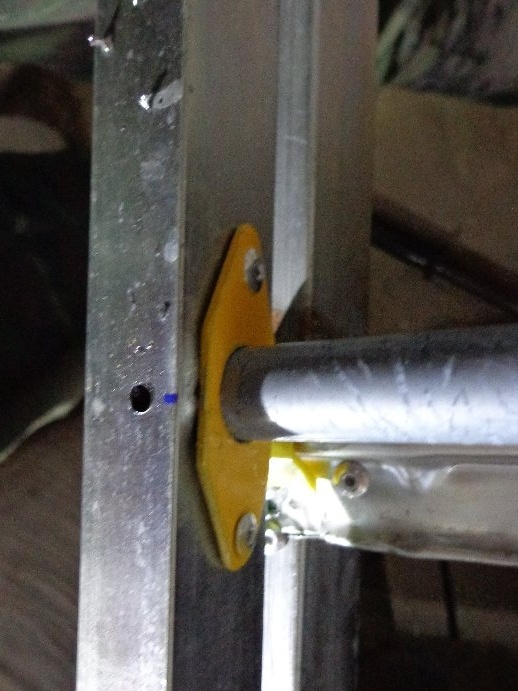
Now the tubes will not pop out and give sufficient rigidity to the structure.
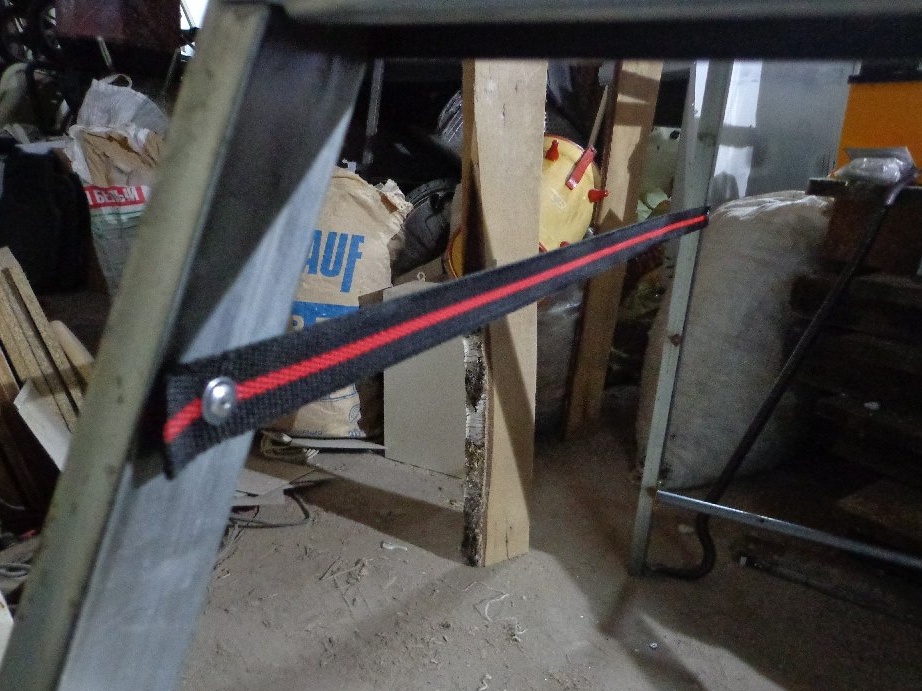
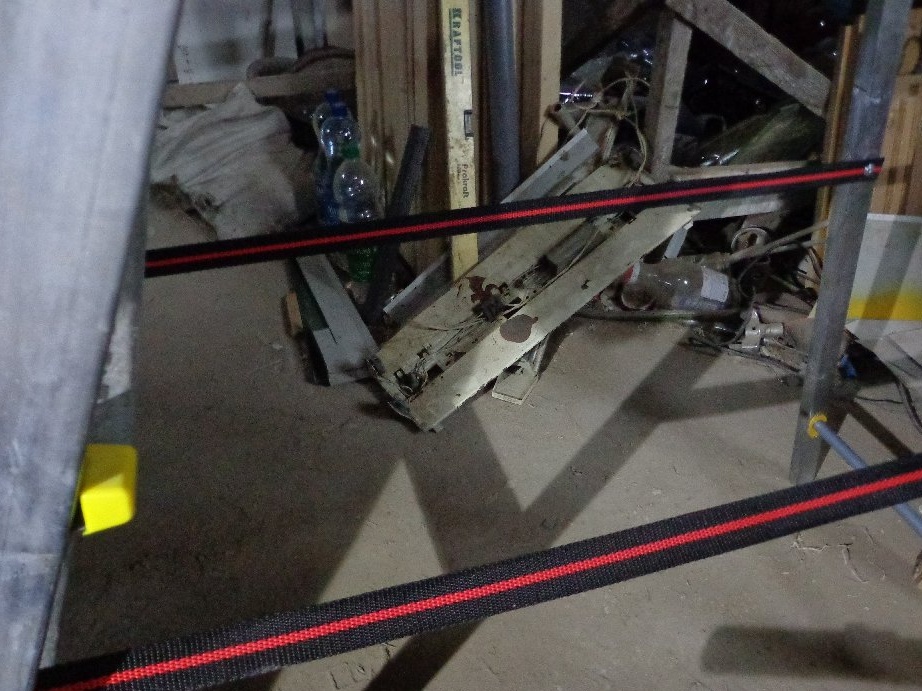
Step 3: Bounding Belts
So that the legs do not move forward and backward, I decided to return the belts.
Unfortunately, manufacturers do not bother with ensuring that their goods are reliable and of high quality.
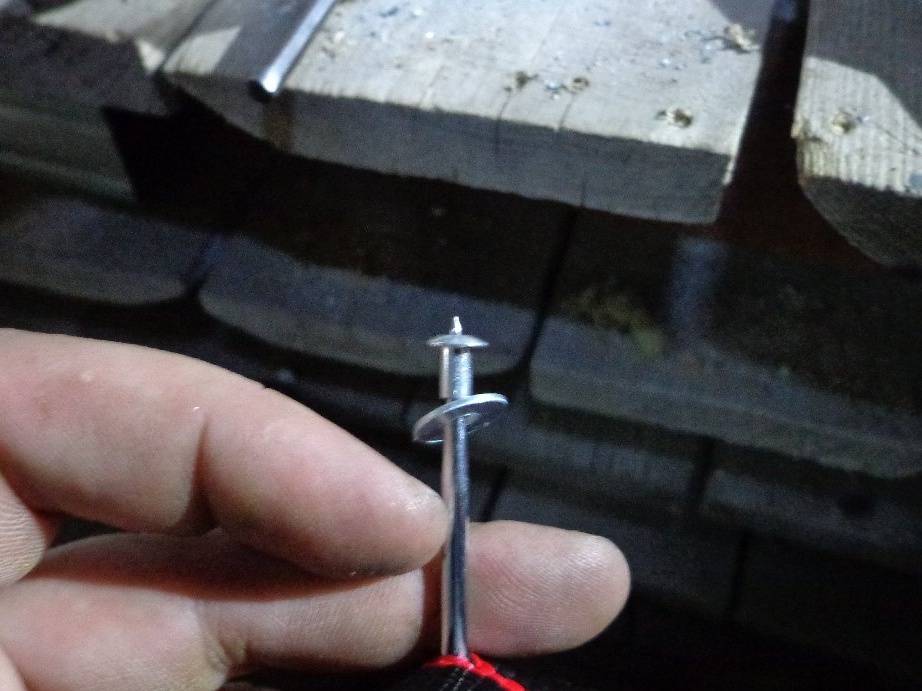
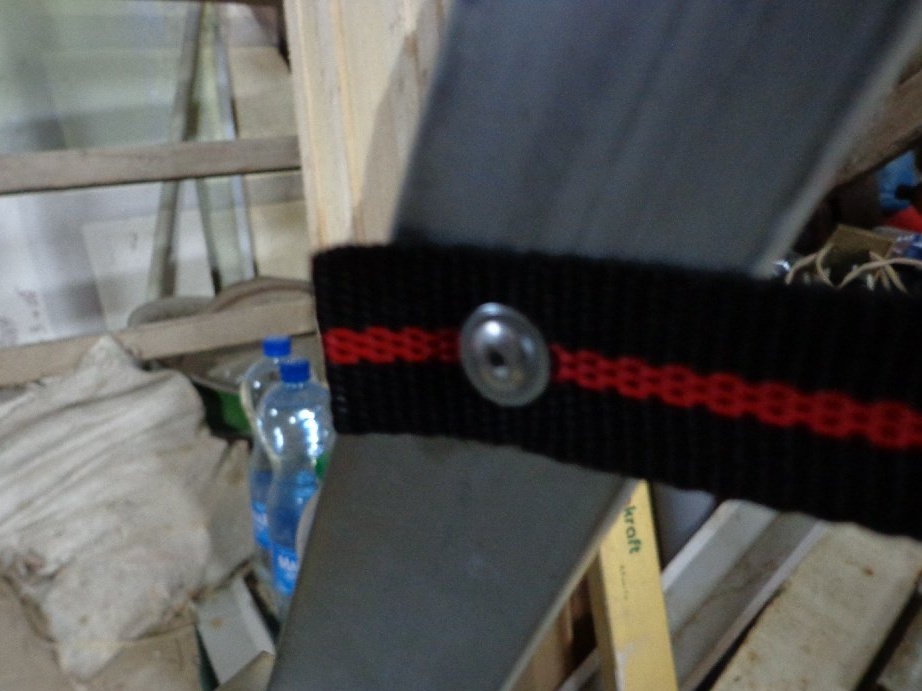
They put rivets with an ordinary hat around which the belt rubs at a time.
In this case, no exception.
I bought a hank of a strap 25 mm, a roofing felts 5 m long, 10 m roofing felts, I don’t remember. Bought with a margin for future repairs and homemade.
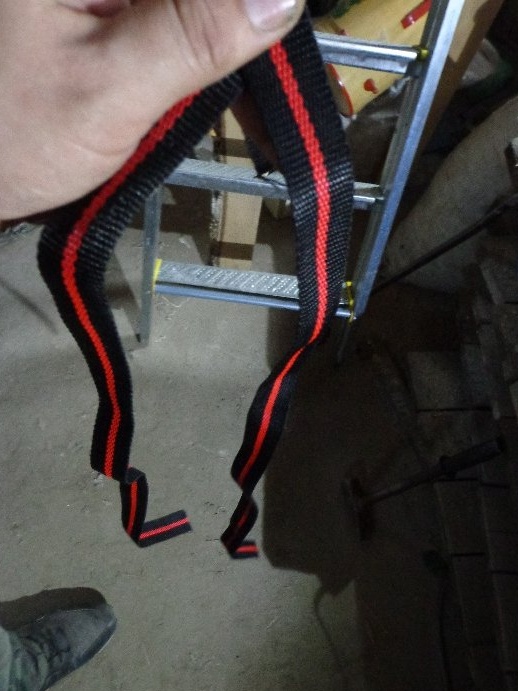
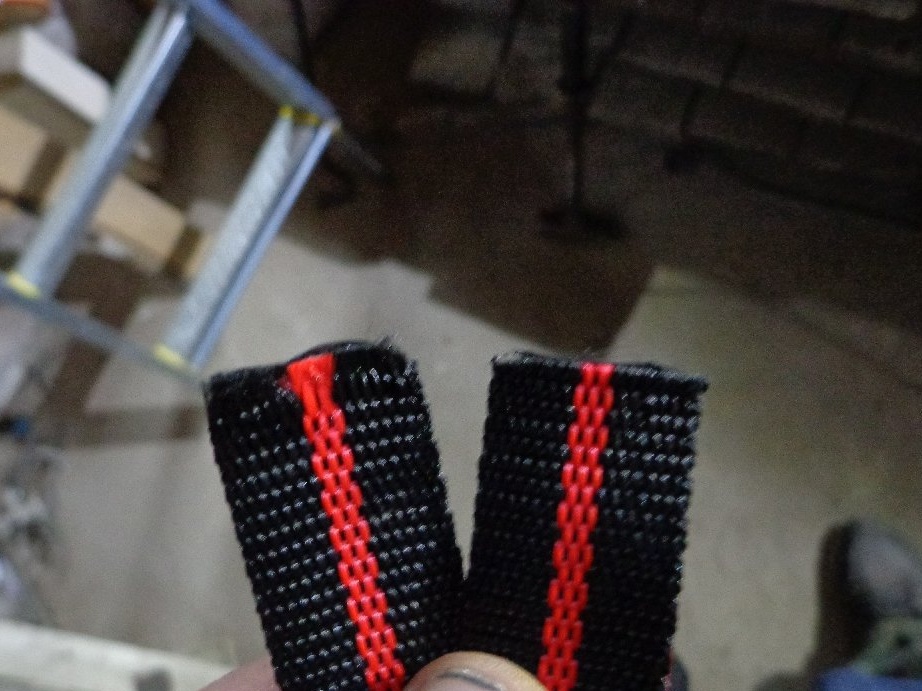
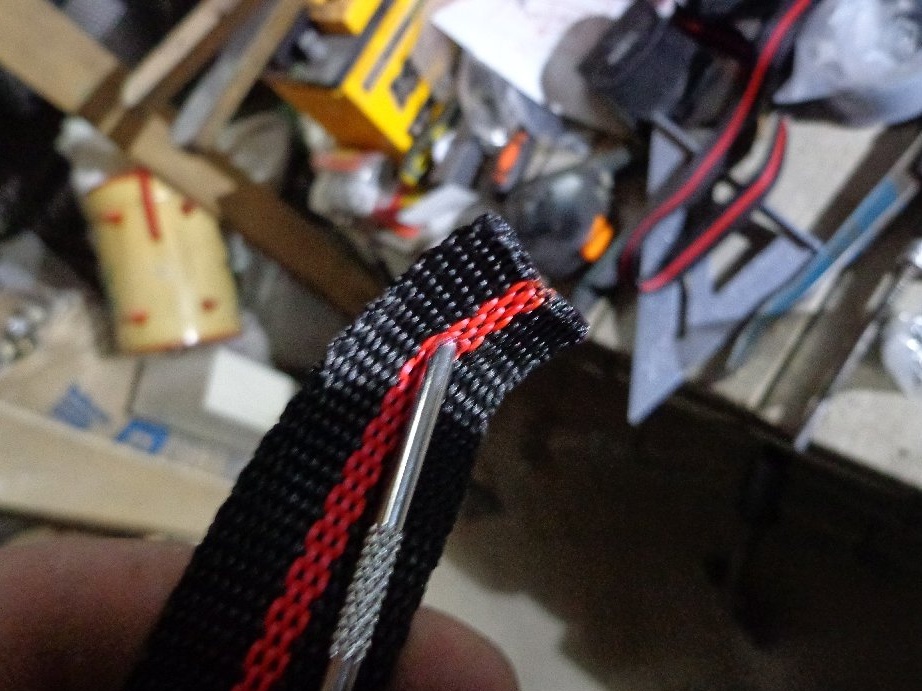
Cut off 2 pieces 78 cm long, 1.5 cm stock on each side. Shaggy edges melted with an ordinary soldering iron so that the ends do not disintegrate.

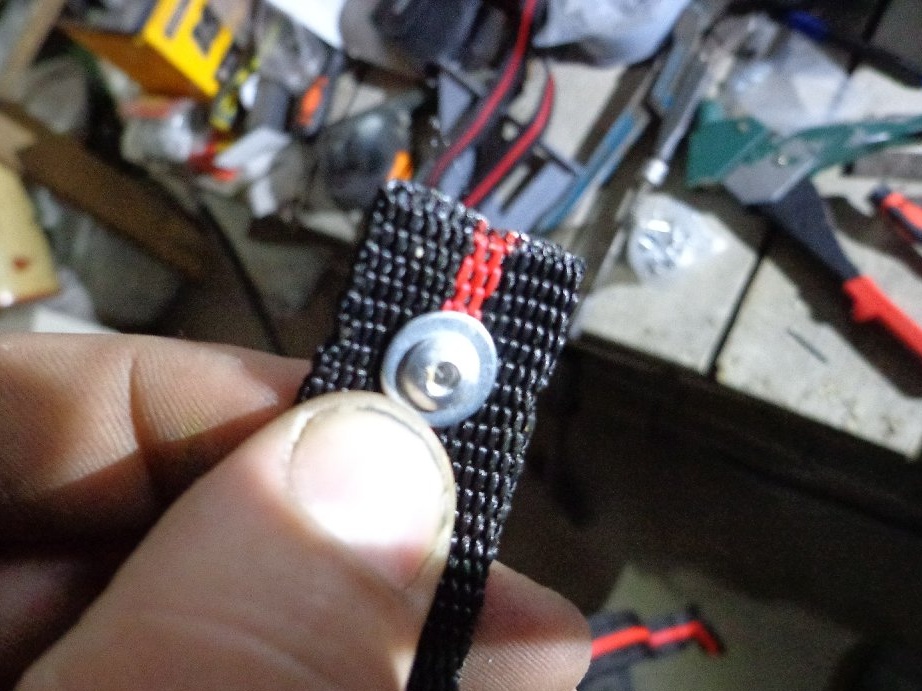
To put a rivet, he pierced with an awl in the place where the rivet would be threaded.
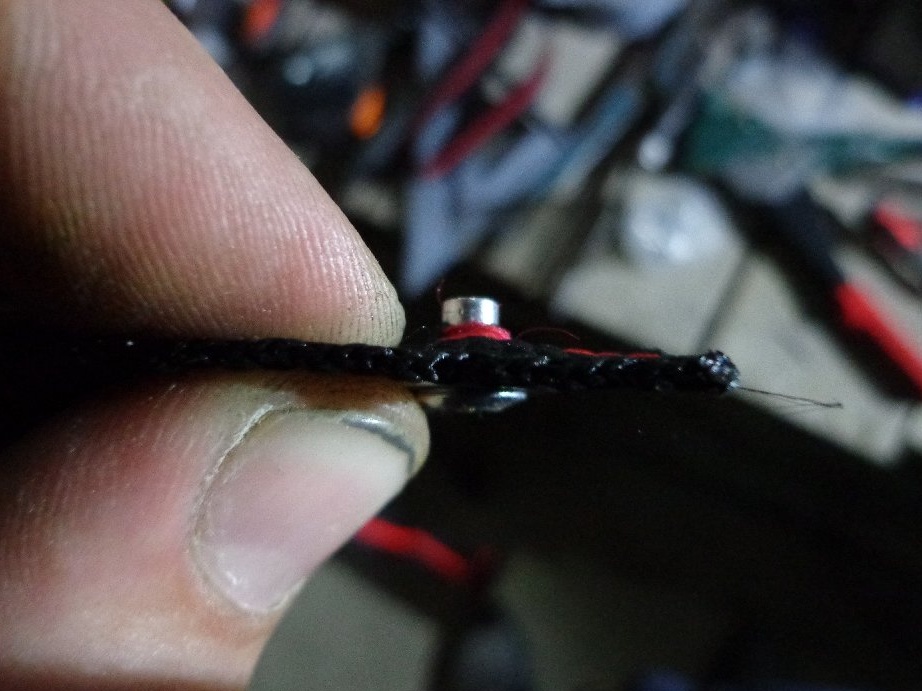
Since the riveting did not last, I had to disassemble it.
The end into which the pin enters inserted the awl and shifted the rivets to the belt, so it was much easier to turn than pushed it in assembled form. And installed in places where there were factory rivets before.

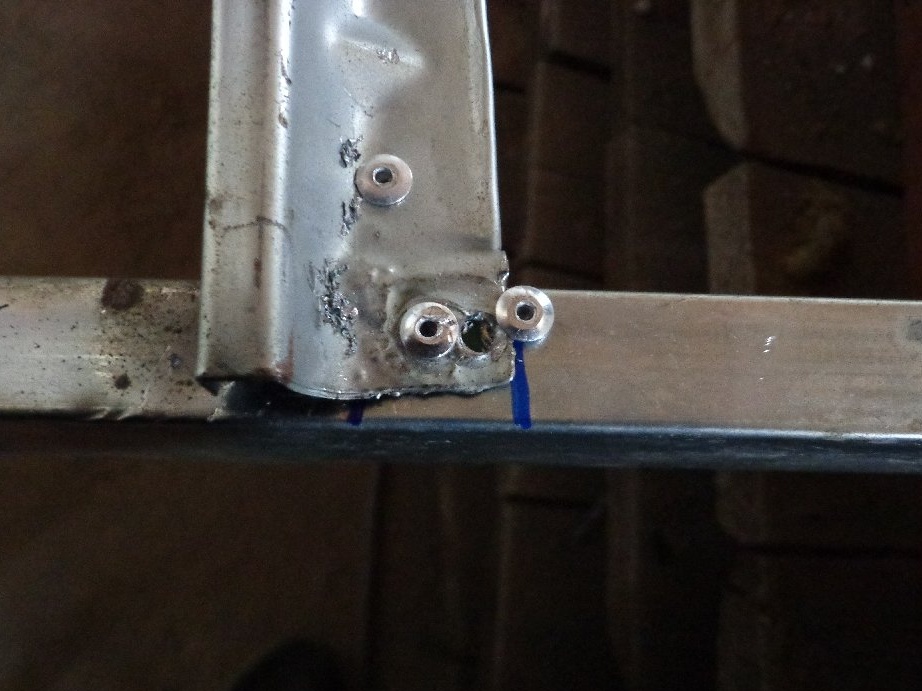
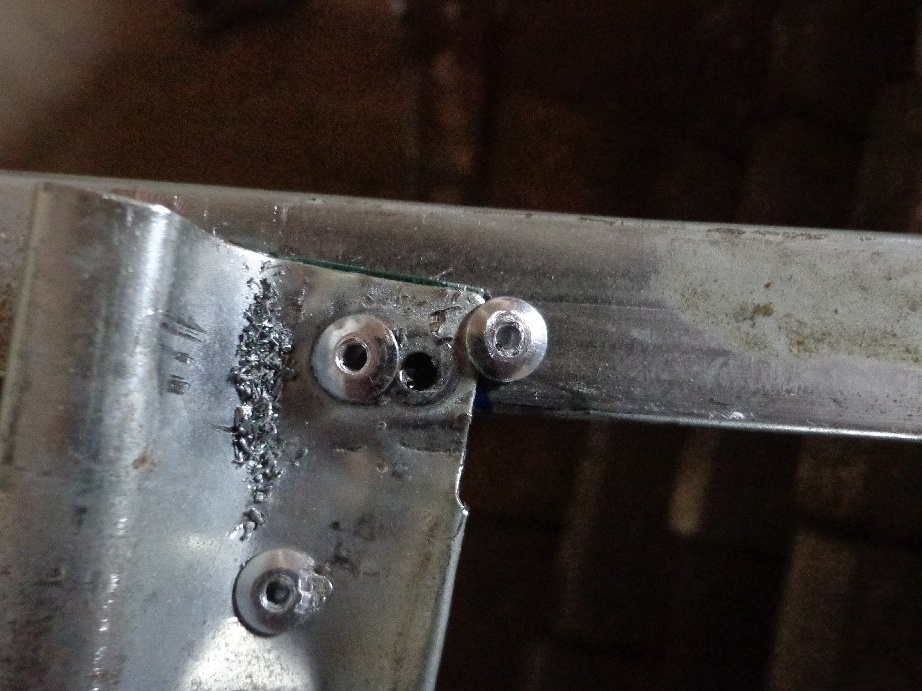
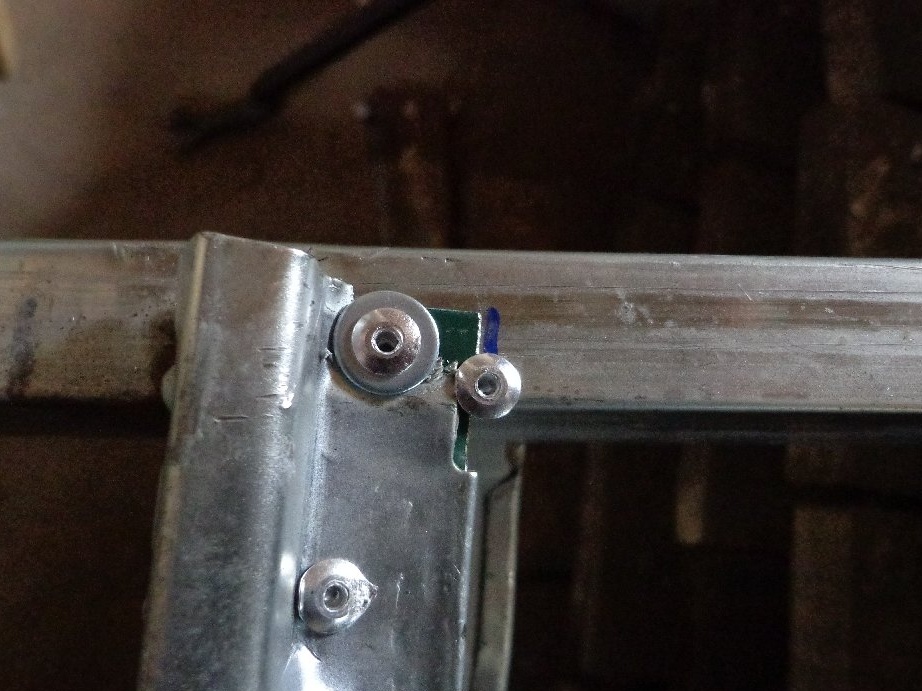
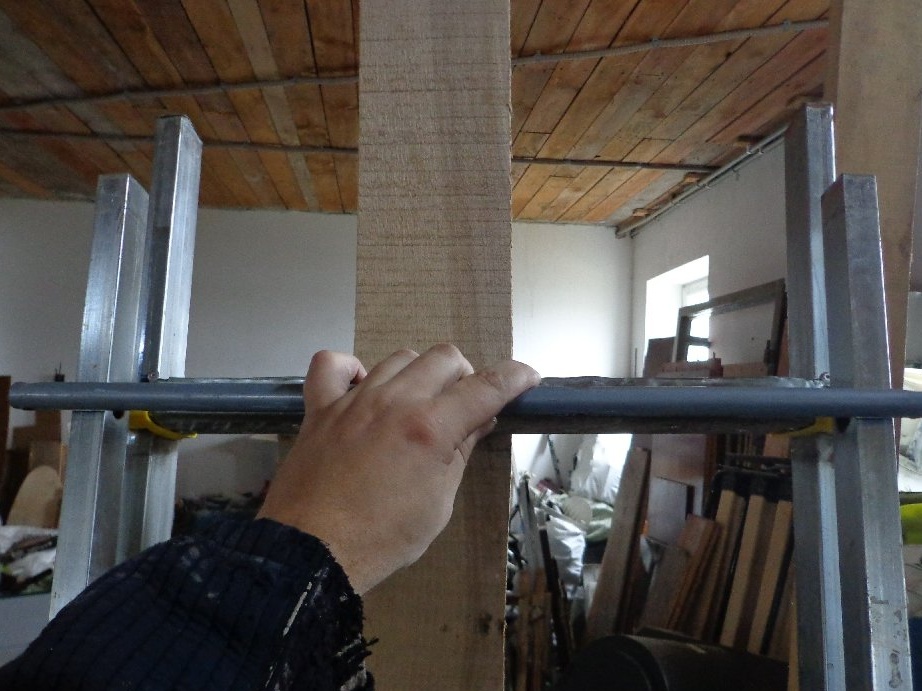
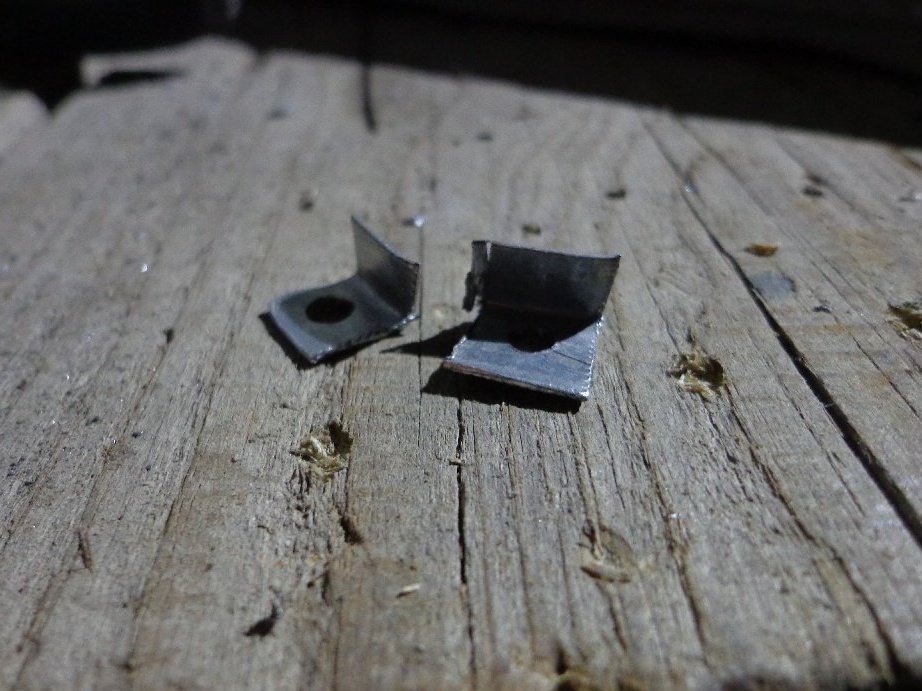
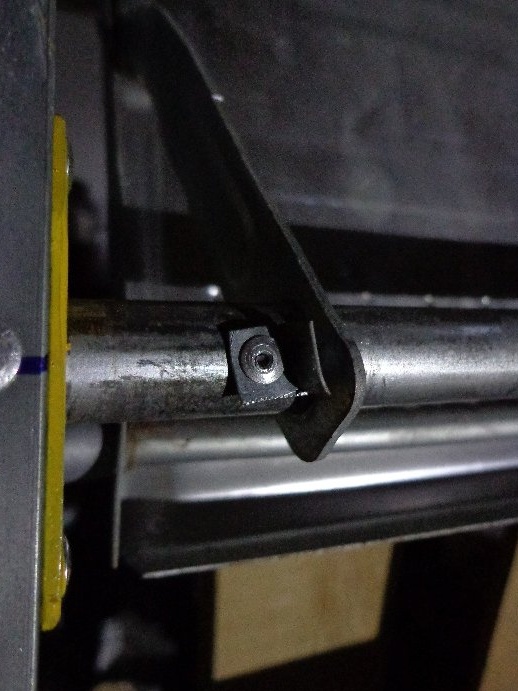
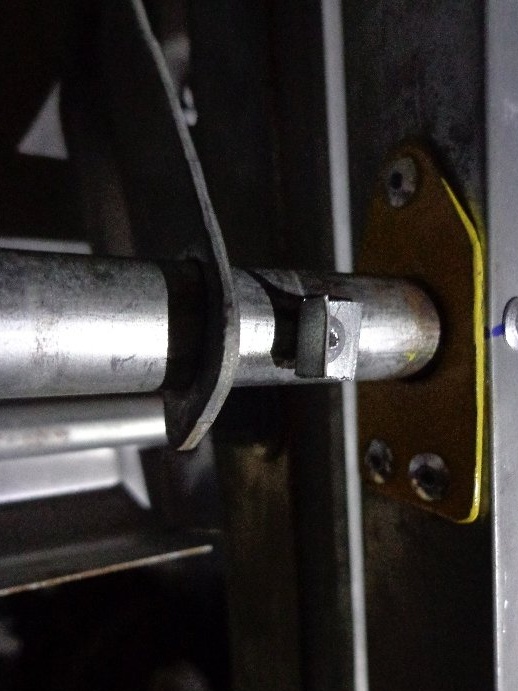
Step 4: Refinement of the record holder under the upper threshold
Everything seems to be, but when laying out the stepladder, I found that the strips under the upper threshold fall under the threshold itself, but should remain under the platform. Most stepladders have this problem regardless of manufacturer.
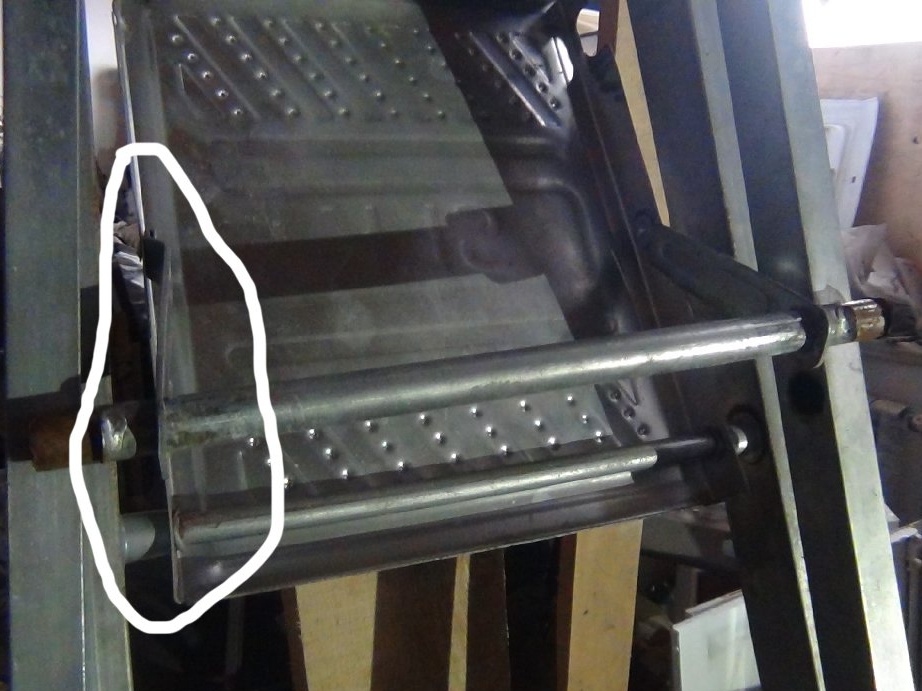
I solved the problem. I cut two small corners from a piece of tin. Drilled holes with a drill for metal 3.5 mm. And marked in what place these emphasis will be located. Put on rivets 3.2x6, the whole problem.

Now that's all. You can use a stepladder.
P.S .: Is it worth repairing
Many will think that it’s easier to buy a new one, maybe you are right, but no one can guarantee that the same problems will not happen with the new one as with my stepladder.
Those two ladders that I wrote about earlier, I changed them.
I returned the small one twice on the check within a month, different problems arose until I got the one at the moment. During the return, each time I chose a different manufacturer.
The one that is high, changed it 1 time, the first time a problem arose, and this is a bent threshold! And bent so that he pulled his legs. As soon as I returned the money, I immediately ordered, by the way, our manufacturer, almost 1K more expensive, and did not lose, it turned out to be strong. I have it for 5-7 years already, I rarely use it, but it can withstand even heavy instruments.
If you have similar problems, then repair or throw away this is everyone’s business.
In this article I shared, one might say, the author’s approach to repair.
Thank you for reading! All success :)