Good day to all anglers and lovers homemade. In this article I will talk about how to make an underwater camera for fishing.
For assembly we need:
Materials
1. Camera module (in my case, SONY IMX291)
2. 2.8mm CS camera lens and mount
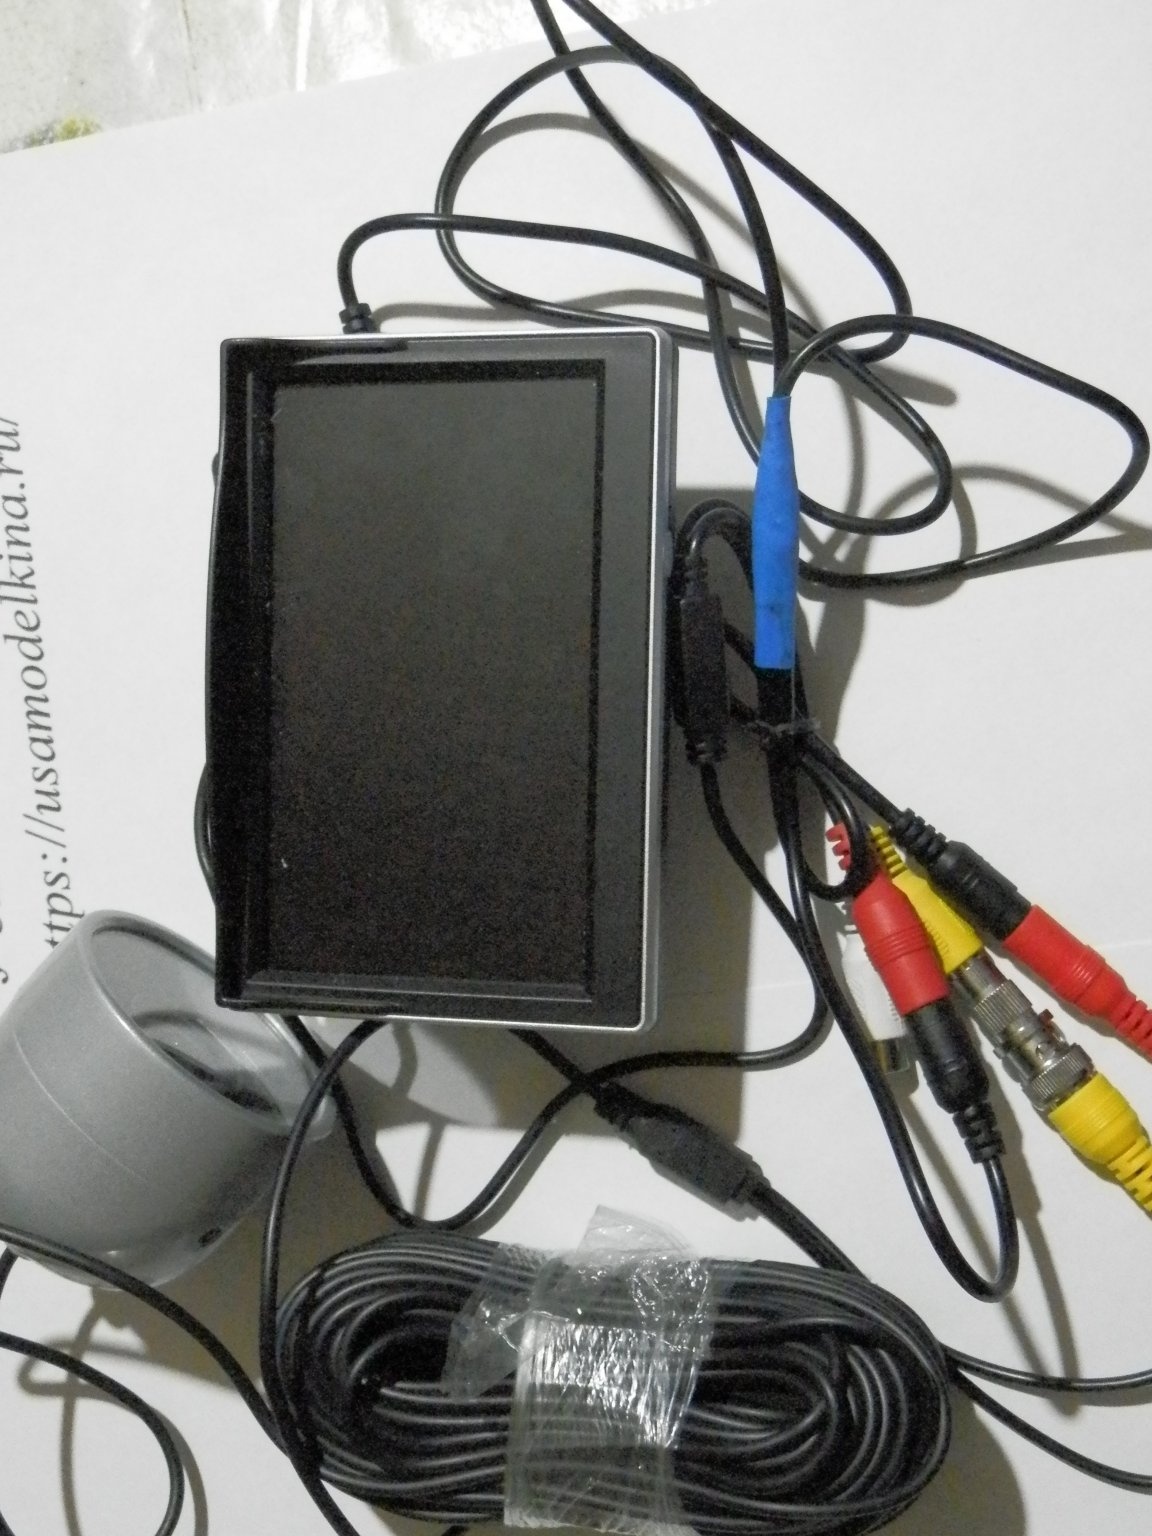
3. Monitor (I chose 5 inch)
4. Wire
5. The 12V battery capacity is preferably larger (I have 6800mah)
6. Housing for the camera
7. Sealant
8. Electrical tape
9. Shrink
10. Hot melt adhesive
11. Solder
12. Flux
Instruments
1. Soldering iron
2. Glue gun
3. Nippers
4. The knife
5. Pliers
Step 1 Selection of components
Before you assemble the camera, you need to determine the conditions for fishing and proceed with them to select accessories. For example, if fishing is supposed to be at great depths, then LED backlighting is needed. Why LED? Because the infrared light illuminates the haze and the picture becomes even more illegible than with the backlight. If, on the contrary, the depth is small, then you should not bother with backlighting, this significantly reduces the cost of the camera. The size of the monitor also depends on the conditions of the pond. If you plan to catch fish, it is better to take a 5-inch monitor that fits easily in your pocket. If you are going to catch without a long search, the big 7 inch monitor will be better. The battery is selected based on the estimated operating time. Now let's move on to the camera modules with their many options, but I will consider the main ones:

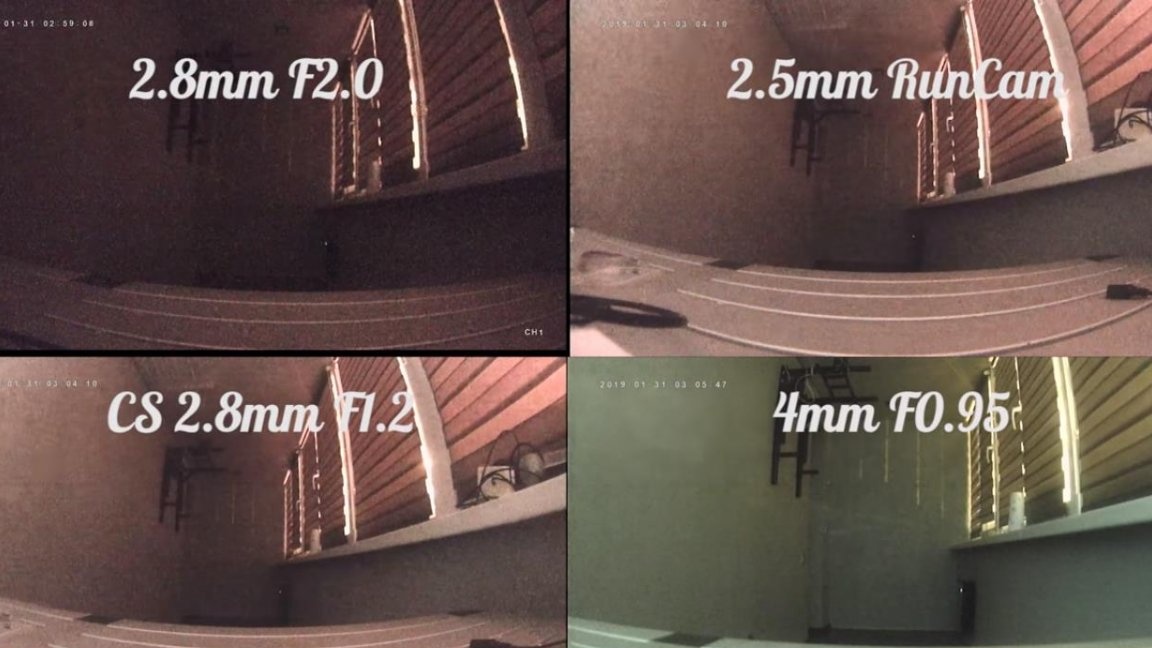
It can be seen from the photo that the SONY IMX291 module has the best quality, so I chose it, it remains to choose a lens. The choice fell on the CS 2.8 lens because it has a wide viewing angle. I will give a comparison from another site.
Further, depending on the size of the camera module and lens, a housing is selected.
Step 2 camera eye assembly
We cut the wire, put a clamping nut and a rubber seal on it with a cone to the nut, and insert it into the body. We clean the wire and solder according to the scheme i.e. black wire with black, red with red, yellow with yellow.
Next, connect the soldered connector to the camera module, install the module into the case by screwing it in (the three-pin connector is the bottom of the module). We lubricate the thread of the bolt, the wire and the sealant with a sealant, insert the seal and tighten the nut until it stops, remove the excess sealant.
Step 3 final assembly
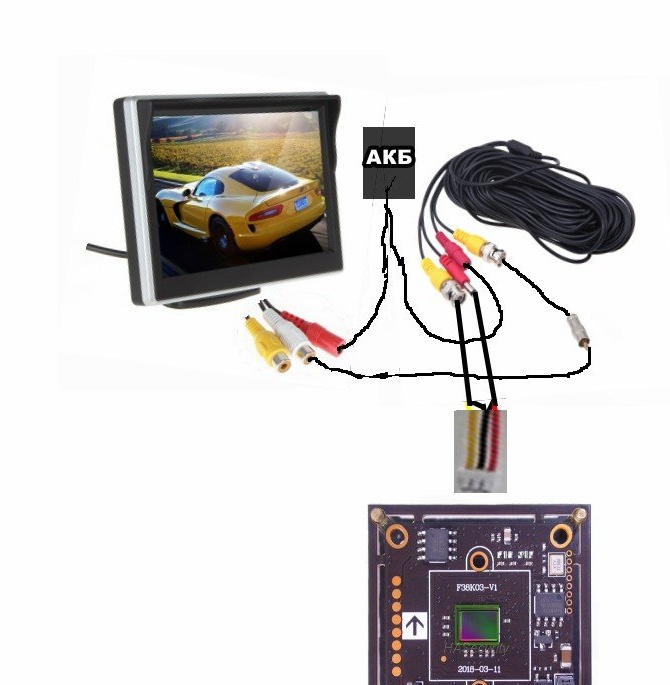
I soldered the power splitter. (You could directly solder the wire coming from the camera’s eye to the monitor and everything will work, but I left the option to change the camera’s eye or use the monitor separately) Next, connect all the connections according to the diagram.
As a result, we got an underwater camera for fishing which has a cost much lower than that of expensive cameras. I wish you success in repeating homemade work!