
Surely many of you had an old dream to get a small incubator, and bring the chicks inhome conditions.
In this article, the author of the Imaginative Guy YouTube channel will tell you how he made a simple model with heating and automatic temperature control.
This homemade product is very simple to manufacture, and quite cheap. Even a schoolboy can handle it.
Materials
- Plastic bottles, egg tray
— Digital Thermostat 12V
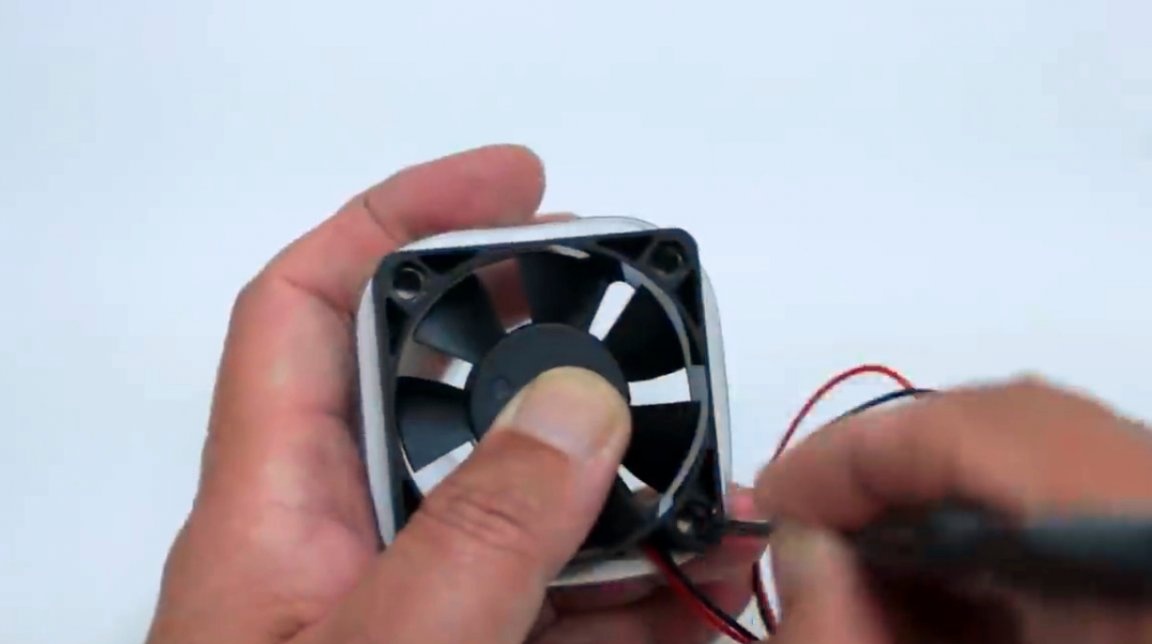
— 12v fan
- White LED strip
- Power supply 12 V
- syringe
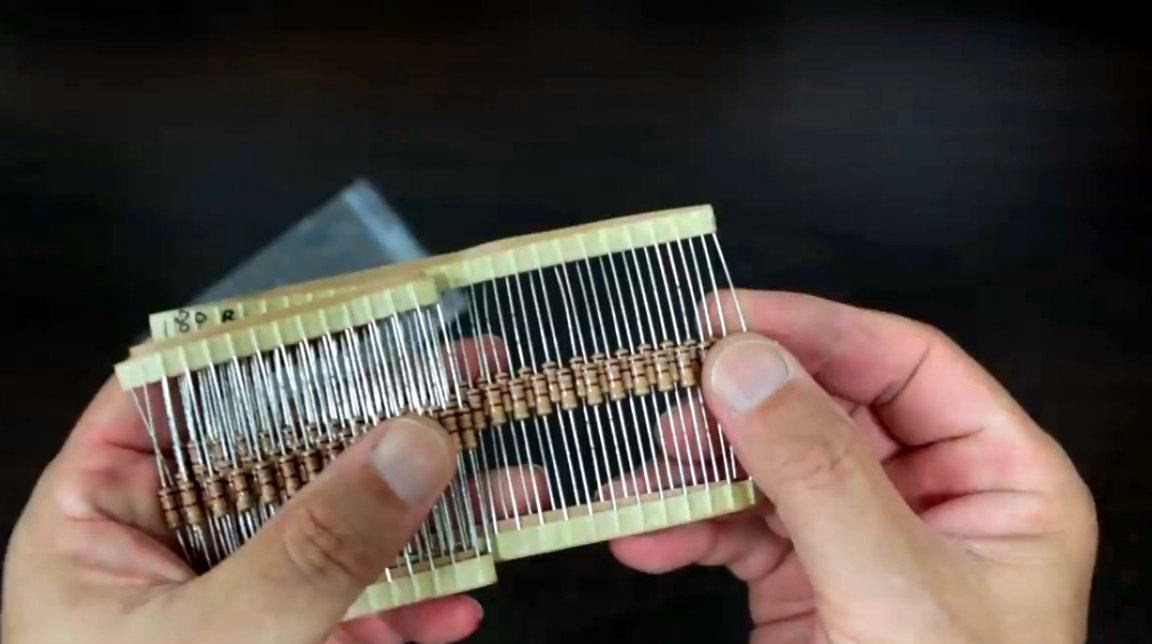
- Resistors 180 Ohms 1-2 W
- Copper wire, screws, M2 nuts, heat shrink tube
- Solder, flux, second glue
- Sandpaper.
Instruments, used by the author.
— Screwdriver
— Mill ballerina on wood and drywall 30 - 120 mm
- Hacksaw, wire cutters, screwdriver
— Construction hair dryer
— Soldering iron
- Marker, knife, pliers, scissors.
Manufacturing process.
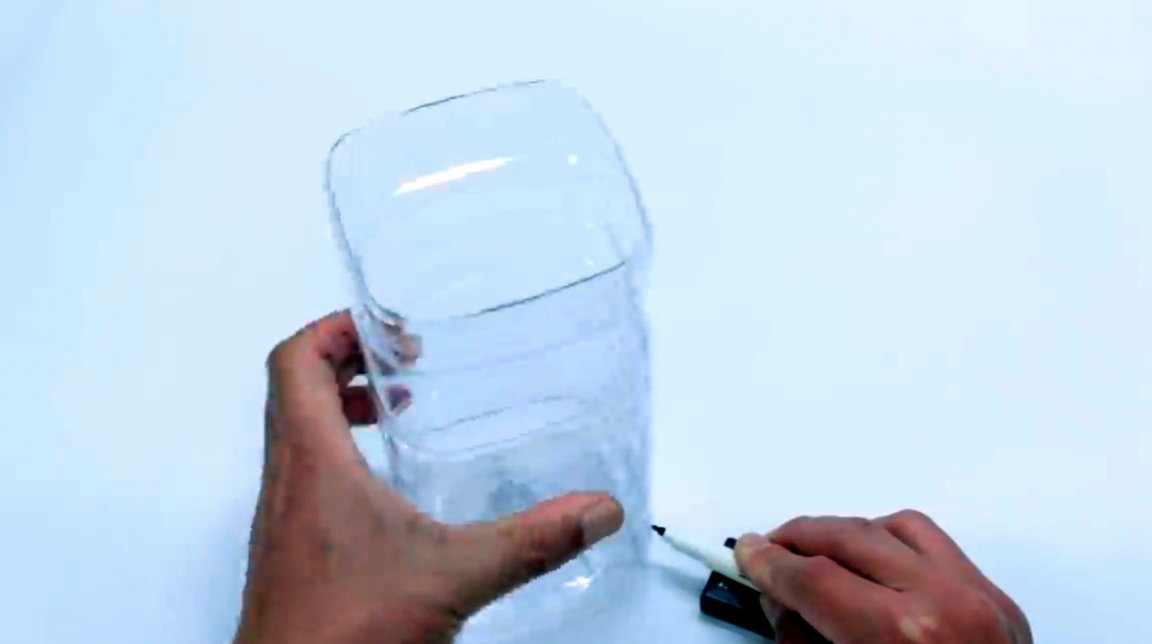
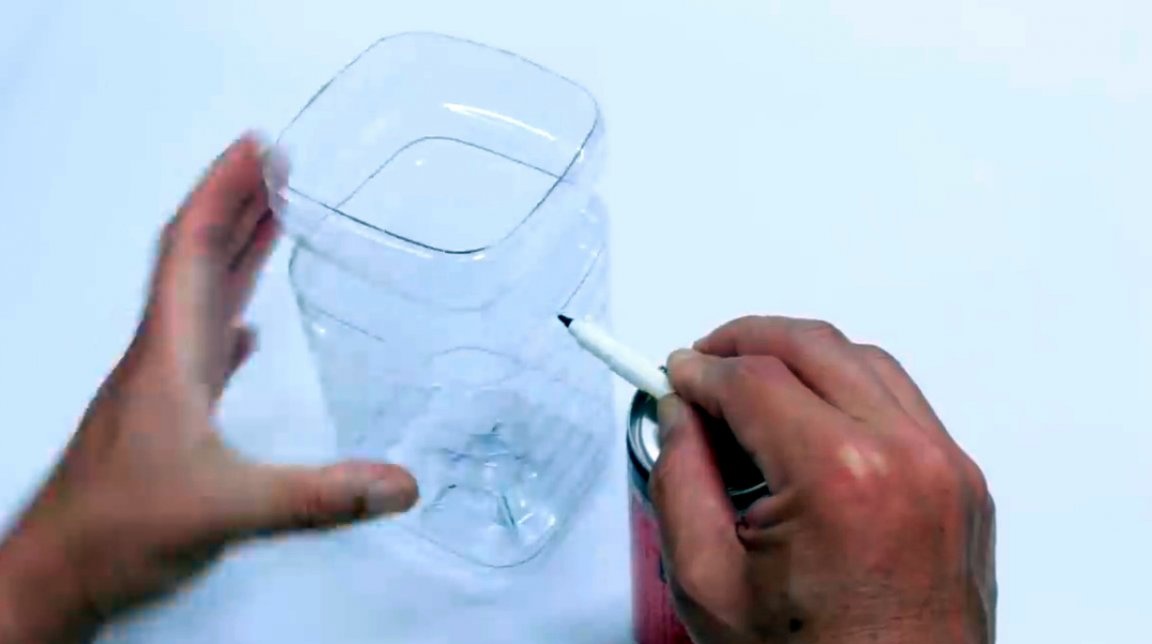
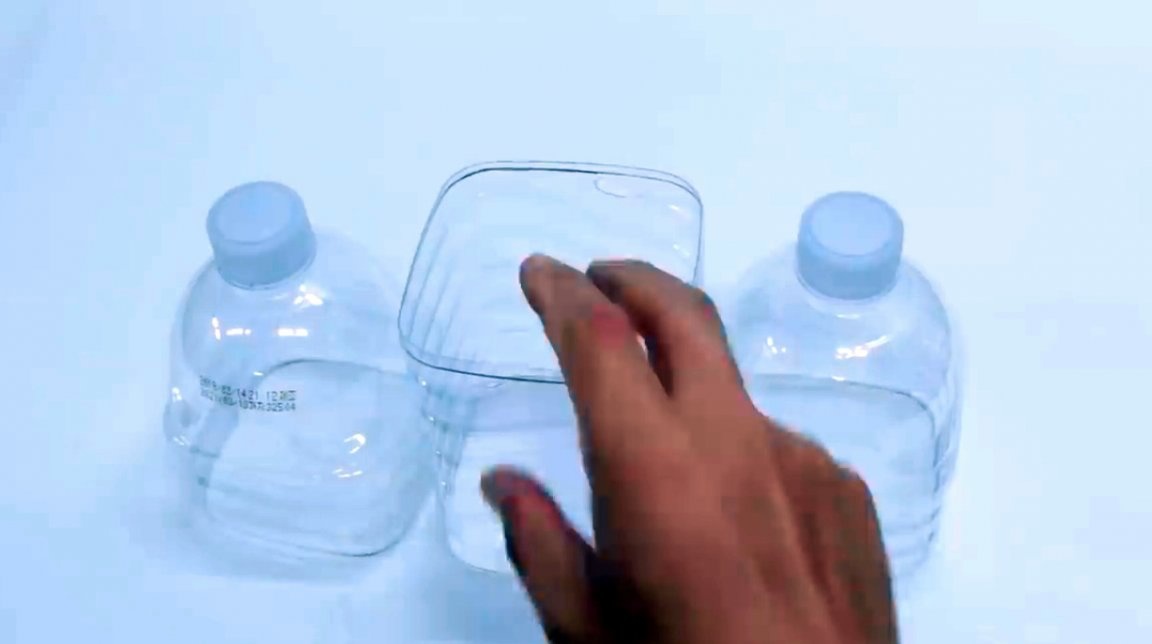
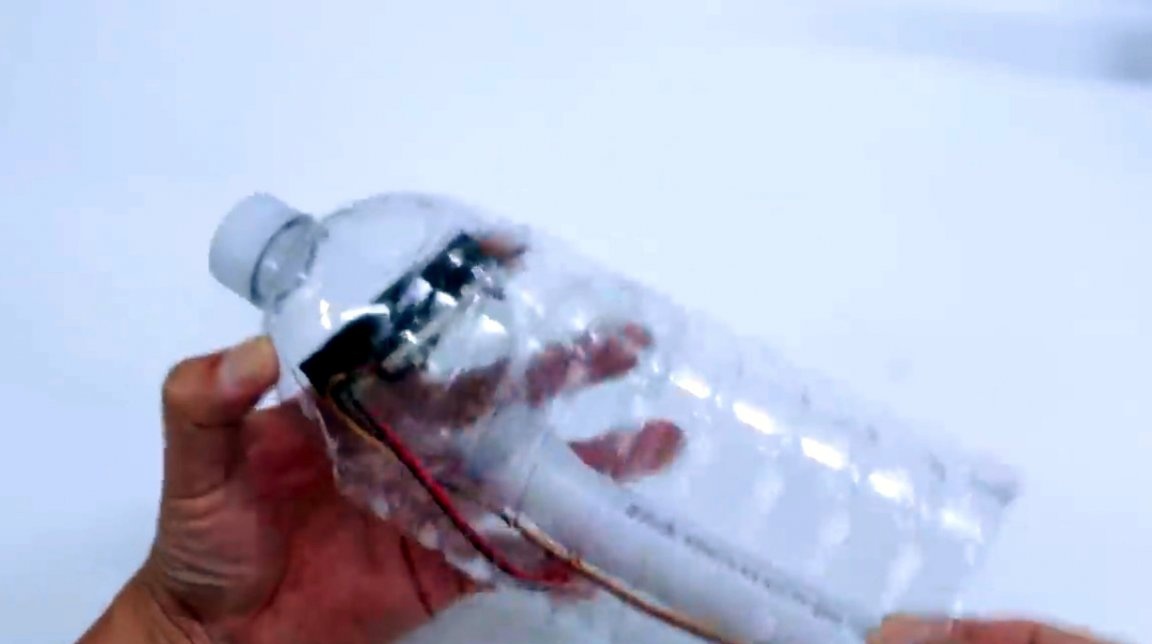
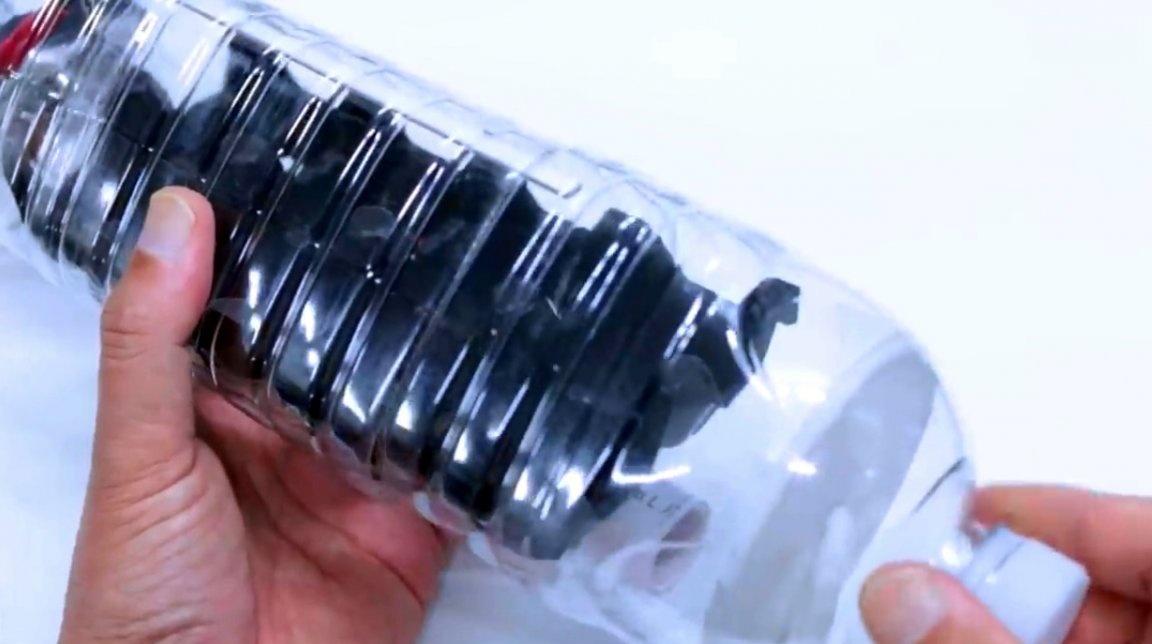
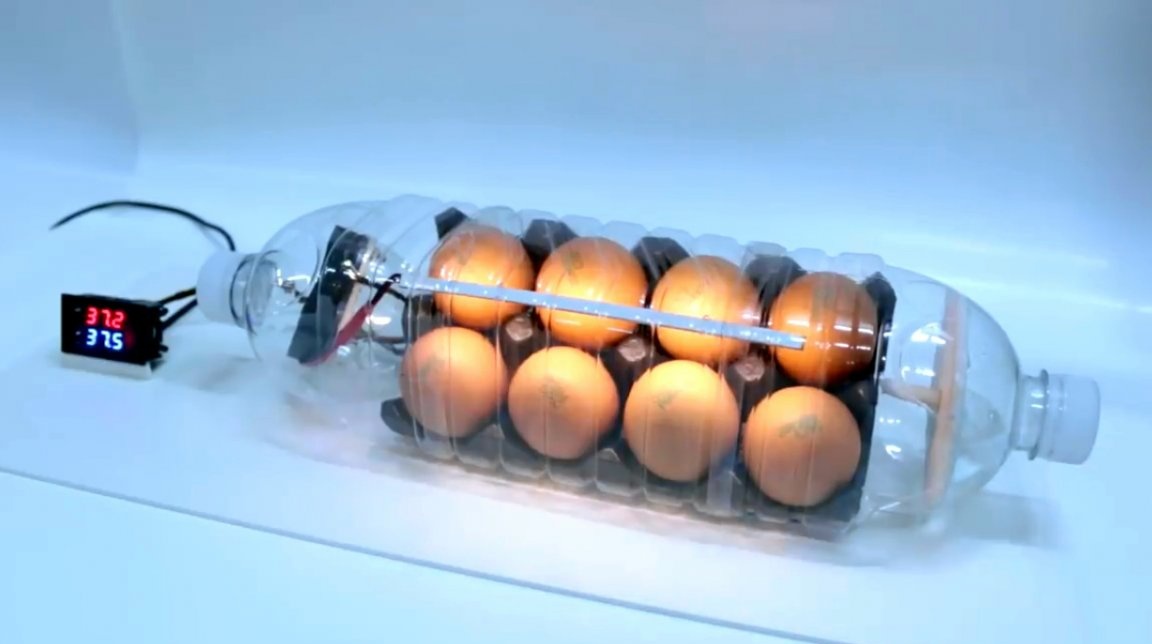
So, as a case for the incubator, the master chose the most affordable material - ordinary plastic bottles. He cut them in size, and assembled the outer part of the hull.
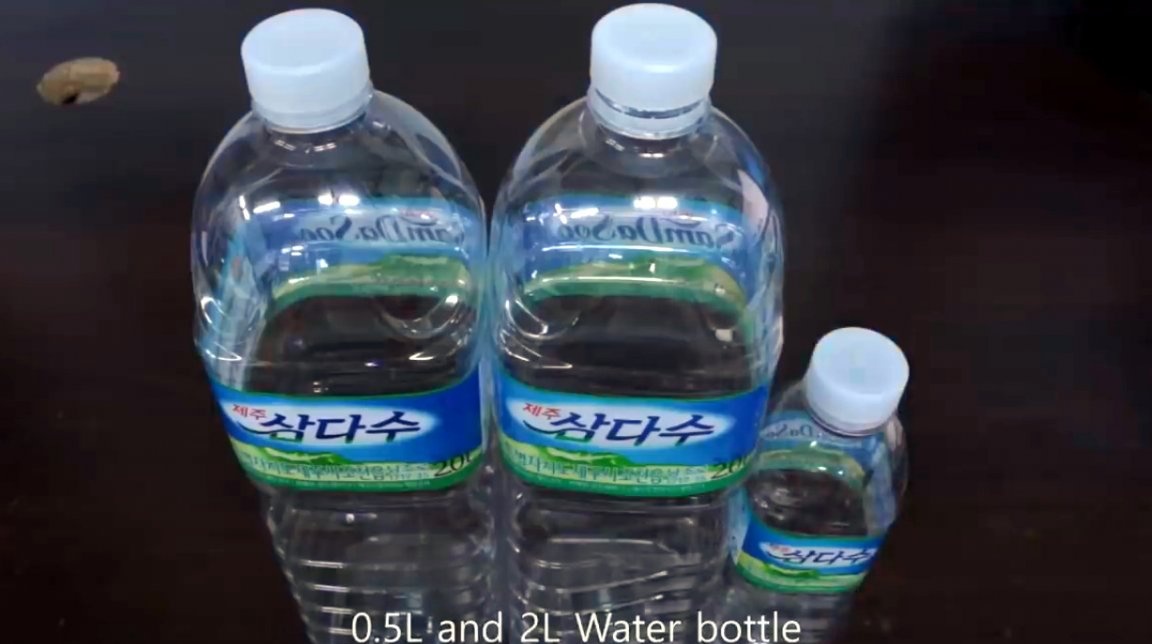


For the heater you need a neck from a bottle of 0.5 liters.
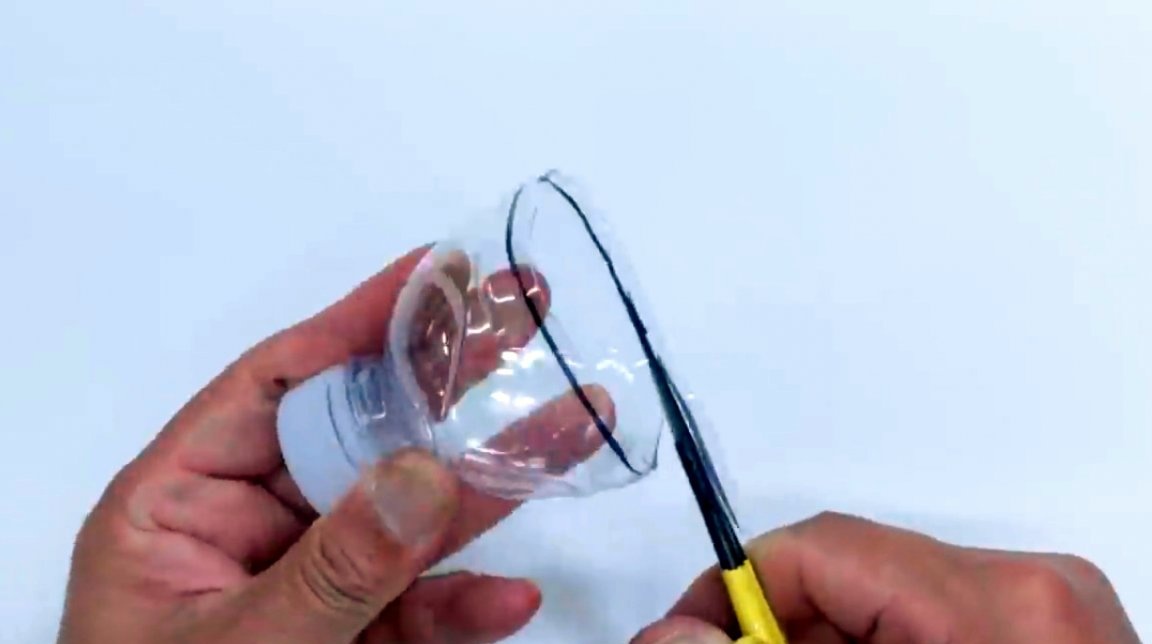

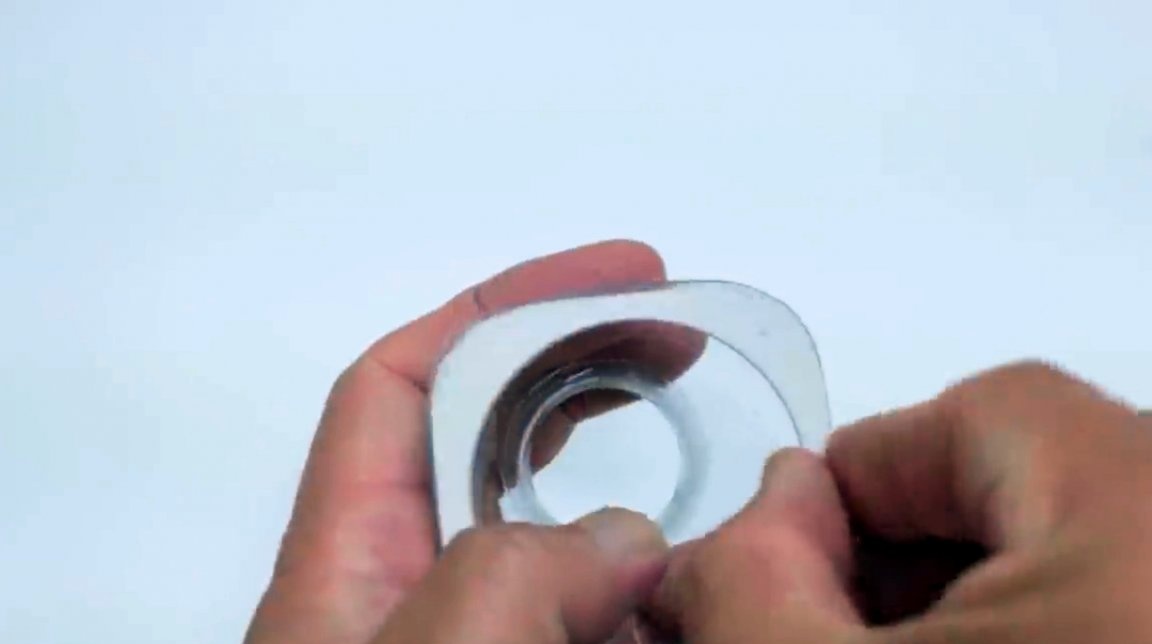
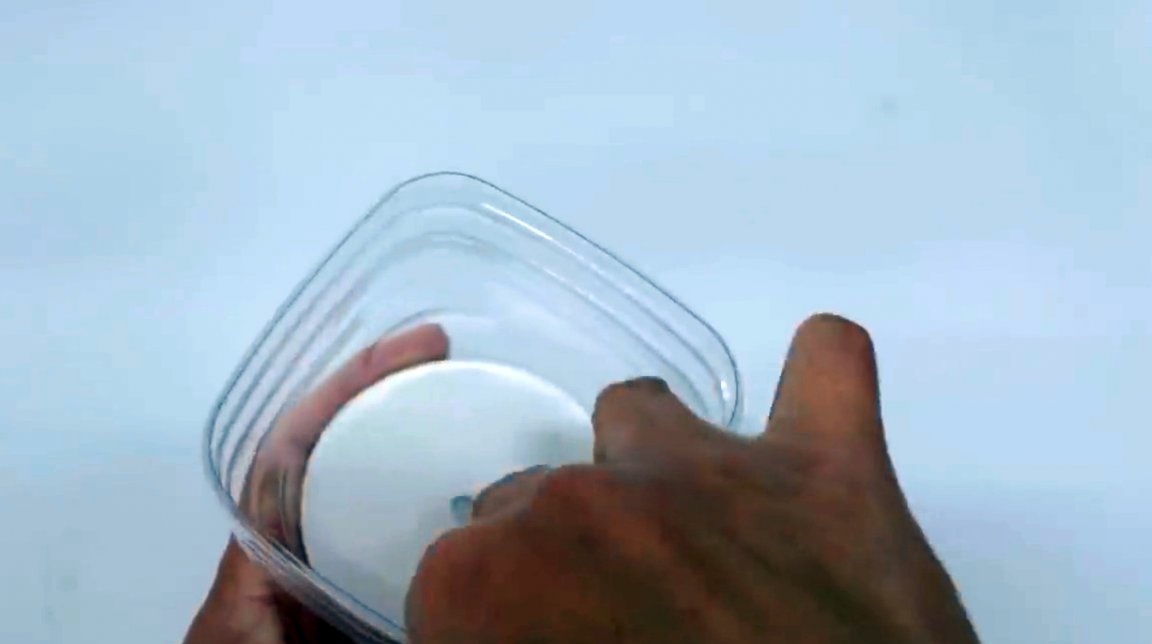
Having marked the external contour of the bell on the sheet polystyrene, I cut a lid from it.
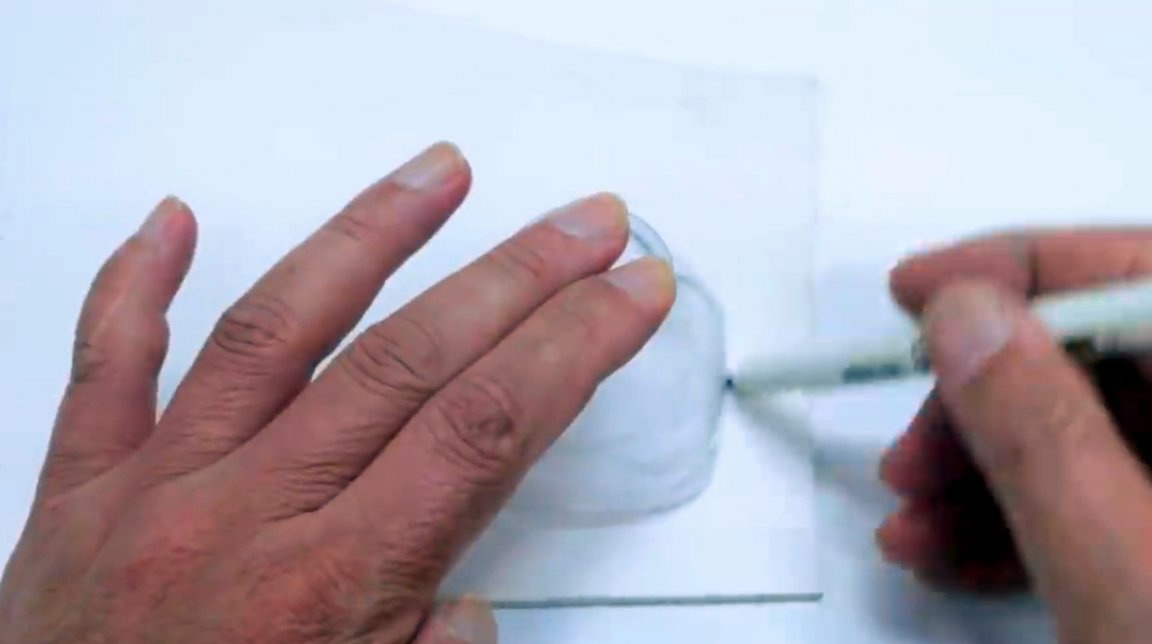

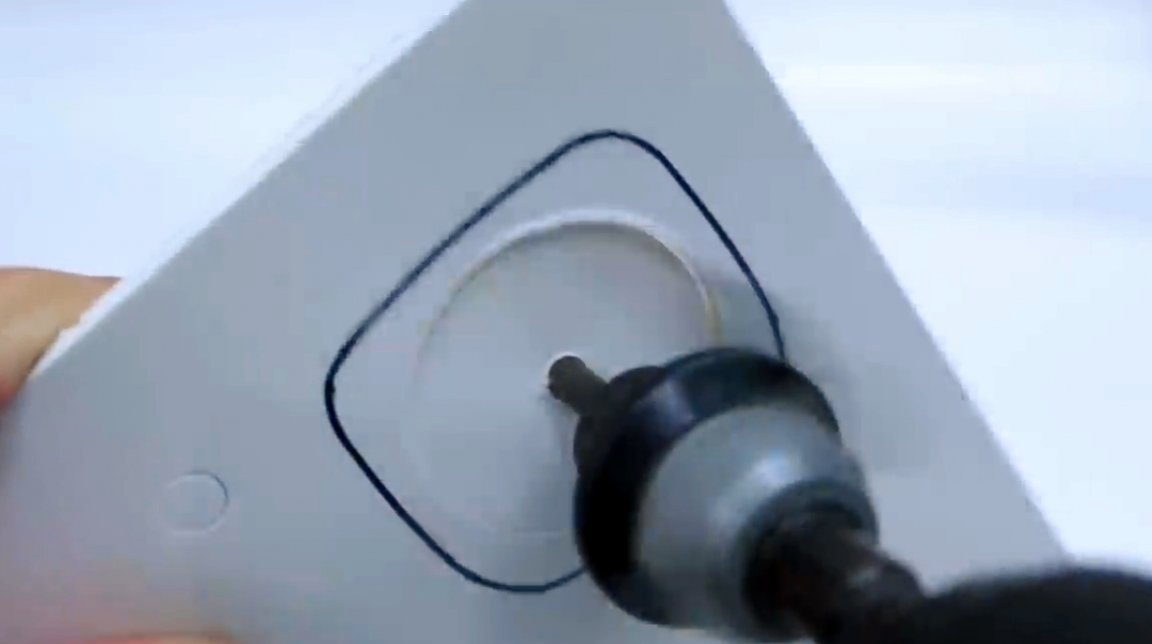
Then, holes for mounting screws are drilled in the cover.

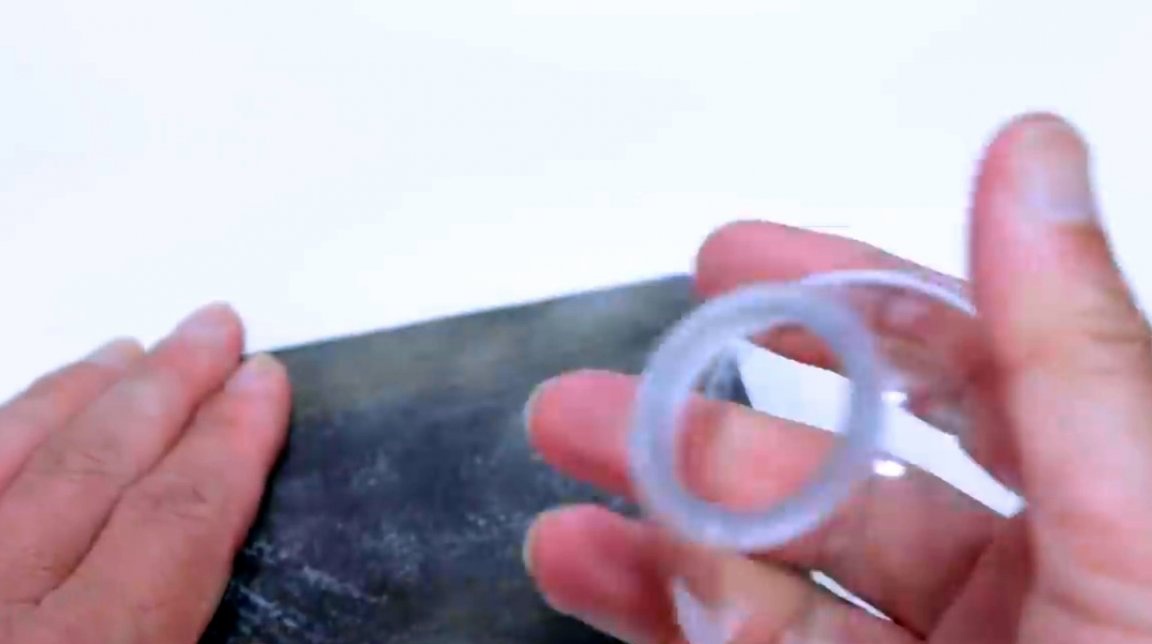
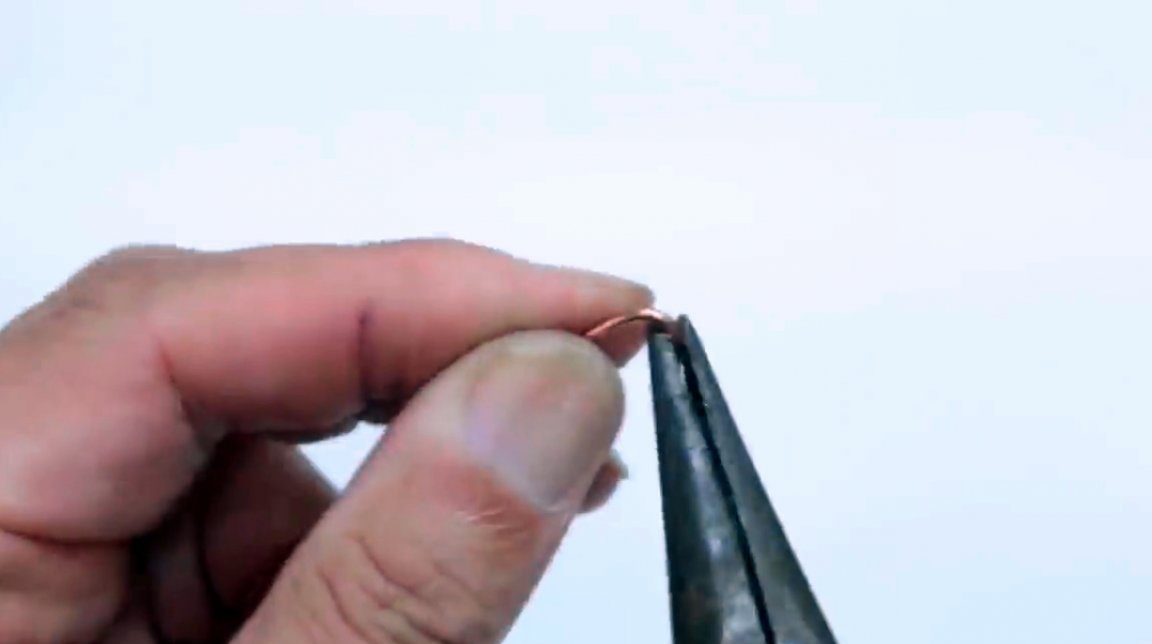
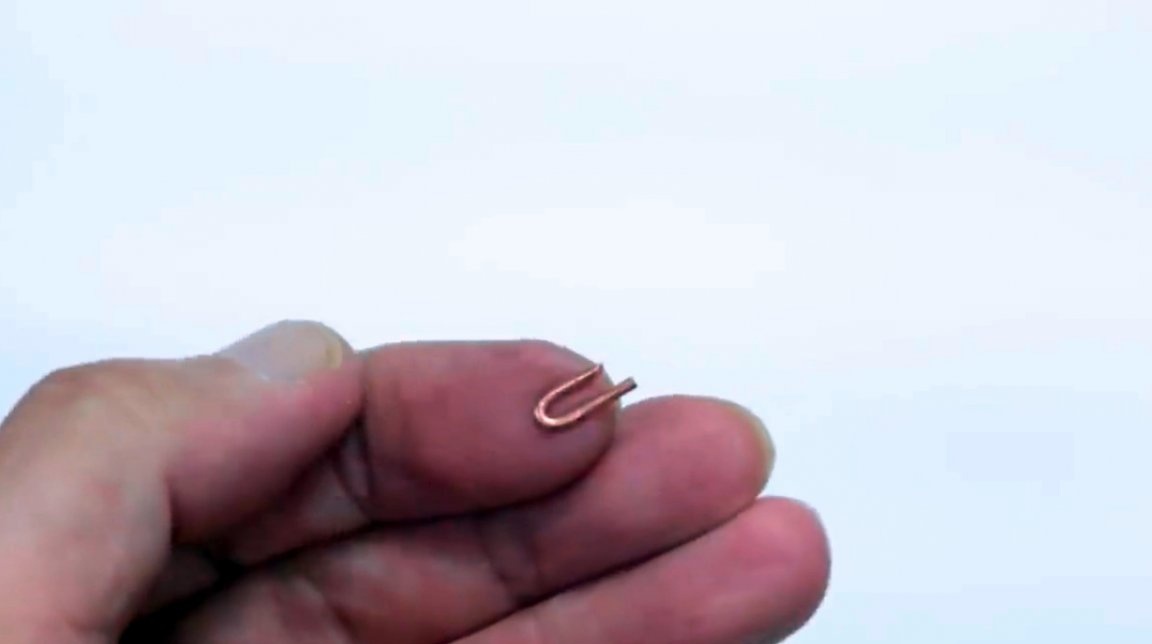
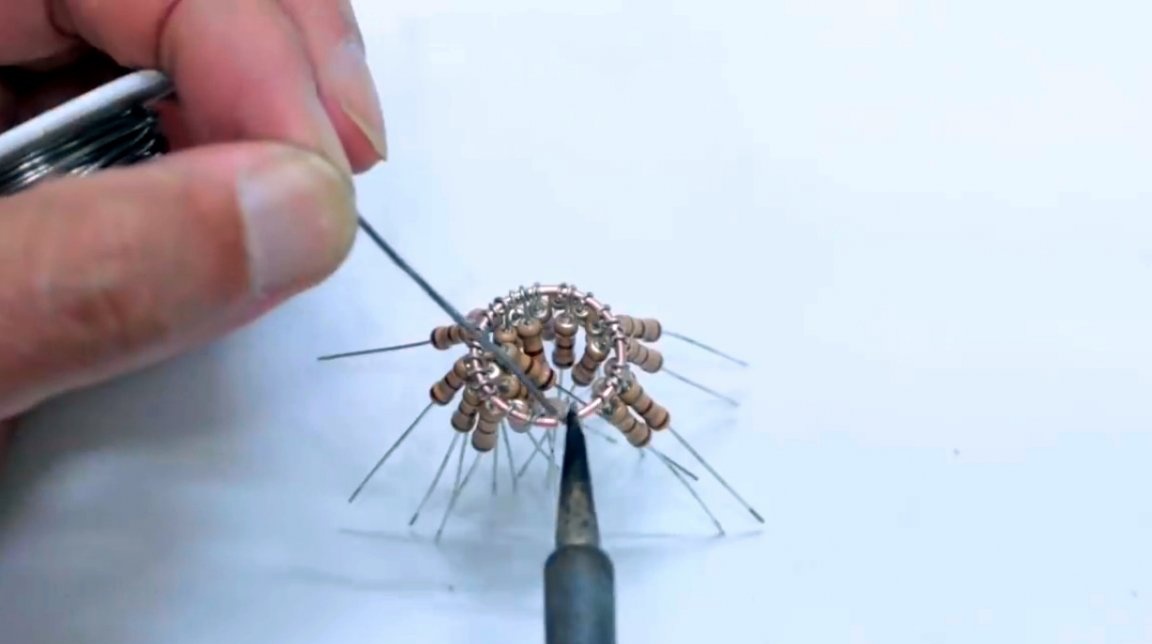
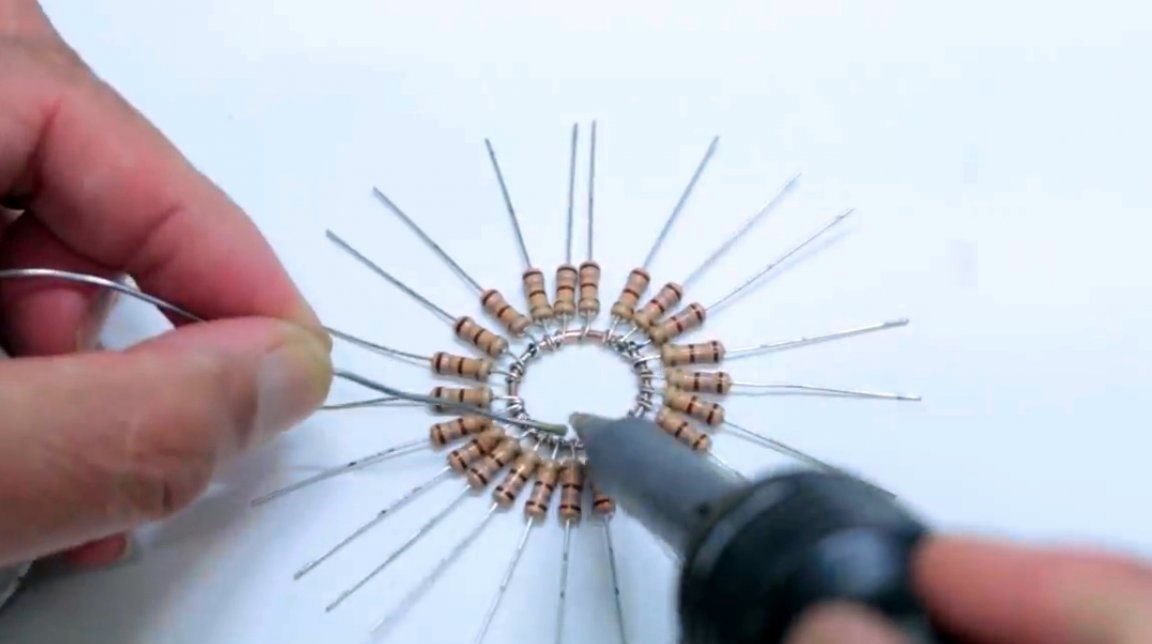
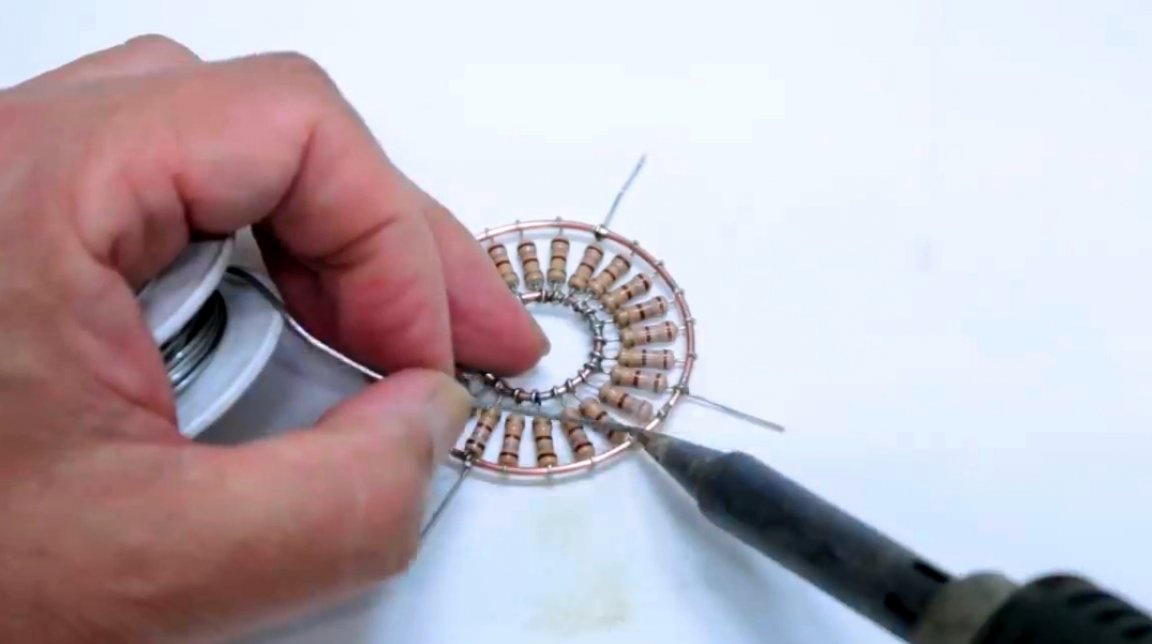
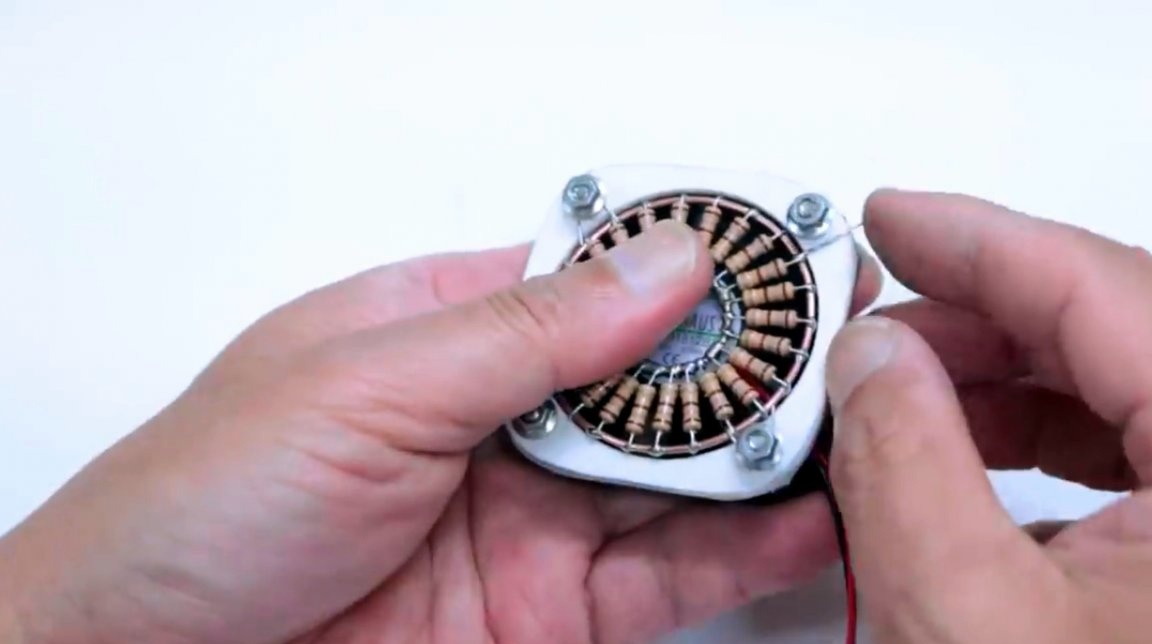
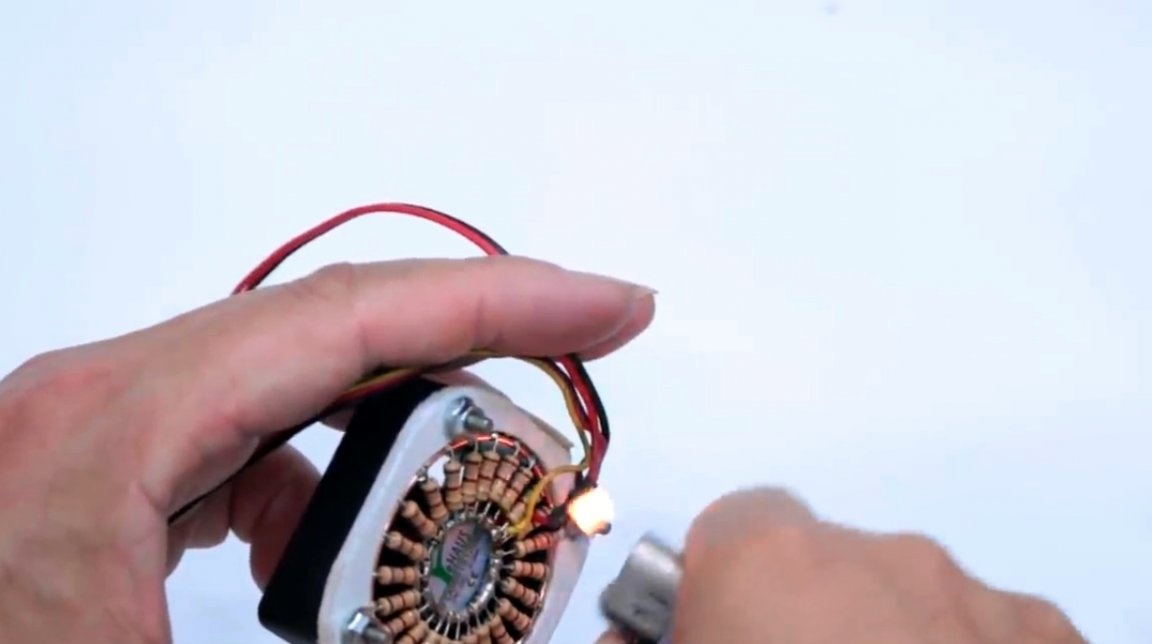
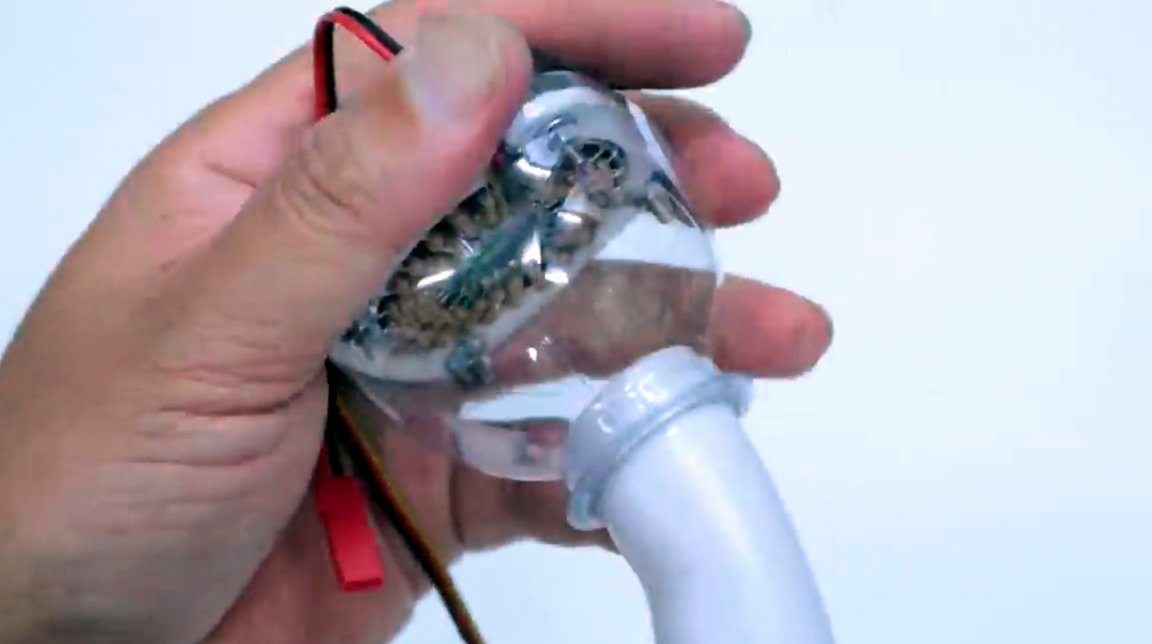
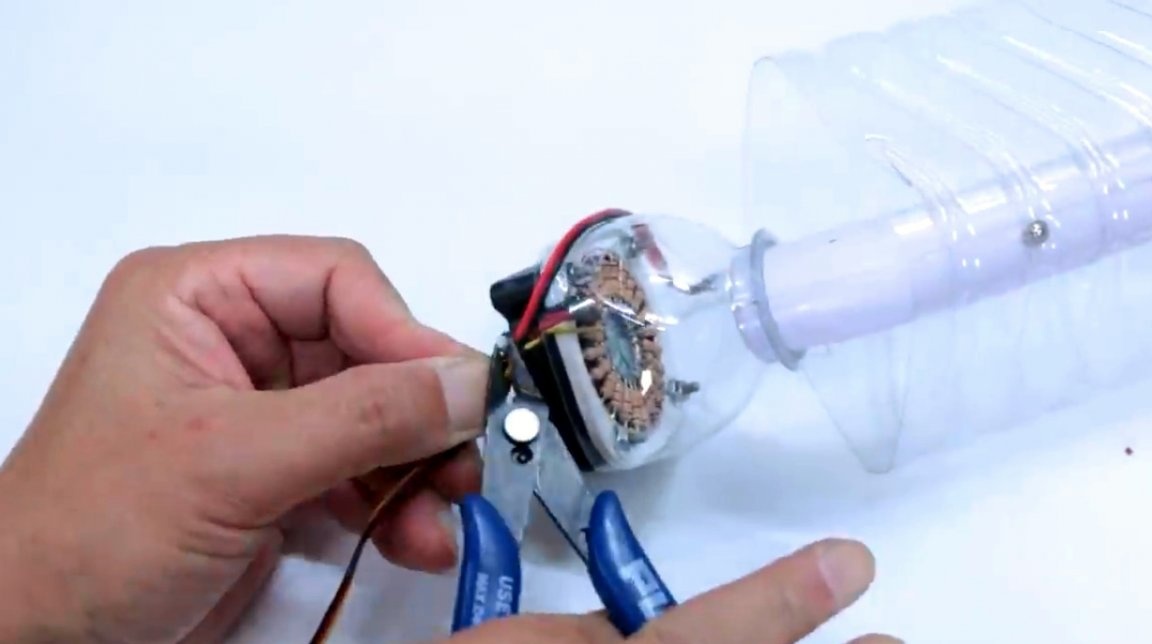
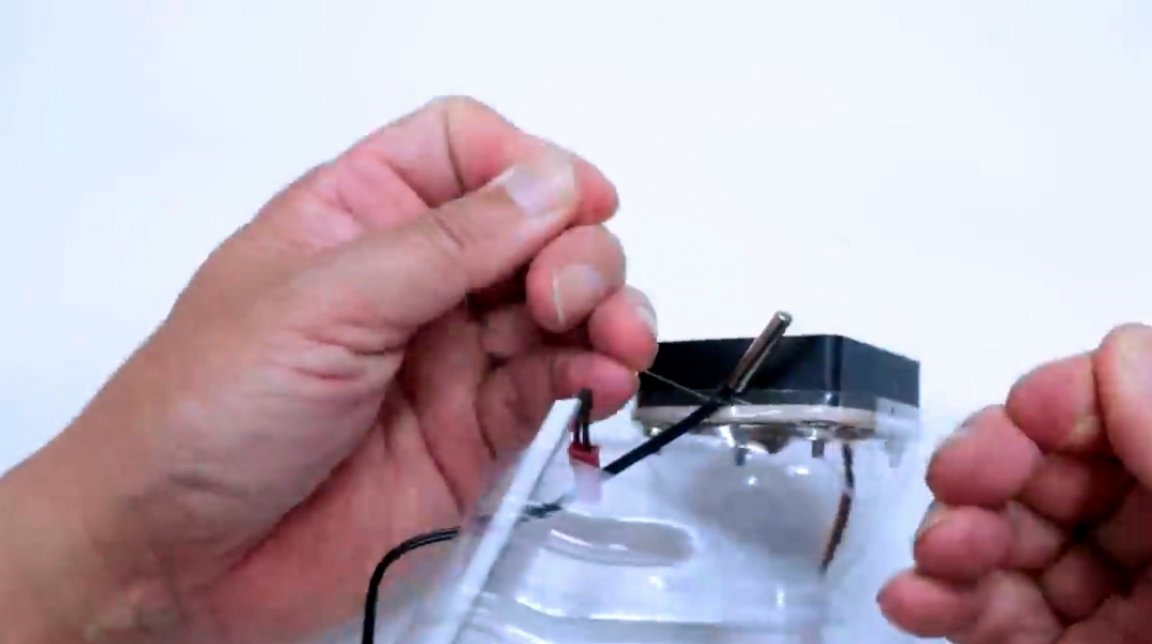
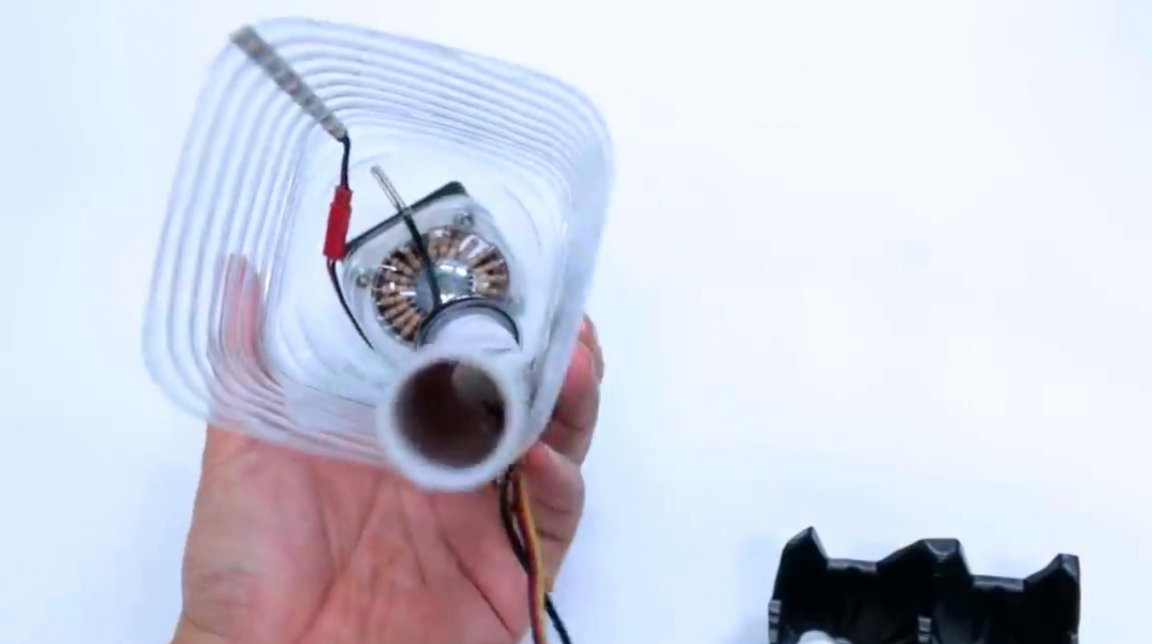
The heater itself will be made of pieces of copper wire, two rings must be made from it.

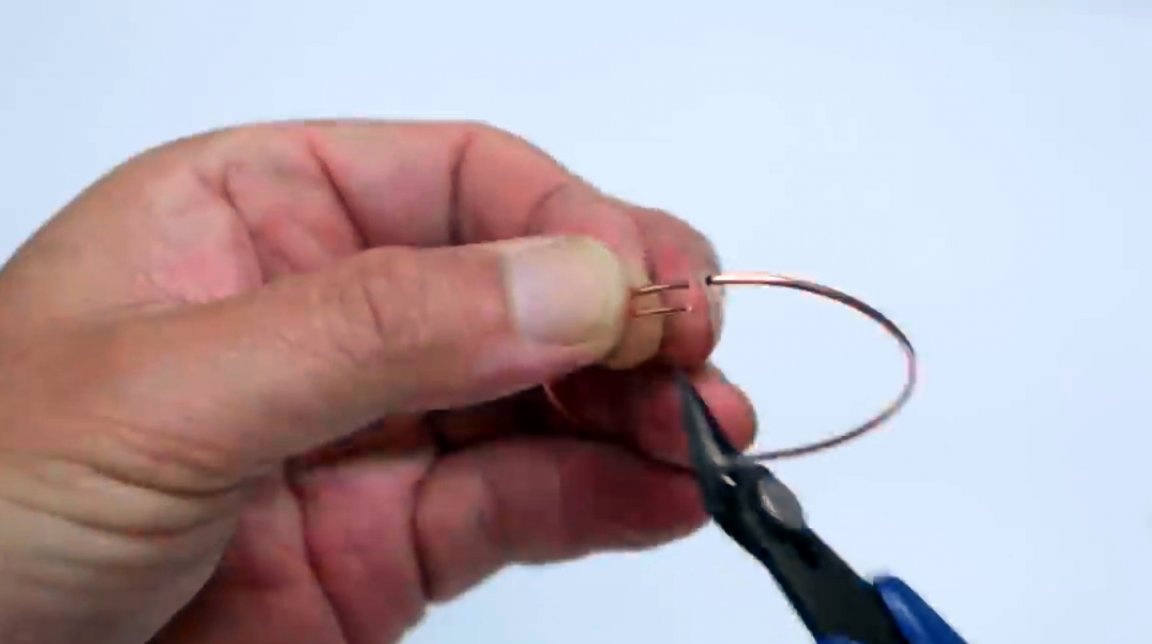

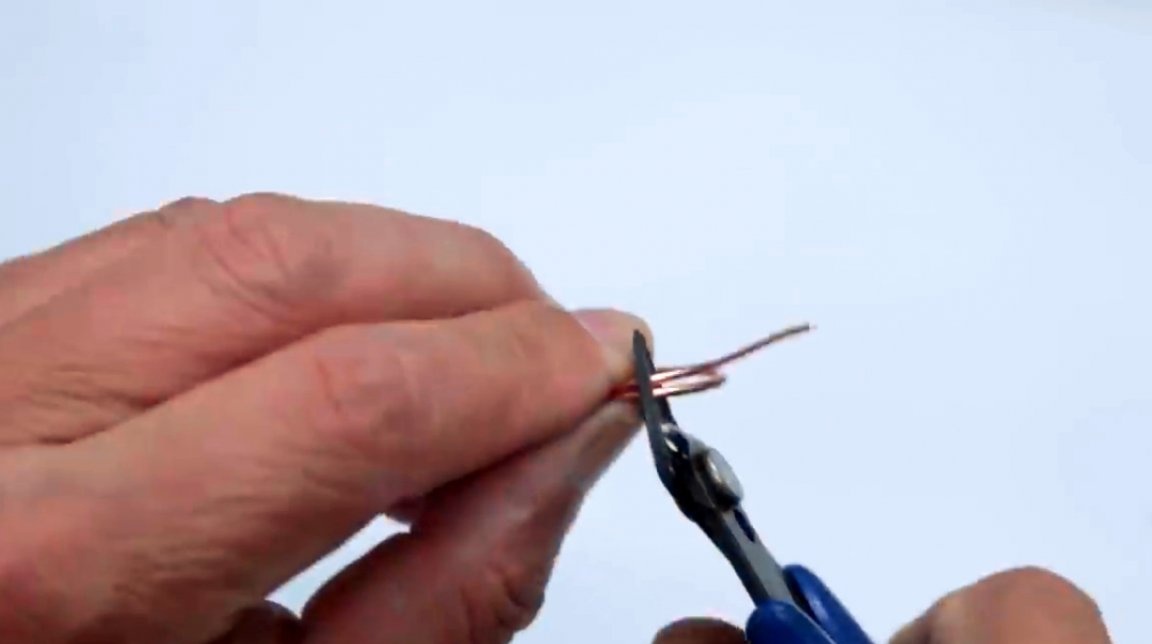

And as heating elements it is very convenient to use resistors with a resistance of 180 Ohms and a power of 2 watts. They just solder between the rings.
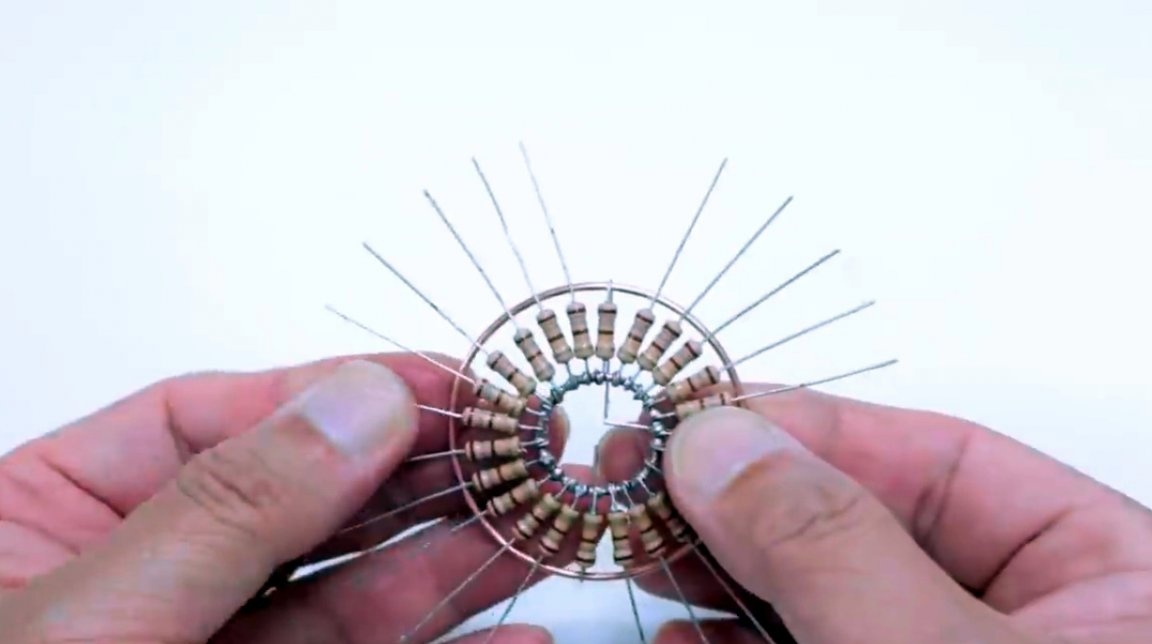
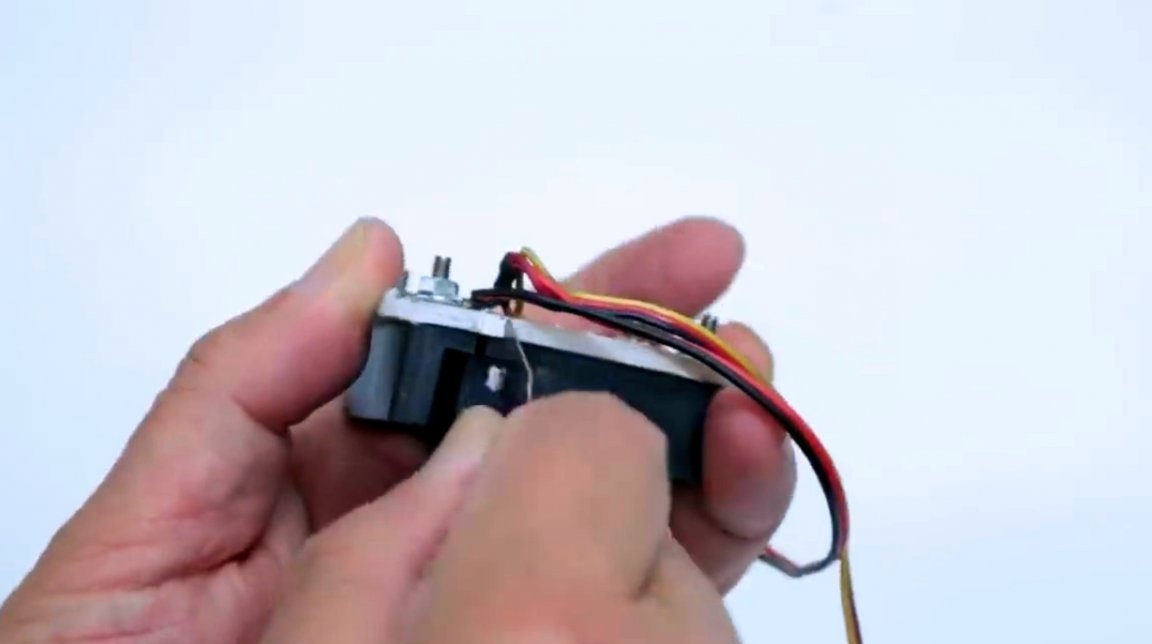
The master also leaves four legs intact, it will be convenient to attach them to the screws during assembly.
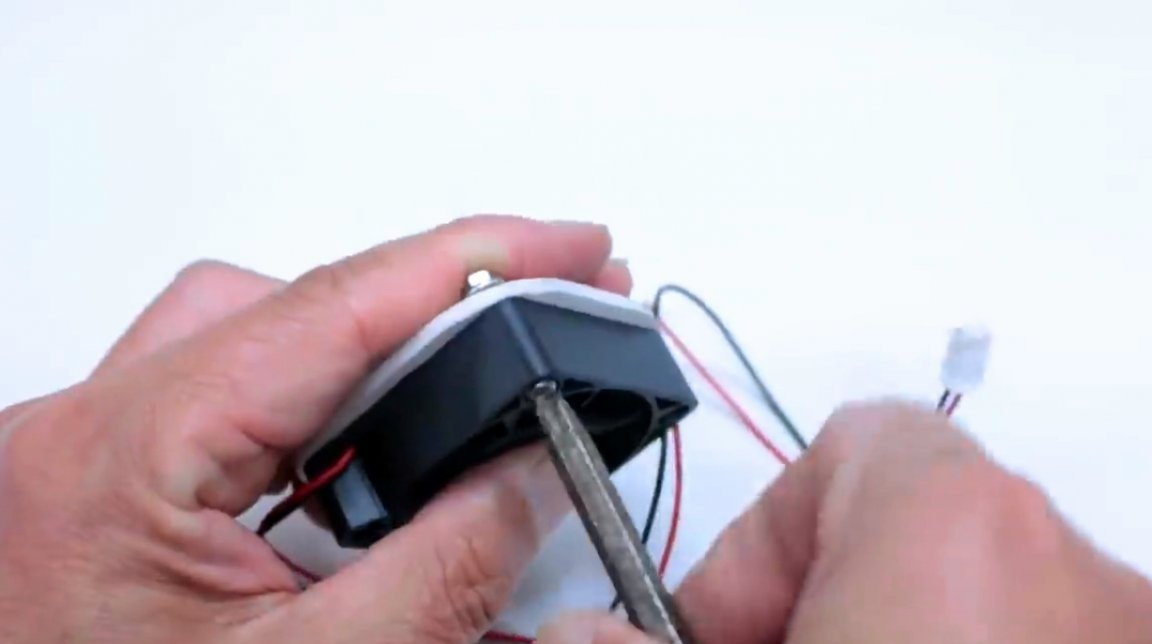
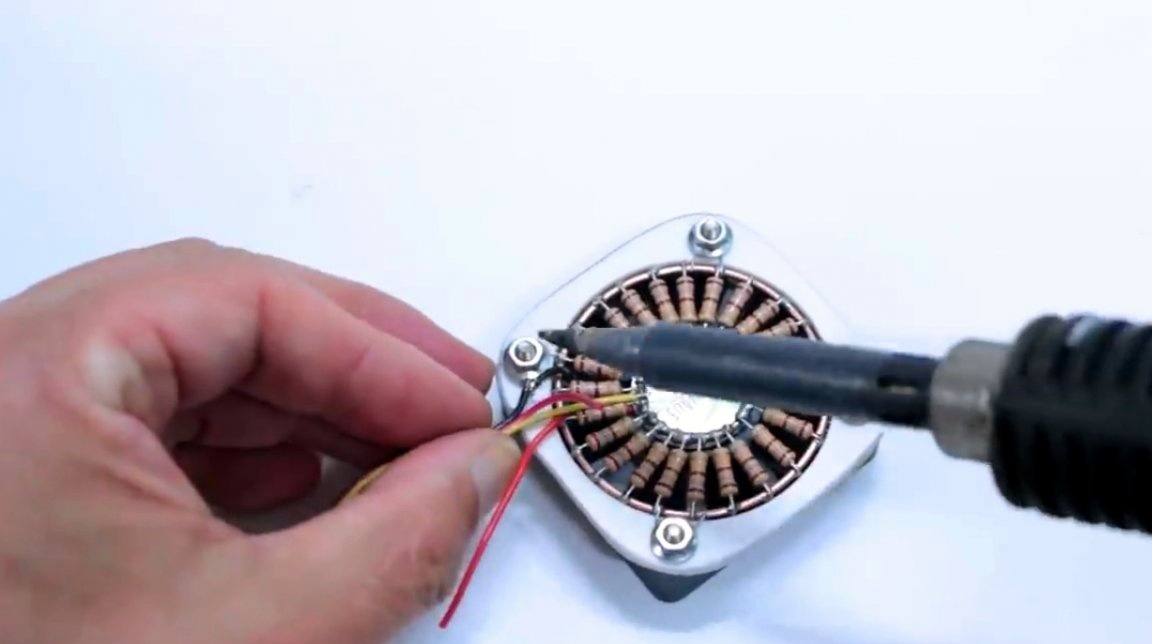
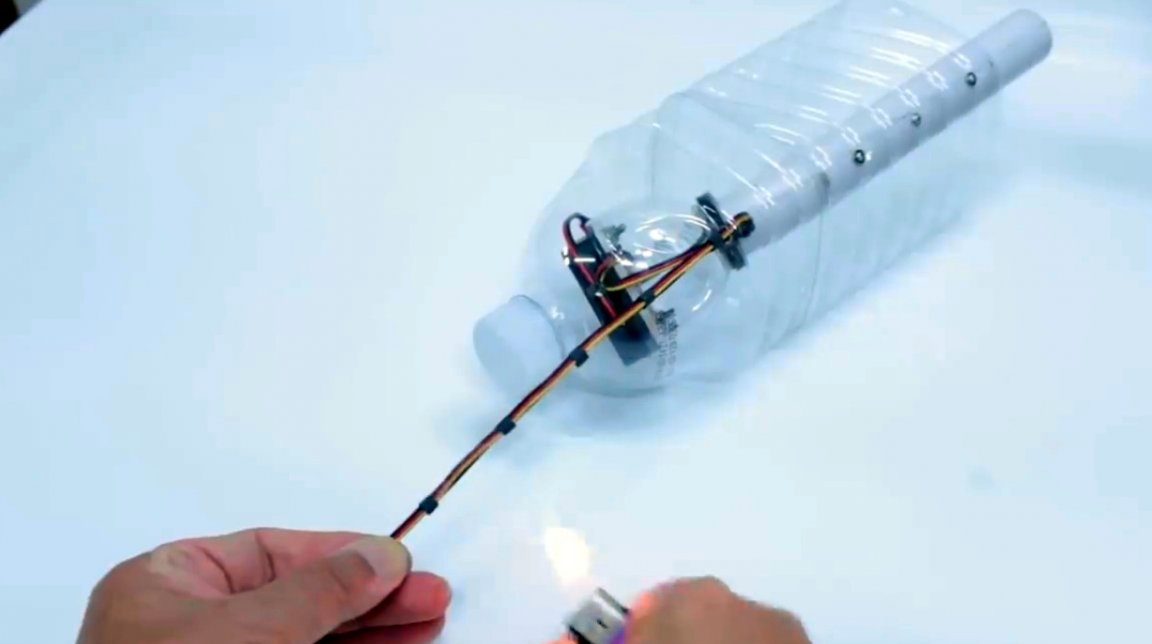
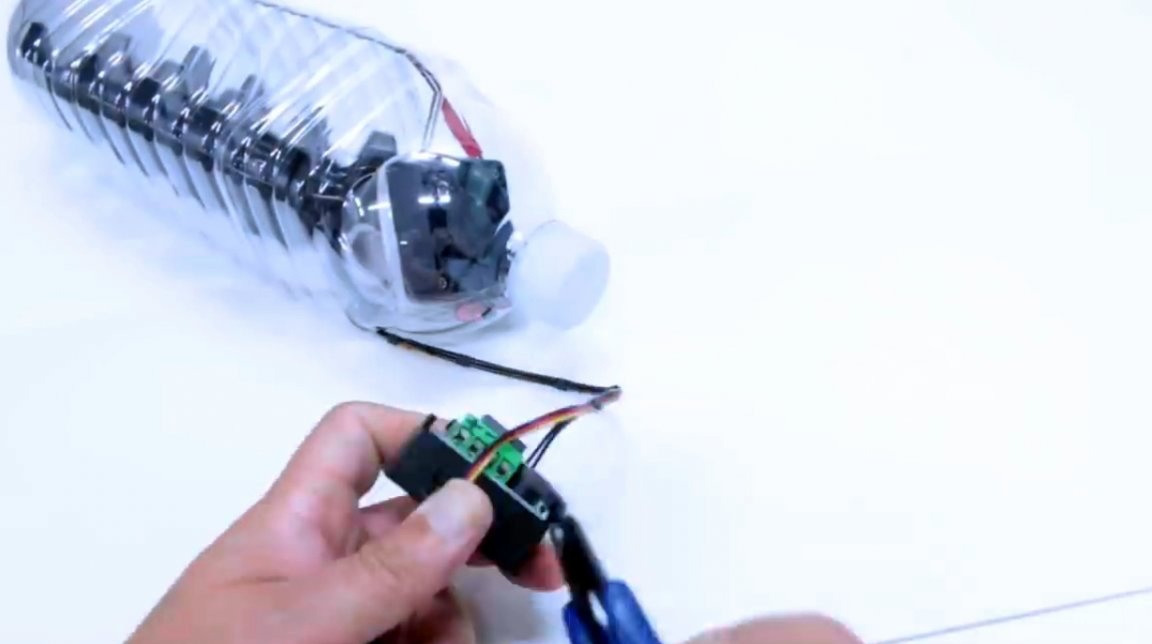
Next, you need to solder the wires. The fan will run continuously, and voltage will be supplied to the heater when heating is required. The wires are insulated with a heat shrink tube and closed with a bell.

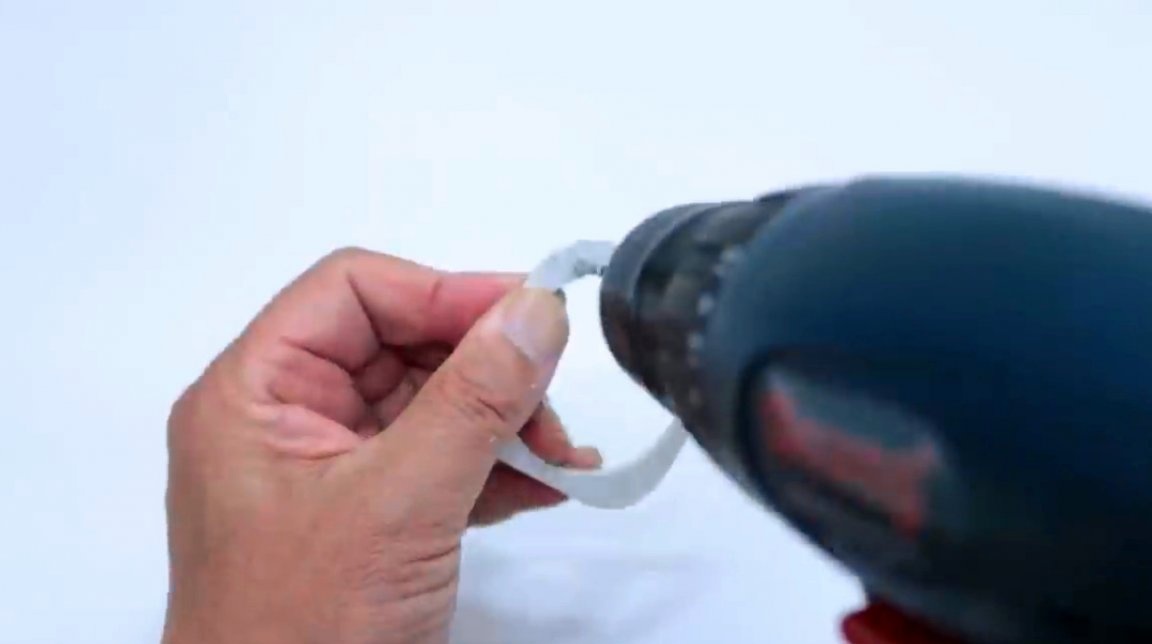
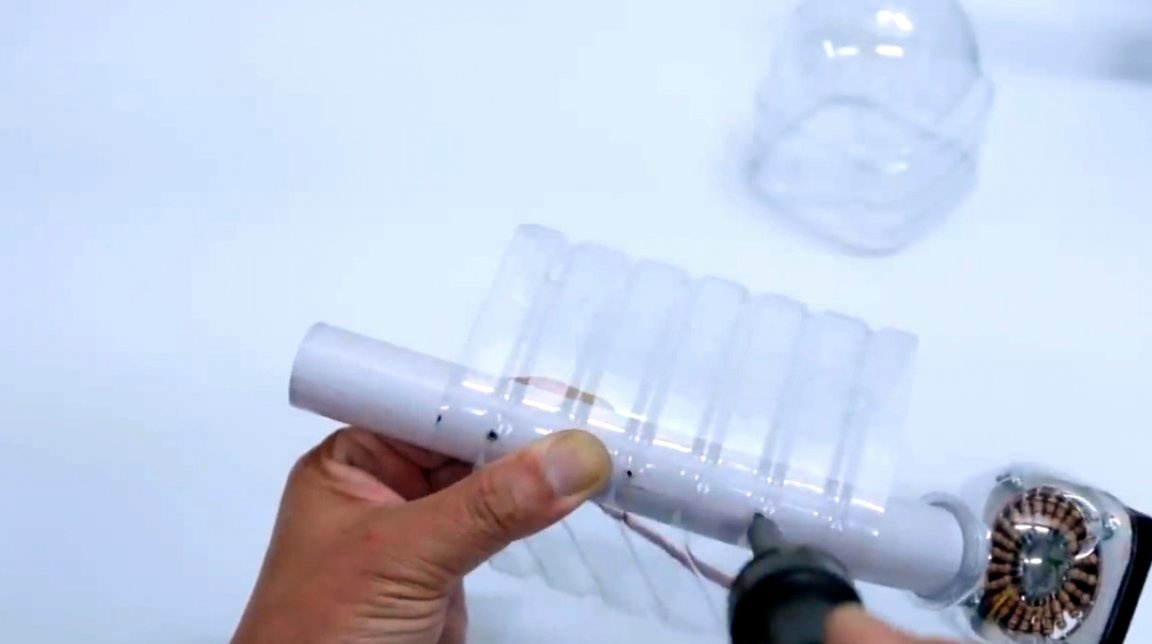
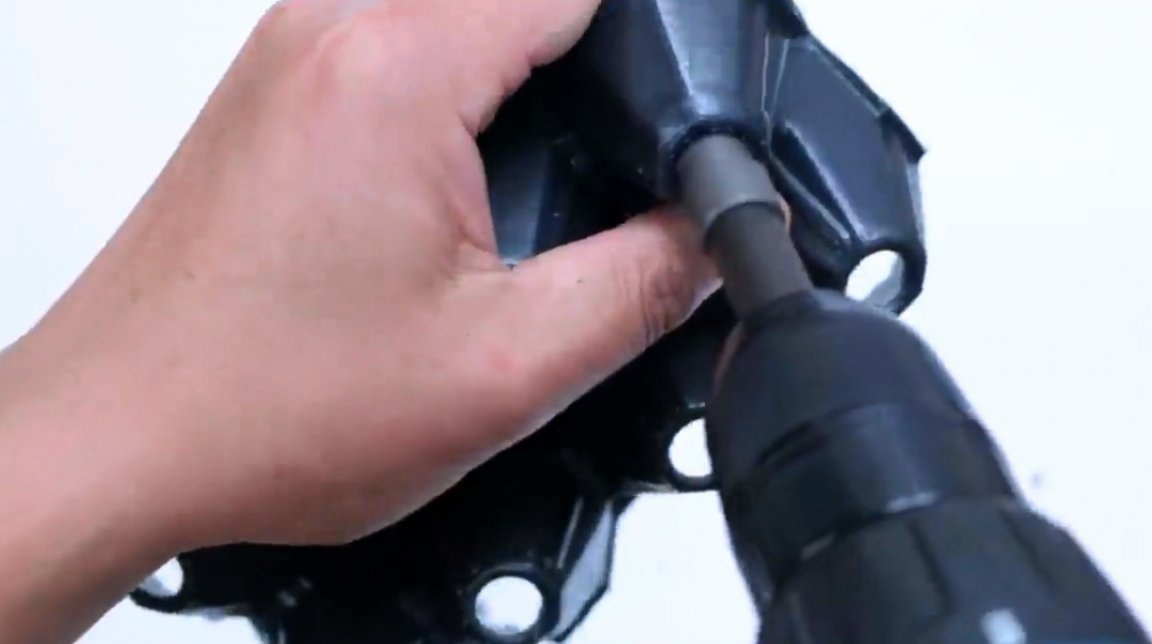
To evenly distribute heat inside the incubator, the master makes such a part from an inch PVC tube, it needs to be slightly bent on one side. This is easy to do by warming up the handset in the right place with a technical hairdryer.

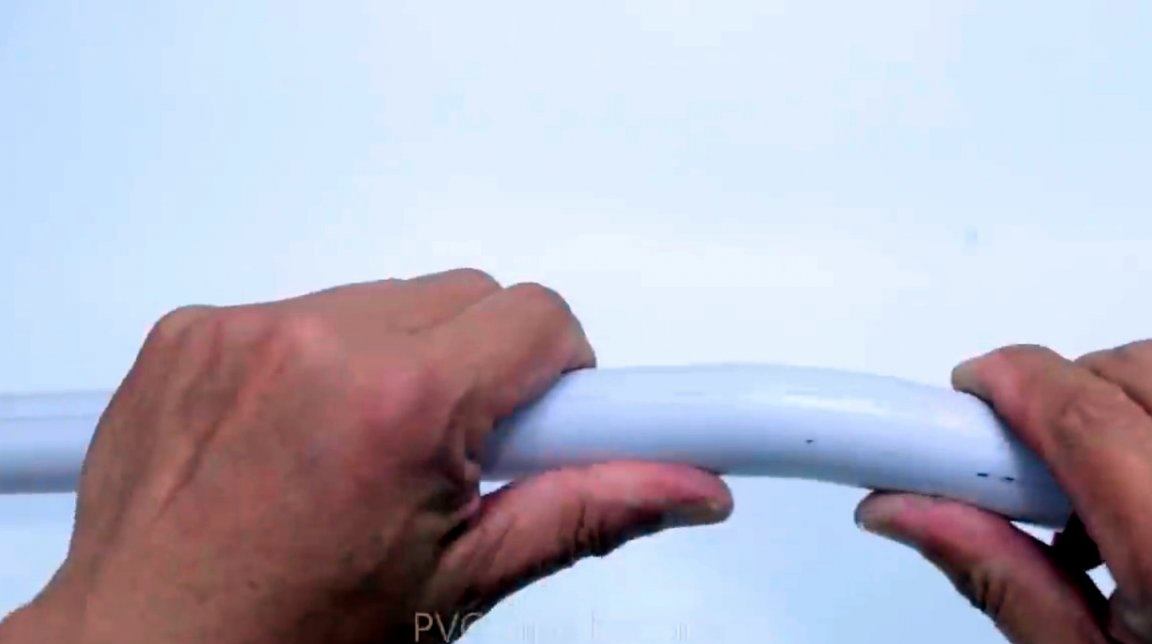
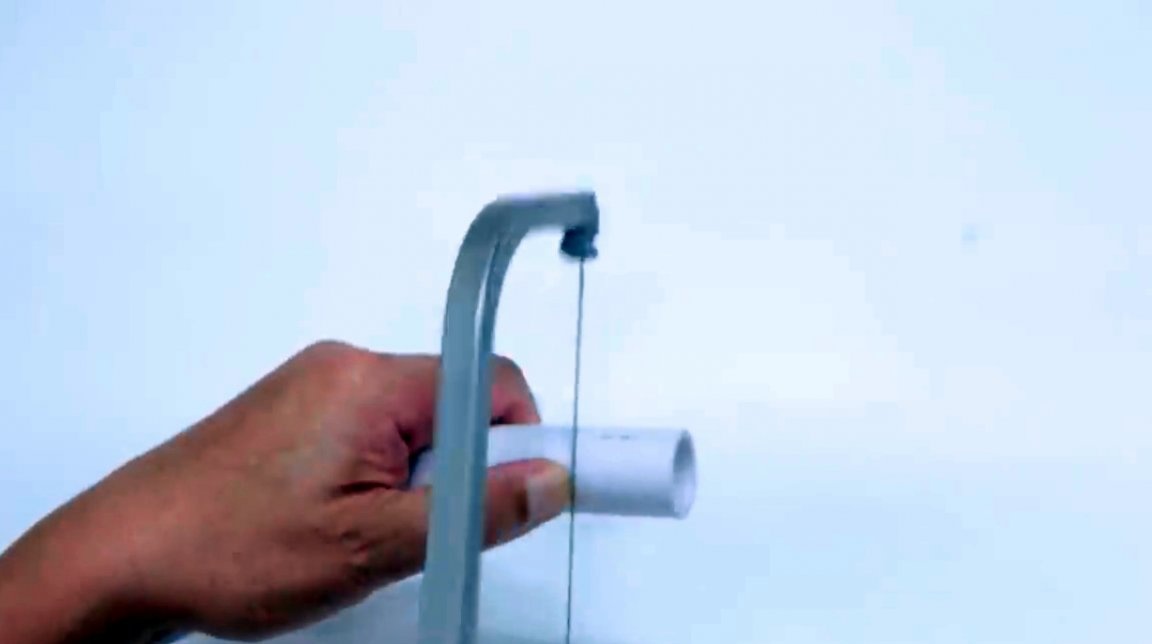
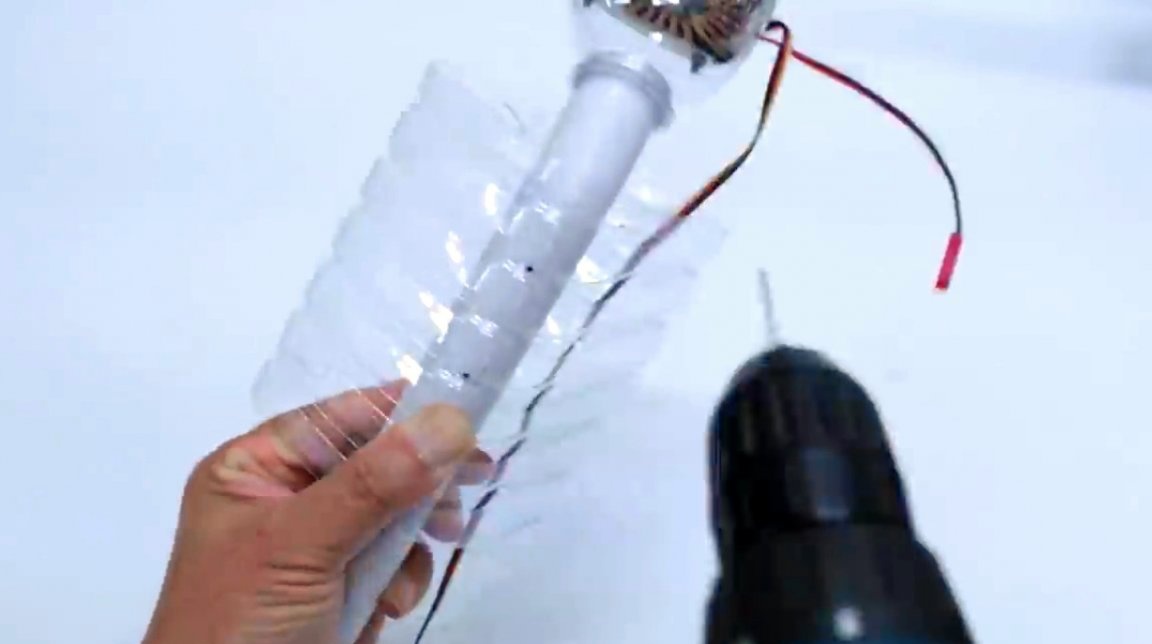
The tube is inserted into the socket of the heater, and is tried on to the body. So the circulation of warm air will pass through the entire internal volume of the housing.
Now the tube needs to be screwed to the shell of the case with a few screws, or glued with a second glue.

An LED strip can be used to illuminate the incubator.

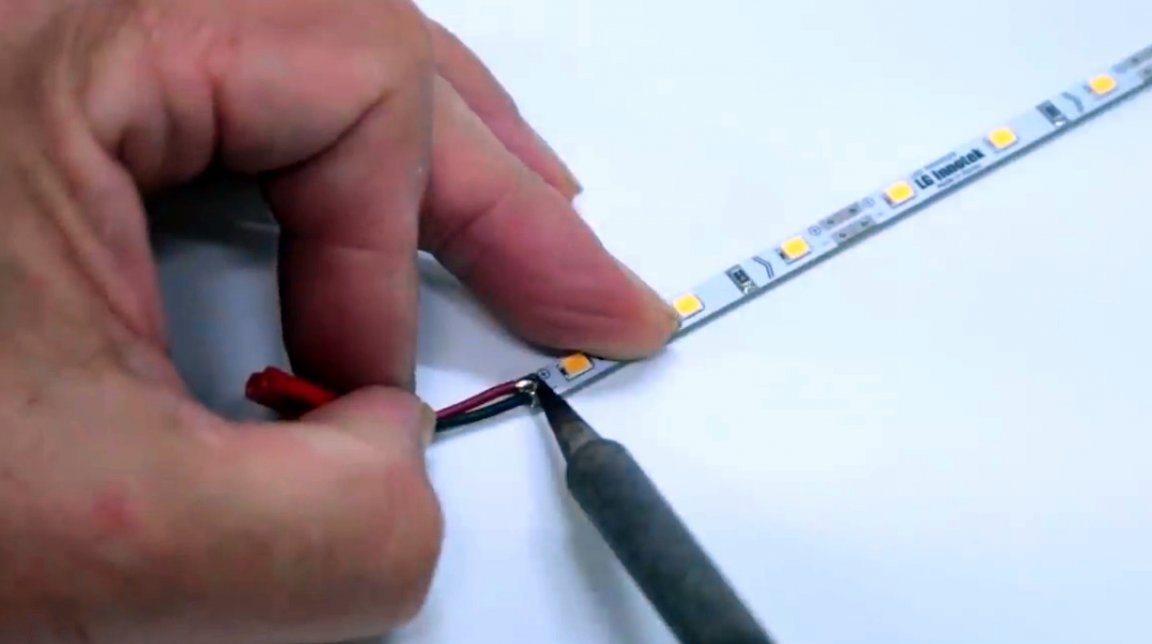
Her master fastened inside the case with ordinary fishing line.

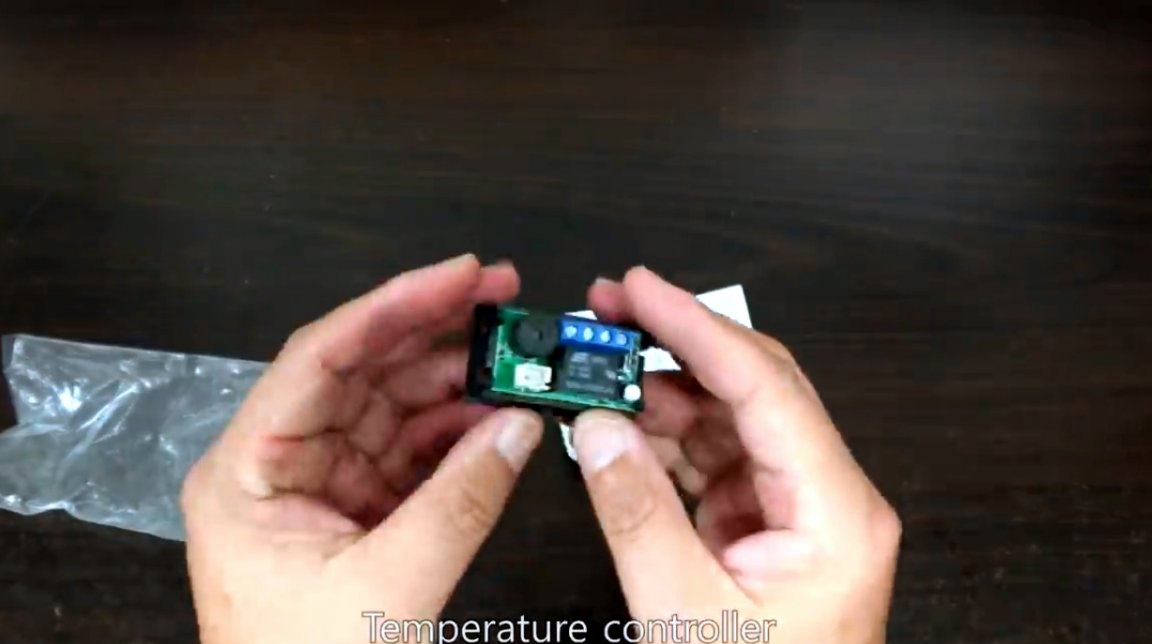
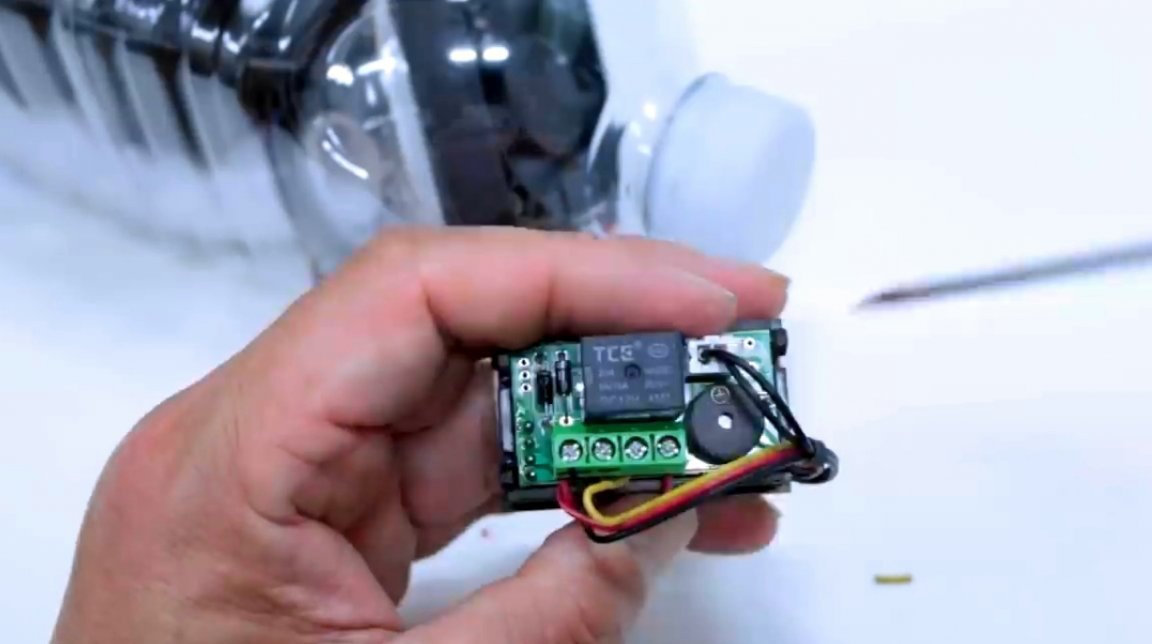
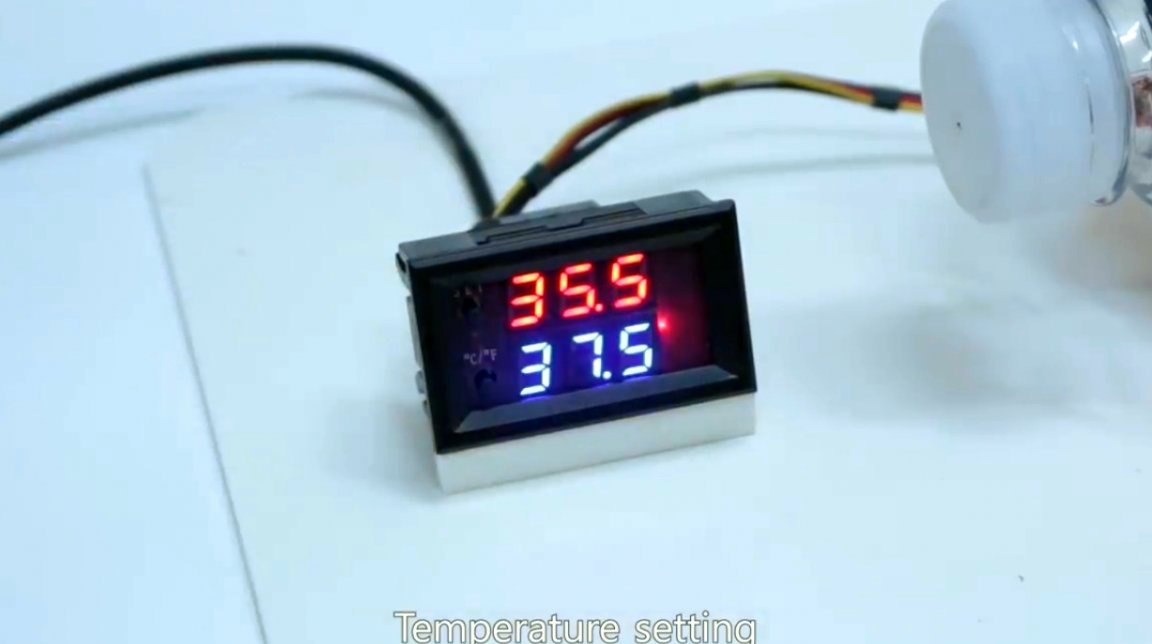
To control and maintain the required temperature will digital thermostat. Its cost does not exceed 300 rubles.
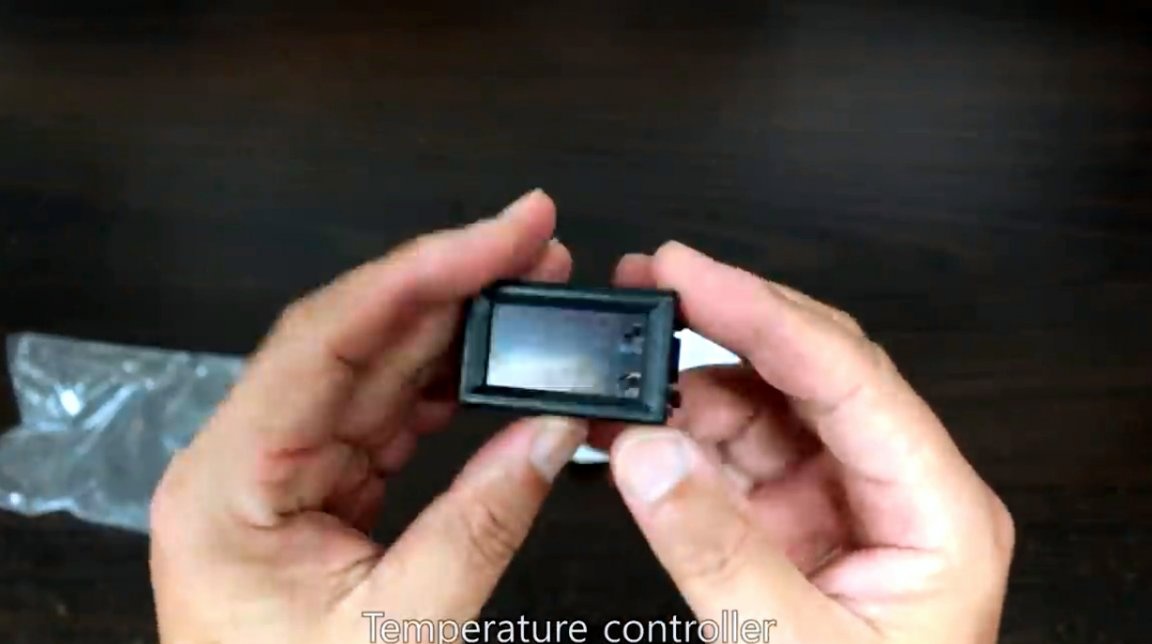
A temperature sensor is fixed inside the bell, and the wires are fixed with plastic clamps.


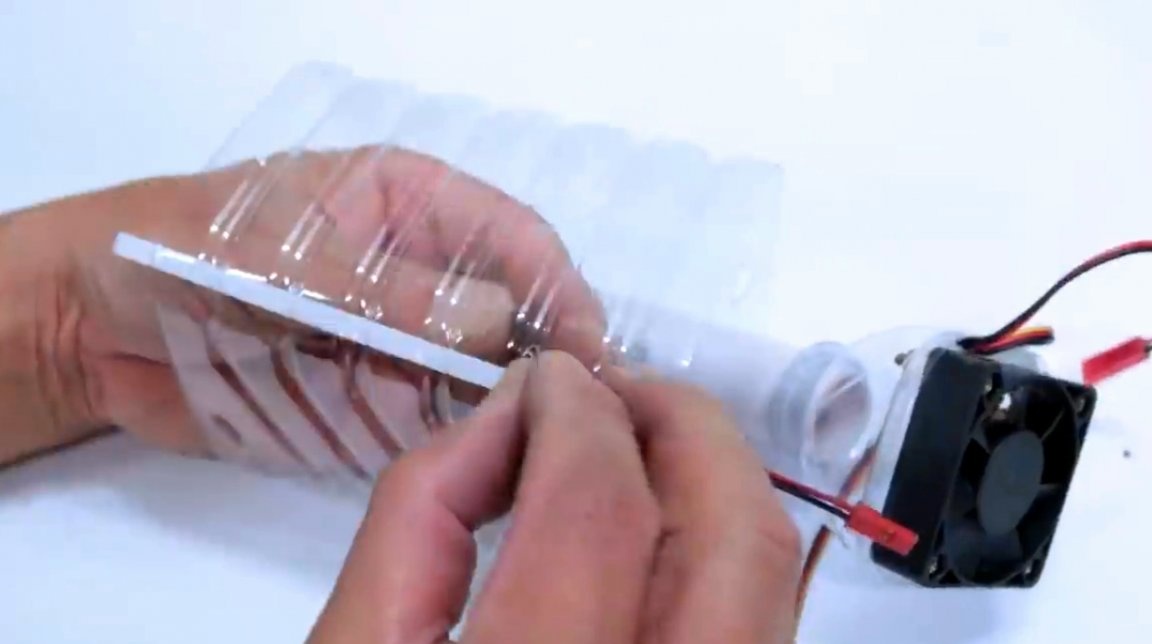
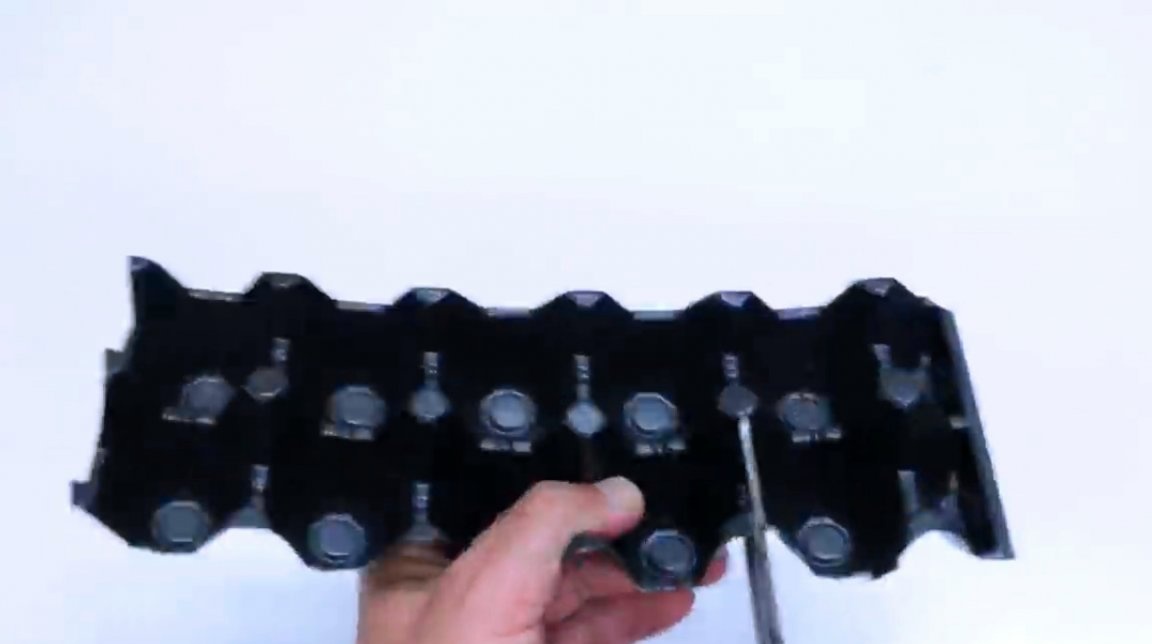
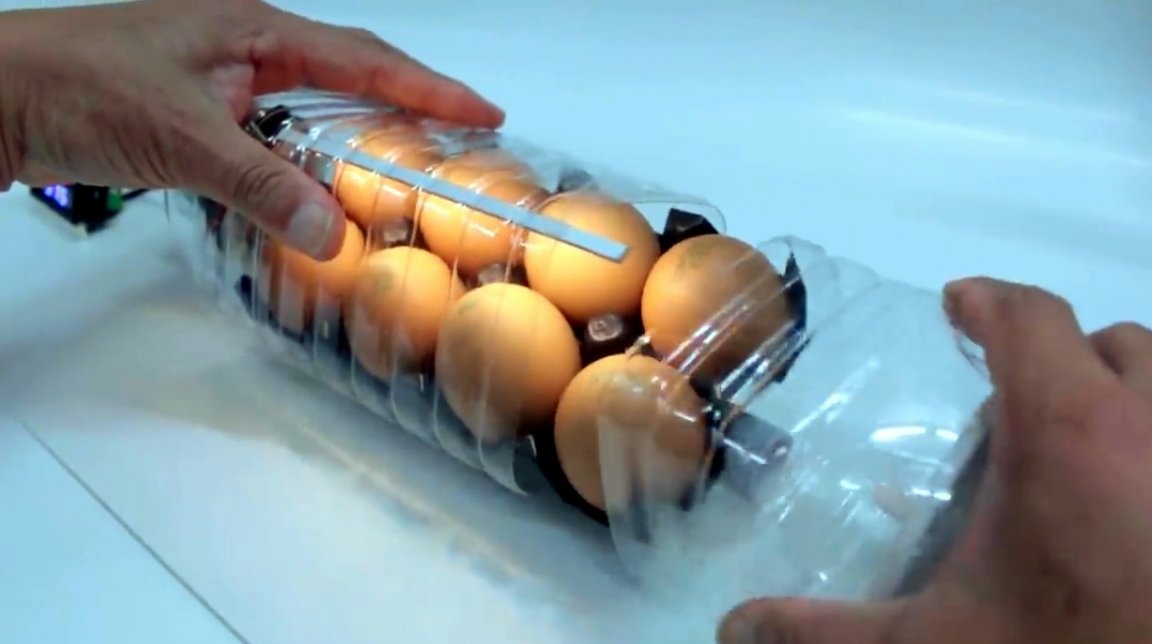
A section of eight cells is cut out of a plastic egg tray, and holes are cut out for good ventilation in their bottoms.

Almost everything is ready, and you can start assembling the incubator.


The wires should be fixed with pieces of heat shrink tubing or insulation tape.
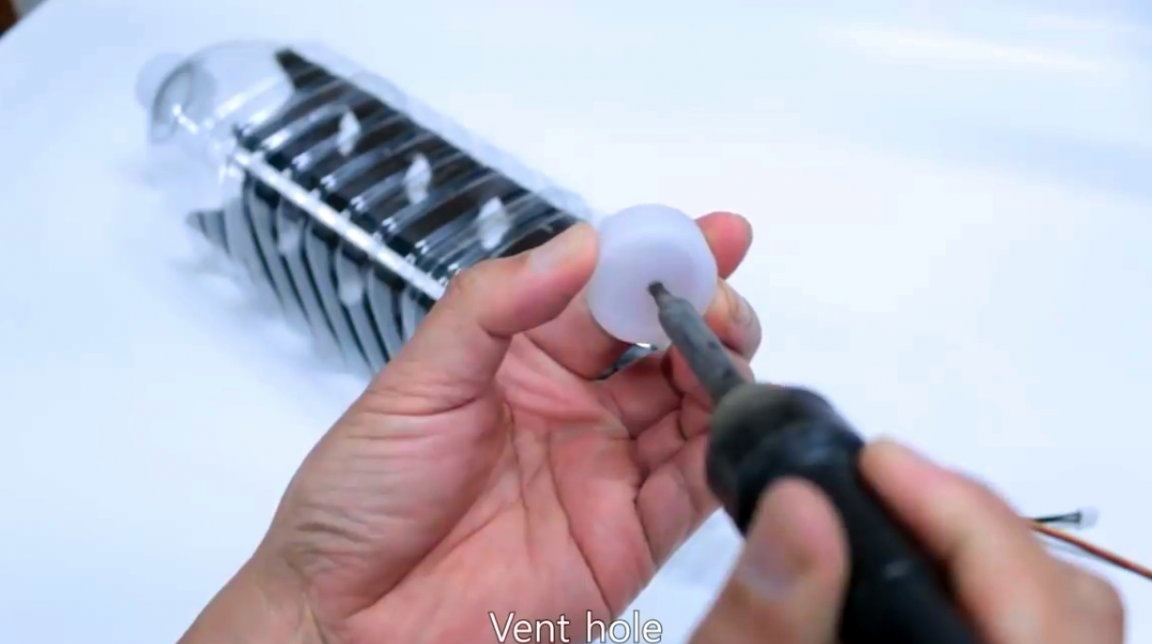
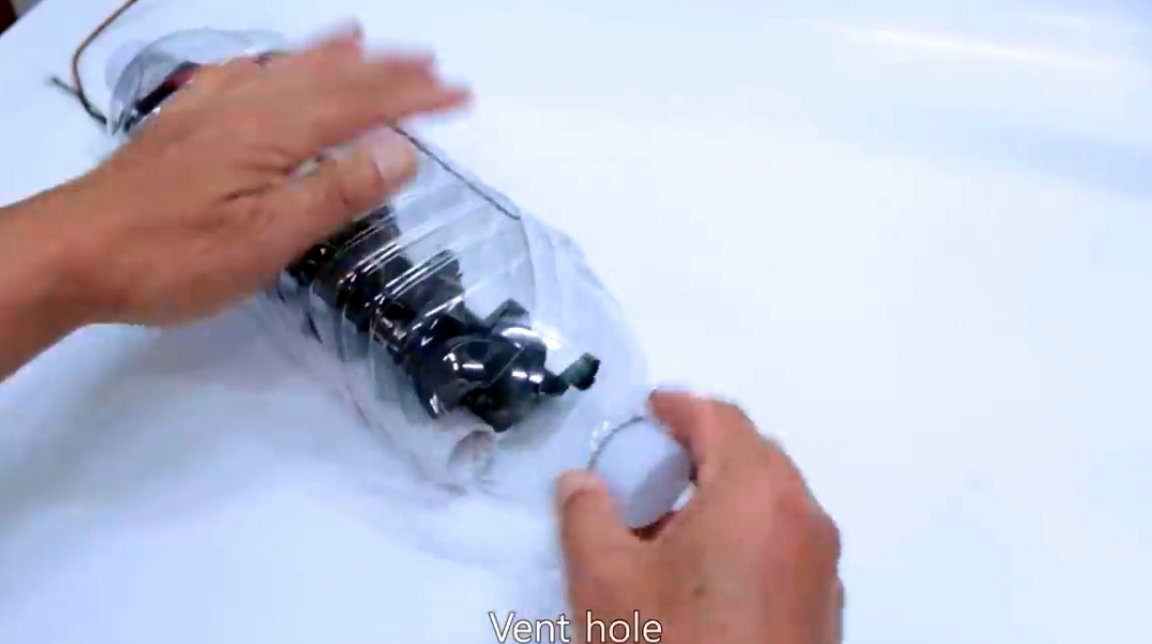
For fresh air to enter the tank, you need to make a small hole in the cork.
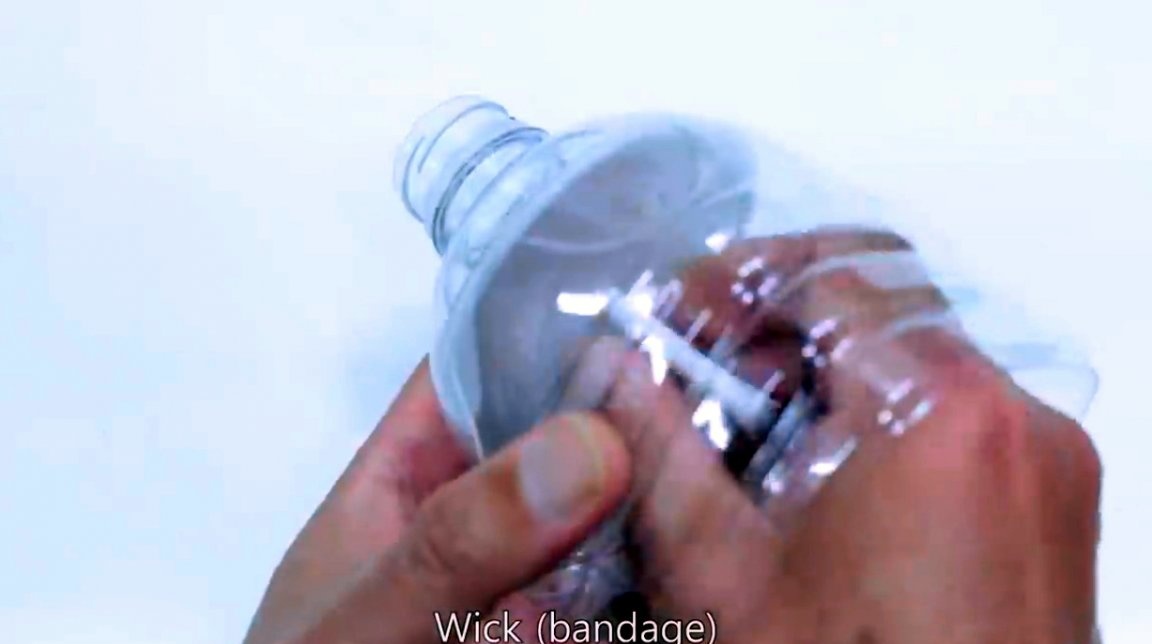
In the second neck you need to glue here such a plastic disk with a hole in the center. This must be done hermetically. It is even better to first fix it with second glue, and then additionally pass the seams with silicone sealant, or hot glue.


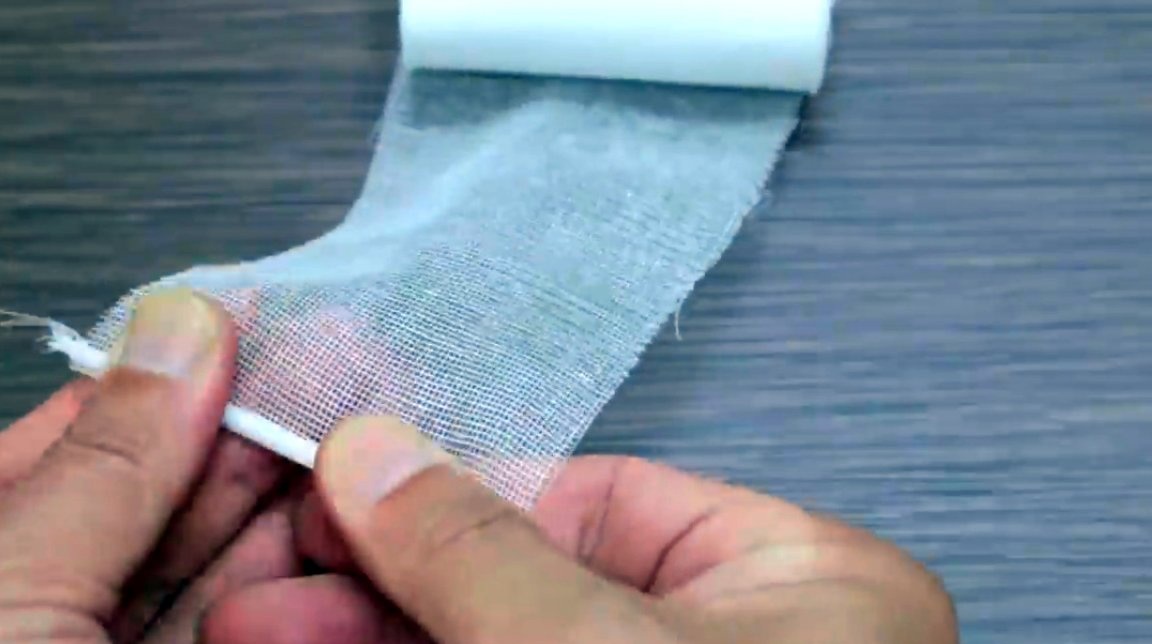
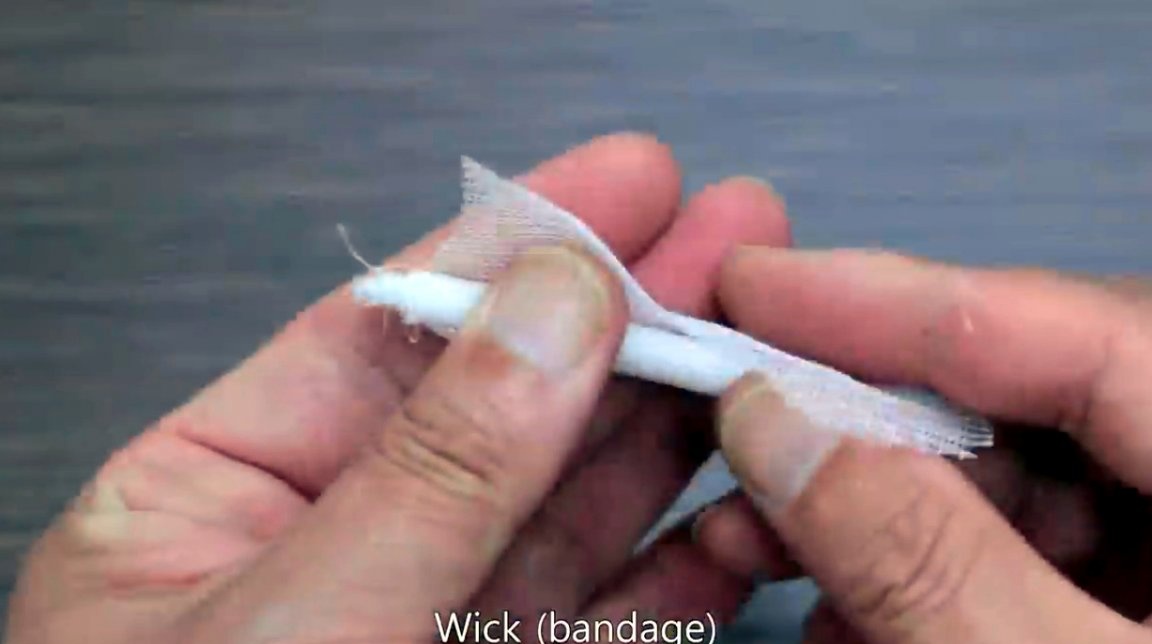
A piece of gauze is made like a wick, and inserted into a hole in the disk.
The fan and LEDs are connected with the power of the controller, and the heater is already through the relay.
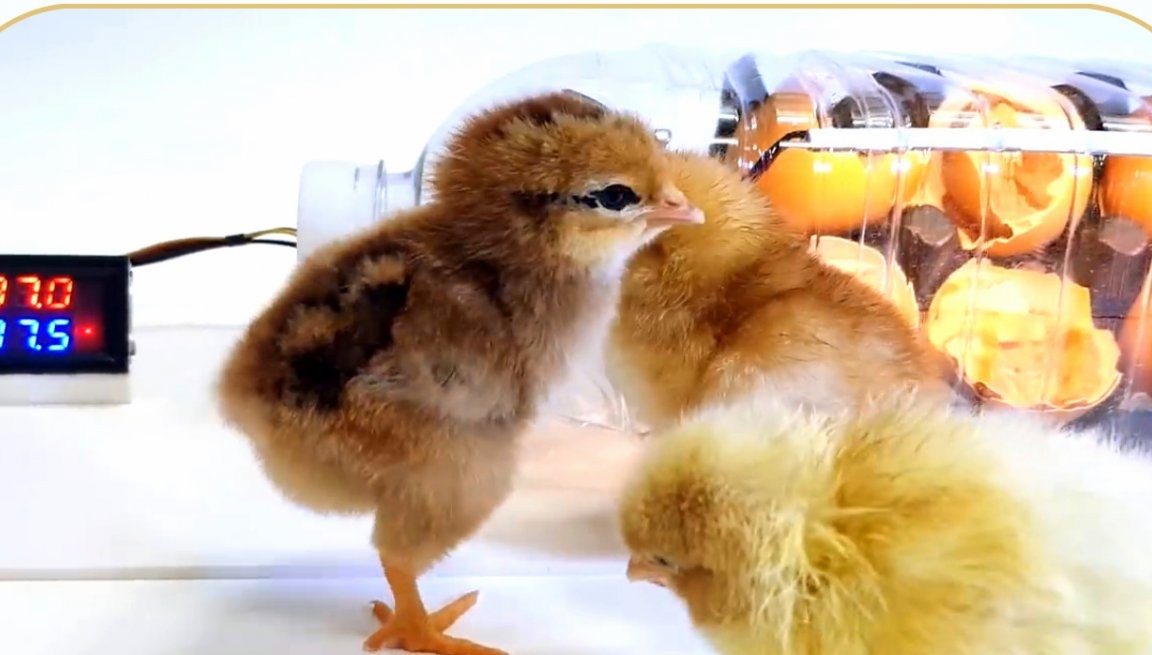
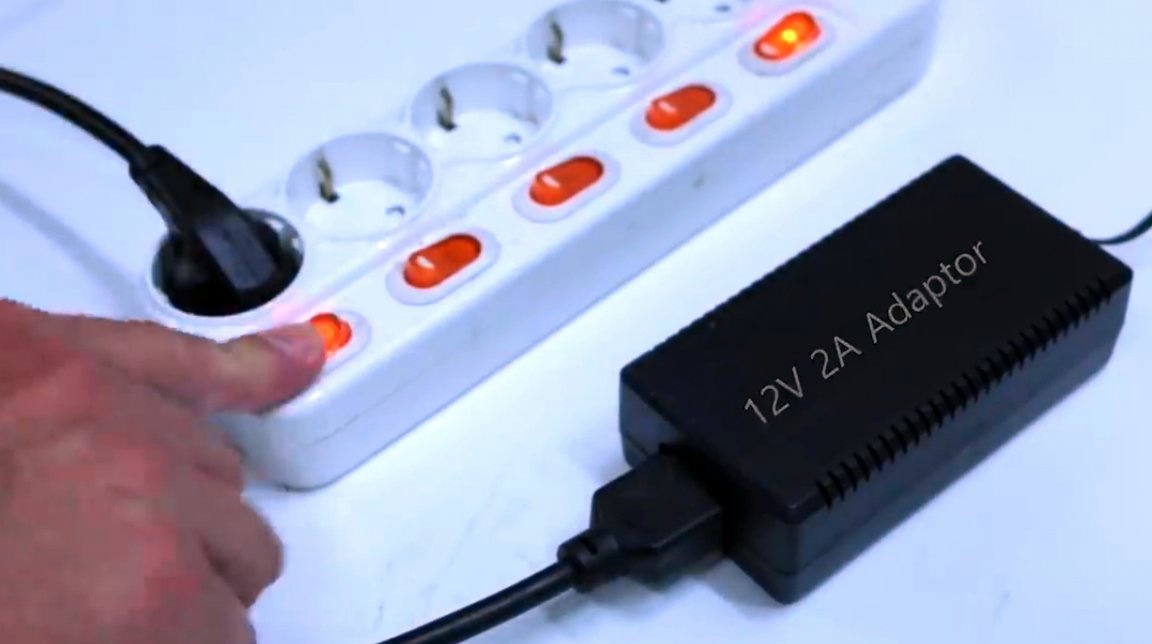
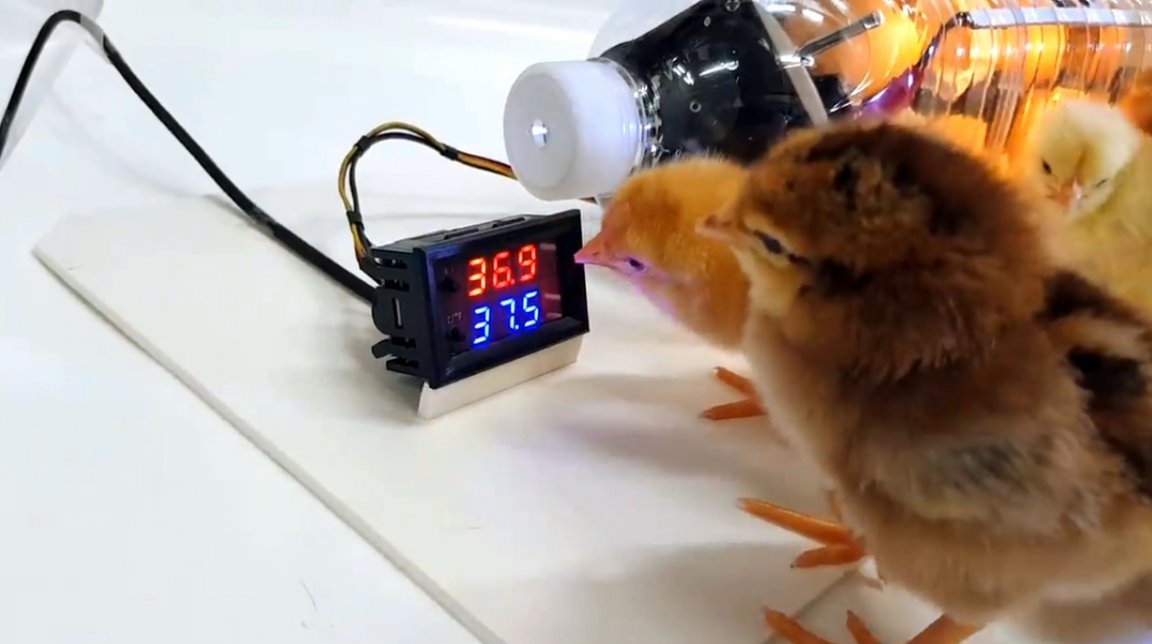
The controller is powered by 12 V and the temperature is set to 37.5 ° C.

The author acquired fresh fertilized eggs, and immediately installed them in an incubator.


It remains only to add water to the previously prepared compartment. This is necessary to maintain humidity.
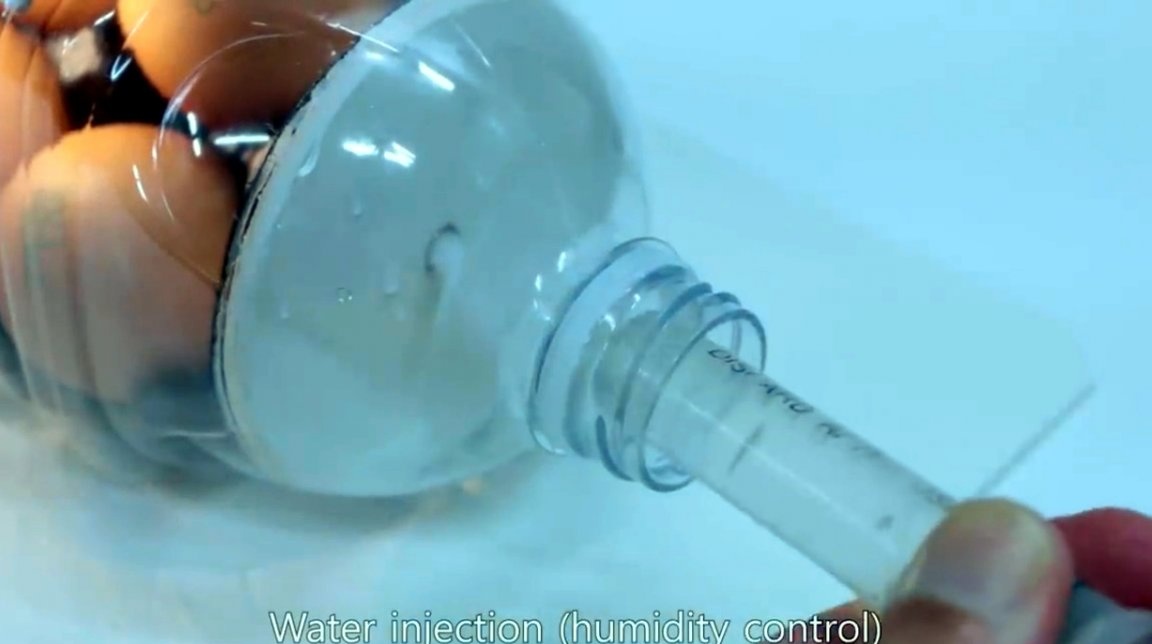
Over the next 18 days, you need to turn the incubator body every 3-6 hours, and be sure to monitor the presence of water in the compartment.


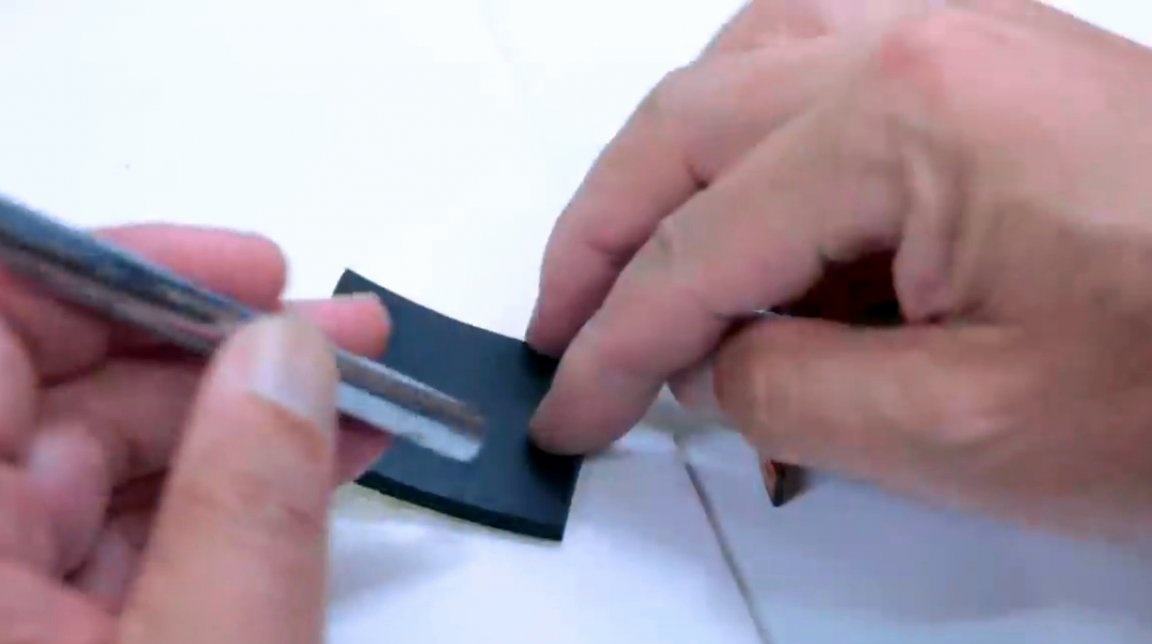
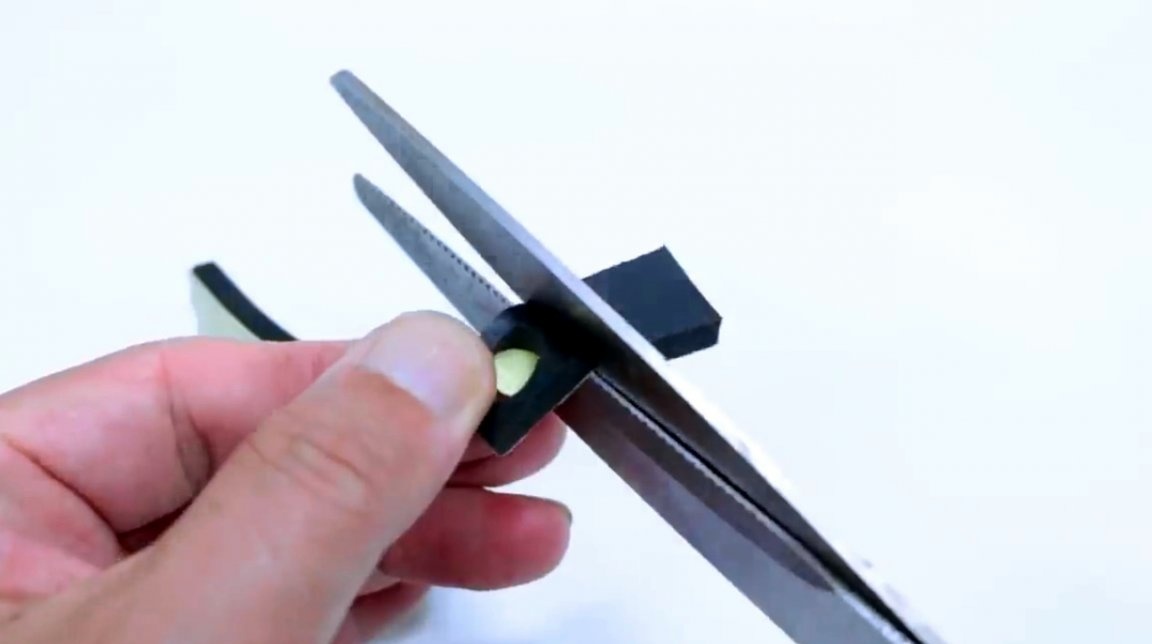
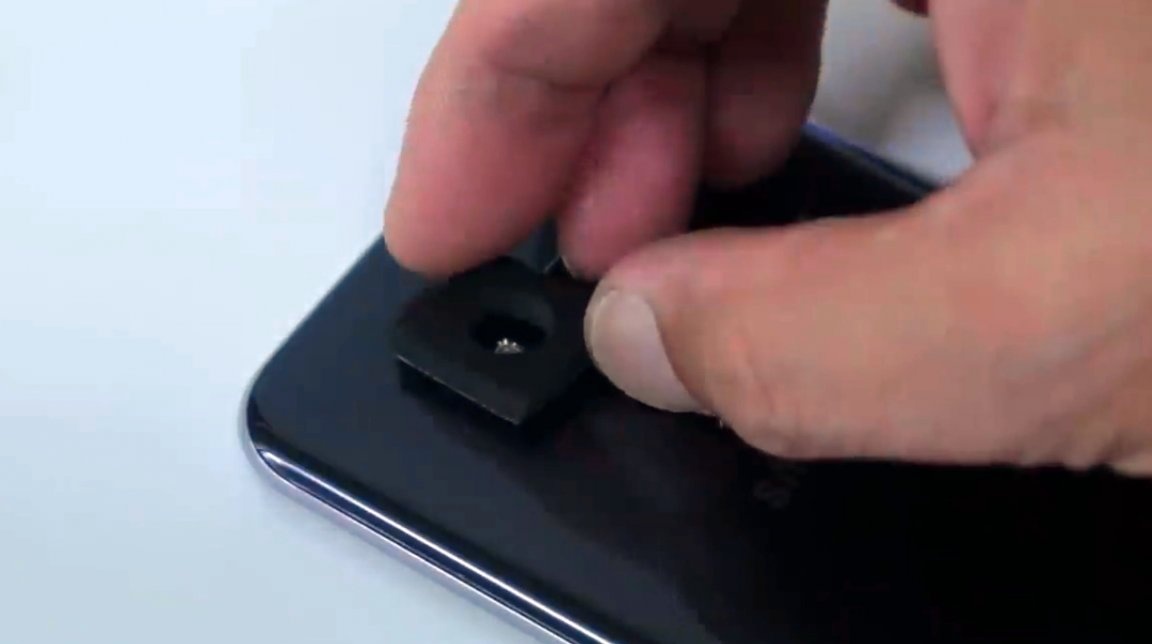
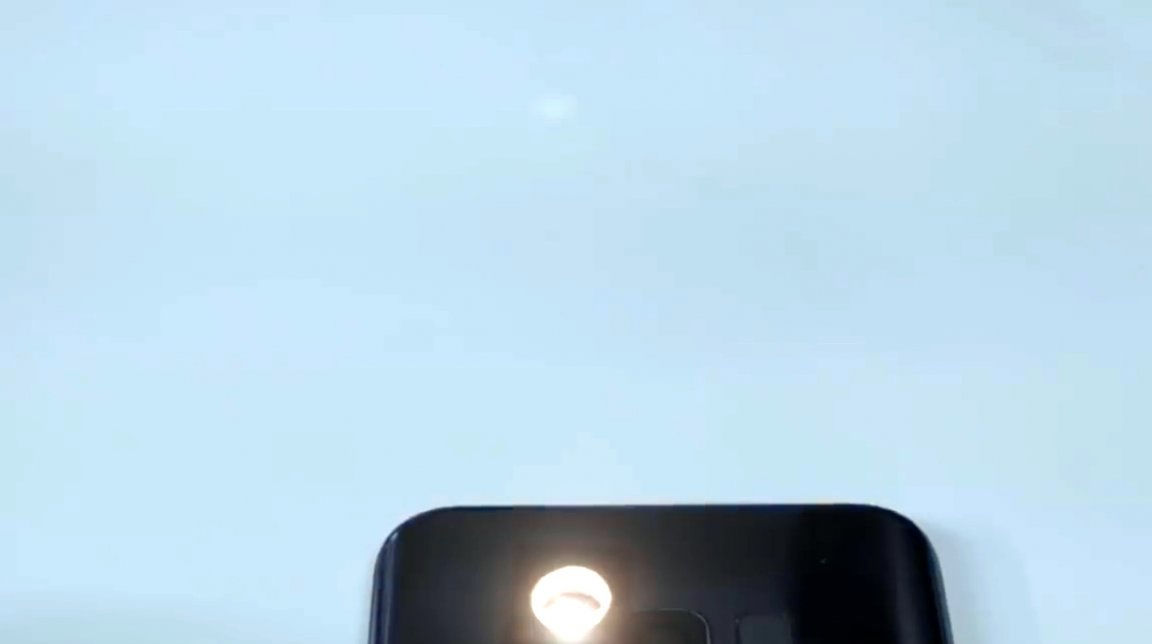
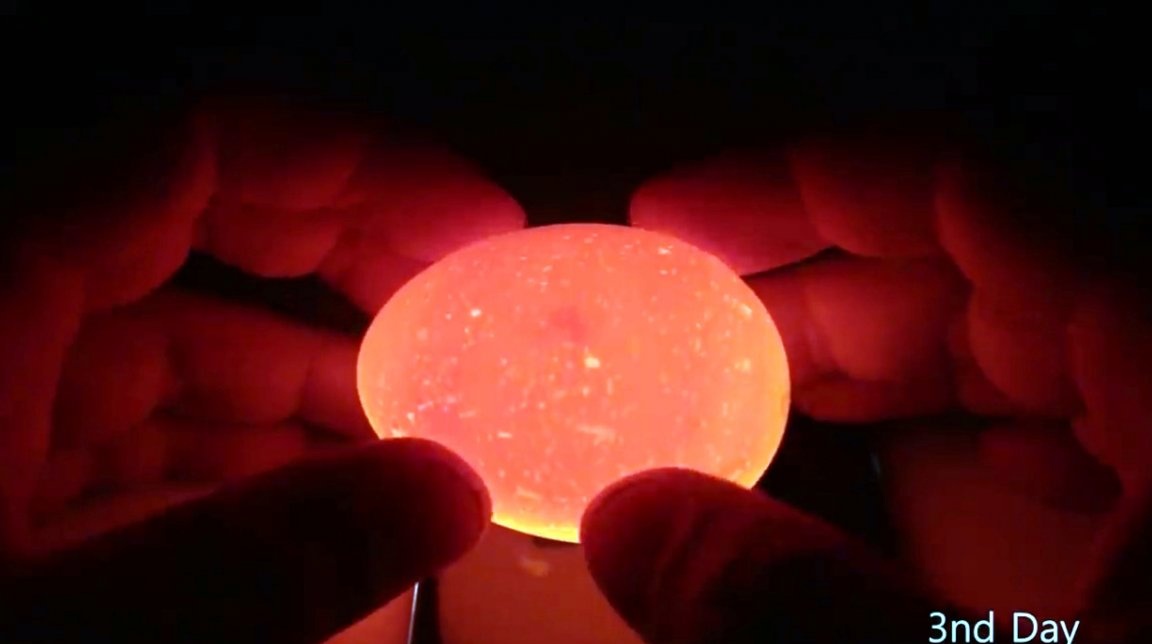
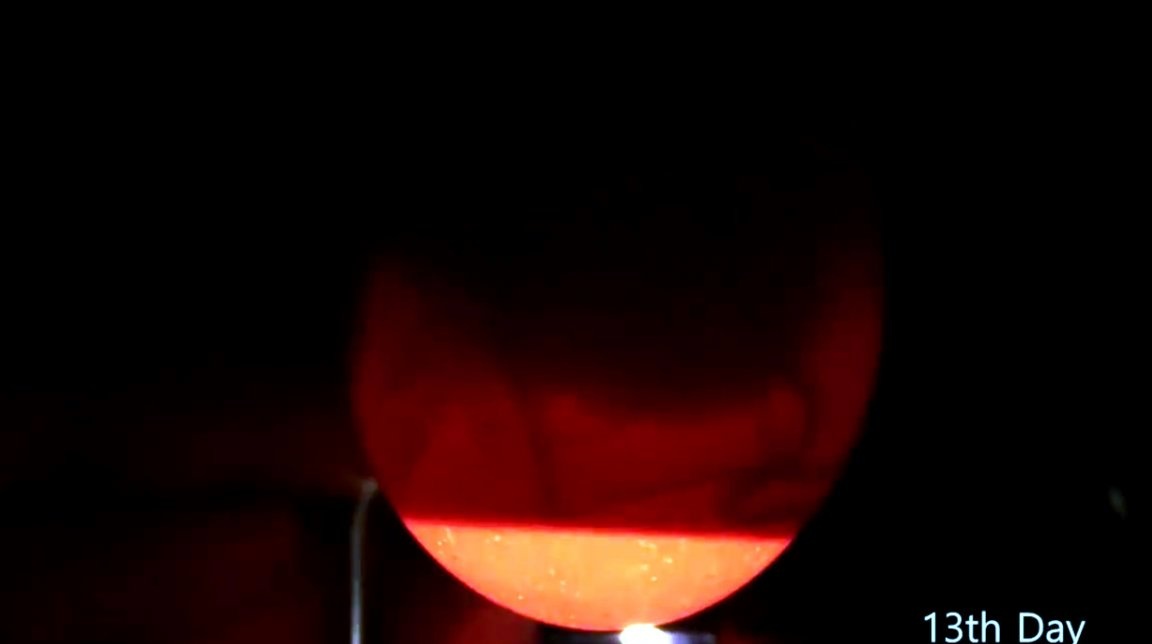
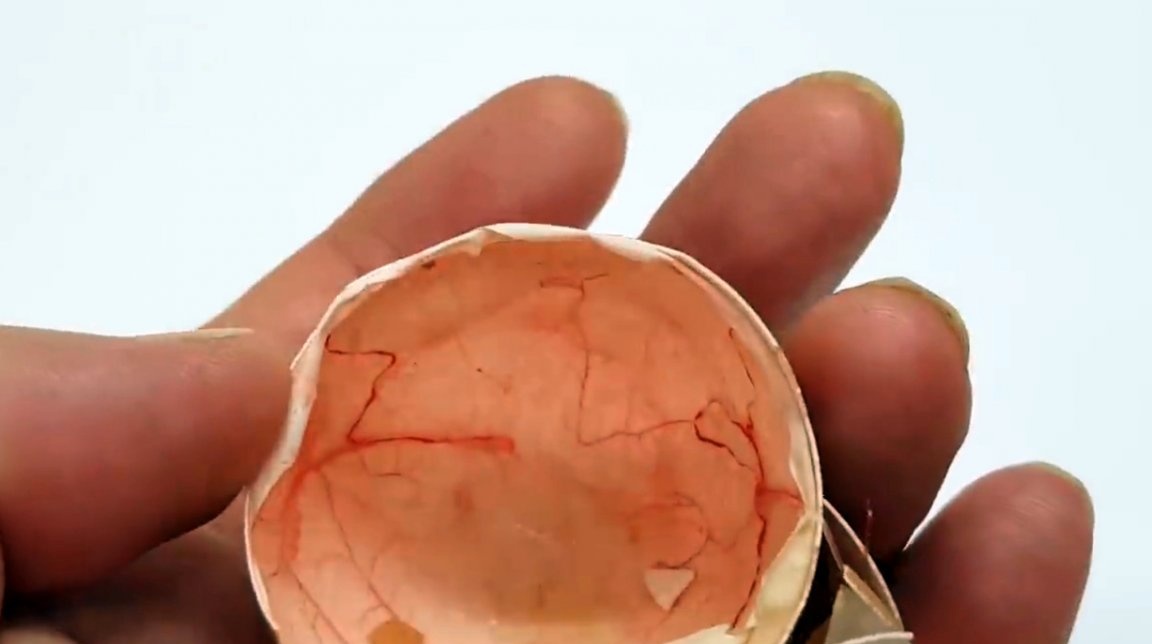
In order to consider what is happening in the eggs, the author cut out a small square with a hole in the center from adhesive rubber sheet. Now it can be glued around the flash on a smartphone, and highlight the egg.
So interesting is the process of embryo formation.

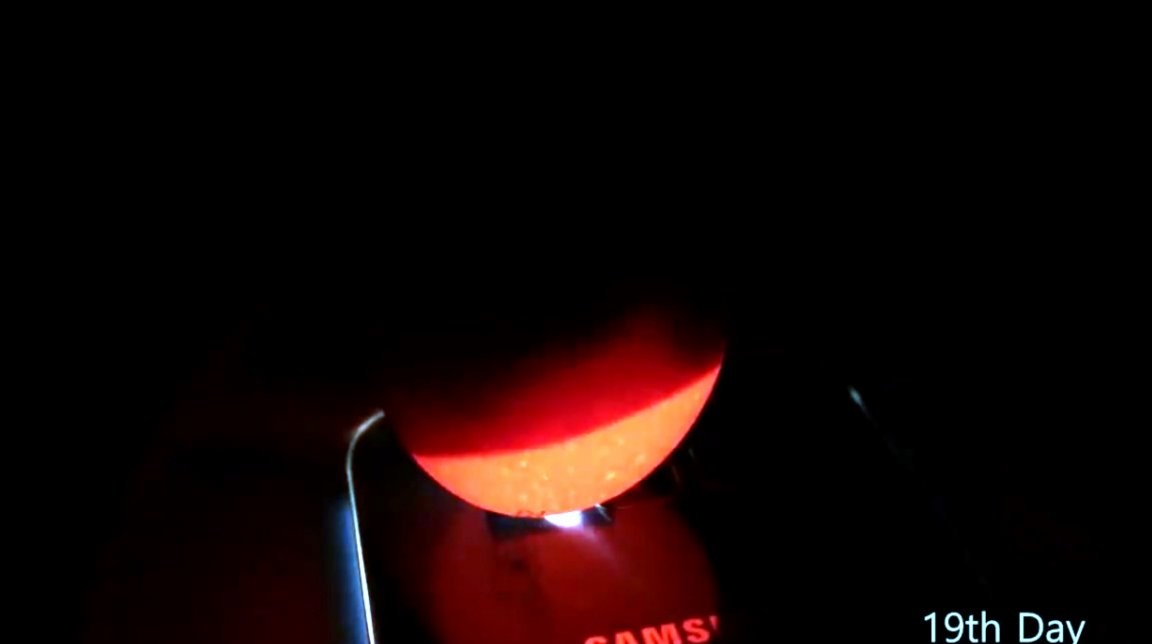
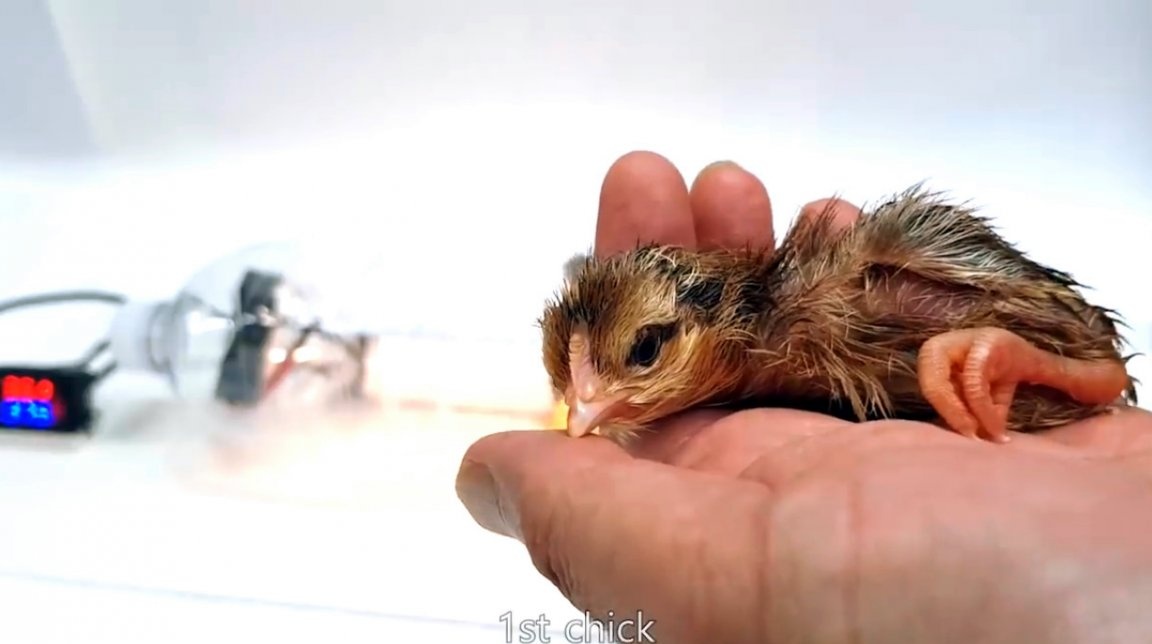
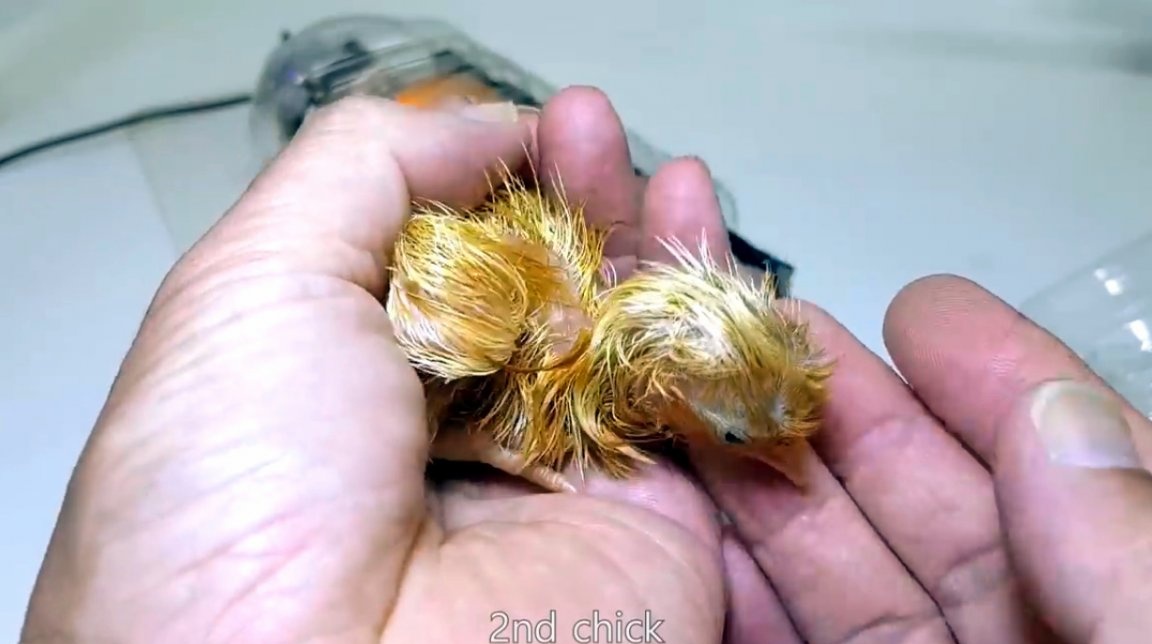
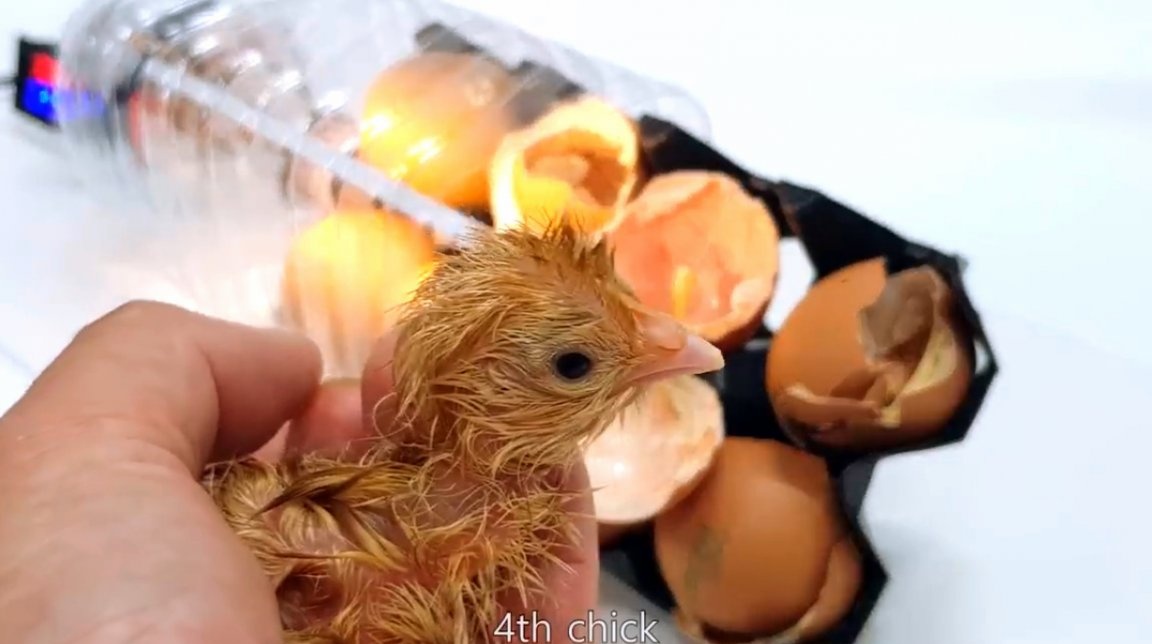
On the 19th day, you need to stop turning the eggs, and wait for the nestling to hatch.
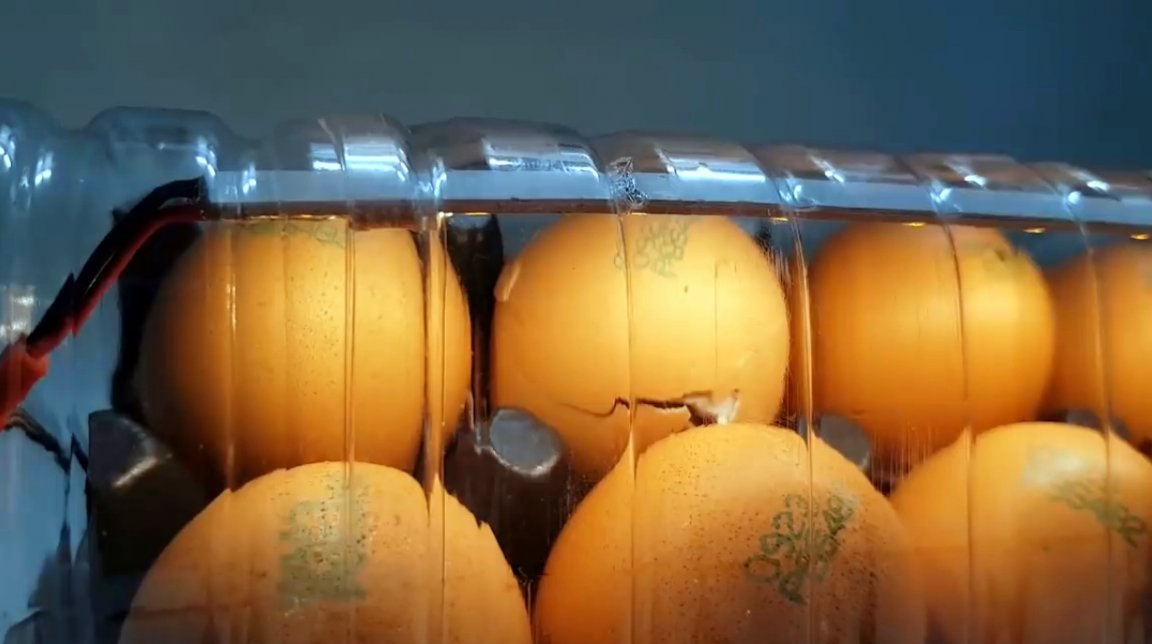
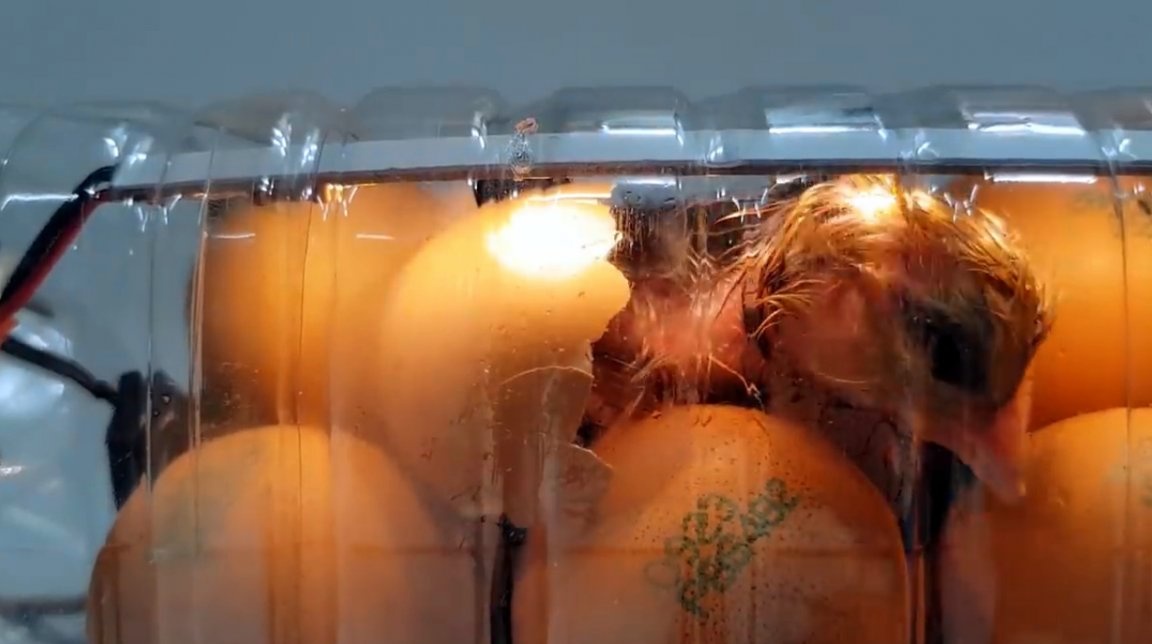
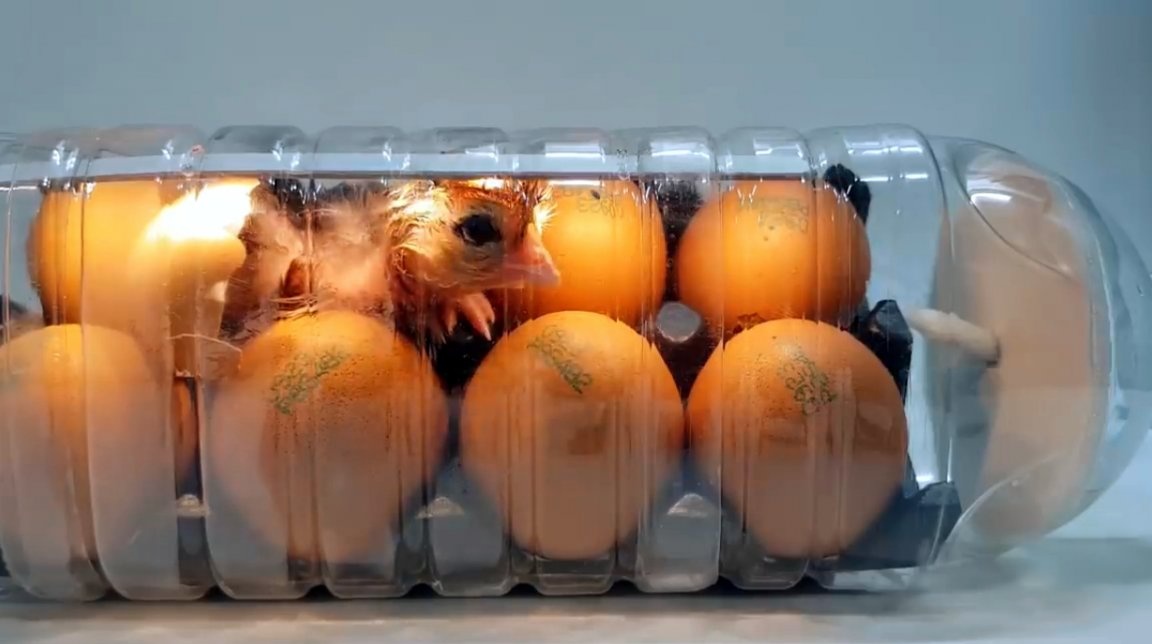
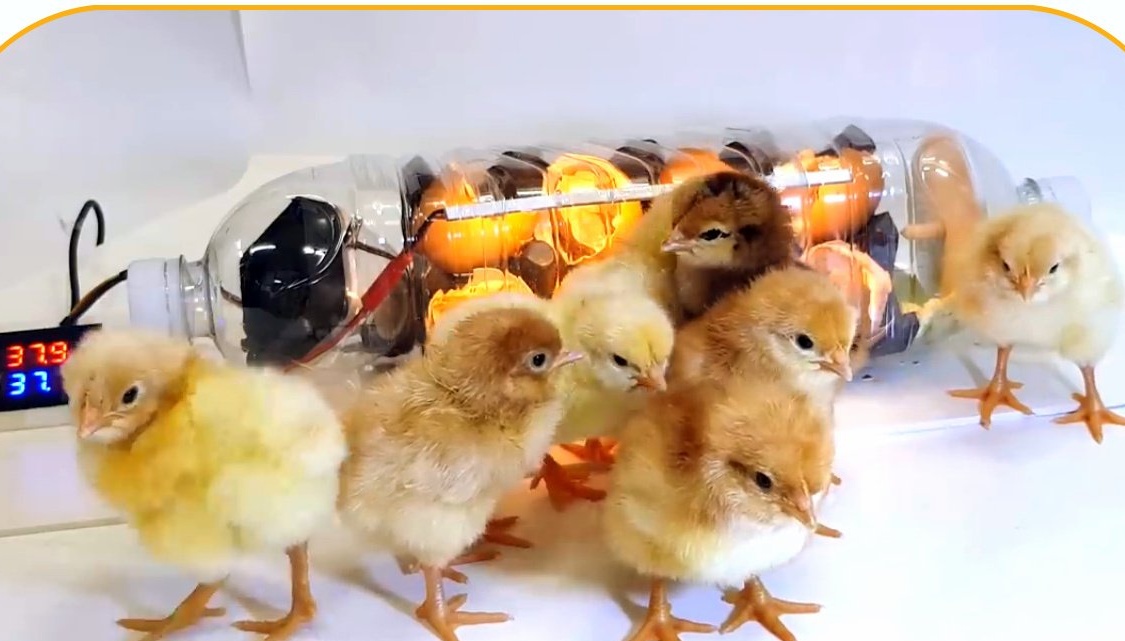
In one day, all the chicks hatched, dried up quickly enough, and settled down.


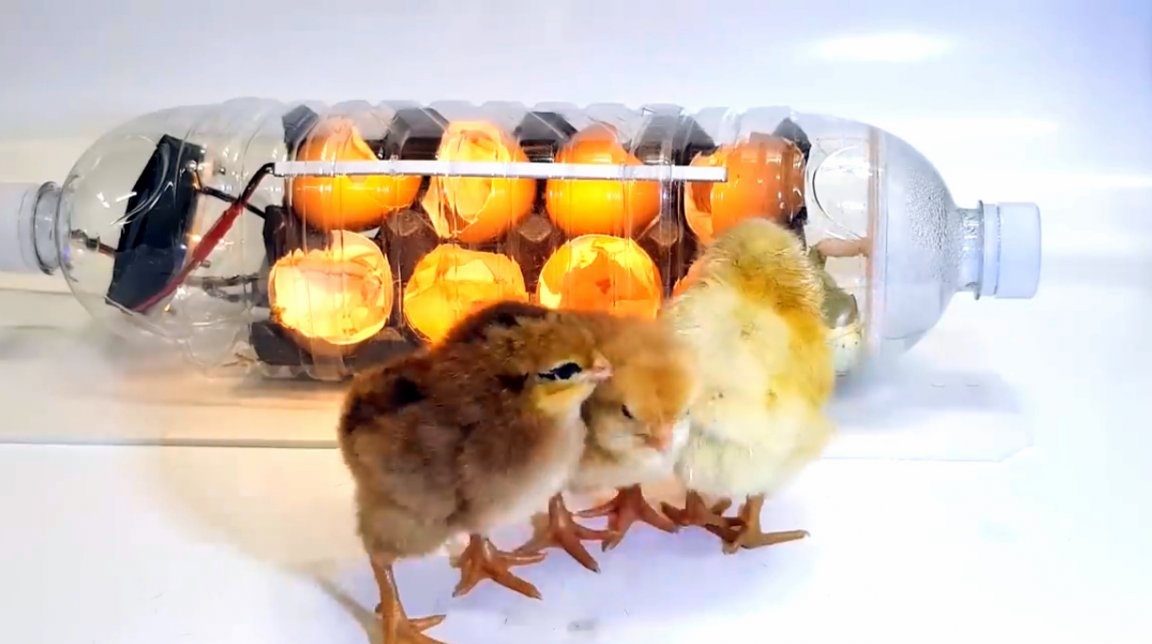
A few hours later they even decided to bite the thermostat screen.
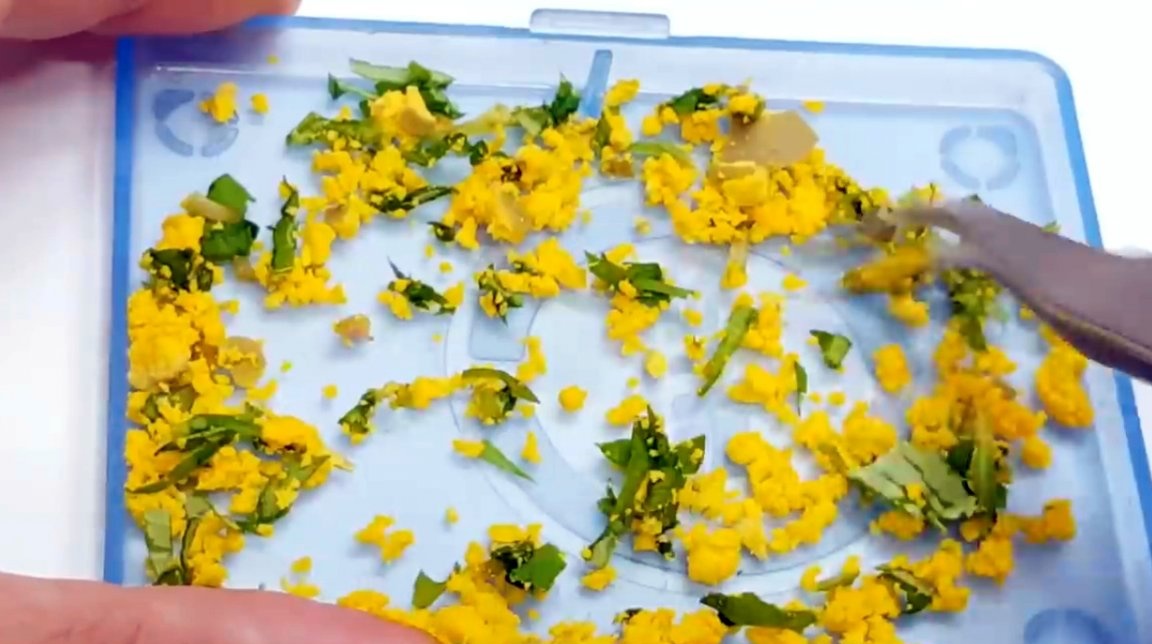
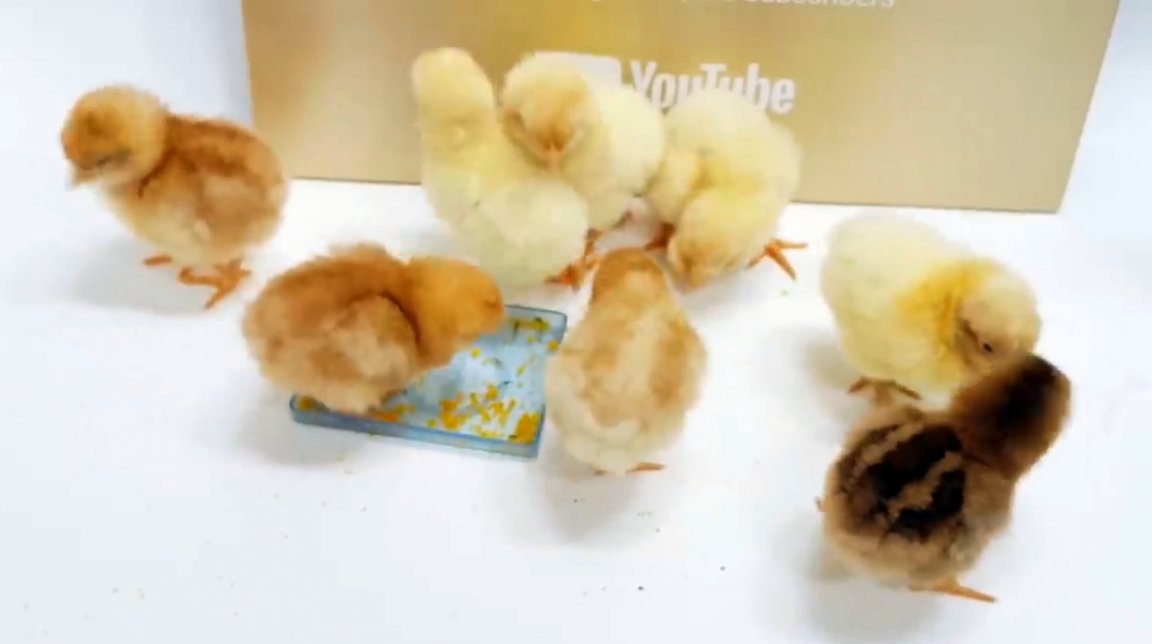
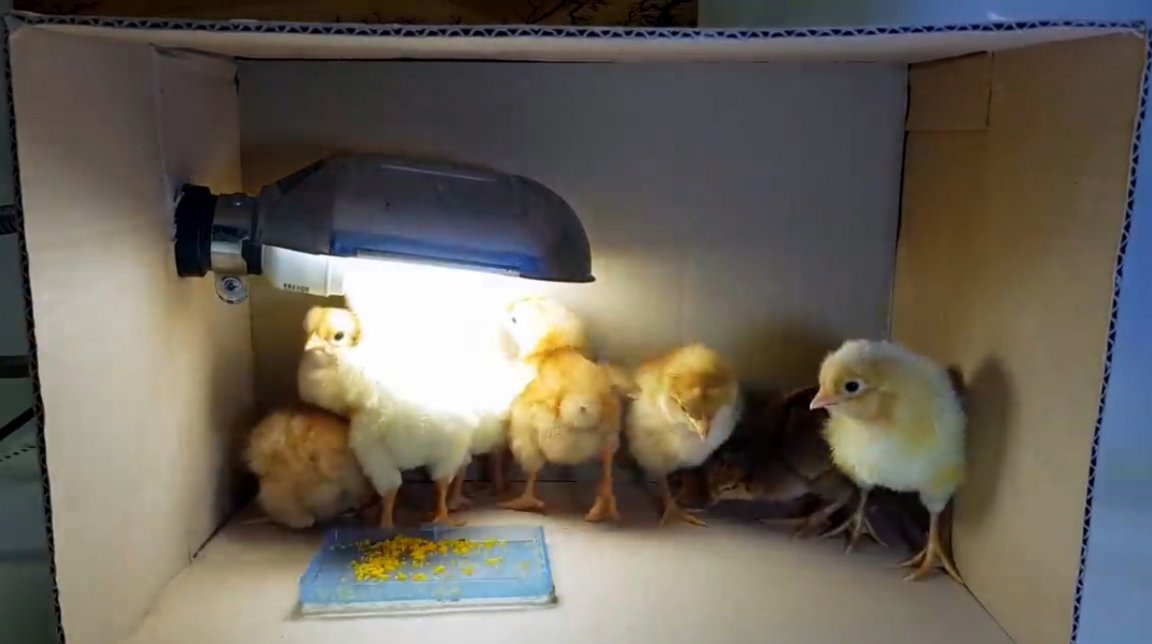
Now this brood should not be forgotten to properly feed boiled egg yolks, ground eggshells, and various greens. To maintain good conditions, you need to make the incubator simpler by installing an energy-saving lamp in a cardboard box. It will give enough heat and light, but will not burn the chicks, like a normal incandescent lamp.
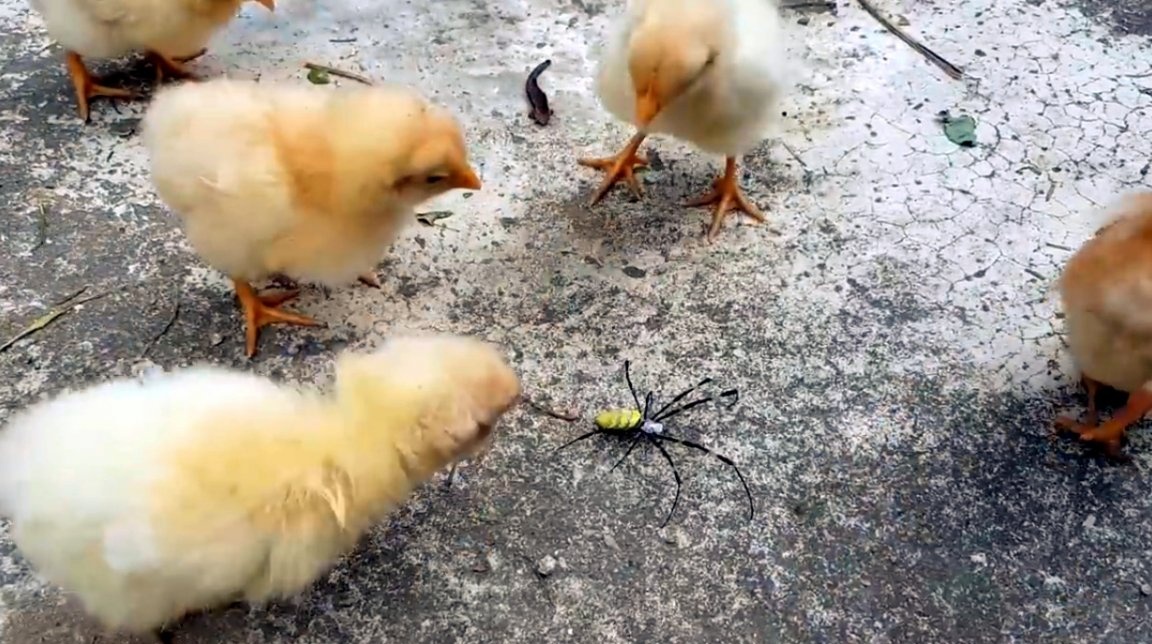
After 7-10 days, stronger chickens can be released into the street and fed with worms.
Such an incubator will be interesting not only for adults, but will also bring many benefits to your children! And if there is a desire, then you can make a small business in the middle of spring. Is that a large incubator will be required.
I thank the author for the simple but useful idea of making the design of the incubator!
If you have interesting homemade products, share them on this site. Here you will get a real reward, not a “bunch of green stuff" at the entertainment forum.
All good mood, good luck, and interesting ideas!
Author video can be found here.