

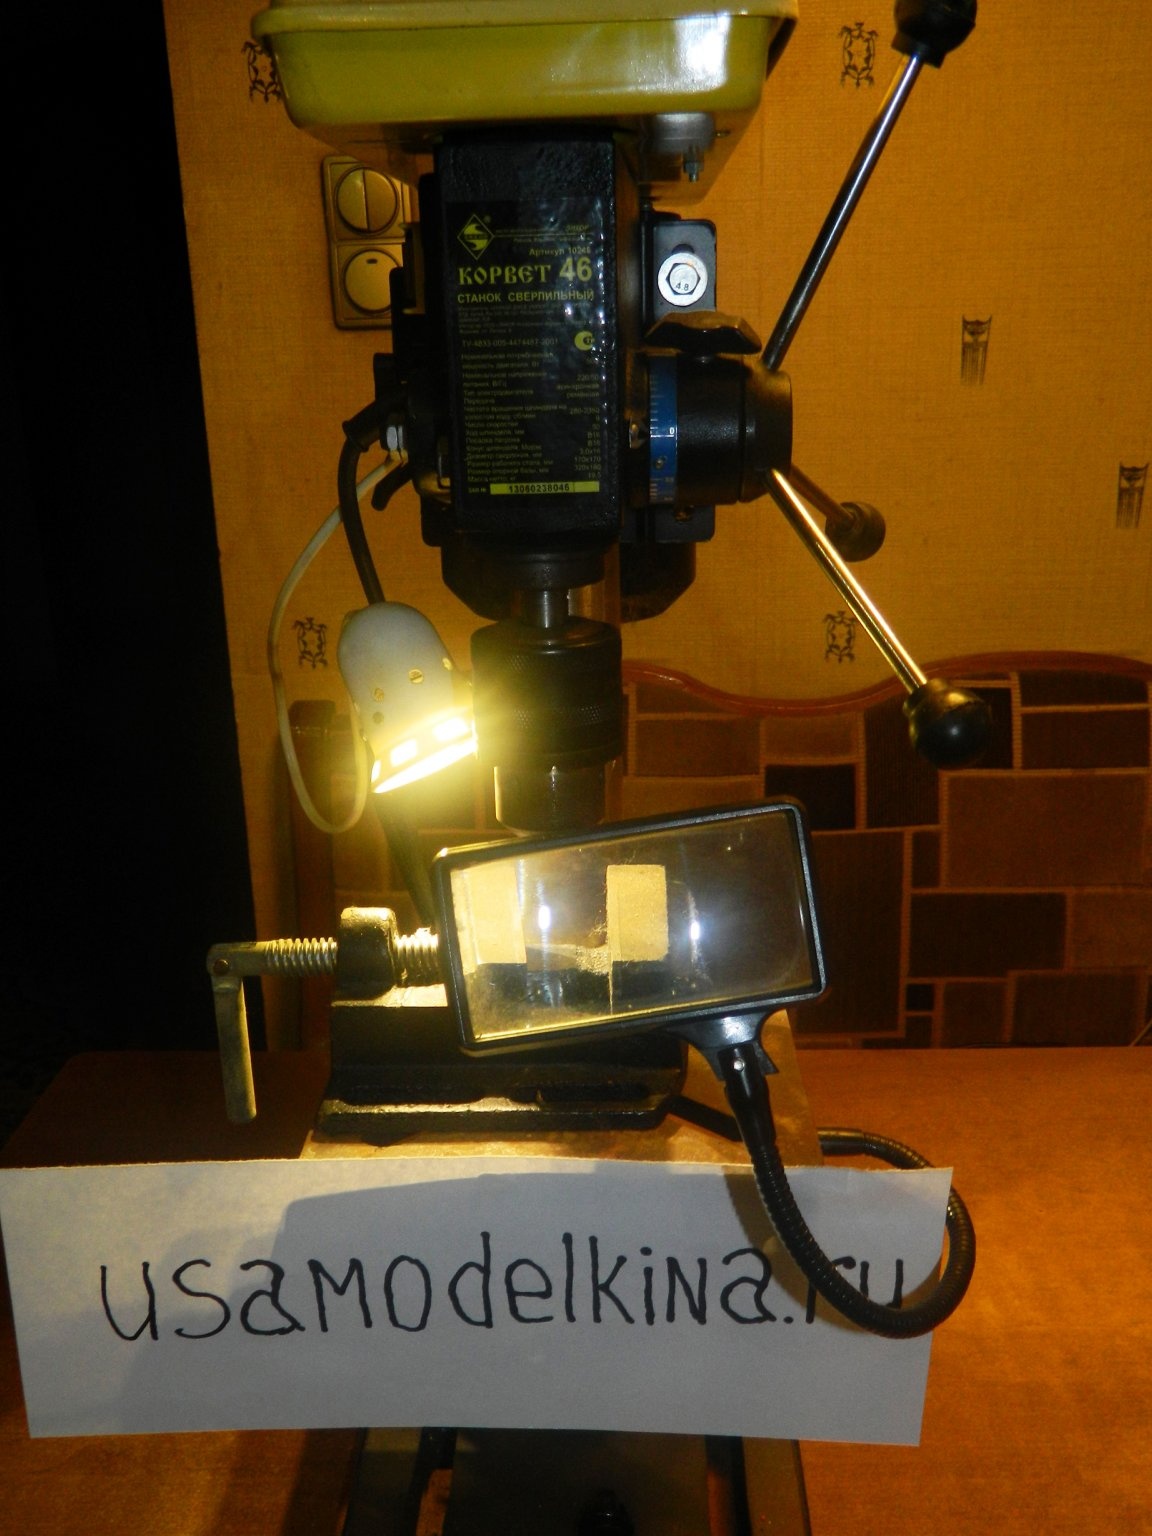
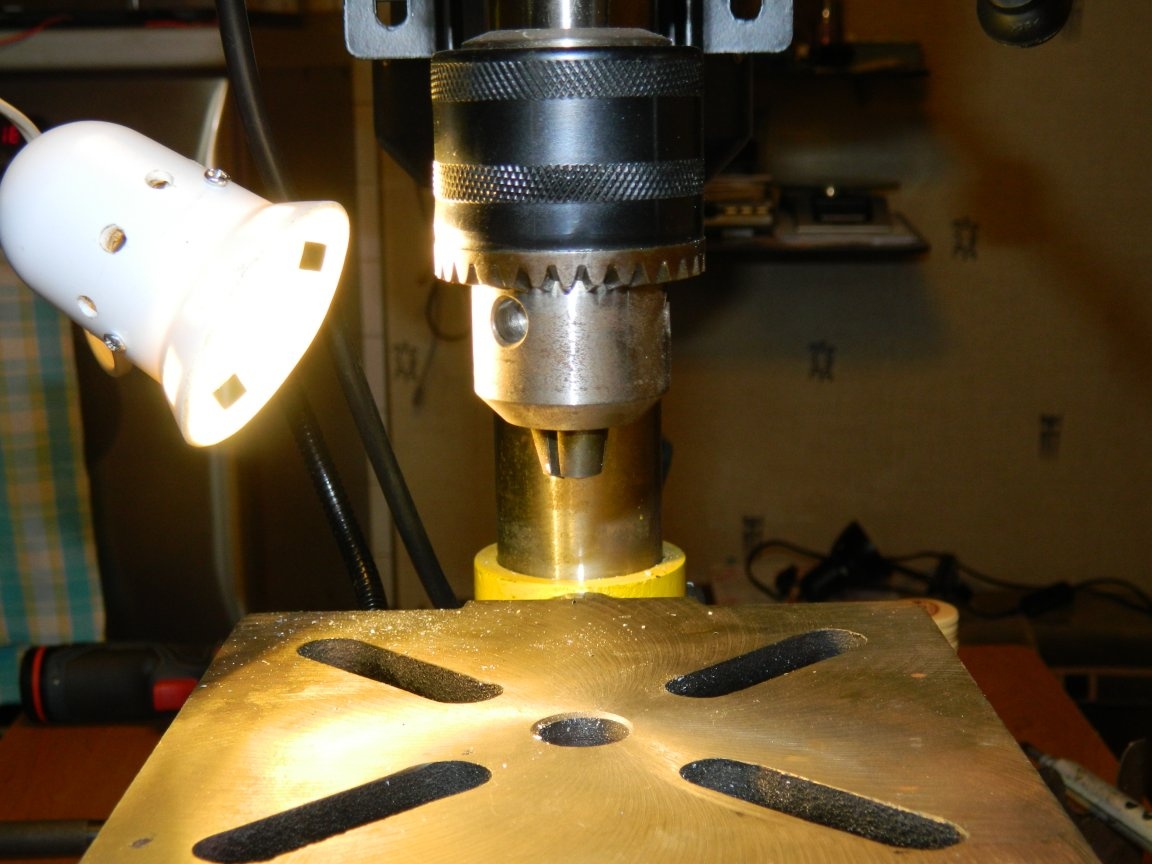
I bought a Corvette-46 machine (drilling) - a cool thing, if you need to drill holes in the workpiece. I even tried milling on it - I just need to adjust the speed. The only drawback: you have to install an additional lamp to illuminate the desktop. And when you move the table, the backlight goes off. We have to reconfigure again.
And if you attach the lamp to the desktop? Then the lamp will shine on a drilling place irrespective of position constantly. In the store, lamps with a flexible leg on a clothespin for 155 rubles were purchased. apiece, designed for an E14 lamp.
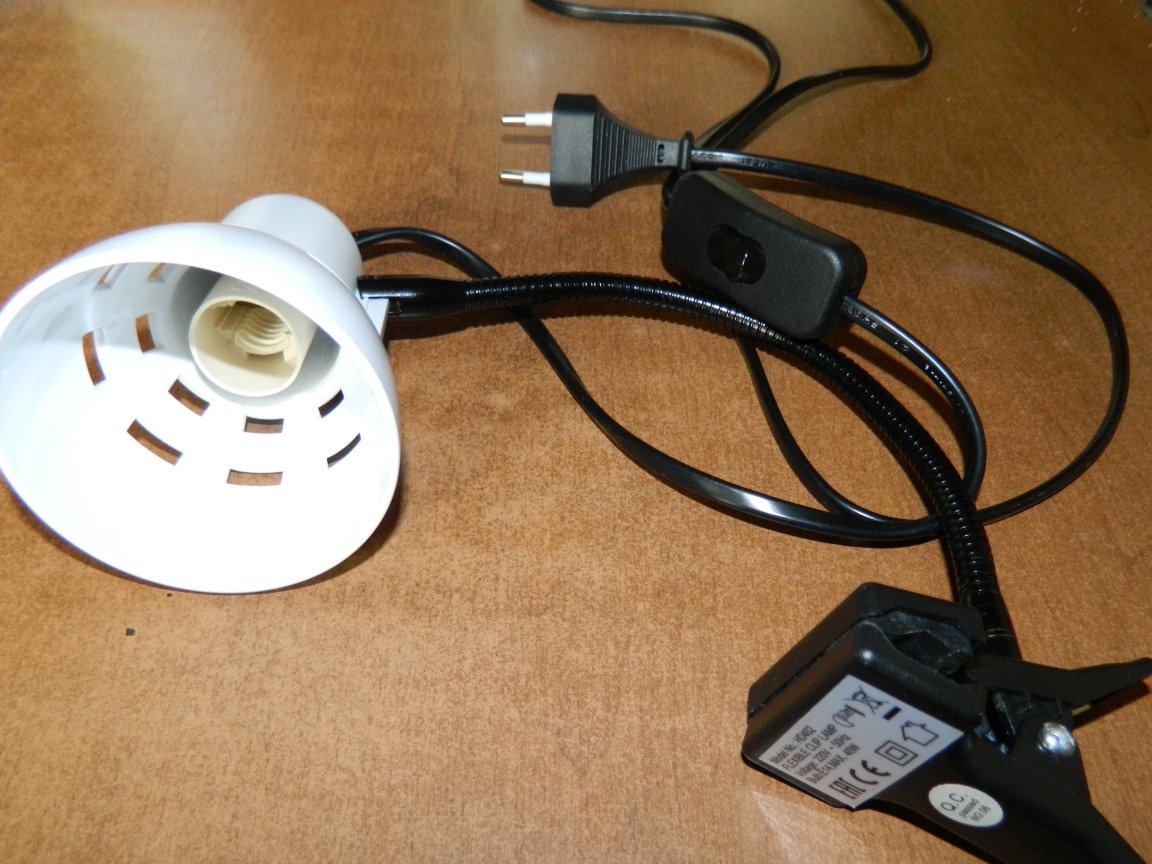
It became easier to work, but the clothespin, which had to be attached to the table, interfered, and the clothespin constantly slipped due to stiffening ribs from the bottom of the table. And I began to think about a stationary lamp, which is devoid of these shortcomings.
Rummaging around in the electric junk, I found what I wanted:
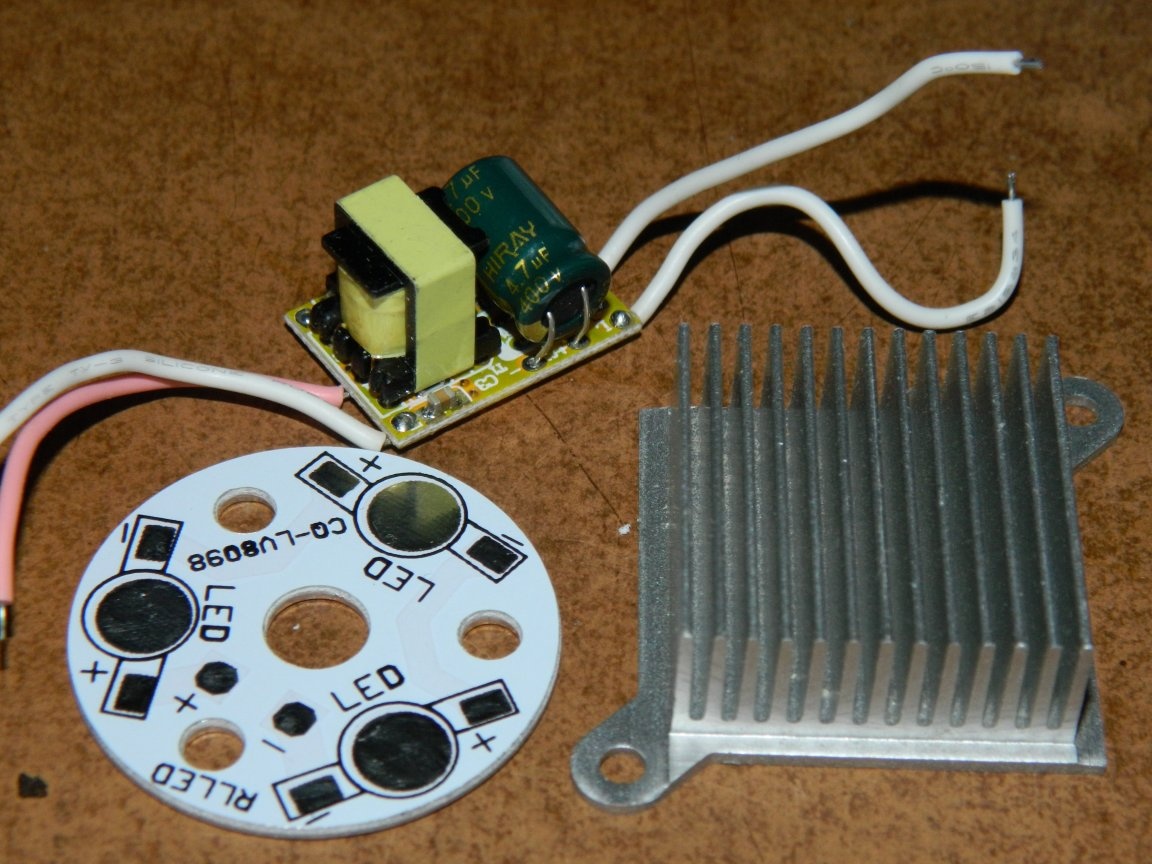
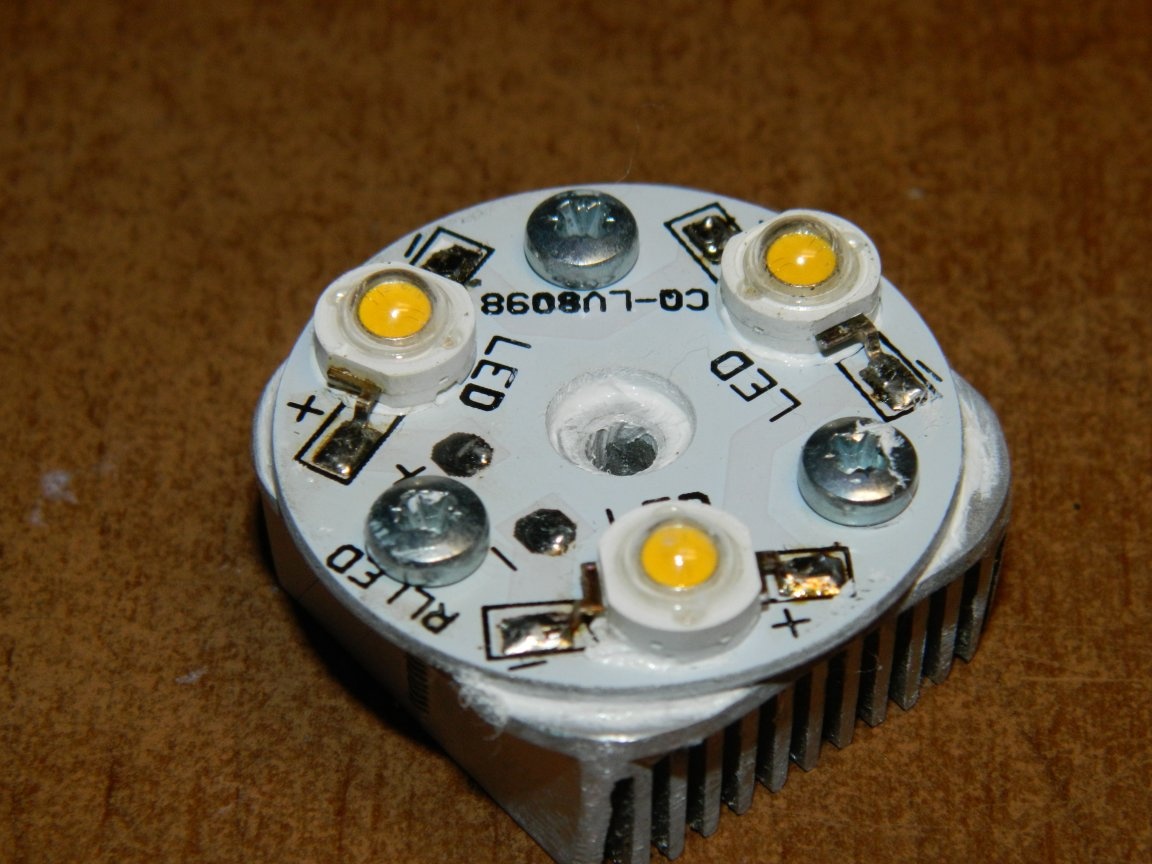
Driver with parameters: Uin. = 100-260 VAC; Uout. = 8-12 VDC; Iout. = 300-330 mA; dimensions - 22.5x16x14 mm and a ø35 mm board for 3 LEDs connected in series, as well as a radiator suitable for power (from a computer). Dimensions also fit the lamp purchased (it was only necessary to round the corners).
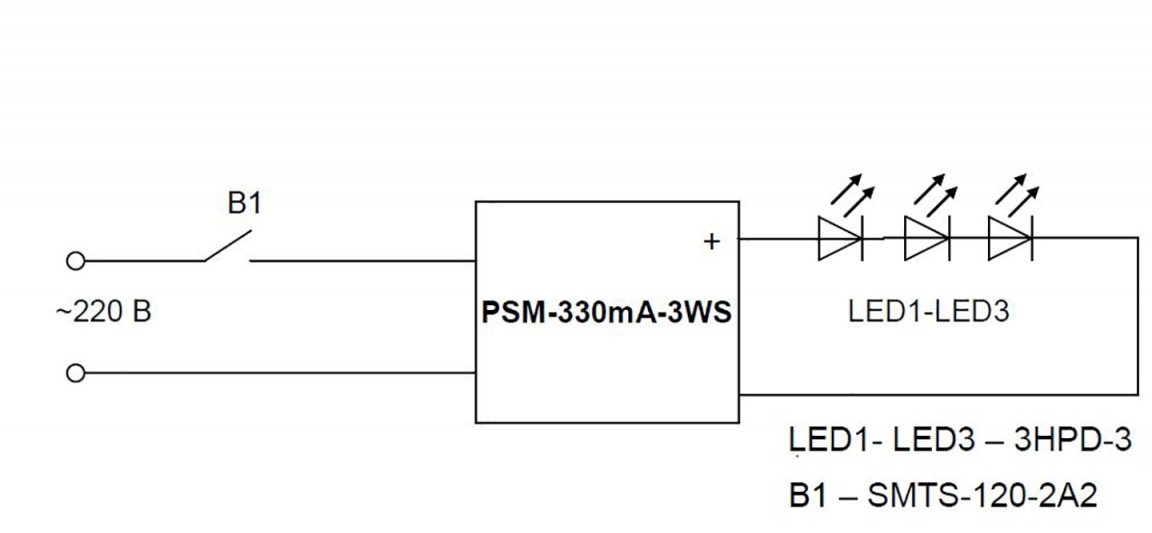
Focused on 3-watt LEDs - (although they will work in single-watt mode). These LEDs have a larger chip (45 mil) and, therefore, in a confined space they are subject to less heat, which means more stability. On the figure The connection diagram of these LEDs to the driver is presented.
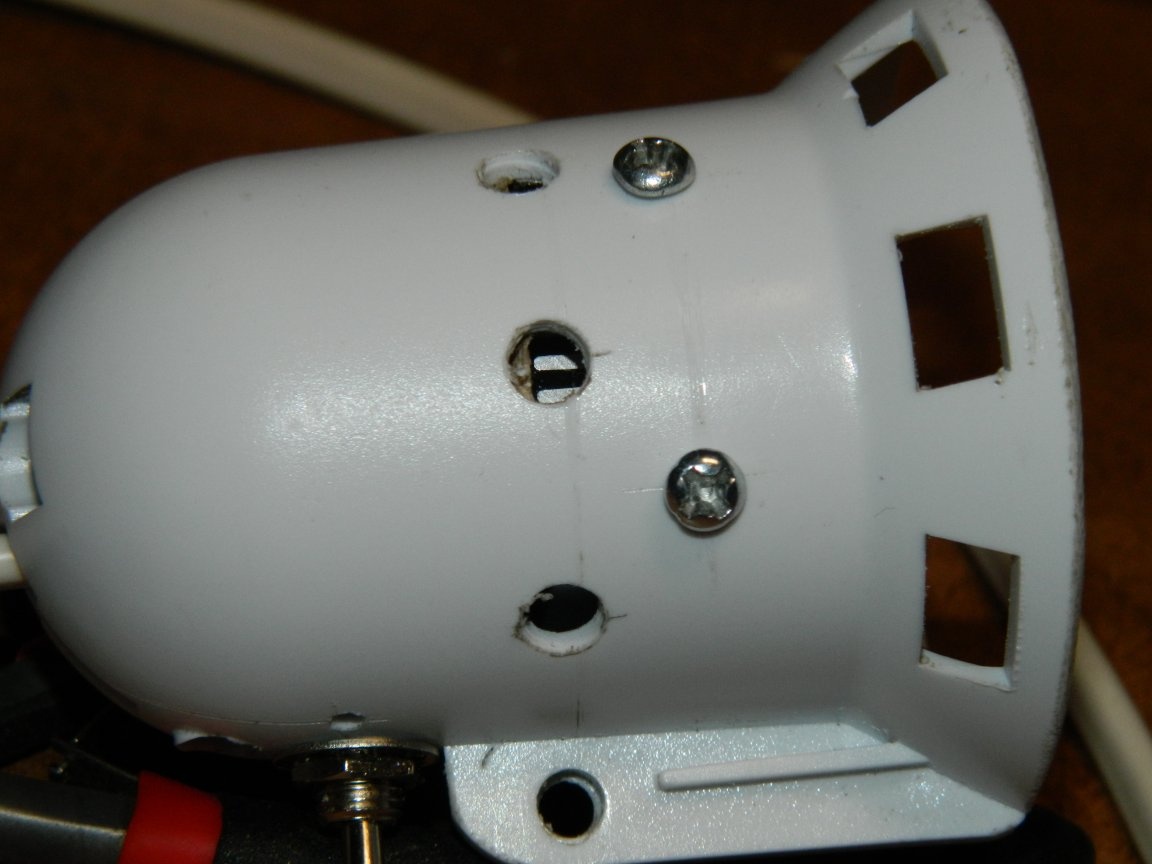
The plastic shade was a little too big, and with a drill I cut off part of the shade.
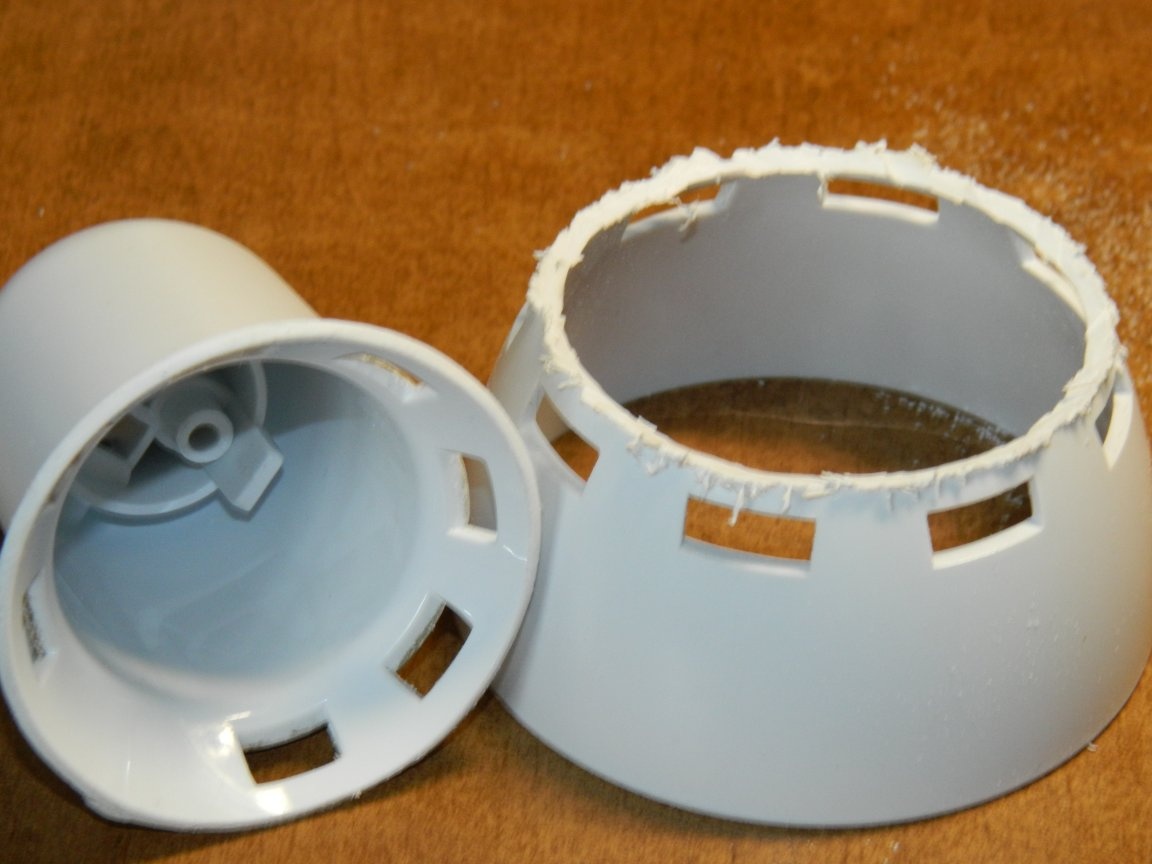
All the stuffing was to be shoved into the cartridge.

Drill removed part of the ring (where the cartridge was) and installed the driver there.
On the opposite side, I milled a place for the SMTS-102-2A2 microtumber switch and, having drilled a ø5 mm hole on the side of the plafond, installed it. On the sides of the plafond, I drilled holes for cooling, and also made threaded holes for attaching the LED assembly.
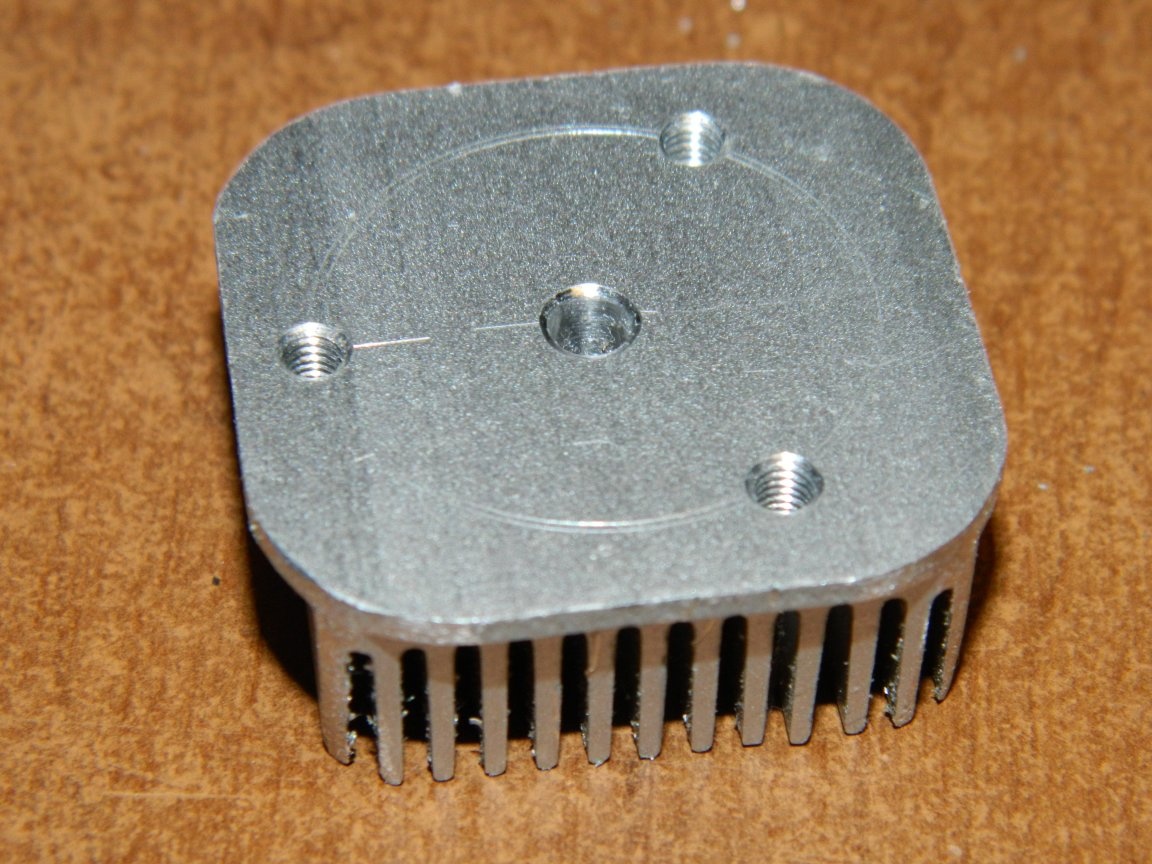
Now let's deal specifically with the module. The preparation of the radiator was reduced to the fact that the ears were sawn off and the corners rounded with a file so that the radiator fits into the ceiling.
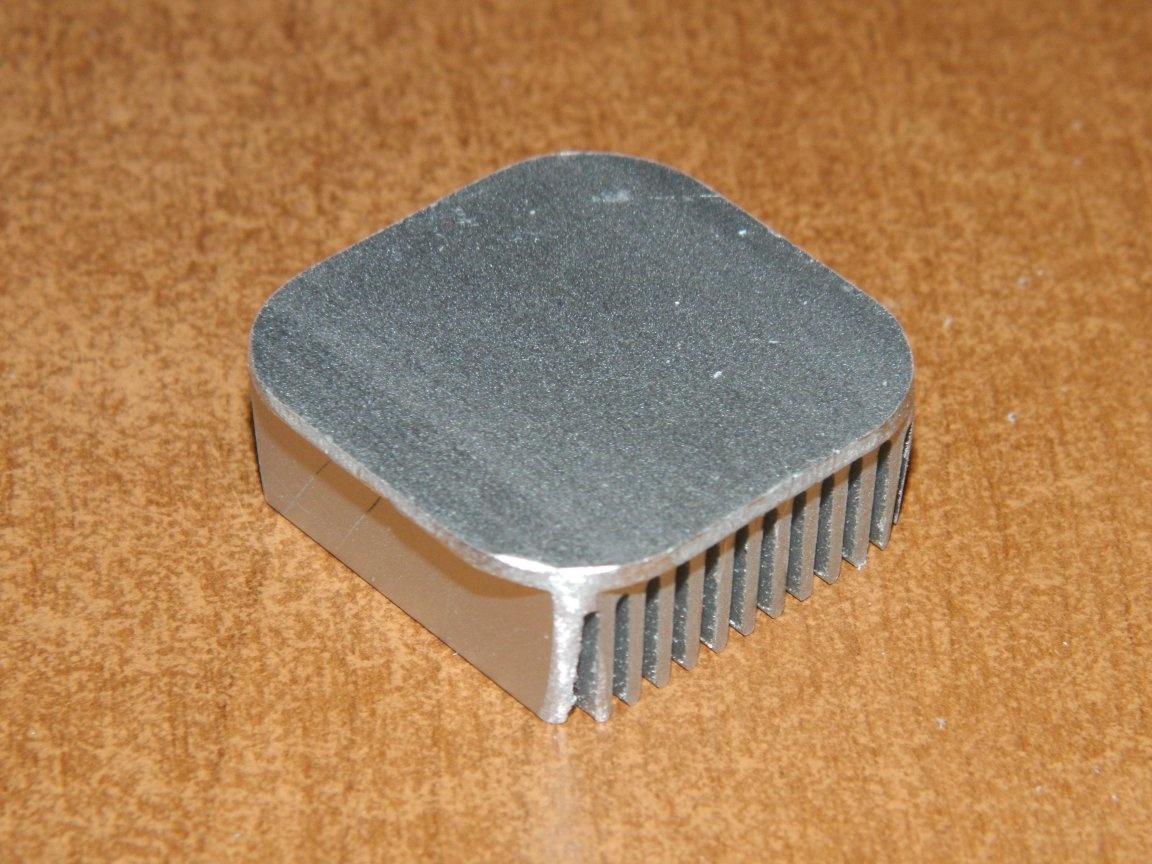
Then, one central hole ø4 mm was drilled in it for the release of wires and three threaded M3 for fixing the board.
The LEDs were soldered onto the board after gluing with Radial glue (glue drying takes about 20 hours), the board was mounted on a radiator using heat transfer paste KPT-8.
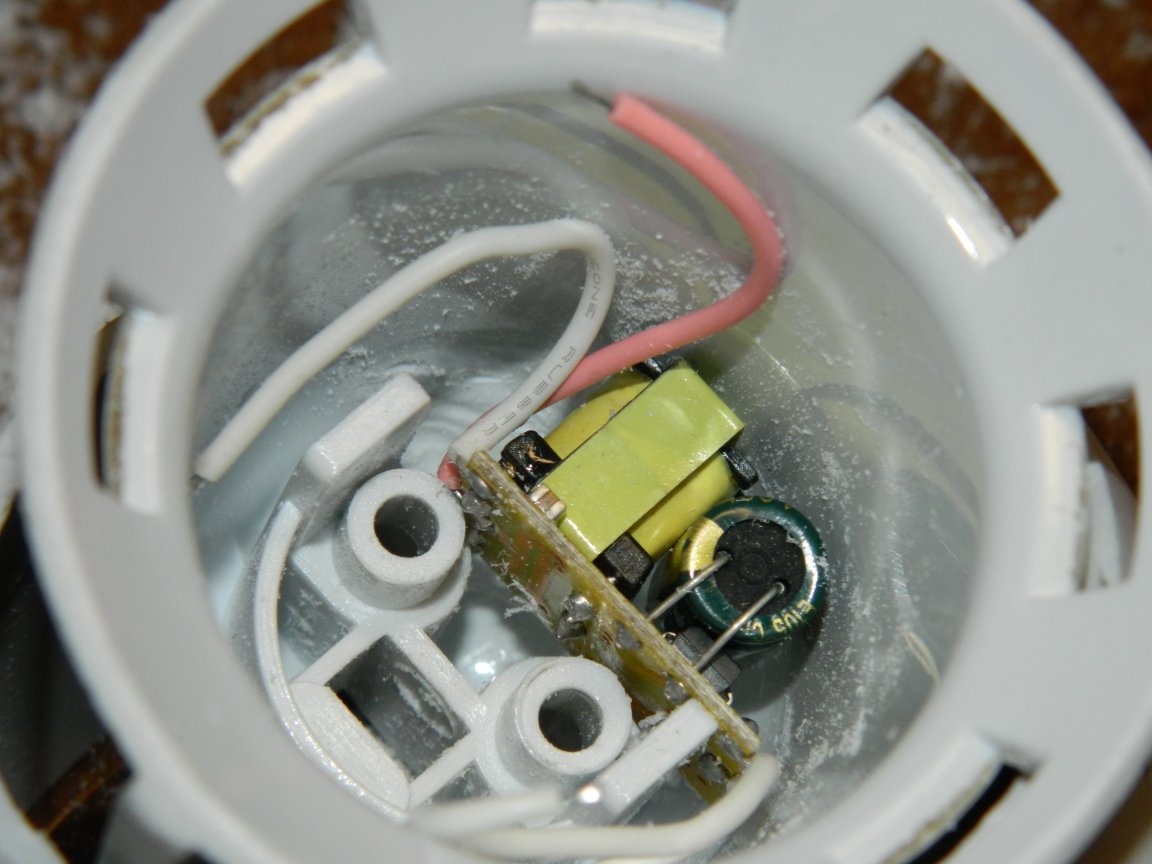
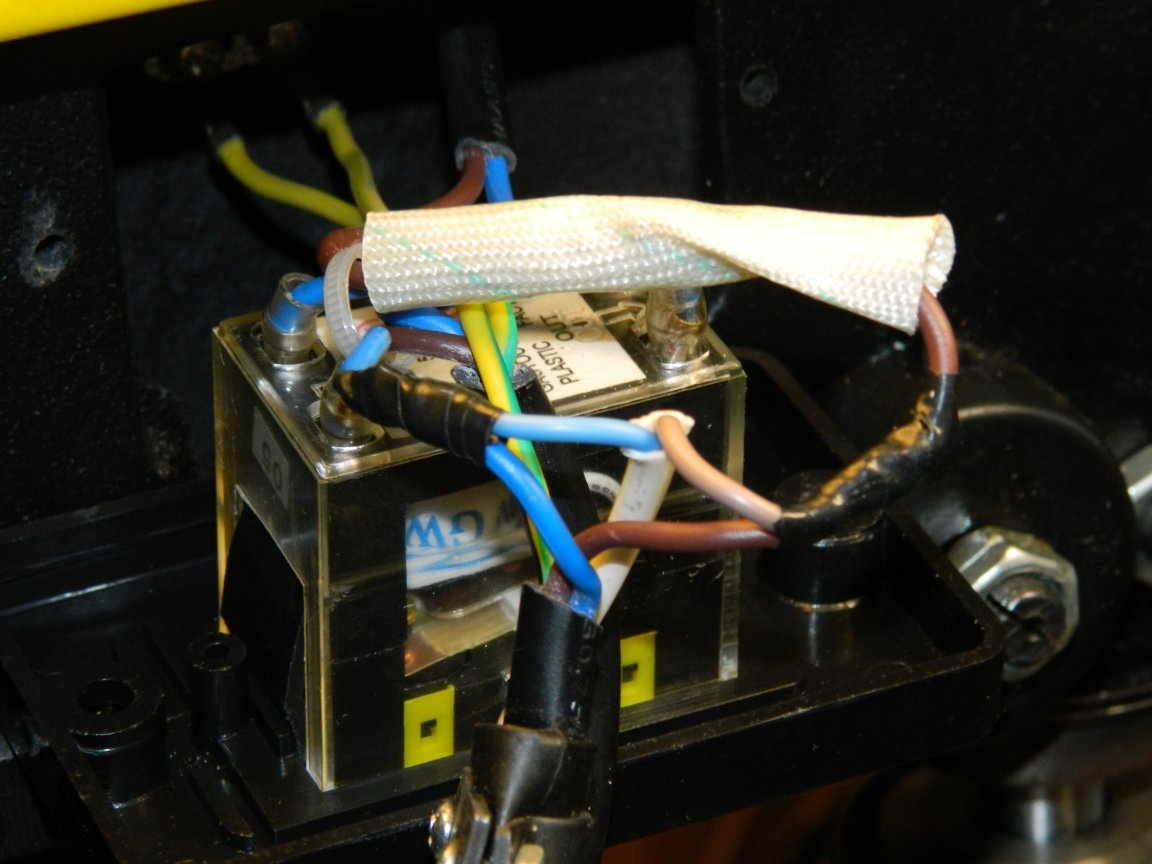
Installation of all wiring was done with a MGTF wire of 0.2 mm².He soldered with wires (which should have fed the lamp) to the toggle switch and fixed it with a screw (such a fastening was already provided in the lamp). The input wires from the driver, of course, soldered to the output of the toggle switch. On the output “+” wire of the driver, he tied a knot (since he built them up with the MGTF wire).
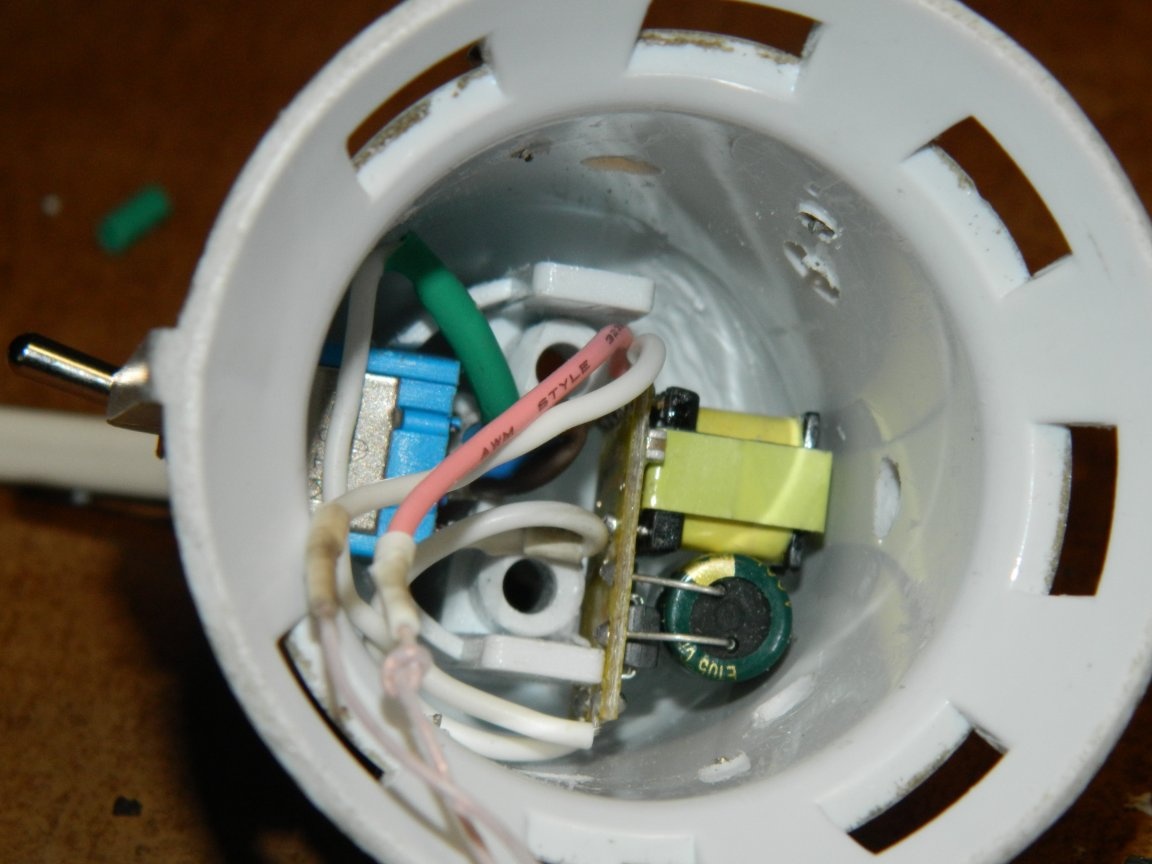
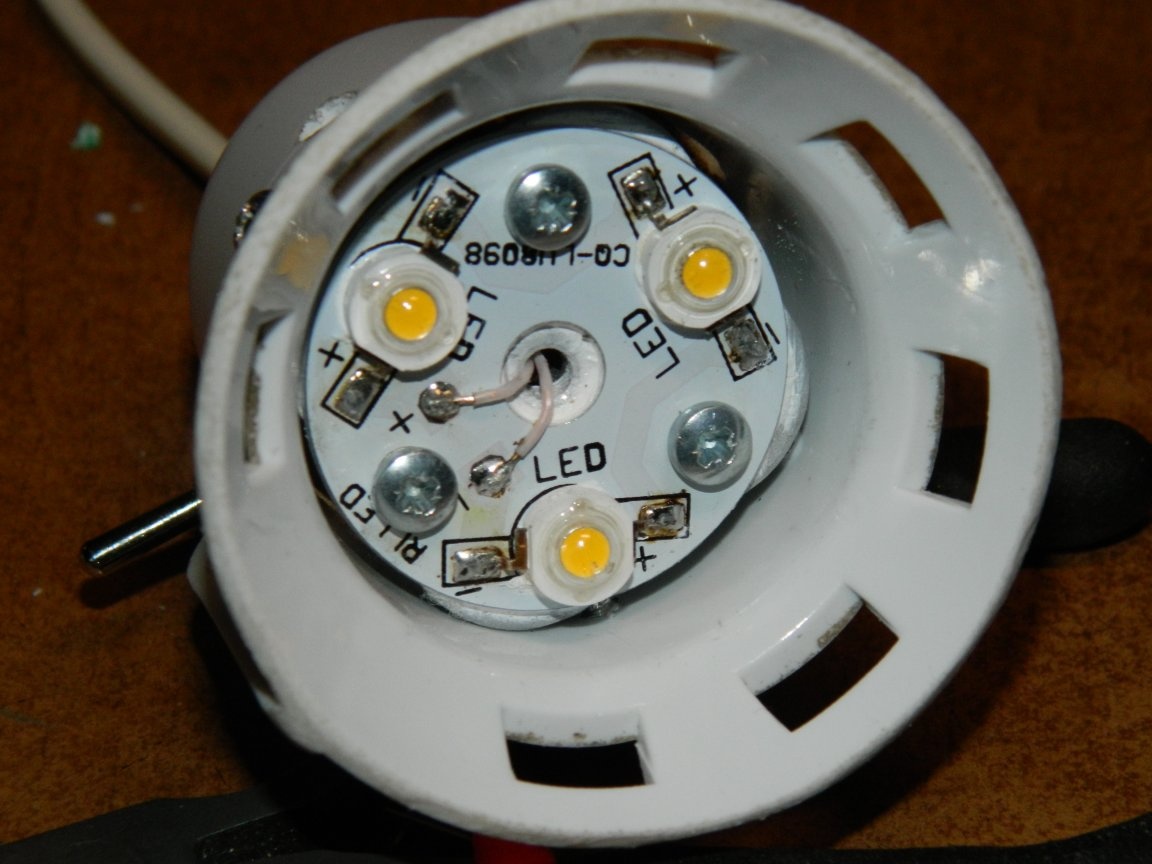
All joints of the wires were insulated with a heat shrink tube. Observing the polarity, passed the wires through the central hole and soldered them to the board. The plate was fixed with four self-tapping screws.
I dismantled the module on the machine (where there was a magnetic starter) and soldered the mains cable of the lamp directly to the power cable of the machine.
The joints were insulated with electrical tape.
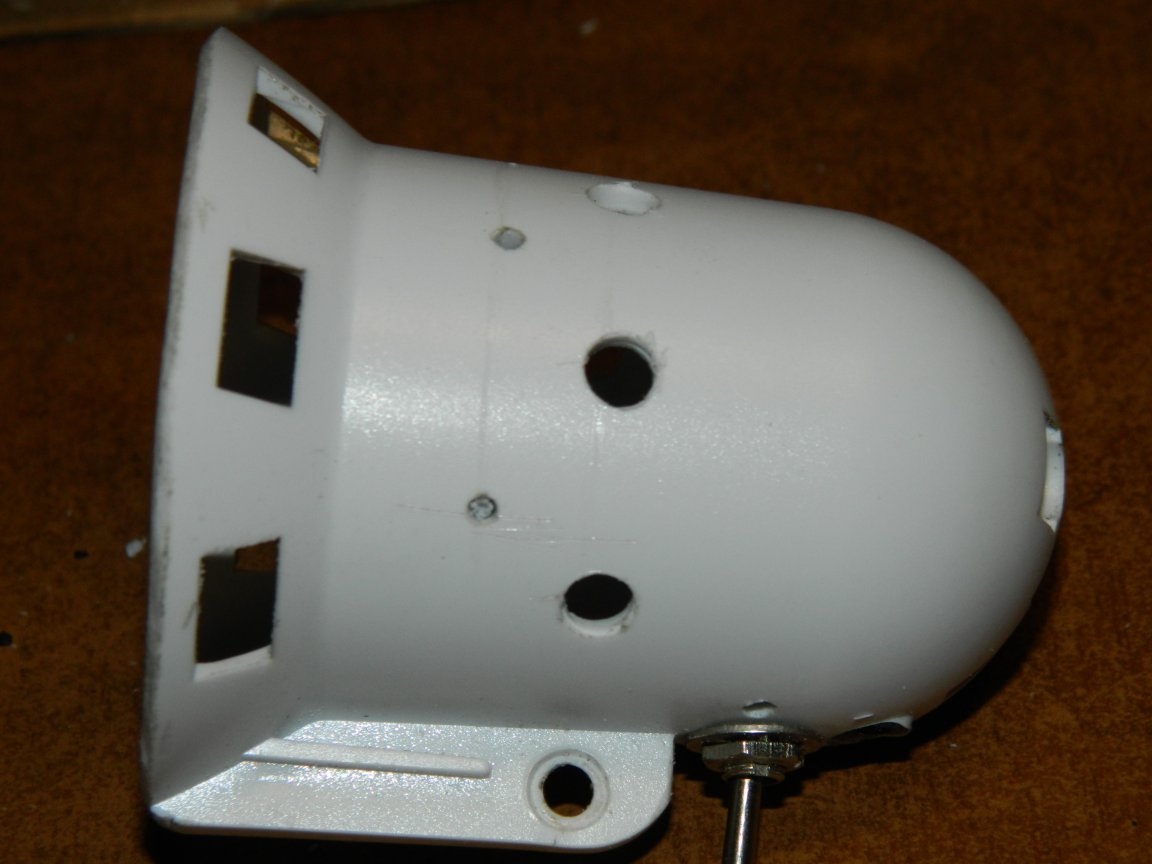
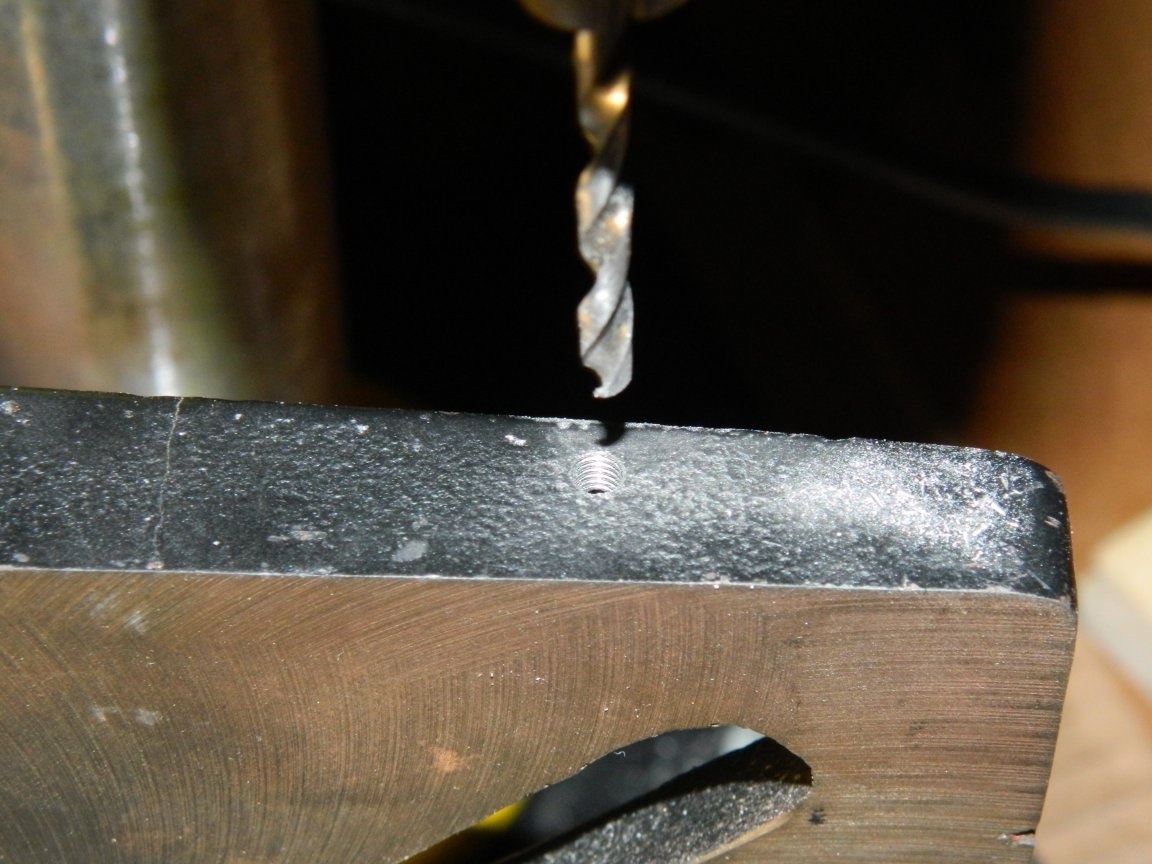
Now it was necessary to fix the lamp on the machine table. Having removed the table, I drilled a ø3.5 mm hole in the side and cut an M4 thread in it.
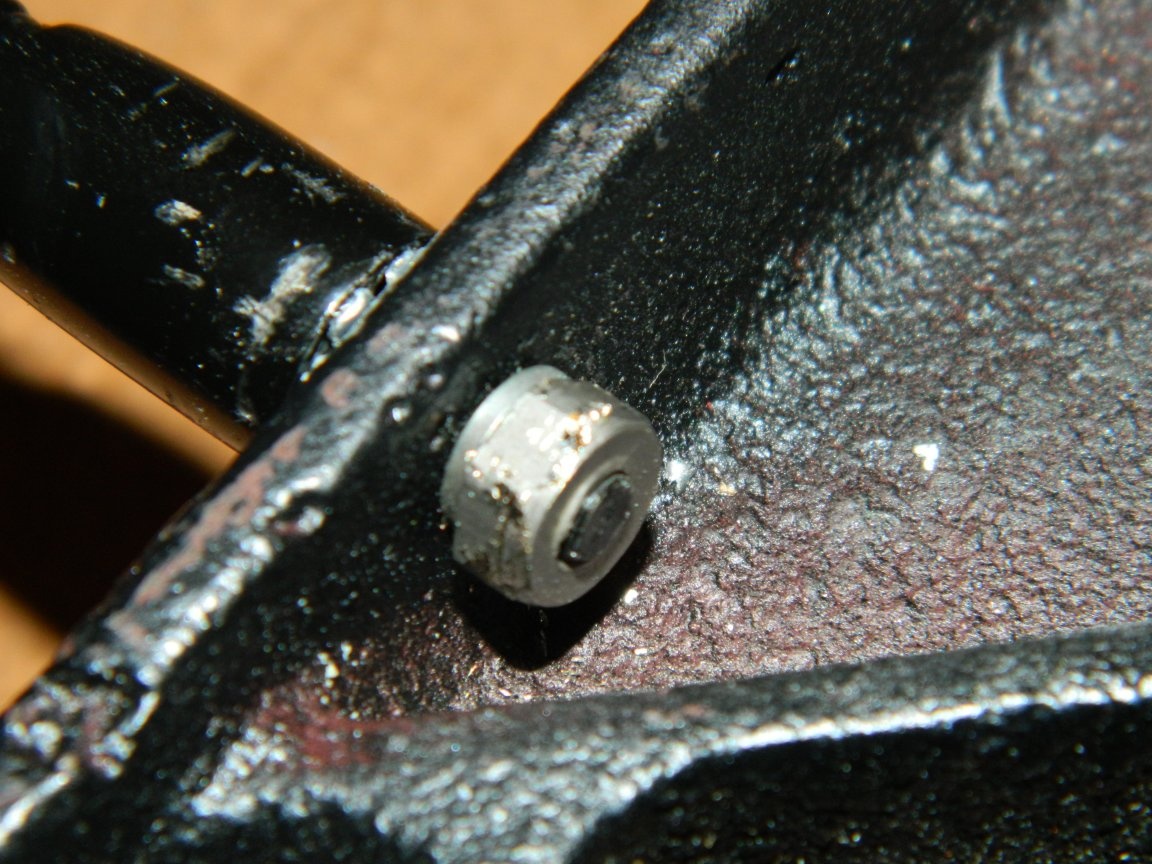
The screwed leg was fixed with a self-locking nut.
I put the table in place and attached a lamp to the flexible leg.
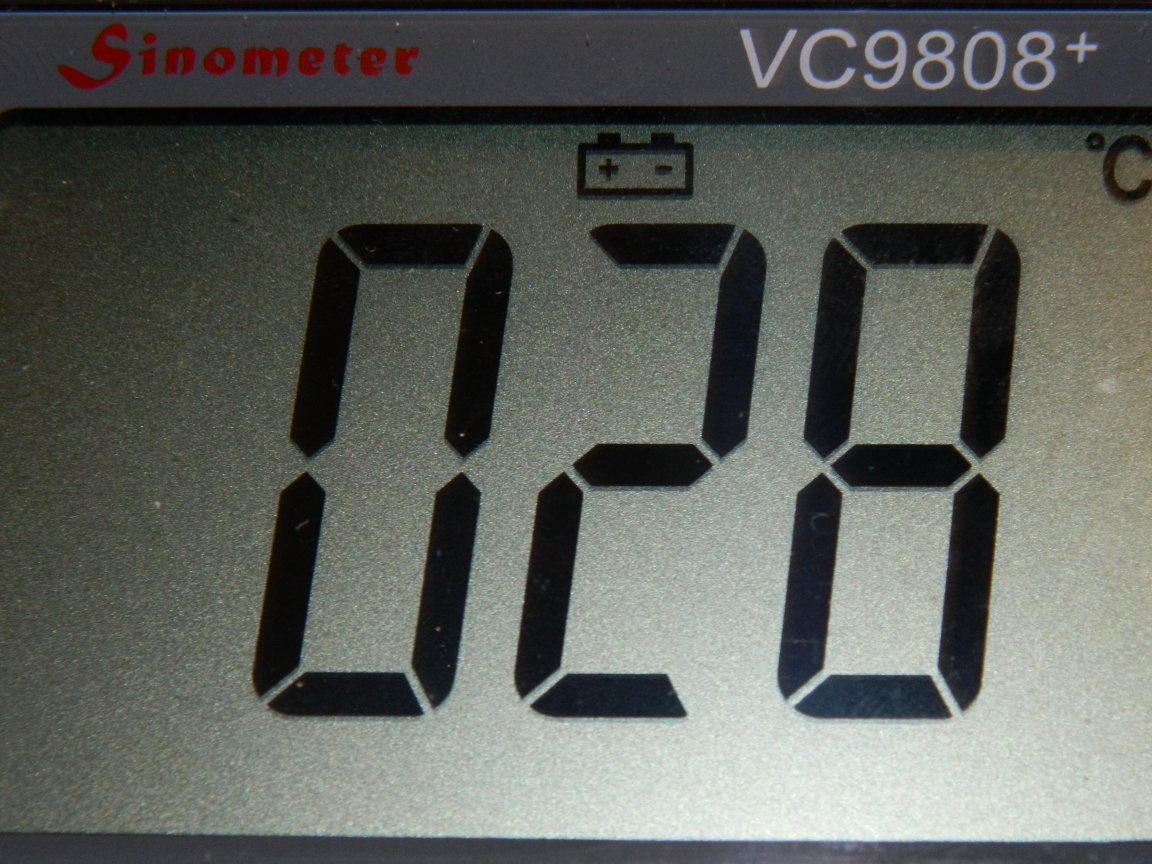
Although I was sure of the correctness of my calculations, just in case I measured the temperature on the radiator - it amounted to 30ºC after half an hour of lamp operation, which corresponds to the normal operating mode.
Remodel, so to the stop ("the monkey in old age became weak with eyes")! There was an idea to install also a magnifier on a flexible leg. I had a lamp with a leg - it's up to the magnifier. In optics, I purchased a rectangular X3 magnifier on the handle (for 340 rubles). Cut off part of the handle from her,
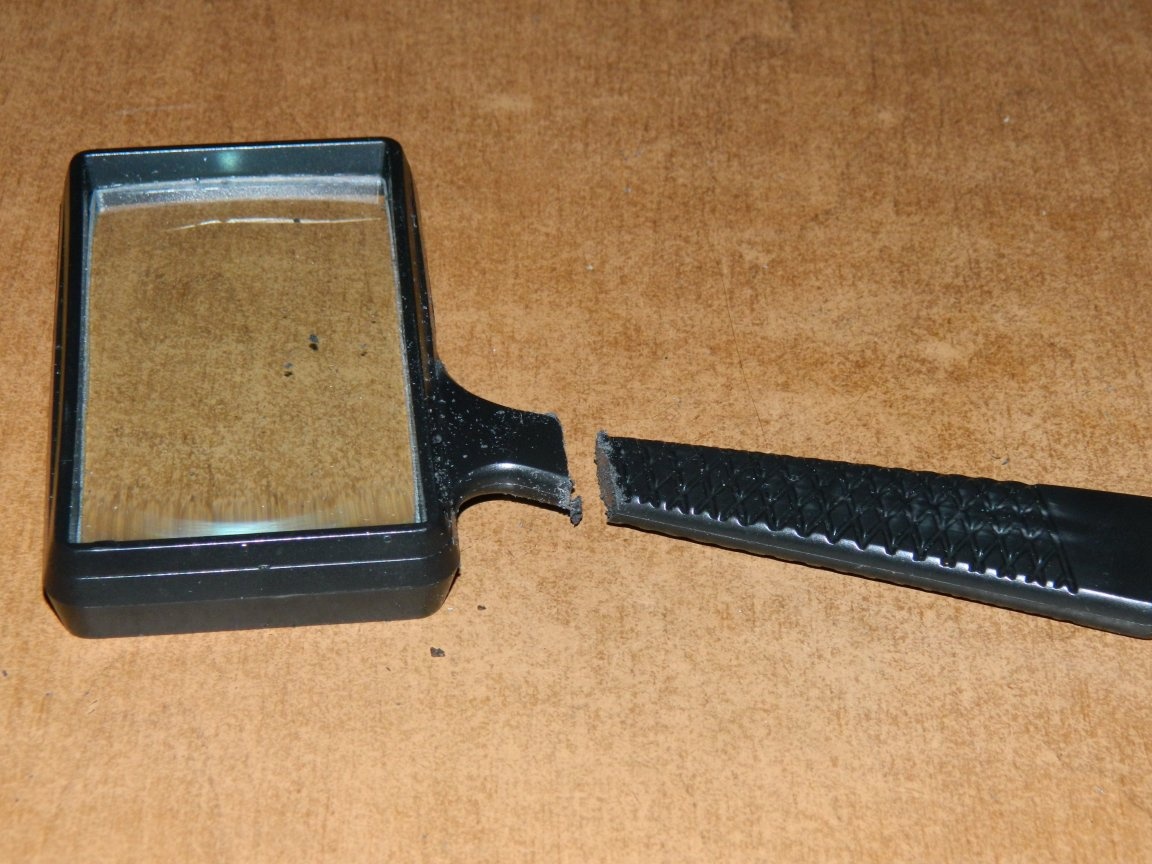
I drilled a ø4 mm hole in the remaining part and adjusted the thickness to the slot with a file.

Next, I installed a magnifier, as well as a lamp.
Now the completion of the drilling machine is completed.

It was a pleasure to work. And don’t have to wear glasses - everything is so clearly visible!
At one time, the machine cost about 7000 rubles, and I spent just nothing. The improvements to the machine were worth it!