
If you need an overflow between a display aquarium and a sump in a marine aquarium system, then it will be much cheaper to make it do it yourselfthan buying ready-made. We suggest that you make your own Stockman overflow. It is stable in operation, has small dimensions, which significantly reduces the size of the overflow shaft.
In the video you can watch a detailed phased creation of an overflow from plastic pipes
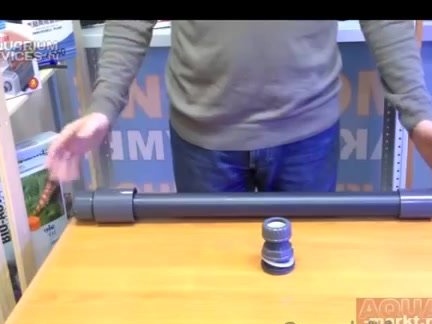
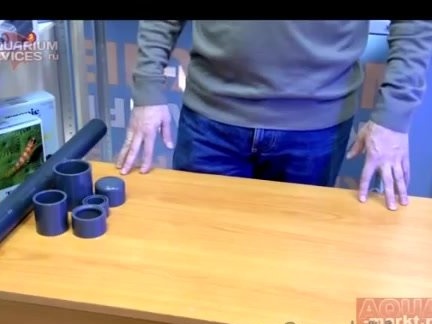
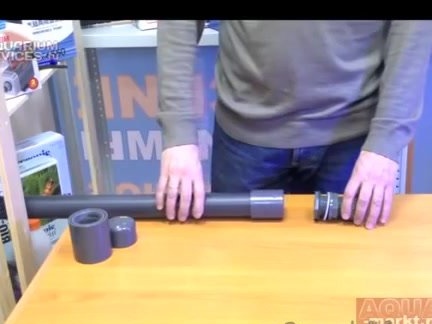
For the production of overflow we need:
- a stub;
- adapter ring 63 to 50 mm;
- coupling 63 mm;
- coupling 50 mm;
- adapter ring 50 to 32 mm;
- pipe section
- file;
- marker;
- a hacksaw;
- drill;
- drill;
- pliers;
- acetone.
The main overflow diameter will be 50 mm; accordingly, over the pipes are taken for this size.
First, take the adapter ring 63 by 50 mm and get rid of the restrictive side inside the ring along the 50th diameter. This is necessary so that our ring can freely dress on the pipe and move along it. Initially, the ring cannot move through the pipe due to the restrictive side.
We grind the bounding flange with a file so that the ring fits on the pipe and moves along it with an interference fit. Those. it is very important not to regrind this side.
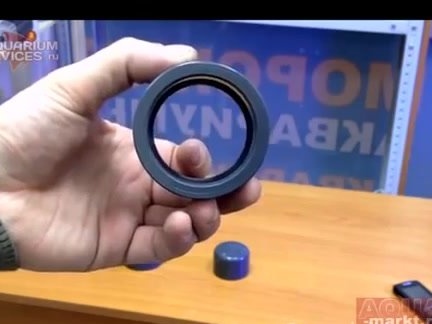
After the adapter ring is dressed on the pipe and moves when a significant force is applied, we proceed to the assembly of the upper part of the overflow.
We dress the adapter ring without a flange on the pipe and close the hole with a plug. Dress her to the end, point blank with the adapter ring.
On the back of the pipe we put on a 63 mm sleeve, it will be our bell. The coupling is tightened close to the plug, the adapter ring should be under it.
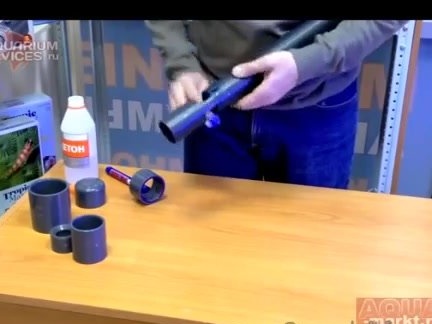
Now we need to mark the holes with a marker. Circle one line along the bottom edge of the sleeve. Remove the clutch. The second line is drawn along the lower boundary of the transition ring.
We disassemble the design. Now you need to draw a third line, placing it between the first and second. Moreover, it must be located at a distance of 1-1.5 cm from the first line. It is very important to make it even.
Now it should be noted two jumpers.They will be located at an equal distance from each other. The thickness of the bridge will be about 1.5-2 cm. We denote it by two lines intersecting the second and third ring lines. On the back of the pipe we do the same.
Cut free large areas between the jumpers. We make cuts with a hacksaw, use a drill, drill and pliers to remove excess pieces of plastic. The edges are processed with a file.
The marker is removed with acetone.
We collect the upper part again.
We drill 1.5-2 mm in the upper part of the plug.
Now collect the bottom of the overflow. We put a 50 mm coupling on the pipe, into which we insert the adapter ring 50 to 32 mm.
We adjust the overflow length depending on how much you need.
We glue the adapter ring to the bell coupling, this is necessary for overflow reliability. It is also worth gluing the lower part of the overflow, fixing the coupling and adapter motionless relative to the pipe.