
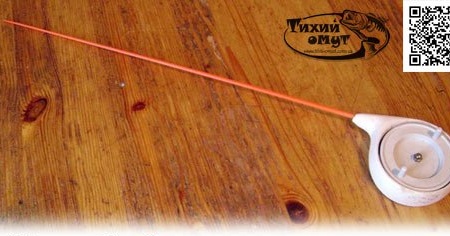
Probably, nevertheless, there is such a man in the world who loves winter fishing. And such lovers, by no means, are many. Most prefer the perching of perch on Lake Ladoga.
But for good fishing, you need a good fishing rod and in a store like that, it's simply impossible to buy. The best option is to make it with your own hands. So, better and more reliable.
But in order to make this important element yourself, you will need the following:
From materials:
• An ordinary piece of polystyrene foam, and the harder the better
• Coil wiring plan, the diameter of which must be at least 65 millimeters
• A simple whip, the length of which does not exceed 500 millimeters. It can be very different, both from the category of vinyl-plastic and fiberglass
• Spring nod
• Glue. It is advisable to take an epoxy
• A ring so that you can skip the line and fasten the baits.
Remember that in the process of choosing coils, as well as the whip, you must take into account your own characteristics, individual ones. For example, the dimensions of your palm, namely, that you can comfortably hold the handle of the fishing rod. Your hand should be in a freer state, not in any way compressed.
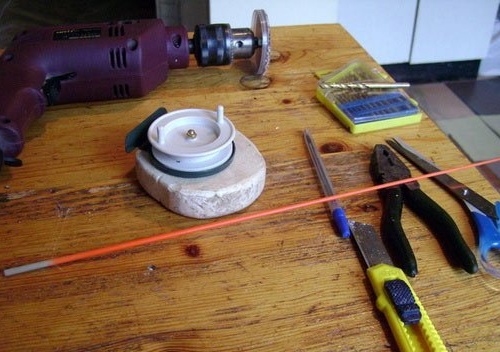
So, and in order to make the work easier, you, with the exception of materials, will still need tools. Without them, just can not do.
Instruments:
• Simple stationery knife
• Drill and drill (very different)
• pliers
• File, file
• The skin is coarser (the thicker, the better and easier)
• Specialized scissors designed for working with metal
• Dishes so that glue can be diluted
• Simple pencil and compass
• Durable ruler
After you have acquired all the necessary components for the work, you can, directly, proceed to it.
Step 1
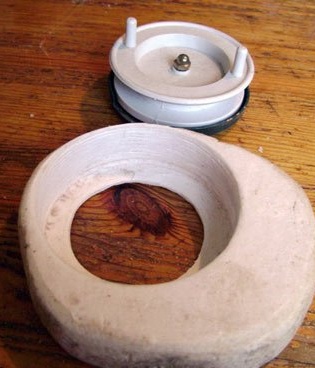
First you need to process a piece of pre-prepared foam so that its thickness is not more than 3 millimeters and at the same time does not exceed the coil volumes. Styrofoam can be taken anywhere.In extreme cases, you can take the one that remains from the purchased equipment.
Step 2 Now is the time to make markings on the plane of a piece of polystyrene foam, namely, the outline of the handle of your fishing rod. Note the location of its axis, and the contours of the spool in conjunction with an allowance of one millimeter.
Step 3
Next, in the inner circle that turned out, draw another contour, the diameter of which should be 21 millimeters smaller than the dimensions of your spool.
It is not that difficult.
Step 4 The time has come to apply the clerical knife prepared by you, as well as the skin. To do this, first process a small recess slot. As for its height, it should be about three millimeters. You can take a little more.
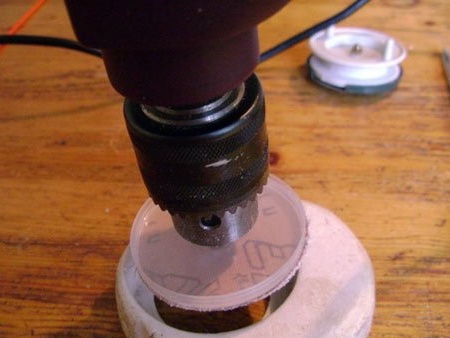
Step 5 Now you need to process the bottom of the nest. For this, it is very good to use a drill. You can choose a nozzle at will.
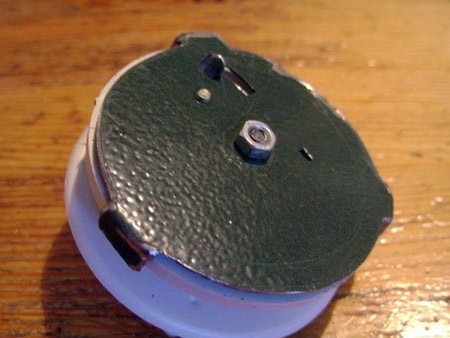
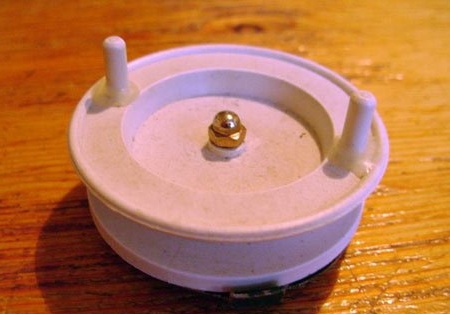
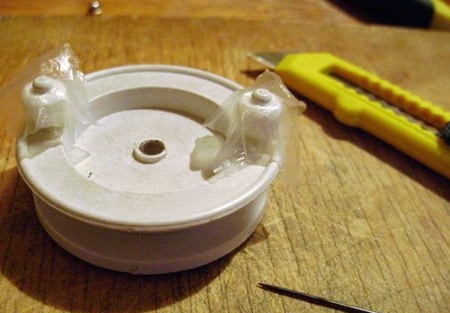
Step 6 The last steps remained. It is imperative to modify the coil. Take scissors designed for working with metal and remove with them a leg that is absolutely unnecessary. To make the fishing rod easier, treat the base of the reel to a diameter that leaves ten millimeters. Be sure to leave about three paws that are located right at an angle. They are needed so that the coils can be fixed in the socket itself.
Step 7
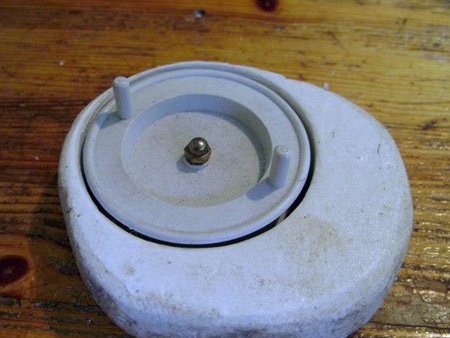
Now, try on a coil to the socket. If necessary, you can refine it with a knife and sandpaper. Along with this, make sure that there are no protrusions above the surface of the handle.
Step 8
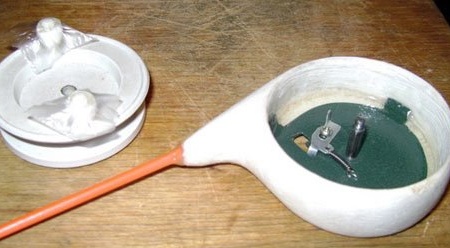
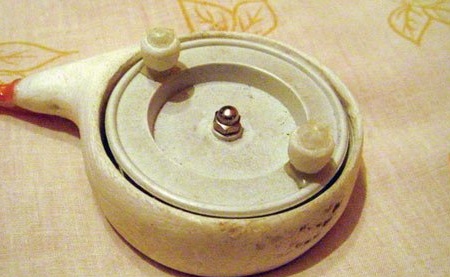
Gently begin to unbend the tabs outward so that the base itself fits very tightly into the socket and can be held there. For "fidelity" re-check the gap around the perimeter.
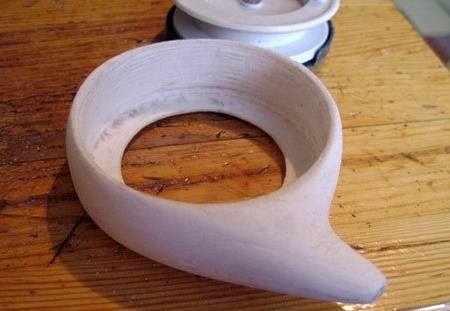
Step 9 The hardest job is over. It remains to carefully handle the handle from the outside, using a knife, skin and, of course, a file. In a circle, leave a small layer of polystyrene, approximately 6 millimeters. The place where the whip will be glued, it is desirable to process with a small allowance that can be removed after gluing.
Step 10 Now, gently sand the handle with a sandpaper.
Step 11 Next, you need to burn the hole intended for fishing line with a very thick and dense needle so that it can enter parallel to the hole that belongs to the whip.
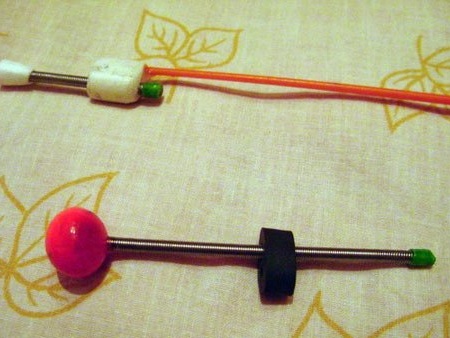
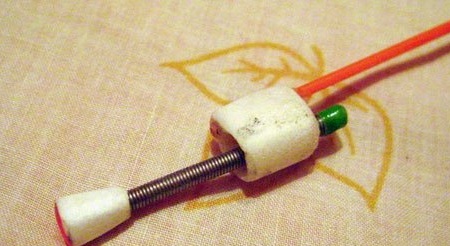
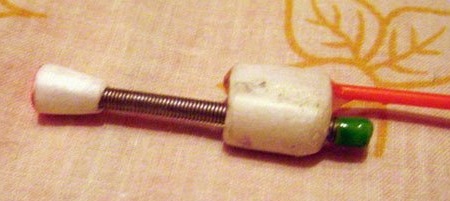
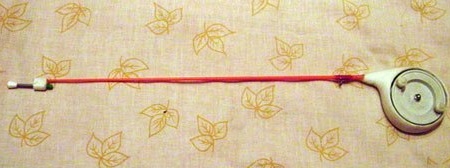
Step 12 Now you need to start bonding. To do this, spread epoxy glue. Apply a little glue to the ends of the whip and gradually put on a nod so that the outside is flush with the end of the whip. In order for the glue to dry well, it is necessary to place the fishing rod in an upright position.
Step 13 Once the rod is completely dry, it can be used in work. Great fishing for you!