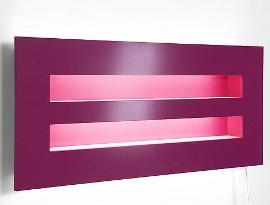
A beautiful lamp can be an excellent decorative element in any interior. Today in stores you can buy a wide variety of fixtures, which are made using different design techniques. We propose to make a beautiful lamp that will have a back wall and a front panel with openings.
Let's start by listing the necessary materials and tools:
• MDF profiles;
• jigsaw;
• Grinder;
• drill;
• screwdriver;
• milling machine;
• spray gun;
• wood drills;
• patterns for dowels;
• pins for marking;
• dowels for wood with a diameter of 8 mm;
• countersink;
• glue;
• rag;
• clamps;
• sheet for grinding;
• roulette;
• pencil;
• elastic;
• pencil sharpener;
• roller;
• primer;
• putty for wood.
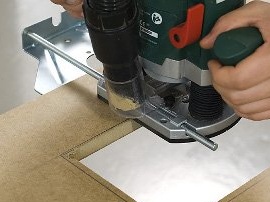
Start by cutting openings in the front of the lamp. To do this, draw contours in the form of rectangles on the MDF profile. After that, we take a drill and a drill with a diameter of 10 mm to drill in each corner of the rectangle so that the edges of the holes reach the angular lines without intersecting them.
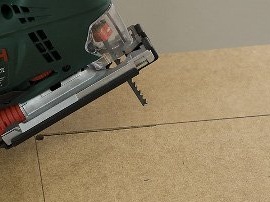
We introduce the jigsaw blade into one hole, after which we begin to cut openings along the intended lines, connecting the holes. At this step, you can decide the shape of the holes, as there is a chance to give them round corners.
We put the front panel on the back and align them to the installation sites in the final form, after which we mark the contours and remove the front panel.
On the inside of the front and rear panels, draw a line 8 mm below the cutouts. In total, each panel should have 4 lines. On these lines, you need to drill 5 holes with a depth of about 10 mm. Later, we will install wall holders in these holes. The diameter of the holes thus depends on the diameter of the holders.

You can connect the panels with threaded connections, but you can not spoil the appearance of the lamp, if you attach the panels to each other with wood glue and dowels. We install the side parts of the front panel on the back side in the form in which they will look. Make notes.
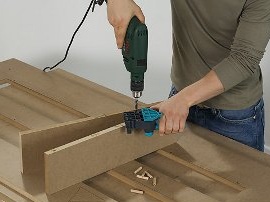
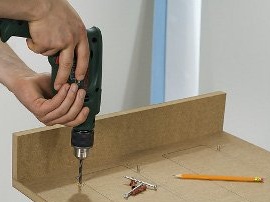
Next, we take a drill and drill 3 holes in the end parts of the side parts of the front panel. The position of the holes must be moved to the back of the front panel.
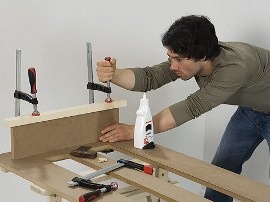
We proceed to gluing the front panel and side parts. The holes for the dowels are already drilled, so at this step you need to apply glue to them. We also apply glue to the joints. After that we connect the elements together. It is necessary to fix the details with clamps so that they do not move.
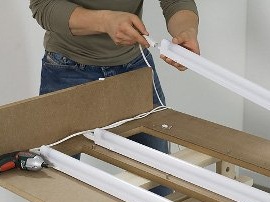
We proceed to the installation of lamps. To do this, put the front panel with the inside up. Using a screwdriver, we mount the lamps between the cutouts. After that, we bring the wires through the passage between the wall and the side of the front panel. We connect the cables so that you can turn on the lamp with one cable.
In this step, you can begin to connect the front panel to the back wall. However, before that, you need to take care of the holes that are necessary for hanging the lamp on the wall. Only after this can the connection of the front and rear parts be started, making sure that they are even. It should be said that the threaded connection of wooden parts has its own characteristics. In particular, the part into which the screw will be inserted must be drilled with a drill whose diameter is 0.5 - 1 mm larger than the screw. After this, the hole must be countersunked to fit the size of the screw head. The second part must be drilled with a drill, the diameter of which is 1 mm less than the screw.

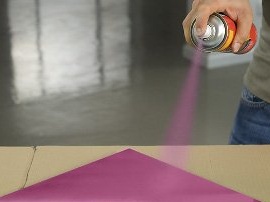
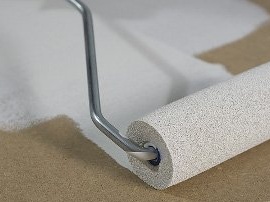
After connecting the parts, they need to be thoroughly sanded, primed and painted.
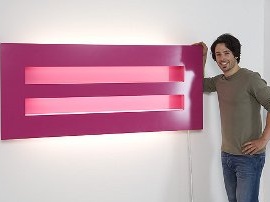
Our beautiful and designer lamp can be hung in its place in the room to enjoy the beautiful view.