
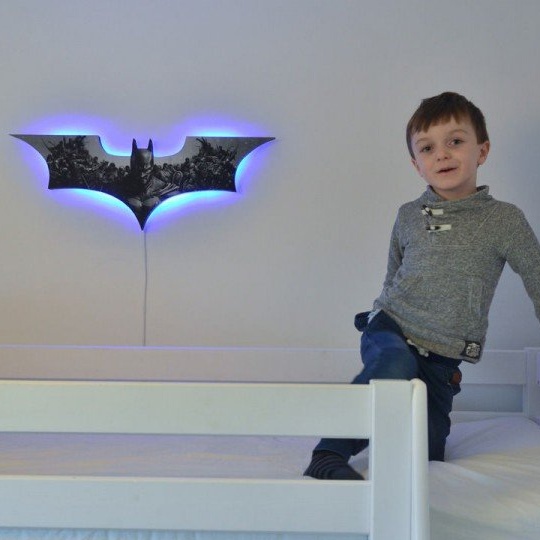
This excellent, made do it yourself, a night lamp, will become a good friend of any boy. Despite the fact that there are a lot of similar works on the Internet, this night lamp will not leave anyone indifferent.
All work will consist of 9 rather extraordinary and interesting stages.
At the first stage, it is necessary to prepare the following materials:
- medium density fiberboard (MDF);
- a light source assembled on the basis of LEDs (LED strip);
- 12V DC power connector, adapter, paint for aesthetics and a switch.
Of the tools you need jigsaw, milling cutter, drill or screwdriver, printer.
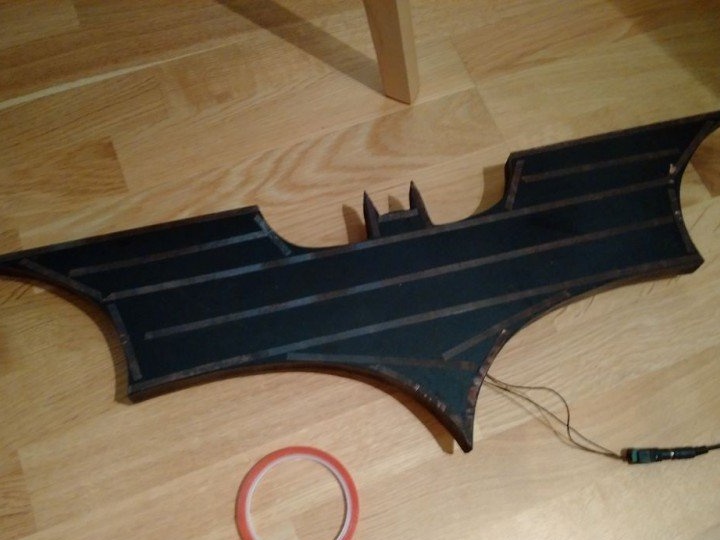
Stage number two lies in making the foundation for a future nightlight.
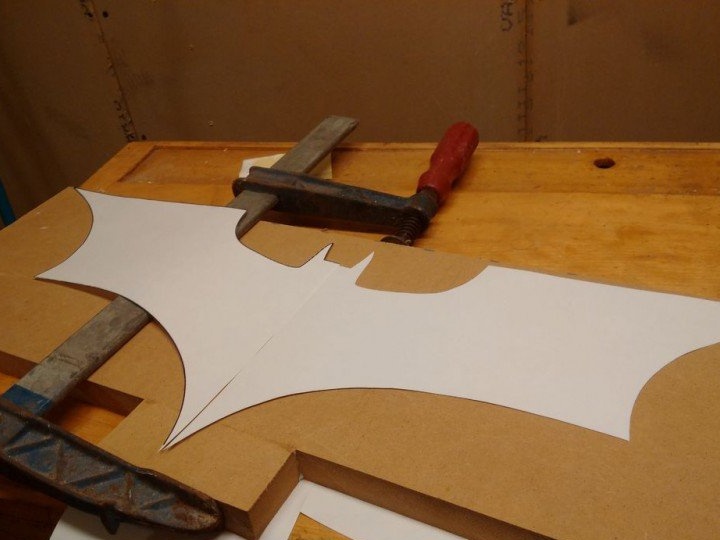
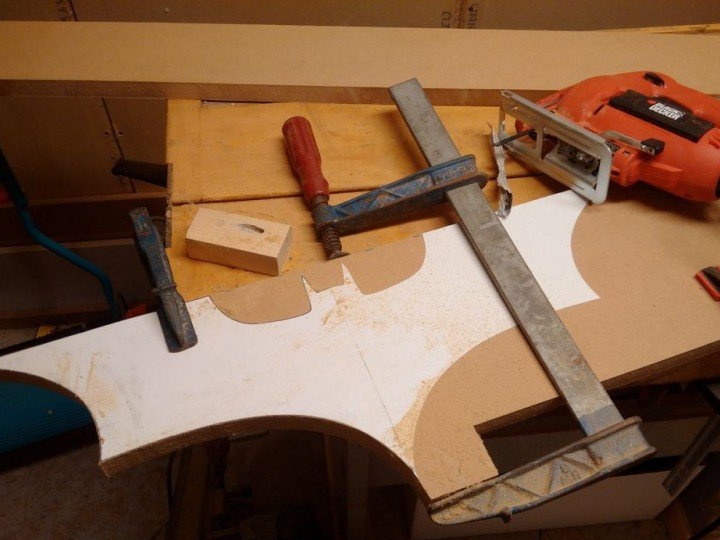
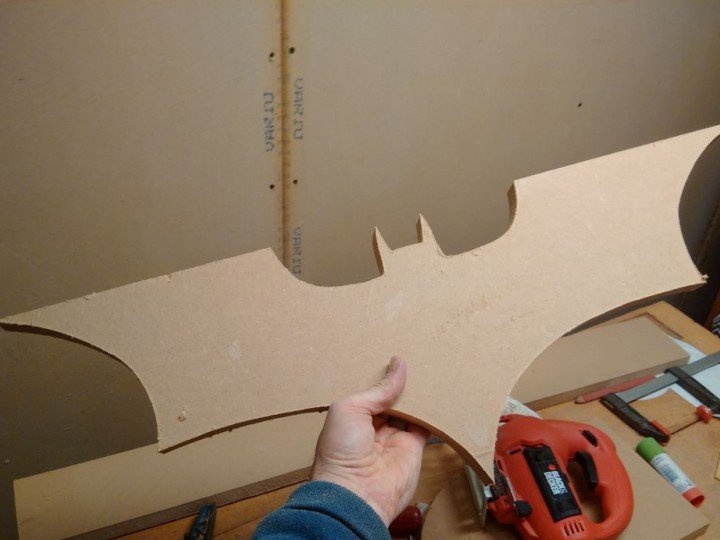
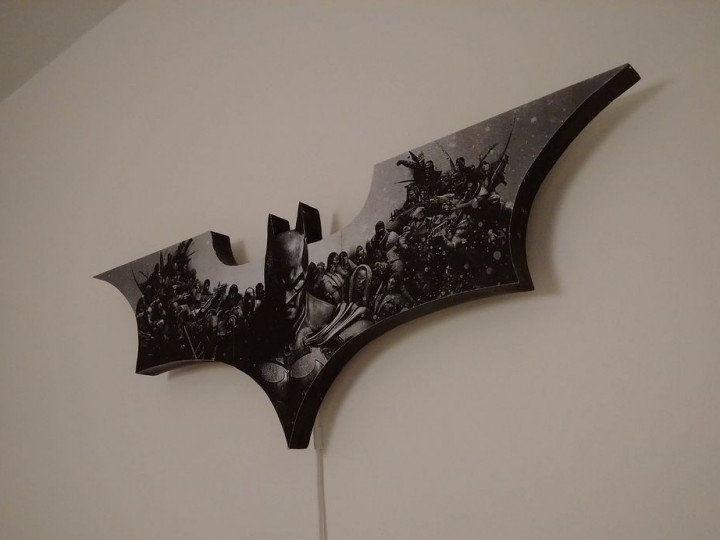
If you are not sure about the ability to create a future template with your own hands (here it’s Batman’s symbol), you can easily use a printer. When the template is successfully made, it must be applied to the MDF board. For the production of the main workpiece, you will need a jigsaw. The plate itself is quite fragile, so categorically you need to abandon saws with small teeth.
Third stage will be enclosed in the processing of previously trimmed edges. To do this, using sandpaper, you need to give them a complete aesthetic appearance.
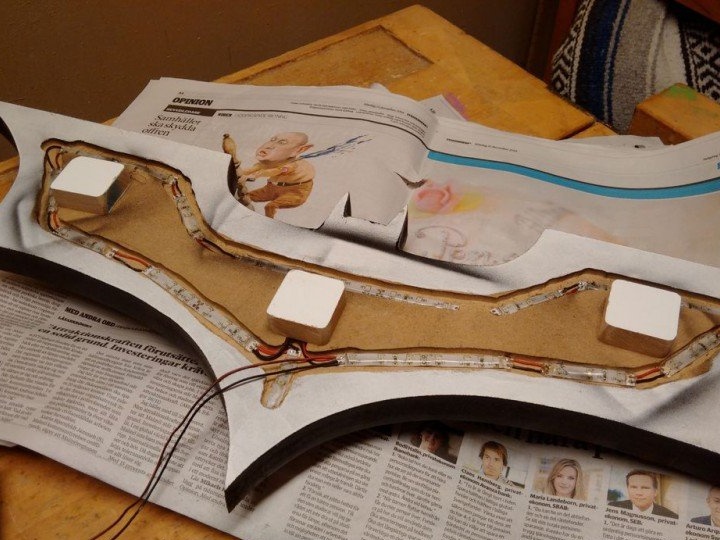
In the fourth stage You will need to make a groove for a future light source, which is an LED strip.


First, on the reverse side, with the help of a marker, make markings for it. Then, with the cutter, we cut out the necessary grooves.
Fifth stage will consist in the direct installation on the product of the LED strip of the desired size.
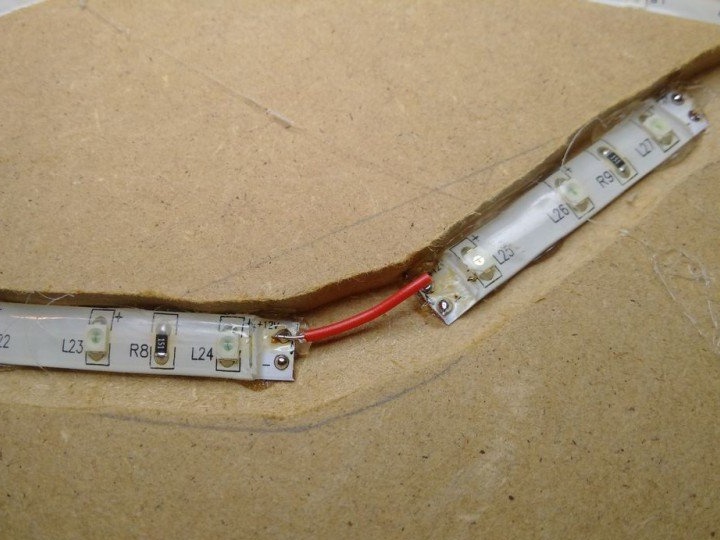
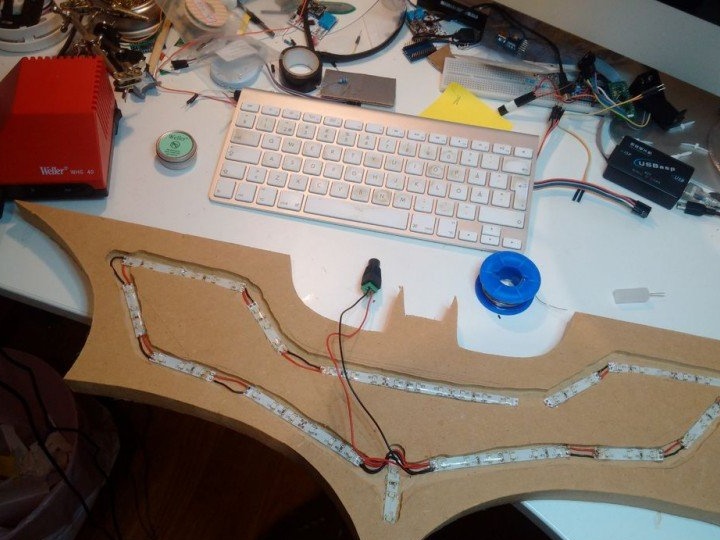
To make it easier to fit into the grooves - it needs to be cut into pieces. They are easy to solder into an electrical circuit. Then you need to add the cord with the DC power connector.
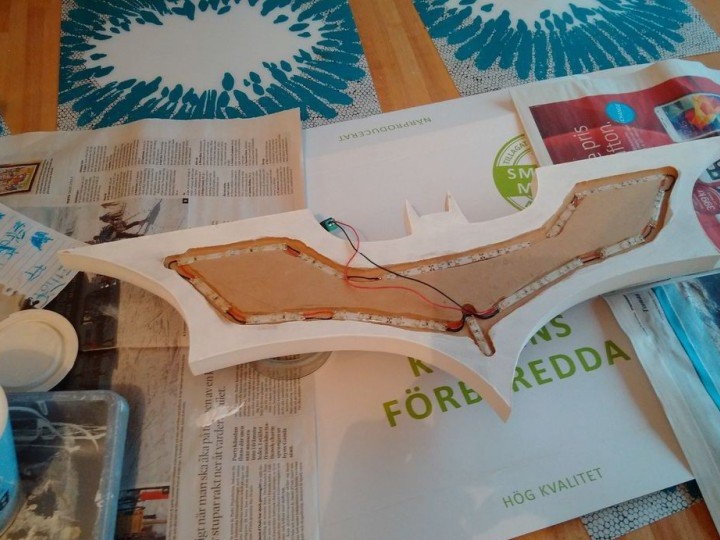
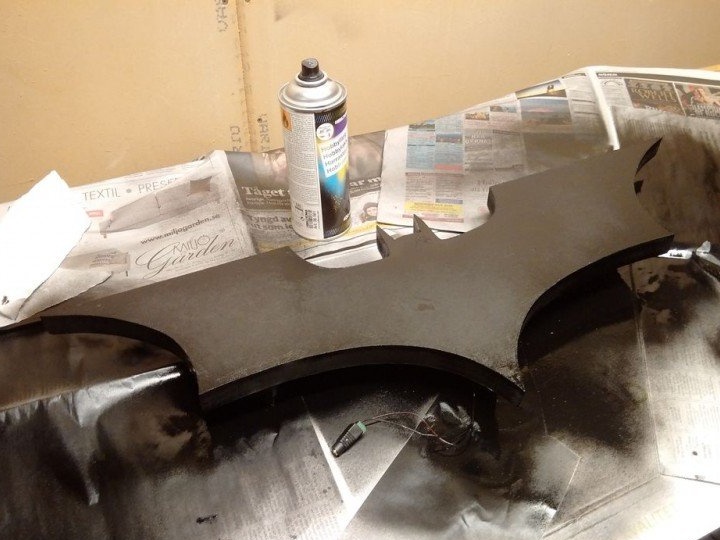
Stage six will be creative. The future lamp needs to be painted. For this, a primer will be necessary, since an aerosol without it will not fall on MDF. Then we paint the blank in black.
Seventh stage will be a continuation of the previous one - the main decor will be applied to the lamp.

To do this, using a printer on matte photo paper, you need to print the facade of the future product and attach it to the workpiece using double-sided tape.
Now it remains only to finalize the back of the nightlight - this will be stage eight.
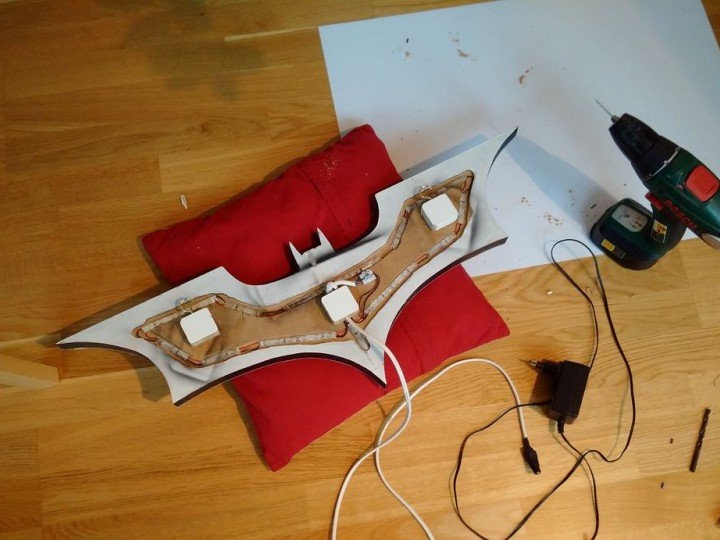
To improve the quality of the glow, you need to glue on the other side several small pieces of MDF. This will give additional light scattering. It remains only to mount hinges or other fastening elements on the future lamp.
Ninth stage most pleasant.
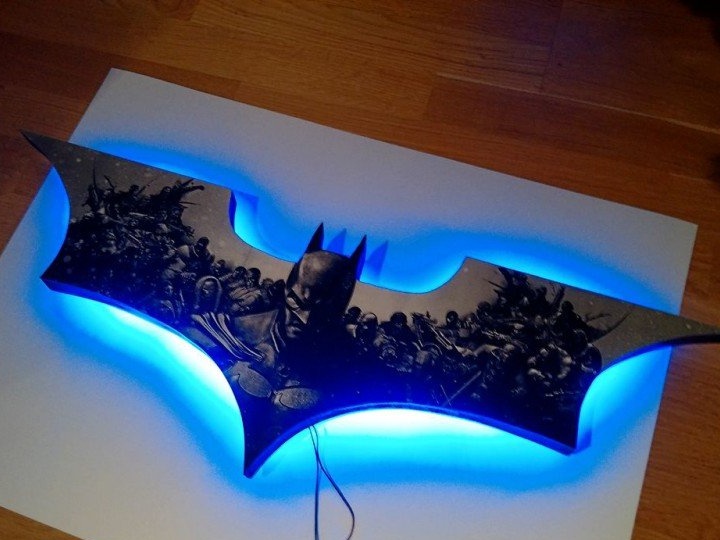
When the lamp is completely ready and hung in its place, we connect it using the adapter.