
In order for the design of the garden to look finished, garden paths are needed. They are not so difficult to make. do it yourself. It takes only patience and, of course, a little creative thought.
First of all, you need to plan future tracks. This is not so difficult. The main thing is to observe the basic condition: no straightness and sharp corners. This is, firstly, ugly, and, secondly - uncomfortable. The easiest way to lay them on the already trodden paths. In some places it may be necessary to slightly round them or straighten them. To simplify the process, sketch a plan of the plot and draw future paths on it.
Now you need to decide what material you will make them from. Of course, you can do what is called "little blood" and pour them with concrete. But such paths are both ugly and short-lived, so let's try to choose another material. Brick tracks look very good. But it is an expensive pleasure. And laying brick paths is quite laborious.
You can go the other way by making broken brick garden paths. Brick battle costs nothing, you only have to pay for its delivery. In order to lay out the track, you will first have to dig a fairly deep groove. Its depth is calculated so that a brick placed on a 10-cm sand cushion protrudes above the soil surface by about 4-5 cm. Before laying a brick on a sand lining, do not forget to pour and compact it. Brick battle can be stacked without even adhering to any pattern, in any case, the track will look good. After the brick is laid, it is covered with a dry mixture of cement and sand in a ratio of 1: 5, rubbed with a brush and gently moistened with water.
Looks very original track from the end sections of wood. A tree (preferably aspen) is sawn into dies about 20 cm high.In order for the wood not to rot, the lower part of the dies should preferably be charred, tarred or treated with special compounds that prevent decay. After you have marked your future path, you will need to dig holes in it on the diameter of the dies with a depth of 25 cm. Sand is poured into the holes with a layer of 7-8 cm and set the dies. Please note that they should protrude 4-5 cm above the surface, as some shrinkage will occur over time.
Well, now a few tips that you will surely find useful.
• The optimal time for laying the tracks is autumn, as the soil will sag during the winter
• The width of garden paths must be at least 80 cm.
• When laying tracks, be sure to consider the fact that there will be some shrinkage of the soil (3-5 cm), while the track should slightly protrude above the ground
• If you decide to make cast or paved paths, consider a slight slope from the center to the edges to drain water
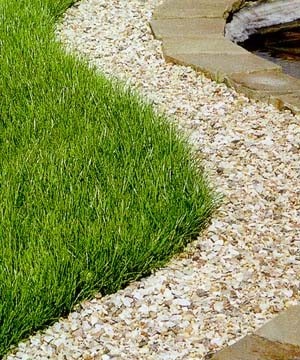
• Paths made of stone, tiles or wood cuts look much more beautiful if grass breaks through their seams
• If you live outside the city all year round, keep in mind that stone paths are instantly covered with ice, which could result in personal injury.
• Wooden tracks should not be made in damp places
Now your site will look great, delighting you and your guests.