
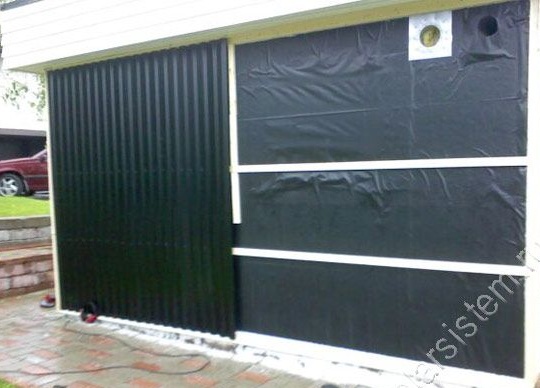
The feature of the collector, which was proposed by one author in this article, is that it is one of the walls of the room, that is, it is not even visible, therefore the collector does not violate the harmony of the facade. In this example, an air manifold was built on the south wall the garage.
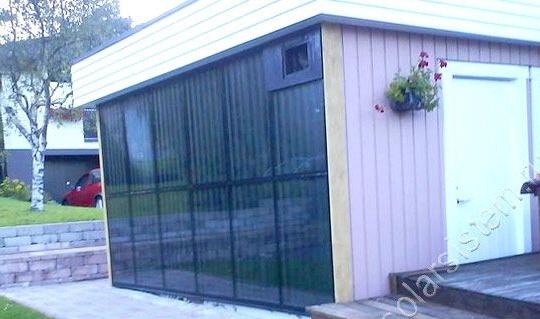
Due to the fact that the collector area is large and dirt will appear on the glass during air circulation, which will be rather difficult to clean, it was decided to take the heated air from the back of the absorber. But at the same time, the collector will still be glazed.
Materials and tools for the manufacture of the collector:
- silicone;
- glass;
- corrugated board (black);
- wooden beam;
- drill;
- saw;
- black plastic film;
- caps for corrugated board;
- duct liners;
- decorative film;
- pipes;
- pump;
- corrugation;
- pieces of old bicycle chambers.
The process of creating a collector:
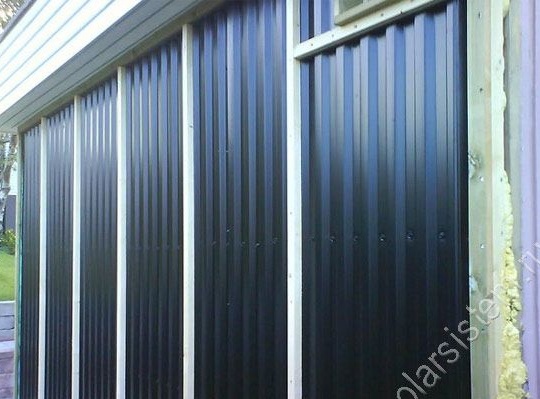
Step one. Garage Wall Preparation
First of all, the entire lining was removed from the garage, here the scale already depends on the size of the collector.
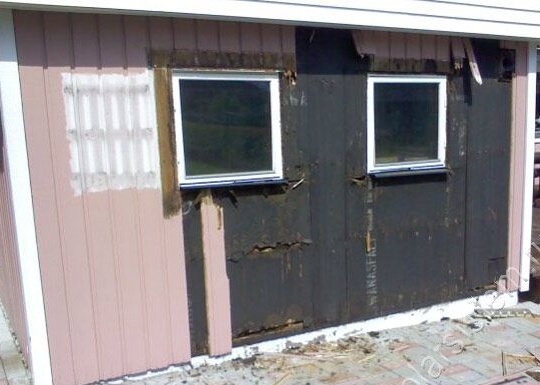
Since there were windows on the south side of the garage, they had to be bricked up to make the collector design simpler.
Next, a black plastic film was attached to the outside of the wall. It can be put on glue.
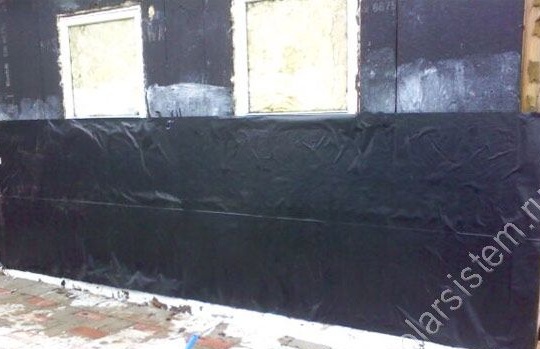
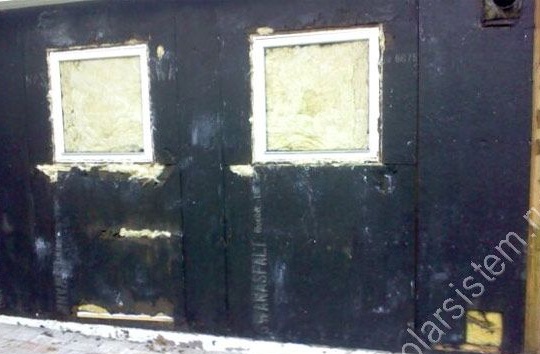
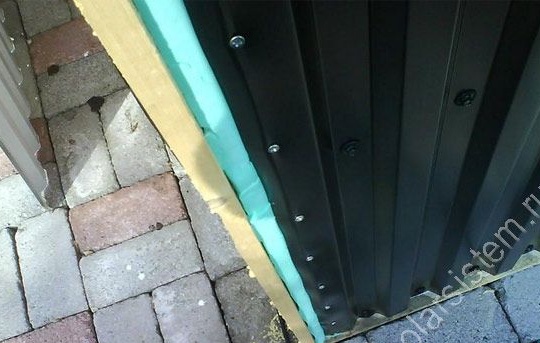
Now on top of the film you need to make a frame of wooden bars of size 20X40.
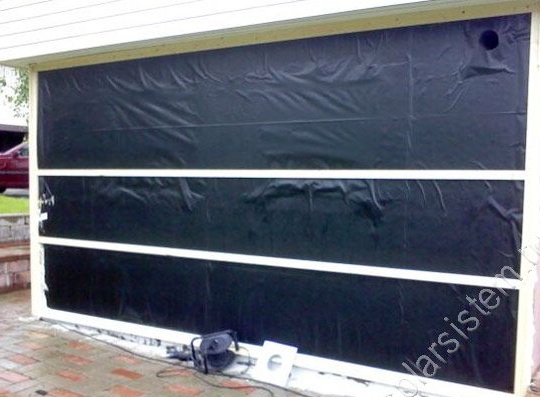
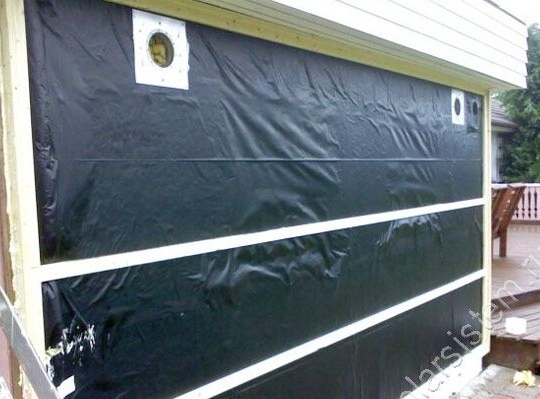
Two holes must be made in the upper part of the wall, through one cold air will enter the collector, and already warmed out through the other. In these holes you need to install sleeves for connecting ducts. The author has both holes drilled at the same height, so there will be no natural air circulation in the system. For air to circulate, the inlet must be at the bottom of the manifold.
Well, in conclusion of this assembly phase, in the lower part, you need to nail the plugs that fit the type of corrugated board used.
Step TwoInstall corrugated board
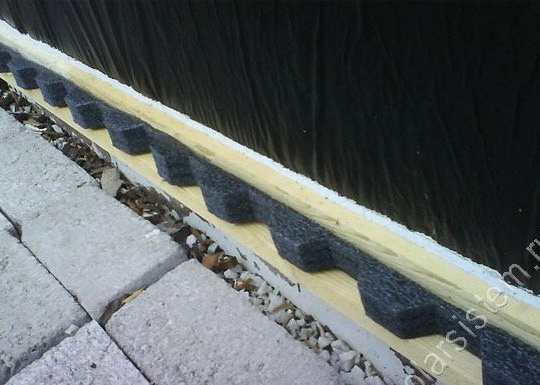
At the next stage, you need to attach corrugated board, it plays the role of an absorber, that is, a heating element. Of course, the corrugated board should be black, if another one is caught, then it can be repainted with black heat-resistant paint.
At least one wooden beam will need to be fixed in the central part of the wall; it will form a kind of labyrinth through which air will circulate. It is best that there are as many of these labyrinths as possible, then the air will warm up better.
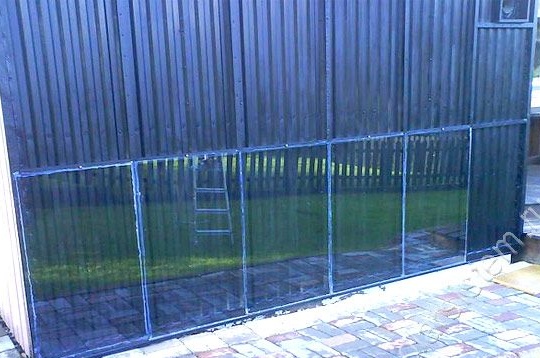
Step Three Manifold sealing
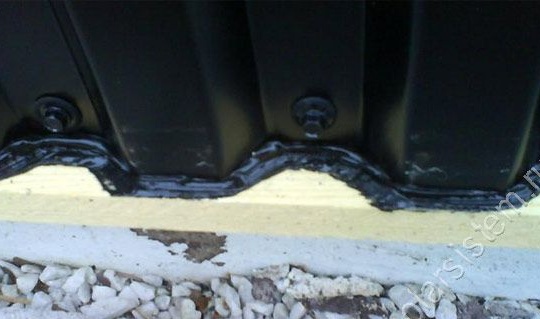
After installing the corrugated board, you need to take mineral wool, polystyrene foam or any other insulation and plug the gaps with it.
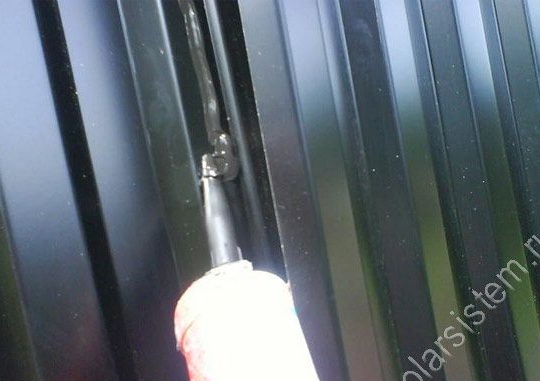
Those cracks that formed at the junction of the sheets of corrugated board must be sealed with silicone.
Step Four Glass installation
To install glass, on the corrugated board you need to fix the wooden bars. It is important to understand that the thinner the glass, the smaller the area it should have. If you need to use glass of a large area, then it should be as thick as possible. If you use glass from small fragments, as in this homemade, then a thickness of 4-5 mm is quite enough.
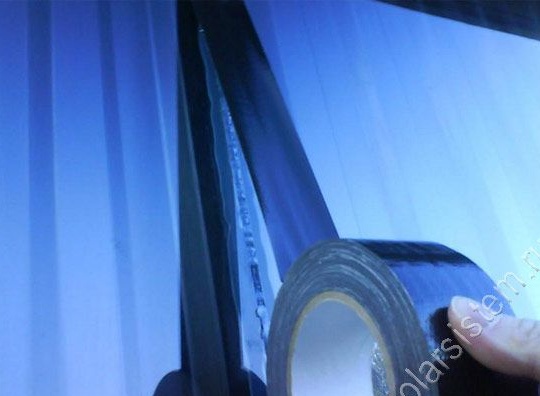
Now the bars can be painted black so that they merge with the background of corrugated board.
After installing the glasses, it is necessary to carry out sealing again, this is done so that dirt does not get into the collector. For these purposes, silicone is used. To hide the places where silicone was applied to the glass, you can use a decorative tape.
Now the collector is almost ready, in the photo you can see how it will look. In the picture you can see one ventilation hole, as it is necessary for safety when equipping garages.
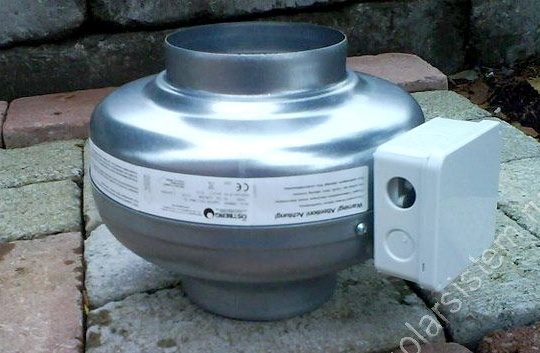
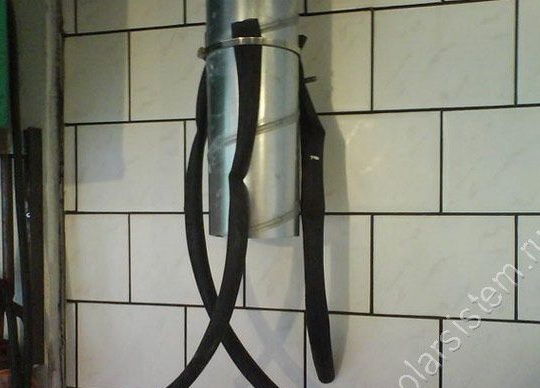
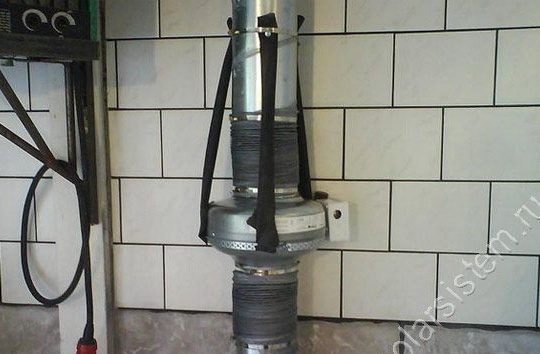
Step Five Circulation pump installation
Since the system does not provide for natural air circulation, it is required to use an air pump, in this case a device was used with a capacity of 400 cubic meters.
To reduce the noise level in the pipes during the operation of the fan, it was connected through the air ducts. And for fixing the fan to the pipe, the author used pieces of bicycle chambers.
According to the author, in the case the collector showed very good results. So, for example, at an outdoor temperature of only +2 degrees, a homemade product could give an output temperature of +74 degrees. The device showed good results even in cloudy weather.
The disadvantage of this system is that there is no air movement between the absorber and the glass, and therefore condensation forms on the glass, and this reduces the performance of the device. But this problem is solved, you just need to drill a couple of holes for water drainage.