The next Friday night, the author wanted to collect something interesting. Remembering that, he saw projects of drawing robots, and having a continuous rotation servo, it was decided to assemble such a robot. A continuous rotation servo can be made from ordinary.
Materials:
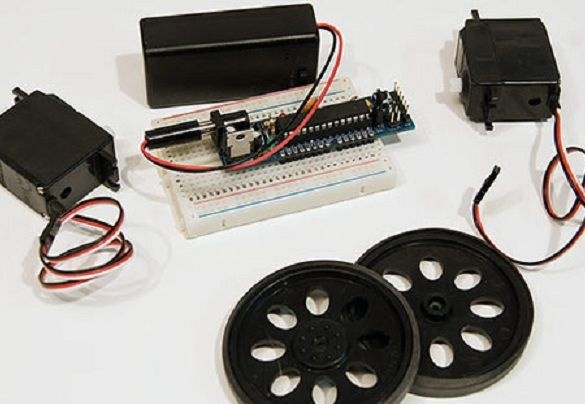
- DC Boarduino (this is a clone Arduino)
- Servo of continuous rotation of 2 pieces
- Servo wheels 2 pcs
- Bread board
- 9V battery connector with 2.1 mm plug and switch
- connecting wires
It is not necessary to use Boarduino in this project, any Arduino board is enough. The author chose this board because of its size. You will also need a certain number of markers, you can purchase a set of different colors for this robot.
In addition, you need a 9V battery and the base for the body of the drawing robot.
There is nothing complicated in the assembly of the robot. First of all, the author fastens the wheels with two servos with adhesive tape, and measured the distance between the wheels. It is necessary that the width of the base is slightly less than the distance between the wheels. The author uses corrugated plastic, as it is quite light and durable, and it is not difficult to work with it. Its use, of course, is not essential, you can even use cardboard or plastic from cases for disks.
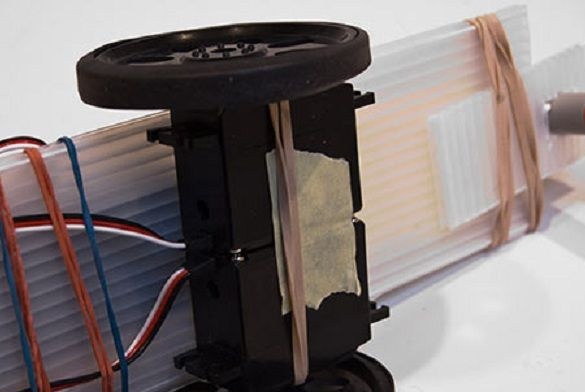
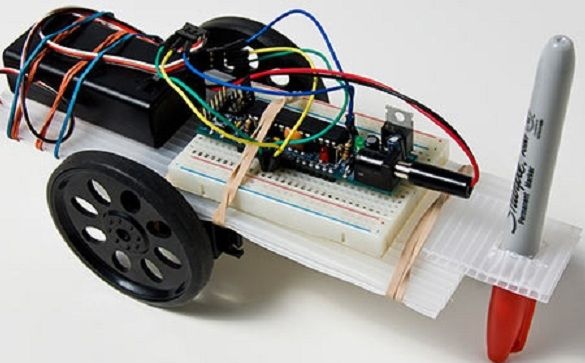
Servo drives were connected to the base with rubber bands. When placing the battery and breadboard, difficulties arose, since it was necessary to maintain a balance. The author wanted to make more space on the side with which the marker was placed, but did not want to make an advantage on the opposite side. With the help of rubber bands, it is quite simple to adjust the location of the components, determining the optimum.
Throughout the project, wires with BLS pins are used to connect to the breadboard, servo drives are also connected with them.
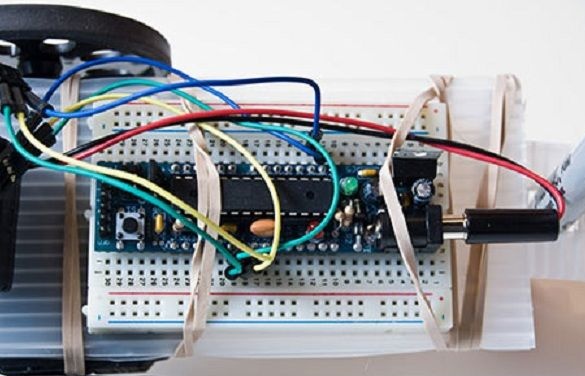
When the author finished all the work on assembling the robot, he immediately wanted to check its performance. It took some time to search for the code. Having stumbled upon an article on controlling Parallax continuous rotation servo using Arduino, he realized that he was on the right track. The code was simplified as much as possible, at the moment Drawbot can only just go in circles.Of course, this is primitive, but it is also a great start and the basis for development and modernization. The code can be downloaded under the article.
Now the author has received a robot that travels in a circle. Continuing the work, the author took the remains of corrugated plastic and made a hole in it with the help of a knife. The hole was cut with a diameter slightly smaller than required, thanks to the reduced hole the marker in it was perfectly attached. If you use cardboard, then this effect will not be, and the marker will not hold well or fall out.
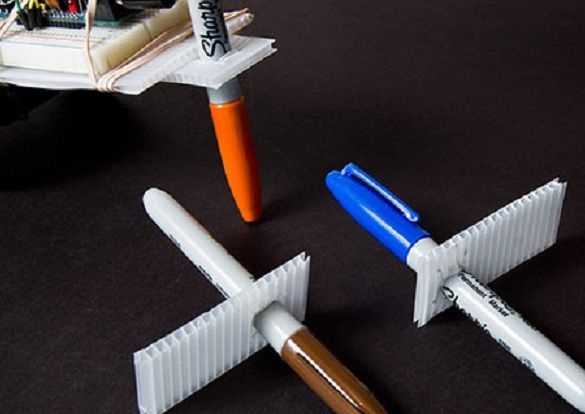
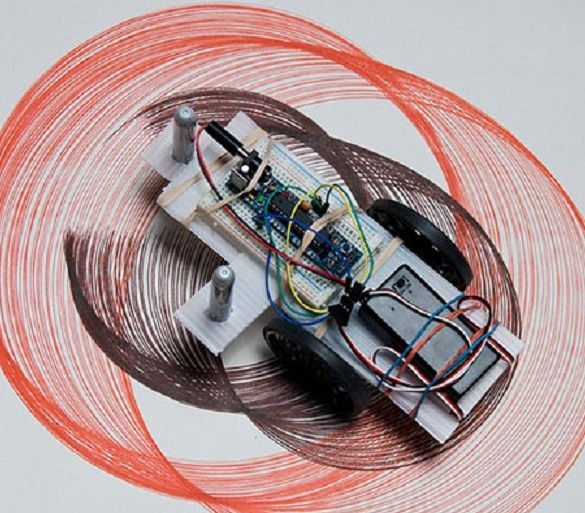
After installing the marker, it is time to test the robot. By setting it to the center of the 24x18 sheet and turning it on, the author finally saw Drawbot in action. He began to spin drawing circles. We can say that the author managed to create a robot that creates a kind of work of art.
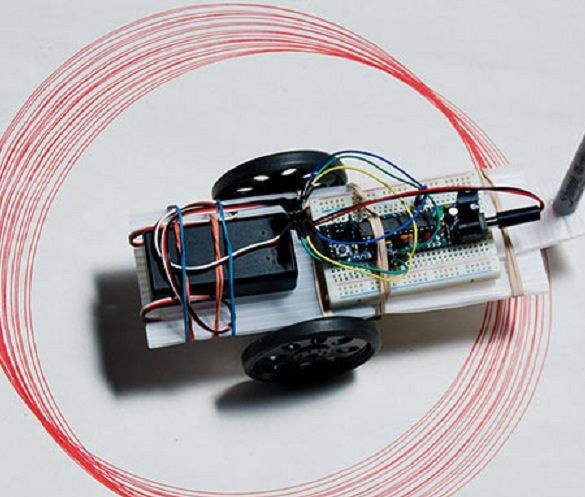
The picture came out a bit awkward due to the sheet lying on the floor, and it was not quite even, and most likely, the servos did not rotate synchronously. It turned out that one circle could be lower, the second higher, and the next still a little higher or lower. Probably, in an ideal location, all circles would be aligned in one line. It would look prettier in appearance.
The author thought that the second marker could brighten up the situation, and robot will make more interesting pictures. The result was good, circles began to intersect with each other. It will be more interesting to see how Drawbot behaves on a large sheet of paper.
By releasing the robot onto a paper surface, the author can get a circle or a bunch of circles. But having a ready-made robot, you can already think about improving it by changing the code.
