
When people enter the house, the first thing they see is the entrance hall. Each person who first crossed the threshold of your home first of all sees the entrance hall, thereby forming a preliminary opinion about you. That's why furniture the hallway should carry such qualities as elegance, beauty and practicality. The main task of the hallway is not only a decorative and representative function, but also the safety of your things in proper condition and, in general, the order in the house.
The entrance hall is the face of your entire home. In the morning you leave the hallway about your business, in the evening you return again to it. Therefore, you must carefully consider the design of the hallway. It should be as convenient, practical, beautiful as possible. The size is selected based on the size of your room. Since it is in the hallway, in those cabinets and shelves that are supplied with it, that most of the clothes are stored, you need to approach the choice of furniture wisely.
Of course, you can buy it, but it’s much more interesting and cheaper to make it do it yourself. And if you have children in your family, then you can attract them. Then the process of creating furniture will turn into a developmental program, especially for boys who, by the example of an adult, will learn to do this or that independently device. The author of this master class also decided to independently make a hallway for his house on his own. And this is what he did.
For work were used furniture panels 1600x400x18 mm - 7 pcs. 2000x400x18 mm - 3 pcs., Boards 2000x120x16 - 7 pcs., 2 grooved boards 2000x240x18 mm. 1 three-meter rail 3000x40x12 mm, piece of plywood 6 mm, furniture hinges - 12 pcs., Furniture handles - 6 pcs.
First, he began to manufacture bedside tables, sizes 820x400x400. The sawn corners in the upper part of the side walls are visible on the frame so that the top cover of the cabinet is slightly narrower than its main part. Bonding was done with self-tapping screws. Do not forget to cut corners under the baseboard at the bottom of the nightstand. Next, the front plate is attached, which is attached to the dowels.
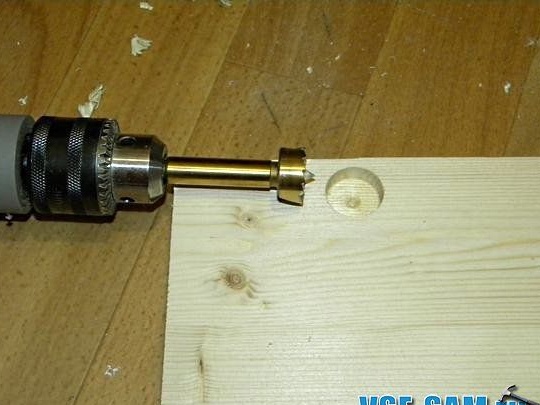
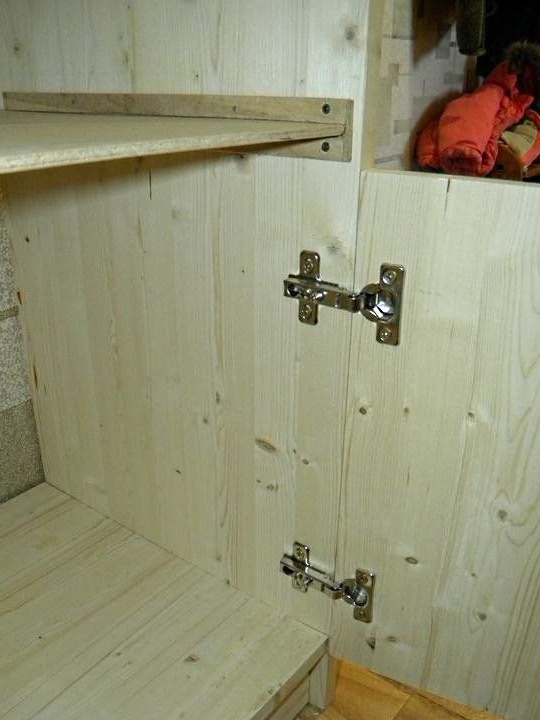
After making the cabinet, a door is made for it, the dimensions of which are 400x400 mm. Holes for holes are drilled with a special drill. We fasten the door.
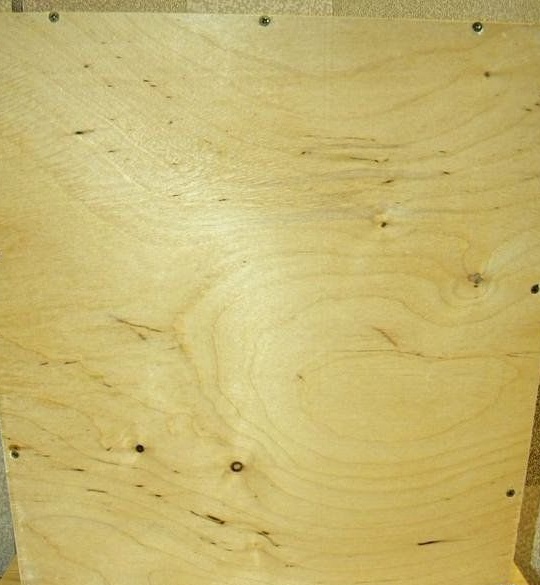
The next step is the manufacture of skids for the drawer, which will be located in the upper part of the cabinet. They are cut from 6 mm plywood. We fasten them on the side walls of the nightstand.
Production of the box begins. It is also made of 6 mm plywood.We measure the dimensions, the depth of the box you need and fasten the parts to each other. To do this, wood screws were used, for which holes had previously been drilled so that the plywood did not crack.
The front part of the drawer, which is made of a furniture board, is attached at the very end, after it is varnished and you get handles suitable for it.

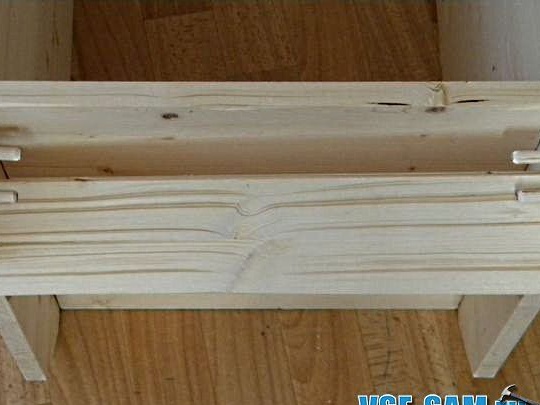
Now the cover of the nightstand is being made. It will be mounted on dowels. To do this, small cloves, about 2/3 of the length, are driven into the upper end parts of the side walls. The cap is applied to the overthrow and pressed on it. It turns out the markup for the holes. We drill them and with the help of dowels and glue we fasten the lid. To provide stronger bonding, we put some kind of load on the lid.
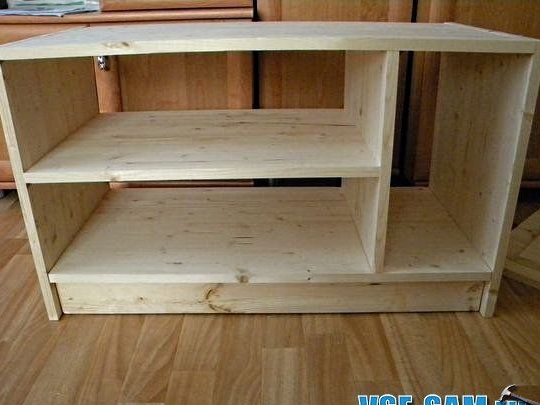
Now we move on to the manufacture of the next hallway item, also curbstones, but with a different appearance and corresponding dimensions - 820x490x400 mm. Everyone does internal shelves as he likes. The location can be anything. We fasten on the sides with self-tapping screws. The upper part of the central partition is mounted on dowels. Doors are cut out and loops are attached. Do not forget about the front strip and the cuts under the baseboard.
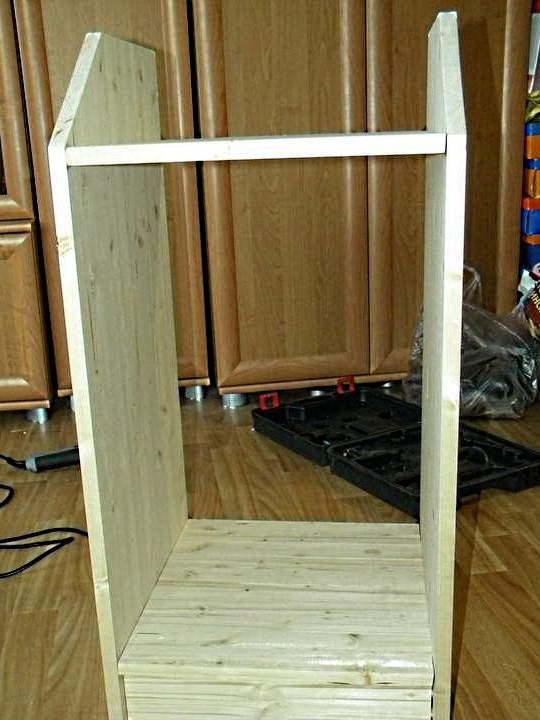
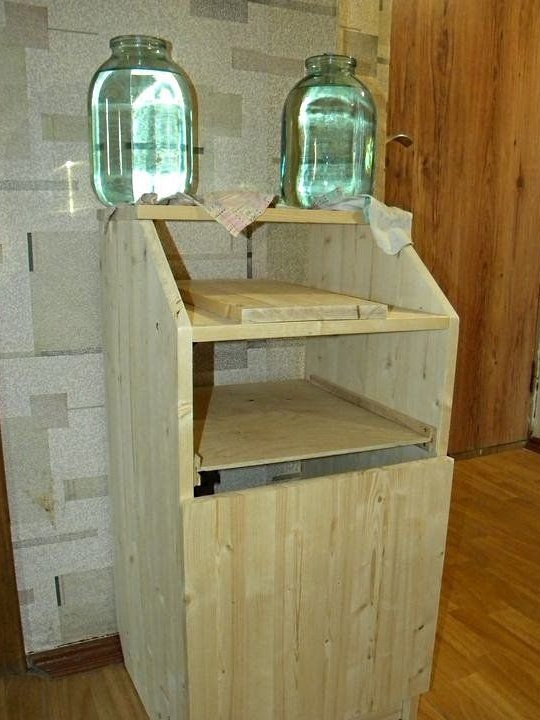
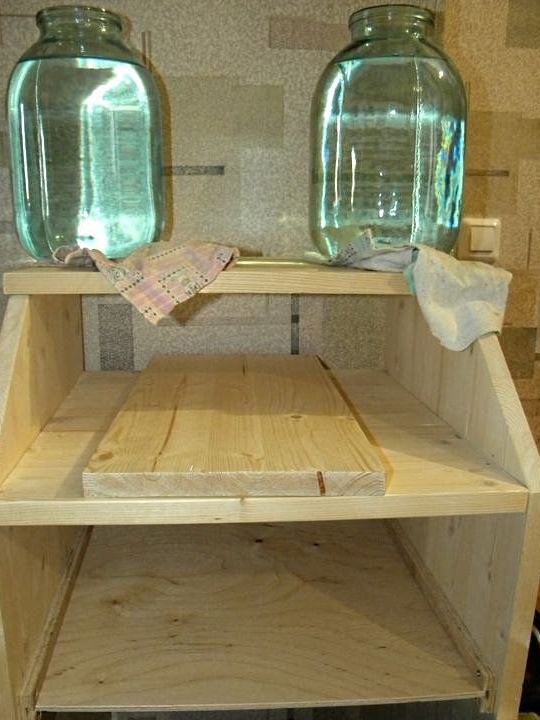
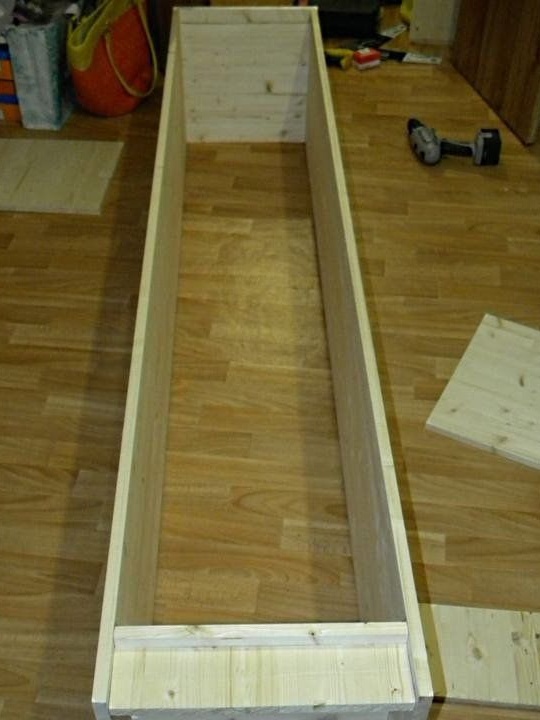
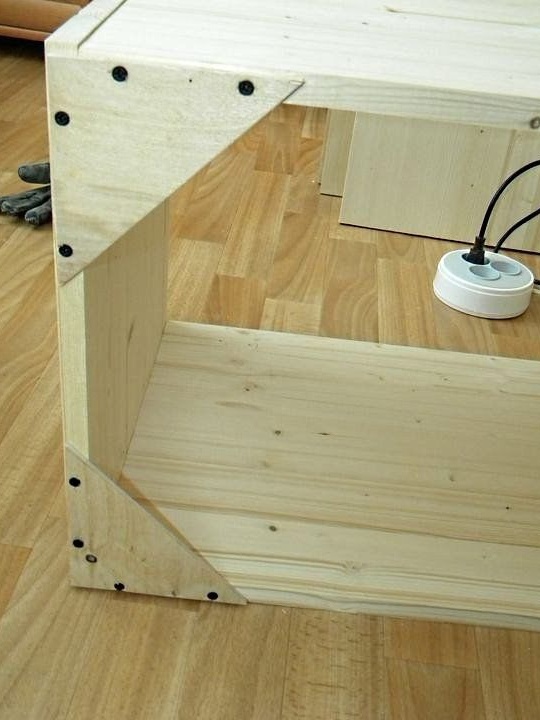
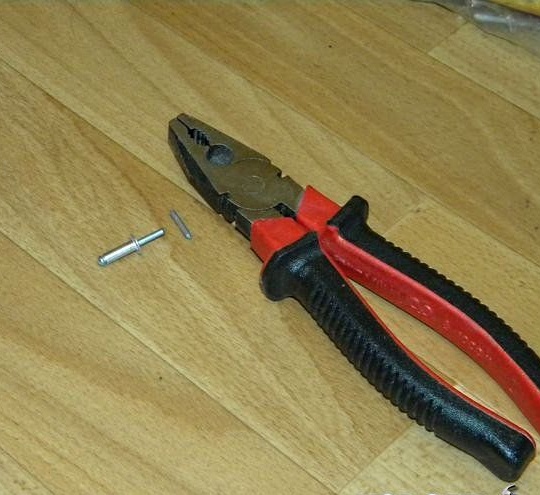
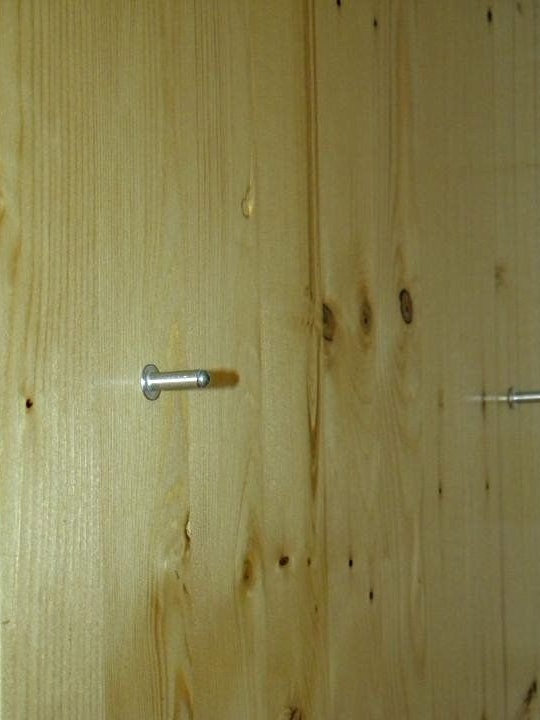
Now the author proceeds to the manufacture of a pencil case, which will have dimensions - 2000x400x400 mm. Lateral, upper and lower parts are cut out. Everything is fixed on self-tapping screws, except for a front level. It, as in other cases, will be mounted on dowels. For durability, the corners are fastened with the corners of their plywood. The shelves located in the pencil case will lie on the holders made of rivets, in which the upper part is slightly cut off. Doors are mounted on 3 loops each.

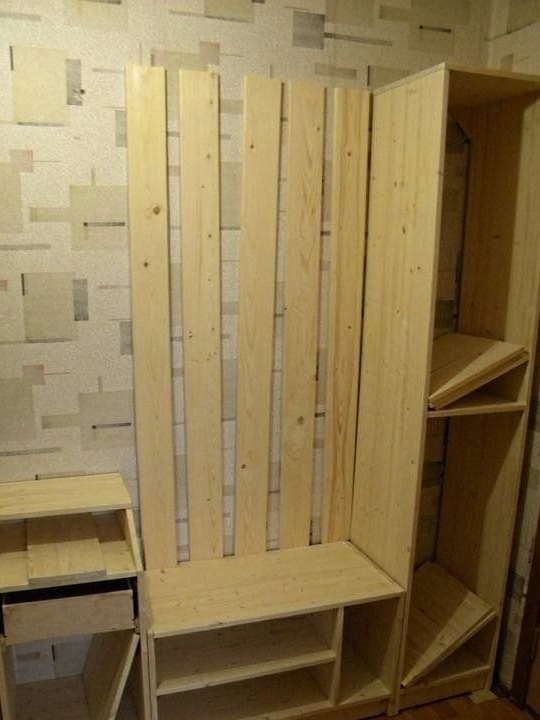
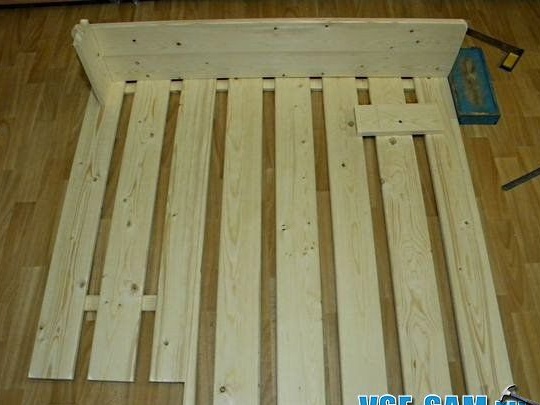
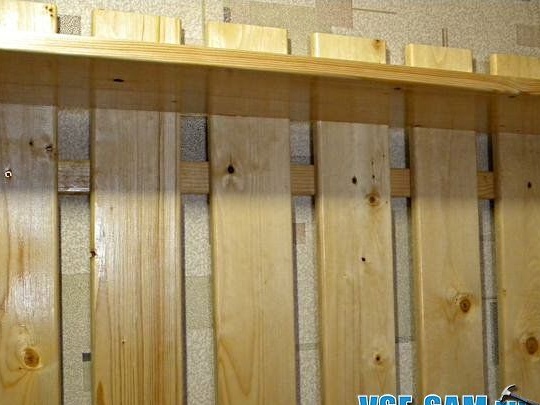
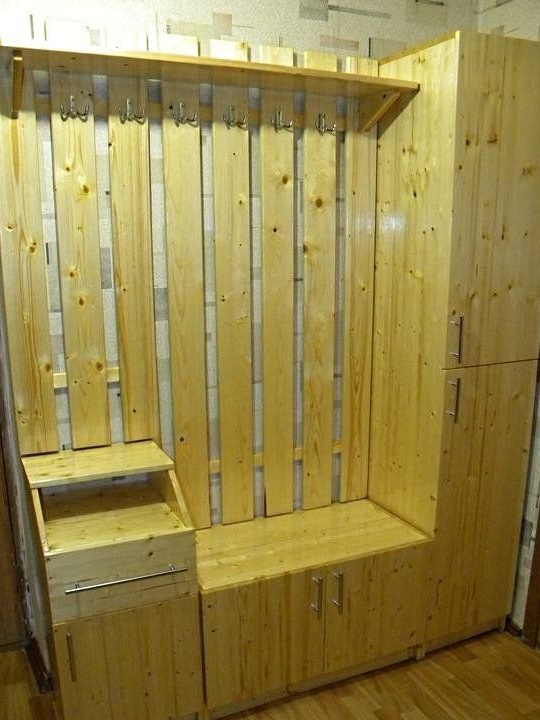
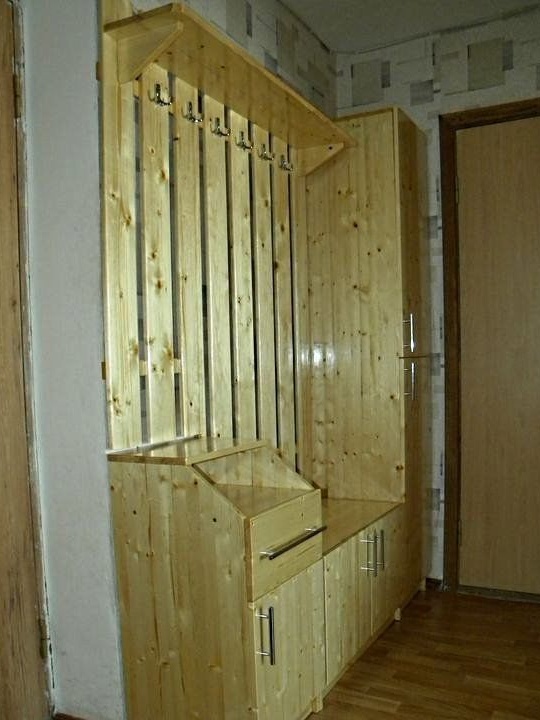
A trellised stack of boards is made. Try to arrange the cross rail so that subsequently hooks for clothes can be attached to it. The design cuts out a place for a bedside table, which the author made at the very beginning. A shelf is made in the upper part of the crate. Holders for it are made from scraps of boards. Everything is polished. The whole structure is varnished in several layers. Hooks for clothes fasten.
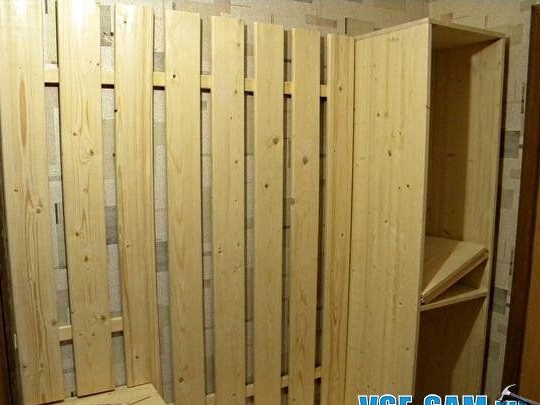
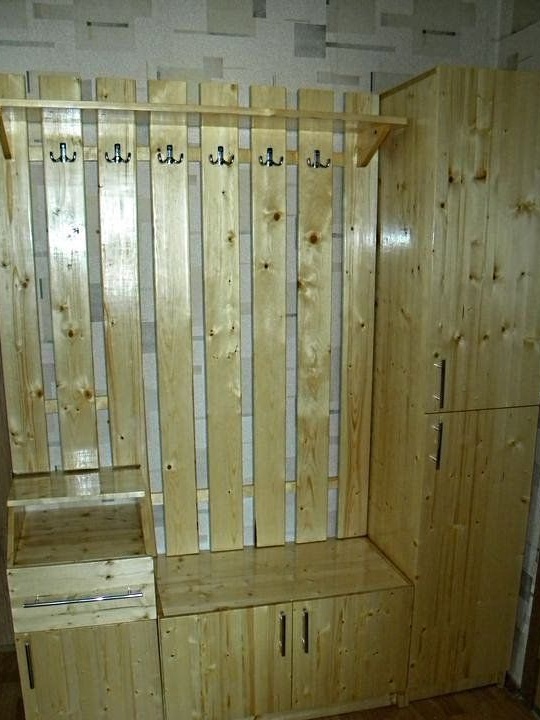
And this is what happened in the end. Now the face of this year face control will pass)
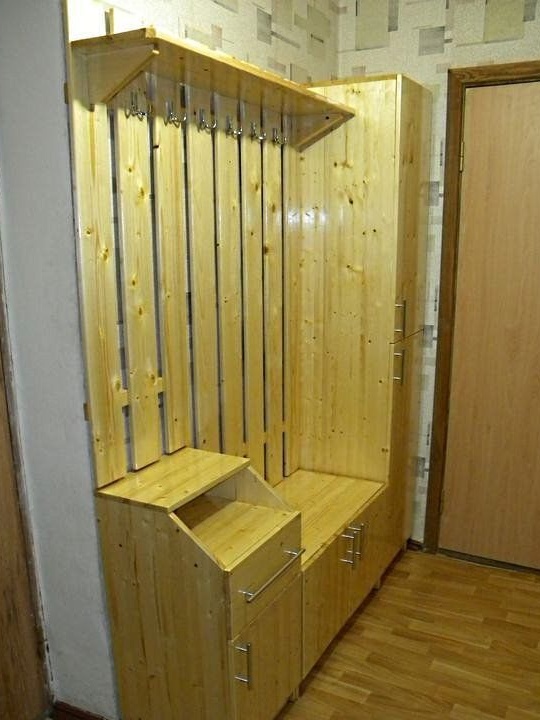
I wish you all success in the manufacture of such a hallway.