
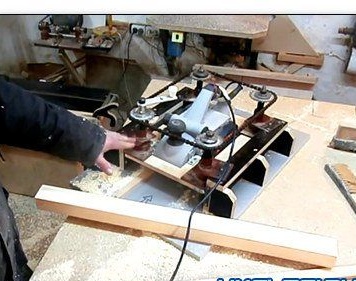
The surface gage is a device with which a tree is processed, and more precisely, with a surface gage a plane is planed, focusing already on a planed flat surface. Using it, you can even out the material before sawing. The author decided to make a surface gage based on an electric planer.
Materials and tools for manufacturing homemade:
- wooden planks, as well as bars with dimensions of 15 × 15 and 25 × 25;
- plywood (sheet thickness not less than 15 mm);
- four drive sprockets;
- bicycle chain;
- washers (will need different sizes);
- screws;
- nuts (M14);
- long threaded screws;
- four spots for screws (needed so that they are not pressed in during operation).
Of the tools you will need an electric jigsaw, a screwdriver, an electric plane, a ruler, a corner, as well as different size wrenches and screwdrivers.
Homemade manufacturing process:
Step one. Base manufacture
To make the base, you need a sheet of plywood whose thickness is at least 15 mm. From it you need to cut a rectangle 400 mm wide and 500 mm long.
Next, you can make the mounting stand electroplan. As for stands for thicknessers, they are also made from a piece of plywood. These elements will be made of several parts, which are then assembled. Everything is fixed on the back with screws. An electric planer with a working platform will be installed here.
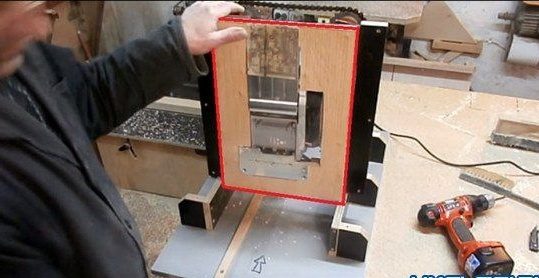
Step Two Electric Plane Platform
At the next stage, you need to make a platform for an electric planer. It will be installed on its individual platform, in the center of which there is an opening. In order to make a hole you need a jigsaw, you need to do it exactly in the shape of an electric planer. The appliance must be fixed with clamps and screws.
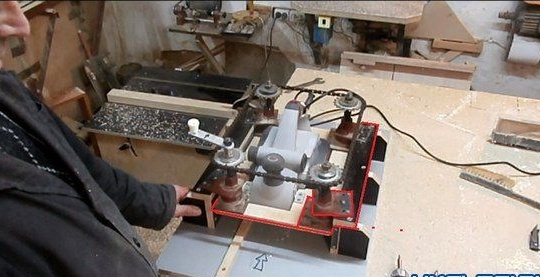
Step Three Assembly of threaded screws with sprockets
So that the platform can rise and fall, a special mechanism must be made for it. To do this, in the four corners you need to install long screws with large threads.Thanks to these screws, it will be possible to adjust the depth of processing of the material.

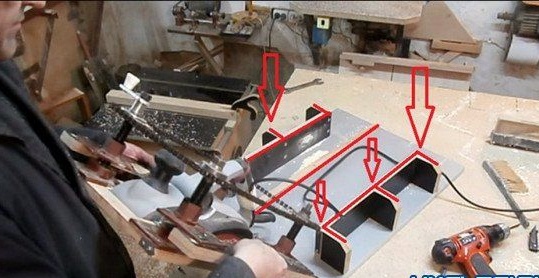
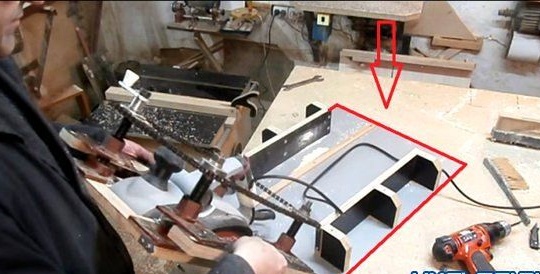
Step Four Installing platforms on stands
Stands need to be made of plywood. They set the upper part of the thicknesser, on which a plane is fixed. Everything is connected with screws. During the construction process of the device, it is important to figure out how to lay the cable so that it is not damaged during work.
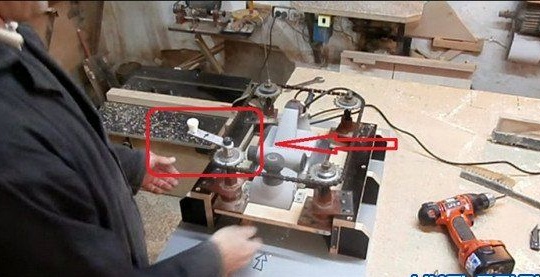
Step Five Thickness grip handle
The handle is needed so that you can conveniently adjust the height of the platform. It is mounted on one of four long threaded screws. The whole structure is fastened with a set of washers and nuts. To prevent the planer from sleeping from the attachment points during operation, you need to make a through hole on one of the screws, so that you can tighten the fixing nut securely.
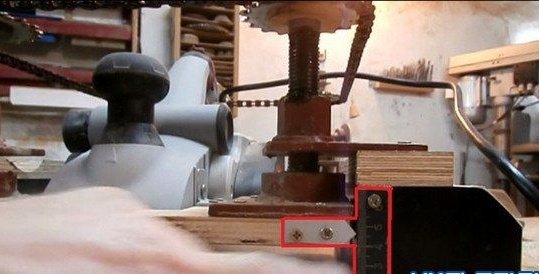
Step Six The final stage of assembly of the device
At the final stage, the indicator is installed, as well as the measuring bar. A measuring bar is needed in order to measure the thickness of the processed material, it must be present. For the manufacture of such a bar, the usual ruler is suitable, you will need a piece of 6-8 cm.
And that’s all, the thicknesser is ready. Now it can be tested and configured, an unnecessary piece of material is suitable for this. Reysmus needs periodic maintenance, it needs to be cleaned, and also sharpen the blade from time to time.