
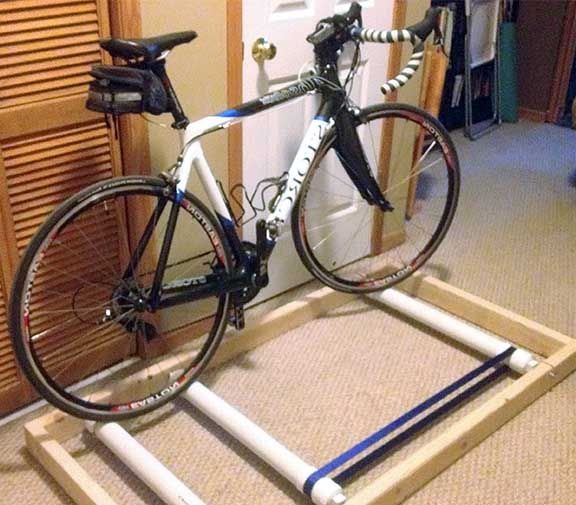
Homemade It will be especially useful for those who are fond of cycling. It will allow you to "ride" a bicycle right at home, in the garage or any other place where it hibernates bike. Such physical activity will allow you to keep fit during the time of year when it is already cold to ride a bicycle.
According to the author, such an exercise bike is going quickly and simply, and the cost of all the necessary materials does not exceed $ 50. It goes without saying that for such money it is impossible to buy a single exercise bike.
Among other things, such a simulator is an excellent simulator of real cycling. Two wheels also rotate here, you need to keep balance and generally concentrate. This allows not only to play sports, but also to have a moral rest, as it happens when riding a bike.
It turns out to keep balance on the bicycle in a standing state due to the fact that both wheels rotate on the bicycle.
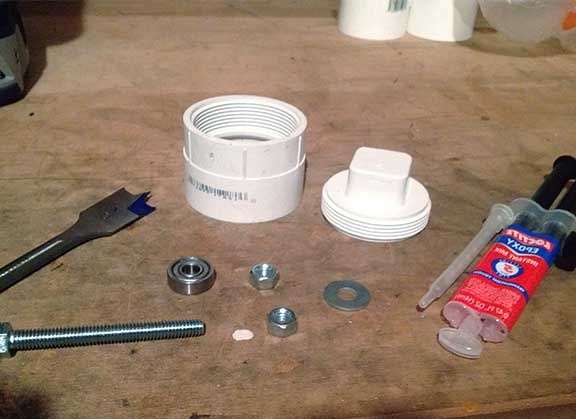
Materials and tools for homemade:
- two inch PVC 40 tubes;
- bearings from a skateboard (can be bought at a skateboard store);
- 4 "x 5/6" hex head bolts;
- hex nuts (5/6 ");
- a two-inch plumbing cover and a female threaded sleeve;
- spoon drill 7/8 ";
- a drill on 5/8 ";
- epoxy resin;
- drill;
- a hacksaw;
- wooden boards or timber to create the frame of the simulator and more.
The process of manufacturing the simulator:
Step one. Making rotating cylinders
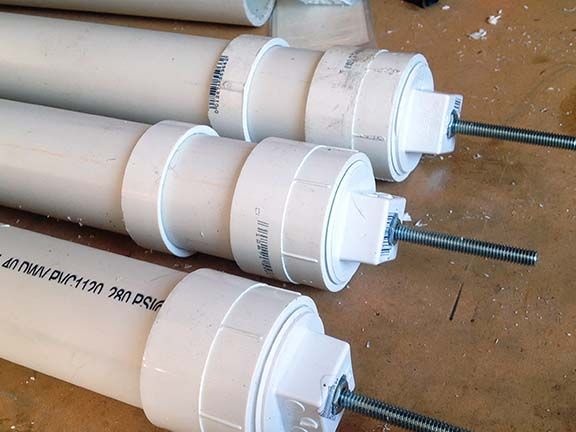
For the manufacture of rotating cylinders, the author used polyvinyl chloride; for this, two-inch PVC 40 pipes came up, which were shortened to 24 inches. To make the plugs, we needed bearings from a skateboard, they can be purchased for about two dollars.
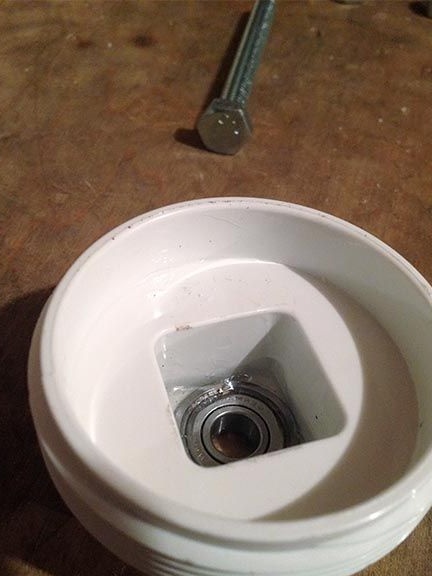
You need to start with the plumbing cap, its inner part must be drilled with a 7/8 "spoon drill, as a result, a bearing with an outer diameter of 22 mm is inserted into it. This also made it possible to install the drill in the plug in the center, since inserting the drill into the square holes of the plugs would be heavy.
Next, in the plugs, drill holes with a 5/8 "drill for a hex nut and bolt.
The bearing is mounted inside a square hole and fixed with epoxy. It must be carefully distributed around the bearing so that it does not get inside the bearing itself. Also, the resin should not get on the bolt head or nut, they should rotate freely.If the resin gets into undesirable places, then after drying it can be scraped off, but it is best to prevent this.
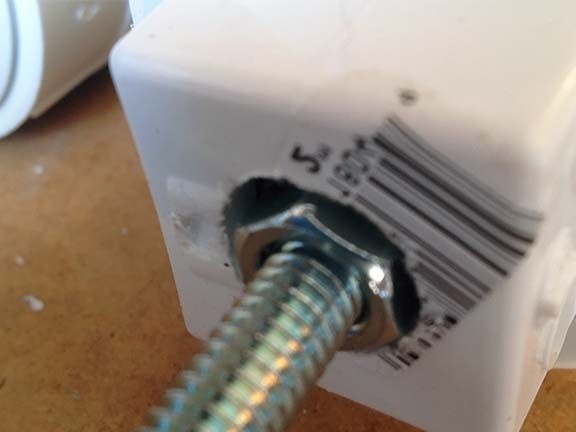
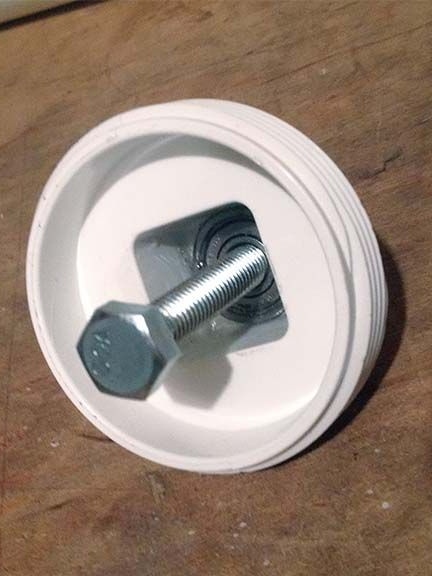
The resin dries in 24 hours. After that, from the inside, insert the bolt and tighten the nut firmly on the other side. To finally tighten the nut, the author inserts a screwdriver between the nut and the plastic cover. To prevent the nuts from unscrewing under the influence of torque, glue for threaded joints must be applied to the thread.
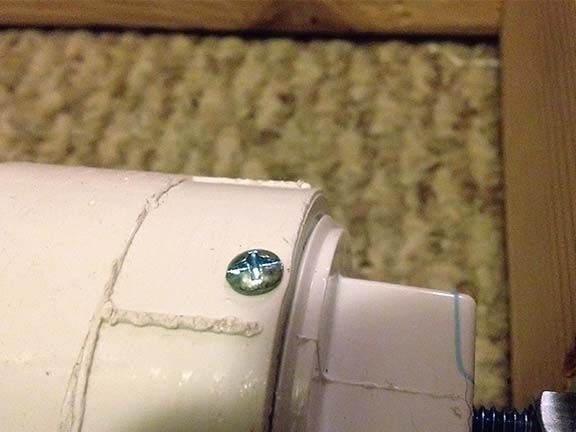
After the bolt is installed, the assembly must be screwed into the coupling and glued at both ends. Then you need to glue the plastic cover to the coupling, or you can use the set screw, as the author did. If this is not done, the cover on the right side may be unscrewed under the influence of torque. A screw connection is good because in case of a problem with bearings the structure can always be disassembled.
Step Two Exercise bike frame assembly
The cheapest is to assemble the frame of the exercise bike from wood. You need to proceed from what is the distance between the axles of the bike. The author has a road bike, the distance between the axles is 39.5 ". As a result, adding a few inches, it turned out 41", this corresponds to the distance from the front cylinder to the middle of the two rear cylinders, the distance between which is 11 inches. Well, as a result, the distance between the front and rear cylinders should be 46.5 ".

Based on the length of the tubes of 24 inches, the author made two crossbars measuring 2 "x 4" x 29 ". The length of the frame was not measured.
The bars need to be cut and holes drilled in them for three rotating cylinders. The holes in the bars should be at the same distance, otherwise the cylinders will be crooked. To do this, before drilling, the bars must be combined. About one inch should be retreated from the top of the bars, this will allow the cylinders not to deliver the floor surface and be slightly above the surface of the frame.
Step Three The final stage of assembly. Belt for the exercise machine
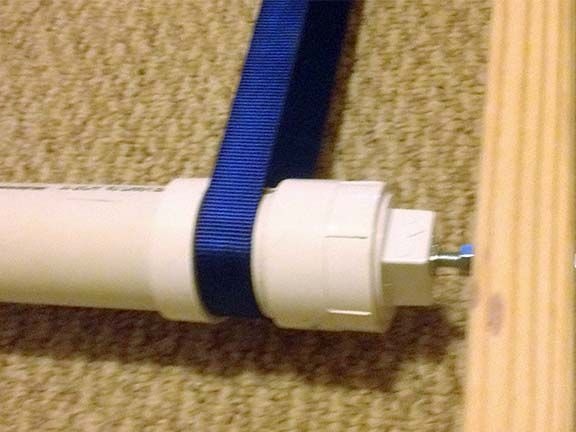
The belt in the system is needed in order to transmit rotation from the rear wheel to the front. This will keep the balance on the bike. The belt was purchased for $ 4. A ratchet is not required for installing the belt; it is mounted directly on the tubes. To get the desired tension, the belt needs to be shortened, the author cut off a piece of the order of 0.25 ". The tension should not be too strong, since this will create excess friction. But the tension must be, otherwise the belt will slip, and as a result the front wheel will not rotate.
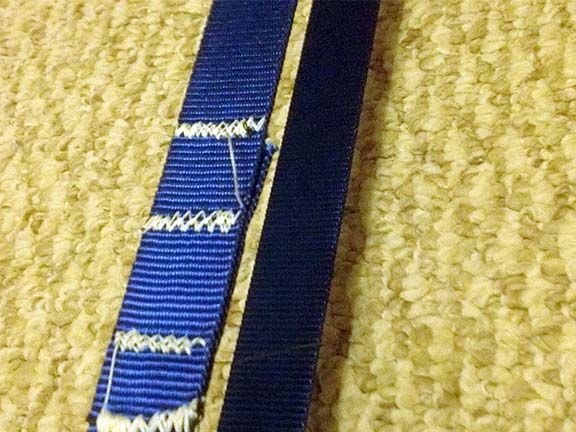
To maintain the flexibility of the belt, it is sewn on the sewing machine with several single seams instead of one large one.
It’s not so easy to achieve optimal tension, the author didn’t get it right the first time, as a result, the hole for the front axle was drilled about 0.25 ”to move the axle back a little. As a result, the homemade work perfectly. If you think a little more with your brains, then you can attach a small generator to the homemade product, so that during the lessons electricity is also generated.