This article will talk about one of many ways to recycle and reuse used plastic bottles. If you have accumulated a large number of plastic bottles, then instead of throwing them away, you can make them beautiful handles for kitchen appliances or other tools. Thus, instead of polluting the environment, create useful things from garbage.
Materials and tools:
- plastic bottles
blender
-mini oven
sharp knife
parchment paper
gloves
- sandpaper with grain up to 12000
MicroMesh Pads
-lathe
circular machine
threaded tray
-construction hair dryer
A detailed description of the manufacture of pens from plastic bottles.
Step One: High Density Polyethylene for Enthusiasts
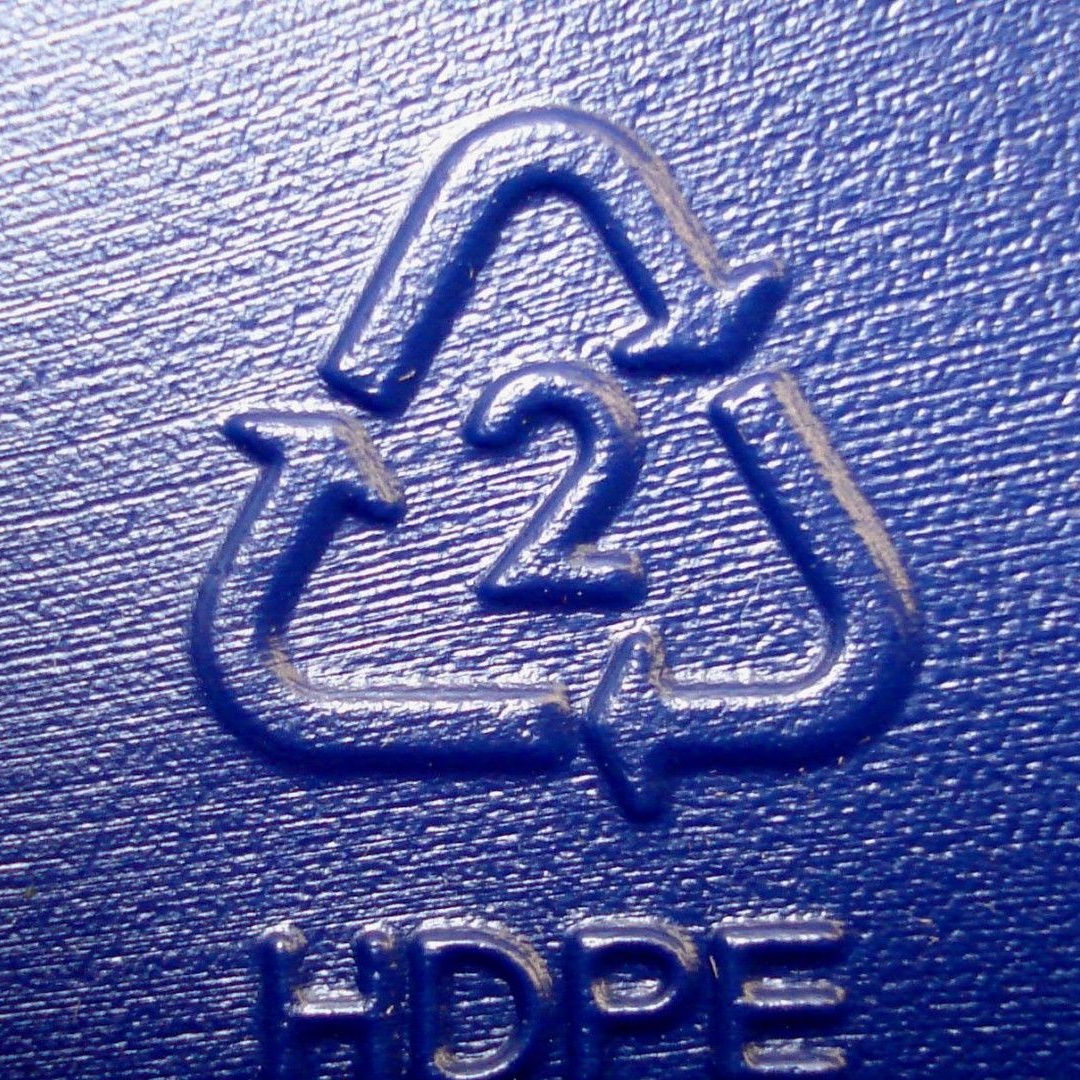
On each plastic container, the number and letter designation of the marking of the grade of plastic from which this or that product is made must be indicated. In this case, on the bottles used for the manufacture of pens, the number 2 with the HDPE marking was indicated. This means that such plastic is able to ignite and emit fumes harmful to the body at high temperature. Therefore, all work related to the heat treatment of such materials must be carried out in rooms that have a hood, ventilation and well ventilated.
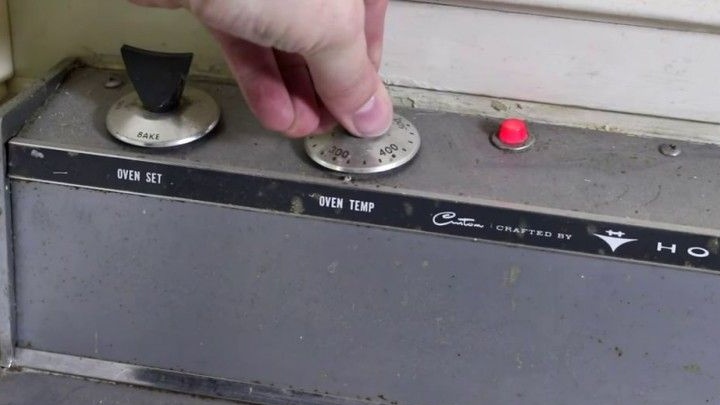
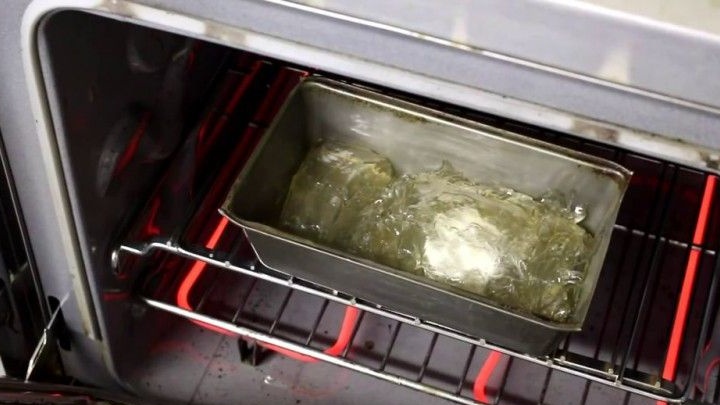
To make pens, you must first cut the plastic into pieces. It is best to use a sharp knife for this, and then place the cut plastic in a blender to grind the plastic into even smaller pieces. Then the resulting plastic porridge must be placed in the oven, preheated to 165 ° C. At this temperature, it is necessary to ensure that the entire mass of plastic melts to a transparent state.
Step Two: Add Color Variations


The time for which the plastic should melt is selected individually, largely depends on the volume and shape of the container in which the re-melting will take place. In order not to spoil the container for melting and subsequently there were no problems with the separation of the molten plastic, the author used parchment paper as an outer shell, since it is parchment paper that does not stick to HDPE plastic!
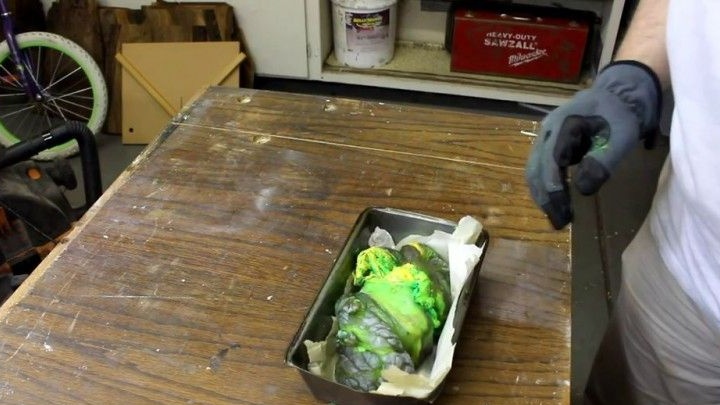
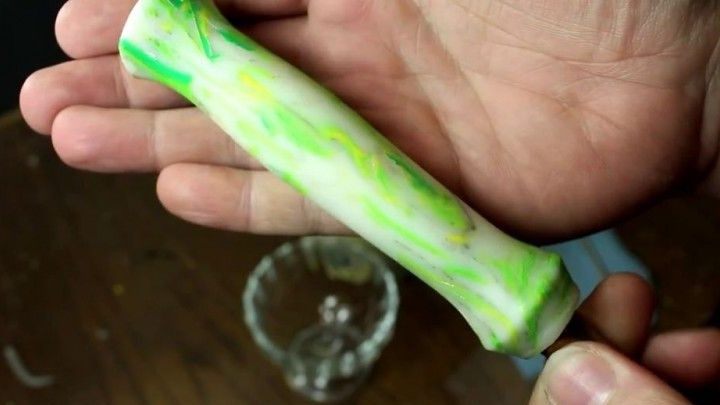
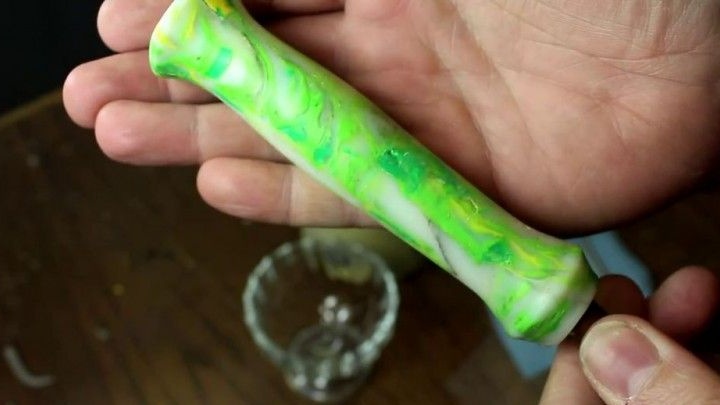
The amount of plastic used for the first billet was equivalent to 8-9 plastic bottles in which there used to be milk. In order to make the handle, which will be made of this plastic, brighter and more interesting in appearance, several colored caps from mustard and other cans were cut and added to the total mass. As a result, the workpiece obtained in this way will have sharp edges, it is important to remember this and do the work with gloves on.
After adding colorful parts, the plastic mixture is returned to the oven for another hour. It is best to control the melting of the plastic every 30 minutes so that there are no problems.
During the smelting process, the author decided to twist the existing workpiece several times. This type of plastic in a pre-warmed state resembles a soft candy in consistency, therefore it is quite easy to twist or crush it. Such a manipulation will give a spiral-like pattern to the future handle. Since the plastic must be hot enough during twisting, this work must also be carried out strictly with gloves.
Outside the oven, the plastic cools and hardens quite quickly, so after kneading the workpiece was sent back to the oven.
Step Three: Creating a Blank Form
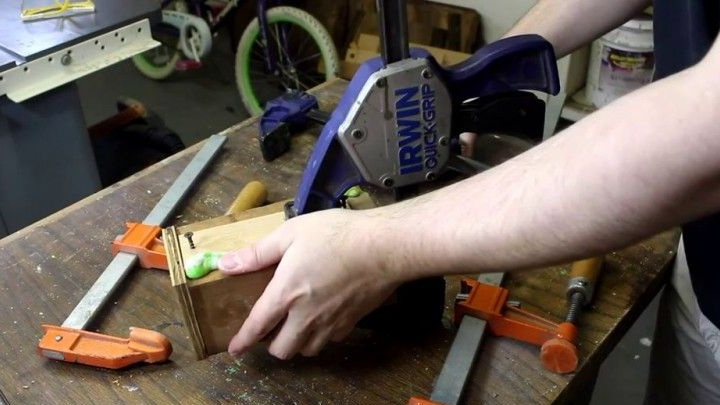
While the plastic is melting, the author made a form of plywood, in which the plastic blank will completely cool.
The dimensions of the mold were selected as follows: height 50 mm, width 50 mm, length 150 mm. Sizes were selected based on the necessary parameters for the preparation of the workpiece for more convenient processing on a lathe. It is necessary to avoid any air pockets when pouring plastic into the mold for cooling, for this you need to apply the maximum pulling force.
The workpiece cools down for about 12 hours, that is, after 12 hours the plastic completely cools inside the mold, all this time it should remain in the form tightened by the clamps. Only in this way will you get a workpiece worthy of quality for subsequent processing on a lathe.
The next day, unrolling the wooden form, the author took out the resulting plastic blank. It turned out to be 3x5x15 cm in size, which is suitable for making a normal handle.
Step Four: Grinding and Roughing
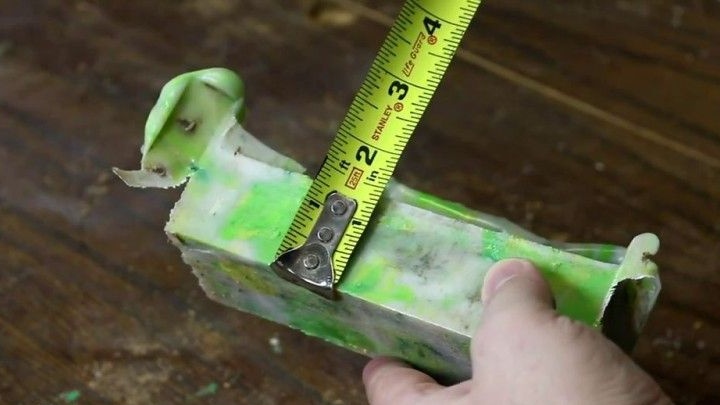
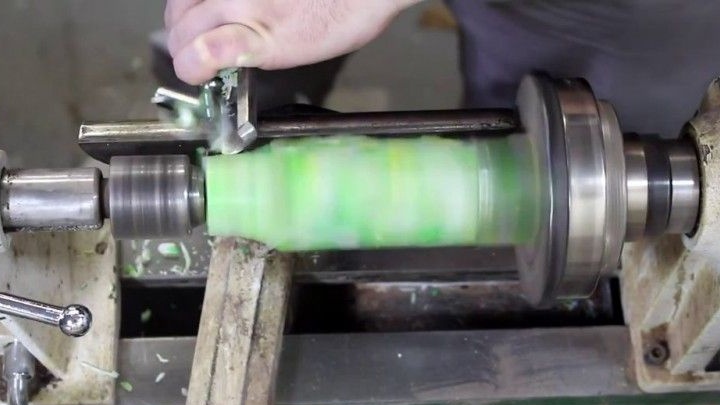

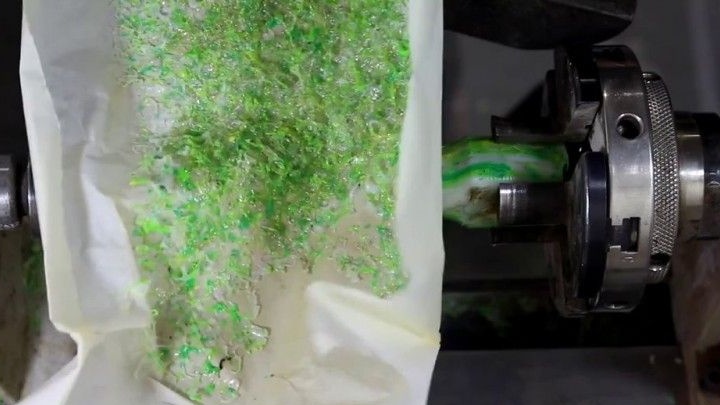
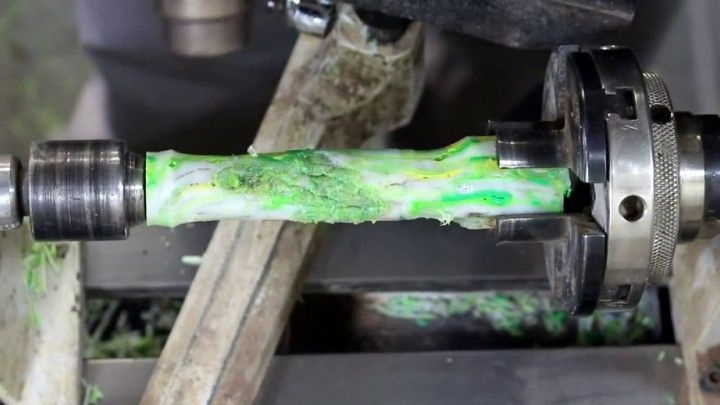
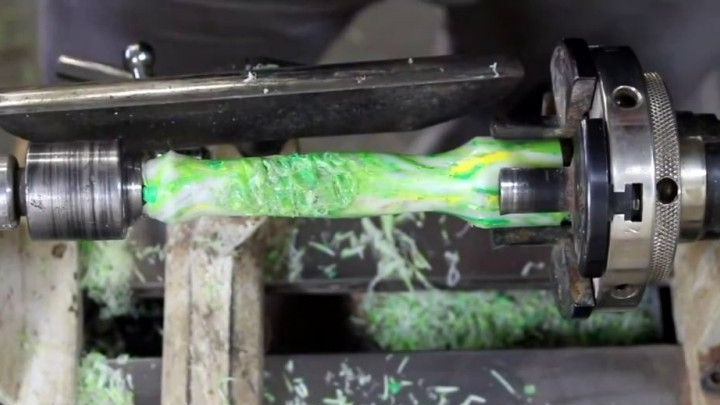
Since it would be more convenient to use a workpiece with equal sides on a lathe, the author decided to cut it to a square shape. A circular machine was used to align the shape of the workpiece. After that, the workpiece was fixed in the lathe chuck and subsequently turned to a cylindrical shape.
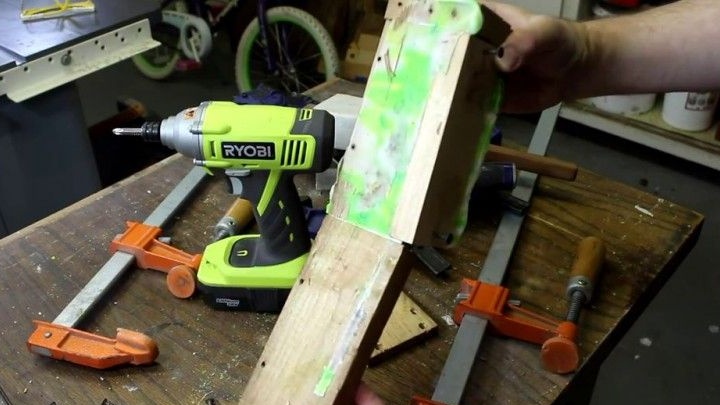
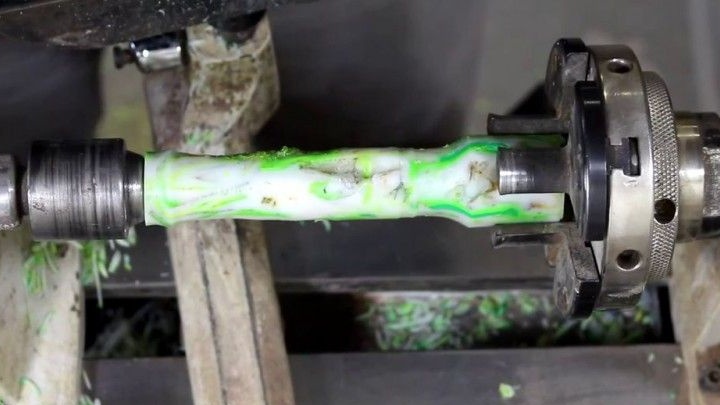
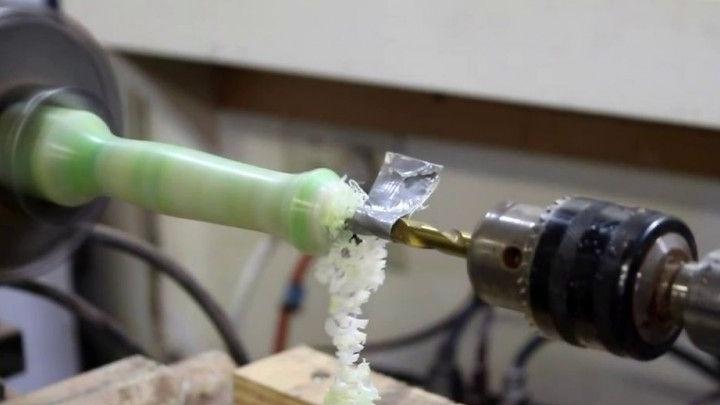
After grinding, several small cavities were found inside the workpiece. These cavities are fairly easy to fix using a hair dryer and particles of plastic chips. The chips must be heated in the oven on a parchment sheet at a temperature of 165 degrees for several minutes. Then, the problem area of the workpiece is heated with a construction hairdryer and the cavities are filled with plastic preheated in the oven.
For the best effect, you need to evenly heat the workpiece and use a spatula to press the plastic chips deeper into the cavity of the workpiece. Filling all the voids with shavings, and leaving the workpiece cool for another couple of hours, you will get an excellent workpiece for the handle, which will be free from defects in the form of cavities.
Step Five: Finishing Machining and Sanding


After waiting for the time necessary for the workpiece to cool completely, you can proceed to the subsequent processing. So that the handle does not scratch, you need to give the workpiece a smooth shape. For this, the author decided to use wet sandpaper. According to the author, the processing of HDPE plastic is not much different from the processing of acrylic parts. For processing, sandpaper with grain up to 12000 was used, as well as MicroMesh pads. Since HDPE is rather slippery, sanding with just such a grain will be most optimal and convenient.
Step Six: Attach a tool or accessory without glue
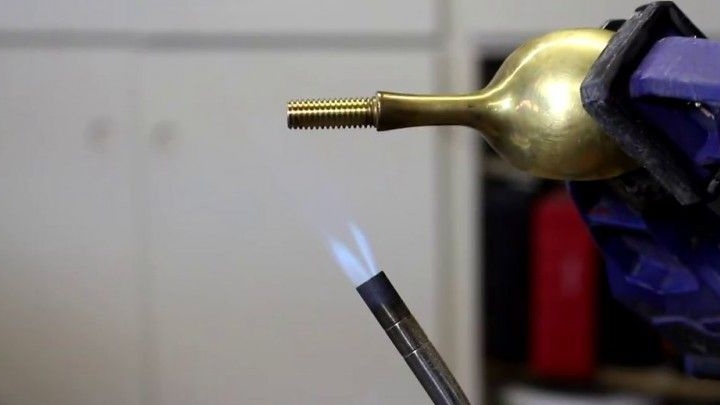

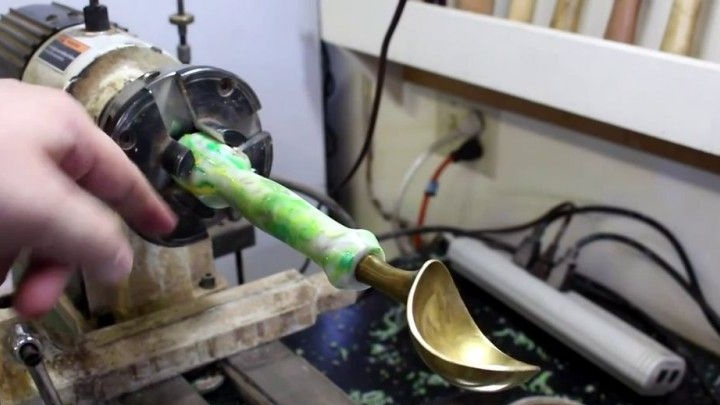
After receiving the handle, there was a problem of attaching it to the spoon, because the used plastic is hard to glue firmly. Therefore, it was decided to fix the handle in a rather unusual way. To begin with, a hole with a diameter of 8 mm was drilled in the place of fastening the handle with a spoon. Then, using a torch on propane, the spoon thread was heated. The handle at the attachment point was again heated by a construction hairdryer.
It is important not to forget about safety measures, and all work with hot parts should be done in protective gloves.
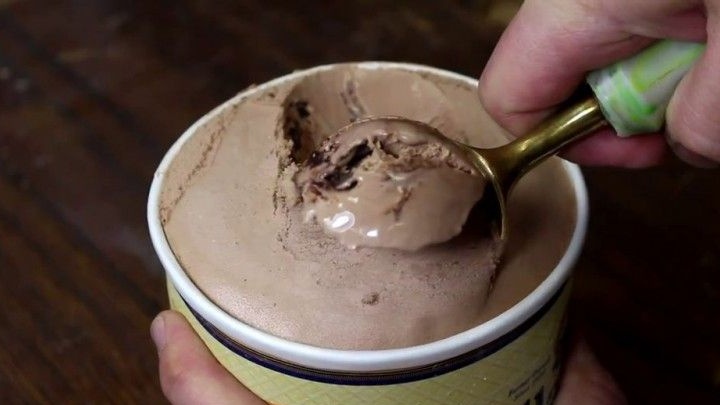
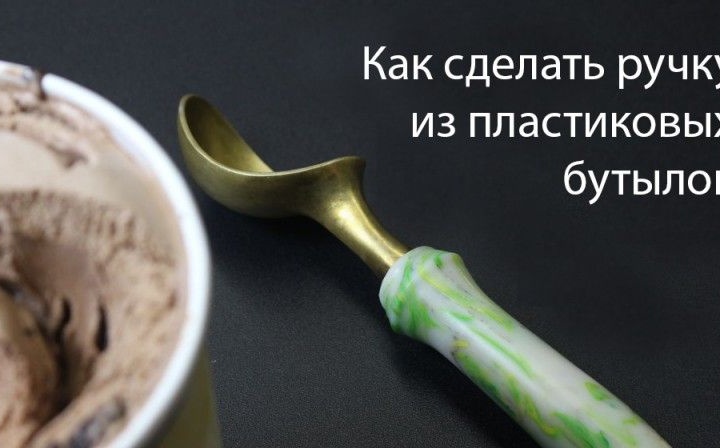
When both parts are at a suitable temperature, you just need to take and screw the spoon directly into the handle hole. Such fastening after cooling of the parts will be quite strong despite the fact that there are no additional parts or materials involved. Therefore, this method, according to the author, is the most acceptable and convenient.
Step Seven: Final Stage
After the spoon was screwed into a plastic handle, the author removed it from the machine and again manually sanded it. Thus, a beautiful, comfortable spoon made from recycled plastic bottles was obtained.