
Hello to all lovers homemade, the erhfitybq market offers us a wide range of different types, but sometimes you want something of your own and original, the idea of making a ring from wood that came to the author will be very relevant, since the texture of the tree always looked prestigious and unusually beautiful.
To make a ring of wood do it yourself, we will need:
* Board, 15-20mm thick.
* Epoxy mortar.
* Dye, you can choose its color at your discretion, in this homemade product the author applies blue color.
* Capacity for filling epoxy.
* Insulation tape.
* Vise of medium size.
* Drill with a nozzle for grinding.
* Sandpaper, grit from small to large.
* Band saw, a manual jigsaw can serve as a replacement, but it will be more difficult to work with it.
* Polishing paste.
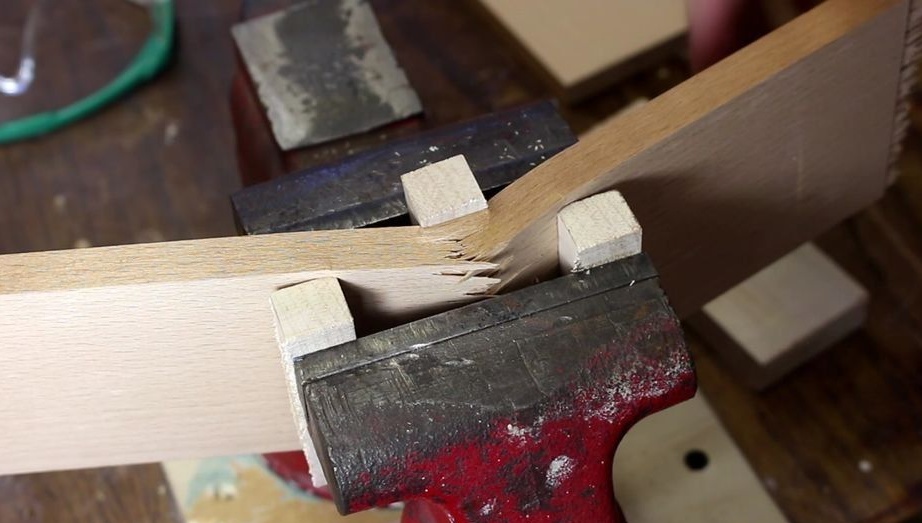
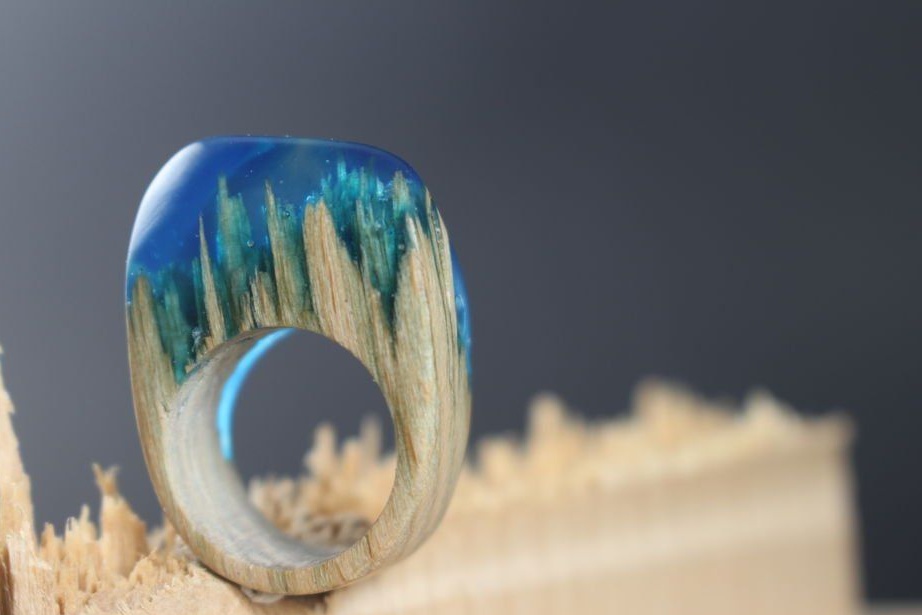
Step one. The ring that we will manufacture will have a distinct texture of wood and at the same time imitate the forest. To make our maple board slightly remotely resembling a forest, we need to use three square bars to grip it in a vice, as in the photo, to make a break. In this case, it is better to use a vise, otherwise large chips will form at the place of the fault and they will not look like a ring on your finger, because it looks too rough.
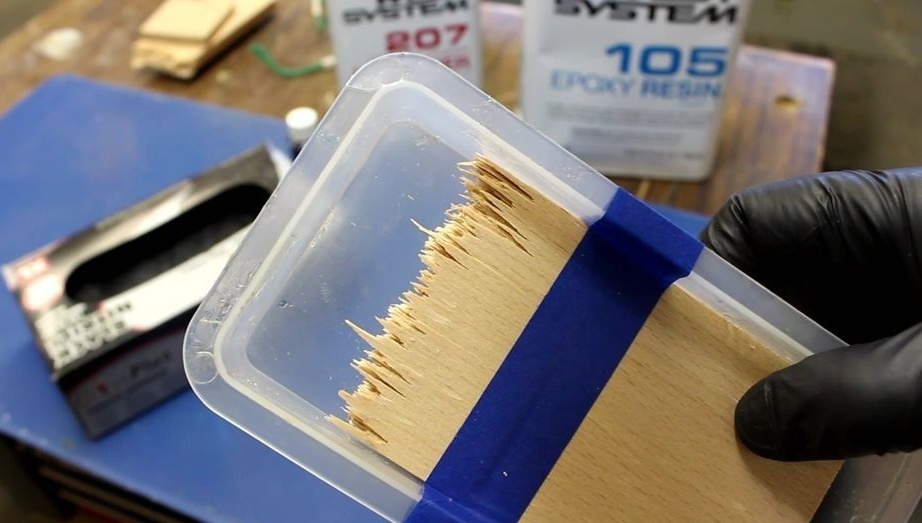
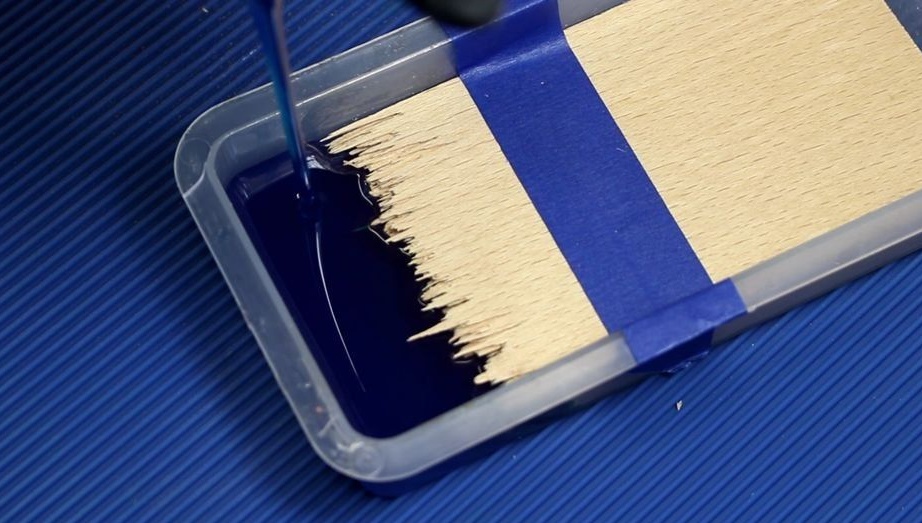
Step Two We place the half of the split-off plank in a container, then we need to pour the resin into it so that the board does not fall out, we fix it with tape.
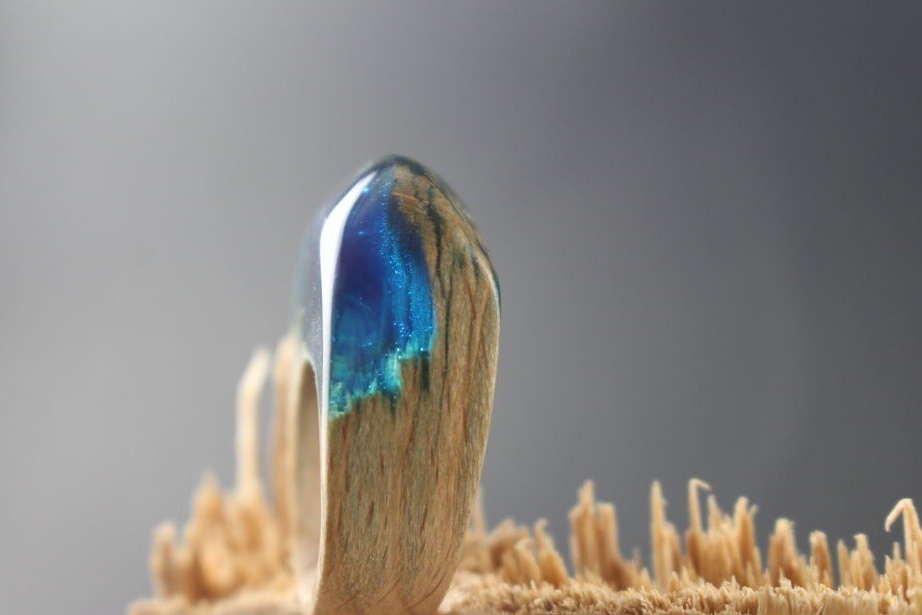
According to the instructions, it is necessary to dilute the epoxy solution and add a couple of drops of the dye to this solution to give it a blue color.
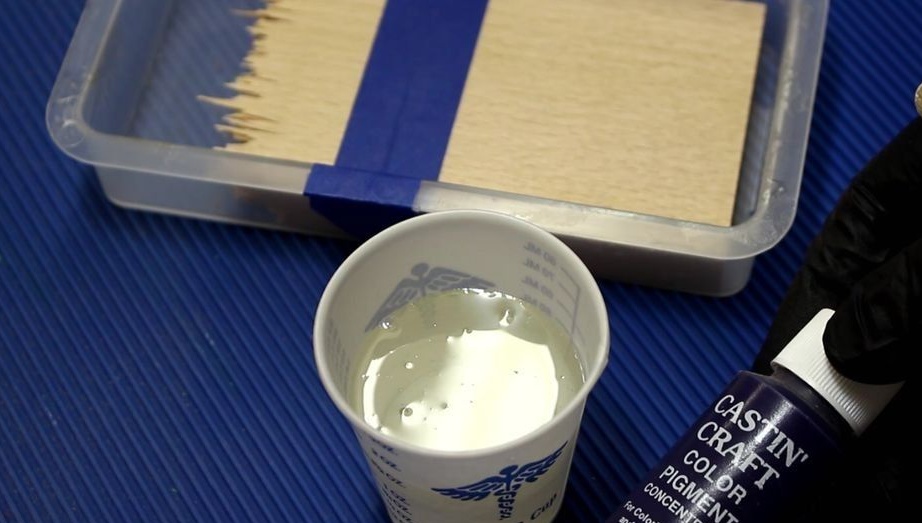
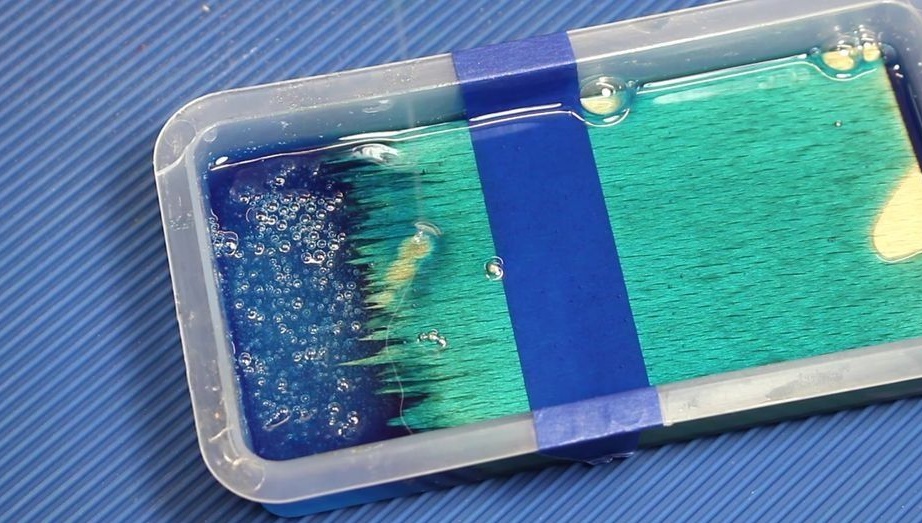
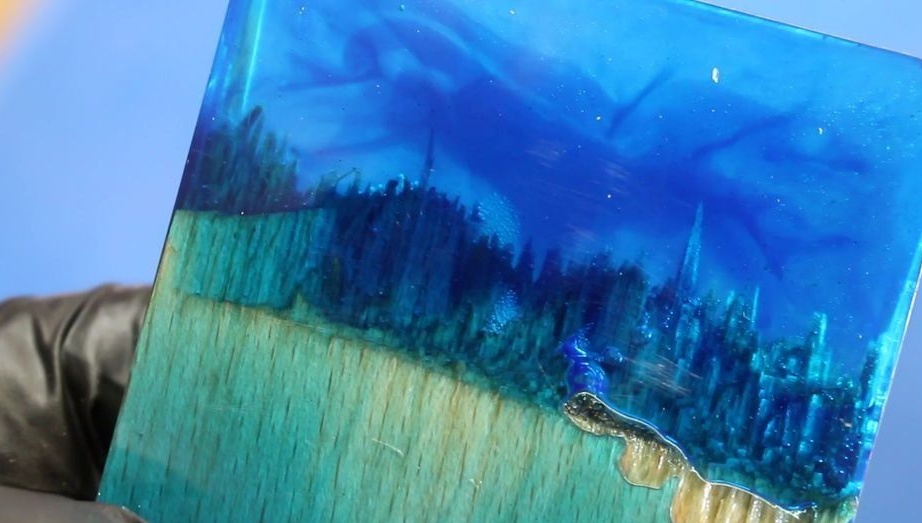
Blue color implies an imitation of the night sky over the forest. When our solution is ready, we directly proceed to pouring it into a container with a board, so that it finally hardens, it is necessary to withstand 24 hours, after which you can proceed with the next step.
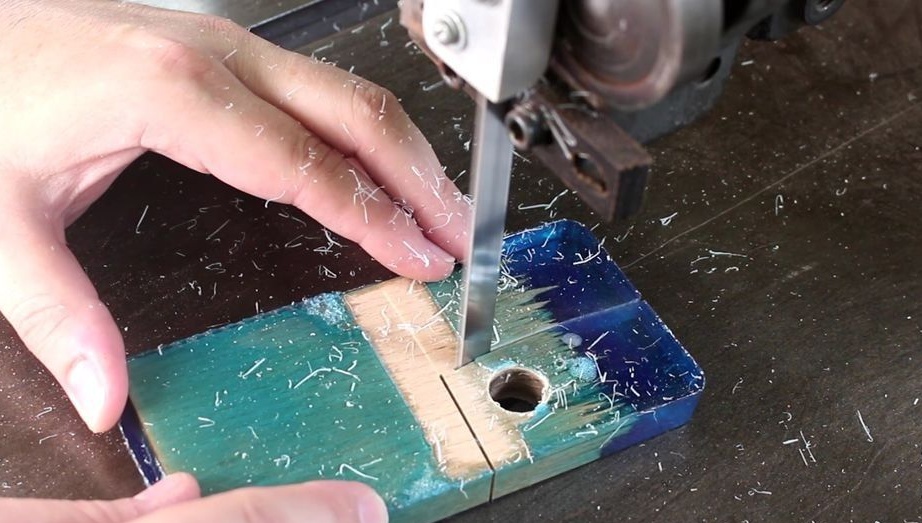
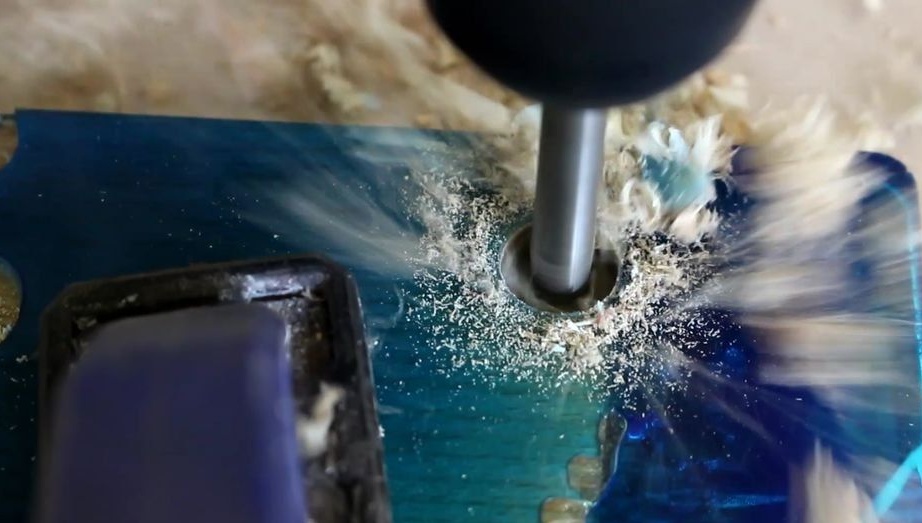
Step Three Using a drill or drilling machine, drill a hole for the finger of the size you need, leave a grinding allowance for the diameter, then use the band saw to cut the desired part of the board, also observing the machining allowance.
Grind each of the elements of the ring on rough sandpaper to give a rounded shape, it is most convenient to do this on a belt grinder. During this treatment, be careful and observe safety measures.

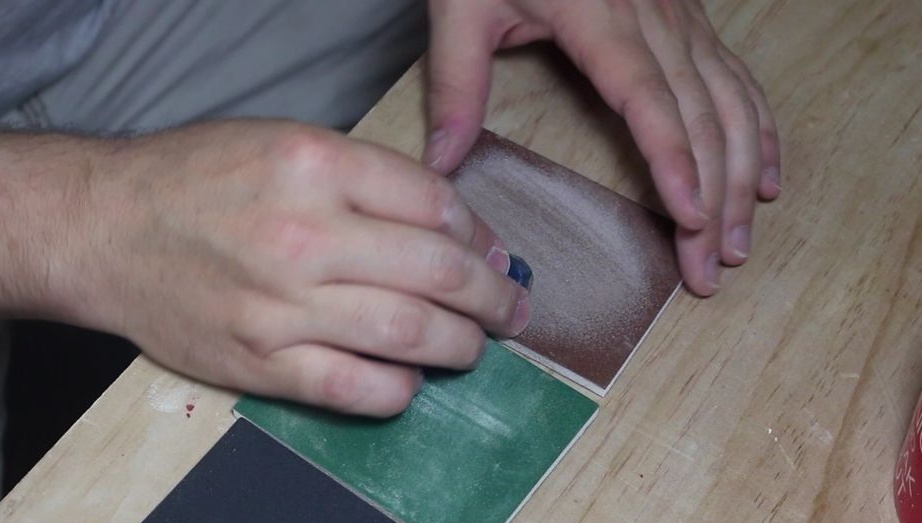
After processing with large grain, gradually switch to sandpaper with a grain size 100-150 higher, until you reach the final result, namely the smooth surface of both the wooden part and the epoxy.
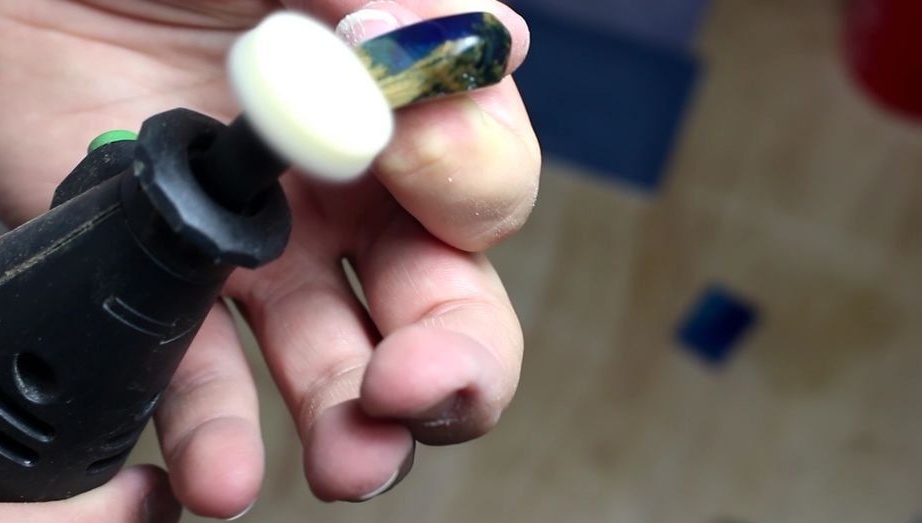
The final step. In each grinding, the final step is polishing, since this process is more accurate and removes all flaws when working with sandpaper, therefore, having armed with a drill with a polishing nozzle, polish the finished product using polishing paste.
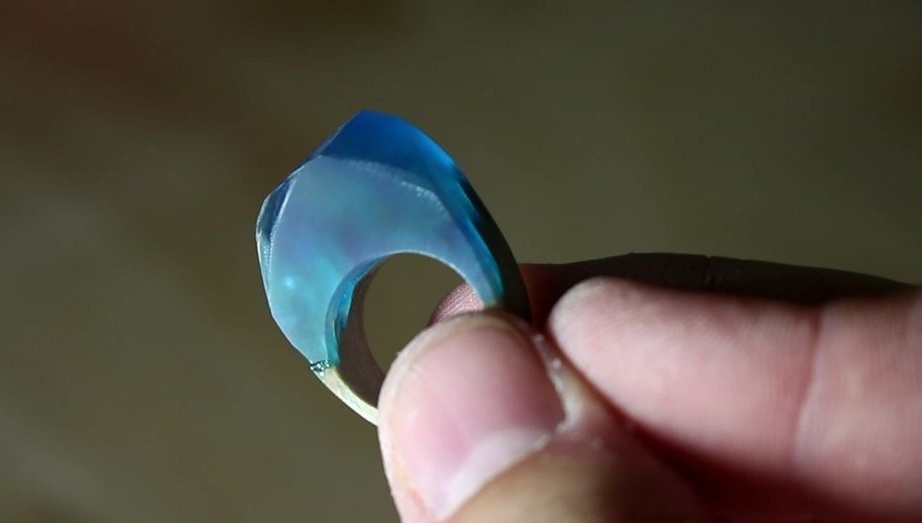
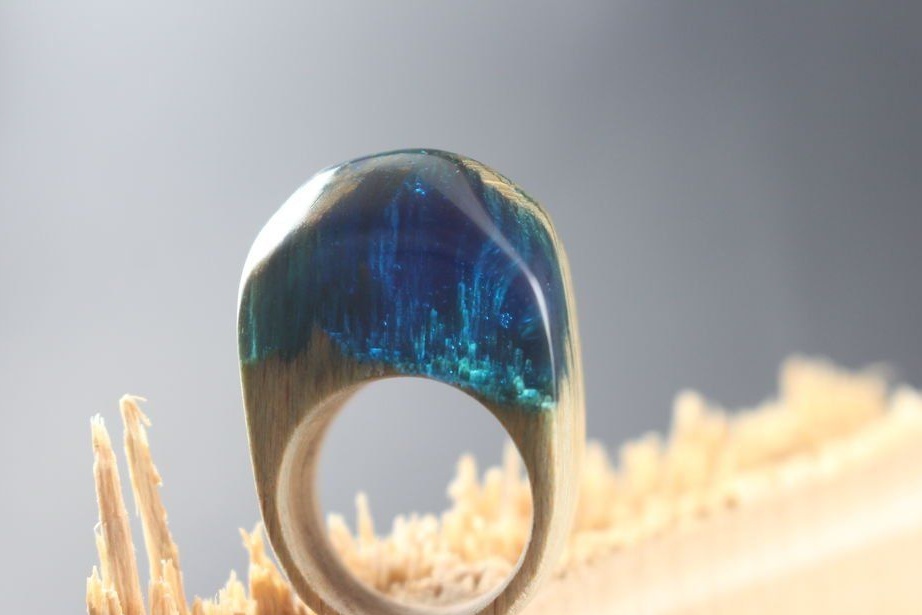
Our wood ring is ready for this, it turned out to be very original and surprisingly beautiful, a light shade clearly conveys the texture of the tree, which gives even more charm to your decoration.
All successful homemade products, as well as original and unique ideas.