» Fixtures » Instruments »Mini drill, battery-powered drill

Mini drill, battery-powered drill


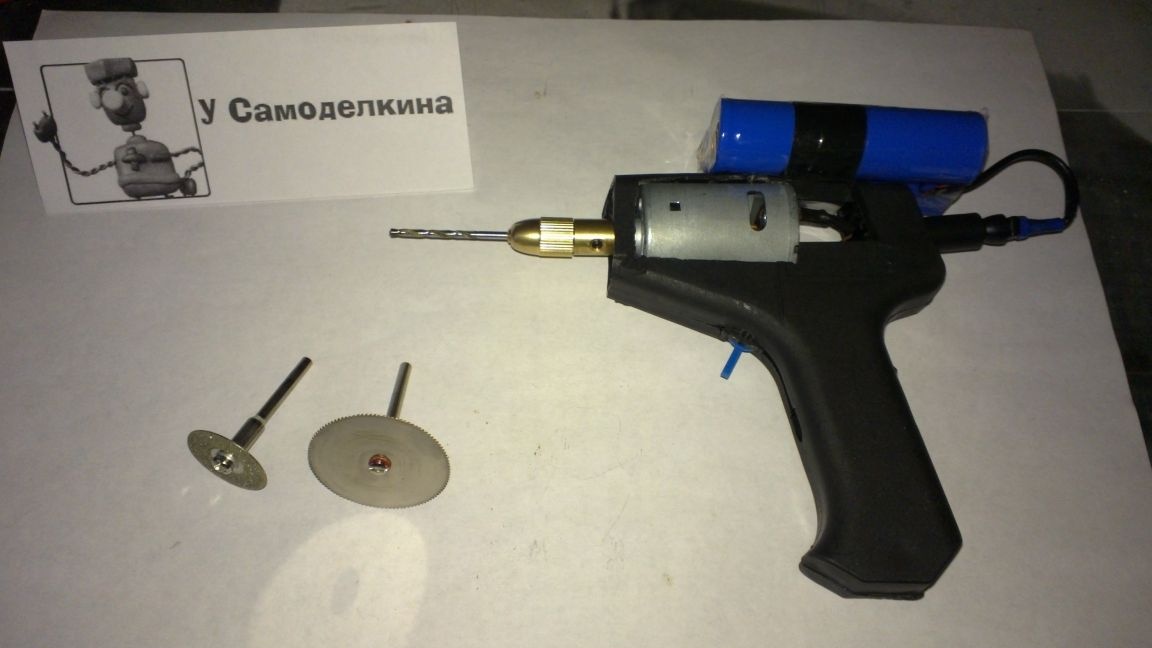
Cordless mini drills and drills are not cheap and sometimes, for small jobs, I do not want to overpay for high power and brand of the tool. I decided to try to make a similar tool do it yourself and not at great cost.

Video of assembly and test instrument for familiarization


We will need:
1. Cheap glue gun from a fixed price (60 rubles)
2. 2 rechargeable batteries of 18650 of the same capacity ()
3. Switch from the drive of the old music center
4. Connector and 4mm plug for connecting power (or any other)
5. Motor 6 - 12V ()
6. Not an expensive collet in a set ()
7. Heat Shrink 3mm
8. Copper wiring
9. Hot melt adhesive
10. Scotch tape
11. Electrical tape

From the tools:
1. Long nose pliers or pliers
2. Stationery knife
3. Glue gun
4. Screwdriver
5. Soldering iron

Step 1
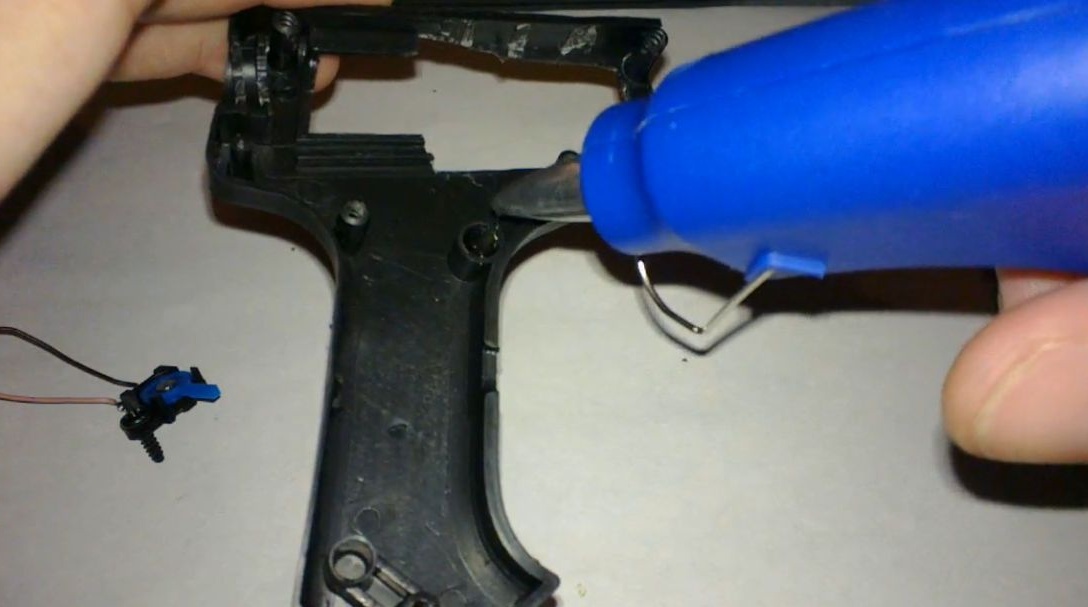
We need a glue gun from a fixed price, it is not expensive and not a pity to put into action. Maybe someone has such an old one, they often fail.

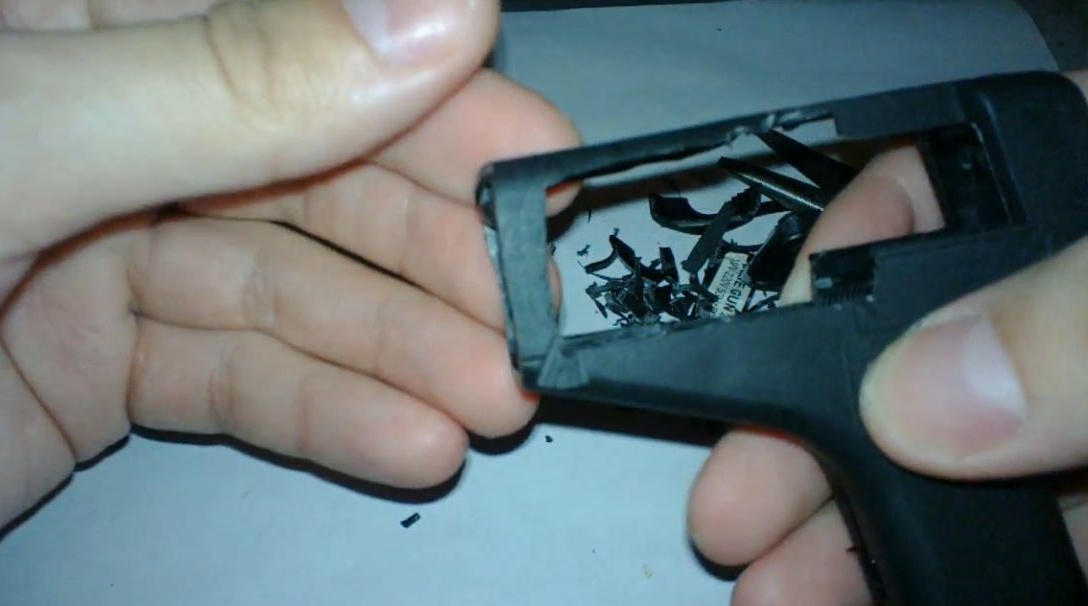
We disassemble it, pull out all the insides (maybe later for which they will come in handy) and leave only the case.

I chose this particular case due to the fact that the motor fits well if you cut a place for it, low cost and ease of further operation. You don’t have to make a pen and the case from anything, almost done already.

Step 2
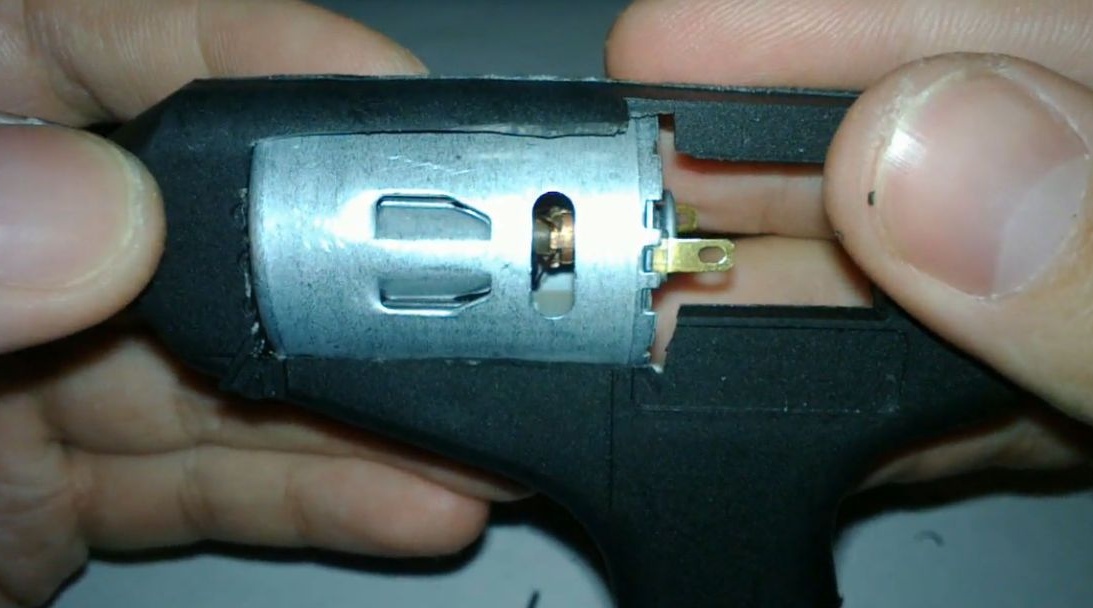
I ordered a motor (), which is often used in budget drills, is not expensive.

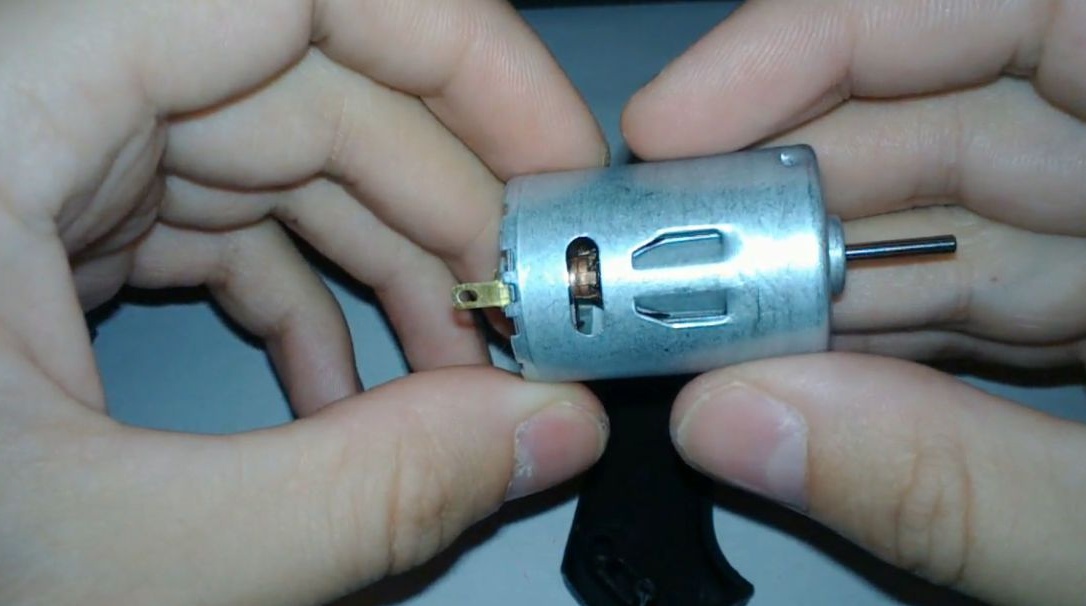
You can try to get one of the old printers or MFPs, also suitable.

Step 3
We cut out a place for the motor in the body from the glue gun so that there are legs for fixing the two halves with self-tapping screws, the motor just fits in with their location.

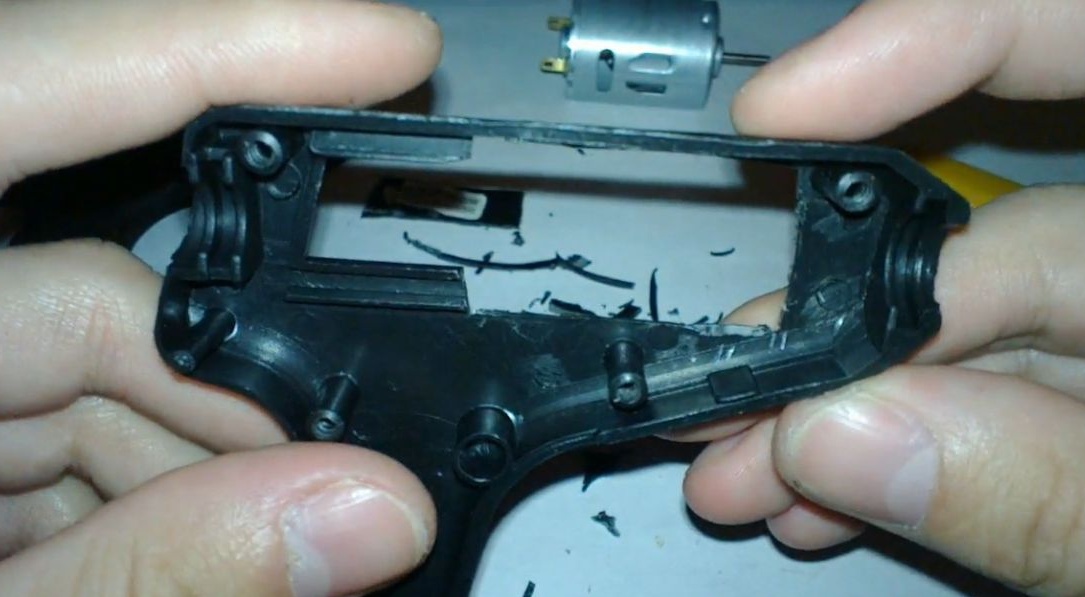
You can cut with a clerical knife, but carefully, the main thing is not to overdo it and not break the case.
I cut holes by gradually adjusting it to the size of the motor, cutting it a bit.

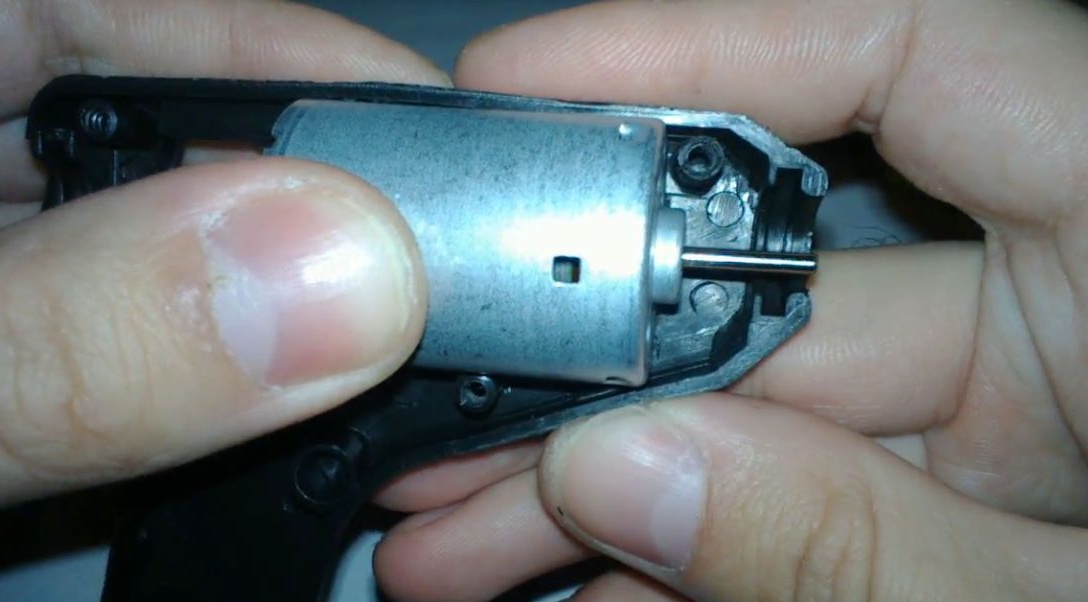
The shaft should be centered as in the photo.

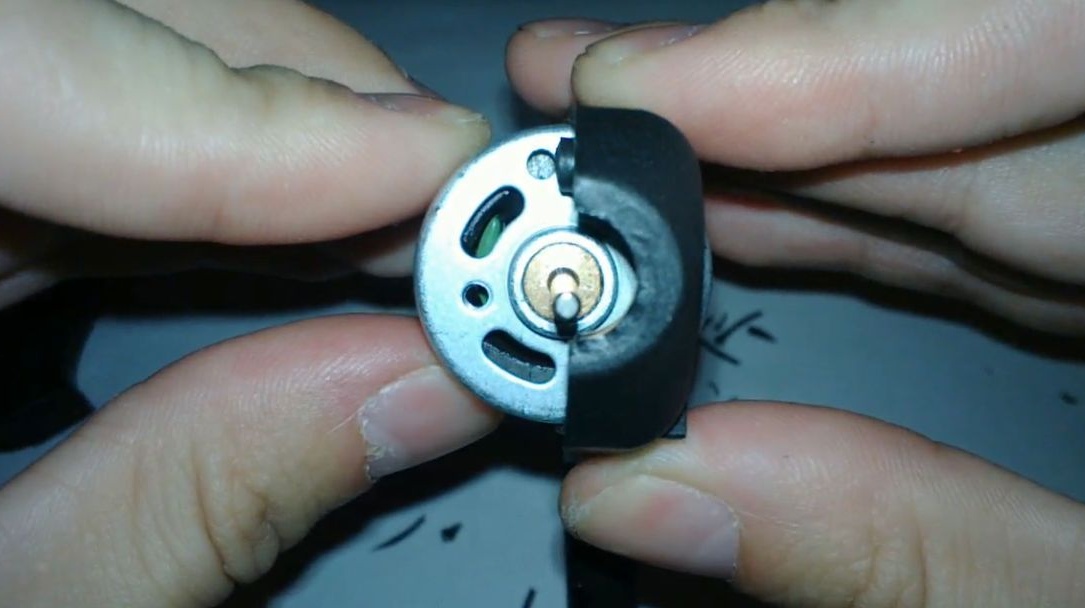
Very well located ventilation holes.


Step 4
We do the same with the other half of the case and connect for fitting.

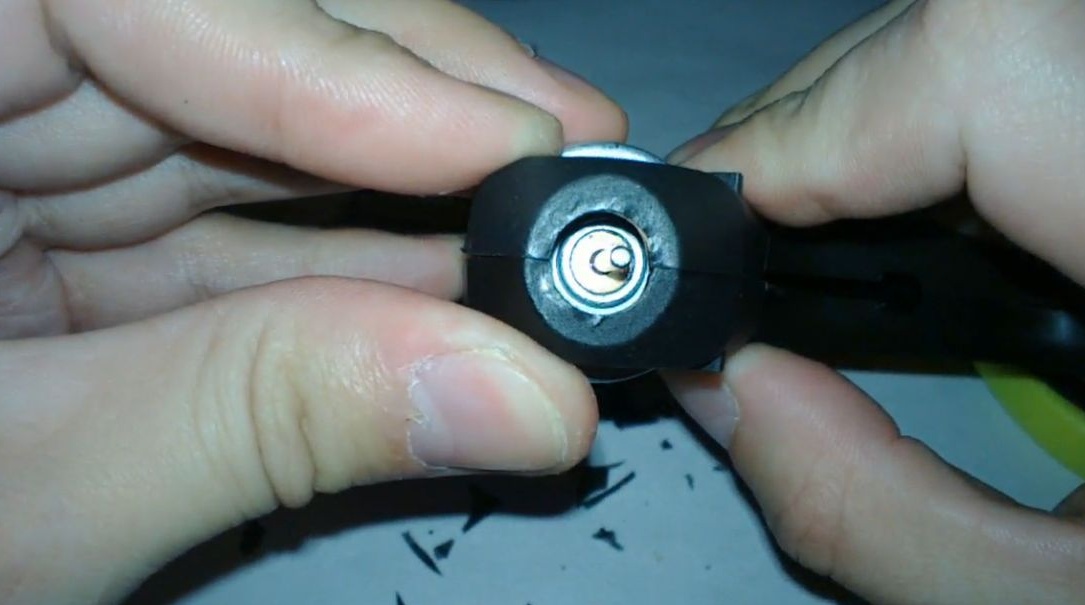
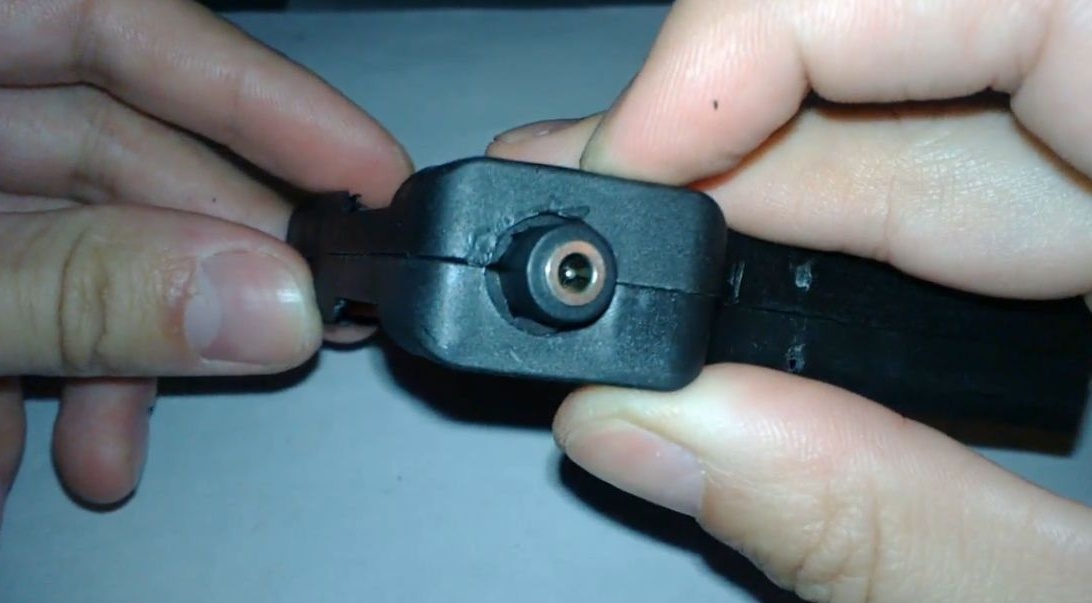
After fitting the housing to the motor, it is necessary to trim part of the housing where the collet will be mounted on the shaft. It should turn out like in the photo. Cut to the fixing legs, we need them.


Step 5
Next, you need to choose a connector for connecting power. I used a 4mm jack from an old charger extension cord.

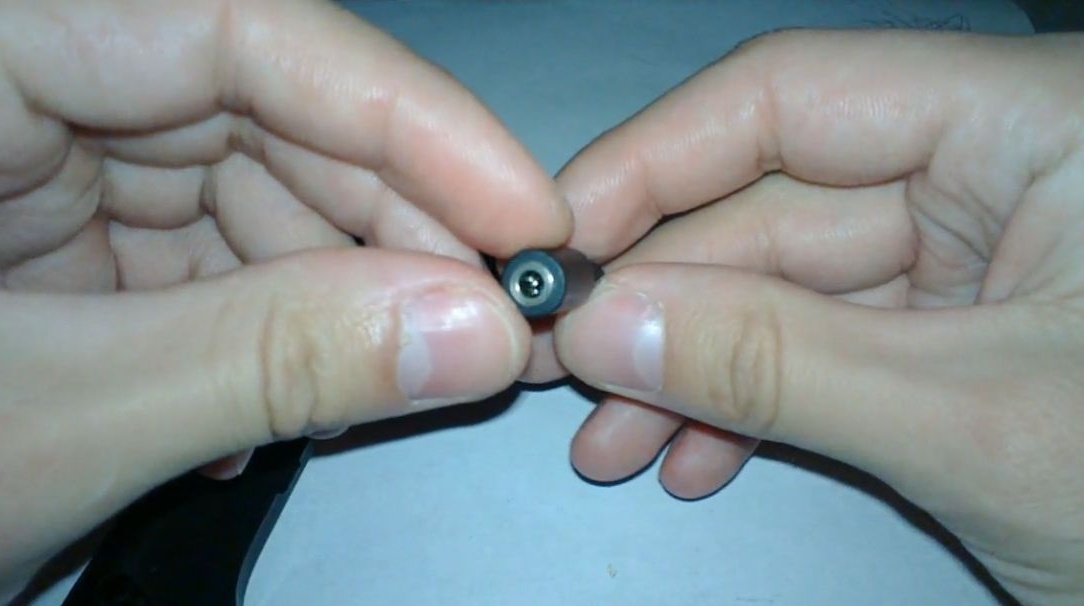
I decided to install it in the hole where the glue sticks were fed.

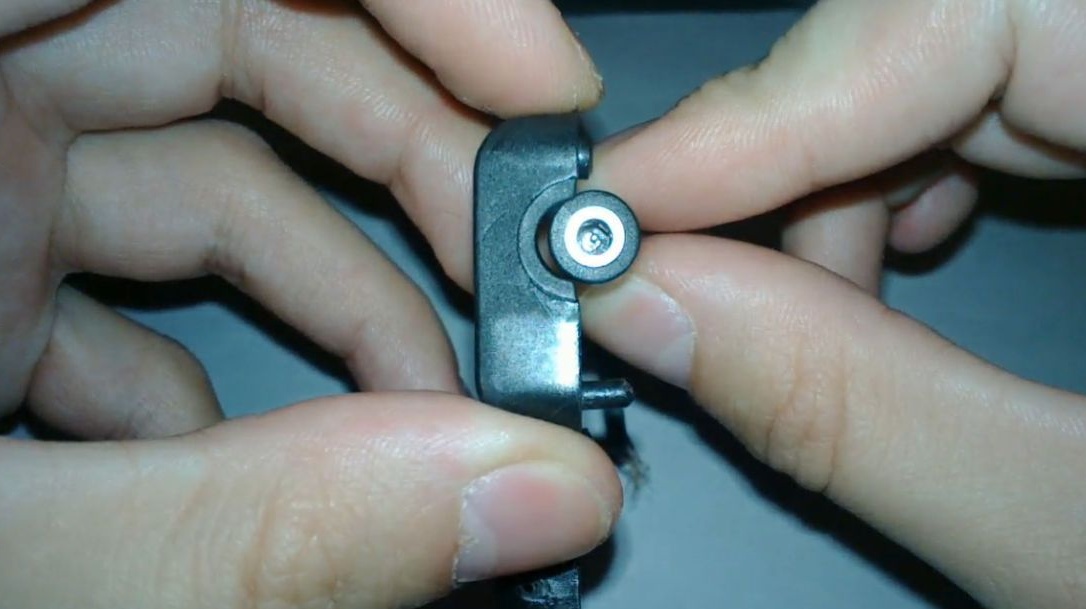
Cut a little with a clerical knife and now it holds tight. Then we fix it on one half with hot-melt adhesive for reliability.
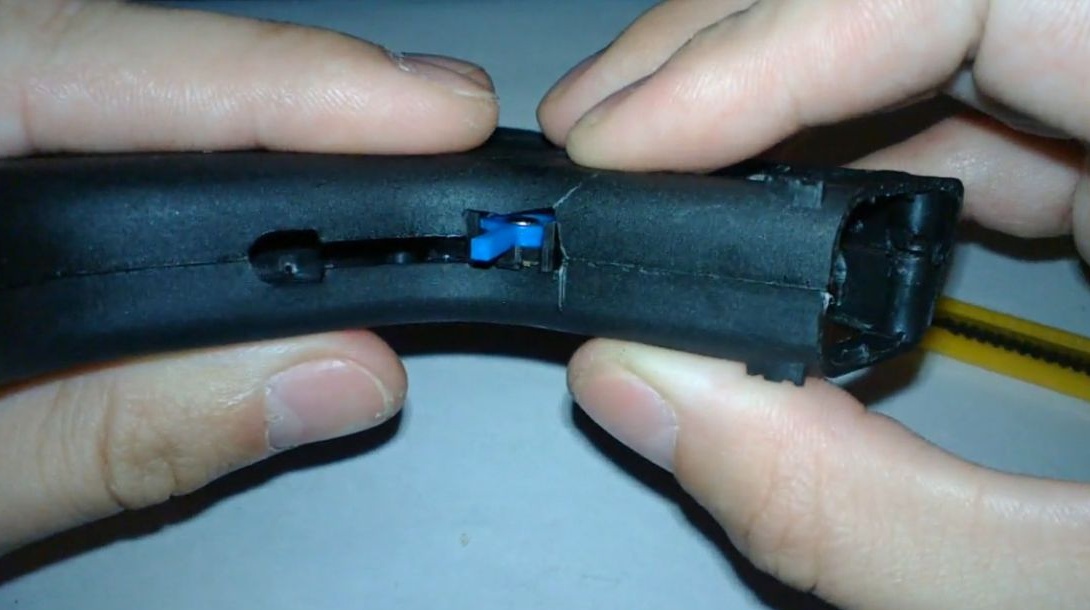

Step 6
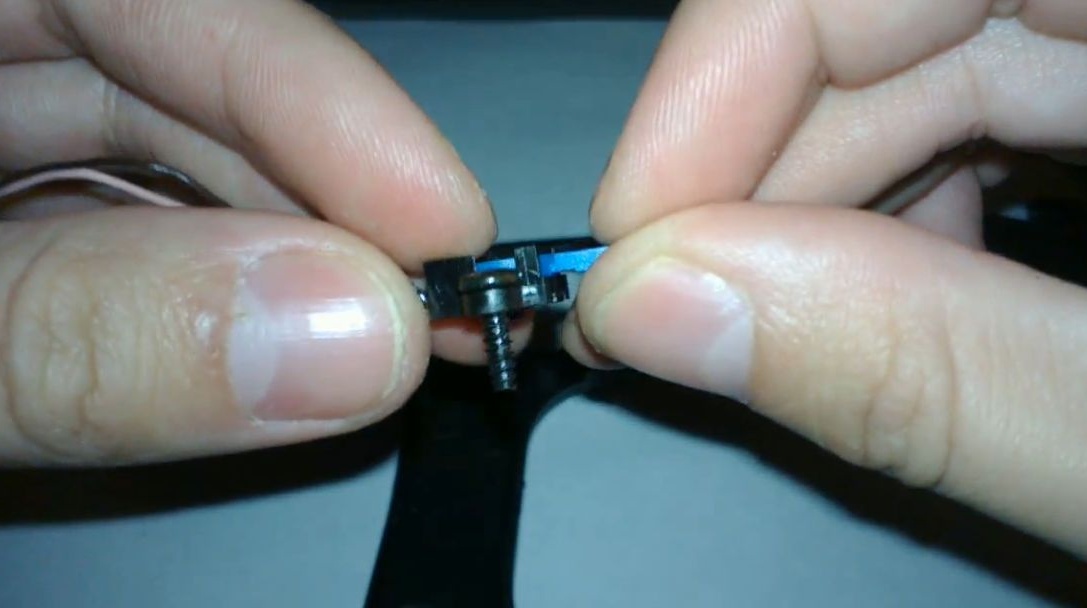
From the old drive of the musical center, after its analysis, there was such a switch. Used to turn off the motor when the drive tray was closing.

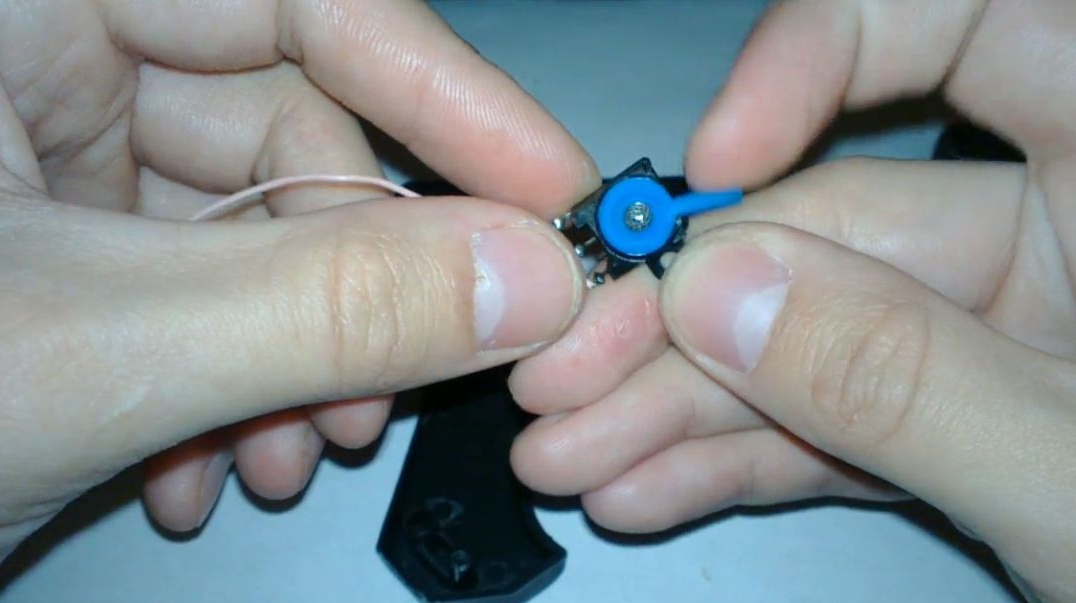
Very well suited in size to the body and there is an eye for a self-tapping screw or bolt. In addition, a spring is installed in it, which returns the lever to its original position.

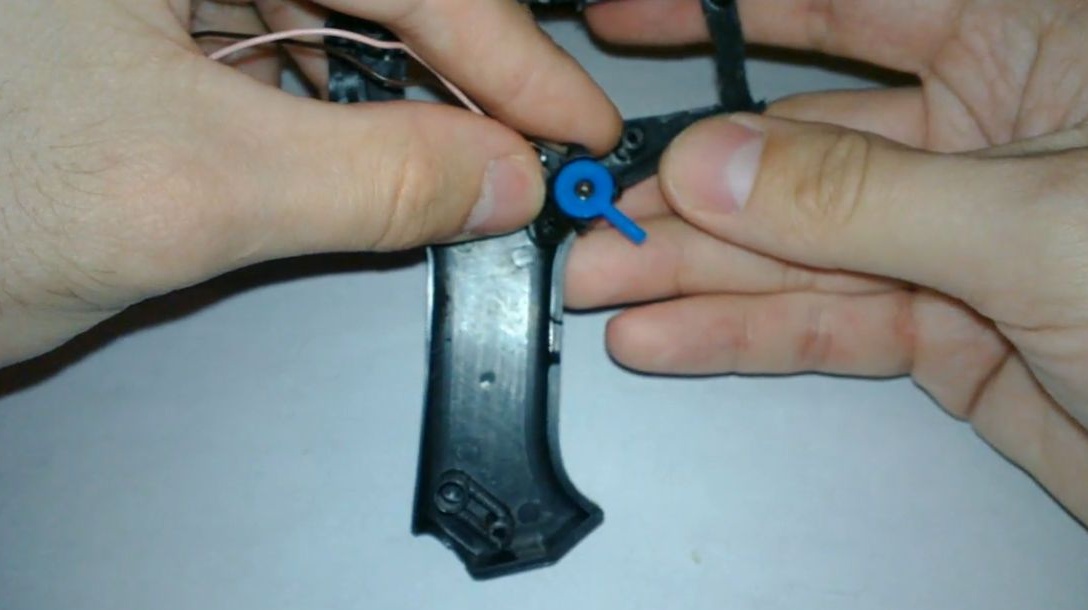
In the holder where the glue gun button was installed, fill it with hot glue and put our switch in place with a self-tapping screw in the eye. After the adhesive cools down, the switch will be well fixed. For reliability, the switch can also be fixed on the inside of the case with hot-melt adhesive.


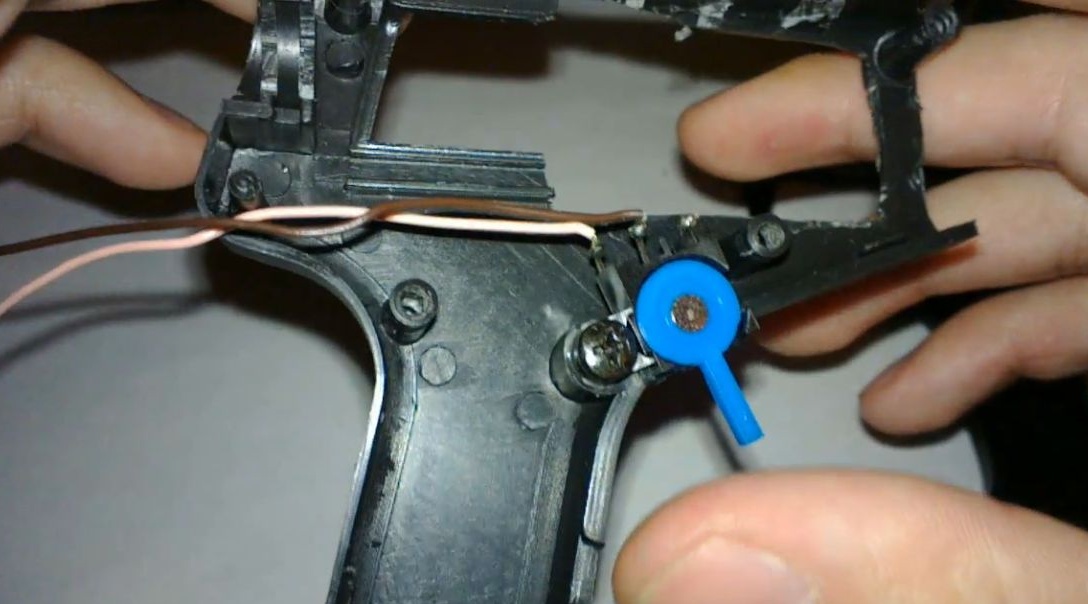
We cut the excess on the second half to fit the size of the switch and combine both halves to view the result. It should turn out like in the photo.


Step 7
Next, we place the motor in the prepared place, we fix the connector for the power supply with hot-melt adhesive and solder the wiring.


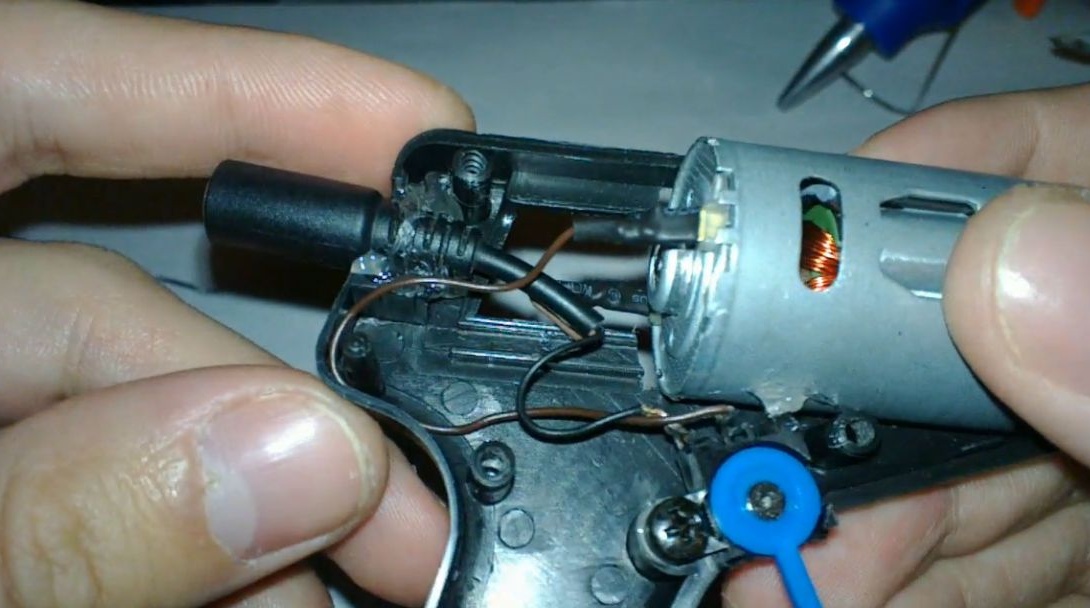
At the expense of connecting wires.

In the connector I took, the polarity is as follows:
+ located inside the connector (light brown wire lead)
- is located outside the connector (black wire output)

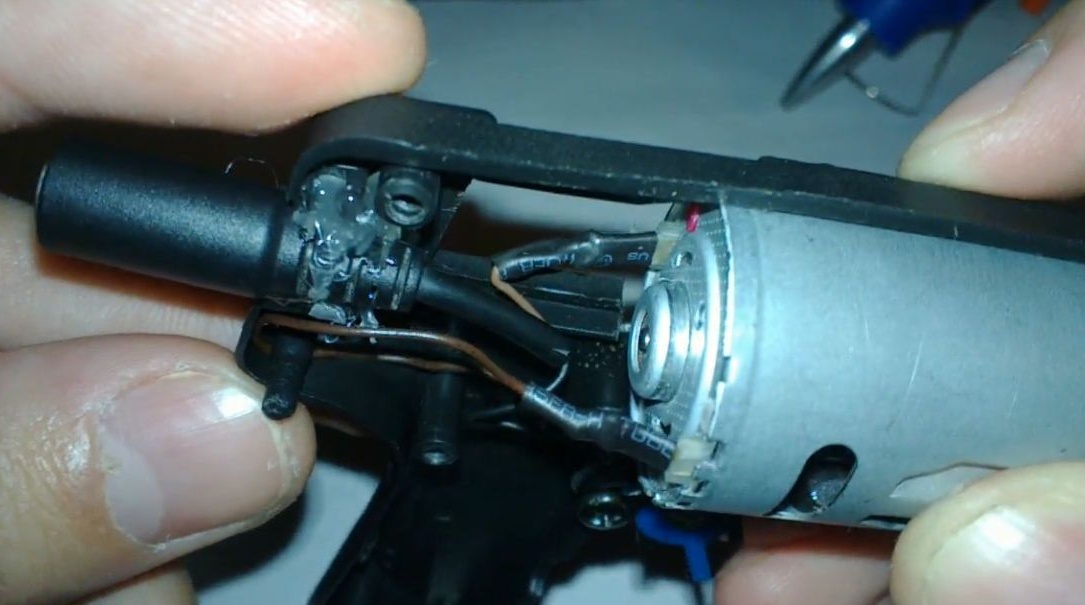
Plus from the power supply (light brown wire), I connected to the plus of the motor (usually marked in red) directly. The minus from the power supply (black wire) was soldered to the switch and from the switch (dark brown) led to the minus of the motor. Places of adhesion insulated with heat shrink 3mm.

With this connection, the motor shaft will rotate clockwise, for the possibility of using drilling, since there is no implemented system for reversing the direction of rotation of the motor.
We twist the screws fixing the case and on this design is ready.

Due to the large size of the connector, I made it a little sticking out. This does not bother me at all, but you need to select the connector for yourself.

Step 8
Now let's start making a battery for a mini drill.
Normal voltage for the motor is not loading and does not overheat it 6-10V.
Initially, I wanted to use one 18650 rechargeable battery placed in the handle of the case and a step-up voltage converter. It will allow 4V to increase to 10V. Delivery is delayed, then I will finish it as planned.

And now I will use 2 18650 batteries connected in series.

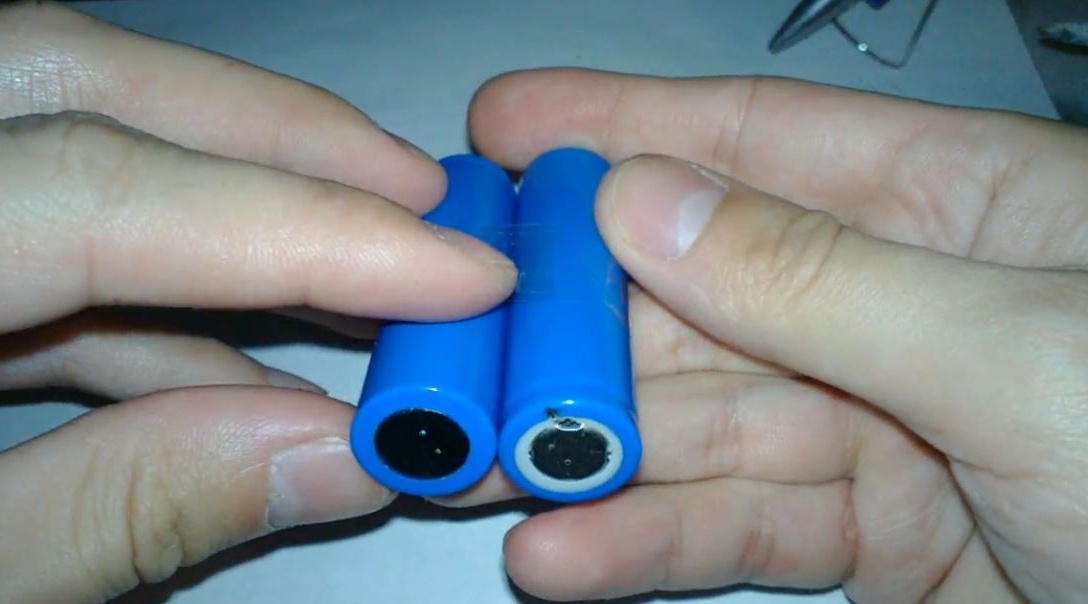
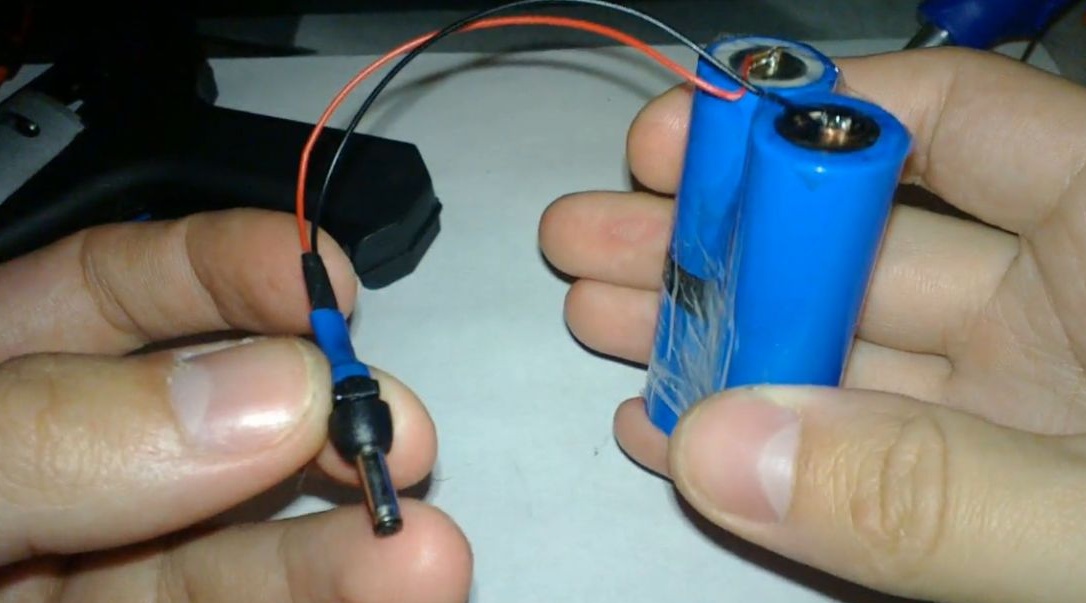
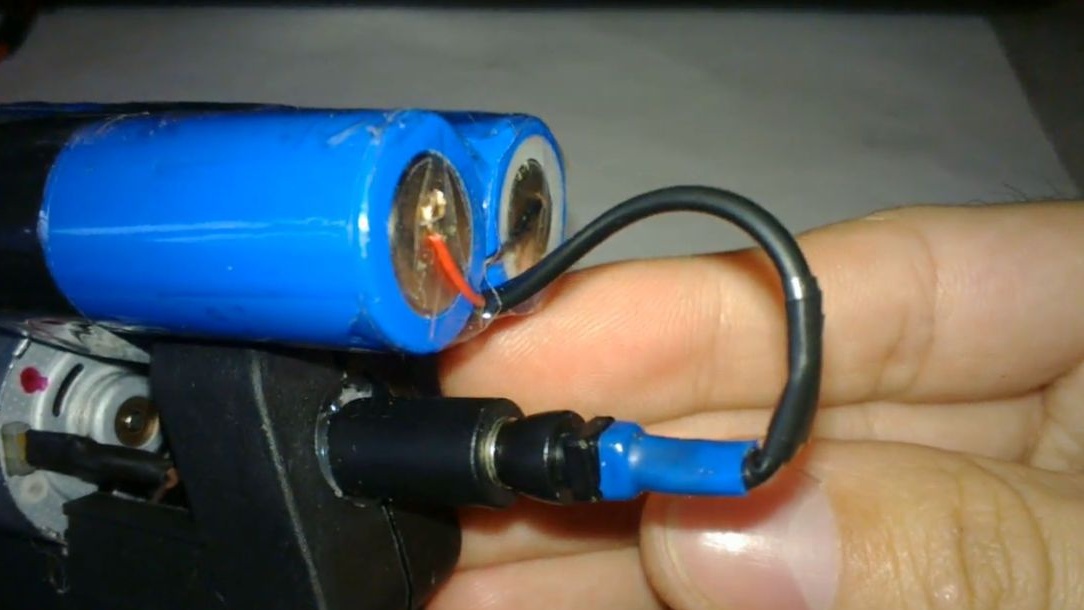
On one side, they are connected by a copper wire twisted into spirals on both sides, and on the other, a plug is soldered to connect to a mini drill.


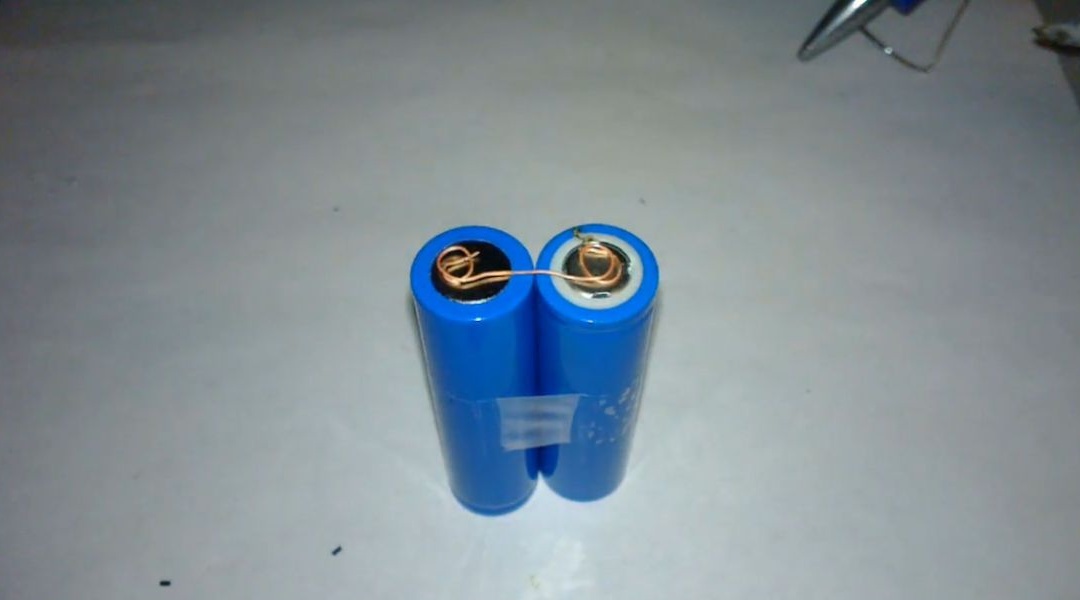
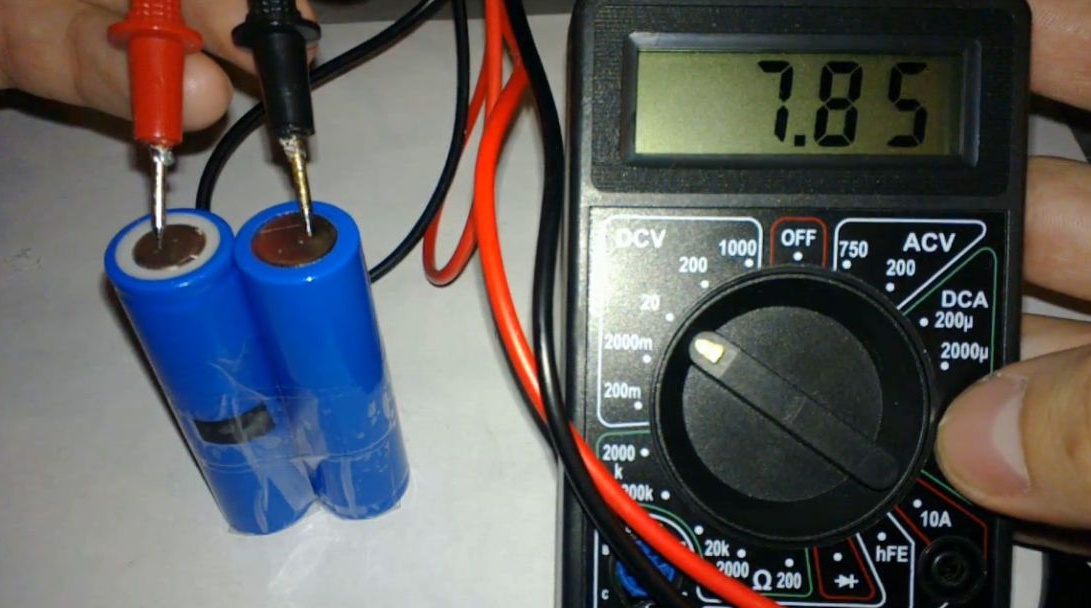
The total voltage of the two batteries is 7.6-8V, which is enough for small jobs.

They will have to be charged separately or using the module to charge two 18650 batteries () in series.
I fixed the batteries on the top or bottom of the handle, as it is convenient for anyone. It’s more convenient for me from above.


Getting to the test
In the video, I conducted several tests of work. There is enough power for small jobs.
Even an old drill does a good job.
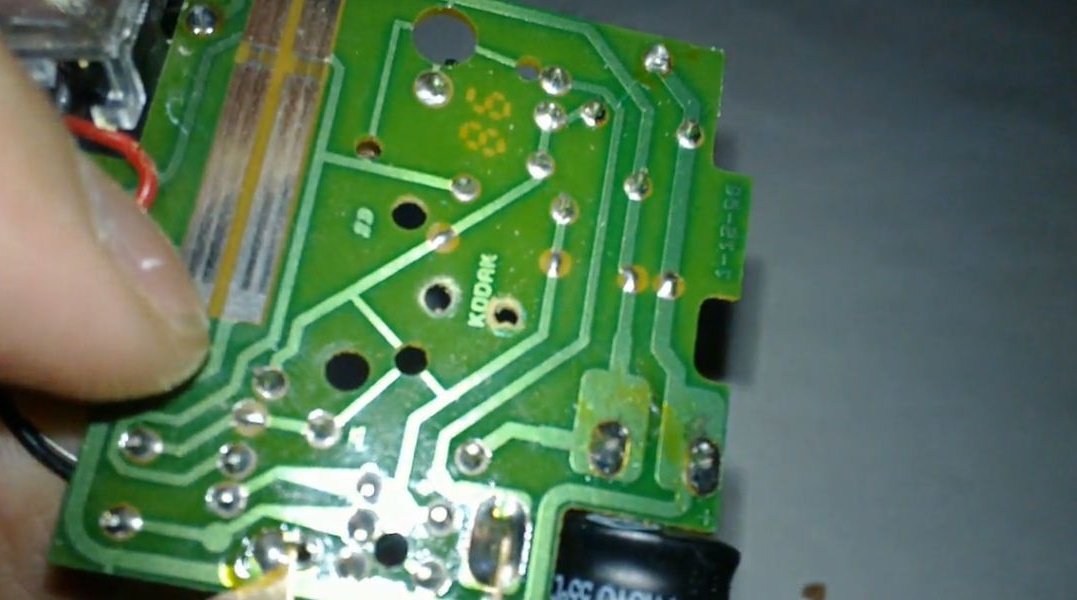
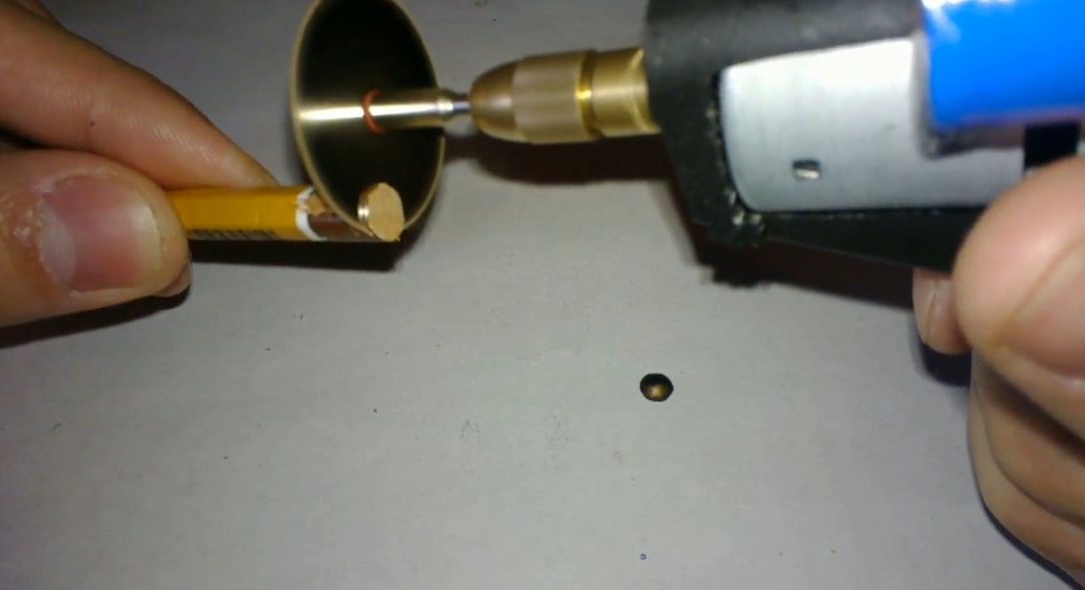
Wood, plastic and circuit board from the camera drills confidently.


Sawing wood and plastic like a knife without a break. Not stuck.

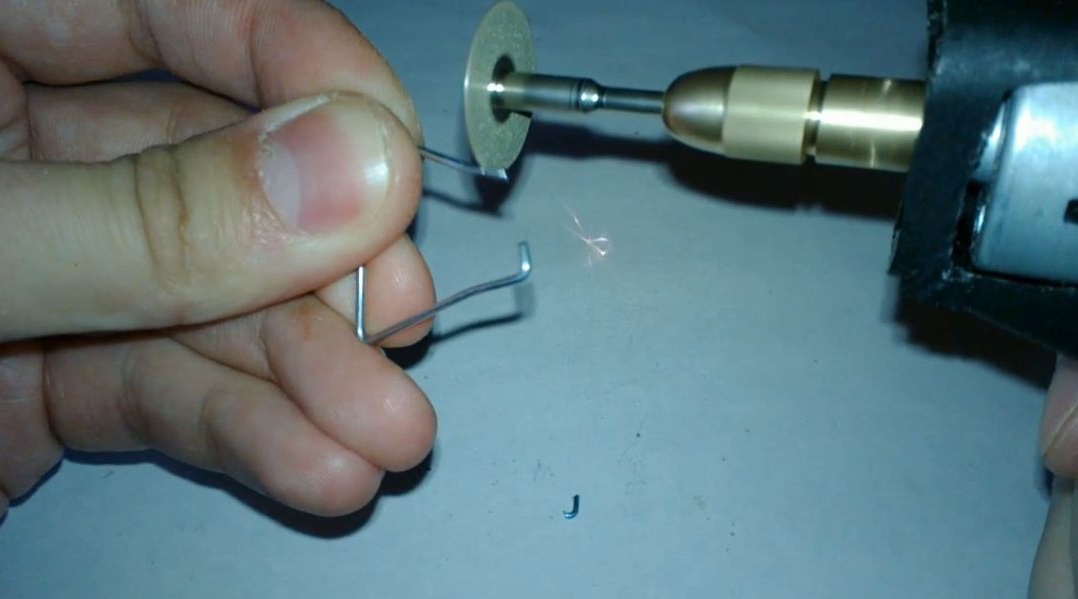
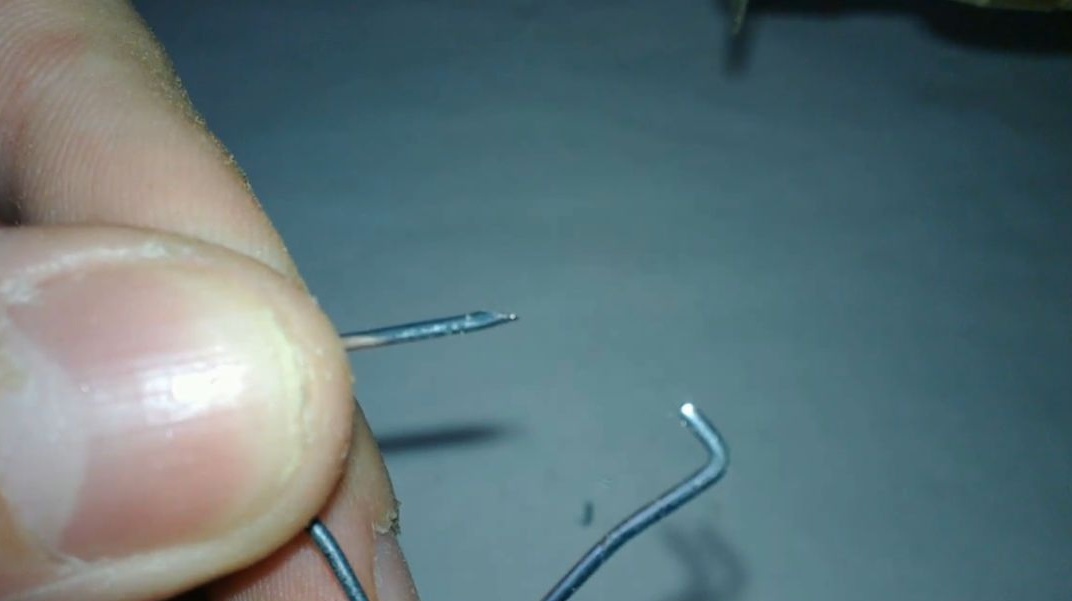
The diamond nozzle handles metal confidently and quickly.


In the future I will improve the design and power.
I hope the article was useful and will help someone in creating such homemade.
Your opinion is important
Total Voters: 18
10
10
9

Add a comment

    • smilesmilesxaxaokdontknowyahoonea
      bossscratchfoolyesyes-yesaggressivesecret
      sorrydancedance2dance3pardonhelpdrinks
      stopfriendsgoodgoodgoodwhistleswoontongue
      smokeclappingcraydeclarederisivedon-t_mentiondownload
      heatirefullaugh1mdameetingmoskingnegative
      not_ipopcornpunishreadscarescaressearch
      tauntthank_youthisto_clueumnikacuteagree
      badbeeeblack_eyeblum3blushboastboredom
      censoredpleasantrysecret2threatenvictoryyusun_bespectacled
      shokrespektlolprevedwelcomekrutoyya_za
      ya_dobryihelperne_huliganne_othodifludbanclose
17 comments
No ... Just, I think, the way of thinking is the same ... At different turns of the spiral, let's say, but one vector ....)))))

Why did I suggest that this is a gift? “I just wouldn’t buy that myself !!” For a gift - perfect: looks beautiful, impresses with the number of nozzles ....
And for work ... First, I would focus on the characteristics of the engraver. Secondly, as I said, I do not like to overpay for what has been added "for mass" - I prefer to buy only what I will really use. And, as a rule, the equipment that comes with the kit ... a little, usually "not ice")))))
Apparently, Delausyus seems to think ....
It's like a beautiful set of kitchen knives, or spoon-forks in a suitcase - it always surprised me! Why this (not cheap) suitcase? Someone he will stand in the kitchen with knives, spoons ??? )))))))
Quote: To Delusam
Why guessed? 100% match. This is not the first time.)))

Gentlemen, you are not psychics?
Quote: Valery
Highlighted and underlined - your real thoughts?
That is, I guessed right?

Why guessed? 100% match. This is not the first time.)))
Highlighted and underlined - your real thoughts?
That is, I guessed right?
Quote: Valery
By the way, Delausyusam ... Here is that “fresh” one, in a beautiful box, is it a present for an hour? )))). It’s just that I also have something similar - they gave it to my daughter and wife. But I do not use it - it’s more convenient for me that with the trunk, more powerful. There is also this “remainder of the screwdriver” that I described, and there is a very small “manicure” battery on the r6 - for absolutely “tendernesses” already ...
And that beautiful one lies. Besides, I don’t like “kits”. I always buy the snap-in myself - there are a lot of unnecessary things in the kits.
So I thought that you might have been presented as well.)))))

"By the way, Valery ... Here is that" fresh "one, in a beautiful box, a present for an hour?)))). Simply, I also have something similar - I need it friend gave. But I don’t use it - it’s more convenient for methat with the trunk, more powerful. There is also this “remainder of the screwdriver” that I described, and there is a very small “manicure” battery on the r6 - for absolutely “tendernesses” already ...
And that beautiful one lies. Besides, I don’t like “kits”. I always buy accessories of isolation - there are a lot of unnecessary in the kits to me.
So I thought that you might have been presented as well.))))) "
xaxa
By the way, Delausyusam ... Here is that “fresh” one, in a beautiful box, is it a present for an hour? )))). It’s just that I also have something similar - they gave it to my daughter and wife. But I do not use it - it’s more convenient for me that with the trunk, more powerful. (He also has a speed control). There is for the rougher still this “remainder of the screwdriver” that I described, and there is a very small “manicure” battery on the r6 - for absolutely “tendernesses” already ...
And that beautiful one lies. Besides, I don’t like “kits”. I always buy the snap-in myself - there are a lot of unnecessary things in the kits. Yes ... and it’s beautiful like that, in a box ... But each time, getting out and folding is not mine. I love that it hangs, ready to work always ... And in the box - only for carrying ...
... Therefore, it lies idle, although I am lying to my wife that they gave me a very necessary thing, very often it helps ...)))))
So I thought that you might have been presented as well.)))))
I will also express my opinion on the convenience of working without a pen. When a powerful force (screwdriver) is required, it is necessary so that you can "apply from the heart" .. In the same place where effort is not necessary, but accuracy is needed, the direct construction is more convenient.
For example, I decided to adapt one of the screwdrivers "for a screwdriver." (Shurikov without batteries I have a lot in the box).In the basement I have a “stationary” 12 volts - quite often it knocks out light (an electrician arrives, he only has the keys to the switchboard). I have several stamper batteries and always charge when there is light. And if it is not, they give 12 for diode lighting and 220 through the converter.)
So, since 12 is next to the table, I took one screwdriver, clamped a long thin bat into it to use as a screwdriver. I cut off this whole "trouble" for attaching the battery, leaving only the handle. And connected, by the way, with a cord from an electric shaver!)))) "Spring" ....
... But THIS IS UNCOMFORTABLE !!! As a result, I disassembled it, threw the case away, and I use only the “inside” - a motor with a gearbox and a cartridge. He threw out a button with a PWM controller, hooked up two key switches on the side without locking and connected via a "soft start" ... It’s more convenient - just a "screwdriver with a massive handle" - without any pistol grip ....
Again, the engraver. It is used with me only through the "trunk" (as with Delausyusam). And also convenient - as you write with a pen.)))
Quote: To Delusam
Ivan, you seemed to read my mind.
When you often have to work with a similar tool, you inevitably come to such an option. Especially since thin drills used to be a considerable shortage, even fiberglass and plastic had to be drilled with sewing needles broken off in the eye and soldered with a thin wire at the sharp end.
Author
Impressive of your set. I'm not so serious about it. Who needs this tool for frequent work or creativity, then I agree, it is better to buy a factory tool. At the expense of pedals, as Ivan Pokhmelev mentioned, a very good idea, you can concentrate more on work. And at the expense of the pen I do not quite agree. There are factory mini drills, where the kit comes with a handle that can be supplied if necessary.
Next, please understand me correctly, I just want to express an alternative point of view.
At the expense of whom it is more convenient.
So you made the simplest design, similar to the factory ones. This choice is based on your personal convenience of using the tool, or on adhering to a common version of the design of this tool, which was made for the needs of the majority. Some manufacturers, as I mentioned earlier, have taken care of the additions in the form of a removable handle for those who are more comfortable working with it. There is no unified and absolutely convenient design for everyone; everyone chooses for himself, for his convenience.
I tried to show a budget option (one of the options) of a homemade tool using the available parts for assembly.
The goal was to make a portable tool on batteries. Since the batteries have extra weight and they need space for placement on the case, the most common type of case was not very suitable (unless you make it 10 cm longer). That's why I chose the case from a cheap glue gun because of its accessibility, compactness and convenient location inside the tool components.
I do everything for informational purposes and do not claim that this is the best option for the implementation of this homemade product. Everywhere there are pros and cons.
Quote: Ivan_Pokhmelev
I made sure that the microdrills do not need a pen. It is much more convenient and more accurate to work with the simplest option: an electric motor, a cartridge and a soft flexible stranded cord of the ШВВП type 2x0.5 or 2x0.75 (you can also simply twisted two wires of MGShV or similar). Power supply from an external regulated source. Such drills are needed mainly for drilling holes up to 3 mm. Drills of small diameters (up to 1 mm) easily break when a radial force is applied, so it is optimal to keep the electric motor as close to its axis as possible, and the complete symmetry of the drill relative to the axis also contributes to smaller deviations of the drill from axial movement. And it is best to include a pedal or a separate toggle switch, and not a button on the drill.

Ivan, you seemed to read my mind. Already mentioned in this thread, made for myself back in that century. I fully support you in that a pen is not needed.It is much more convenient to drill and grind without it.
I “tied” my “drill” to the power source with an accordion wire from the handset. Great, soft and at the same time does not get mixed up with the floor. Supply voltage, adjustable. A well-chosen motor whose axis diameter was ideally suited for a set of collets.

A small "case" and a switch, a little blue electrical tape))).
Set for her.


For more "powerful" works there is (also from that century) such ...

Well, "fresh" for delicate work ...

I placed it not "boasting for the sake of", but for familiarization with the connoisseurs of this device.

Just do not convince us that you are so comfortable. "We know, swam."
If anything, pay attention to the factory design, how it works.
I made sure that the microdrills do not need a pen. It is much more convenient and more accurate to work with the simplest option: an electric motor, a cartridge and a soft flexible stranded cord of the ШВВП type 2x0.5 or 2x0.75 (you can also simply twisted two wires of MGShV or similar). Power supply from an external regulated source. Such drills are needed mainly for drilling holes up to 3 mm. Drills of small diameters (up to 1 mm) easily break when a radial force is applied, so it is optimal to keep the electric motor as close to its axis as possible, and the complete symmetry of the drill relative to the axis also contributes to smaller deviations of the drill from axial movement. And it is best to include a pedal or a separate toggle switch, and not a button on the drill.
Quote: MNS1961
Do you think that comparing two same-type home-made products within our site is not correct? ...

I believe that it is necessary to discuss the proposed author.
For myself, I solved this problem even when some were not born, the most reliable and simplified version, but I did not offer it even with your publication.
Author
Share your thoughts on this. I think some will learn something new for themselves and this will help them not to make mistakes when creating such tools.
Quote: To Delusam
How is it that you do not quite correctly, do not you think?

Dear, Delayusam, explain, please, in relation to whom I act incorrectly. Do you think that comparing two same-type home-made products within our site is not correct? ...
I wanted to develop a thought, but, I agree with you, comparing horseradish with a finger does not make sense.
(Yes, to be honest, for some reason no one discussed this homemade product of mine, but I had it the first on this site).
Sincerely, Mikhail.
Author
I just show what can be done and how it will work. If I had a ready-made knob with switches, then I would also attach a motor to it. In this homemade product, batteries and cheap components of the tool are a plus. I told how to bring to mind the use of batteries in mini drills. Yours certainly looks prettier) Let's not argue about this)
Yours has already been discussed. How is it that you do not quite correctly, do not you think? How to compare which is better.
My minidrill
Which is better? Discuss?

We advise you to read:

Hand it for the smartphone ...