Dear site visitors, in the presented master class from the author, the next technology for building a garden gazebo will be presented
do it yourself. Today it has become very fashionable to have a beautiful gazebo in your summer cottage, in which you can hide from the sun or rain, as well as sit and relax under the barbecue on the weekend. There are a lot of options for construction, but nevertheless preference is given to lightweight constructions. So our author decided to build a light gazebo with his own hands. How did he do it? See further.
Materials1. beam
2. board 30 and 40 mm
3. sewer pipe 125 mm
4. cement
5. sand
6. fine gravel
7. roofing material
8. OSB
9. soft tiles
10. wood screws
11. nails
12. stain
13. varnish
Instruments1. shovel
2. hacksaw
3. hammer
4. screwdriver
5. drill
6. jigsaw
7. level
8. concrete mixer or mortar tank
9. roulette
10. corner
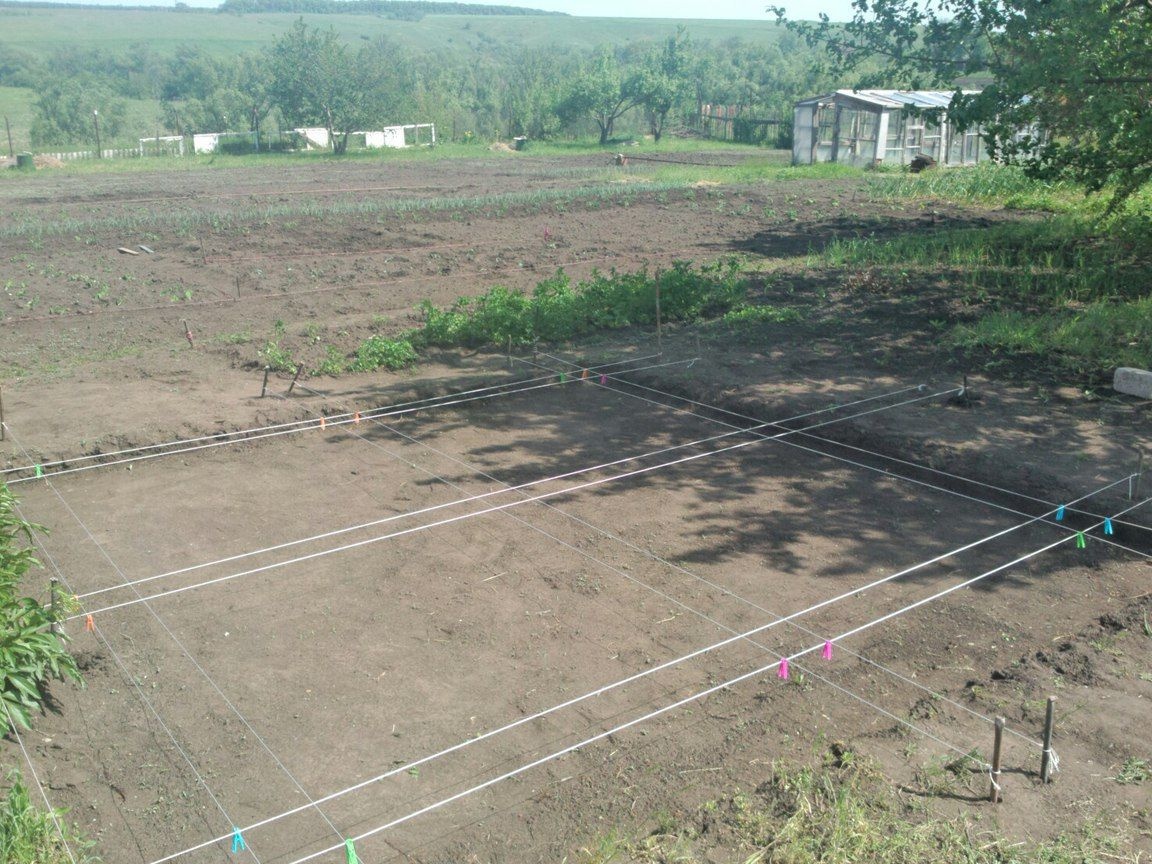
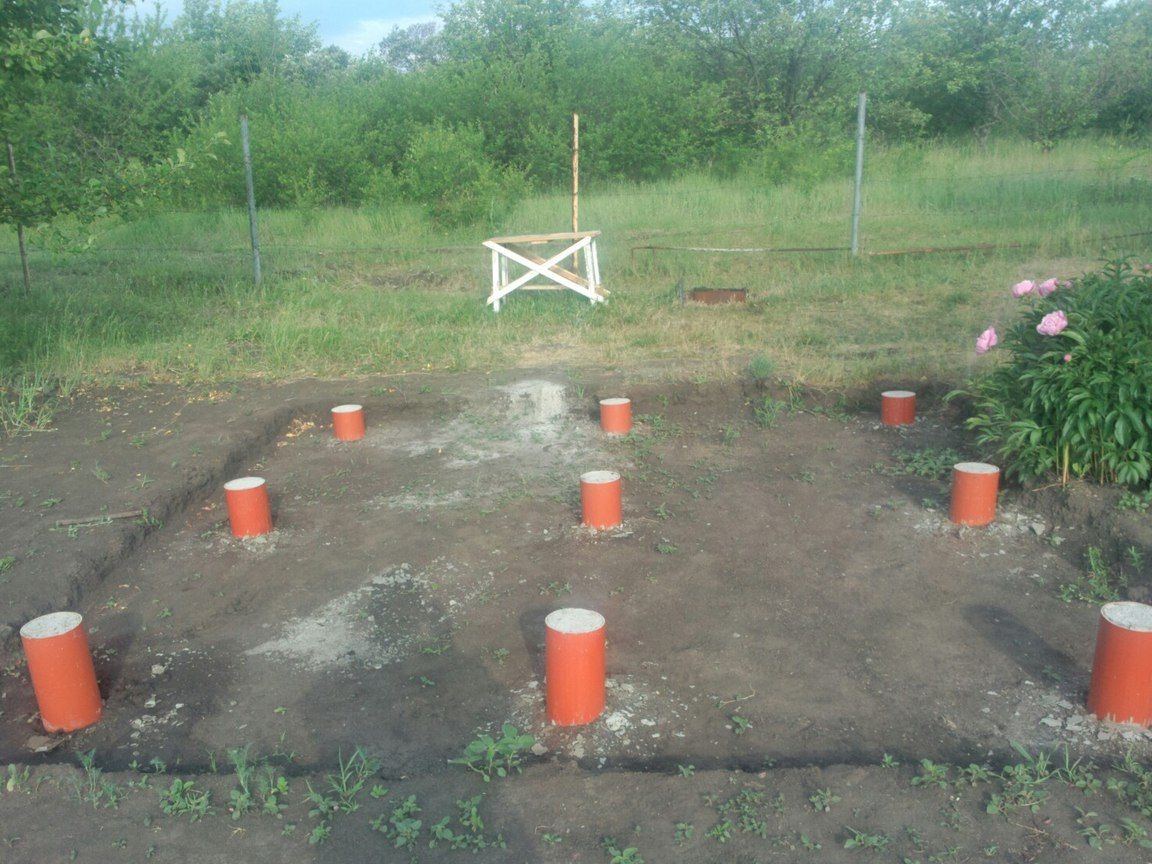
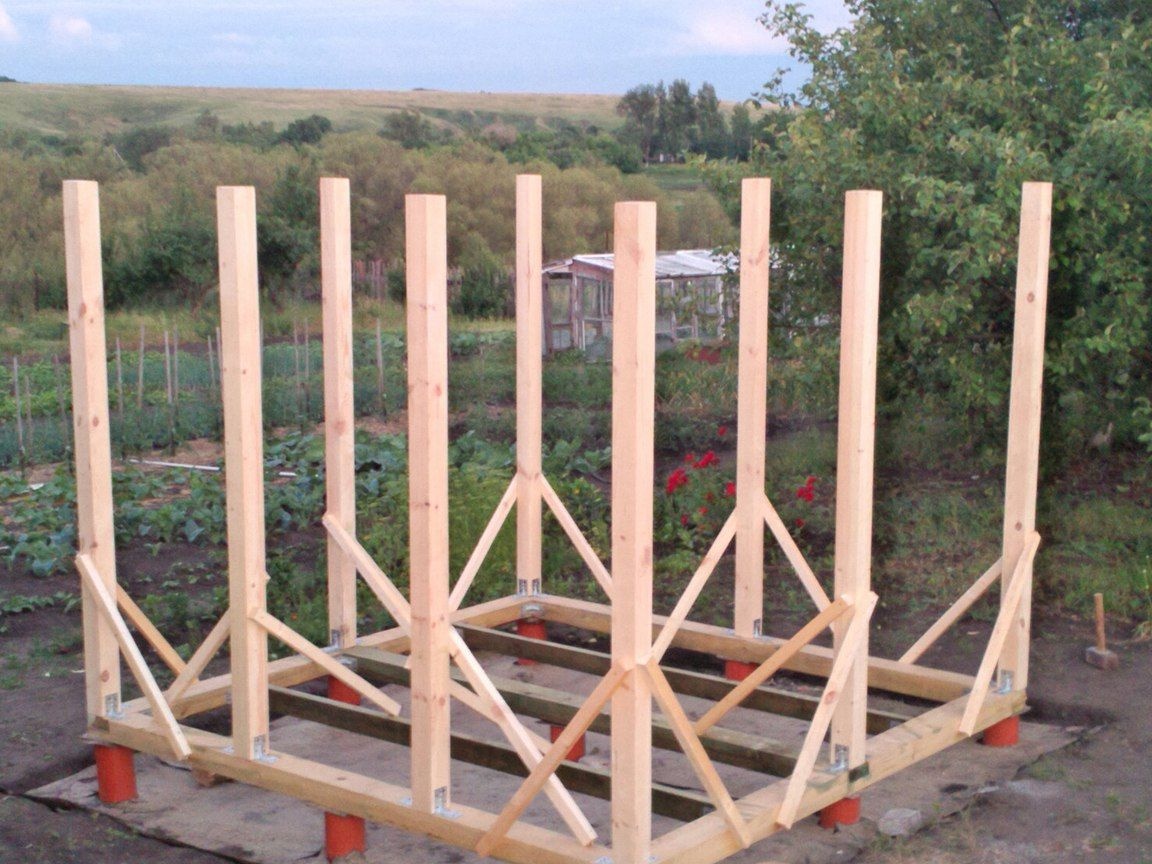
The process of building a garden gazebo with your own hands.As mentioned above, a gazebo built by the author of light construction, assembled from boards and timber. The author made the foundation in a rather interesting way, namely, he took a sewer pipe with a large diameter of 125 mm and cut it into meter sections. Further, small indentations were dug, the bottom of which was filled with sand and rammed. And already in the prepared recesses, meter-long pipe sections are installed, filled to the top with concrete. Thus, a kind of columnar foundation was obtained. Previously, the author chose a place for construction and made a marking of the site using tape measure, pegs and thread.
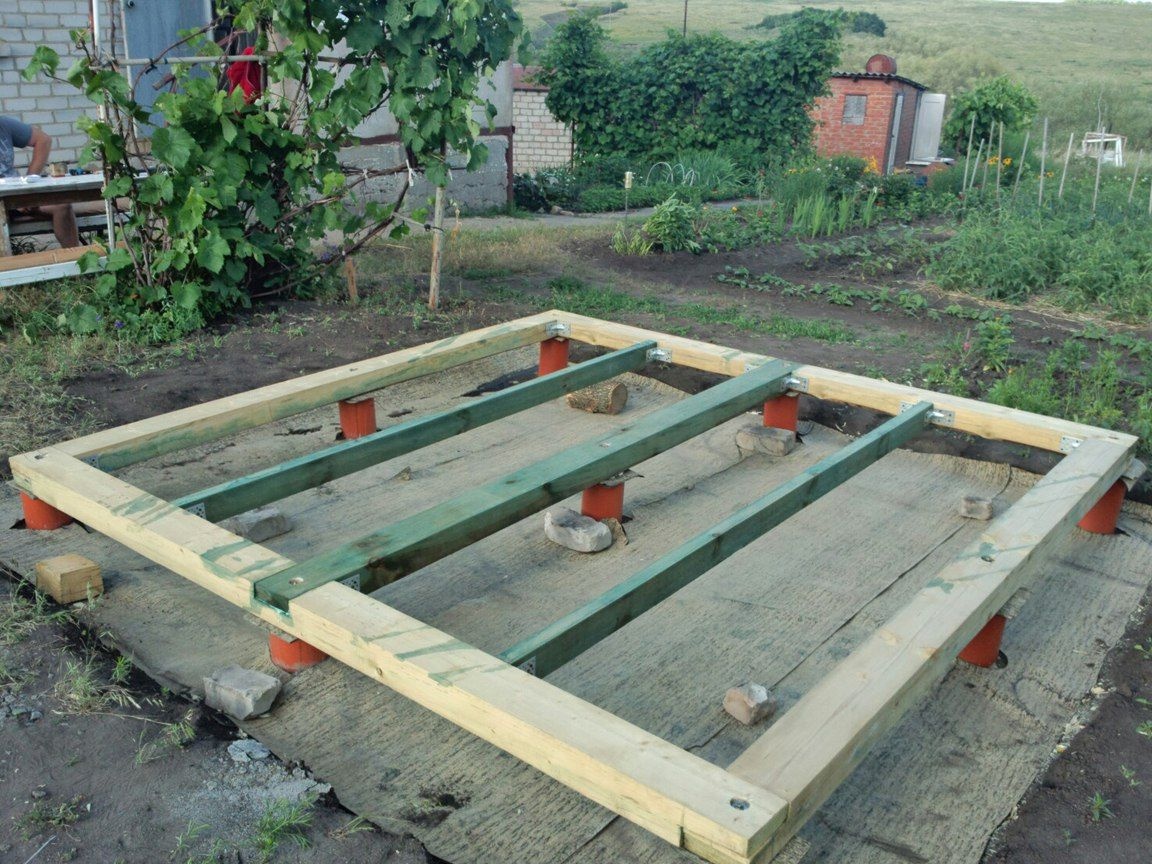
Next, the owner prepares and fills the columnar foundation.
Logs are laid on poles and fastened with anchor bolts. Also, the master makes waterproofing, by laying sheets of roofing material on the ground.
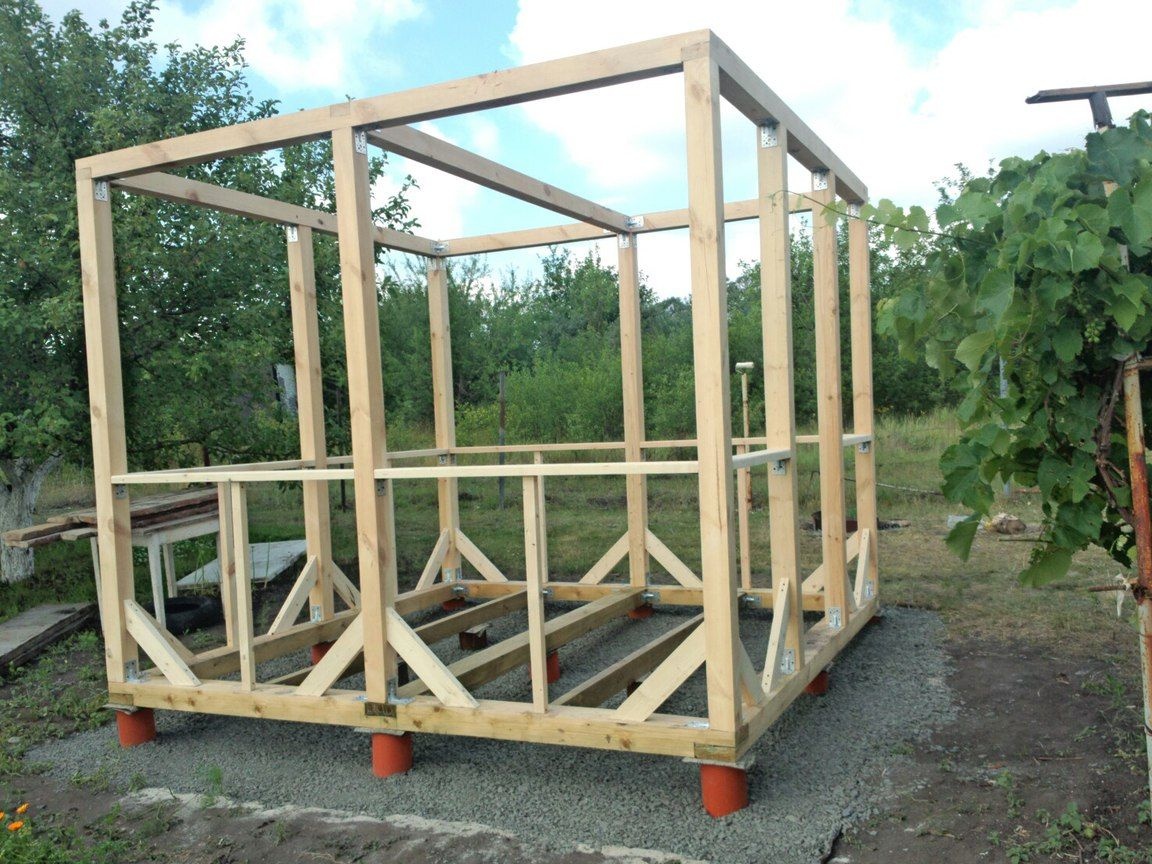
Then begins the assembly of the frame from the timber.
Fine gravel is poured onto the expanded roofing material and leveled.
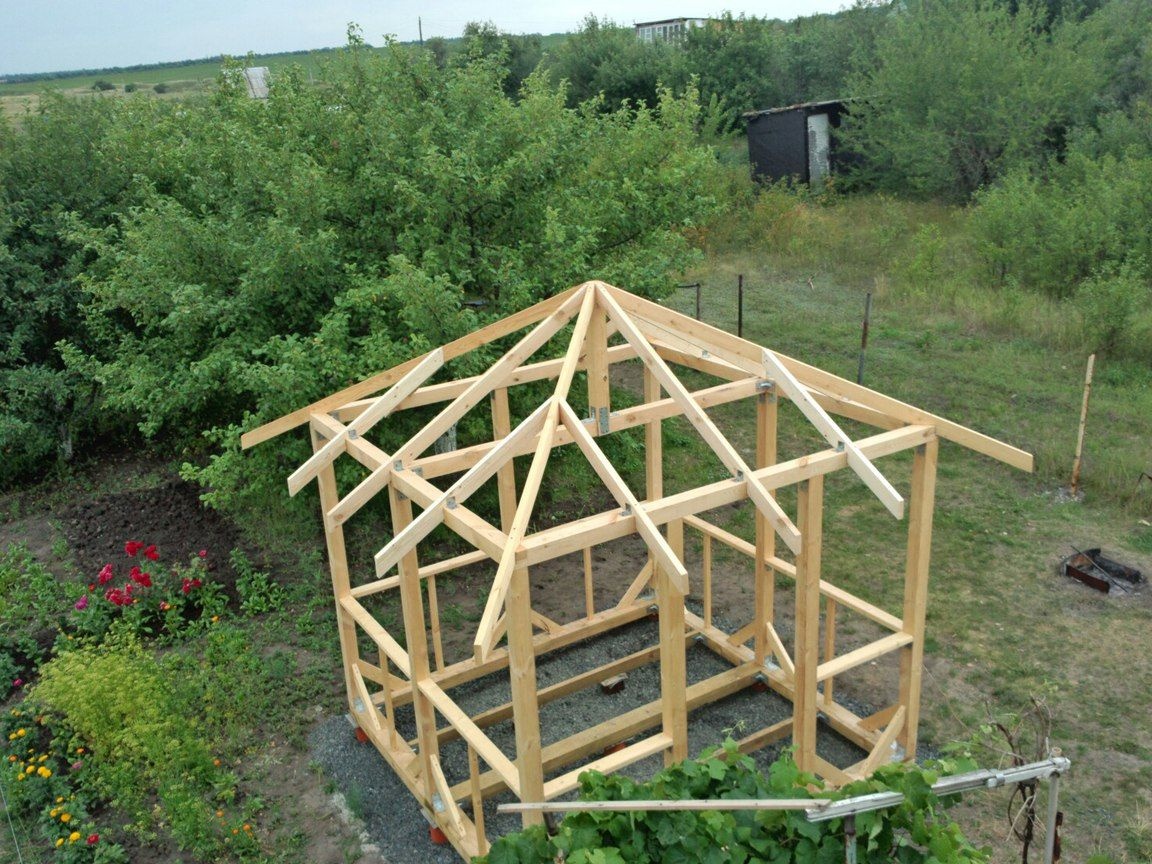
The rafter system is made.
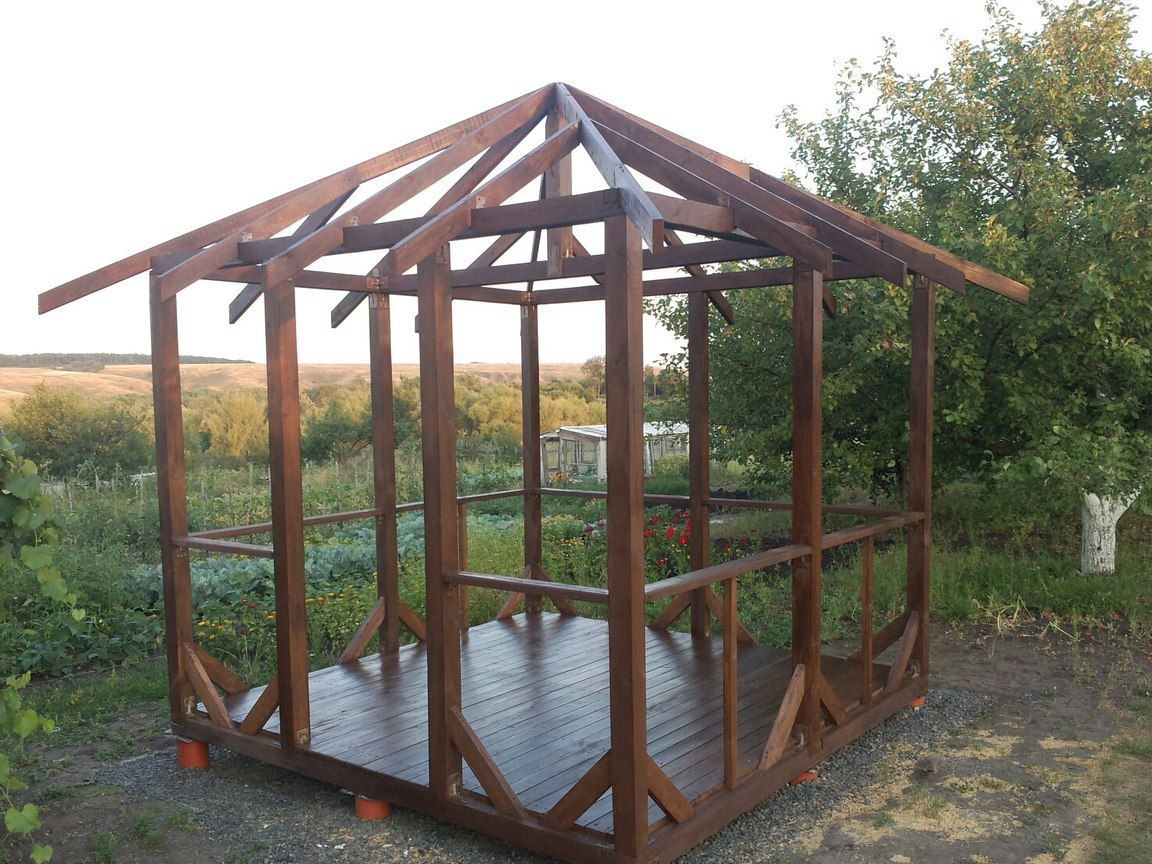
The whole structure is covered with stain, and then also with varnish, so the tree will take an even more noble appearance and will last much longer.
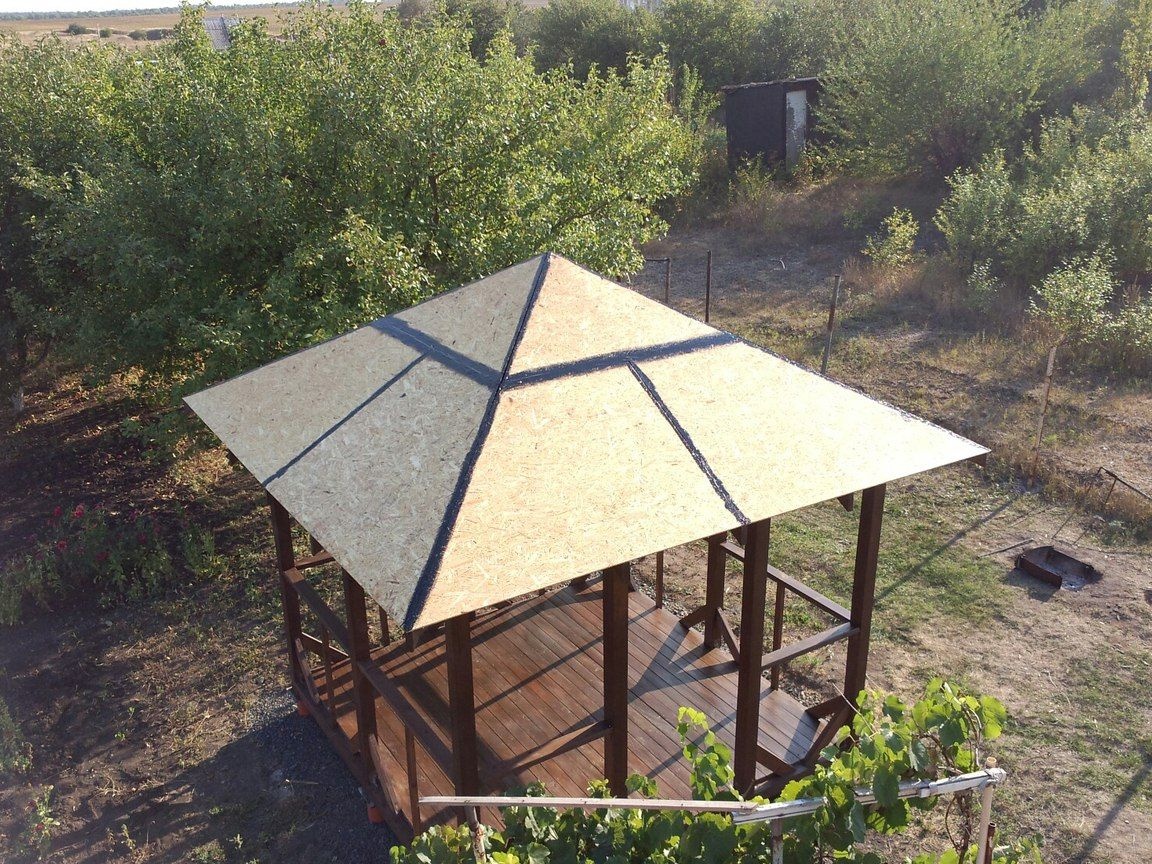
The roof is covered with OSB sheets at the beginning, this is necessary in order to then lay soft tiles on a flat surface.
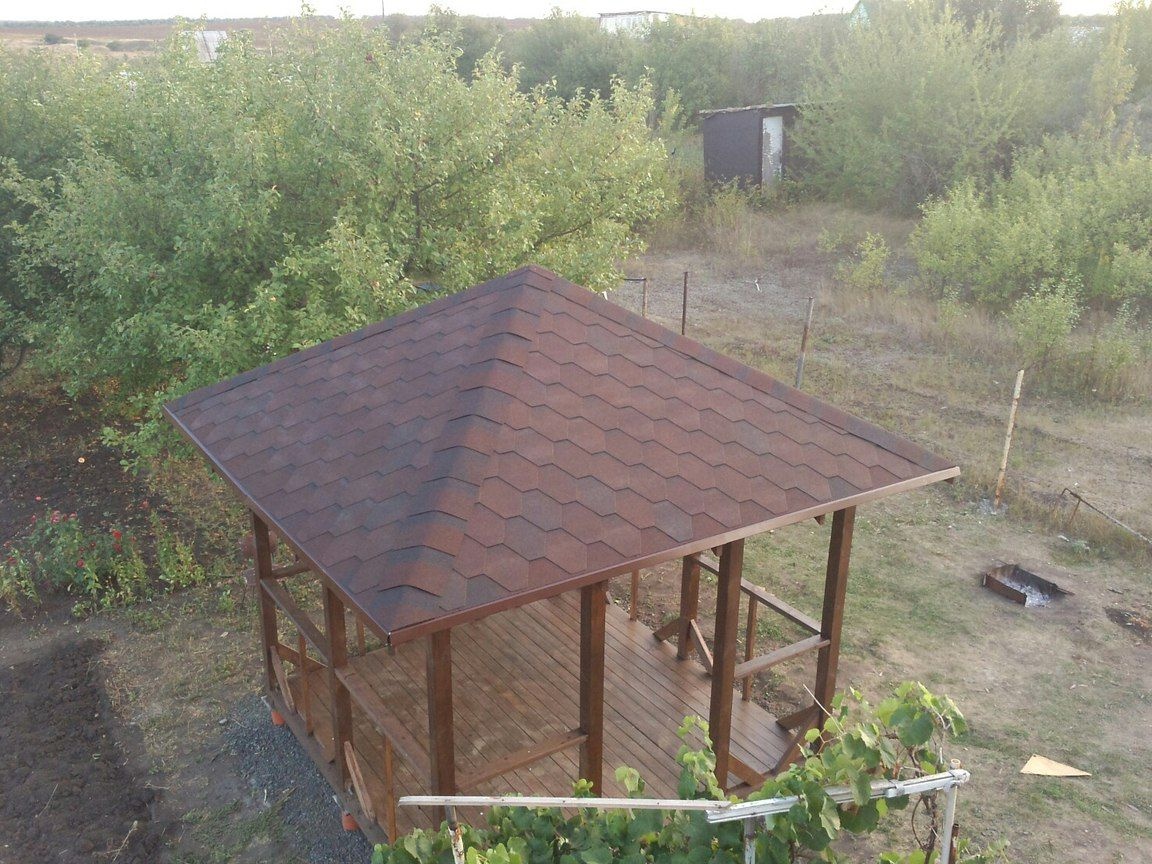
The author fastens the soft roof with a hammer and galvanized nails (for roofing), they are best suited for roofing, because they do not give rust over time.
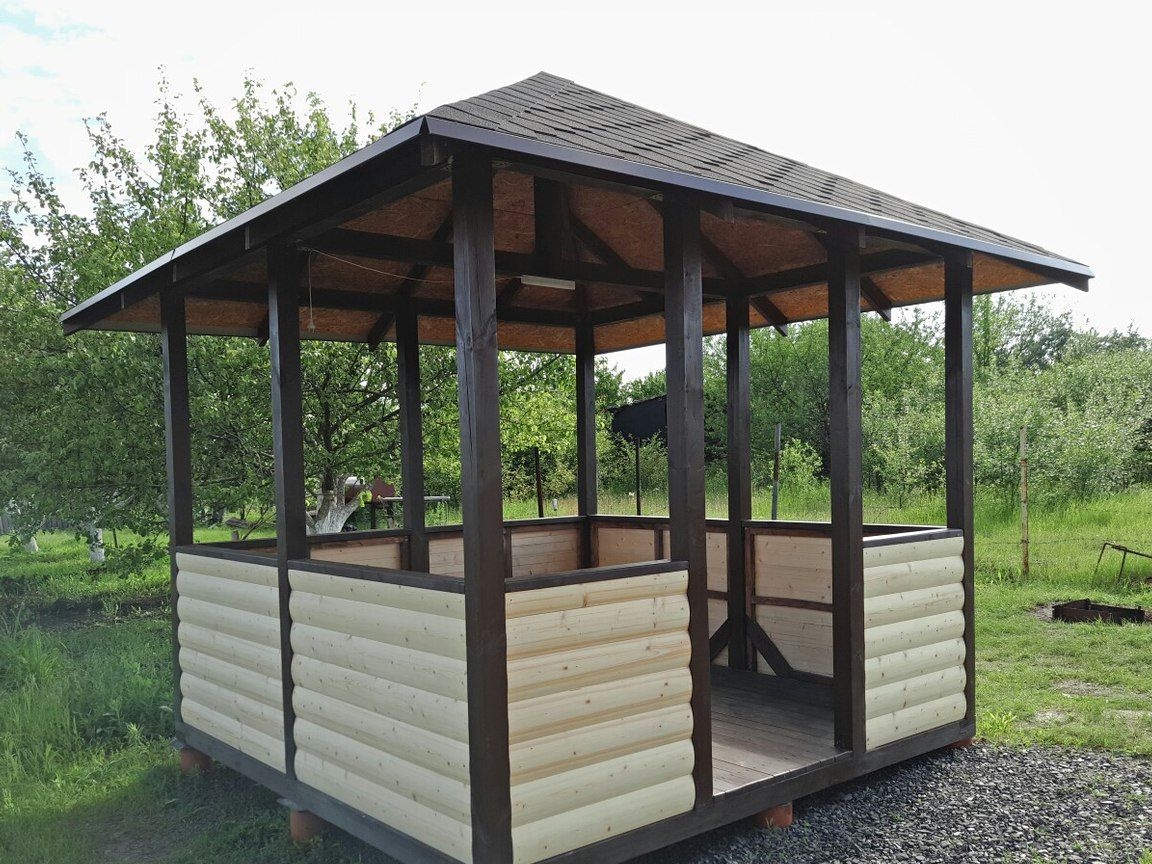
And now the arbor is ready, you can receive guests, cook a kebab. Now the author will be able to gather family and relatives for the weekend, relax, cook in nature. This concludes the article. Thanks for attention! Come visit often, do not miss the latest in the world of homemade goods!
This article is for informational purposes only!