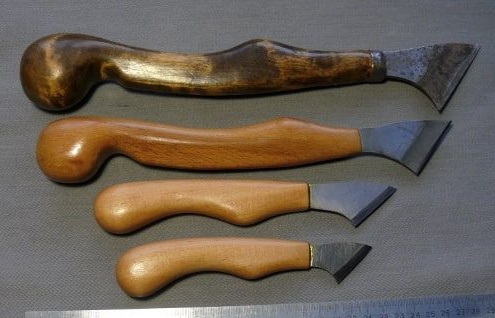
Hello to all lovers homemade, this article will be very useful for those who are to some extent interested in woodcarving or just want to start working with woodworking. As you know, not only skills play a big role in obtaining the desired result, but also what you work with, in this case, a tool. Without a good tool, the result cannot be achieved, therefore, in this article I will tell you how the author made a jamb knife do it yourself. Why do it yourself? This is all due to the fact that the quality of the tool is an important factor, which currently costs a lot of money, and even more so with all the necessary materials, this knife can be made in a matter of minutes no worse than the factory one. As in all homemade products, before creating it, you need to decide on the necessary materials and tools.

To make a homemade jamb knife you need:
* A piece of wood, in this case a leg from an unnecessary chair for the handle of a future knife
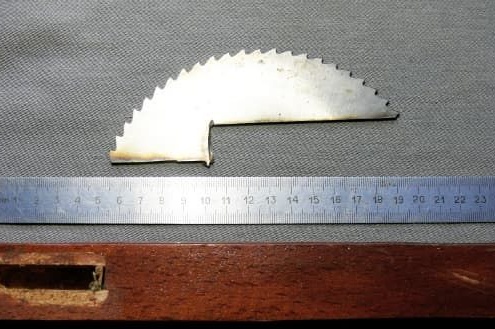
* Metal mill for the cutting part
* A sheet of paper or cardboard to create a template
* Epoxy resin
From the tools you will need:
* Hacksaw
* A pair of straight and semi-circular chisels
* Angle grinder or as they say grinder
* Clamping vise
* Electric drill
After all the materials and tools are available, you can begin to manufacture.
Step one.
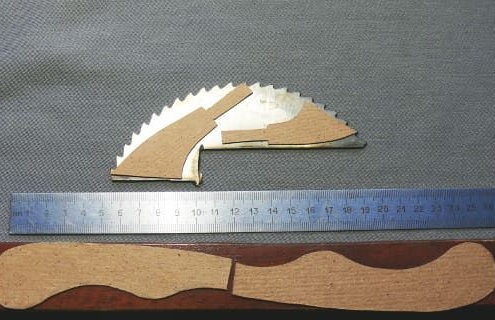
First of all, as in many other homemade products and inventions, it is necessary to make a template according to which the original part will be made. The advantage of templates is their repeated use, and with their precise application you can get completely identical details. Making a template will be simpler from pliable material, such as cardboard. The shape of the future handle and the main part of the knife, also referred to as cutting, are cut out of cardboard based on your preferences. The option that the author made is shown in the photo. The idea is good, so if you do not want to spend time thinking about the template, you can do something similar. The shape of the cutting part was adopted in the form of a braid, so that its grooves and recesses could be cut with its tip.

Step Two
Having the templates on hand, we proceed to cutting out the future details, namely the handle and the knife blade itself. We apply the templates on a wooden blank and metal, and then cut it out.
We cut the wooden part with a hacksaw, but with the metal one we have to tinker a bit.
We will make the cutting part from the already unnecessary milling cutter, which must be clamped and then cut the part according to the template using a grinder. When working with a grinder, be careful and do not forget to wear glasses.
The wooden handle requires processing, so it needs to be sanded and processed wood. The shape of the handle should fit your hand, and on its surface have smooth bends under the fingers, which will be very convenient when using. When the shape of the handle has reached the desired result, then it is time to start finishing grinding, with the help of which the handle will have sufficient smoothness and streamline shape.

Step Three
Now all the details need to be connected, but for this you need to make a hole in the handle. This can be done with an electric drill, the hole should be slightly larger than the size of the fixed part of the knife.
Step Four
It's time to assemble the knife, namely, attach the cutting part of the knife and handle. This is done quite easily and simply, we insert the cutting part into the previously made hole on the handle and fix both parts with epoxy. After this procedure, the knife should be left to lie in a warm place for a day, which will allow the epoxy to completely harden.

Step Five
The last final step will be to cover the surface of the handle with a protective layer, namely varnish, you can also impregnate the handle with a layer of oil, which is absorbed into the pores of the tree and will not let it deteriorate.

In order to use the knife for its intended purpose, it is necessary to sharpen its cutting edge. On this homemade knife-jamb is ready, thank you all for your attention and good luck in new endeavors.
