Dear site visitors, in the presented material you will be shown a clear example of the construction of a concrete cellar
do it yourself on a personal plot or cottage.
The cellar has been known to man since time immemorial; it serves to store food, vegetables, seeds, kvass, by the way, kvass from the cellar is cool and it quenches thirst well on hot summer days. The undeniable advantage of the cellar is that it does not require any energy consumption and serves the owners throughout life, the main thing is to build it correctly and thoroughly. It will be the best way to create a concrete and monolithic cellar; it surpasses all known structures in its reliability.
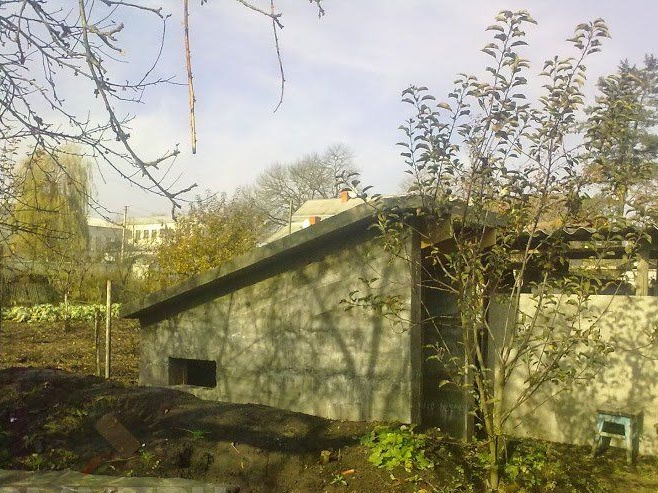
The types of cellars are underground and surface with sprinkling, but the author chose the average option, that is, half the cellar will be buried in the ground, the second part of the cellar will be about 1.5 m above the ground level. The upper half is covered with a minimum of 300 mm of soil removed from the ground. This arrangement will reliably protect the supplies of vegetables, jams and pickles from freezing the soil in the winter.
And so, let's consider what exactly is needed for the construction of a cellar made of concrete?
Material1. cement
2. sand
3. fine and coarse gravel
4. reinforcement 13-16 mm
5. knitting wire
6. the frog
7. board 40x25
8. timber
9. roofing material
10. bitumen
11. screws
12. nails
13. PVC pipe 150 mm
14. rubble stone
15. land
16. roofing material (for entrance vestibule)
Instruments1. shovel
2. concrete mixer
3. drill
4. screwdriver
5. Bulgarian
6. circular saw
7. hacksaw
8. hammer
9. mount
10. ax
11. roulette
12. pegs and twine
13. garden car
14. shovel
15. rule
16. trowel
17. pliers
Step-by-step instructions for building do-it-yourself concrete cellar.Today there is a large selection of building materials, but it is faster and more practical to use concrete, because such a cellar will be very durable and will last a long time, you will use it, and several generations after you.
In ancient times, in Russia, cellars were made of oak logs, oak is certainly a solid and durable tree, but wood is wood, because of the moisture of the earth it will not last long, although 100% is environmentally friendly and completely harmless.
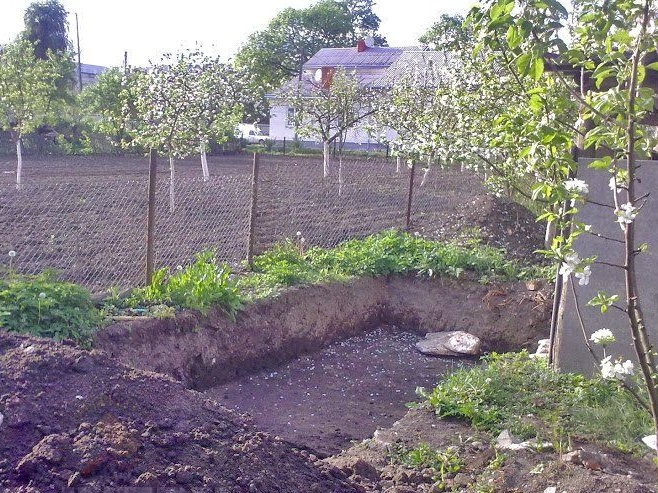
Like 1000 years ago, the fundamentals of construction are the same, the first thing is done marking for future construction and digging a pit.But first of all, you need to choose a suitable place on your site, as is customary to build better near the house so that it is convenient and quick to go down to the cellar for supplies.
According to the law. the cellar belongs to household buildings, and therefore it is not necessary to register and make a layout. (see legislation of your country).
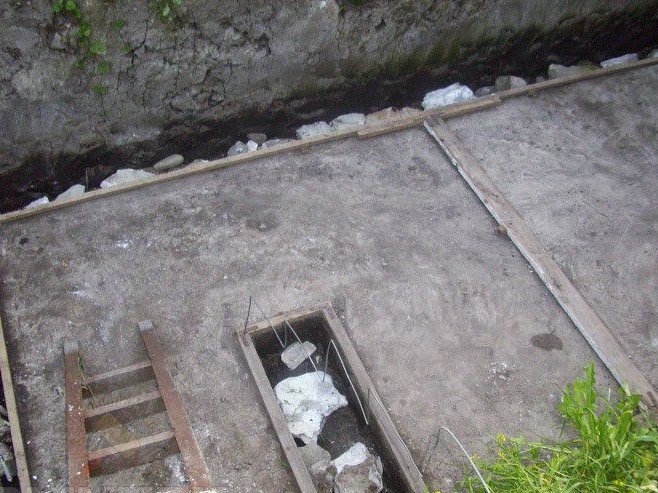
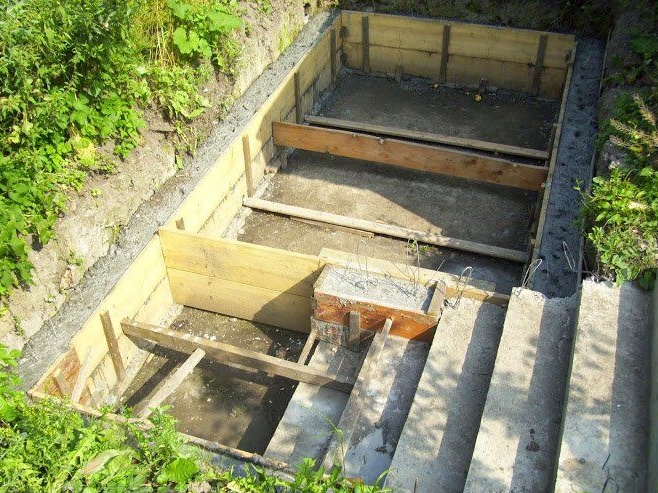
And so, the site was selected and marked, then the foundation pit was dug and the soil was removed, but it should not be far removed, we store it nearby because it will be needed later to cover the upper part of the cellar.
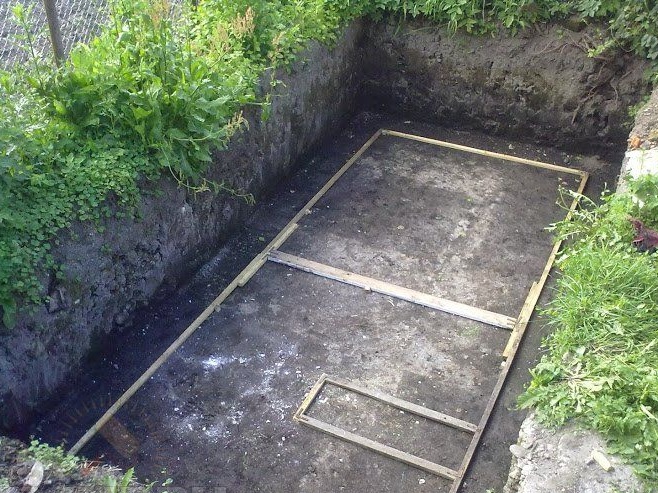
We go deep to a depth of 1 meter, and then the author makes a conductor to comply with the internal size of the room. A contour is knocked together from the slats and its dimensions are 4.3x2 m. An insert is added under the wall of the stairs 1 meter long and 20 cm wide.
Thanks to the internal conductor, you can clearly observe the dimensions, then at the edges we dig a recess of 300 mm and a width of 200 mm - this will be a soil formwork for pouring the foundation.
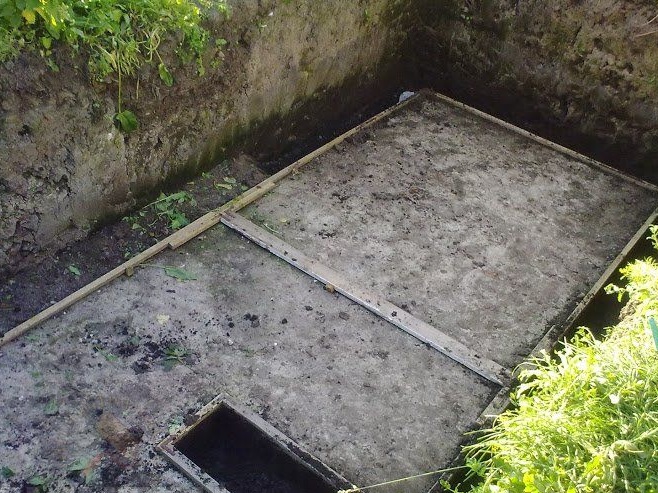
A rubble stone is laid in the dug trench, reinforcement or wire can also be added.
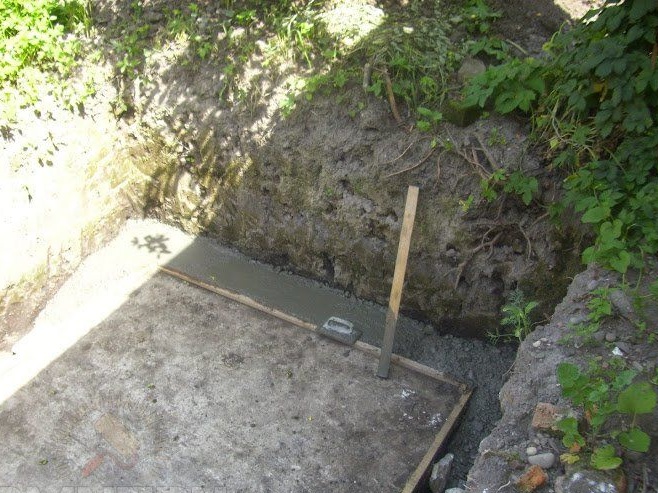
We expose a small side and fill it with concrete mortar, the author uses the composition of the mortar 1: 1: 3, that is, one part of cement, part of sand and 3 parts of fine gravel. Basically, the optimal composition is 1: 3, because the composition should be quite liquid so that it spreads over all the cracks and cavities between the stones. As you fill, you need to carefully tamp the mixture with the handle.
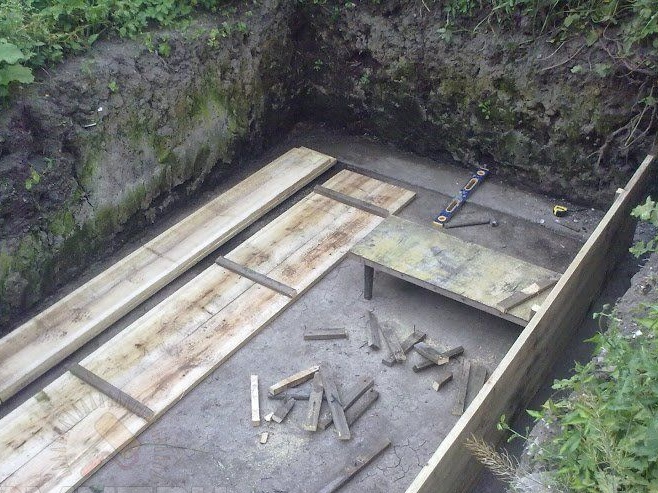
After the foundation has been poured, it will be necessary to allow it to harden and harden, and this is at least 20-25 days, in the meantime, you can still prepare plank boards for formwork from a 40x250 mm board.
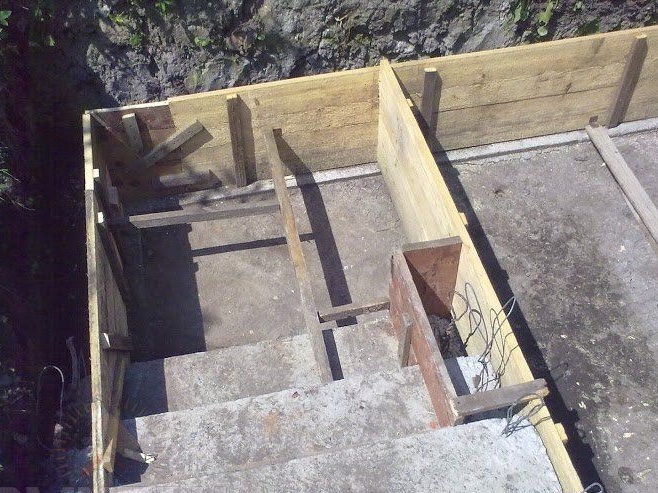
In order not to waste time, the author also made the formwork for the stairs and poured it with concrete. The main formwork was also assembled.
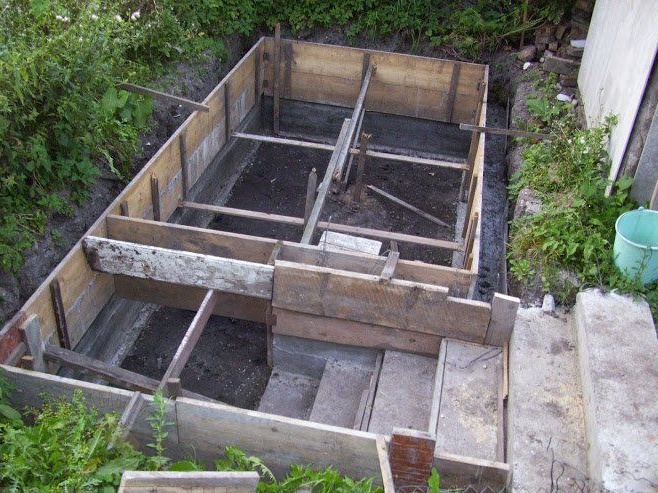
Concrete mortar is poured into the formwork, it should be tamped, and tap on the walls - this is necessary so that the mixture is evenly distributed throughout the level.
After the first layer hardens, after 3 days we dismantle the formwork and rearrange it higher, put the spacers and pour concrete on a new one.
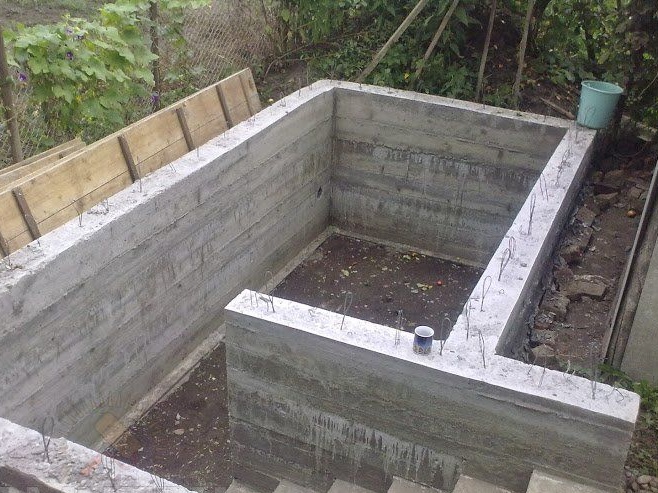
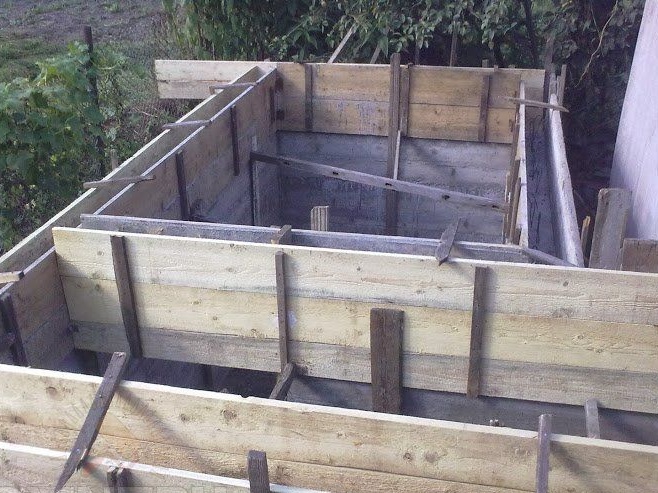
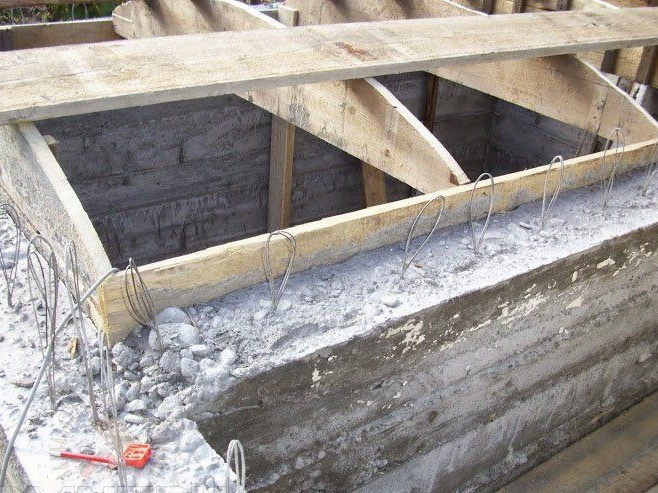
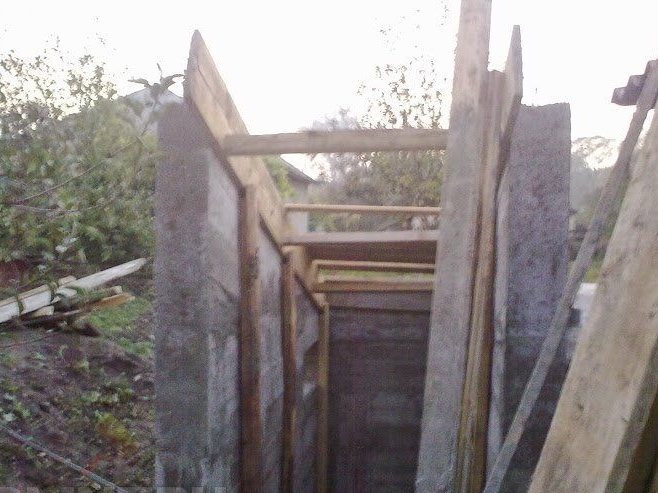
Further, reaching the ground level, it is already necessary to build a reciprocal formwork and pour it to a height of 1 meter above the ground.
It is imperative to use stops and slopes for the reliability of the formwork design.
Loops of wire should be left in each layer so that there is a reinforcing bundle between the layers.
We set the formwork and fill another layer of concrete.
Here, actually the walls are ready, one fill raised the level by 50 cm.
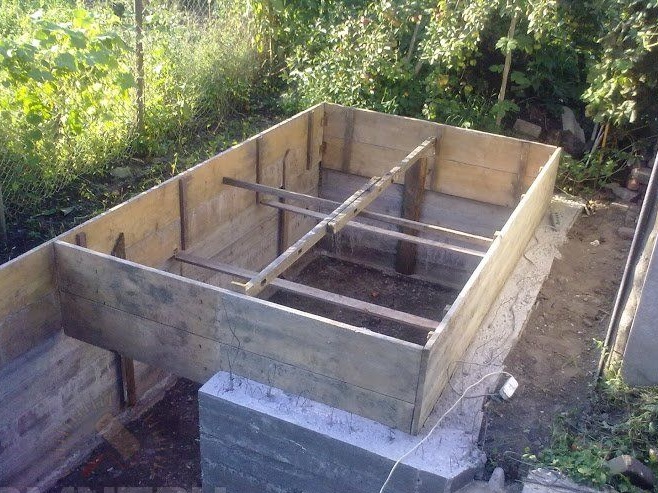
For natural illumination of the vestibule in the daytime, the author provided for a window opening, laying a wooden box without a bottom and a lid when pouring.
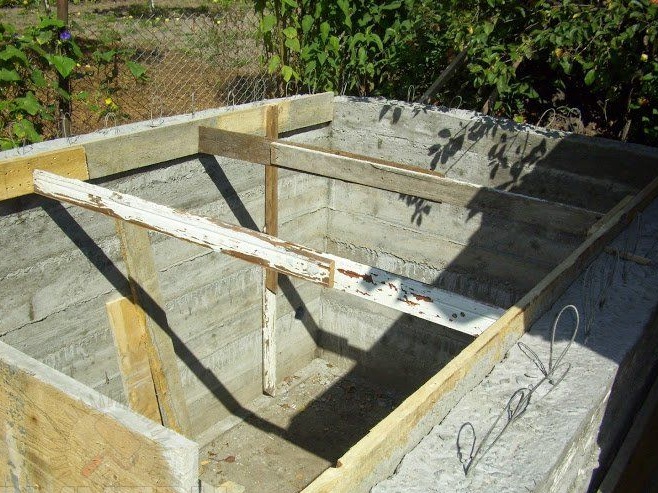
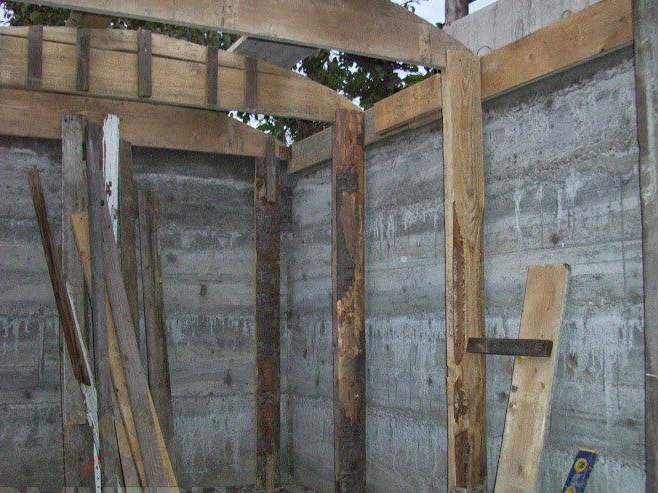
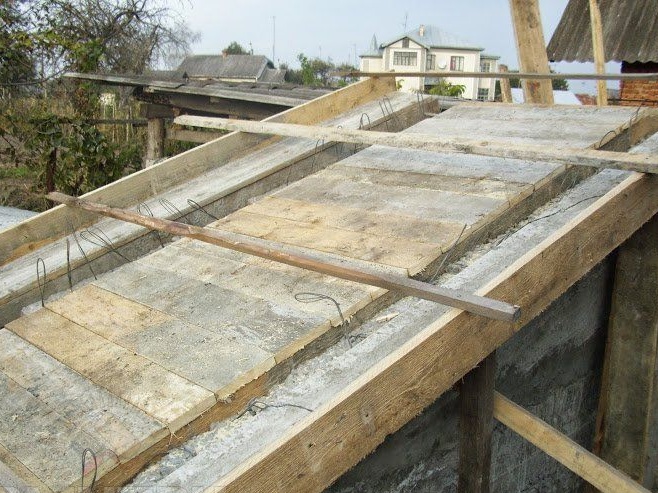
The arched formwork of the cellar ceiling is installed.
Indoors necessarily put props.
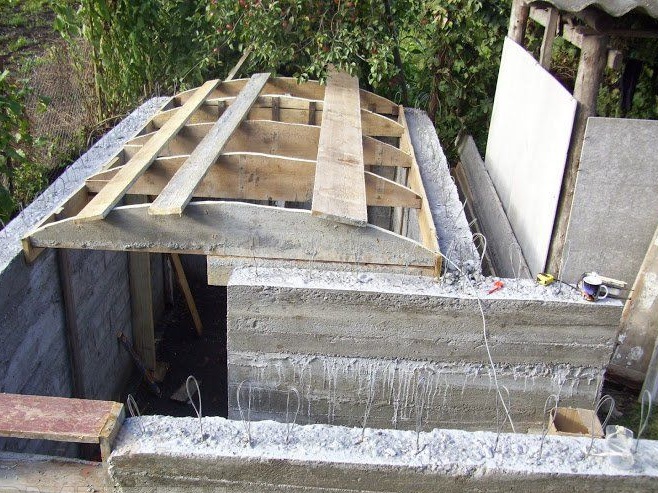
Disassembled boards from the shields overlap on the arch in tight to each other.
The surface of the arched formwork is covered with roofing material.
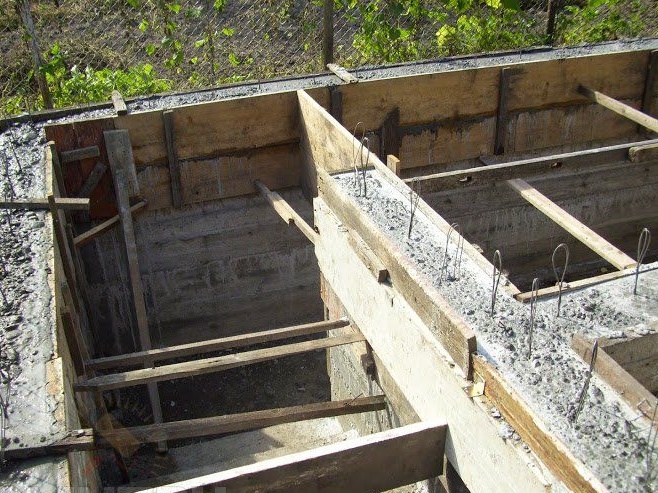
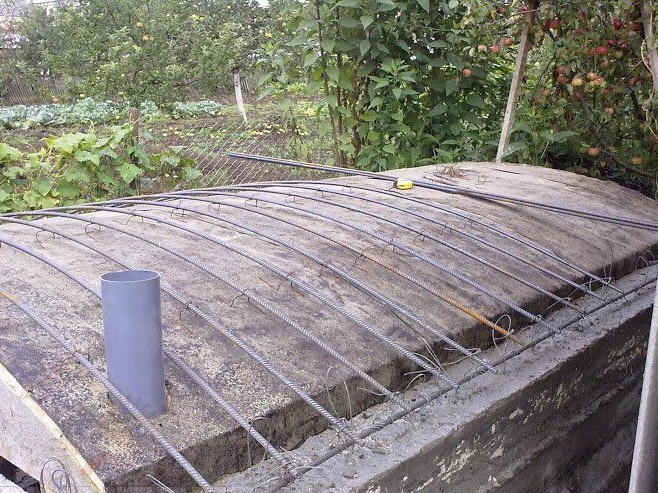
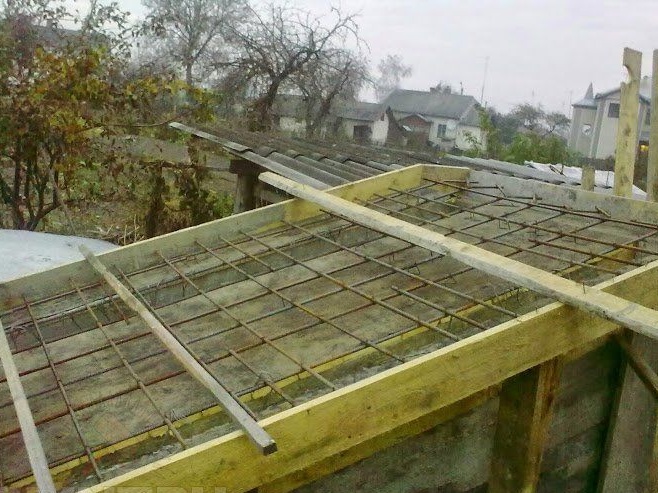
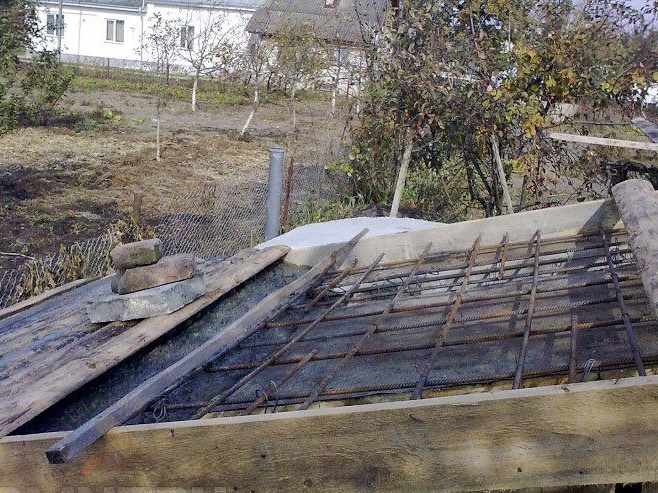
After that, it is necessary to reinforce the ceiling, for which the author used frogs to set the thickness of the concrete slab, the height of the limiter is 50 mm, 3 pieces are installed per reinforcement bar.
The fittings are used with a thickness of 14-16 mm with a pitch of 140-150 mm. The author also installed a PVC ventilation pipe at 150 mm.
Next, the transverse rods are fastened with a pitch of 140-150 mm using a knitting wire.
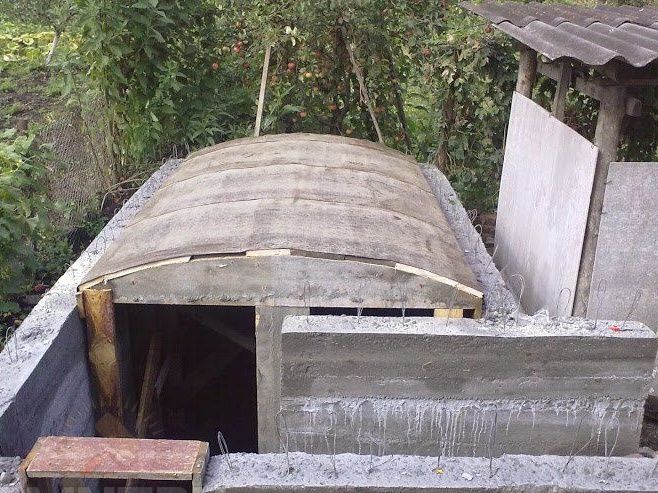
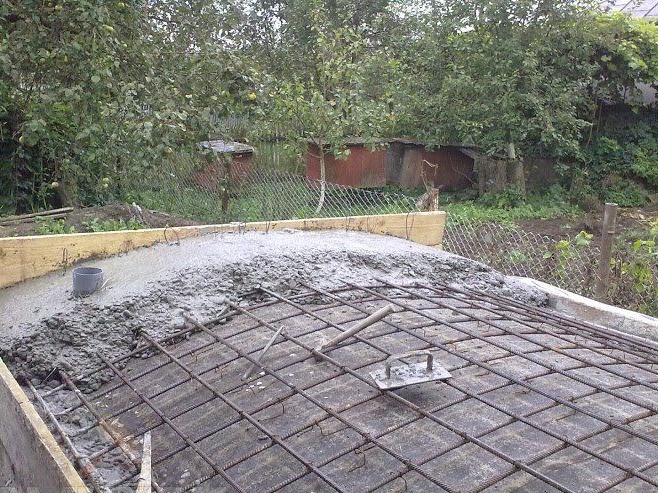
At the edges and ends we make a flanging and begin to lay thick concrete, evenly distributing it over the entire plane, we also tap it from the side of the room so that the mixture spreads well and fills all the cavities.
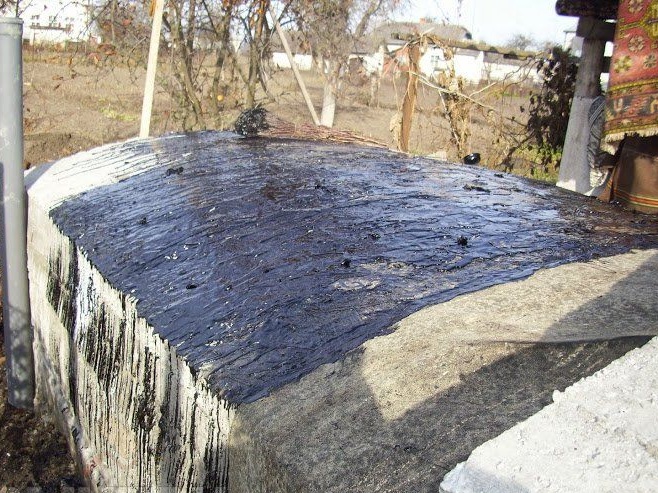
After the concrete has hardened, you can proceed with waterproofing, namely the surface is covered with roofing material.
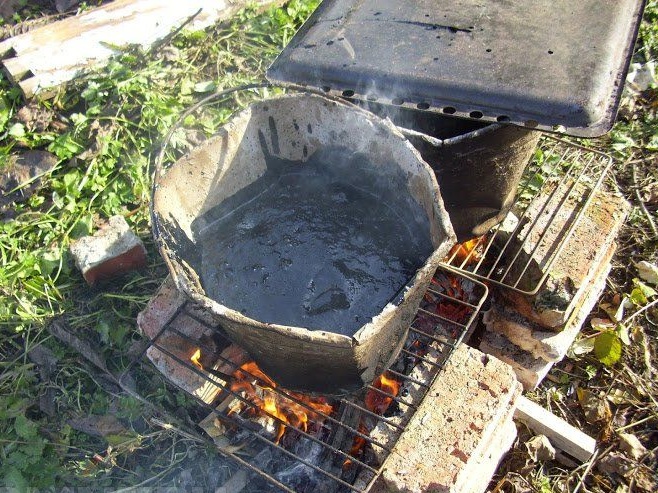
And on top of the roofing material is melted bitumen. A piece of tar is taken and placed in a bucket and put on an open fire, wait until it melts to a liquid state and begin pouring.
Attention!The temperature of hot bitumen is 120 C
0 so be extremely careful and careful.
Gently smear the prepared surface with melted bitumen, this can be done with a homemade big brush.
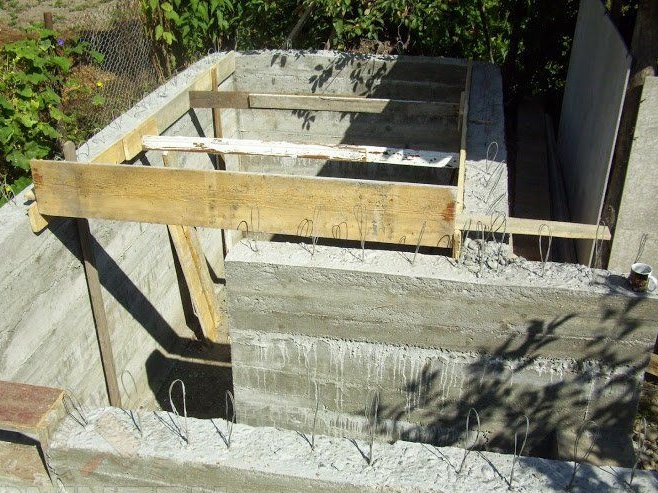
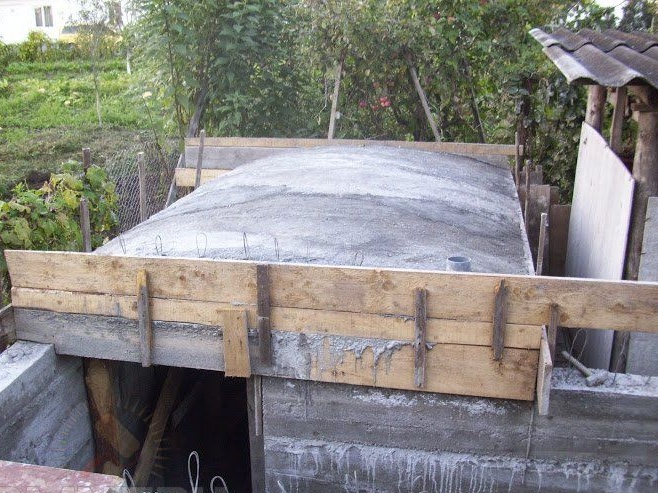
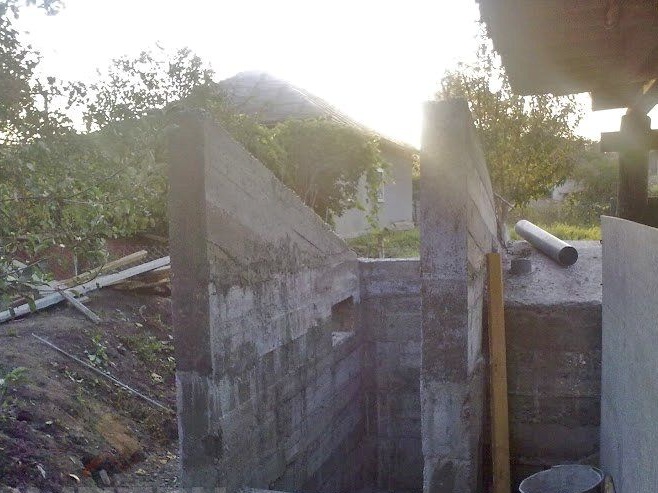
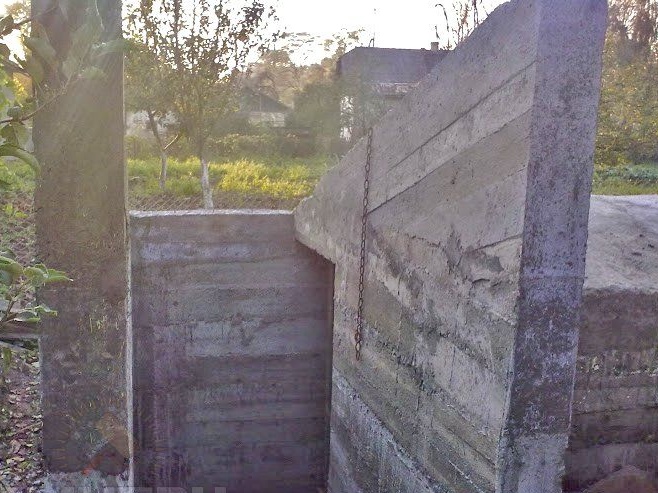
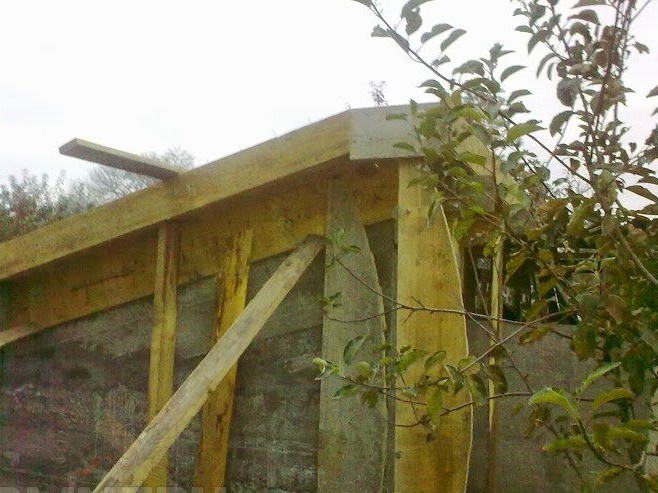
Then the author continues the construction, namely, fills the walls of the vestibule in a similar way.
The walls of the entrance lobby have a slope in one direction.
In the upper part, formwork is also prepared.
Formwork turned out.
The edges are pulled together by slats.
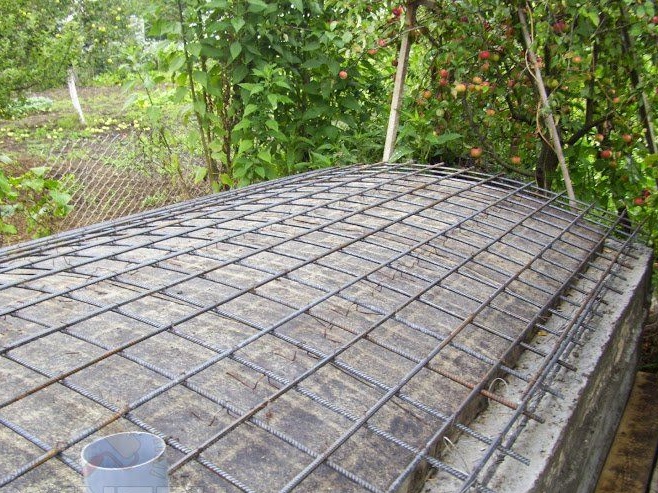
Reinforcement is carried out according to the same principle as the arched ceiling of the cellar.
For the reason that you will have to fill it with a slope, at the bottom there are boards that will not allow concrete to flow out under the natural desire to flow down.
And then you can additionally cover the roof with a light roofing material or professional sheet.
The concrete cellar will serve the owner and his subsequent generations for a long time. As mentioned above, the cellar does not require energy and energy consumption. One solid benefit) According to the author’s calculations, the construction of the cellar took 66 bags of cement, rubble stone, sand, and gravel were available. Assistants were paid 15 thousand rubles and the total amount was about 46 000 rubles. The internal dimensions of the storage are 3.3x2 m. + Vestibule and stairs. Reasonable and justified investment.
This concludes the article. Thank you all for your attention!
Come visit often and do not miss the latest in the world of homemade goods!