
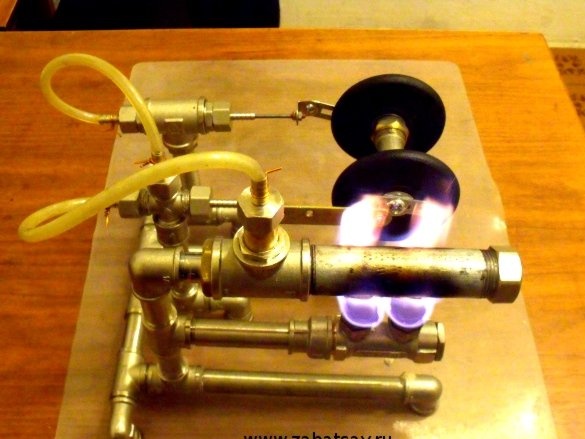
The reason for the construction of this unit was the stupid idea: "is it possible to build a steam engine without machine tools and tools, using only parts that can be bought in the store" and do everything do it yourself. As a result, such a design appeared. All assembly and configuration took less than an hour. Although the design and selection of parts took six months.
Most of the construction consists of plumbing fixtures. At the end of the saga, questions from sellers of household and other stores: “can I help you” and “but for what purpose”, really enraged.
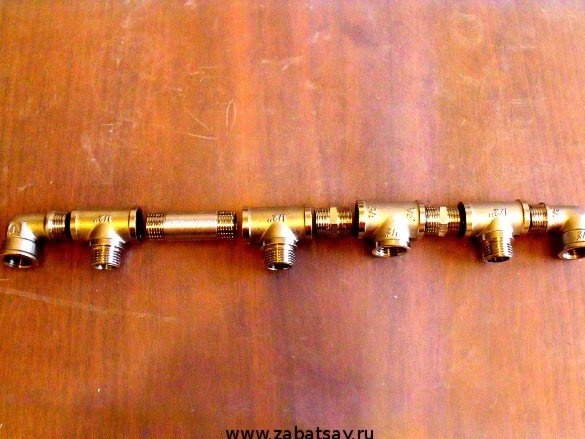
And so we collect the foundation. First, the main transverse element. It uses tees, bocata, angles of half an inch. I fastened all the elements with sealant. This is to make it easier to connect and disconnect them with your hands. But for the final assembly it is better to use plumbing tape.
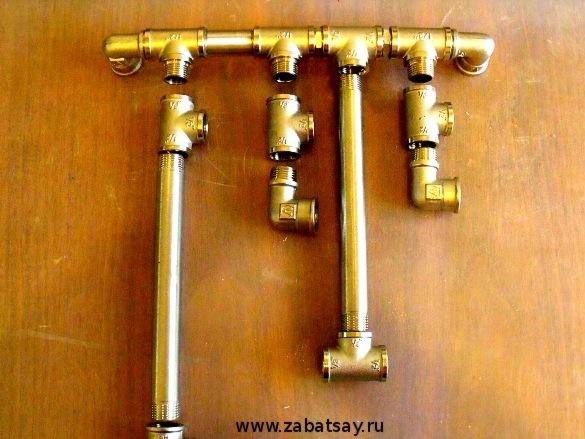
Then the longitudinal elements. A steam boiler, spool, steam cylinder and flywheel will be attached to them. Here, all the elements are also 1/2 ".
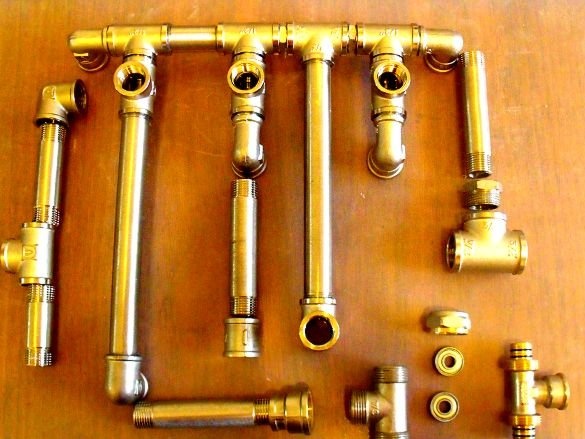
Then do the racks. In the photo, from left to right: stand for the steam boiler, then stand for the steam distribution mechanism, then stand for the flywheel, and finally a holder for the steam cylinder. The flywheel holder is made of 3/4 "tee (external thread). The bearings from the repair kit for roller skates are ideally suited to it. The bearings are held by a coupling nut. These nuts can be found separately or taken from the tee for plastic pipes. This tee in the photo in the bottom right corner (not used in the construction). A 3/4 "tee is also used as a holder for the steam cylinder, only the entire internal thread. Adapters are used to attach 3/4 "to 1/2" elements.
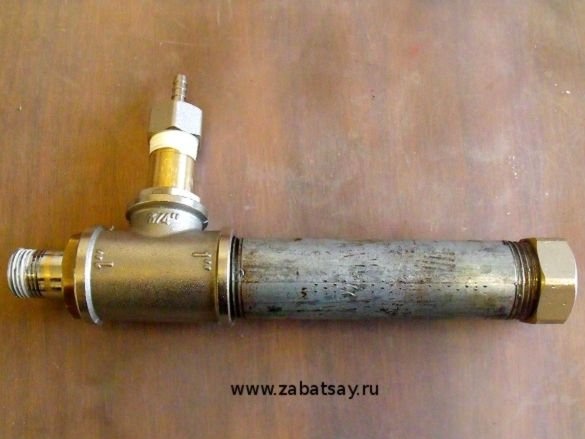
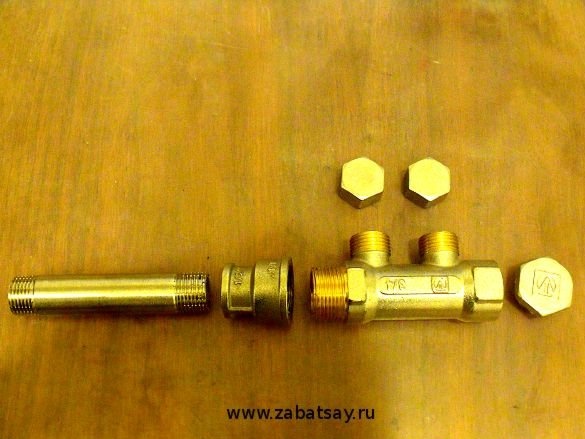
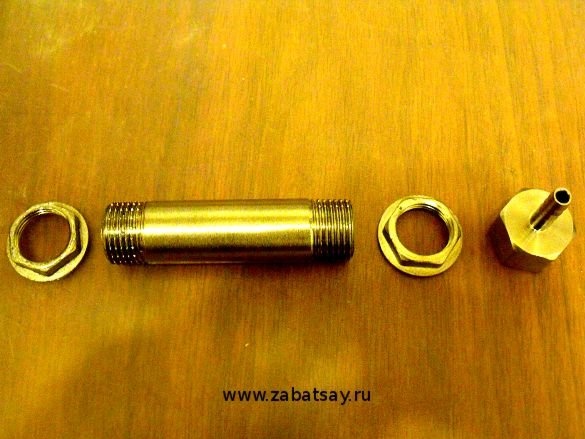
We collect the boiler. A 1 "pipe is used for the boiler. I used it on the market. Looking ahead, I want to say that the boiler is too small and does not produce enough steam. The engine works too sluggish with such a boiler. But it works. Three parts from the right are: plug, adapter 1 "-1/2" and squeegee. The squeegee is inserted into the adapter and closed with a plug. Thus, the boiler becomes leakproof.

So the boiler turned out initially.

But the steamer was not of sufficient height. Water fell into the steam line. I had to put an additional barrel on 1/2 "through the adapter.
This is a burner. Four posts previously included the material “Homemade Oil Lamp from Tubes”. Initially, the burner was designed just that.But there was no suitable fuel. Oil for lamps and kerosene is heavily smoked. I need alcohol. So for now, I just made a holder for dry fuel.
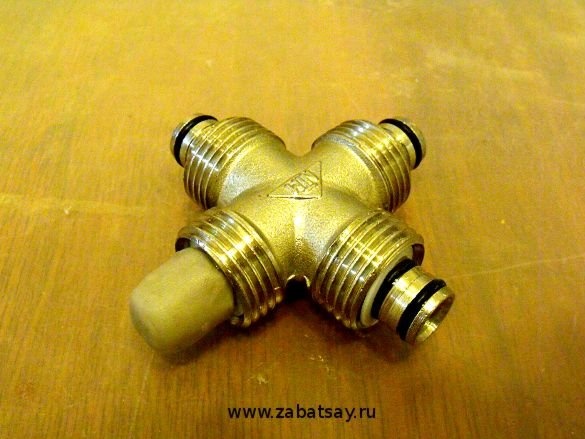
This is a very important detail. Steam manifold or spool. This thing directs the steam into the slave cylinder during the stroke. During the reverse stroke of the piston, the steam supply is blocked and there is a discharge. The spool is made of a spider for plastic pipes. One of the ends must be covered with epoxy putty. At this end, it will be attached to the rack through the adapter.
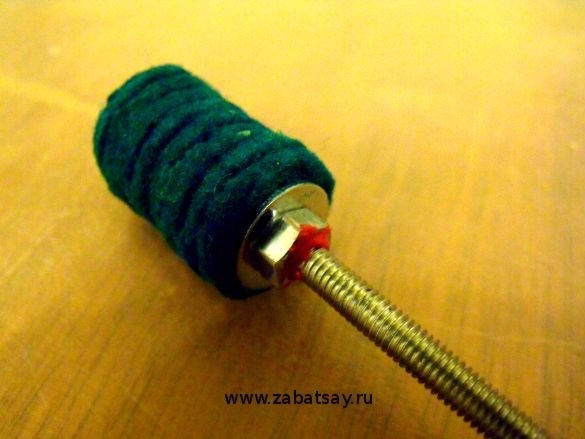
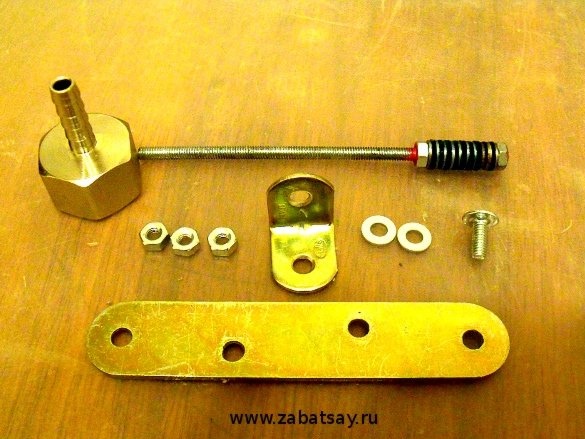
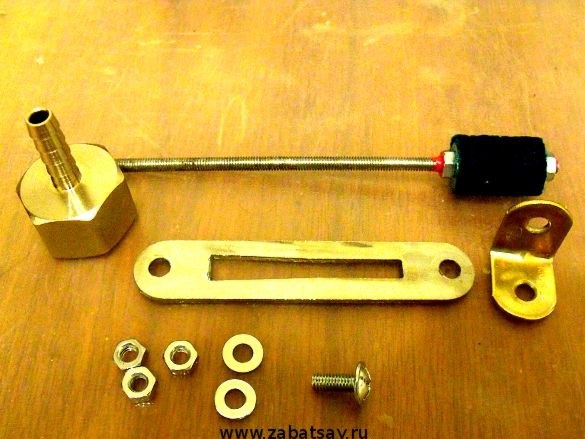
And now the most important detail. The engine will depend on it whether the engine will work or not. This is a working piston and valve spool. It uses the M4 pin (sold in the furniture hardware departments, it is easier to find one long one and saw off the desired length), metal washers and felt washers. Felt washers are used for fastening glasses and mirrors with other fittings.
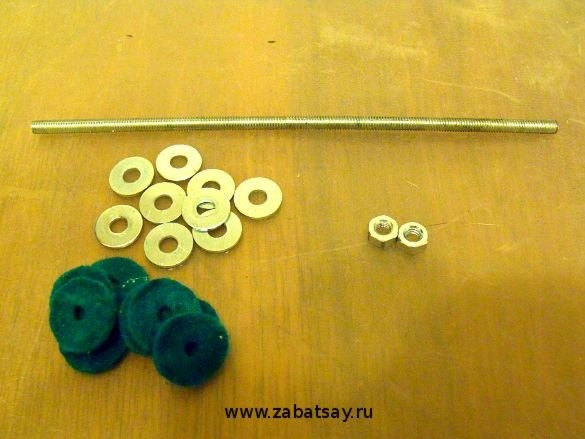
Felt is not the best material. It does not provide sufficient tightness, but the resistance to travel is substantial. Later managed to get rid of felt. Not quite standard washers were ideally suited for this: M4x15 for the piston and M4x8 for the valve. These washers should be tightened as tightly as possible, through a sanitary tape, put on a hairpin and wrap 2-3 layers with the same tape from the top. Then rub thoroughly with water in the cylinder and spool. I did not take a photograph of the upgraded piston. Too lazy to disassemble.
This is actually a cylinder. It is made of a 1/2 "barrel. With two coupling nuts, it is mounted inside a 3/4" tee. On one side, with maximum sealing, the fitting is tightly fixed.
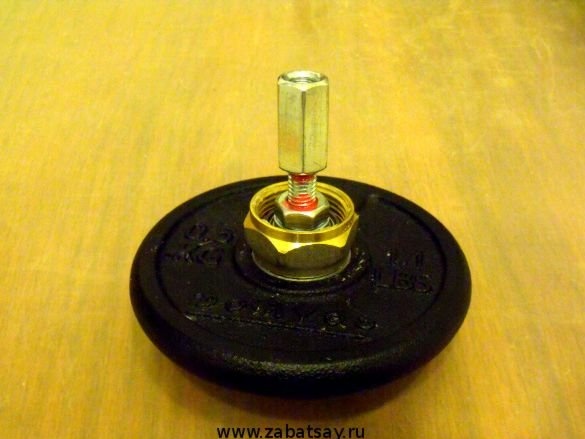
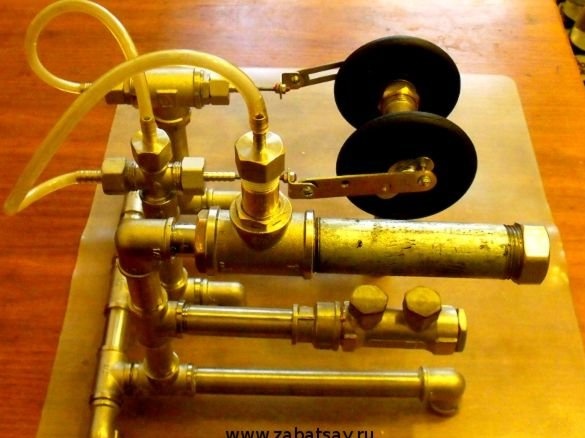
Now the flywheel. The flywheel is made from pancake for a dumbbell. A stack of washers is inserted into the central hole, and a small cylinder from the repair kit for roller skates is placed in the center of the washers. Everything is mounted on sealant. For the carrier holder, a hanger ideally fits of furniture and pictures. Looks like a keyhole. Everything is going in the order shown in the photo. Screw and nut - M8.

We have two flywheels in our design. There must be a tight connection between them. This connection is provided by a compression nut. All threaded connections are fixed with nail polish.
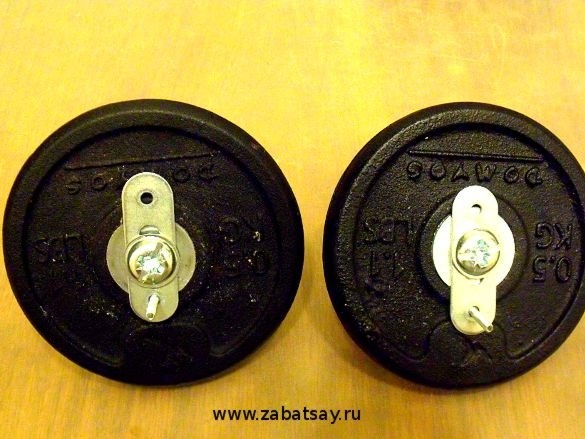
These two flywheels seem the same, however one will be connected to the piston and the other to the spool valve. Accordingly, the carrier, in the form of an M3 screw, is mounted at different distances from the center. For the piston, the carrier is located farther from the center, for the valve - closer to the center.
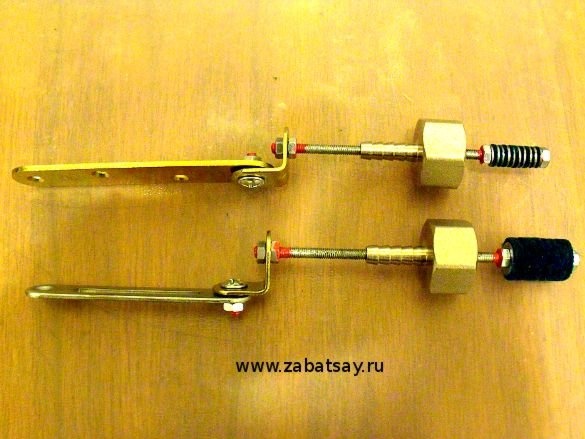
Now we make the valve and piston drive. A fitting plate for furniture was perfect for the valve.
For the piston, the pad of the window lock is used as a lever. Came up as a native. Eternal glory to the one who invented the metric system.
Drives Assembly
Everything is installed on the engine. Threaded connections are fixed with varnish. This is a piston drive.
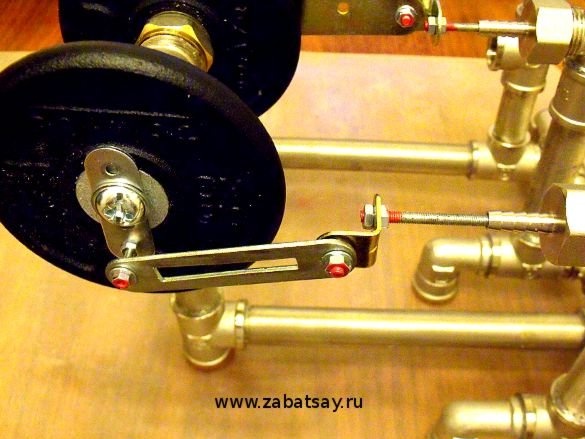
Valve actuator. Please note that the positions of the piston carrier and valve differ by 90 degrees. Depending on which direction the valve carrier is ahead of the piston carrier, it will depend in which direction the flywheel will rotate.

Now it remains to connect the tubes. These are silicone hoses for an aquarium. All hoses must be secured with wire or clamps.
It should be noted that there is no safety valve provided. Therefore, maximum caution should be exercised.
Voila. Fill the water. Set on fire. We are waiting for the water to boil. During warm-up, the valve must be in the closed position.
Video Instructions for creating a homemade steam engine: