With each new tool acquired, the possibilities of a master furniture maker increase by an order of magnitude. New skills appear, successful ideas arise and previously incomprehensible furniture projects become available.
The jigsaw in this case is not an exception, but a direct confirmation of this. Why do you need a jigsaw? Everything is very simple. It allows you to create original and sometimes incredible designs. of furniture and go beyond generally accepted limitations.
With it, you can give the details of wood smooth shapes and shapes. An ordinary street shop turns into a beautiful piece of furniture art. And this is the merit of your new tool.
Making a wooden bench is a great way to test a jigsaw in operation, in particular to test its actual power. The author suggests do it yourself make this wonderful street bench out of raw boards. The material used is neither thin nor thick - in a word, it is just suitable for testing a tool.
The bench is made in a rustic style. Again. Yes, the USA is head over heels in love with this cute shabby furniture and will not exchange it for anything. Therefore, you, among other things, will have the opportunity to practice the artificial aging of wood, or rather, the aging of the paintwork.
For work you will need:
Materials:
- a pair of pine boards with a thickness of 40 - 50 mm (can be unprocessed, but can be used);
- a bar with a cross section of 50 x 50 mm for the manufacture of diagonal support parts;
- glue for woodwork;
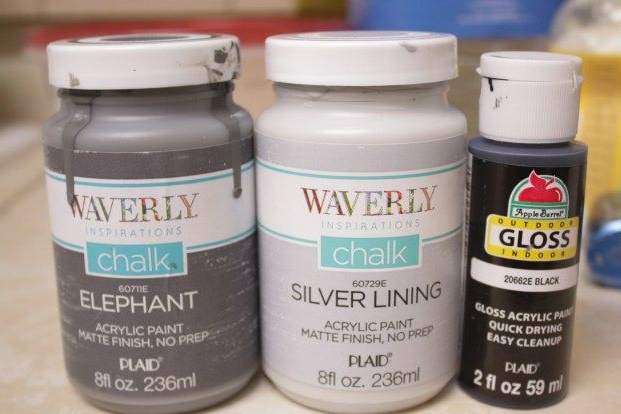
- acrylic paint (not enamel) of a gray-blue shade;
- resistant furniture varnish with a matte effect;
- furniture screws or wood screws;
- metal connecting corners at will.
Instruments:
- jigsaw;
- miter saw or circular (in extreme cases, a hand saw will do);
- electric drill;
- a screwdriver or a Phillips screwdriver;
- grinder;
- sandpaper;
- vise with a device for drilling diagonal pocket holes;
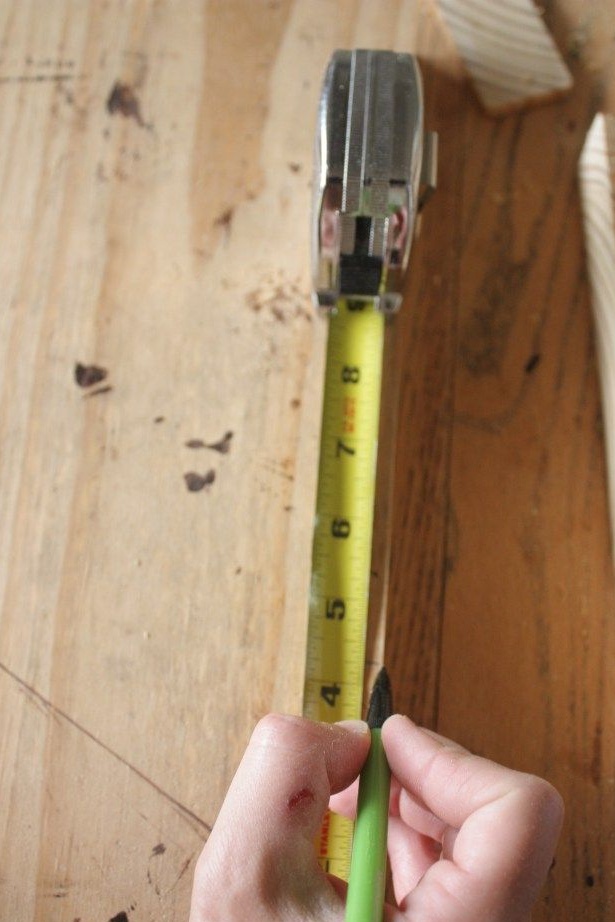
- building tape measure and square;
- a pencil;
- paint brushes.
Step one: material selection and pre-processing
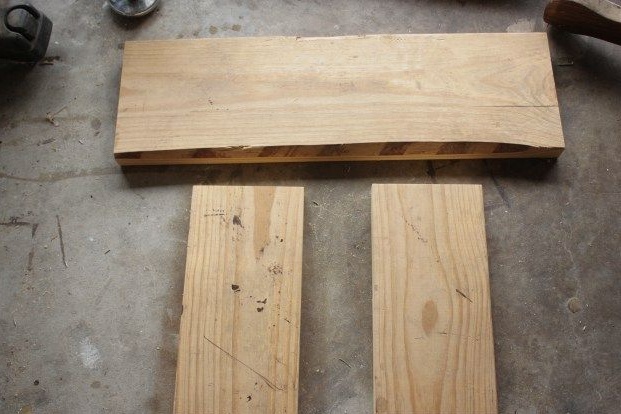
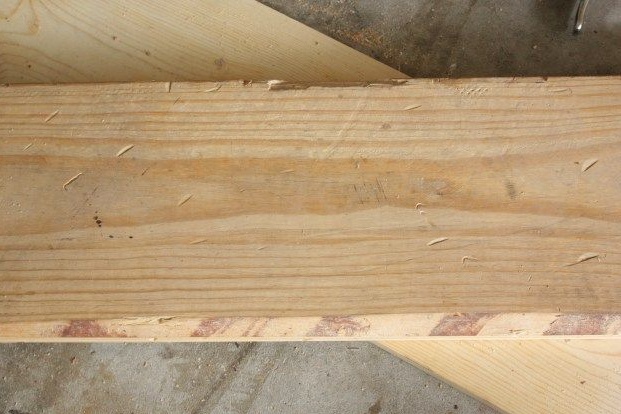
What makes such furniture items (and even made in a simple rustic style) good is the fact that they are produced by sawn timber of the second grade, used materials, as well as the remains of wood from previous works.Paints and varnishes can hide visible defects, and even the author of the product forgets about the origin of the material over time.
In this case, the master used unprocessed boards, which usually rarely go to the manufacture of furniture. Despite the fact that the board is edged, its edge is poorly processed, but here it only benefited. Rustic furniture from first-class wood, it happens, it looks strange and unnatural. Historically, peasants could not afford quality material and were content with little.
If you use second-hand boards and bars, do not rush to cut them. Grinding with an electric grinder will be sufficient. It will come out even more organically.
Step two: marking and manufacturing elements of a wooden bench
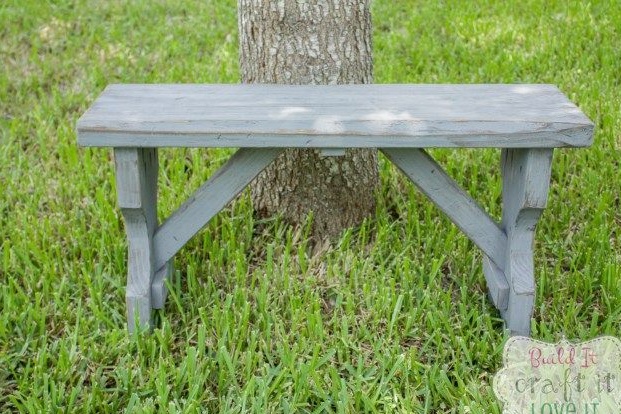
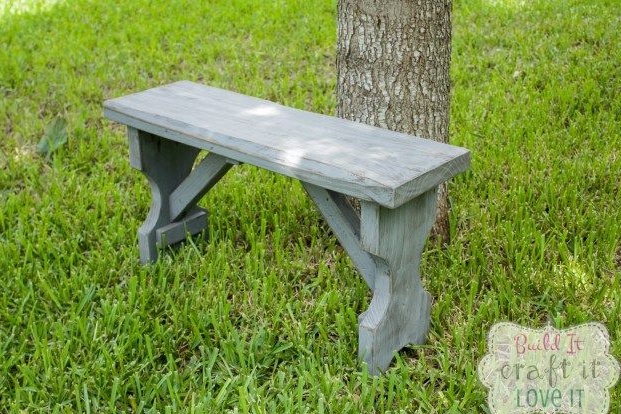
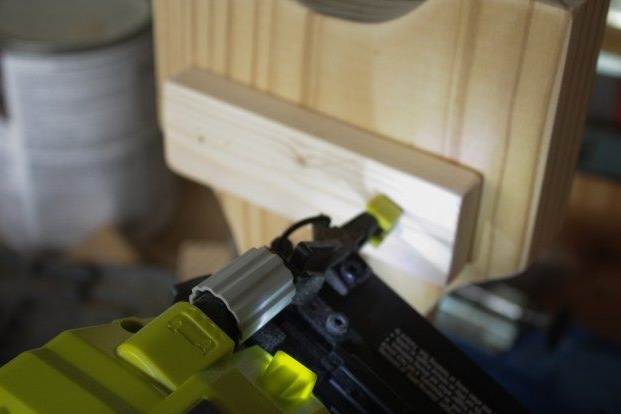
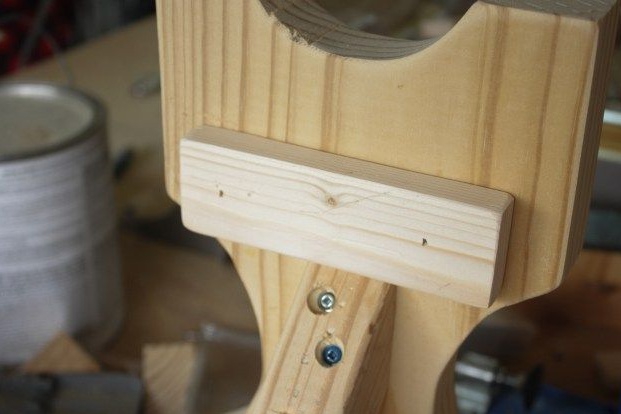
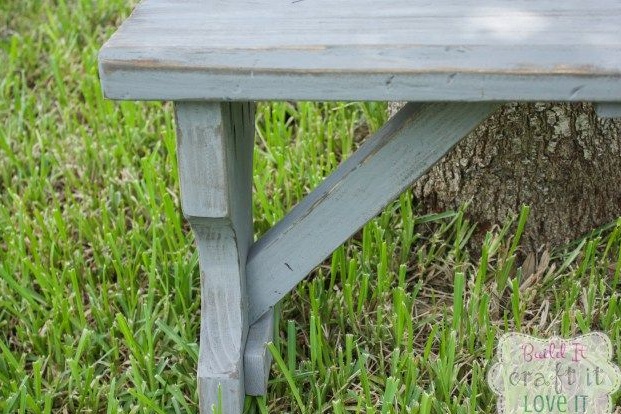
The bench consists of a solid massive seat, two wide legs, two diagonal supports and three decorative bars - on the legs and on the seat. In this case, the legs are made of the same material that will go to the seat.
Pick a thick board, not thinner than 40 mm, but better thicker. The bar used must also be massive so that the design looks harmonious.
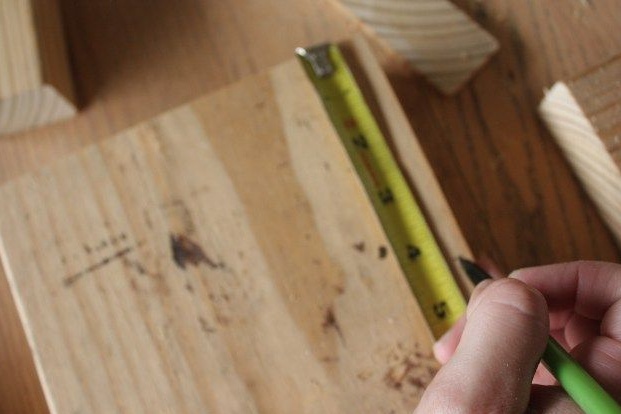
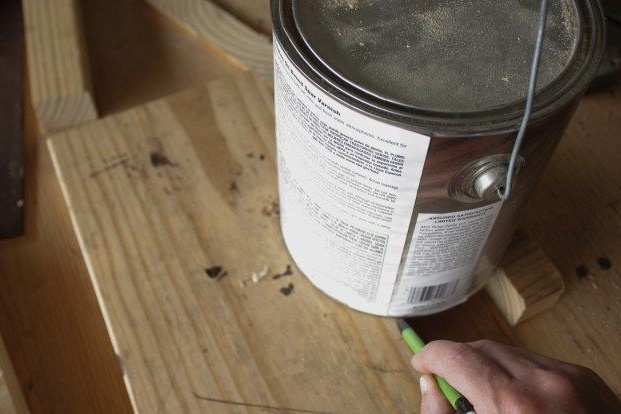
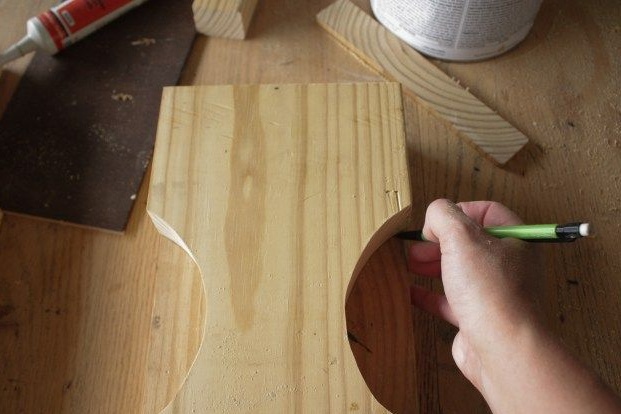
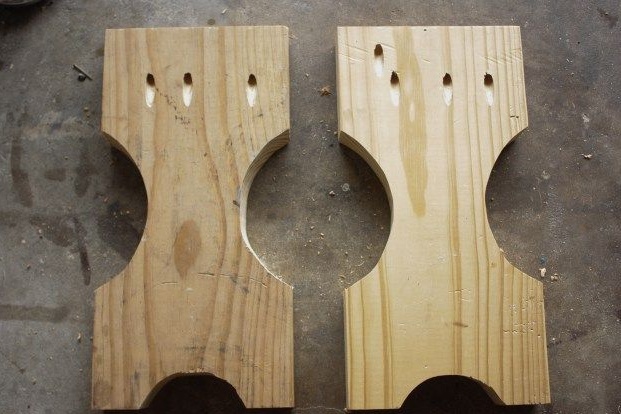
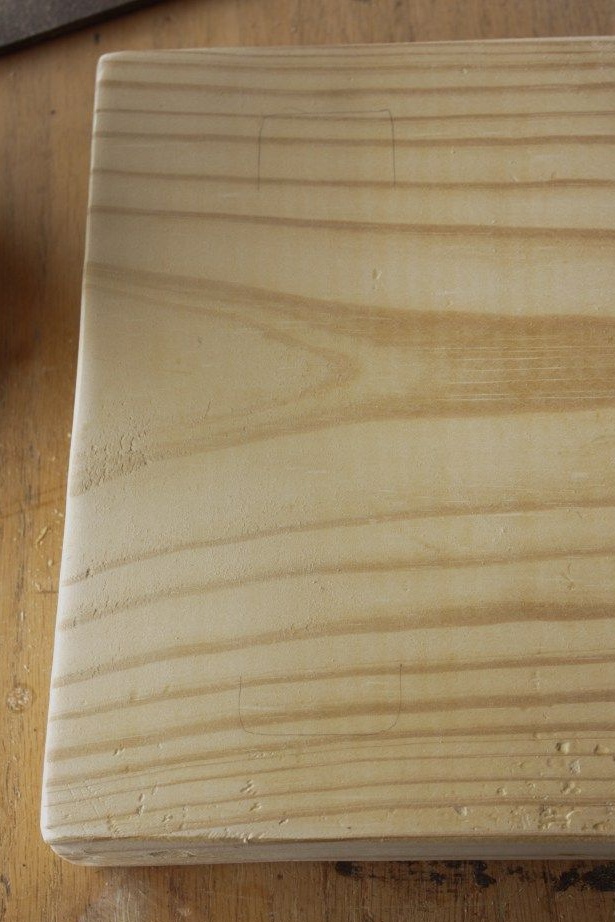
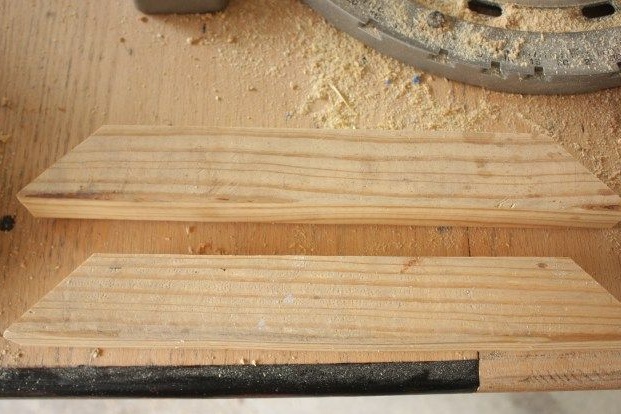
Mark all the details with a pencil and a square. To make the legs, prepare two identical rectangles. Using any rounded object of suitable diameter, draw rounded cutouts of the sidewalls as shown in the photo. By the way, the author used an ordinary can of paint for this. Rather, two banks - smaller and larger.
Saw off the workpiece for sitting the length you need. The bench from this workshop is small, and its length does not exceed 1200 mm. Also saw off the bars for diagonal supports at an angle.
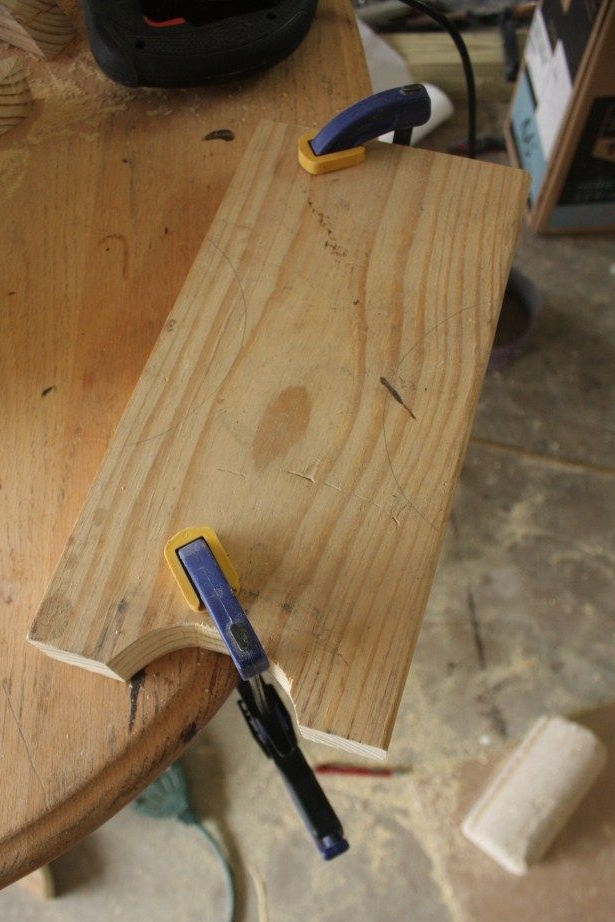
Cut out the embossed legs using a jigsaw. The material is thick, so work slowly and without pressure so that the file does not break.
Grind your parts with a grinder. The author intentionally left the uneven edge of the seat and advises approaching the grinding wisely, and not get involved in the process. If your material is already too rough, your case can be regarded as an exception: prepare the surface for painting properly until it becomes smooth.

Step Three: Assembling a Street Bench
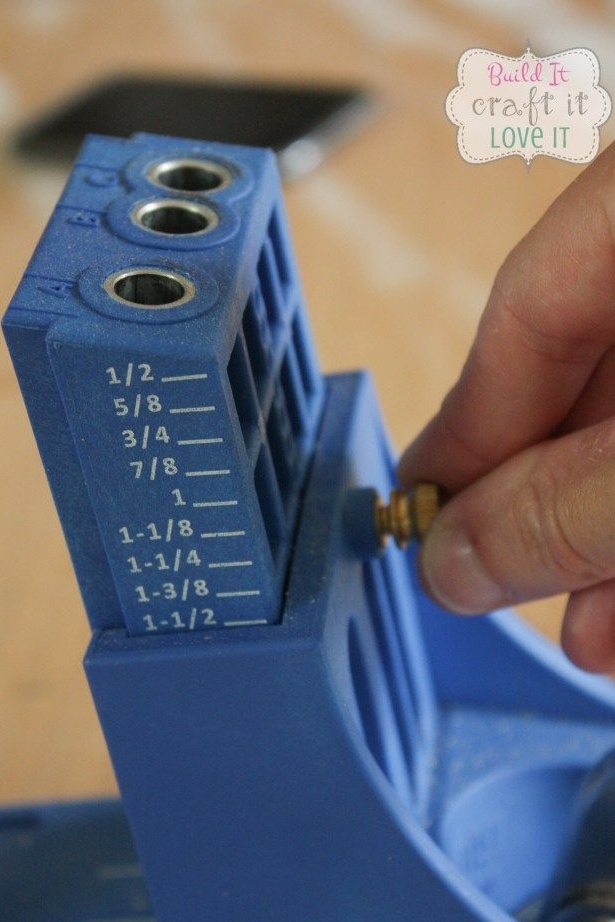
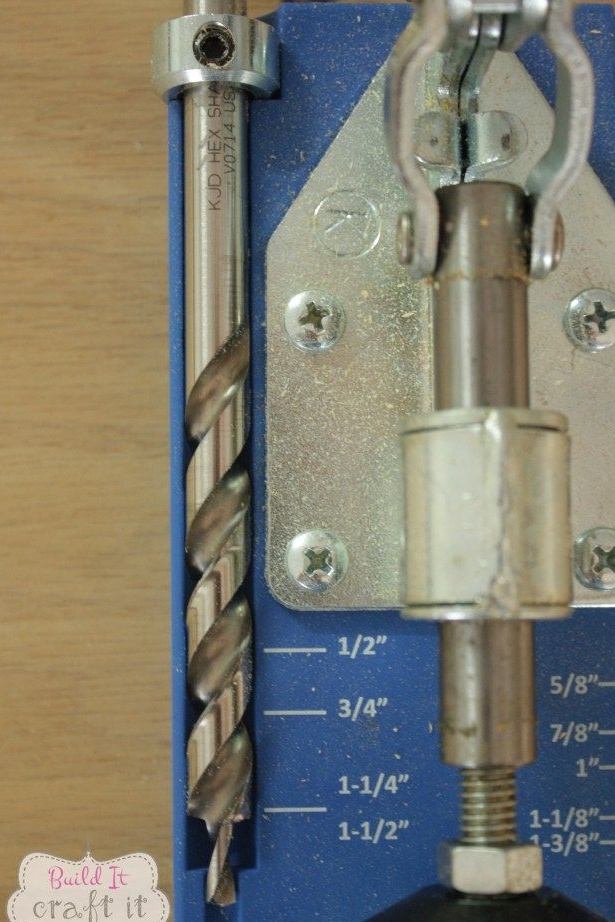
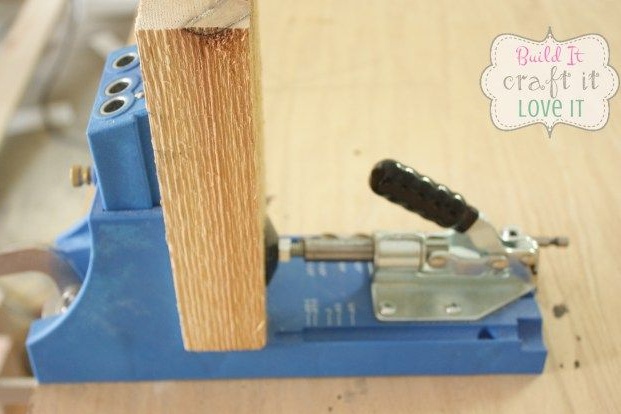
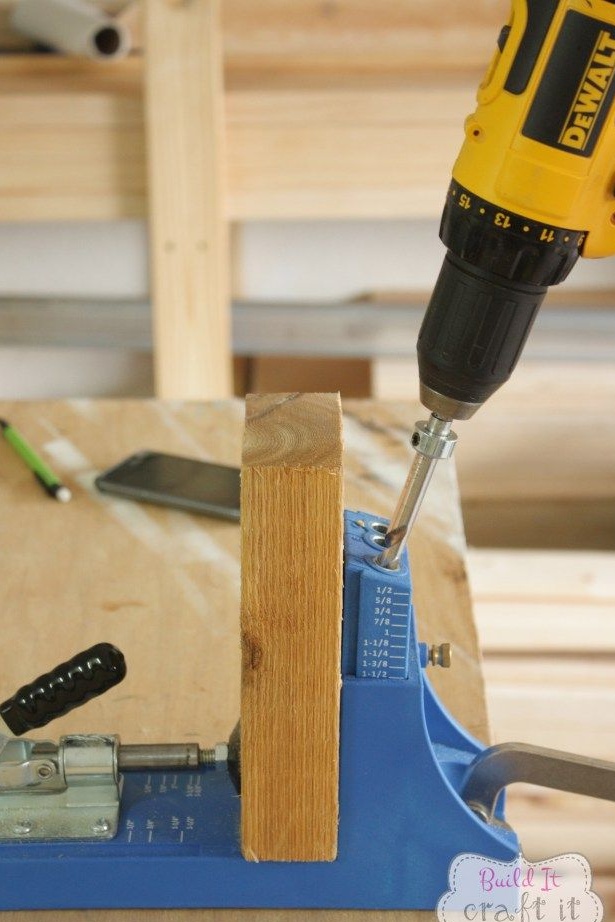
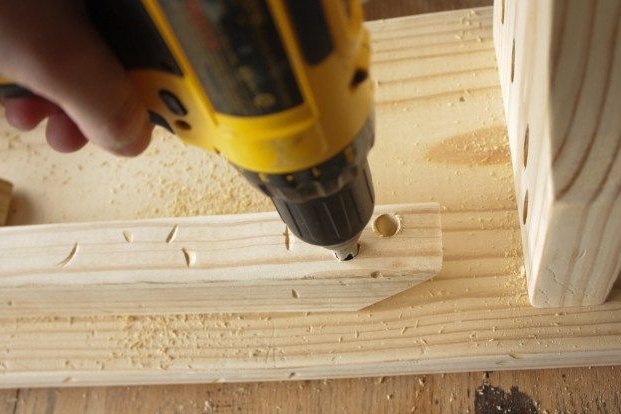
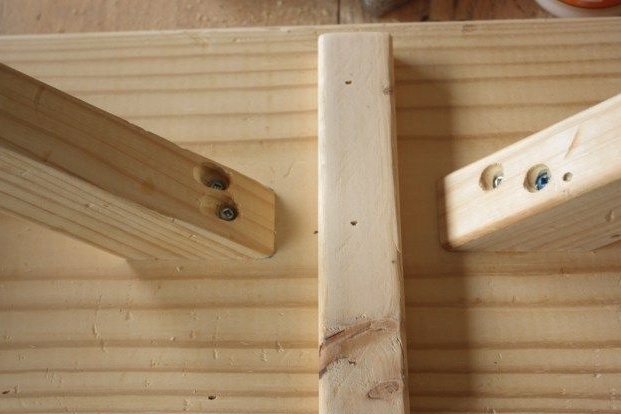
The author is delighted with his latest acquisition. They became a vice with a special device for drilling diagonal pocket holes for screws. Much has been said about this method of joining wooden parts. Yes, it is not as durable as traditional groove joints and yes, it still allows you to produce strong and reliable furniture.
The vice is very easy to use and greatly saves time. They have different configurations: from the most elementary to solid and multifunctional. This tool has already managed to be widely loved by foreign audiences. However, if you have this fixtures no, you can do without it. Practice drilling inclined holes with an electric drill on residual material.
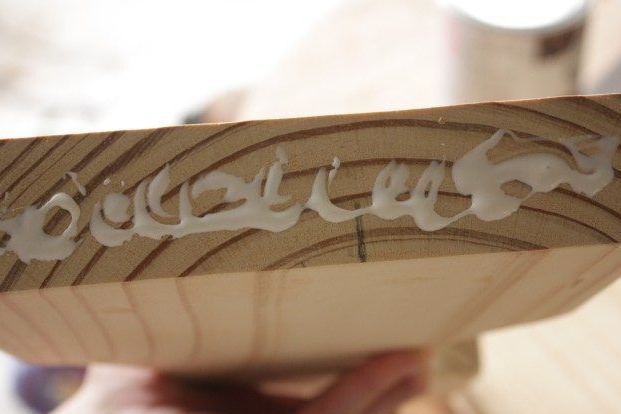
In conjunction with such compounds, craftsmen usually use glue for woodwork. Such a tandem provides strength to furniture structures.
Make holes in the previously marked places, apply a little glue to the joint, join the parts and tighten the screws. Business! You do not even have to give it when the glue has completely hardened in order to continue working. The screws will secure you securely.
Thus, assemble the bench and screw the decorative slats on its legs immediately below the supports and another one on the back of the seat in the center. In these areas you can safely use nails. Yes, and you will not need glue, because the slats do not carry any meaning, except for their purely decorative function.

Fourth and final step: painting the bench and artificially aging the paintwork
The Internet is full of photographs of artificially aged furniture. This is just an incredibly fashionable trend. If you like this style, it's high time to try your hand and something - but to age. The bench is great for these purposes. There are no small details, and the product itself is simple and unpretentious.
The author used several acrylic paints in order to get the desired tone.Paints of one manufacturer and one type can be safely mixed by experimenting with shades.
Put one, at most - two layers of acrylic paint on the surface of the bench. Do not use enamel, because it has too sweaty coating and in this case will simply be inappropriate.
Wait until the paint has dried thoroughly, and for now, prepare yourself the valves of sandpaper (fine-grained). Start sanding the surface to reveal the natural texture of the wood. Do not rush, work thoughtfully and try to be distracted more often to evaluate the result at some distance.
Do not remove too much paint at a time, it is better to return to the already-treated areas again and again if you want to continue grinding further. You can pay special attention to the edges and corners of the product. So the coating will look more natural, because in these places it is most susceptible to wear.
On this painting can be finished. But, if you want the product to serve you for many years, be sure to use varnish. Yes, not some, but a special furniture lacquer. It is highly resistant to abrasion and provides a hard, practical finish. For outdoor furniture, choose waterproof varnishes. And in this particular case, stop your choice on a varnish with a matte effect.
Apply the varnish in several layers and let each of them dry according to the instructions. The smell of furniture varnishes is the same, but the effect is worth it, you believe it.


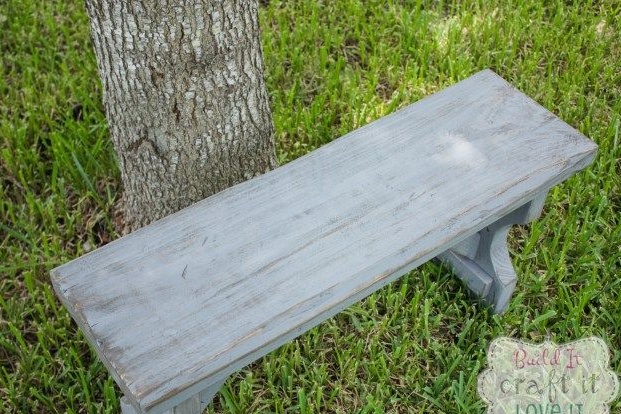
A natural wood garden bench is ready!