
Winter was warm this year, to the great regret of ice fishing enthusiasts. In addition, the new year has already been lived, which means that spring is not far away. It makes sense to prepare for float fishing.
In this article, we will look at simple ways to make cool floats.
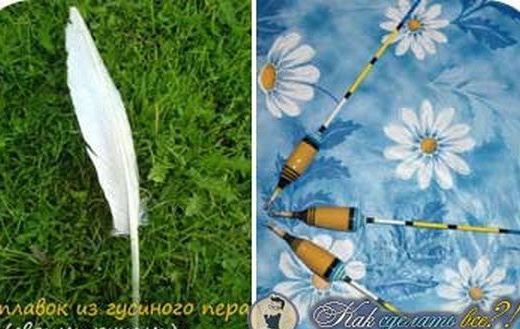
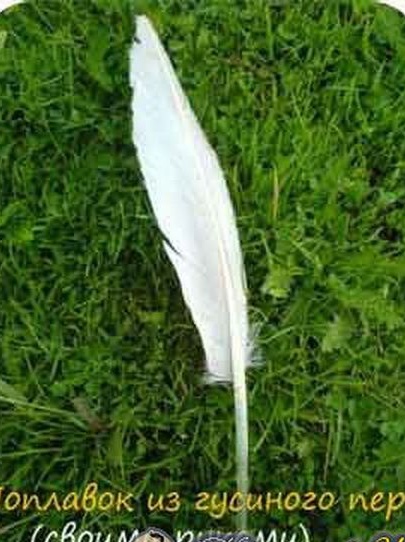
Let's start with, perhaps, the most ancient, classic and beloved technology, the manufacture of goose feather floats! It was on such floats that our grandfathers, fathers, and some of us have probably already experienced this miracle of technology.
Catching on such a float is much more interesting than on purchased ones, this is a completely different psychological attitude. It's one thing you watch for hours in a plastic pin sticking out of the water, and another thing if it is a goose feather, painted and made by hand. The feather float is very sensitive, it trembles at the slightest touch of the fish, as it is thin, long and has low resistance to bite. In addition, when you throw a fishing rod, the slave is not afraid of the sound of a float falling on water, plus the fish perceives this float as something natural.
Materials and tools for making a goose feather float:
- goose feathers (large, with wings);
- scissors;
- blade;
- cambric or rubber band with a nipple;
- varnish or paint (waterproof);
- sandpaper.
The manufacturing process of a feather float:
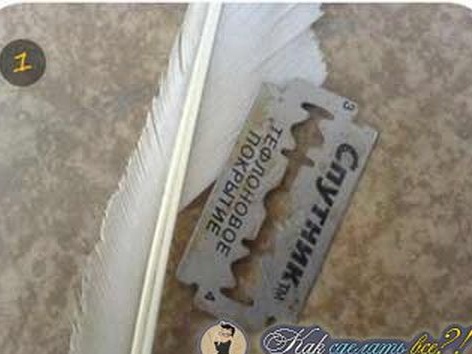
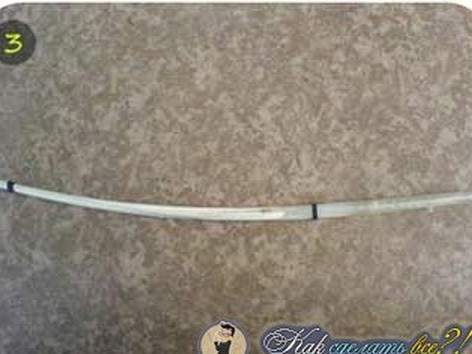
Step one. Cut off the excess plumage
For the manufacture of the float, only the central part of the pen will be needed, so you can immediately cut off all the “fluff” with scissors or a blade. Do not rip it off, as there is a risk that you will damage the air chamber.
The pen shaft consists of two parts, a white part, as well as a camera. Due to the camera, the float also floats, since there is air in it. When making the float, try not to damage the chamber, as water will accumulate in the float and it will sink.
Cut the float to the desired length, you can cut off only the white part!
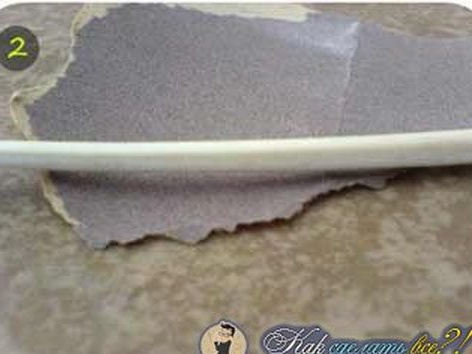
Step Two Float Processing
When you cut the fluff, clean the central part with fine sandpaper so that nothing sticks out. You can also burn the remaining parts gently.
Step Three Float mount
To fix the float on the fishing line, it is enough to cut two rings from a nipple gum or from another suitable one. We put the rings on the fishing line and insert the float.
Some lovers also make a hinge, it can be made of thin copper wire.
Step FourProtection and painting
If you wish, you can paint the float in any color. Although white is already perfectly visible, this is especially true in the evening. It is enough to apply a couple of strips of contrasting paint so that you can see the degree of immersion of the float during bite.
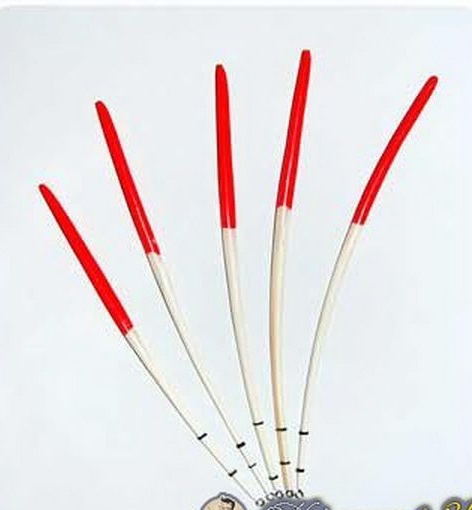
It is important to take care to protect the float from water. With prolonged use, the float will sooner or later absorb water if no measures are taken. It is advisable to paint or varnish the entire float. It can also be coated with epoxy glue, it will generally be a strong and durable coating.
That's all, the feather float is ready, now let's look at how to make a foam float!
A foam float is made a little more complicated from foam, but it turns out to be more massive, such tackle can be thrown further and catch larger fish. Such floats also look quite interesting. As a starting material, you can use wine corks. By the way, goose feather floats part is combined with foam.
Materials and tools for the manufacture of foam floats:
- a hacksaw;
- stationery knife;
- Styrofoam;
- pliers;
- drill;
- sandpaper;
- wooden skewers;
- Super glue;
- baby powder and emulsion;
- paint and varnish;
- wire or thin spring.
The manufacturing process of floats:
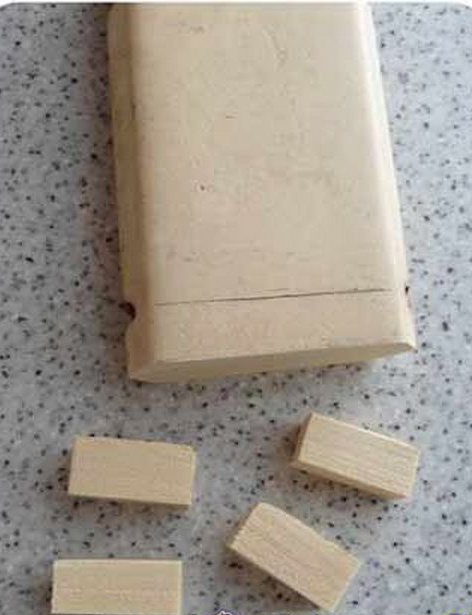
Step one. Cut off the necessary pieces of foam
Decide on the size of the float and a hacksaw for metal, cut off the necessary size workpieces.
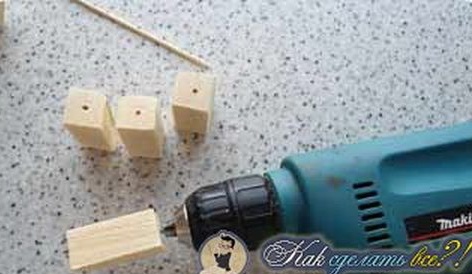
Step Two Drill holes
Drill holes along the workpieces. In diameter, they must be such that wooden skewers can enter them. Skewers should come in with some effort. You can buy them in a store where they sell different things for the kitchen.
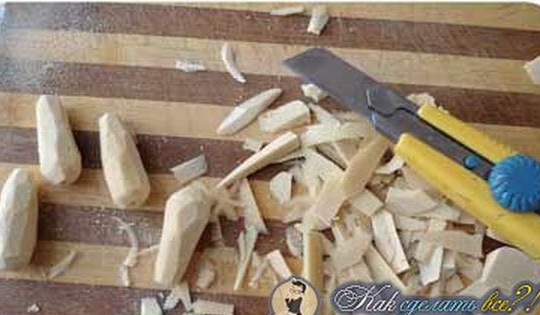
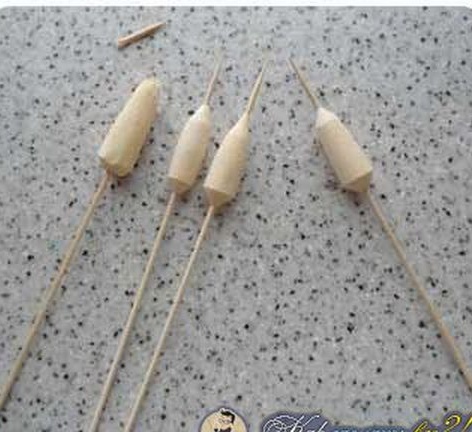
Step Three Rough forming
Now take a clerical knife and roughly cut the profile of the future float.
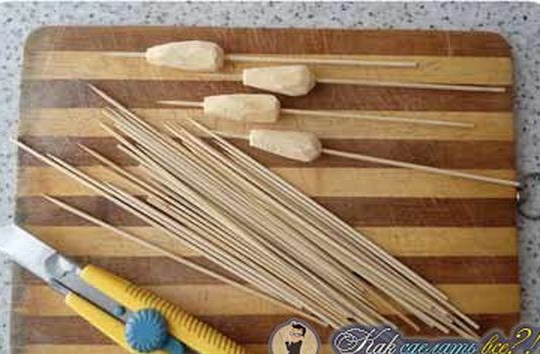
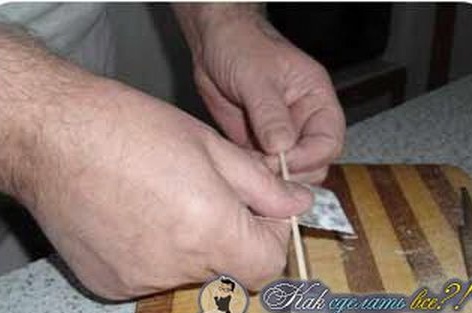
Step Four We insert and fasten the skewers
Carefully insert the skewers into the previously drilled holes. When inserted, take the “second” glue and drip onto the entry points of the skewers into the holes. The glue is liquid, it will go into the slot and securely fix the skewer.
Step Five Grinding
As soon as the glue dries, the most interesting moment comes - grinding. At the same time, the float gets its finished look and practically does not differ in quality from the store one. We clamp the ding end of the skewer into the drill chuck, turn it on and carefully form the float profile with sandpaper.
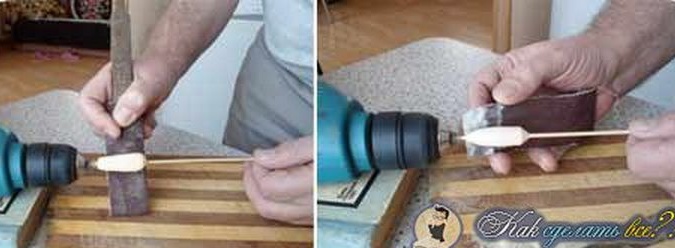
You will need to process not only a part of the foam, but also a wooden skewer.
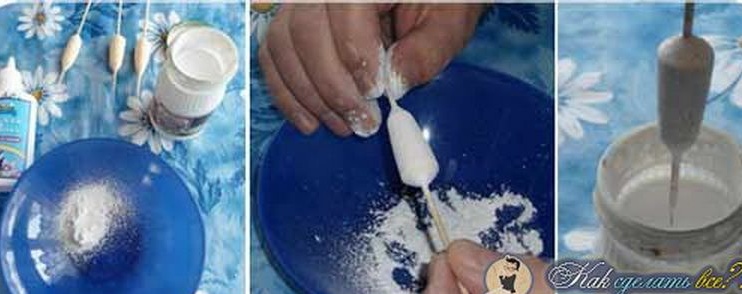
Step Six Preparation for painting
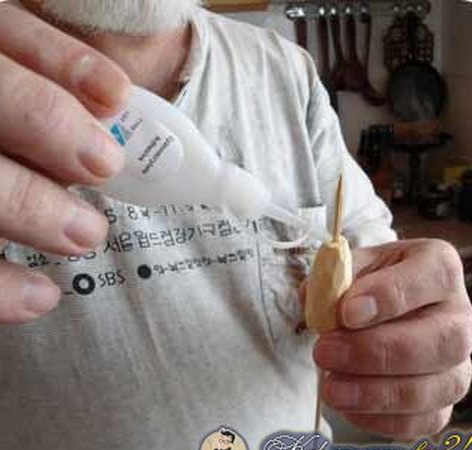
Before painting, the author rubbed a baby powder into the foam, for what purpose, I personally did not understand. Then the float is dipped in a jar of emulsion paint, which is diluted with water. Wait until the whole thing is completely dry.
Seventh step. Painting
In what colors to paint the float, here everyone decides for himself. The author paints the lower part of the float, which will be under water, in a light brown color. Just dip the float in the paint to the desired level.
As for the mast, it can also be painted. The author here alternates three colors, yellow blue and white.
If you want to put strips on the float, this will allow you to clearly see the degree of immersion, hold the float back into the drill chuck and turn it on at low speeds. Using a thin brush, apply the paint in the right places and you will get excellent, even rings.
When the paint is completely dry, be sure to apply a layer of varnish on top. It will protect the paint and also prevent the wooden skewer from absorbing water. With varnish, the float will last much longer and retain its original appearance.
Step Eight. Fastener
The varnish should dry within 24 hours, after which you can begin to manufacture fasteners. Thanks to her, the float can be hung on a fishing line.You will need to fix the ring in the lower part of the float on the skewer, for this purpose the author uses a small steel spring. We make a loop at the end, cut to the desired length and put on the skewer.

But to find such a spring will be quite problematic, it is best to find a piece of copper wire, it can be obtained in the cable by removing the insulation. Similarly, we form a ring, and wrap the remaining edges on the tip of the skewer. At the end, we cover this place with varnish or saturate it with “super-glue”.
To fix the fishing line, you will need to make one more detail, on which the cambric is worn. It can also be made from wire. In principle, cambric can be put on the top of the skewer and stretch the line through two points.
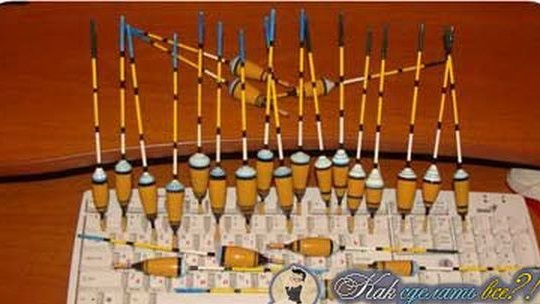
If desired, the float can be made sliding, this will allow you to conveniently fish at a long distance. Such a float works especially well when you need to pierce duckweed. That's all, the floats are ready, they look beautiful, they are made simply, if you wish, you can “rivet” as many as you like. No tail, no scales!