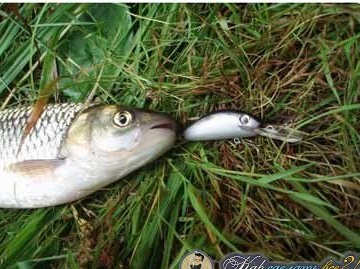
- the most effective bait for catching chinas fish, which trades in the upper layers of water. The most common predator in this regard is the chub, he likes to catch all kinds of bugs, frogs, small fish from above, and indeed everything that moves in the upper layers of the water. Of course, sometimes, and the pike often hits the fry in shallow water and in the upper layers, but this is less common.
The best way to catch a chub is. This tackle moves on top of the water and creates small waves that the fish immediately notice. Also, the wobbler usually makes a sound when moving.
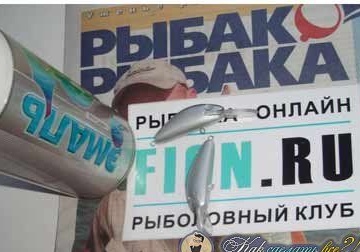
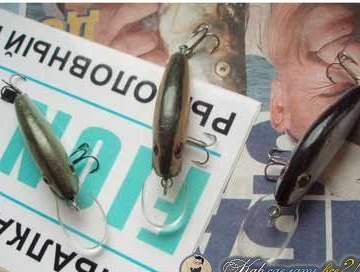
In this instruction we will look at how to make simple wobblers, the author decided to make copies called L-minnow 44. Apparently, this tackle pleased him.
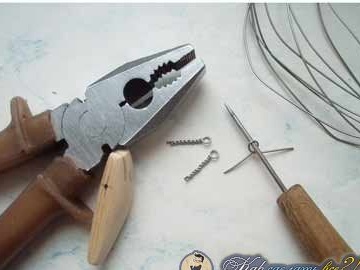
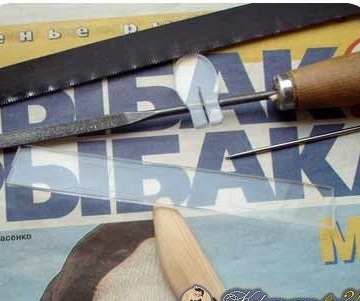
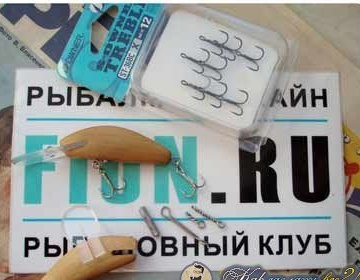
Materials and tools that the author used for homemade:
Material List:
- wooden dostochka;
- thin stainless wire;
- organic glass for the manufacture of the blade (metal, plastic or glass is suitable);
- lead (or tin);
- fishing hooks (tees);
- varnish;
- paint;
- drying oil;
- primer;
- epoxy.
Tool List:
- awl;
- pliers;
- files and files;
- drill;
- sandpaper;
- a hacksaw;
- a pencil.
Wobbler manufacturing process:
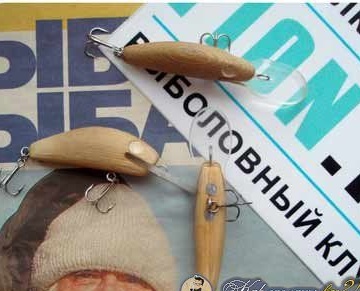
Step one. Draw a profile
First of all, draw the desired profile of the wobbler, you can draw right away. You can also first draw a profile on paper, and then cut it out. When doing, you can print the finished profile on the printer.
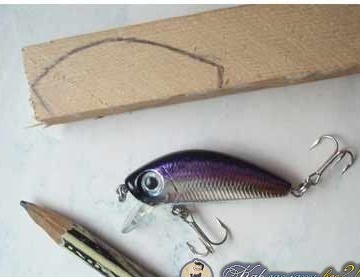
As for the type of wood, then already draw a conclusion experimentally. Try making from pine, oak, birch ... as an experiment. To make the wobbler heavier, use dense wood and vice versa.
Step Two Cut a rough profile
Now cut out what you painted on the board. Use a conventional hacksaw or jigsaw.
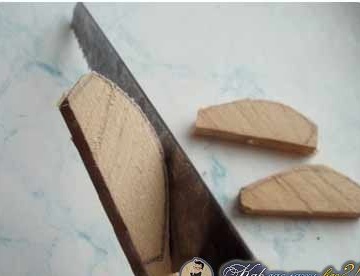
Step Three Stitching too much
Now we give the wobbler the desired shape, for this we use a file on a tree, and preferably sharpened. Also, a sharp knife will come to your aid, with the help of it you can cut off excess corners.
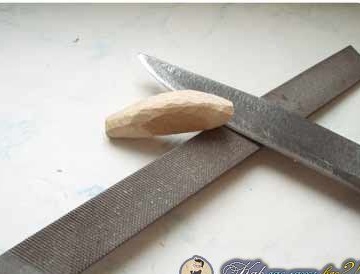
Step Four Grinding
Make the workpiece completely smooth. At this stage, it should have a finished look. Here you need sandpaper. First we use large, grind all the bumps. Then we gradually reduce the graininess and as a result we reach an absolutely smooth surface.
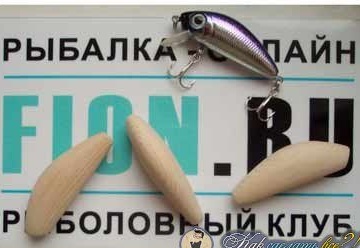
Step Five Markup
We take a pencil and draw a line in front of it. It will indicate the location of the cut, in which the blade will be installed.Also mark the locations for drilling the holes for the lower and rear loops where the hooks will be.
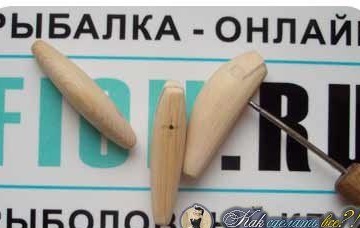
Decide on the angle of the blade in advance, this is a very important point. From this value it will depend on how deep the wobbler will dive during wiring. Also, the width of the blade affects the game of the wobbler.
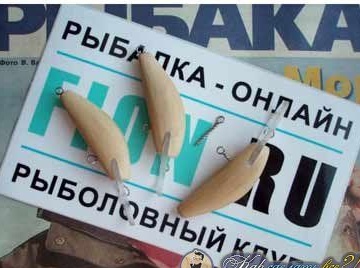
Step Six Make loops
We need loops for hanging hooks, as well as for attaching the wobbler to the fishing line. The author makes loops from a thin stainless wire using an awl and pliers. You can make two loops immediately on hooks, and the third will be in the bow.
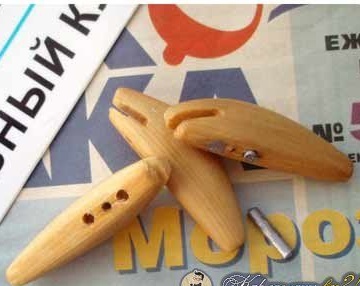
Seventh step. Blade slot
In the front of the wobbler, pierce a slot under the blade. This can be done using a needle file. Also make a blade, for that you need plexiglass, a piece of plastic and so on. A piece of plastic ruler is perfect.

Step Eight. Set the blade and loops
Insert the blade in its place, and also drill holes for the hinges and screw them into the tree.
Step Nine. Wobbler loading
In order for the wobbler to play in the right way, it needs to be impregnated a little, for this lead is used. If there is no lead, pieces of bolts will do. We drill holes in the "belly" and install weights. Weight is determined experimentally. Fasten the weights and try to drive the lure in the bath. If everything is fine, move on.
Step Ten We glue all the details and impregnate the tree
The author decided to impregnate the wood with linseed oil so that it does not absorb water. Choose a quality drying oil, as it happens that it practically does not dry out.
Hook the hooks and spread the epoxy glue. Fill the holes with glue and screw the loops into place. Also glue the blade well using the same epoxy glue.
Do not forget to install weights on epoxy glue.
Step 11. Primer blank
After impregnation with linseed oil, we apply a primer on the lure so that the paint adheres well. After the soil has dried, paint the wobbler from the spray can in silver or another color as desired.
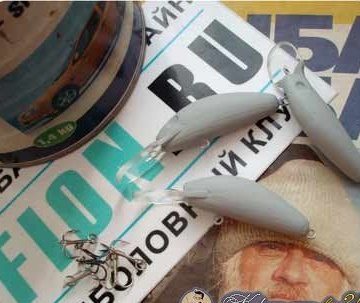
It remains only to cover the wobbler with varnish so that the colorful coating lasts for a long time, and the wobbler was reliably protected from moisture. Good fishing, no tail, no scales!